

You are using an out of date browser. It may not display this or other websites correctly.
You should upgrade or use an alternative browser.
You should upgrade or use an alternative browser.
New To Me 83--Parts Needed
- Thread starter Jeep Addict
- Start date


- City
- Biloxi
- State
- MS
I have yj doors on mine, but they rattled. I installed clear rubber tubing to prevent any rattling on the rods. Seems to have worked so far. FYI if they still rattle. Nice work and nice write up, by the way.
Appreciate it

The tubing around the rods is another good "anti rattle" modification

- City
- Biloxi
- State
- MS
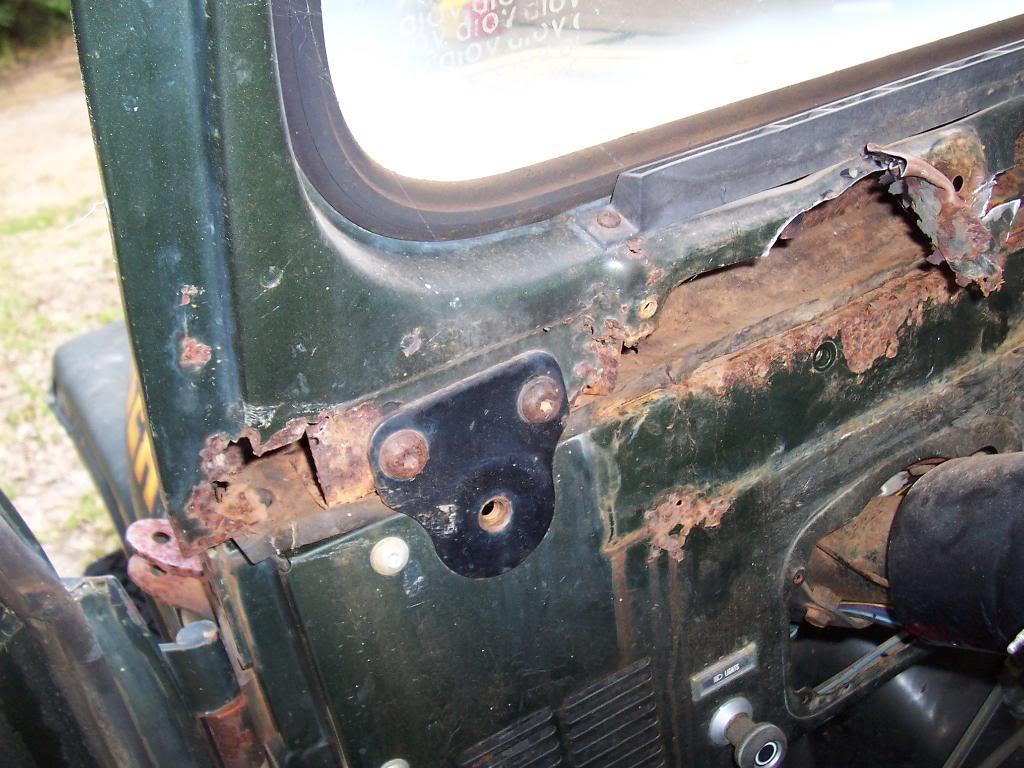
I went ahead and changed out the windshield frame, too. The original windshield frame, unfortunately, is beyond saving. The area around the wiper motor was severely rust damaged; the bottom of the frame was rusted pretty badly, too. A long time ago someone removed the driver side wiper pivot, due to it being broke. This left that hole open to the elements. I guess after all the years of rain water running into this open hole on the face of the windshield frame, the result was the rust damage. It is a shame, because the rest of the frame is in excellent shape. The leaking windshield frame is also what caused the rust damage to the top of the dash board. Once I determined the frame was beyond saving, and the fact that the wiper motor bolts were rust froze in place, I cut the windshield frame to make wiper motor extraction easier.
Picture of the damaged windshield frame.
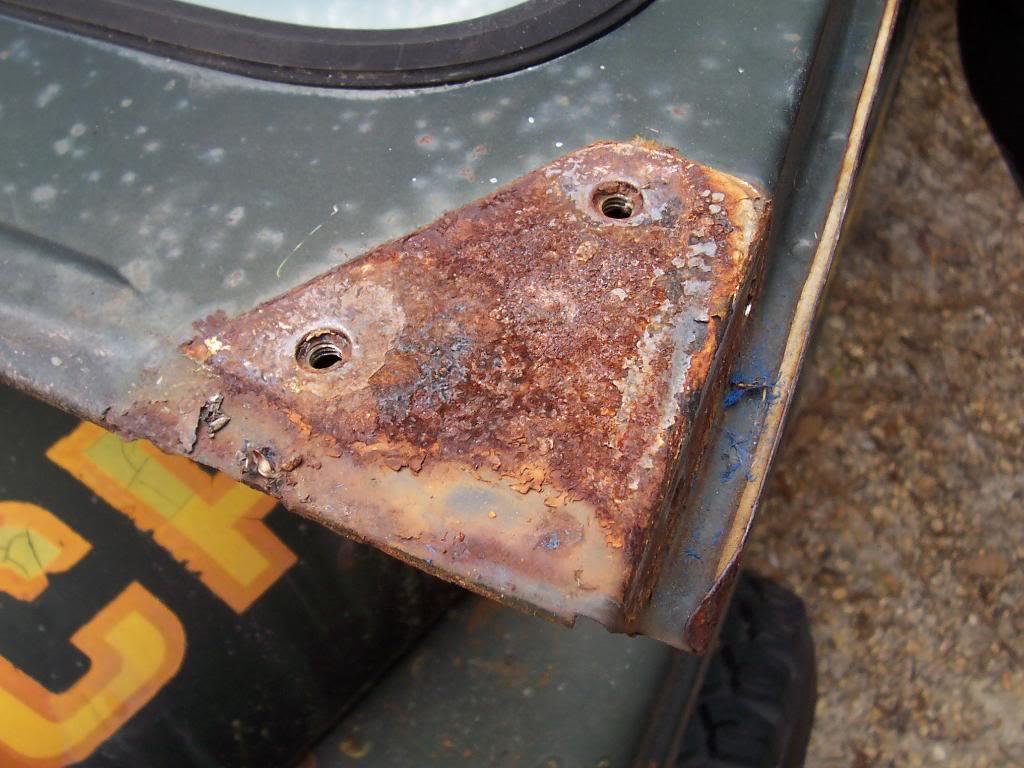
I guess the factory bolted everything together, and then painted the vehicle. There is no paint applied to the part of the windshield frame that is behind the hinge. I guess if you still have a "factory paint" CJ, you might want to check on the condition of the sheet metal behind all hinges.
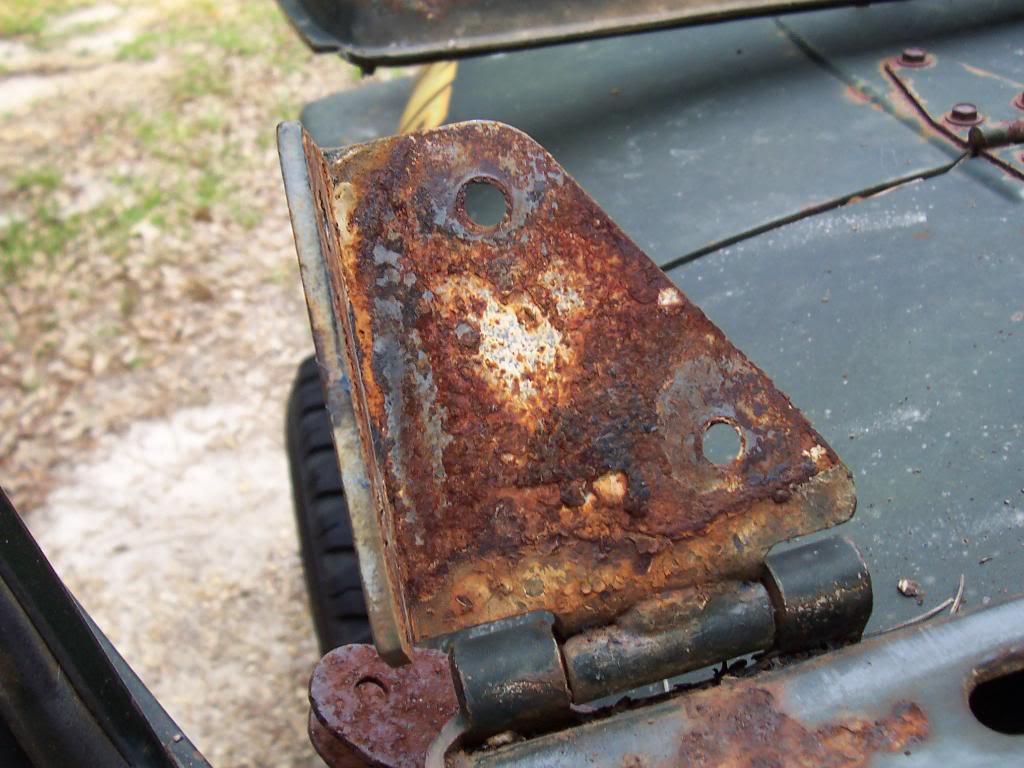
Picture of the back side of the hinges. They are still solid. The lumps of exfoliated metal on the hinges are not hinge metal, but rather windshield frame metal.
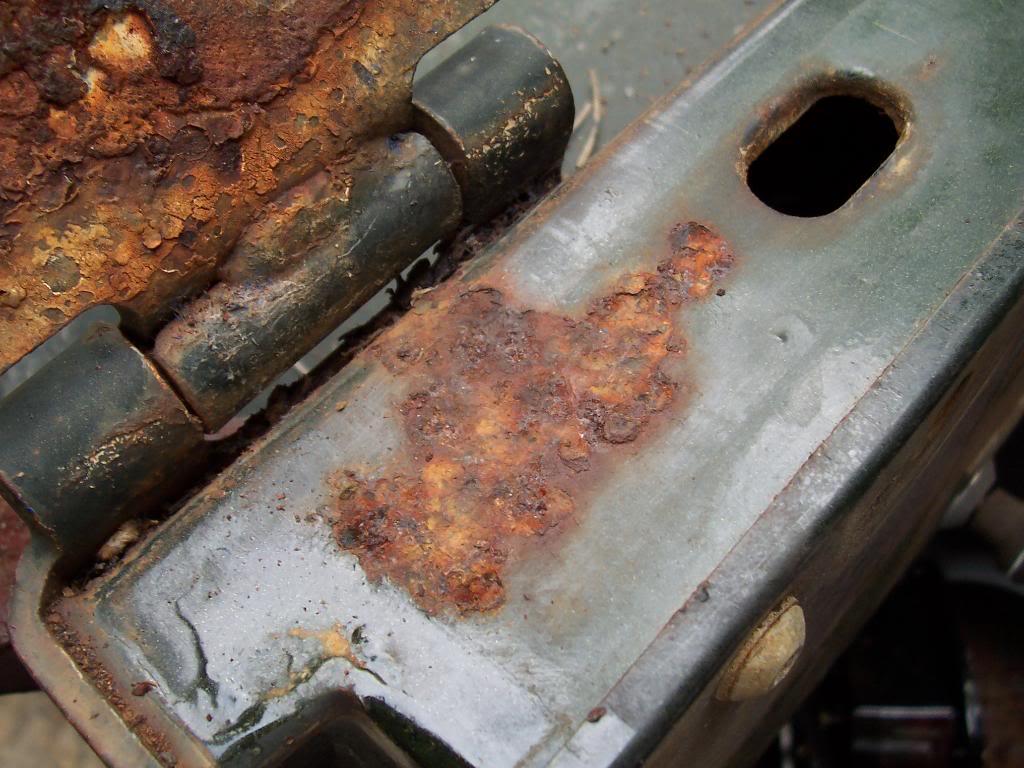
Some pictures of the cowl. There are a few spots of minor "pitting" damage, but nothing to worry about. The cowl is still 100% solid, just has some minor "pitting".
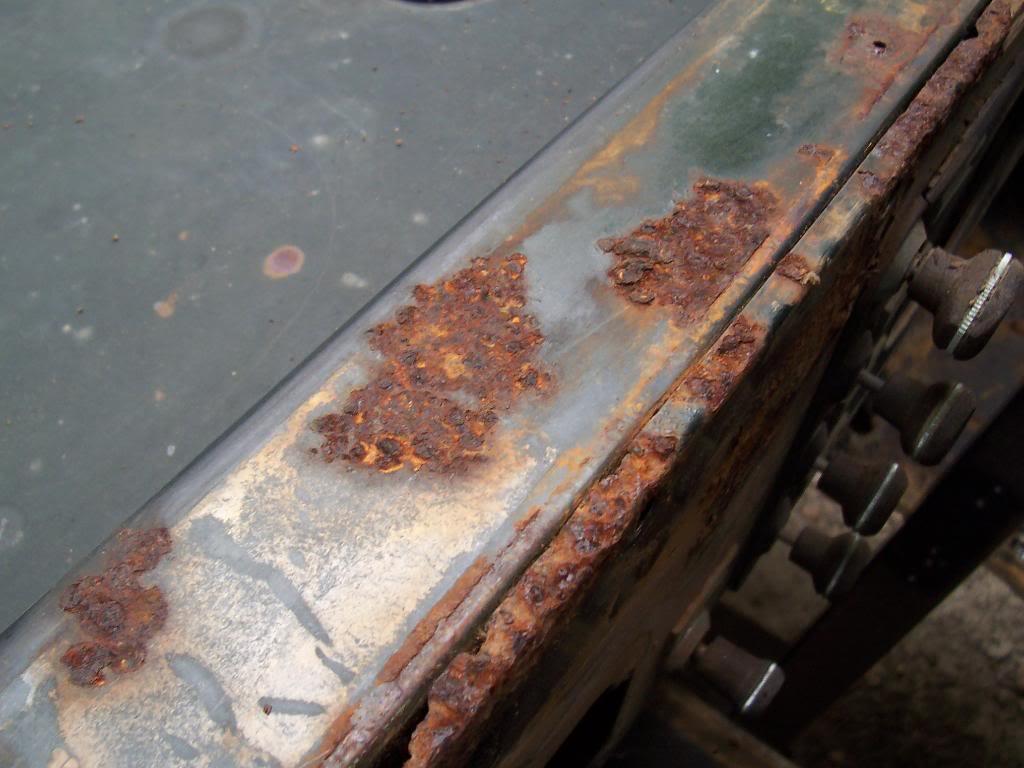
Picture of the still shiny/great shape factory paint on the cowl. I am going to spot prime/paint the "pitted" areas, and leave the factory paint intact.
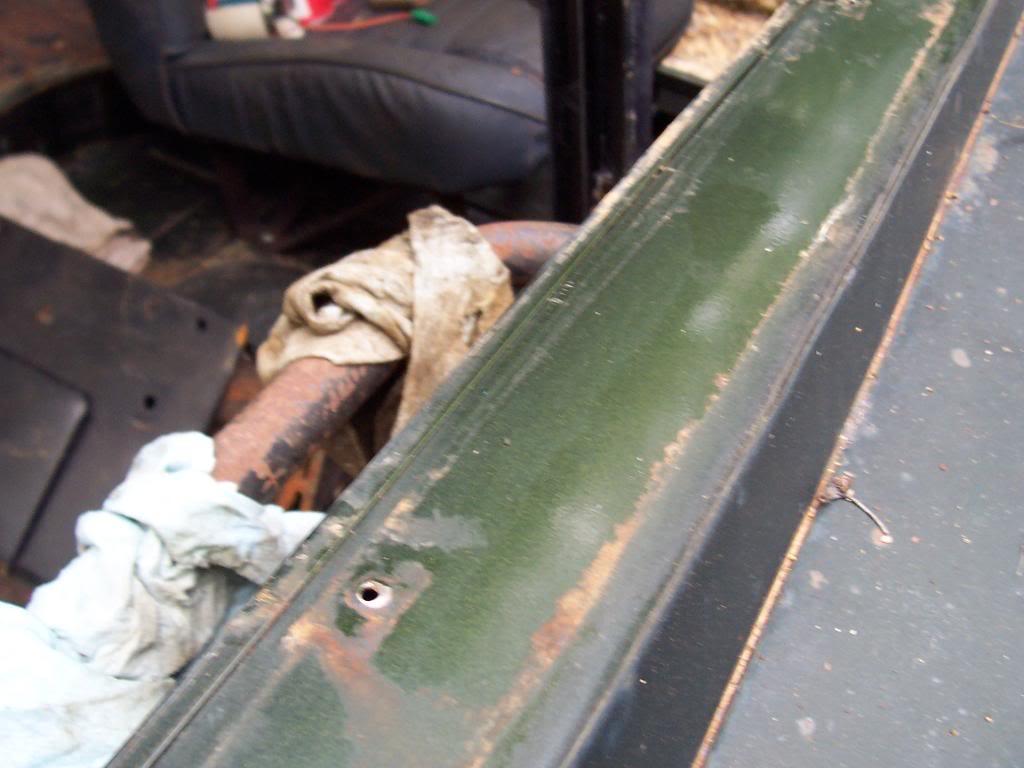
And some more factory windshield frame parts!!!!!!
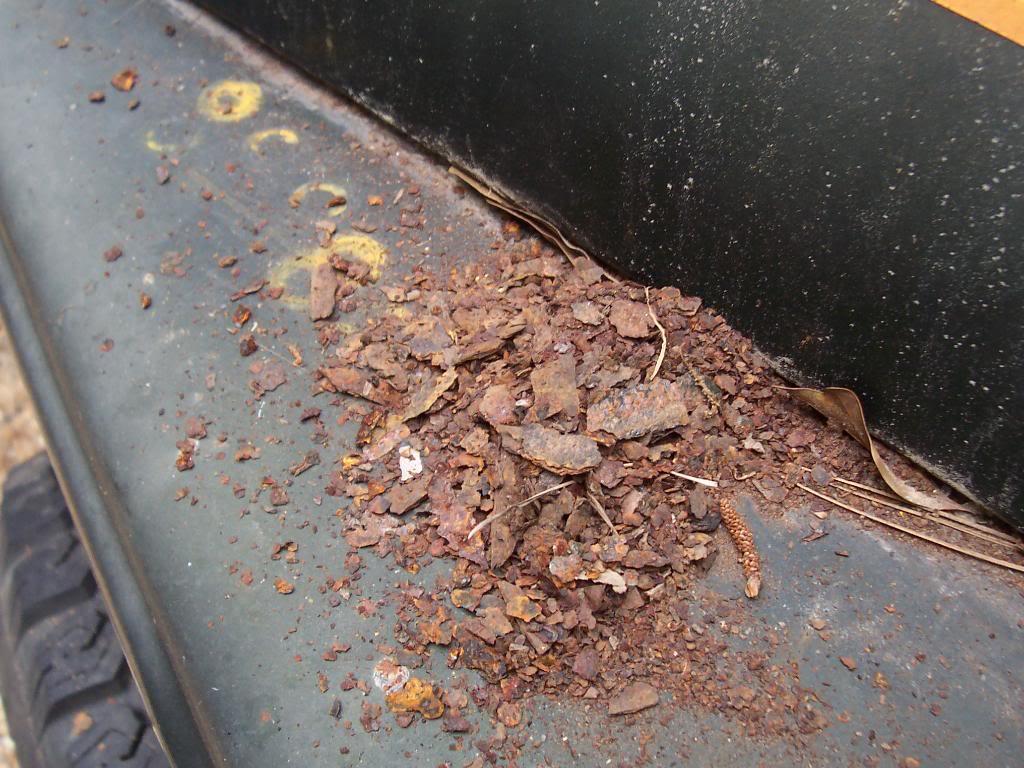
Unfortunately, our used/replacement/aftermarket frame is starting to "bubble". I am not sure if I am even going to waste my time trying to fix/paint this frame. If we have some money left in the budget once I get the Scrambler running, a new windshield frame is at the top of the "wish list". But, this frame is in better shape than the severely rust damaged factory frame, and it will help protect the cowl/dash/interior of the jeep better then what was there. This frame "might" still be salvageable, but it will require a complete paint strip/wire wheel on a grinder treatment to fully determine its true condition. But, there is not too much I can do about the rust on the inside of this windshield frame. Damn New Jersey/East Coast Jeep rust, thank God the Scrambler is from Louisiana!!
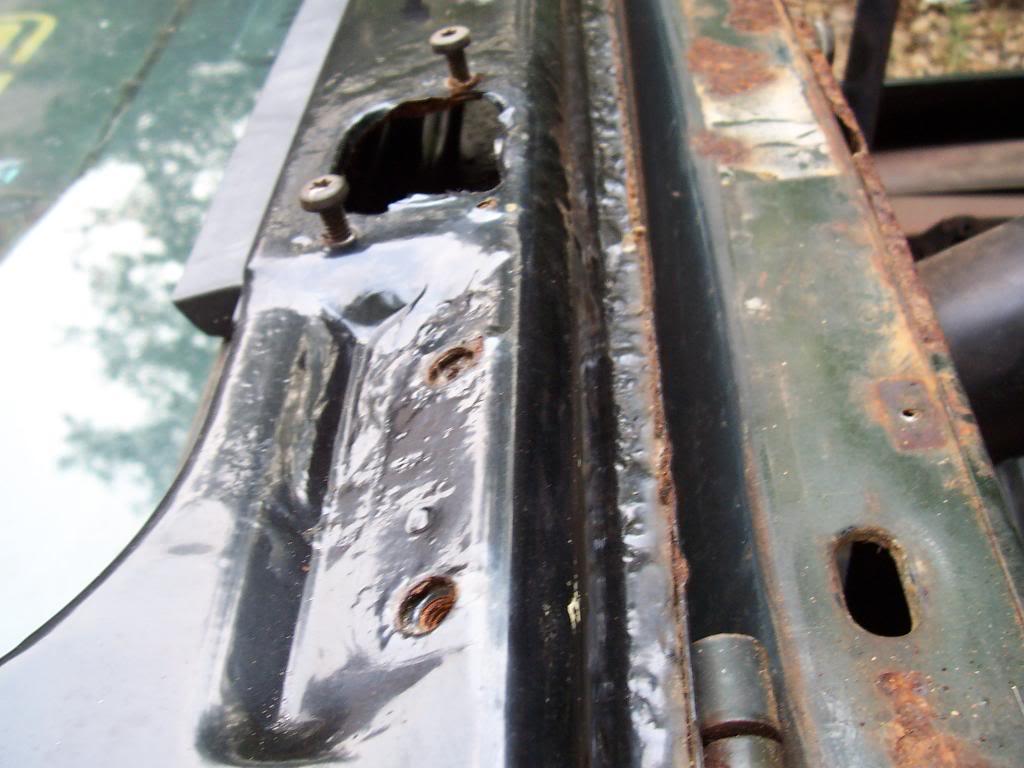
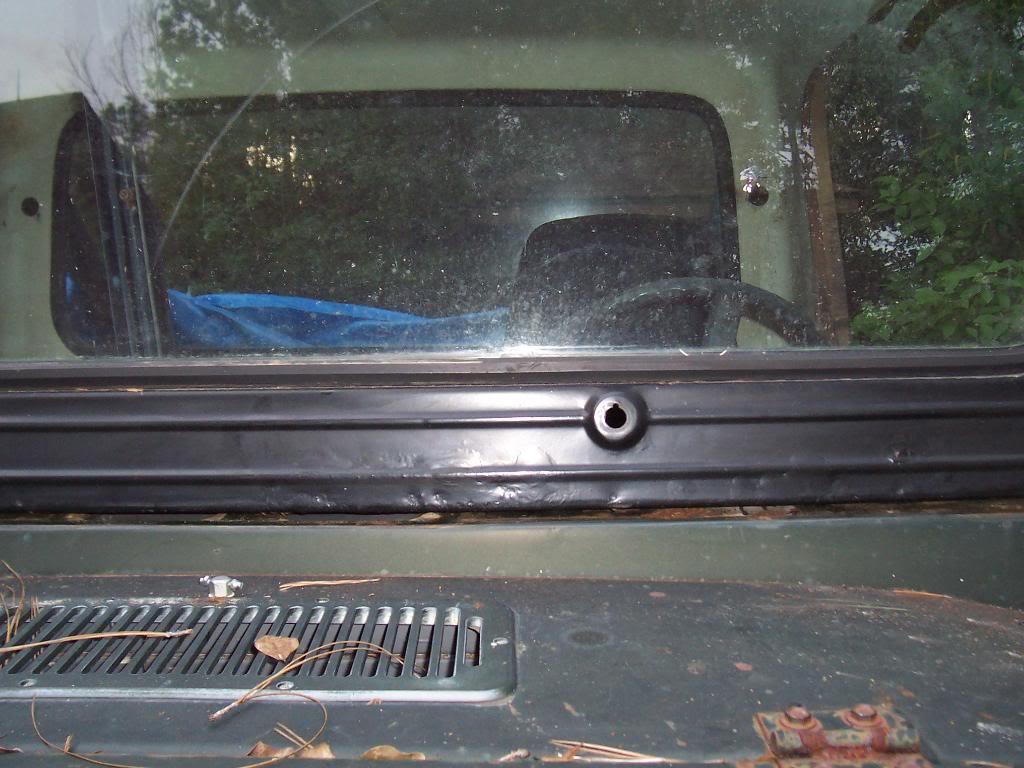
And the newly installed windshield frame.
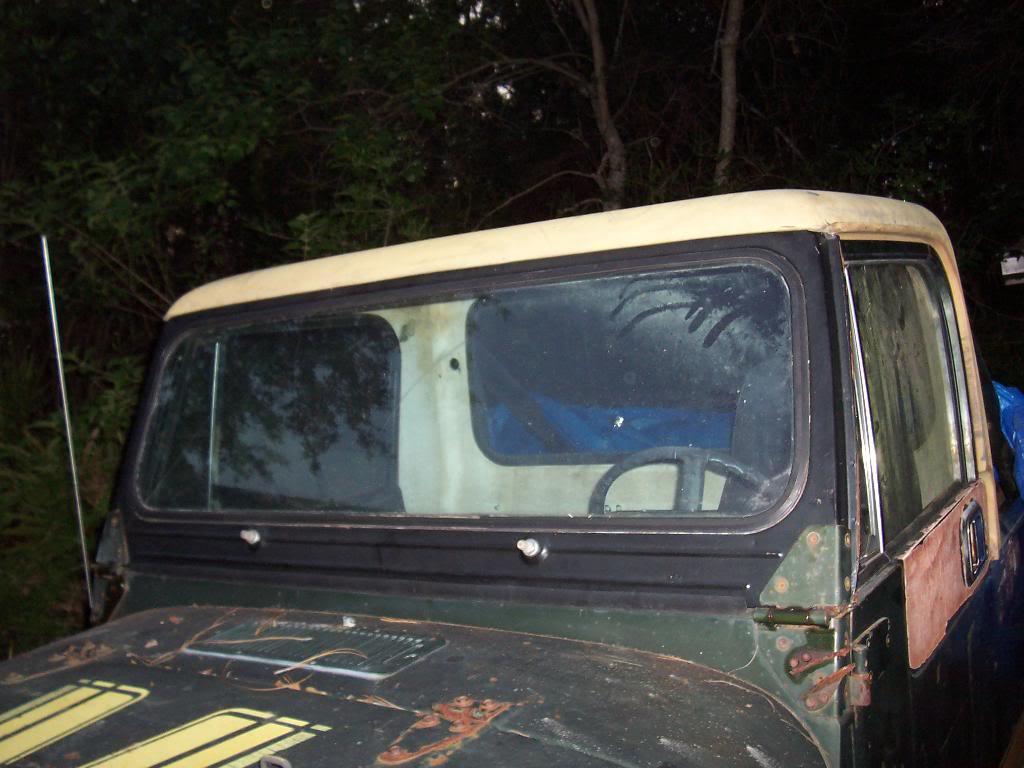
I know it might not make the most sense to install the windshield frame on a Scrambler when I am about to pull the body tub, but there is some logic in my madness.
1) It will help me keep all the windshield frame/wiper parts together so I won’t lose anything.
2) It gets the replacement frame out of my garage.
3) It gets more rusty junk scrap metal out of my yard
4) Looks like I am making progress/improves the overall appearance of "yard Scrambler"
5) I got bored!!!
That's it for now.
Picture of the damaged windshield frame.
I guess the factory bolted everything together, and then painted the vehicle. There is no paint applied to the part of the windshield frame that is behind the hinge. I guess if you still have a "factory paint" CJ, you might want to check on the condition of the sheet metal behind all hinges.
Picture of the back side of the hinges. They are still solid. The lumps of exfoliated metal on the hinges are not hinge metal, but rather windshield frame metal.
Some pictures of the cowl. There are a few spots of minor "pitting" damage, but nothing to worry about. The cowl is still 100% solid, just has some minor "pitting".
Picture of the still shiny/great shape factory paint on the cowl. I am going to spot prime/paint the "pitted" areas, and leave the factory paint intact.
And some more factory windshield frame parts!!!!!!
Unfortunately, our used/replacement/aftermarket frame is starting to "bubble". I am not sure if I am even going to waste my time trying to fix/paint this frame. If we have some money left in the budget once I get the Scrambler running, a new windshield frame is at the top of the "wish list". But, this frame is in better shape than the severely rust damaged factory frame, and it will help protect the cowl/dash/interior of the jeep better then what was there. This frame "might" still be salvageable, but it will require a complete paint strip/wire wheel on a grinder treatment to fully determine its true condition. But, there is not too much I can do about the rust on the inside of this windshield frame. Damn New Jersey/East Coast Jeep rust, thank God the Scrambler is from Louisiana!!
And the newly installed windshield frame.
I know it might not make the most sense to install the windshield frame on a Scrambler when I am about to pull the body tub, but there is some logic in my madness.
1) It will help me keep all the windshield frame/wiper parts together so I won’t lose anything.
2) It gets the replacement frame out of my garage.
3) It gets more rusty junk scrap metal out of my yard
4) Looks like I am making progress/improves the overall appearance of "yard Scrambler"
5) I got bored!!!
That's it for now.

ilovetrains
slightly backward
- City
- Lee's Summit
- State
- MO
does the windshield simply press in? no glue?
Need to put one in mine for the first time.
Need to put one in mine for the first time.

mssldn
Legacy Registered User
- City
- Gooding
- State
- ID
does the windshield simply press in? no glue?
Need to put one in mine for the first time.
See post #1024
https://www.cj-8.com/forum/showthread.php?22240-Gaucho-pickup-build&p=177806#post177806
- City
- Biloxi
- State
- MS
does the windshield simply press in? no glue?
Need to put one in mine for the first time.
The windshield is held in place inside the windshield frame by a thick rubber gasket. But, I believe that the gasket should be glued/sealed to the frame, and the glass should be glued/sealed to the rubber gasket
 When I broke the windshield out of the old rusted frame, I found evidence of sealer on the gasket/frame interface, as well as the glass to gasket interface
- City
- Biloxi
- State
- MS
Yard Scrambler update - working on the bed
The worst rust on "yard Scrambler" is on the rear bed. The bed floor is still very solid, I spent all weekend standing, jumping, and sitting on it, but it is covered in surface rust. The bed floor is also heavily pitted, and it has a few extra "drain holes". Since this is a budget project, I at least wanted to eliminate the rust and repaint the bed, mainly to stabilize it. If this Scrambler is ever restored, this will be the only panel that needs to be replaced.
The first step to gaining access to the entire bed is removing the roll bar, a step many dread. I was able to remove 14 of the 16 torx headed bolts with no problems. The other two bolts, the heads stripped. But, I was able to drill the bolts out, which snapped the heads off. Once the heads snapped off, I removed the roll bar. With the roll bar removed, I drilled out what was left of the bolts, and was able to re-tap the welded nuts. Like I said, the bed floor is covered in surface rust, but this Scrambler is solid. The fact that I was able to remove 14 of the 16 bolts without any problems, and the fact that all 16 factory nuts are still solidly welded in place, attests to that. I was very happy with how easy the roll bar came out.
Passenger side rear corner.
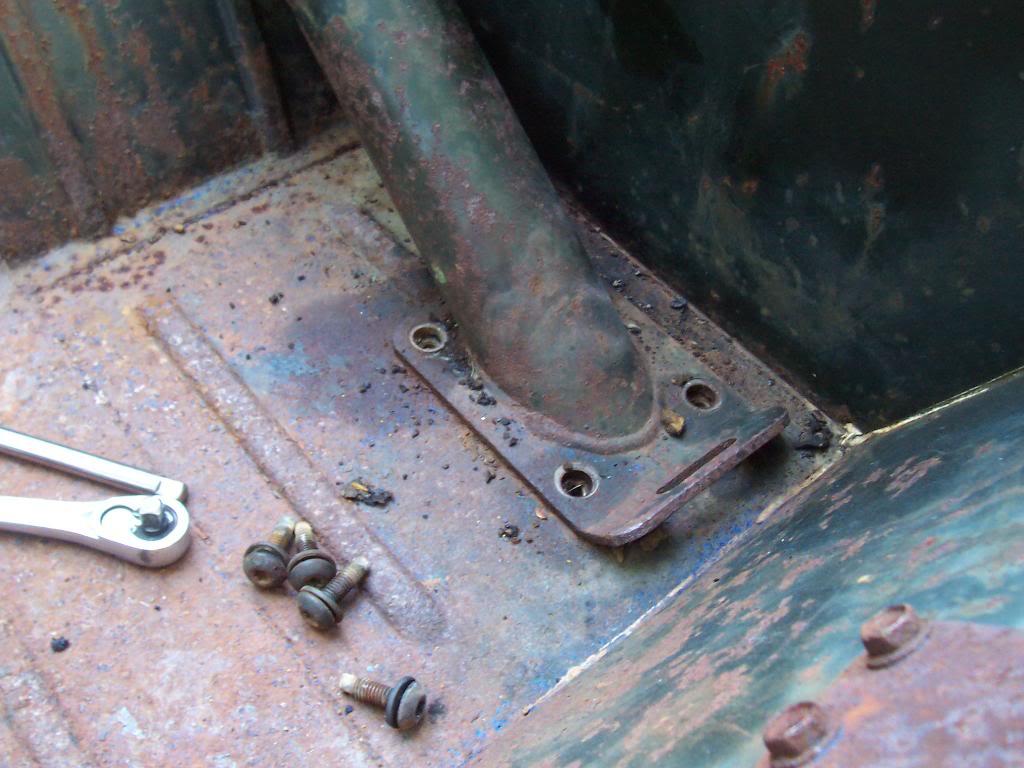
Passenger side front corner.
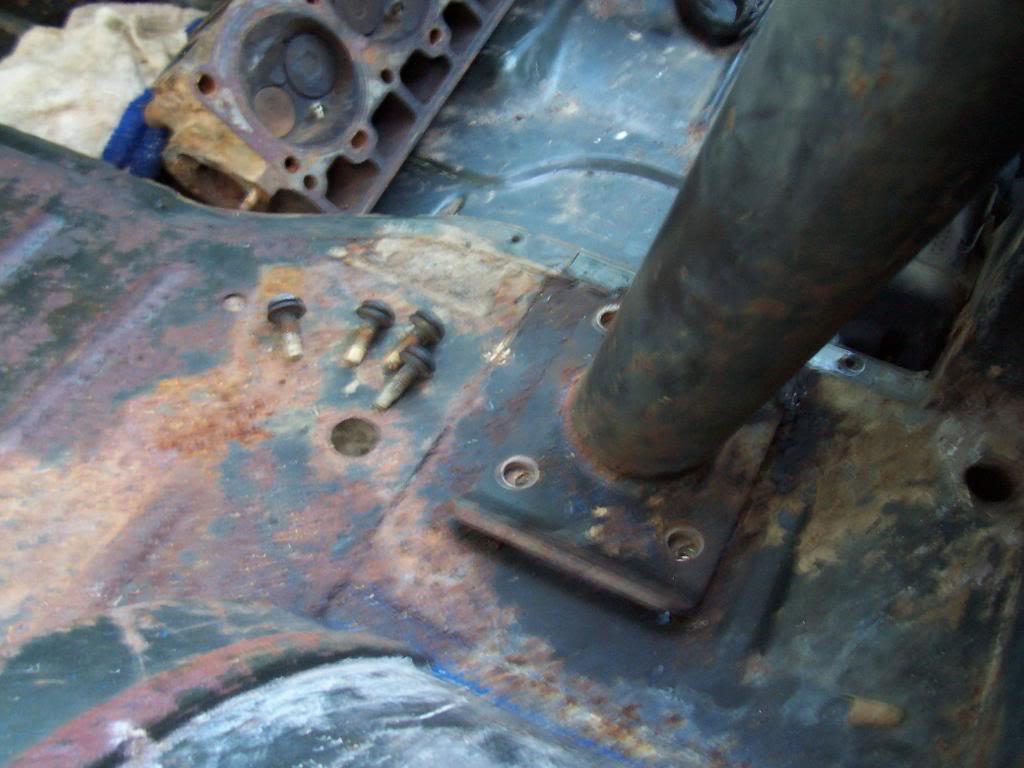
Driver side front corner.
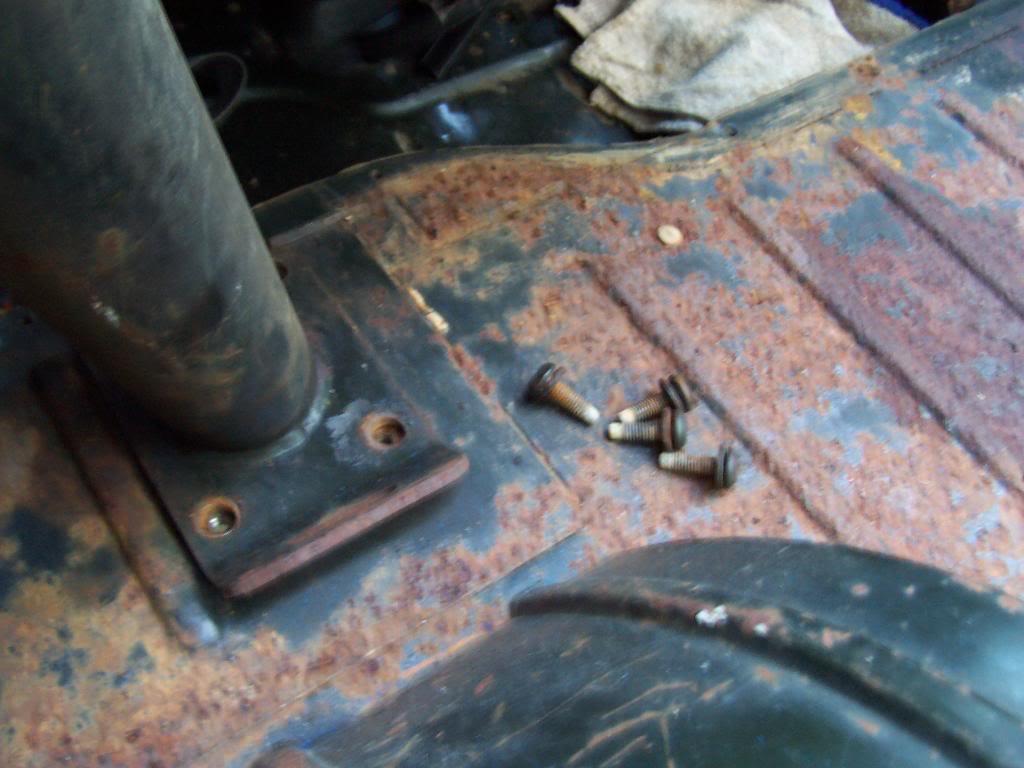
Driver side rear corner. This is where I found the two "trouble bolts". The one pictured is severely rust damaged, which caused the torx star to strip. The other "trouble bolt" is the one that is a PIA to get to, which resulted in its stripping out. Also note the clump of asphalt/tar.
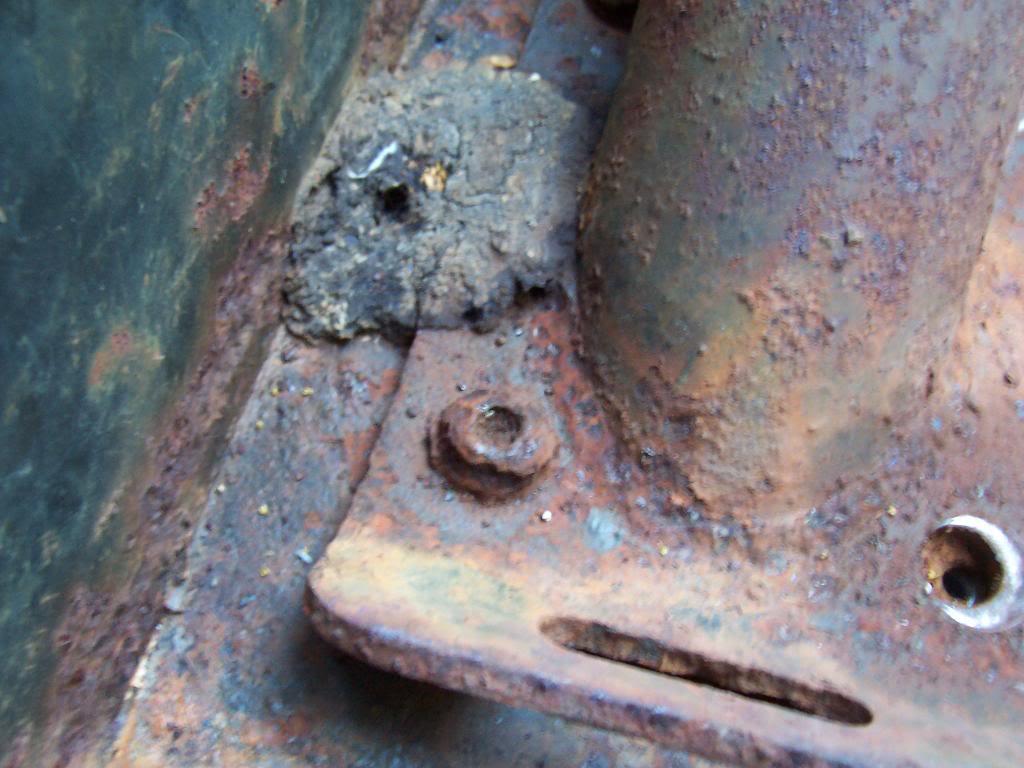
I was able to drill the "two troubled bolts", which snapped their heads off, which is what I wanted. You can see the two snapped off heads in this picture.
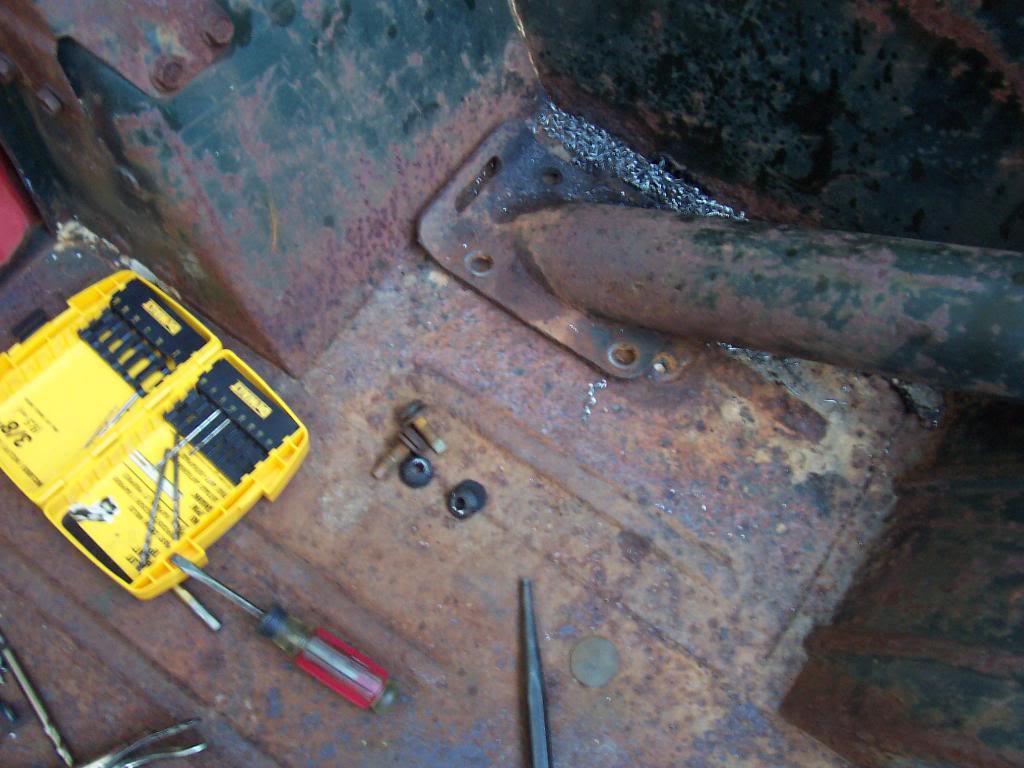
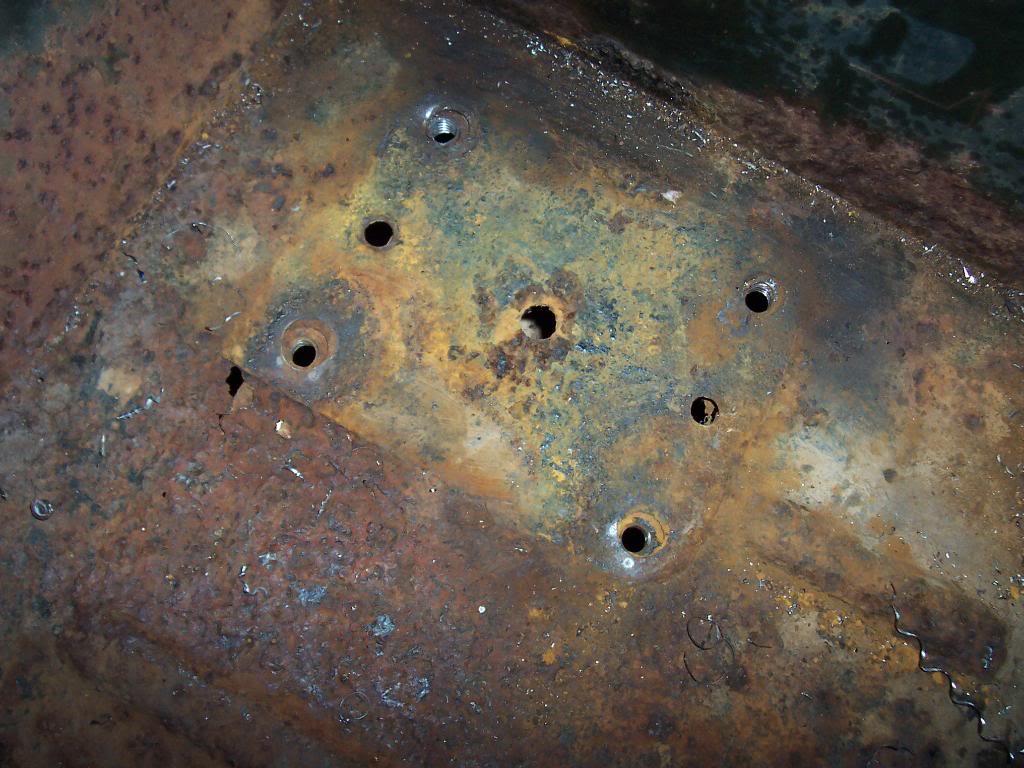
And some pictures of the under roll bar bed corner pieces. All four corners are still rock solid, with only surface rust. The driver side rear corner has one pin hole, but that is all the damage that I found.
Driver side front.
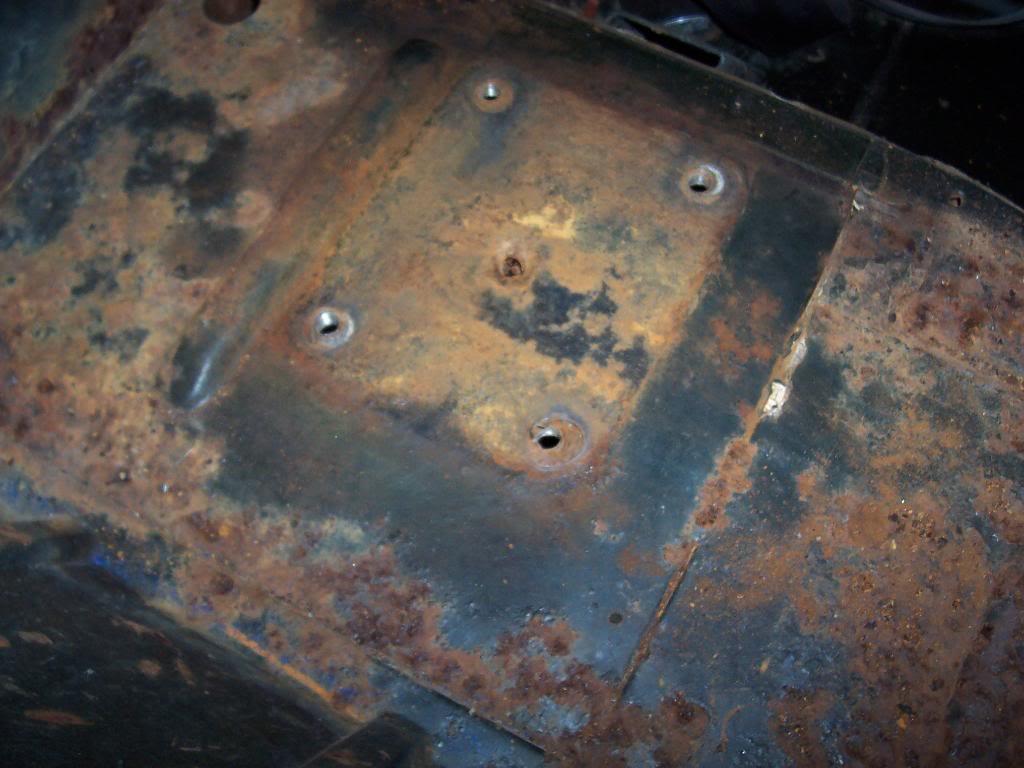
Passenger side front.
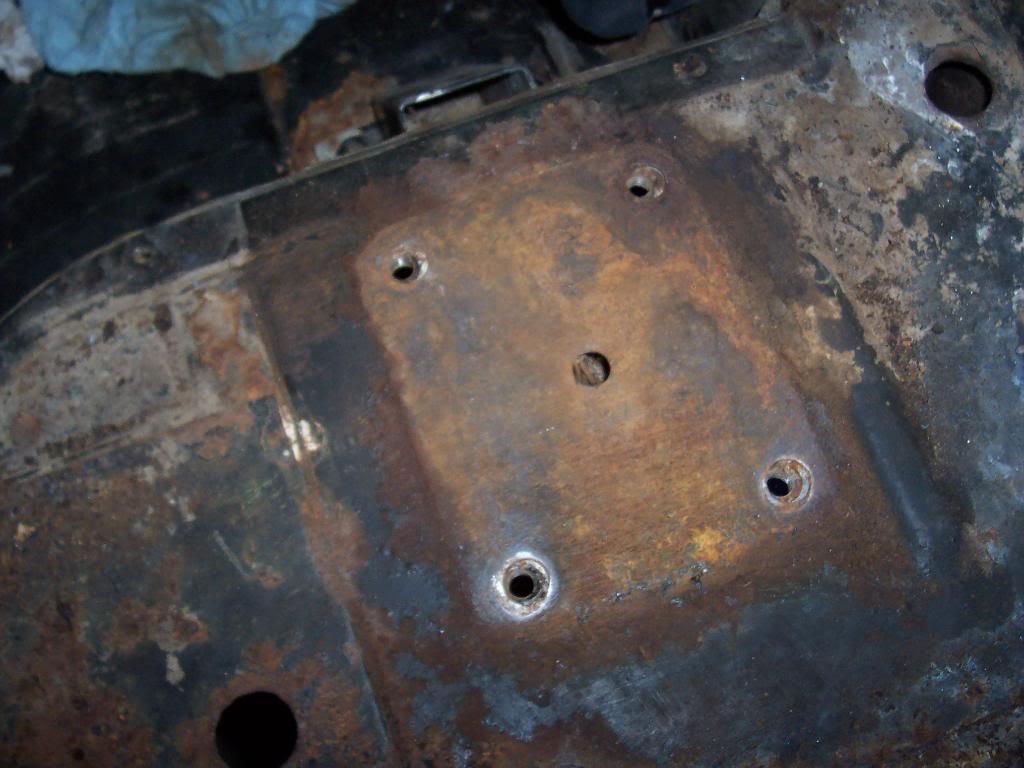
Passenger side rear.
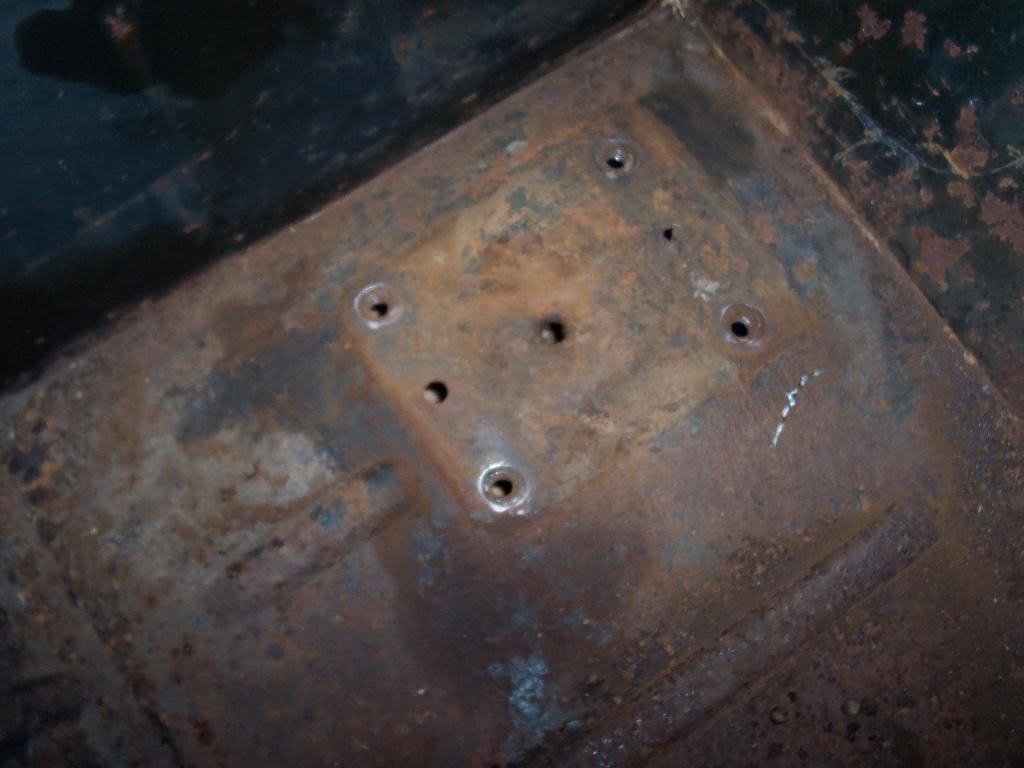
And the driver side rear corner. Only a pin hole. If I was restoring this Scrambler, I would replace this corner piece, but it is still rock solid.
And a quick picture of the entire bed floor.
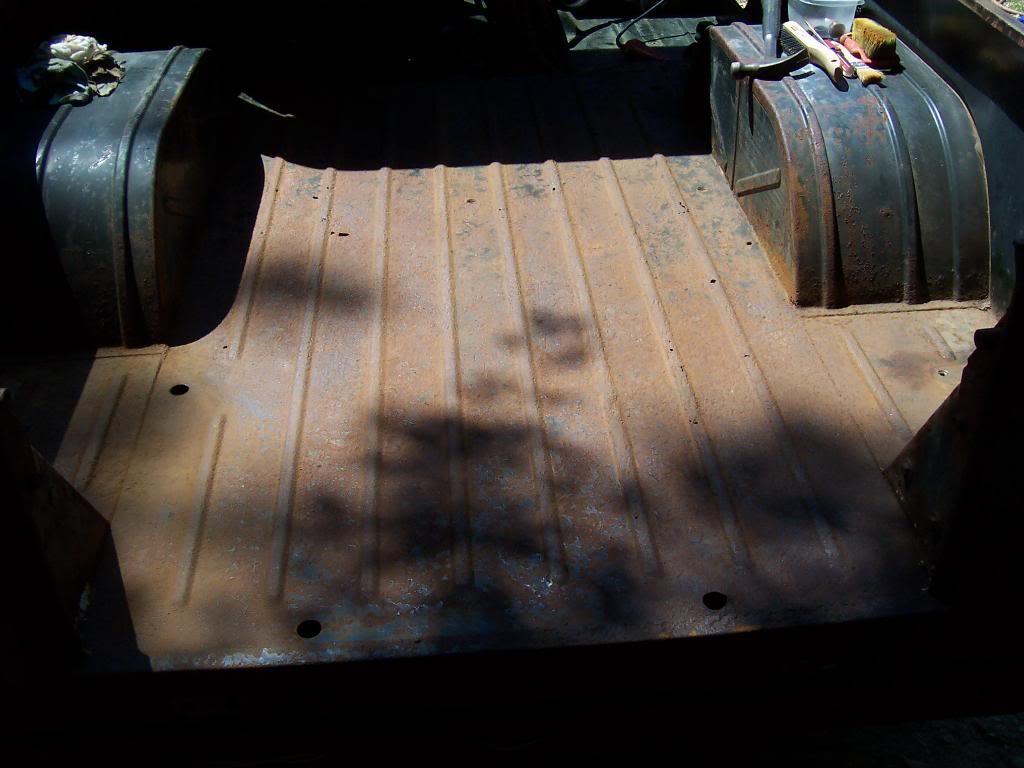
The worst rust on "yard Scrambler" is on the rear bed. The bed floor is still very solid, I spent all weekend standing, jumping, and sitting on it, but it is covered in surface rust. The bed floor is also heavily pitted, and it has a few extra "drain holes". Since this is a budget project, I at least wanted to eliminate the rust and repaint the bed, mainly to stabilize it. If this Scrambler is ever restored, this will be the only panel that needs to be replaced.
The first step to gaining access to the entire bed is removing the roll bar, a step many dread. I was able to remove 14 of the 16 torx headed bolts with no problems. The other two bolts, the heads stripped. But, I was able to drill the bolts out, which snapped the heads off. Once the heads snapped off, I removed the roll bar. With the roll bar removed, I drilled out what was left of the bolts, and was able to re-tap the welded nuts. Like I said, the bed floor is covered in surface rust, but this Scrambler is solid. The fact that I was able to remove 14 of the 16 bolts without any problems, and the fact that all 16 factory nuts are still solidly welded in place, attests to that. I was very happy with how easy the roll bar came out.
Passenger side rear corner.
Passenger side front corner.
Driver side front corner.
Driver side rear corner. This is where I found the two "trouble bolts". The one pictured is severely rust damaged, which caused the torx star to strip. The other "trouble bolt" is the one that is a PIA to get to, which resulted in its stripping out. Also note the clump of asphalt/tar.
I was able to drill the "two troubled bolts", which snapped their heads off, which is what I wanted. You can see the two snapped off heads in this picture.
And some pictures of the under roll bar bed corner pieces. All four corners are still rock solid, with only surface rust. The driver side rear corner has one pin hole, but that is all the damage that I found.
Driver side front.
Passenger side front.
Passenger side rear.
And the driver side rear corner. Only a pin hole. If I was restoring this Scrambler, I would replace this corner piece, but it is still rock solid.
And a quick picture of the entire bed floor.
- City
- Biloxi
- State
- MS
Now, for the fun part, rust removal. I used a wire wheel attached to a drill motor and removed all of the loose/flaky surface rust. I used a Dremel tool to get into the corners. Even though I spent 4-5 hours doing this, it is about impossible to get all the rust out.
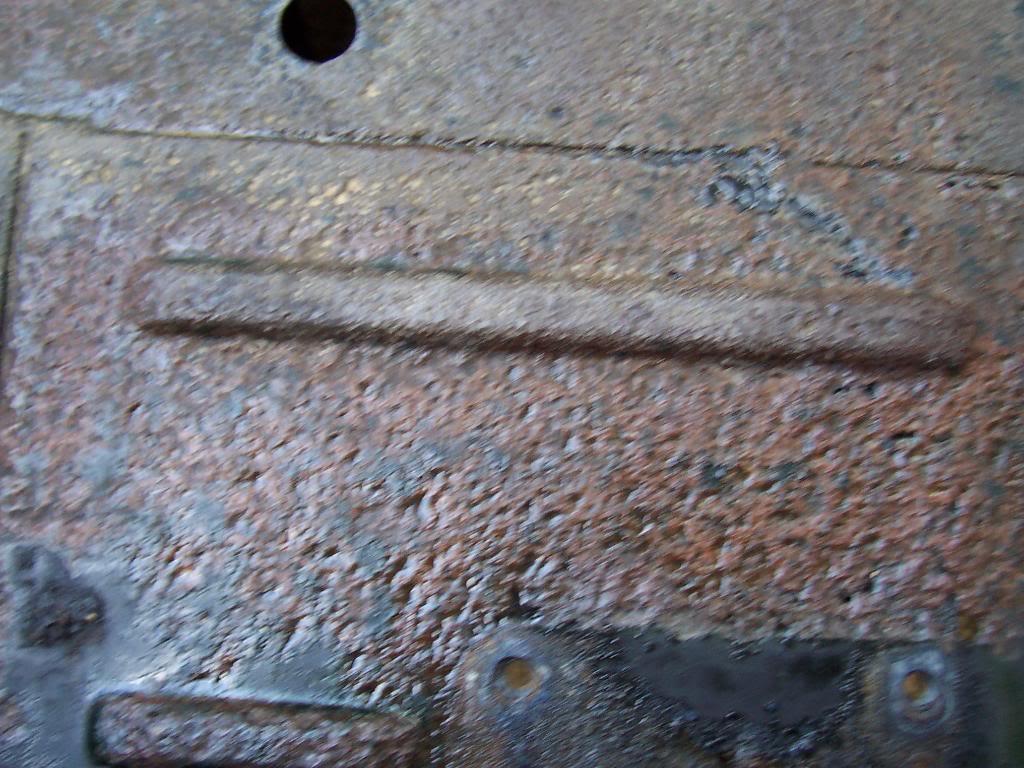
I decided to do an experiment with Phosphoric acid on an old front disc brake splash shield. I did no prep to this piece. I brushed the acid on, waited 24 hours, and this is what I found.
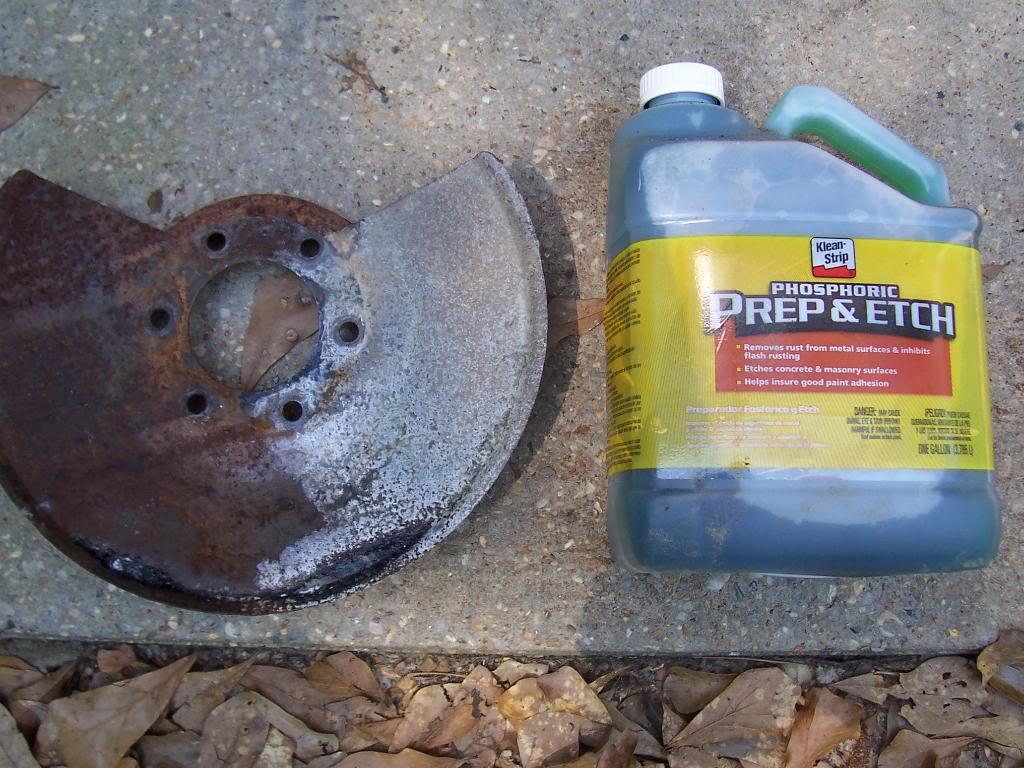
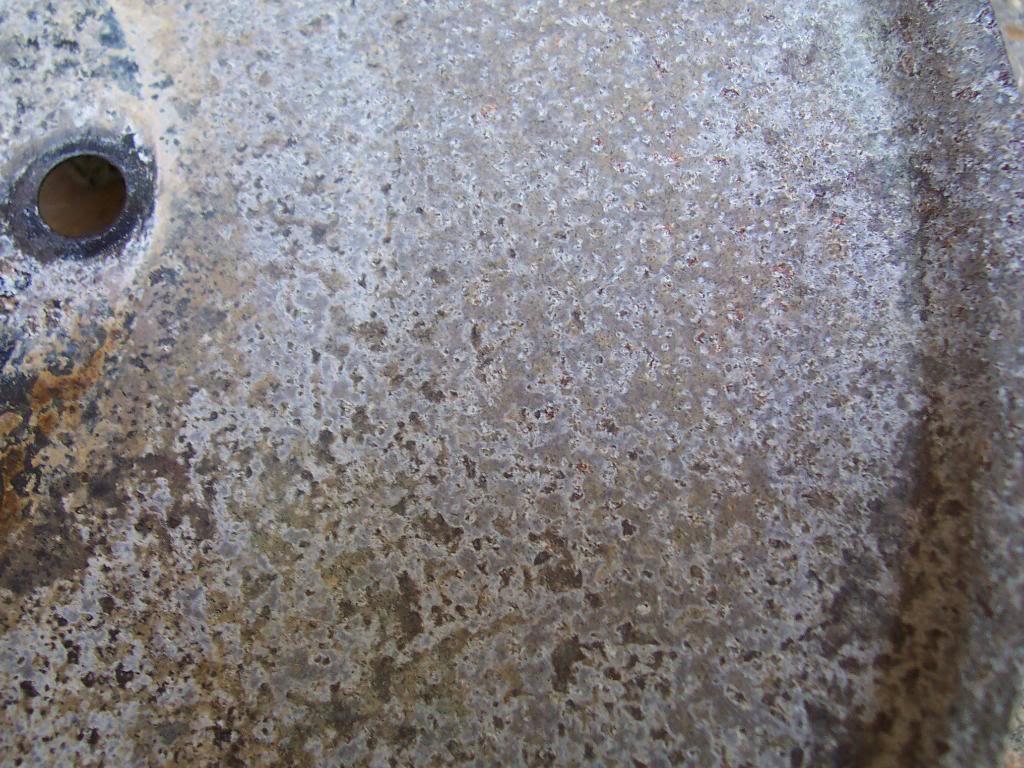
The "silver/white" that you see is not a coating, it is "new" metal. The acid eats off the surface rust, and etches the existing metal, leaving a fresh metal surface. This is not one of those miracle rust converters, this stuff actually etches the sheet metal. This "etched" surface should provide an excellent surface for the primer to bond to.
Some pictures of in progress wire wheel rust removal. Even though I am using acid, I wanted to remove as much rust as possible with mechanical methods, first.
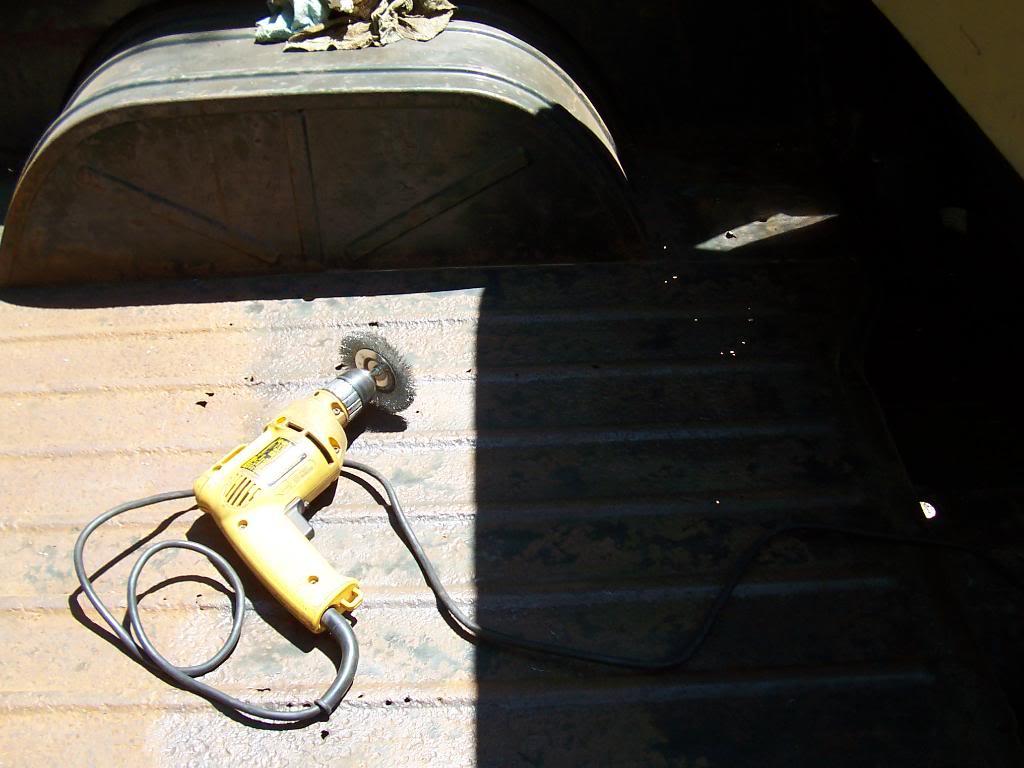
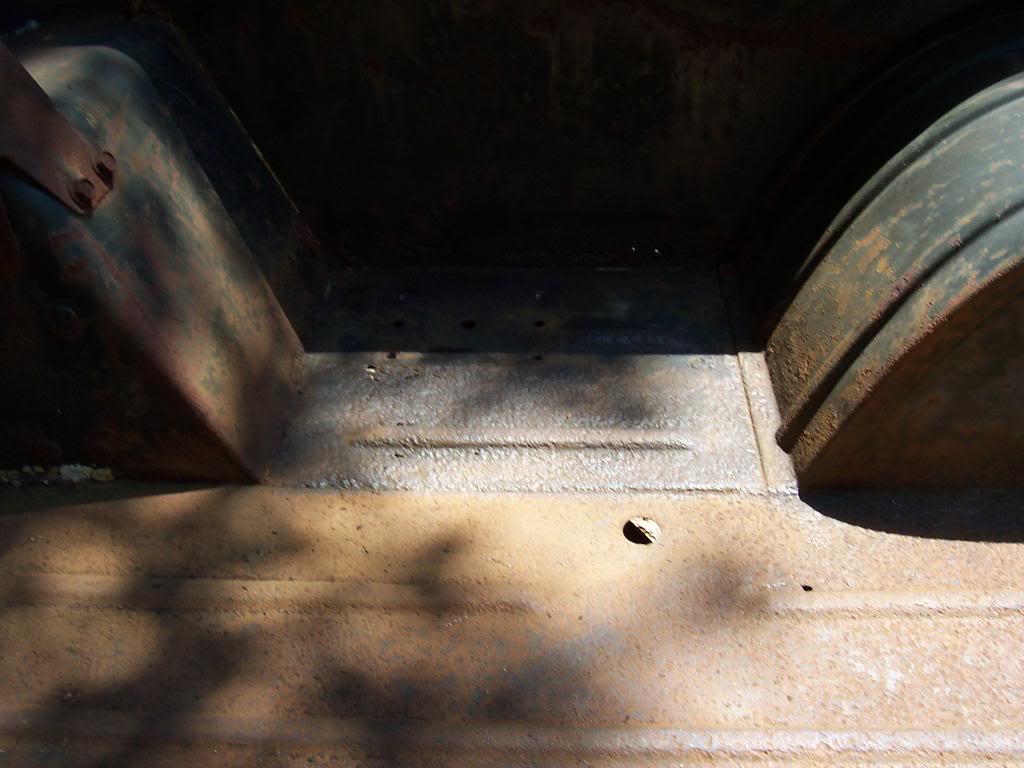
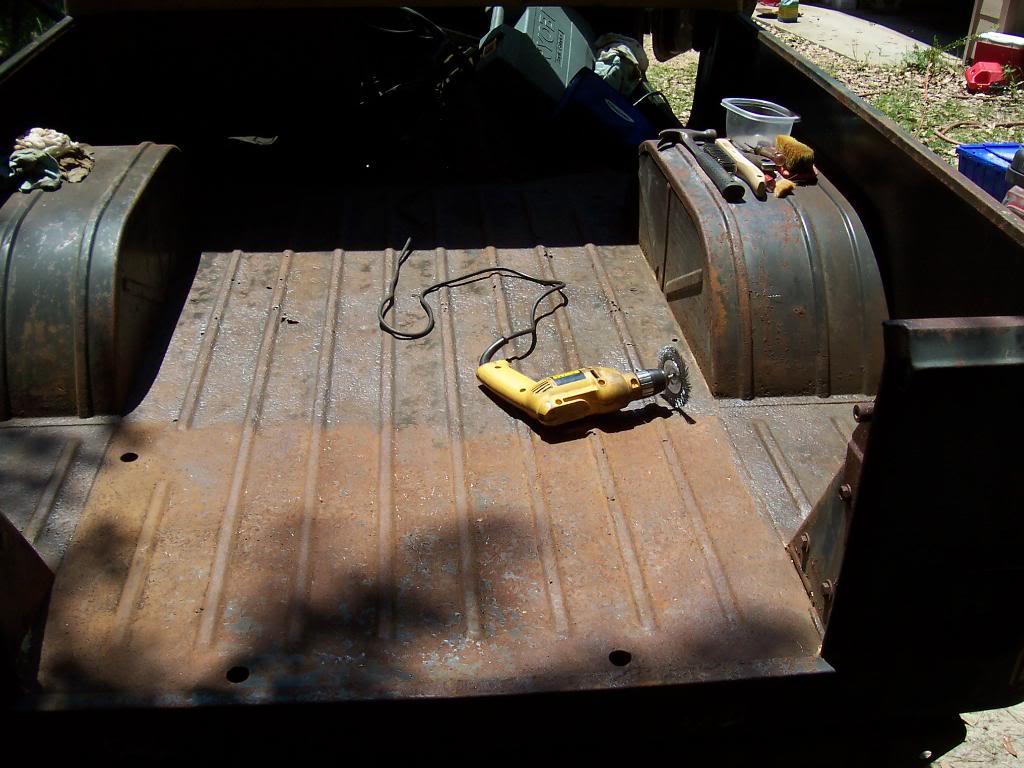
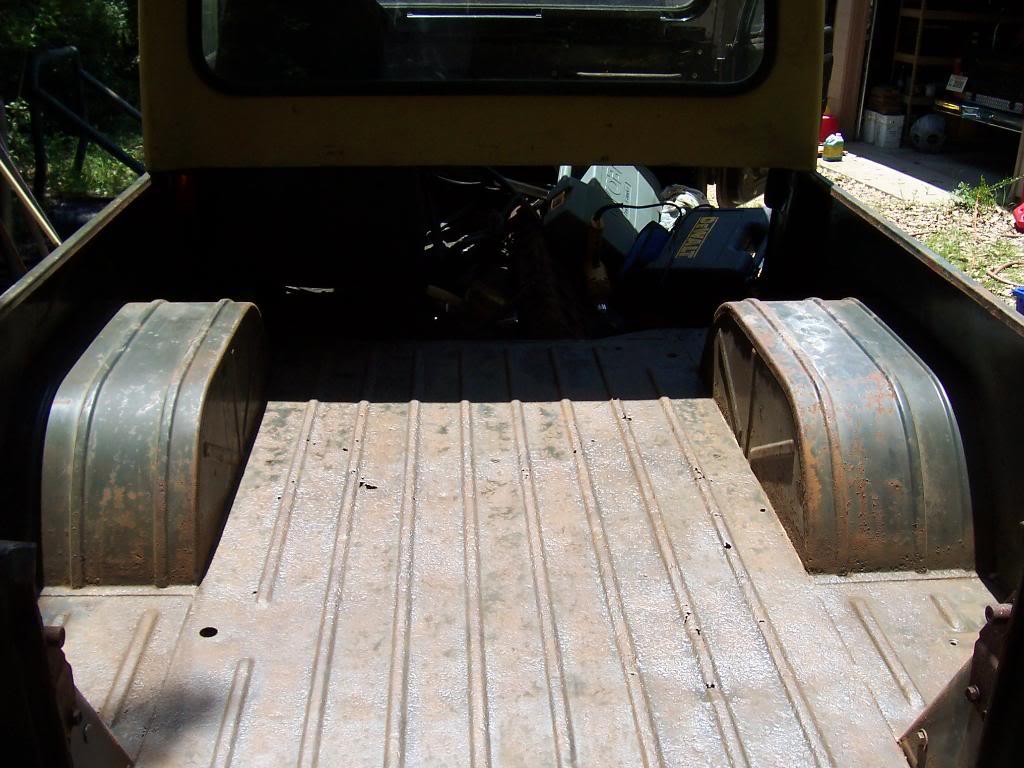
And a close up. The wire wheel removed about 90% of the rust, the acid should take care of the rest.
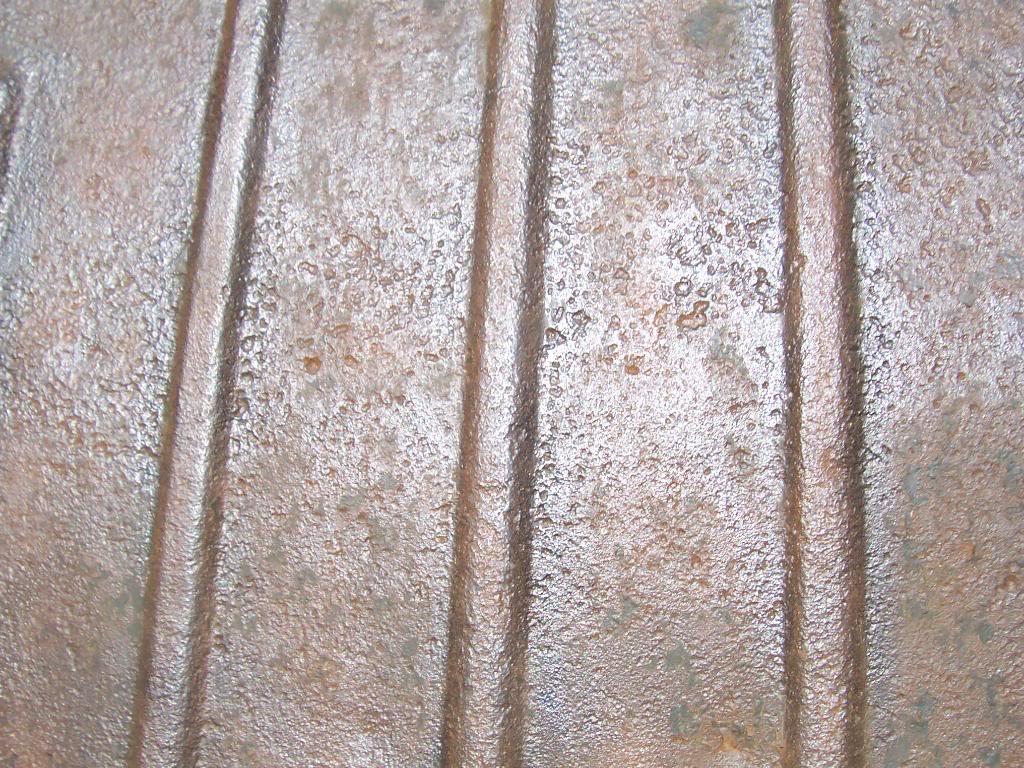
A quick picture of the acid applied to the bed. I brushed/dabbed it on with a 2" paint brush.
After applying the acid, I covered the Scrambler back up with a tarp, to prevent any evaporation. I checked the bed this morning (applied the acid Sunday afternoon), and the entire bed is still covered in acid.
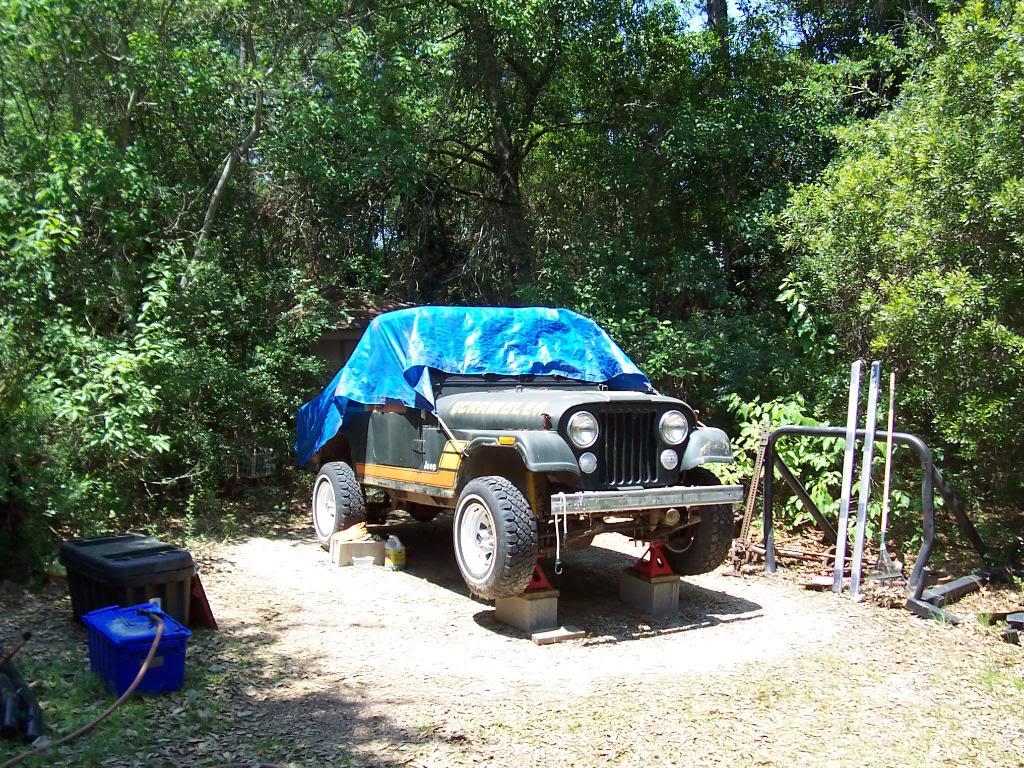
Since the bed was so heavily rusted, I will probably do a second coat of acid. I jacked the front end up so that when I wash the acid off it will all run out the back. I want to protect the factory paint on the cab floors, since it is still in perfect shape.
That's it for now.
I decided to do an experiment with Phosphoric acid on an old front disc brake splash shield. I did no prep to this piece. I brushed the acid on, waited 24 hours, and this is what I found.
The "silver/white" that you see is not a coating, it is "new" metal. The acid eats off the surface rust, and etches the existing metal, leaving a fresh metal surface. This is not one of those miracle rust converters, this stuff actually etches the sheet metal. This "etched" surface should provide an excellent surface for the primer to bond to.
Some pictures of in progress wire wheel rust removal. Even though I am using acid, I wanted to remove as much rust as possible with mechanical methods, first.
And a close up. The wire wheel removed about 90% of the rust, the acid should take care of the rest.
A quick picture of the acid applied to the bed. I brushed/dabbed it on with a 2" paint brush.
After applying the acid, I covered the Scrambler back up with a tarp, to prevent any evaporation. I checked the bed this morning (applied the acid Sunday afternoon), and the entire bed is still covered in acid.
Since the bed was so heavily rusted, I will probably do a second coat of acid. I jacked the front end up so that when I wash the acid off it will all run out the back. I want to protect the factory paint on the cab floors, since it is still in perfect shape.
That's it for now.
- City
- Biloxi
- State
- MS
Quick Phosphoric Acid Update.
The pictures do not show it too well, but the acid is working.
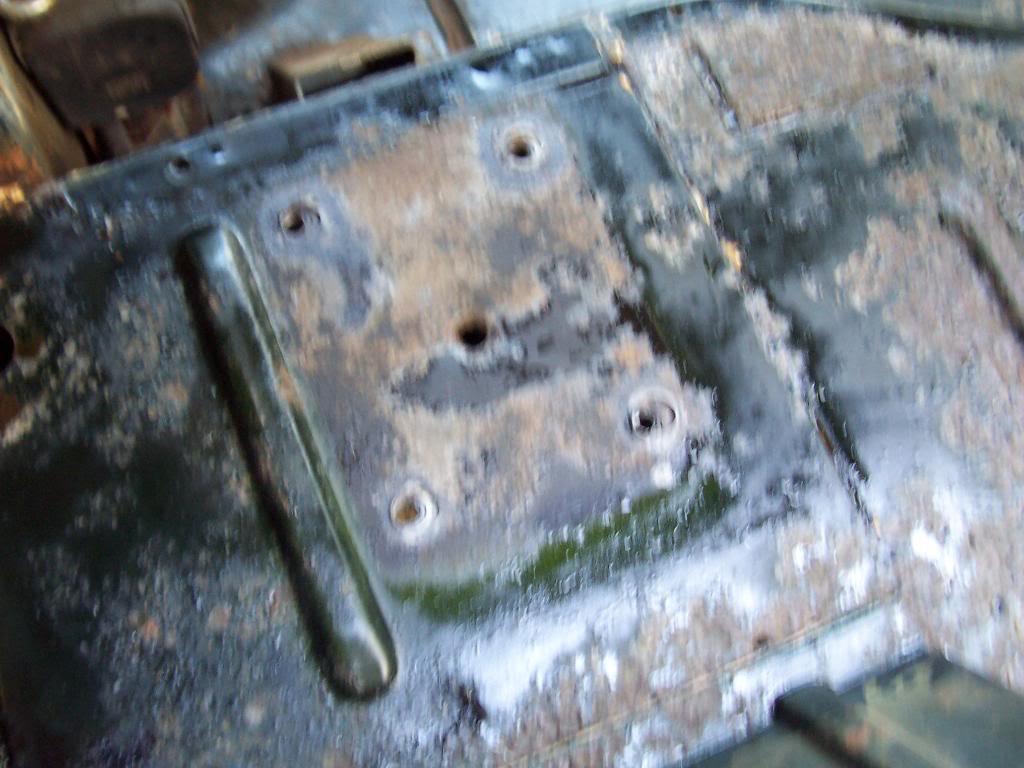
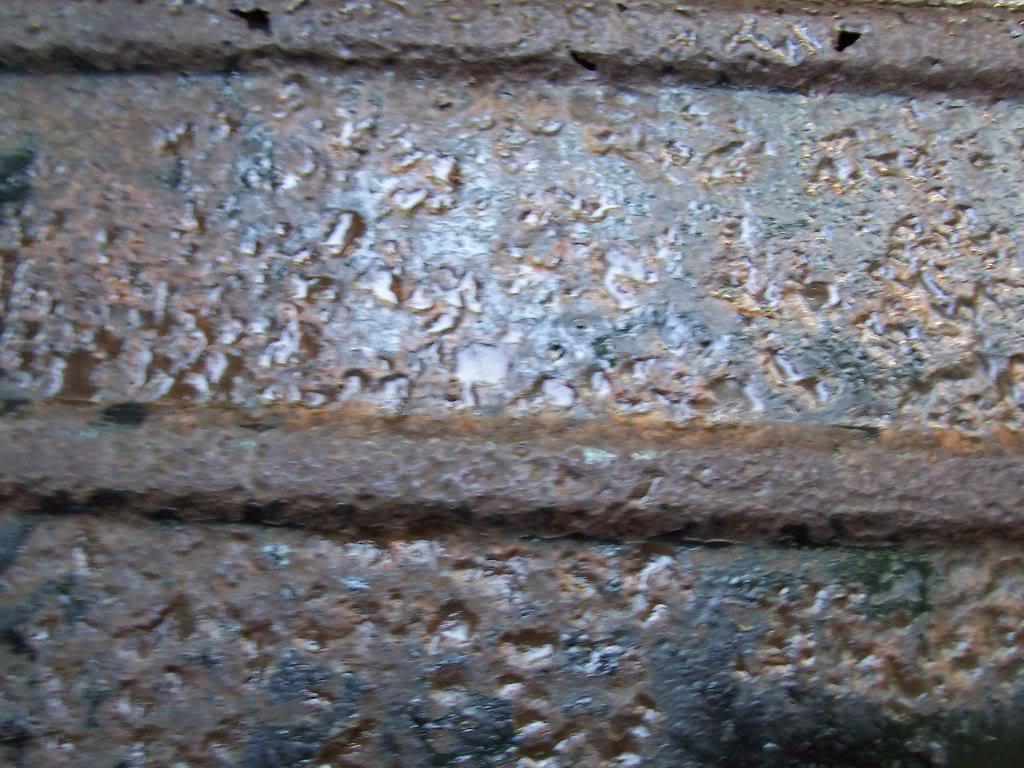
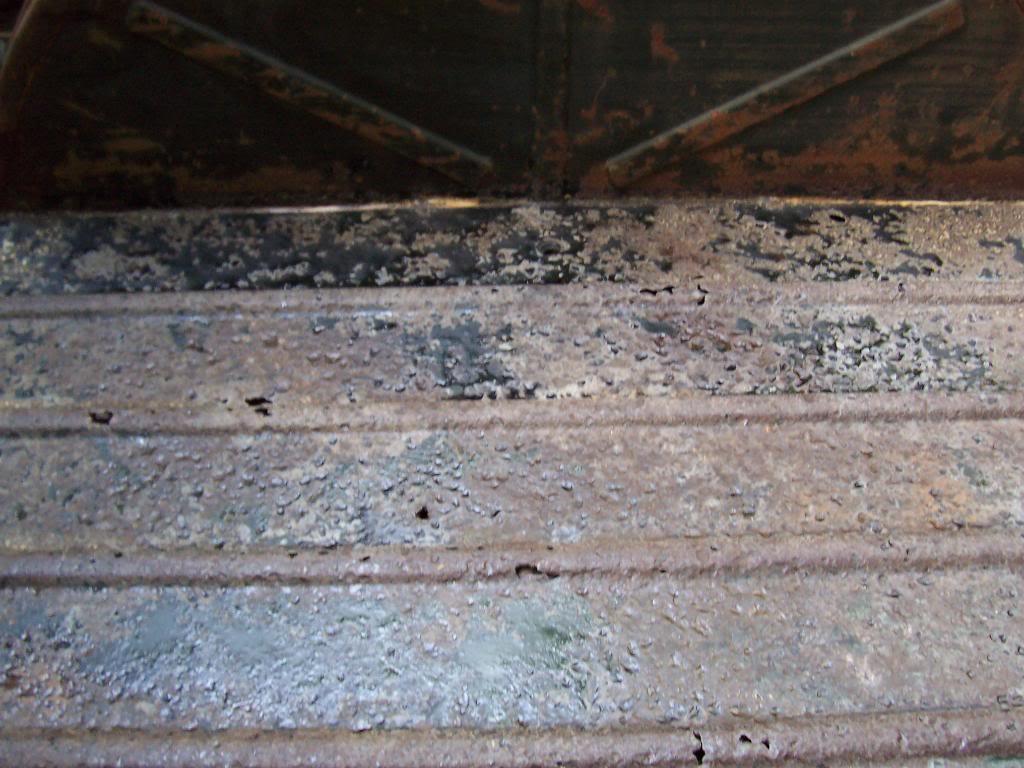
The instructions say to use a second coat on heavily rusted metal, so I went ahead and put another heavy coat of acid on.
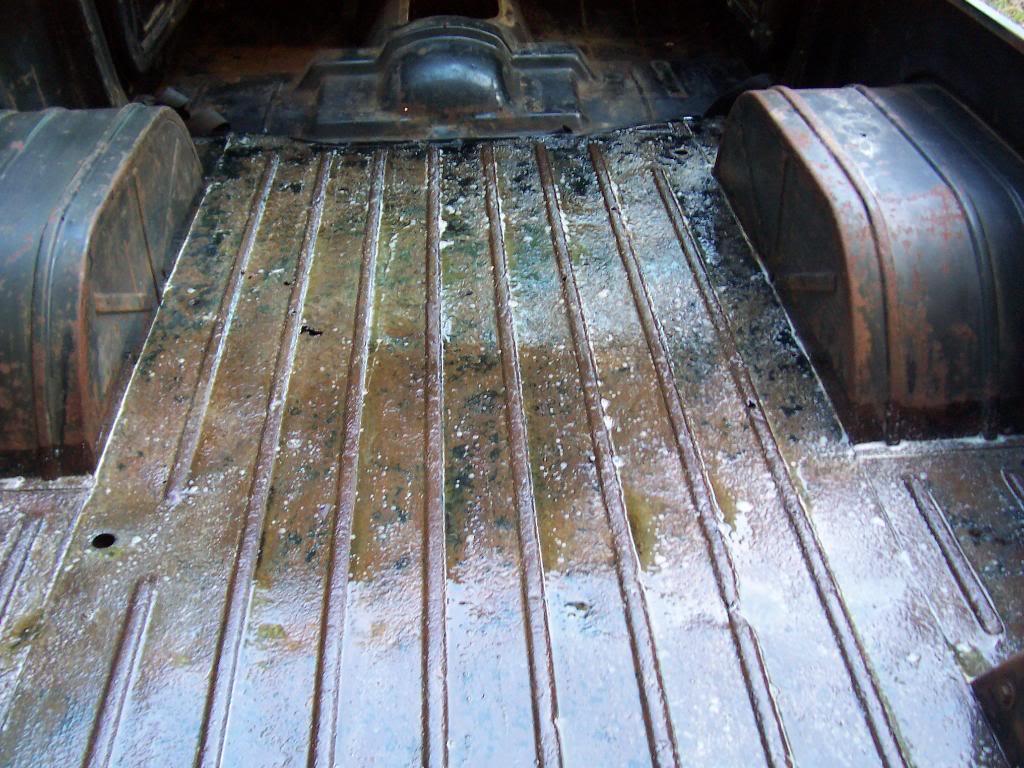
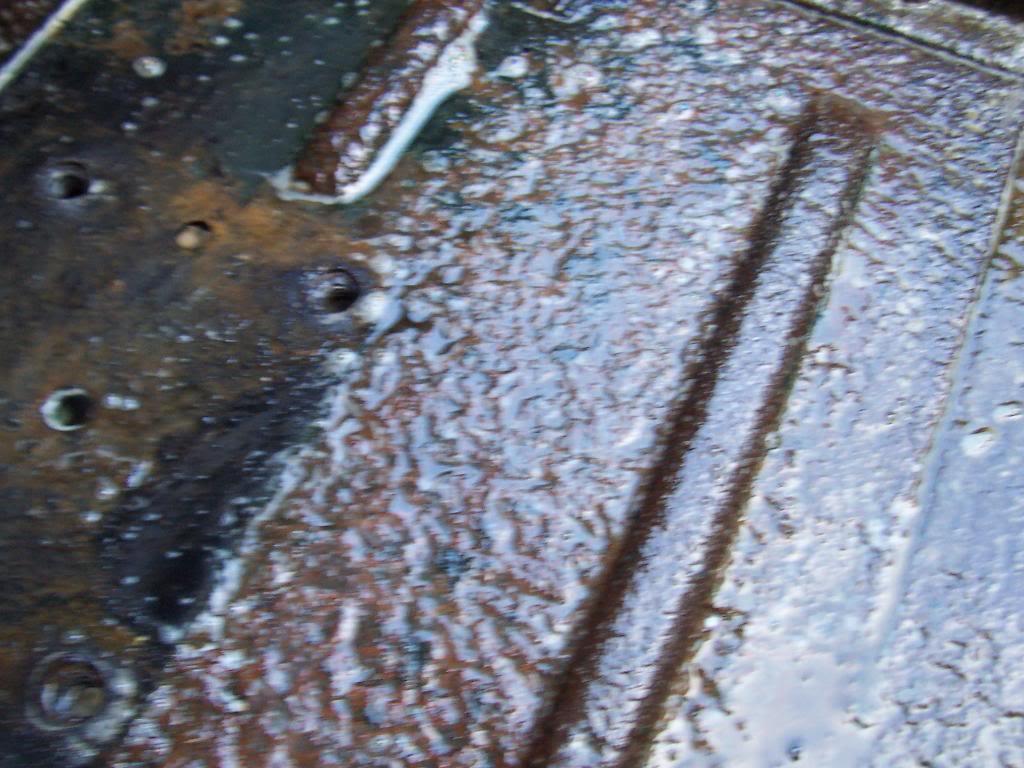
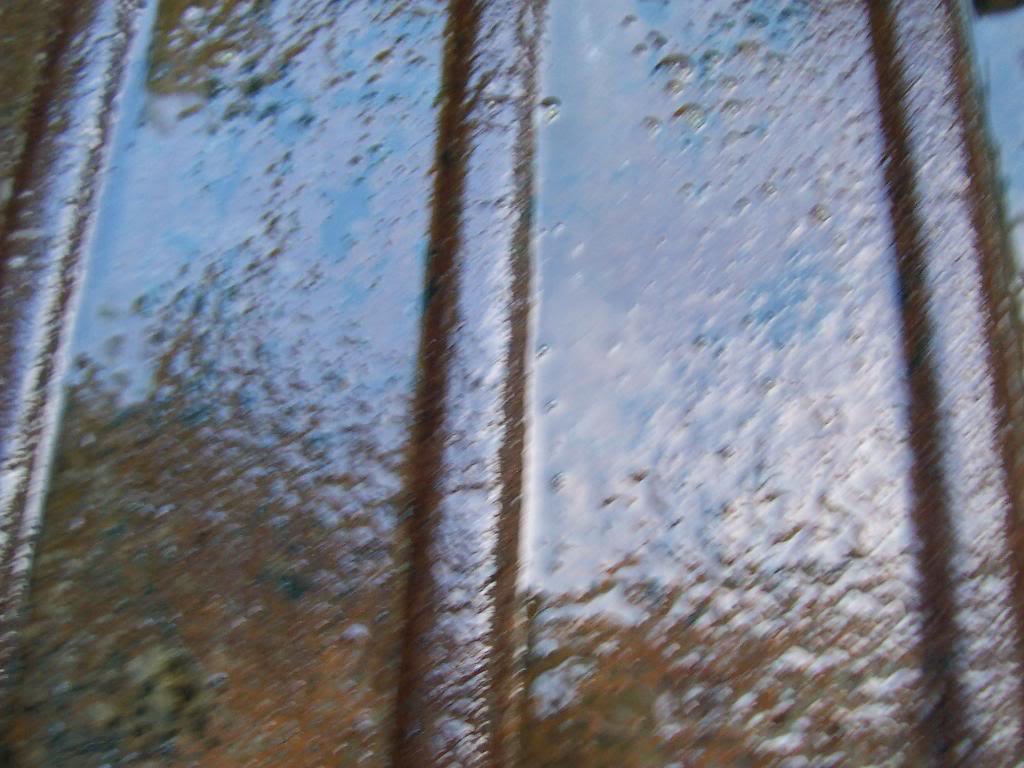
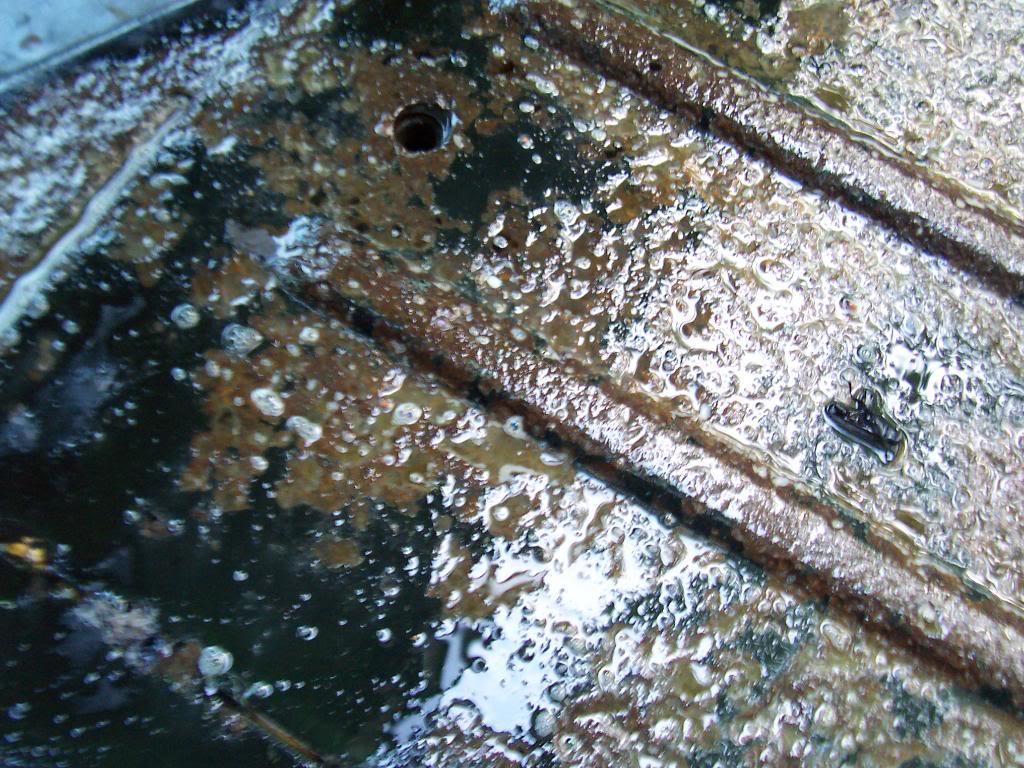
When I get home from work today, I am going to thoroughly clean/scrub/wash the acid off and determine my next course of action. Hopefully, the bed floor will look like my experimental splash shield piece. I will have to wait and see.
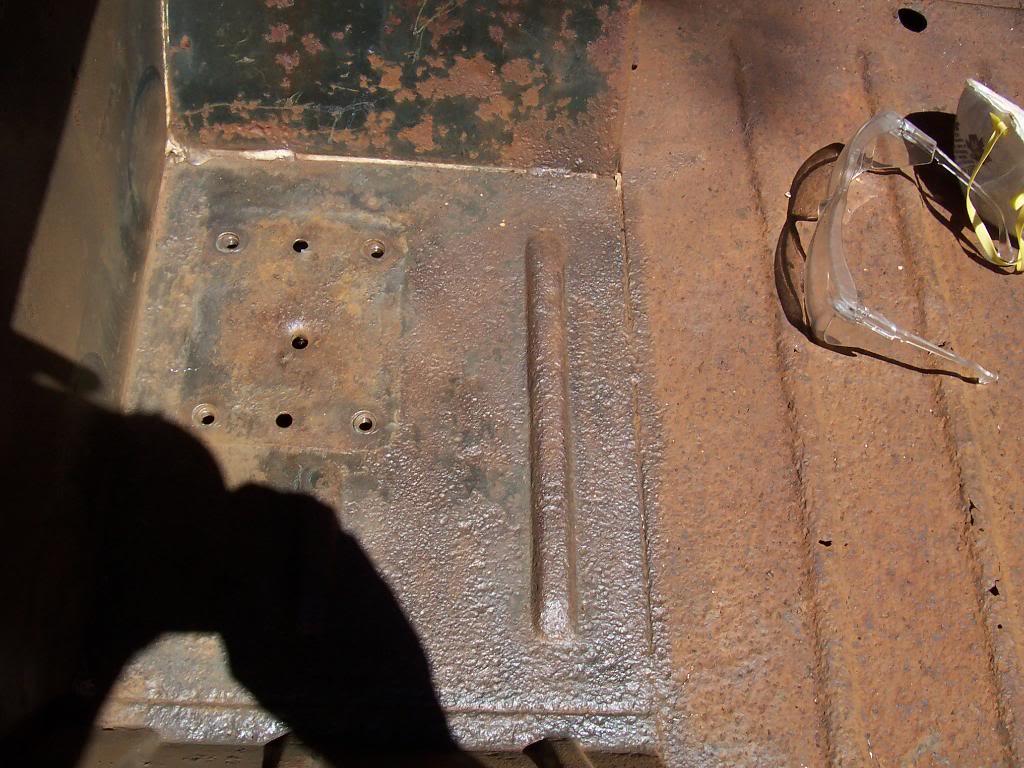
Quick picture of the the cab/interior floor. It is in super solid shape, just surface rust. I will probably just repaint the driver side foot well area, the rest of the floor is still in great shape.
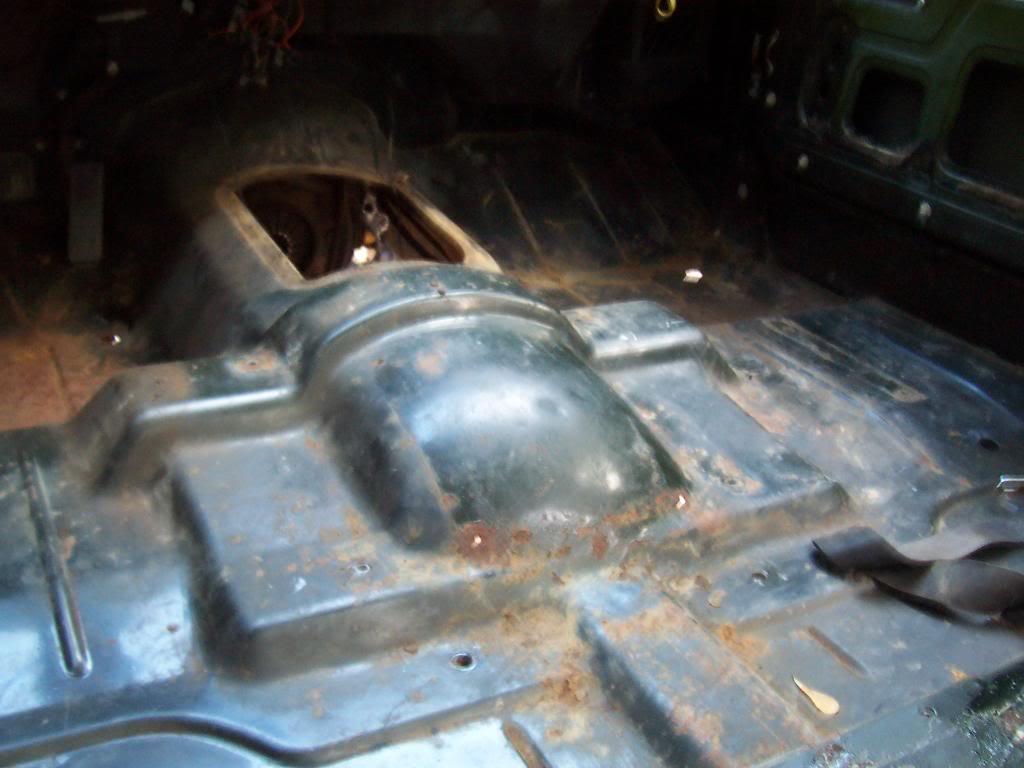
That's it for now.
The pictures do not show it too well, but the acid is working.
The instructions say to use a second coat on heavily rusted metal, so I went ahead and put another heavy coat of acid on.
When I get home from work today, I am going to thoroughly clean/scrub/wash the acid off and determine my next course of action. Hopefully, the bed floor will look like my experimental splash shield piece. I will have to wait and see.
Quick picture of the the cab/interior floor. It is in super solid shape, just surface rust. I will probably just repaint the driver side foot well area, the rest of the floor is still in great shape.
That's it for now.
- City
- Biloxi
- State
- MS
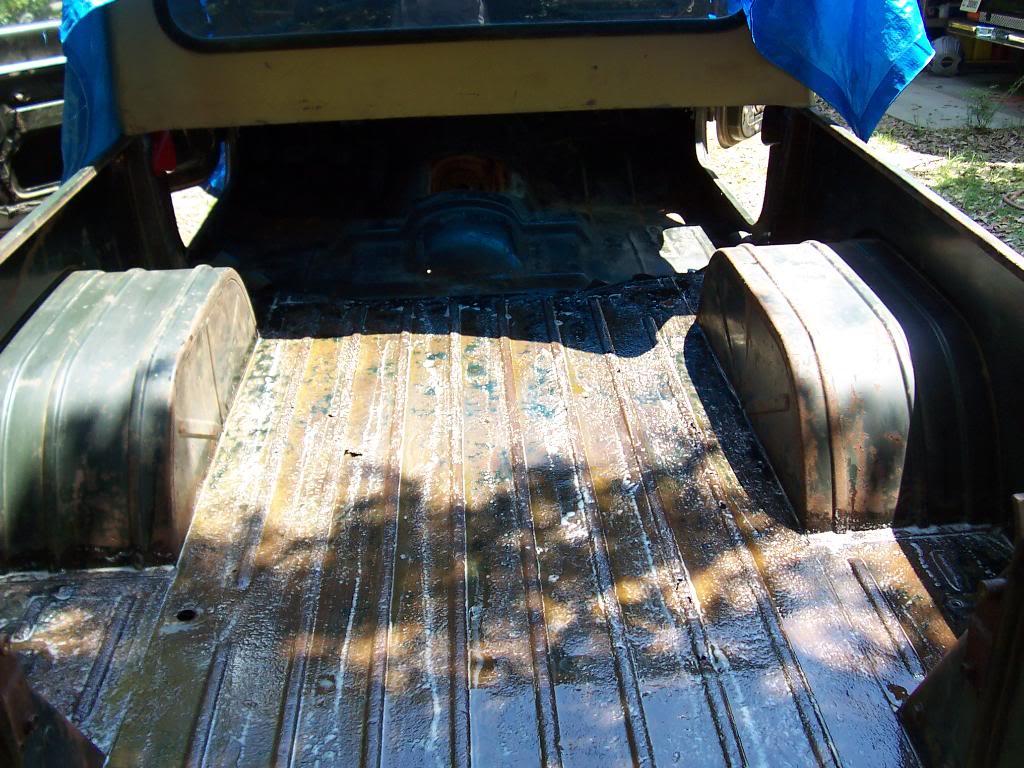
A few pictures of what the bed looks like after two days of acid treatment.
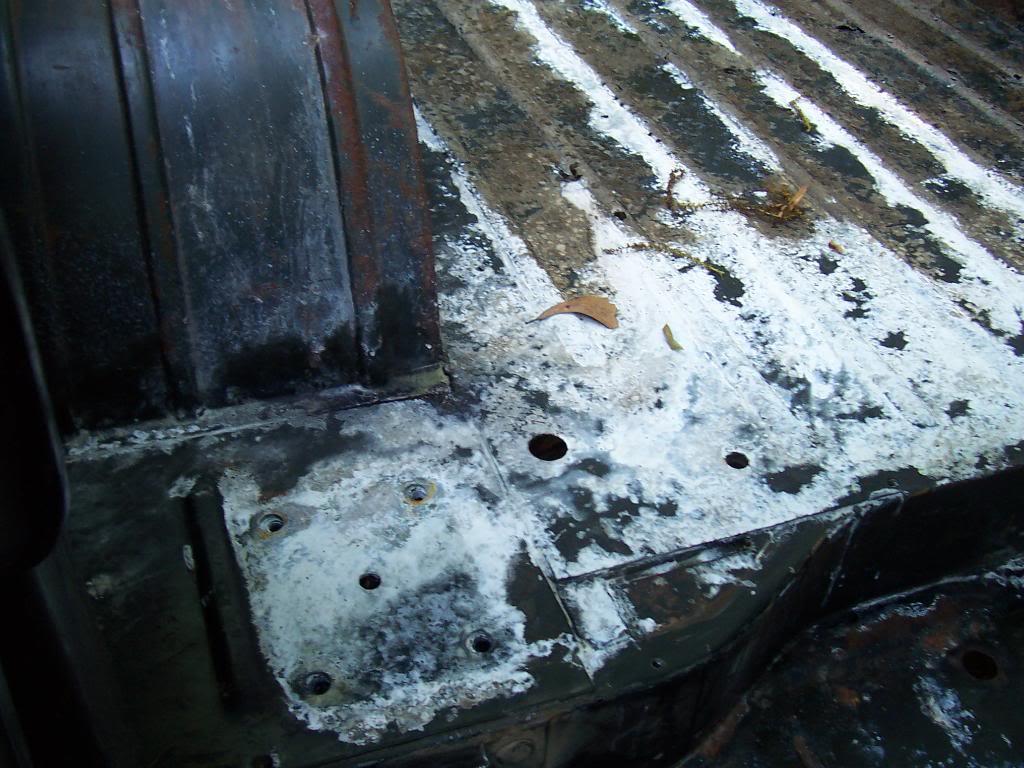
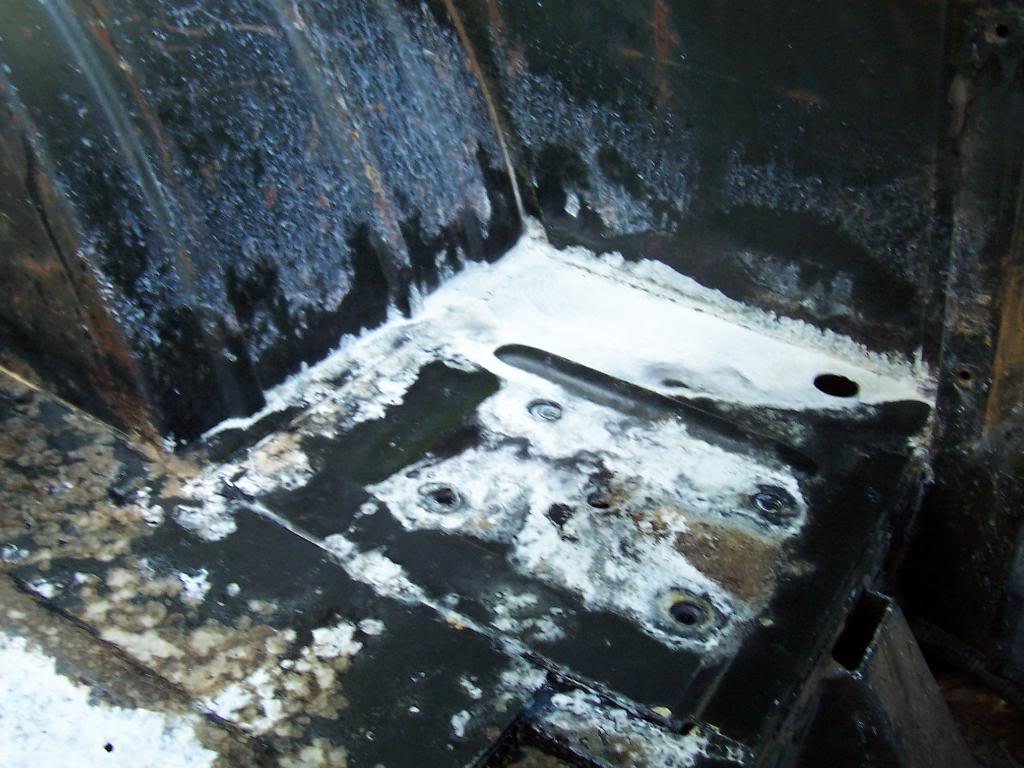
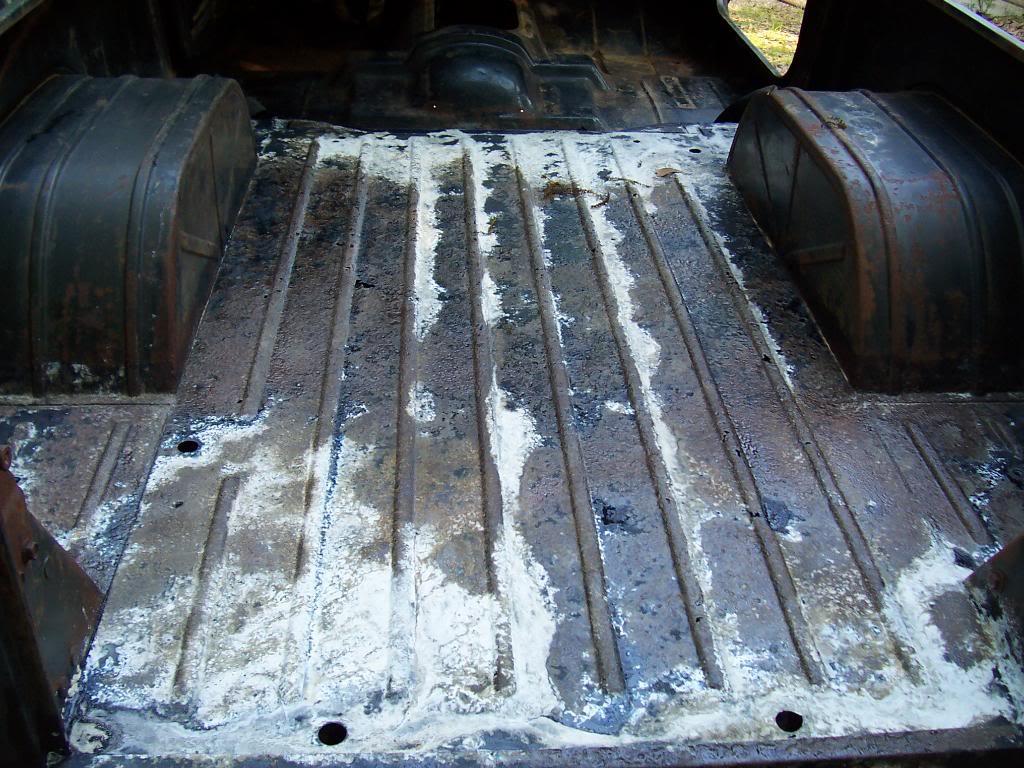
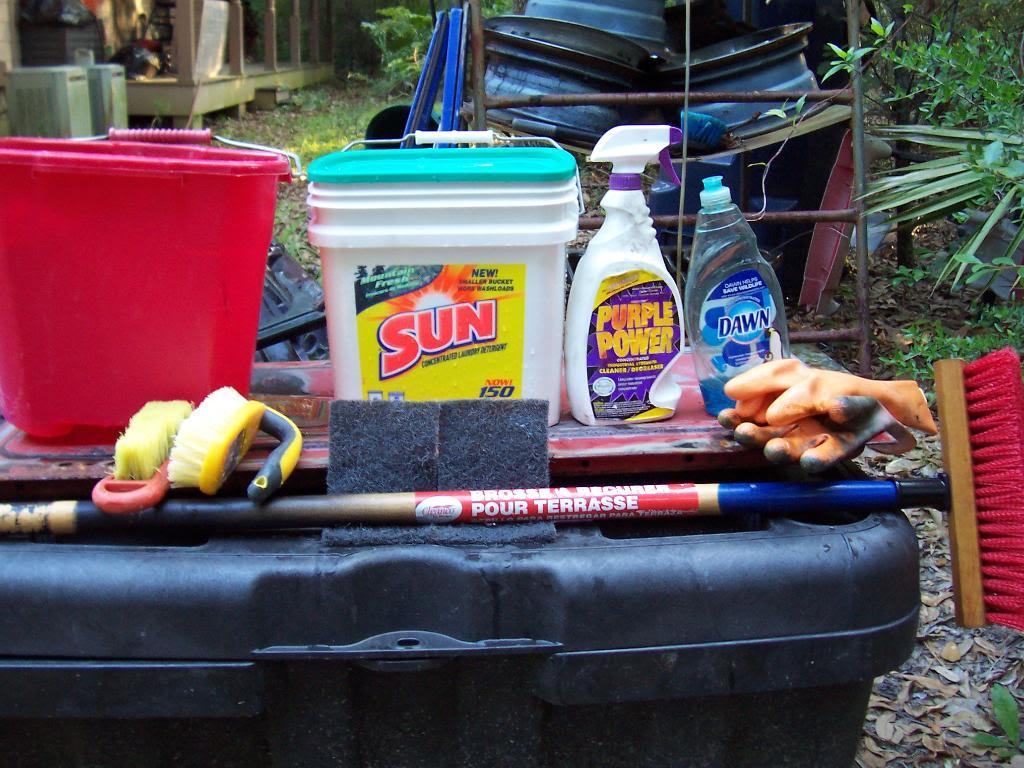
I then thoroughly washed all the acid off of the sheet metal. I used powdered detergent first, as I wanted a scrubbing solution with some "grit". I followed that up with liquid Dawn detergent, using 3M paint stripping pads for scrub pads. I then sprayed some Purple Power on, let it sit for 10 minutes, then rinsed the bed off with water for about 45 minutes. Picture of my "cleaning supplies".
Not too exciting, but some pictures of the rinsed off, still wet floor.
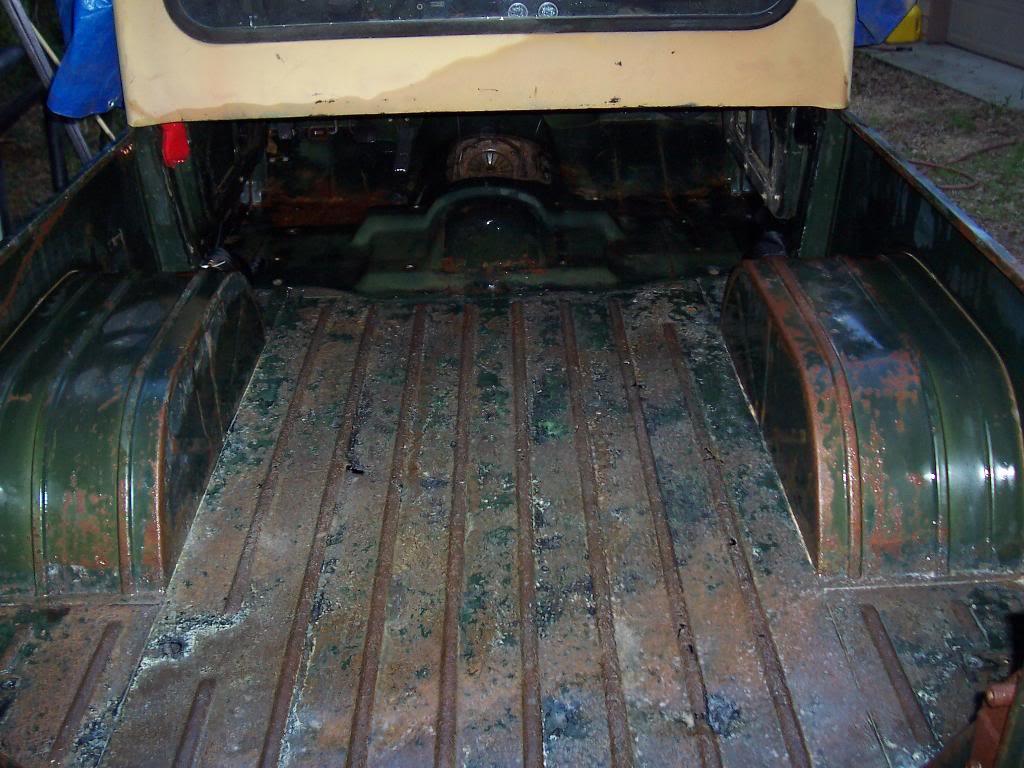
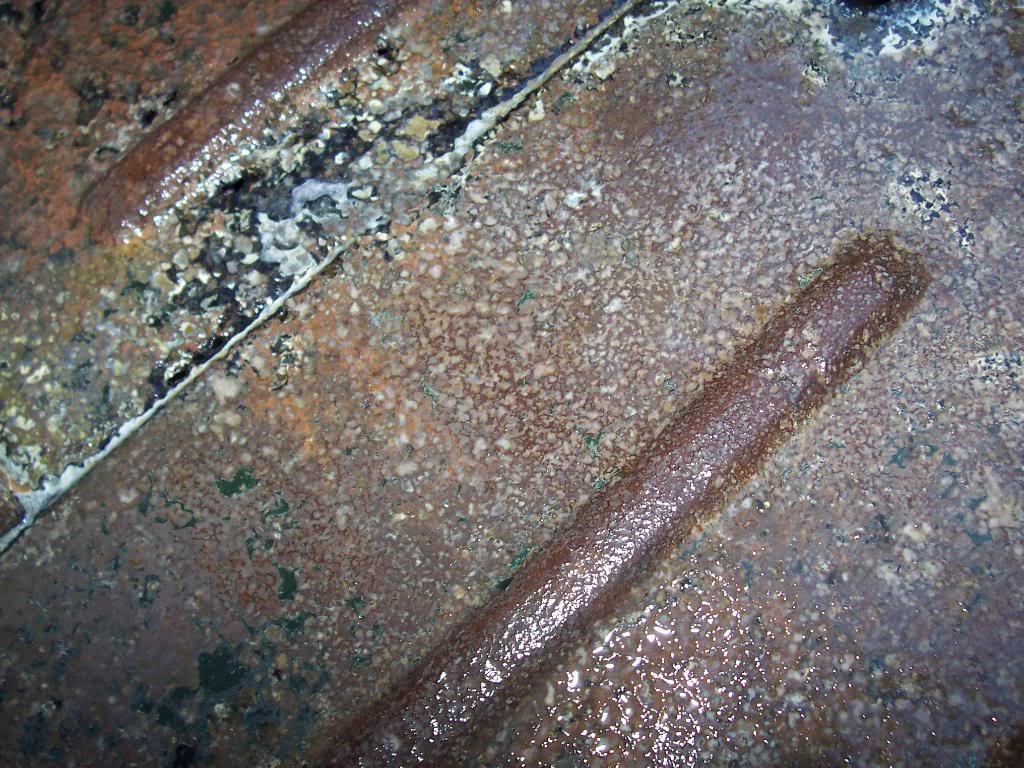
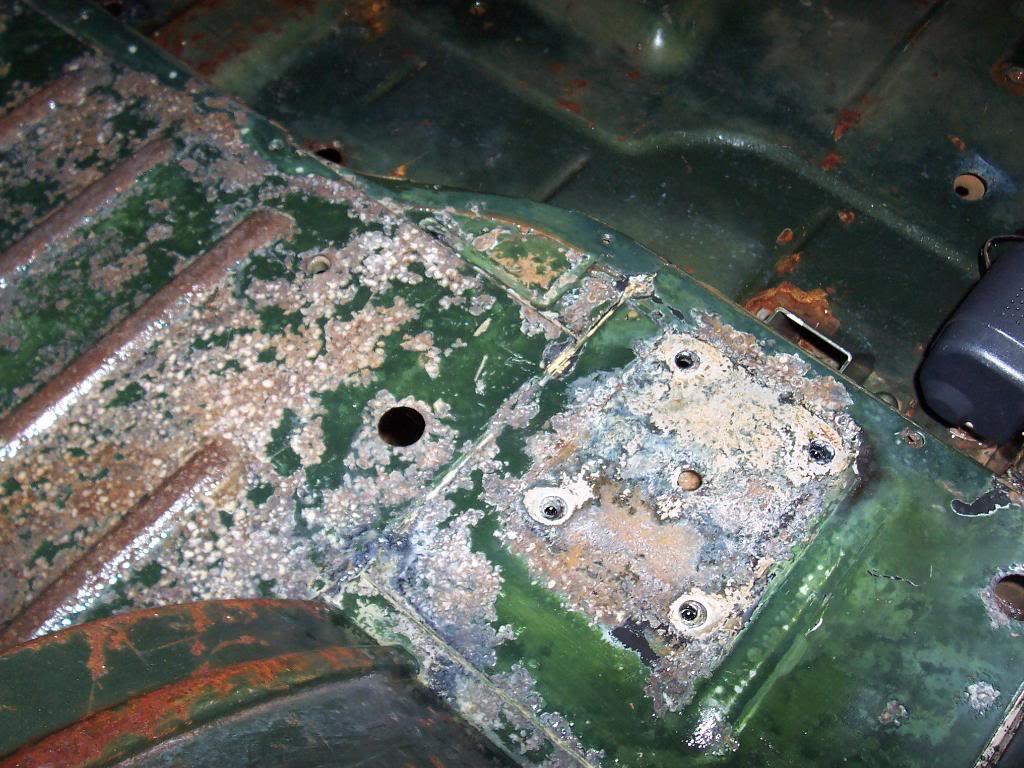
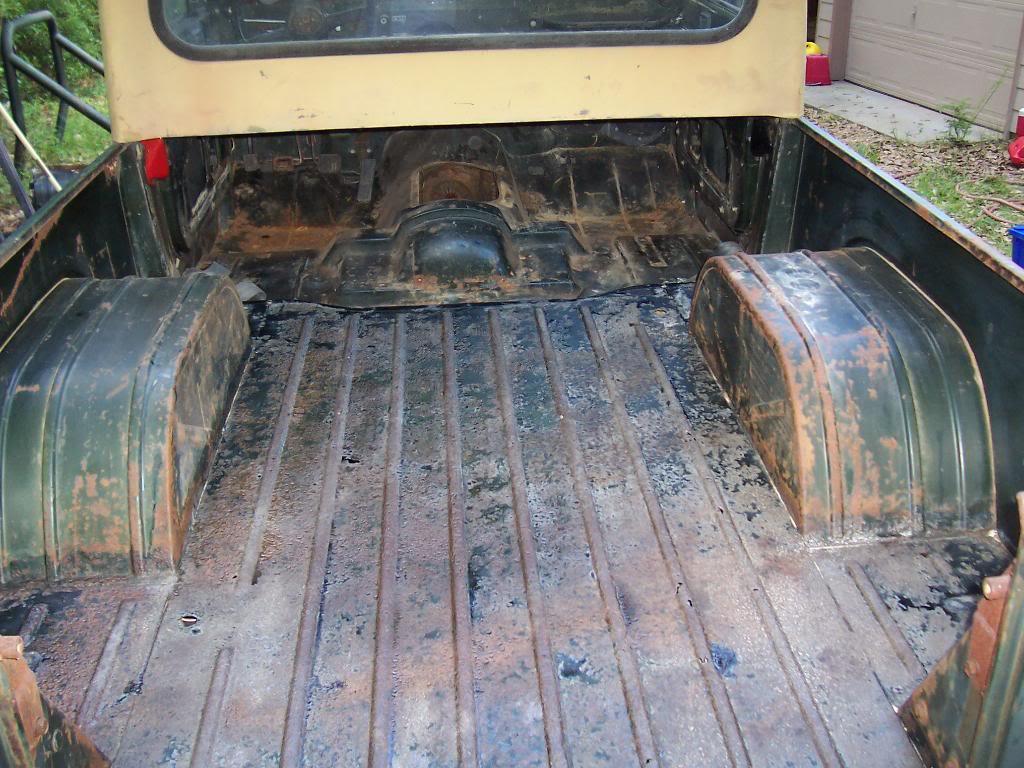
And this is what the bed looked like this morning, after drying overnight. It is still a little damp.
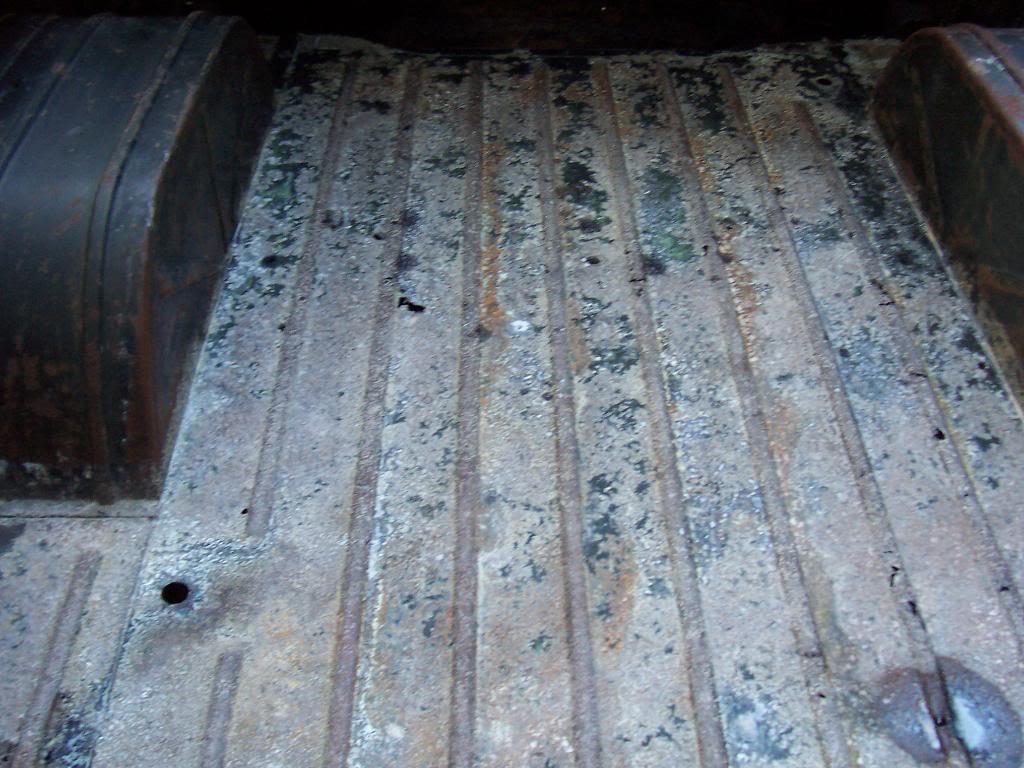
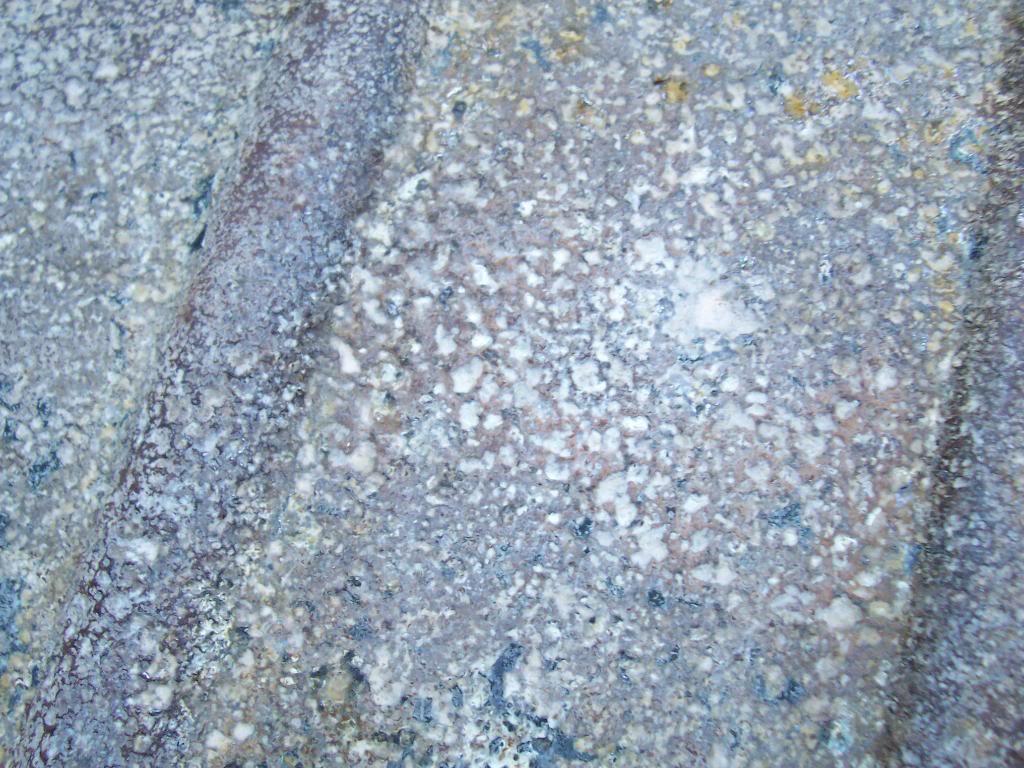
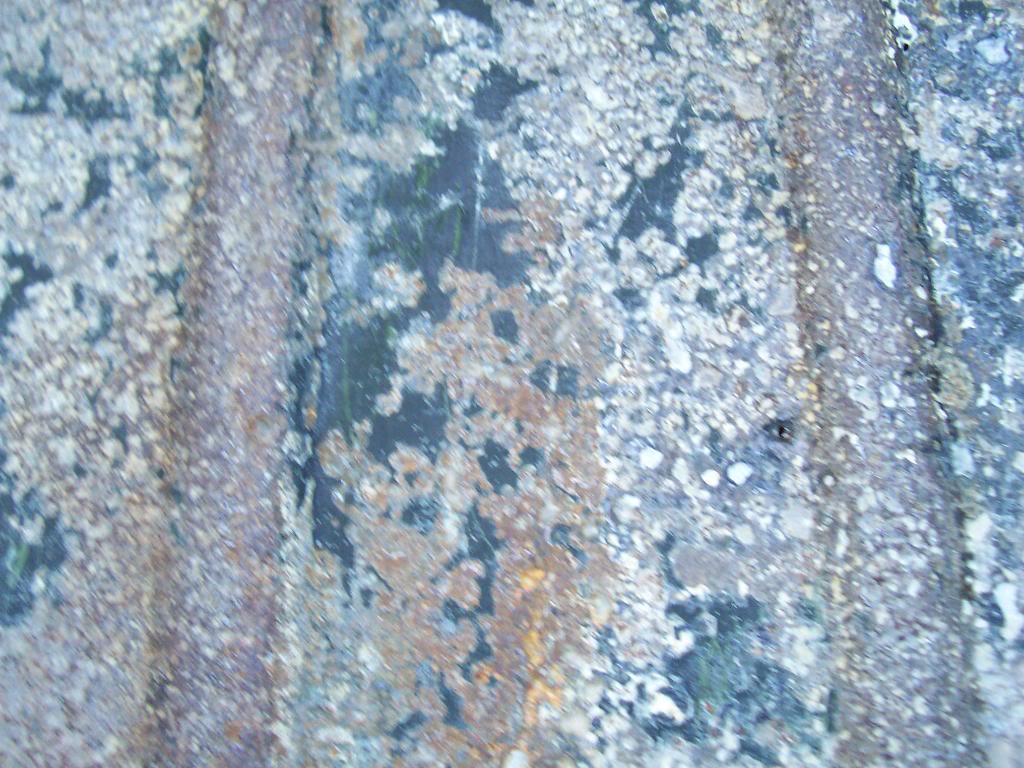
When I get home this afternoon, I am going to thoroughly wipe down the bed with Acetone, to remove any flash rust. If the bed still has some rust, I MIGHT do another acid wash. I think, though, that after the Acetone wipe down, this bed floor will be good to go.
That's it for now.
I then thoroughly washed all the acid off of the sheet metal. I used powdered detergent first, as I wanted a scrubbing solution with some "grit". I followed that up with liquid Dawn detergent, using 3M paint stripping pads for scrub pads. I then sprayed some Purple Power on, let it sit for 10 minutes, then rinsed the bed off with water for about 45 minutes. Picture of my "cleaning supplies".
Not too exciting, but some pictures of the rinsed off, still wet floor.
And this is what the bed looked like this morning, after drying overnight. It is still a little damp.
When I get home this afternoon, I am going to thoroughly wipe down the bed with Acetone, to remove any flash rust. If the bed still has some rust, I MIGHT do another acid wash. I think, though, that after the Acetone wipe down, this bed floor will be good to go.
That's it for now.

- City
- Baton Rouge
- State
- La
Looking good! I may have to stop parting out the tan scrambler. If only I can remember where those black door panels went 
- City
- Biloxi
- State
- MS
Looking good! I may have to stop parting out the tan scrambler. If only I can remember where those black door panels went
Hee hee


- City
- Biloxi
- State
- MS
After letting the bed dry all day, this is what I found.
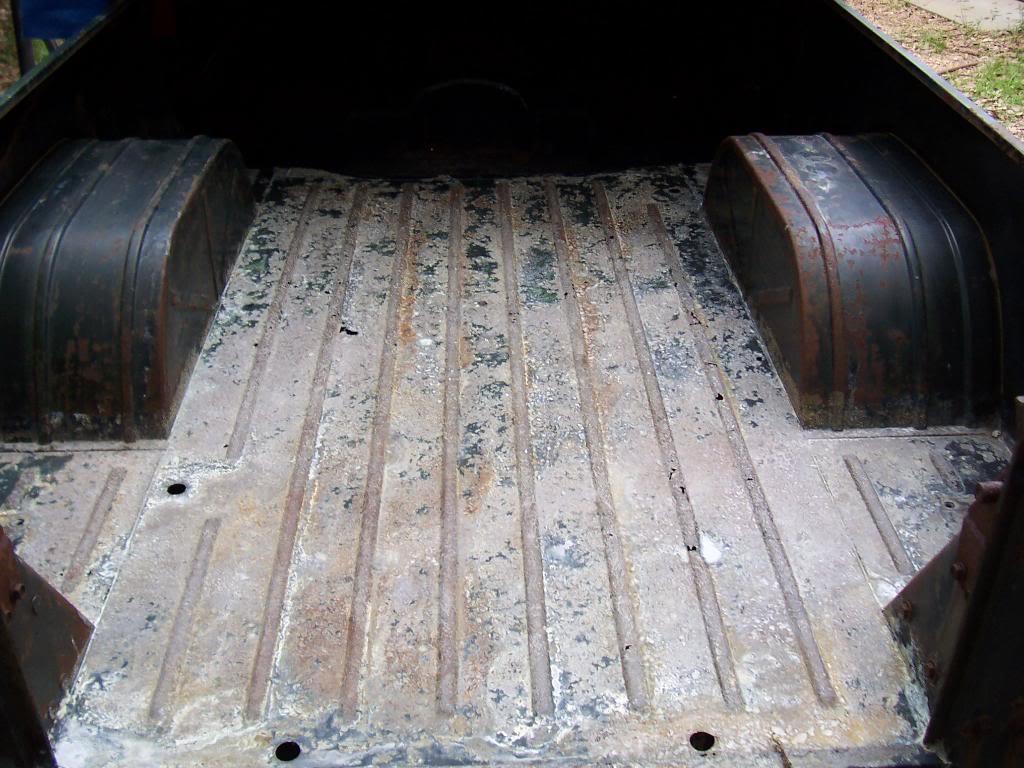
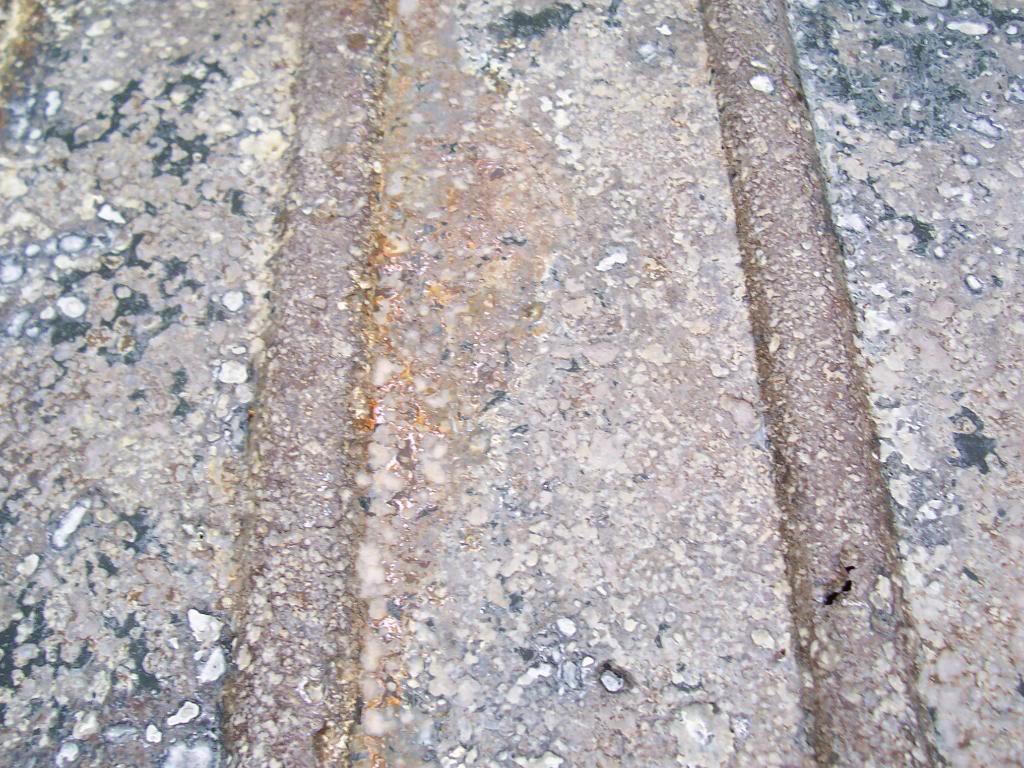
There was still some rust staining present. But, after a thorough rub down with acetone, 99% of all the rust stains were gone.
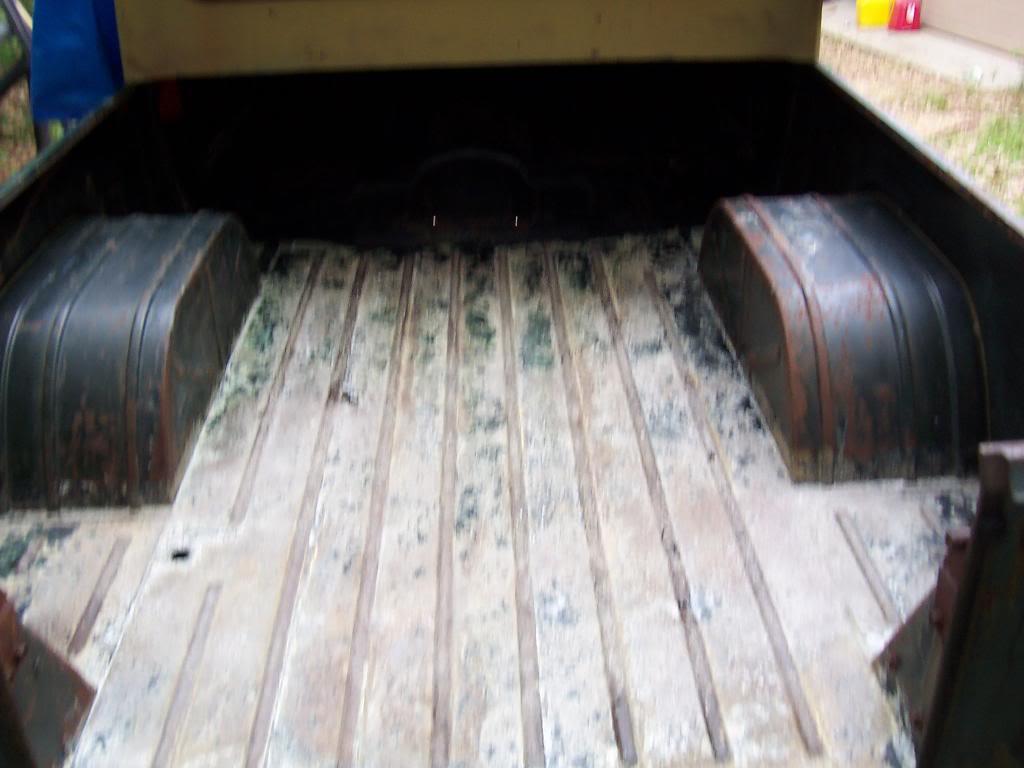
Overall, I think the acid did a pretty good job. It does take some time, and multiple coats, but to go from what I started with to the present condition, I am pretty happy. Obviously, if I was "restoring" this Scrambler, I would have replaced this bed floor for aesthetic reasons. But, since this is a budget build, and the floor is still solid, despite the pits and small holes, I think it turned out great. Total cost: Acid was less than $10.00 (still have over half the container), various drill wire brushes/sanding pads/acetone, $40.00. So, for about $50.00, I think it is a great fix.
I started with this:
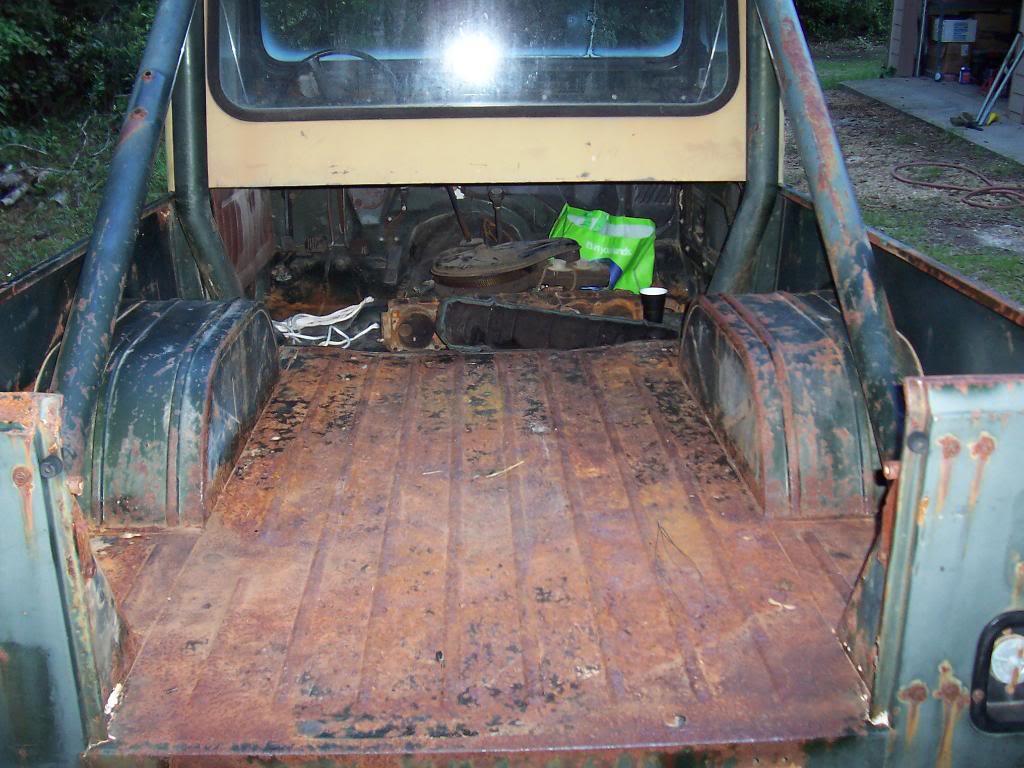
Ended up with this:
Since I was left with basically bare metal, I wanted to prime as soon as possible. I only did limited masking, mainly just to protect the original paint interior floor/exterior body from overspray. I wasn't too concerned about overspray on the interior of the bed.
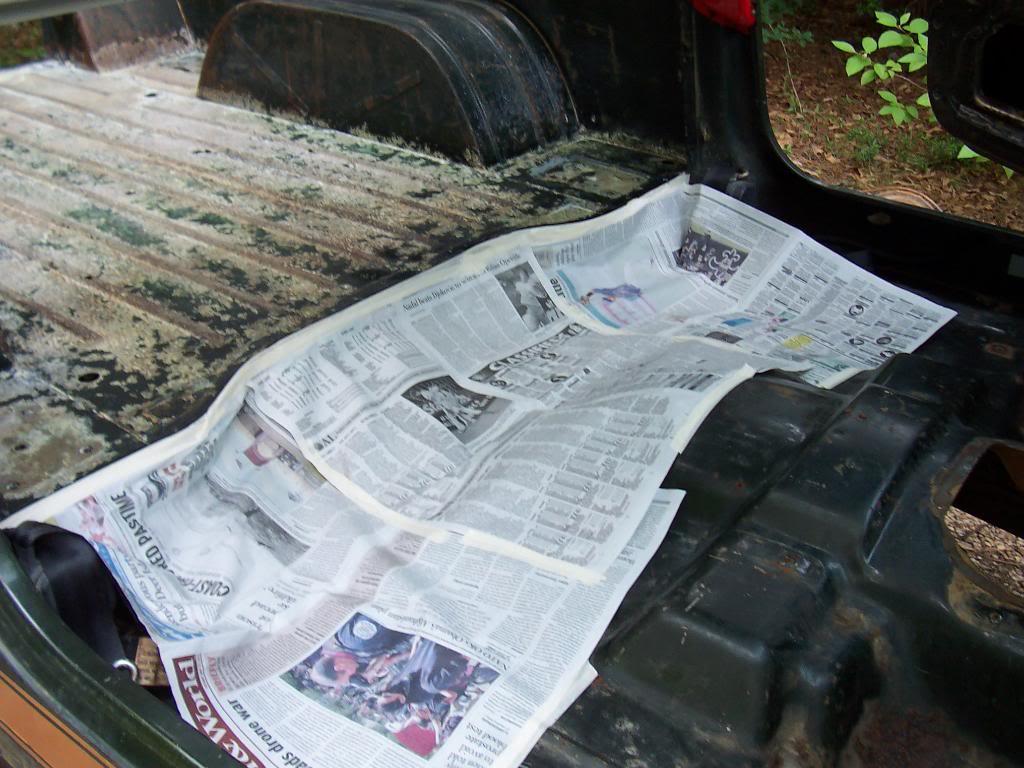
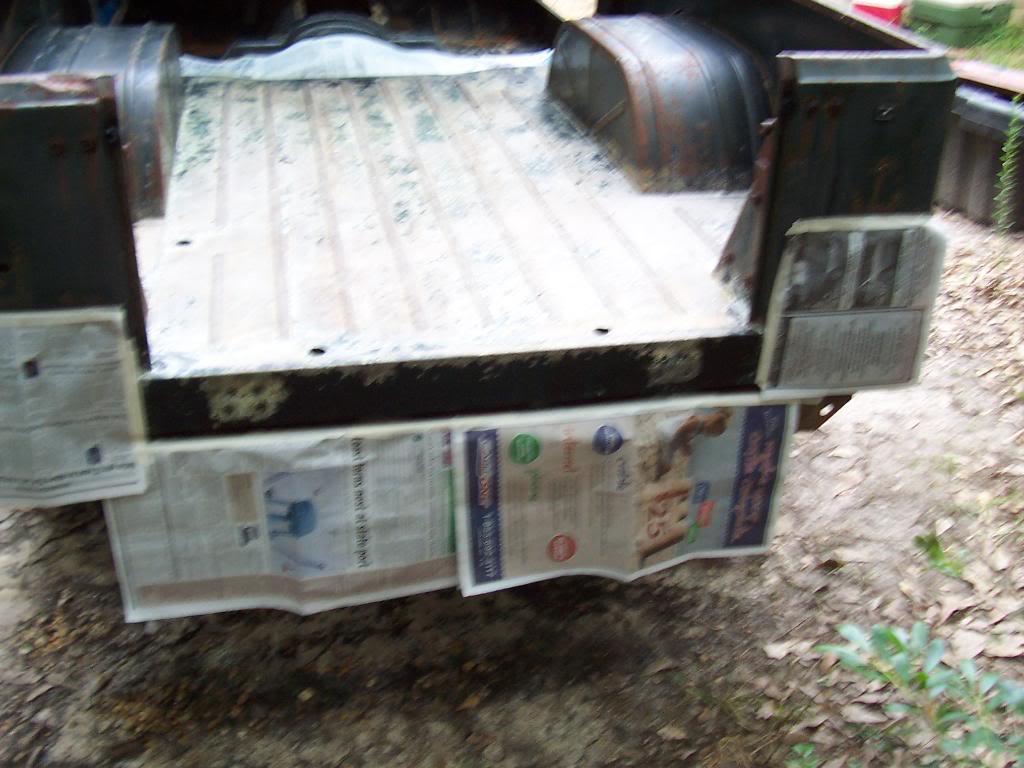
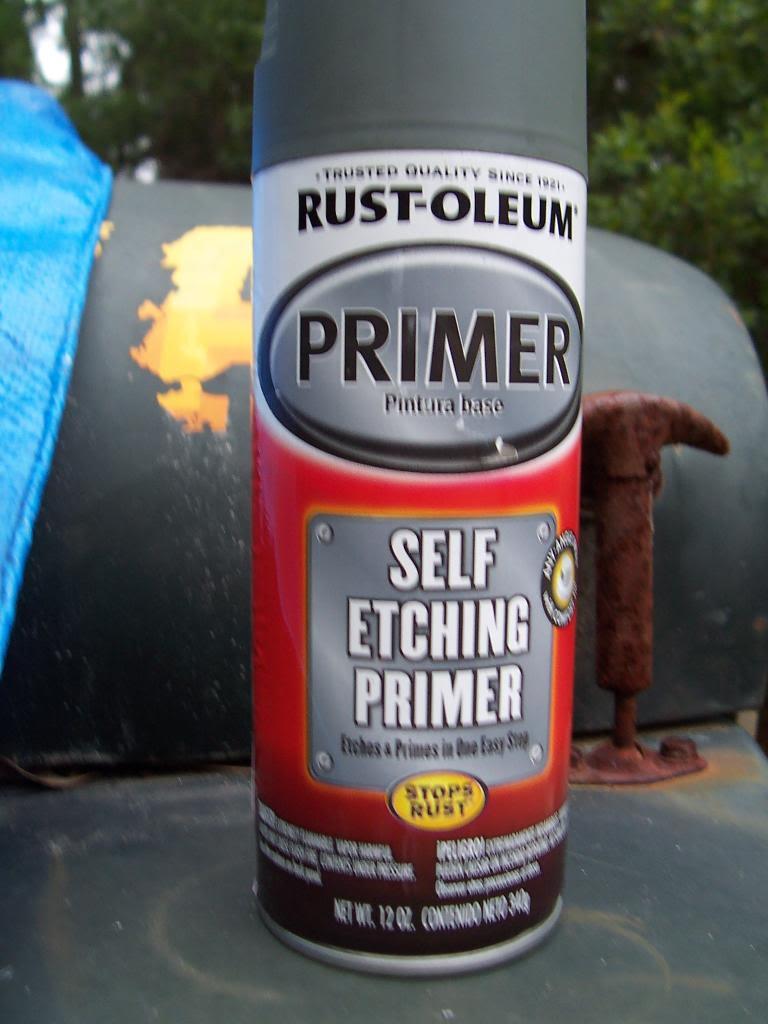
And I bought six cans of this primer, and used all six cans.
There was still some rust staining present. But, after a thorough rub down with acetone, 99% of all the rust stains were gone.
Overall, I think the acid did a pretty good job. It does take some time, and multiple coats, but to go from what I started with to the present condition, I am pretty happy. Obviously, if I was "restoring" this Scrambler, I would have replaced this bed floor for aesthetic reasons. But, since this is a budget build, and the floor is still solid, despite the pits and small holes, I think it turned out great. Total cost: Acid was less than $10.00 (still have over half the container), various drill wire brushes/sanding pads/acetone, $40.00. So, for about $50.00, I think it is a great fix.
I started with this:
Ended up with this:
Since I was left with basically bare metal, I wanted to prime as soon as possible. I only did limited masking, mainly just to protect the original paint interior floor/exterior body from overspray. I wasn't too concerned about overspray on the interior of the bed.
And I bought six cans of this primer, and used all six cans.
- City
- Biloxi
- State
- MS
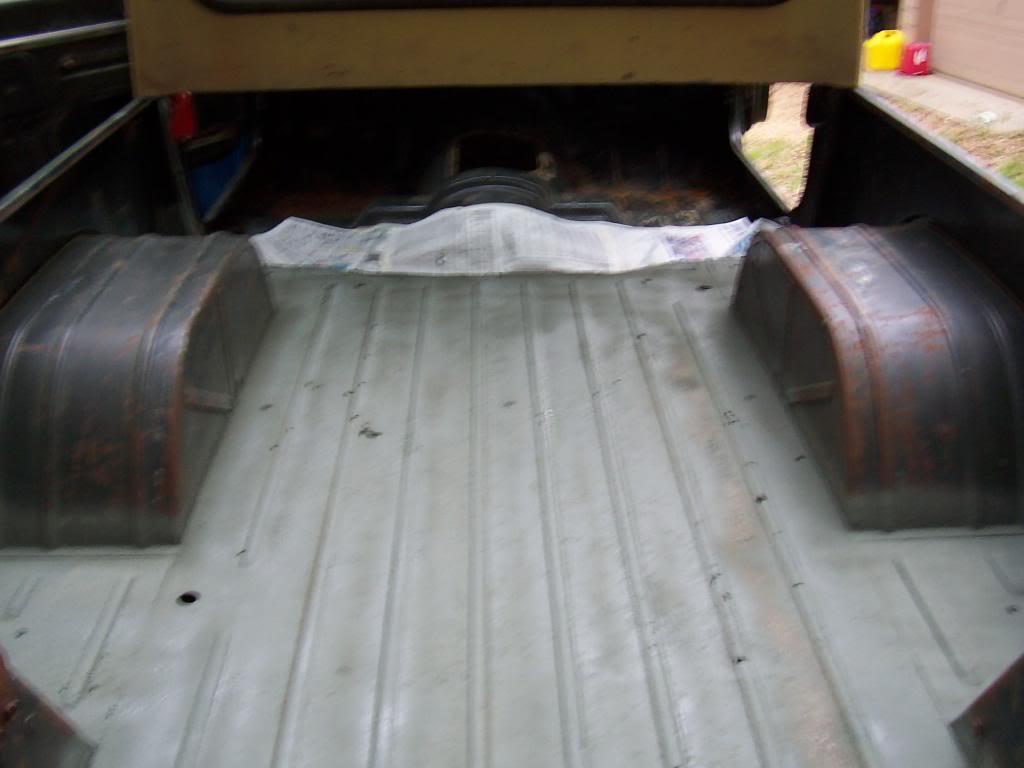
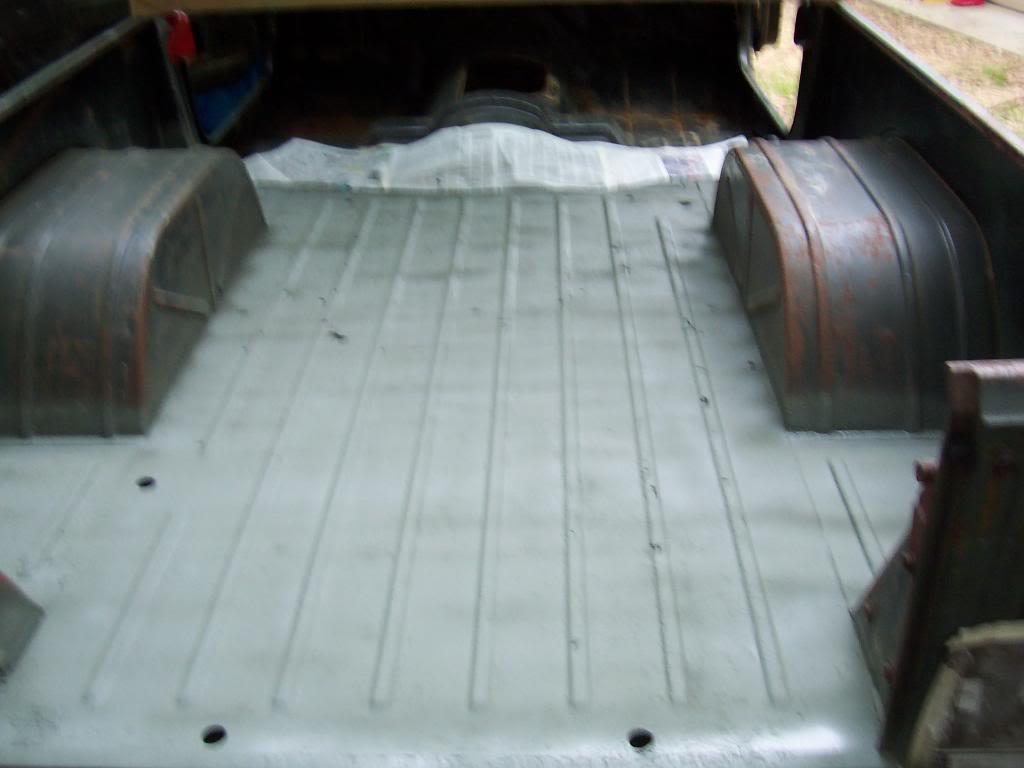
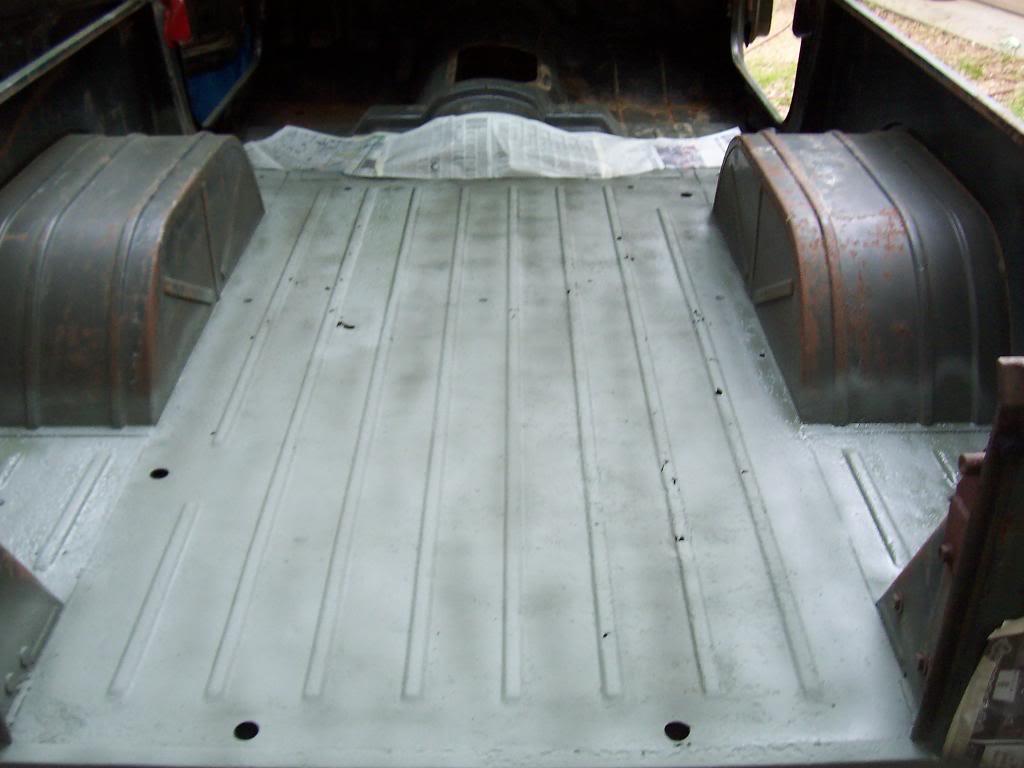
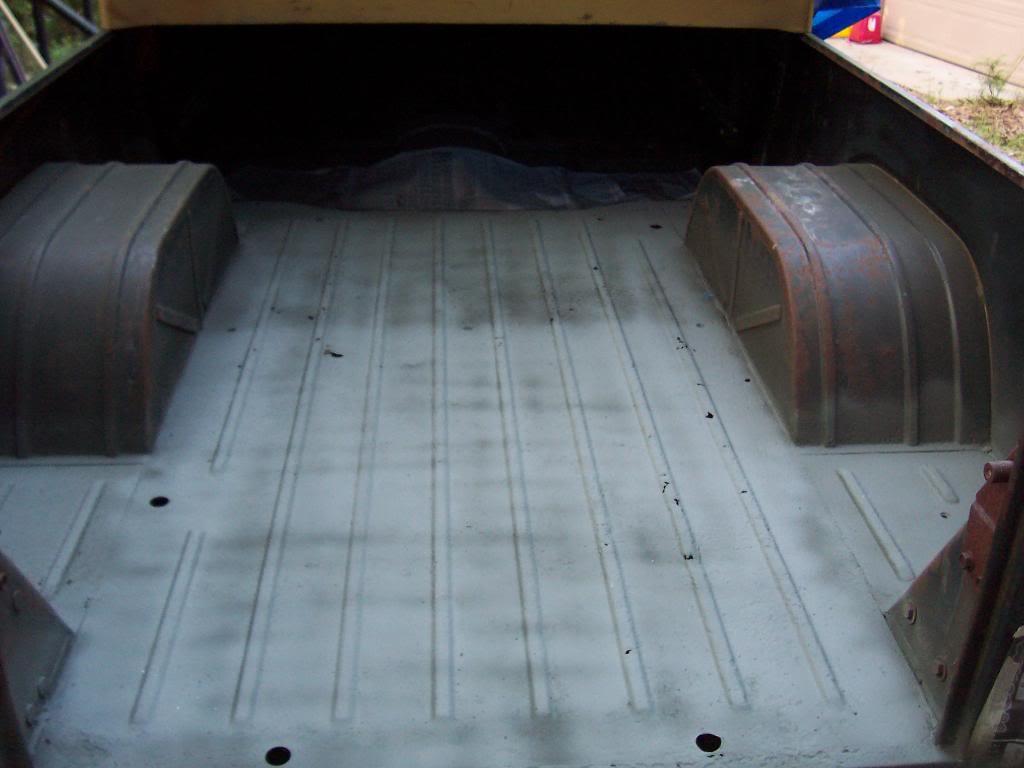
Some in progress priming pictures. I could get one thin coat over the entire floor per can.
The below pictures show the coverage per can, starting with can #1, ending at the final can #6.
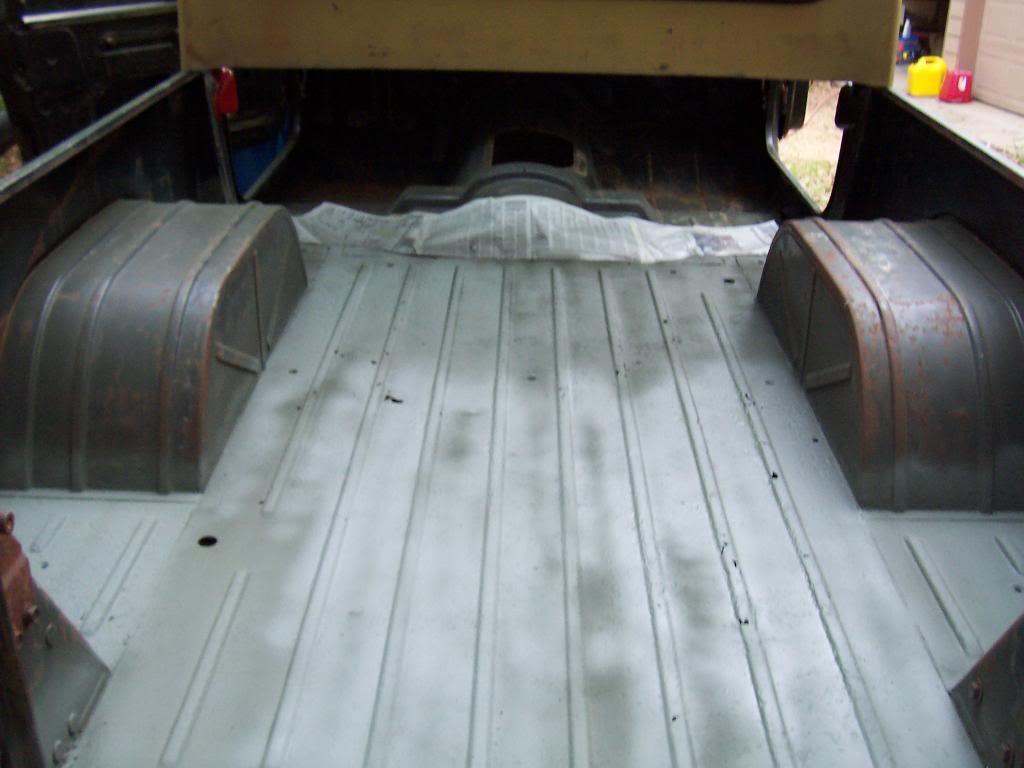
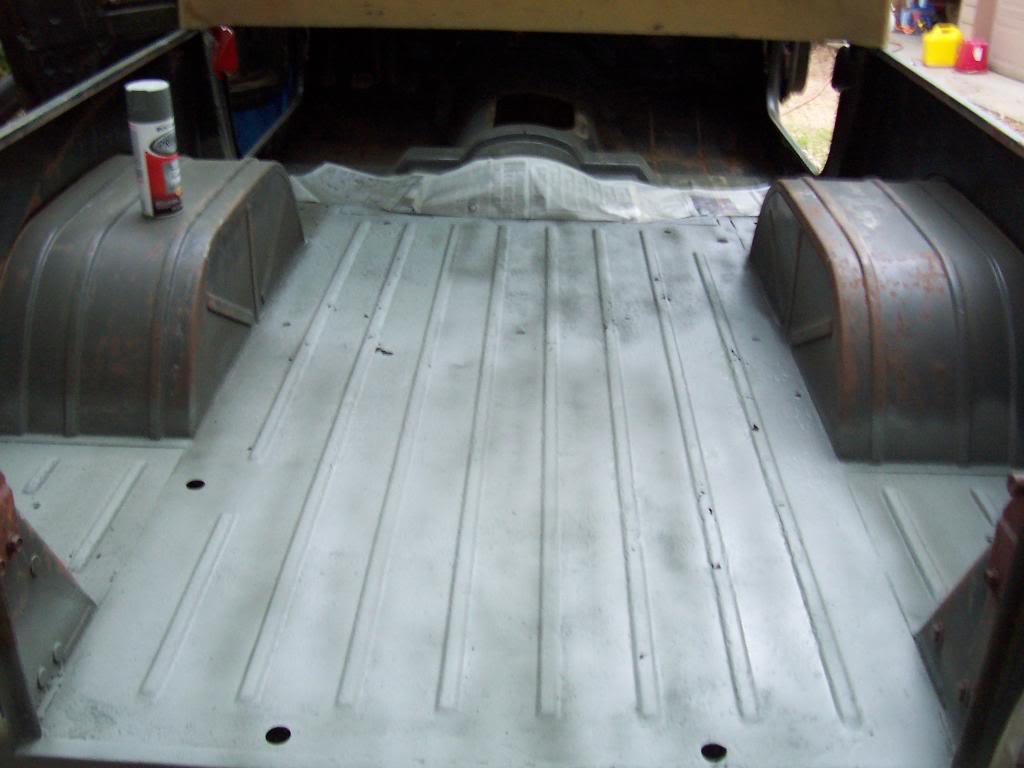
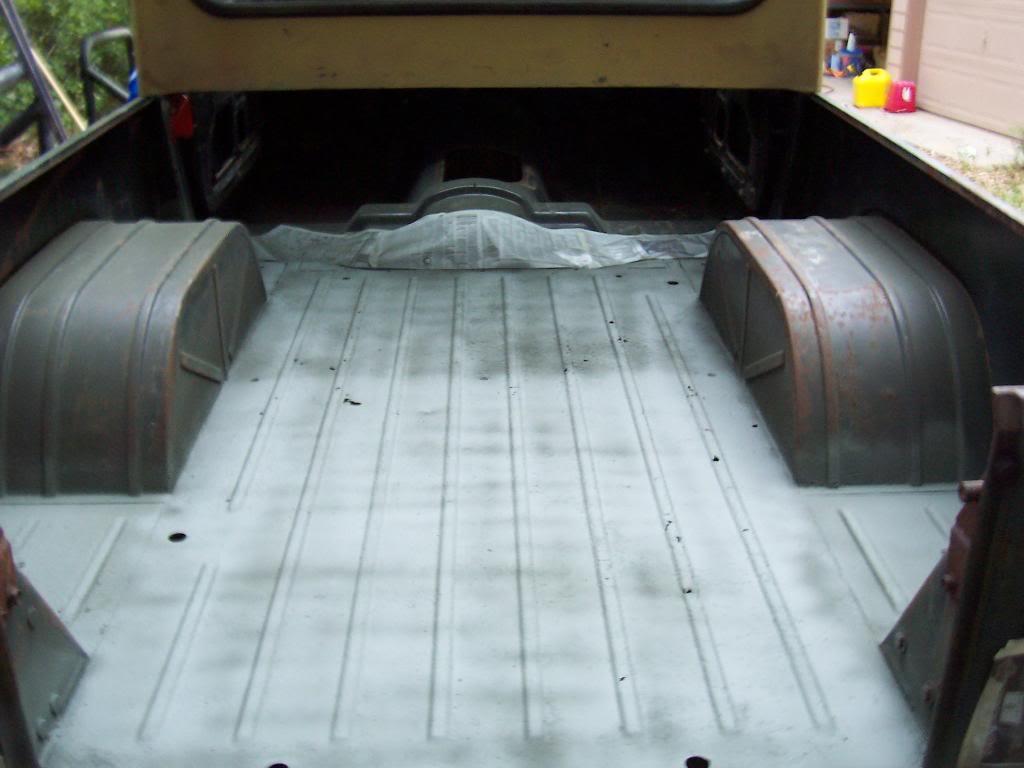
A few close ups, while the primer was still wet.
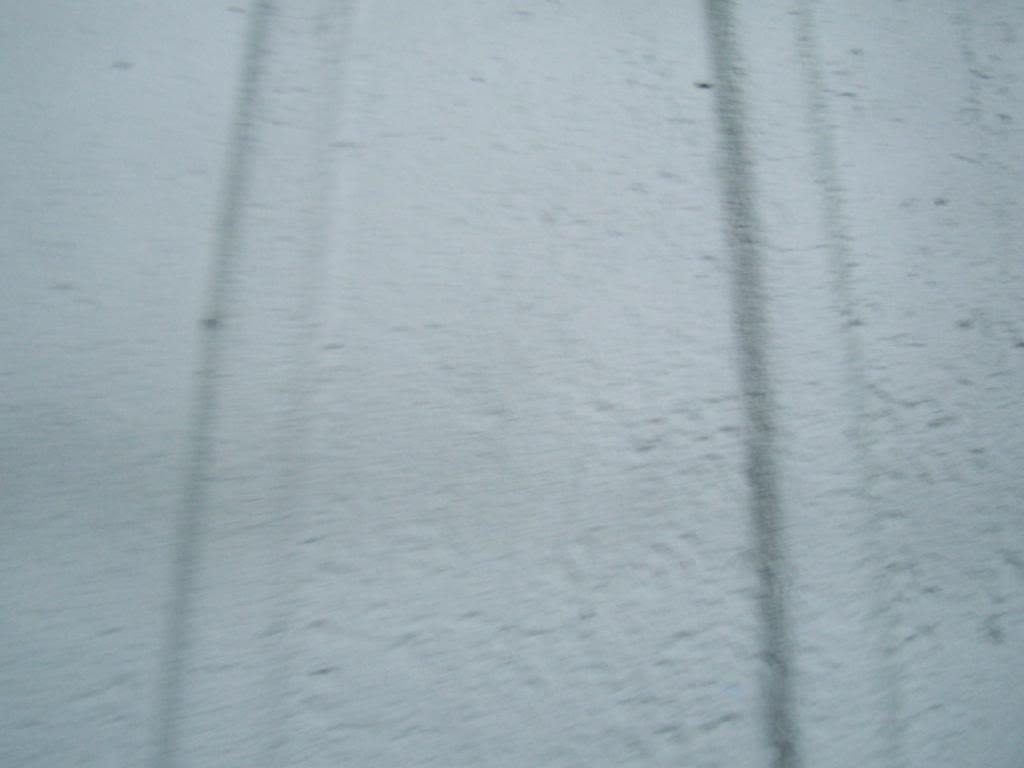
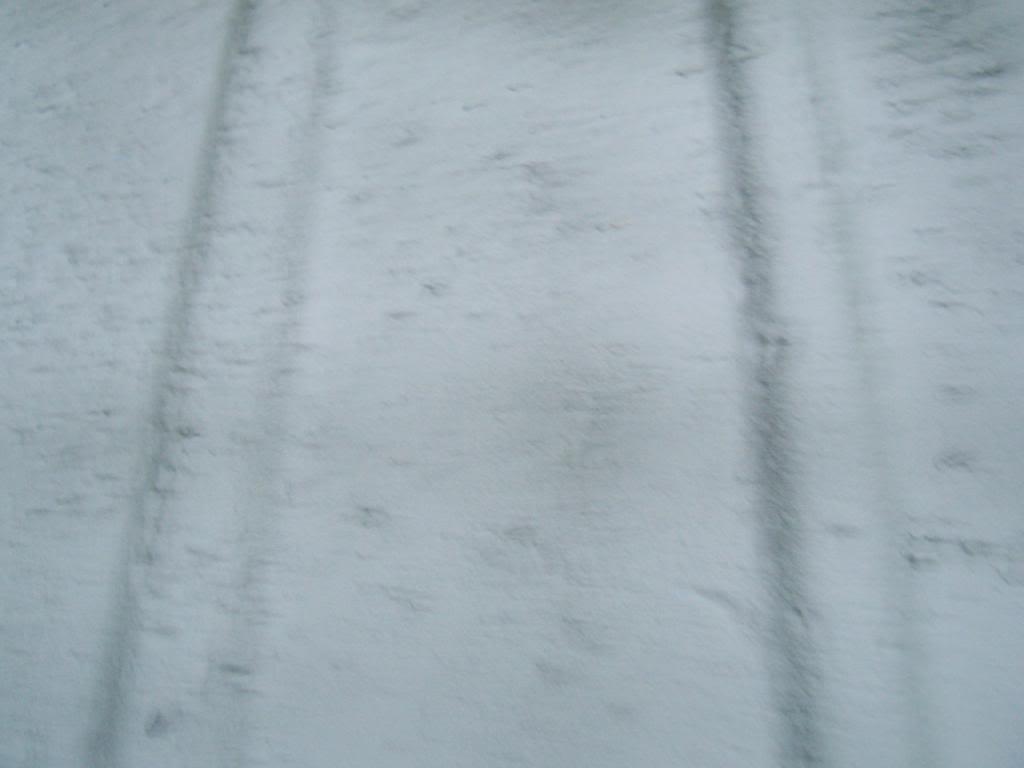
And what it looks like after drying overnight.
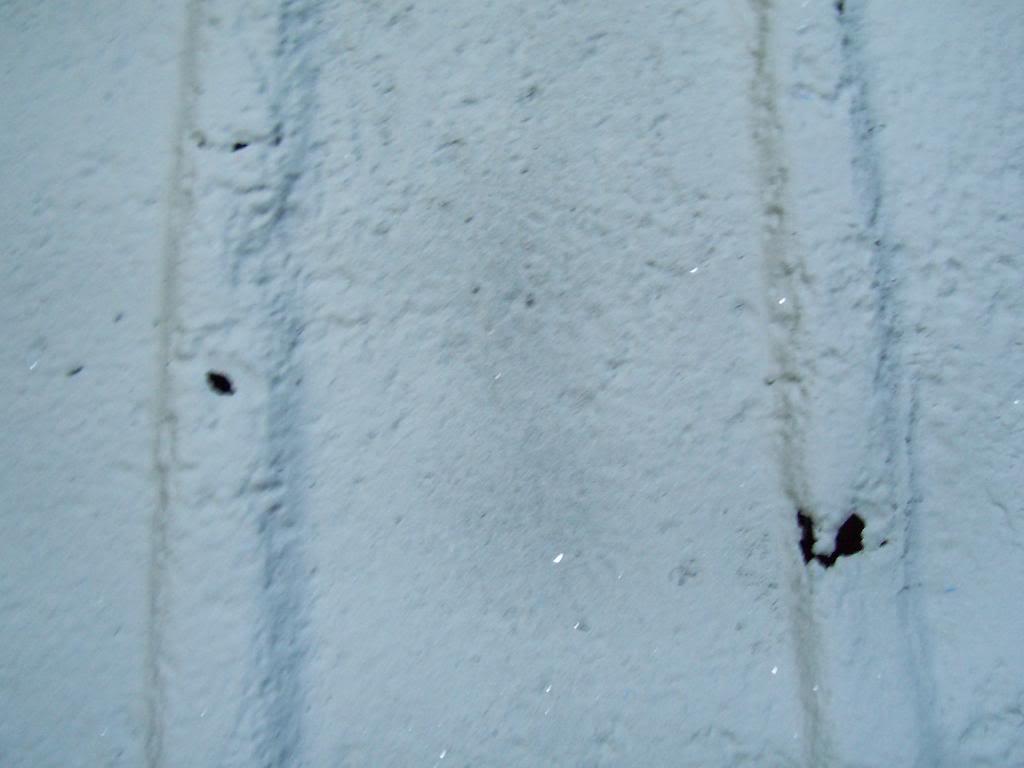
This is a very "rough" primer. I am going to top coat this primer with a more "regular" primer, in order to even out the "splotchiness"/color variations of this base primer coat. But, this primer stuck to the metal great, and should provide a perfect base coat for future top coats.
That's it for now.
The below pictures show the coverage per can, starting with can #1, ending at the final can #6.
A few close ups, while the primer was still wet.
And what it looks like after drying overnight.
This is a very "rough" primer. I am going to top coat this primer with a more "regular" primer, in order to even out the "splotchiness"/color variations of this base primer coat. But, this primer stuck to the metal great, and should provide a perfect base coat for future top coats.
That's it for now.
- City
- Biloxi
- State
- MS
I was able to finally paint the bed of "Yard Scrambler" this weekend.
I wiped down the bed one last time, and sprayed a coat of this primer on top of the other primer.
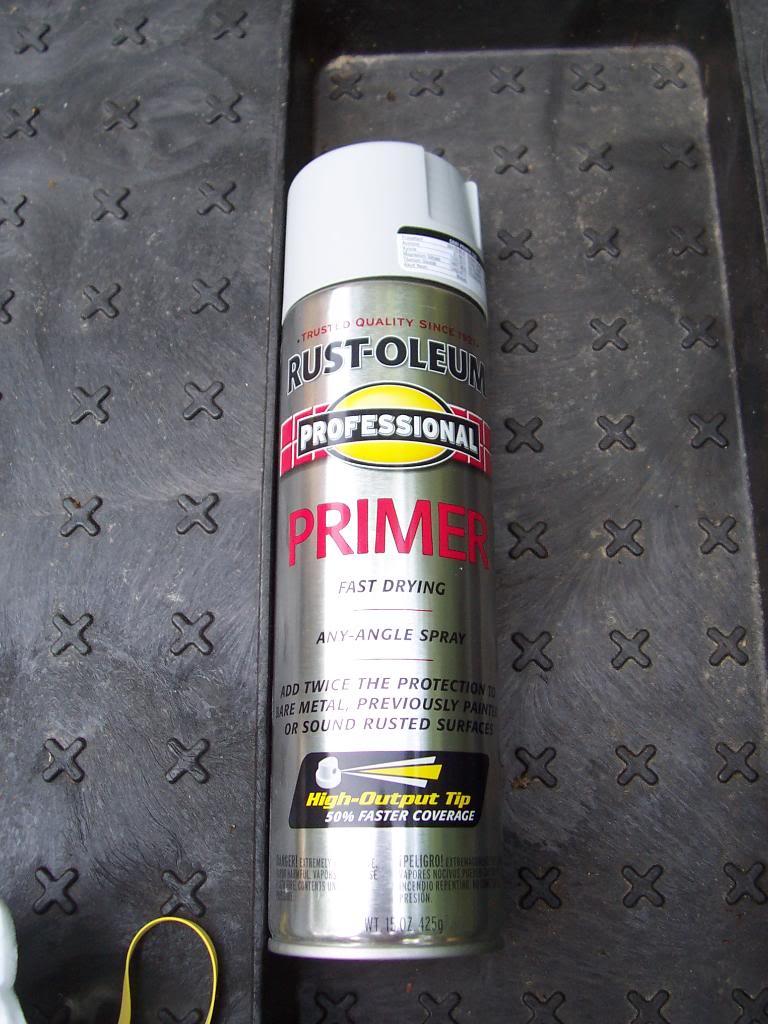
This top primer layer gave me a nice, consistently colored primer layer to top coat over.
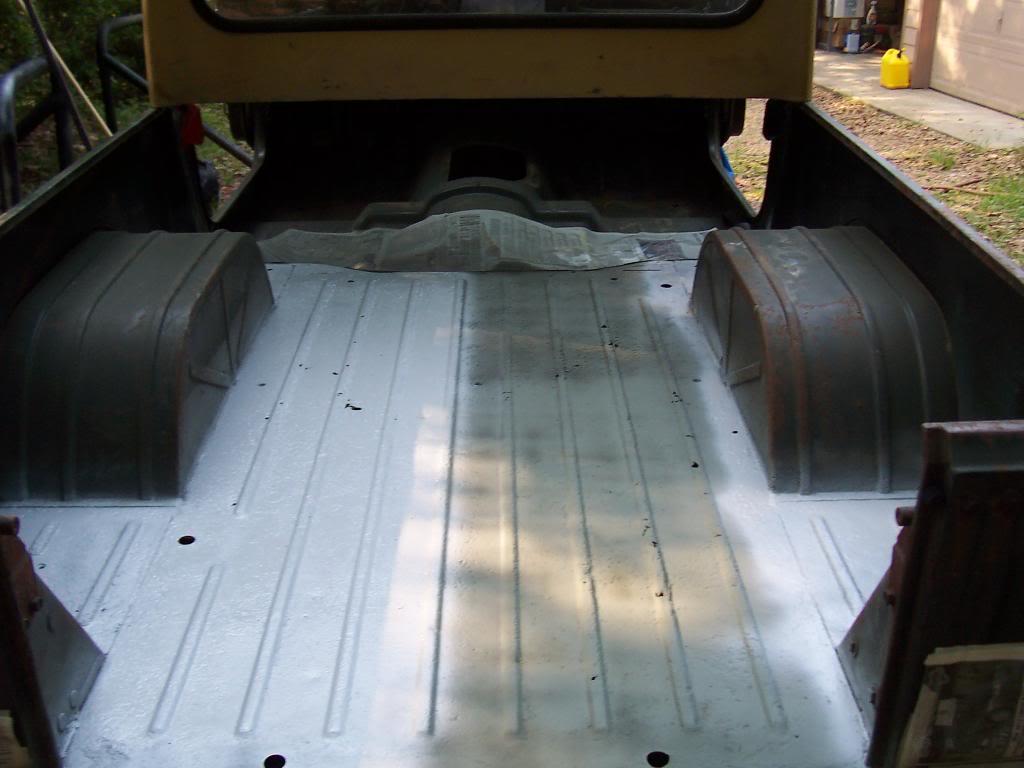
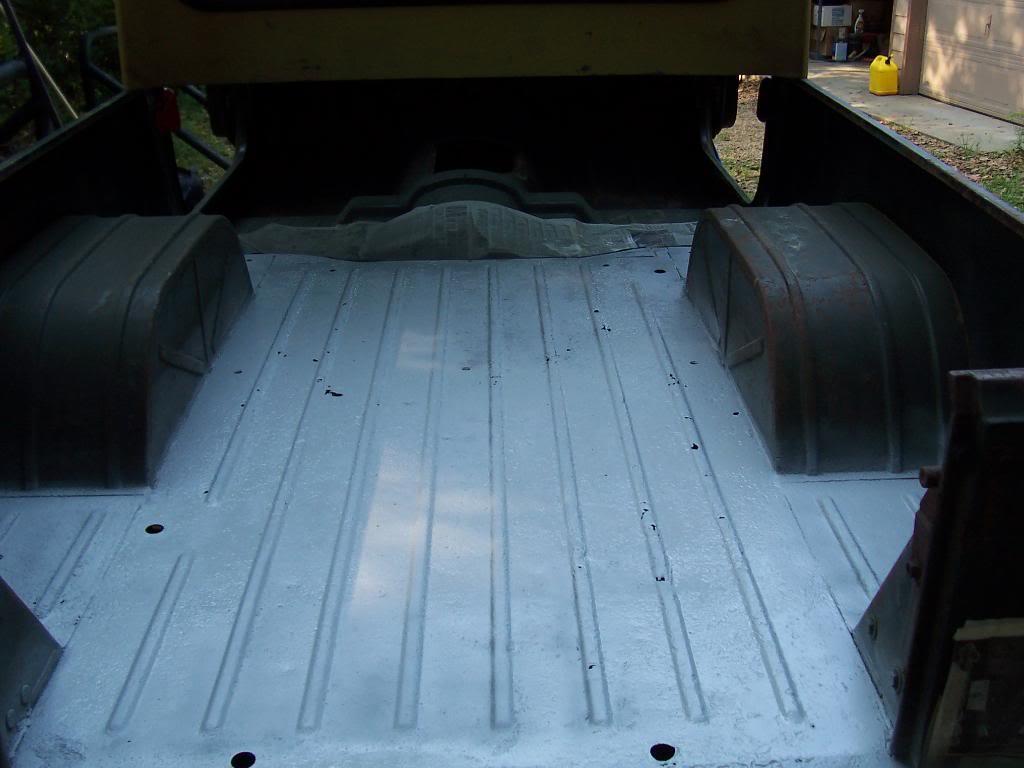
Since "jeepaddict" has had good success with this company before, I ordered 6 cans of spray paint from them.
I had ordered 6 cans, hoping that it would be enough for everything on the entire jeep that I wanted to repaint (bed floor, tailgate, under body,etc). But, this paint goes on very thin, so I ended up spraying all 6 cans just on the bed floor. I would get about one thin coat on the floor per can, so it has six coats of paint on it. The following pictures show how the paint gets a little darker with each successive coat.
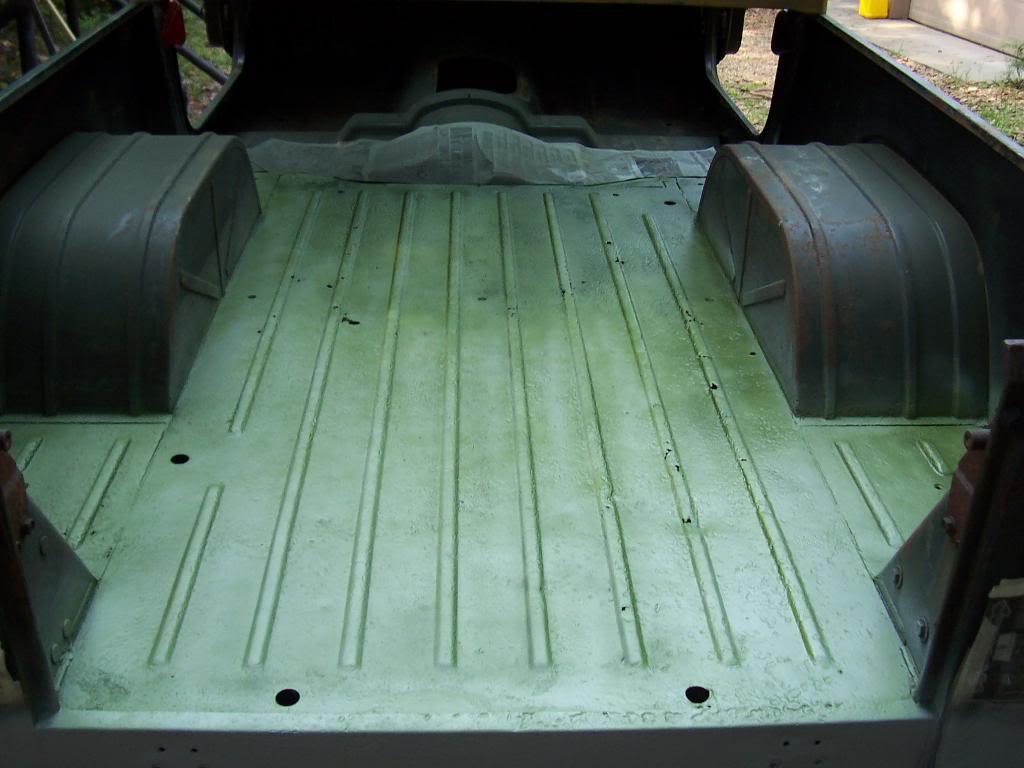
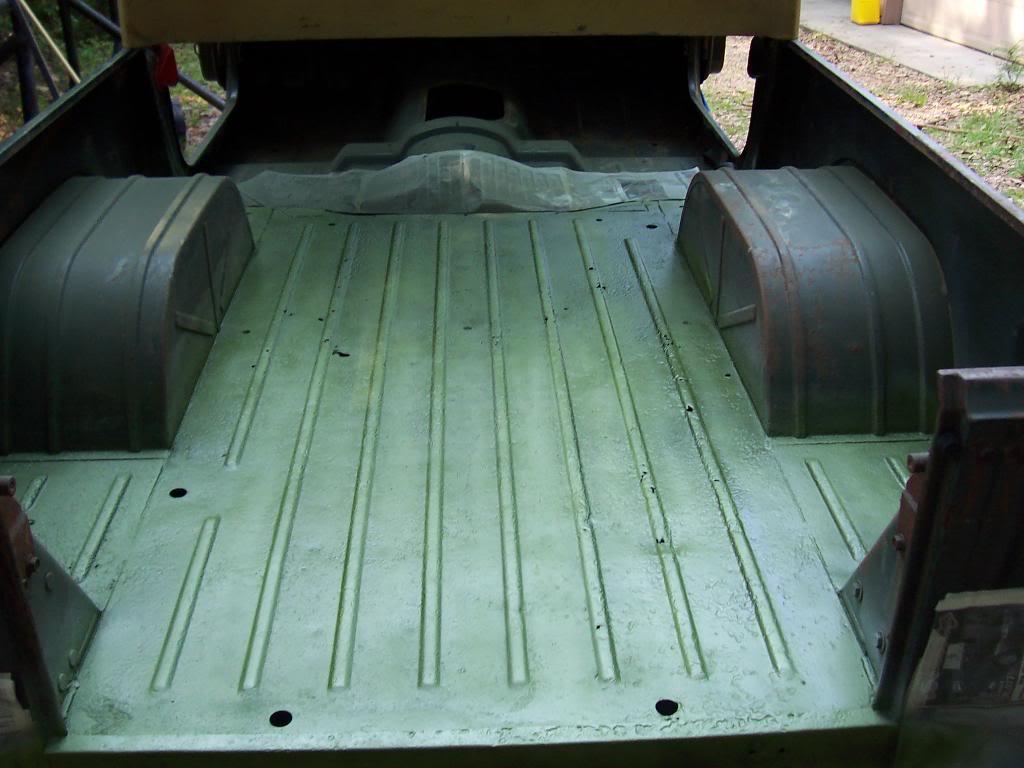
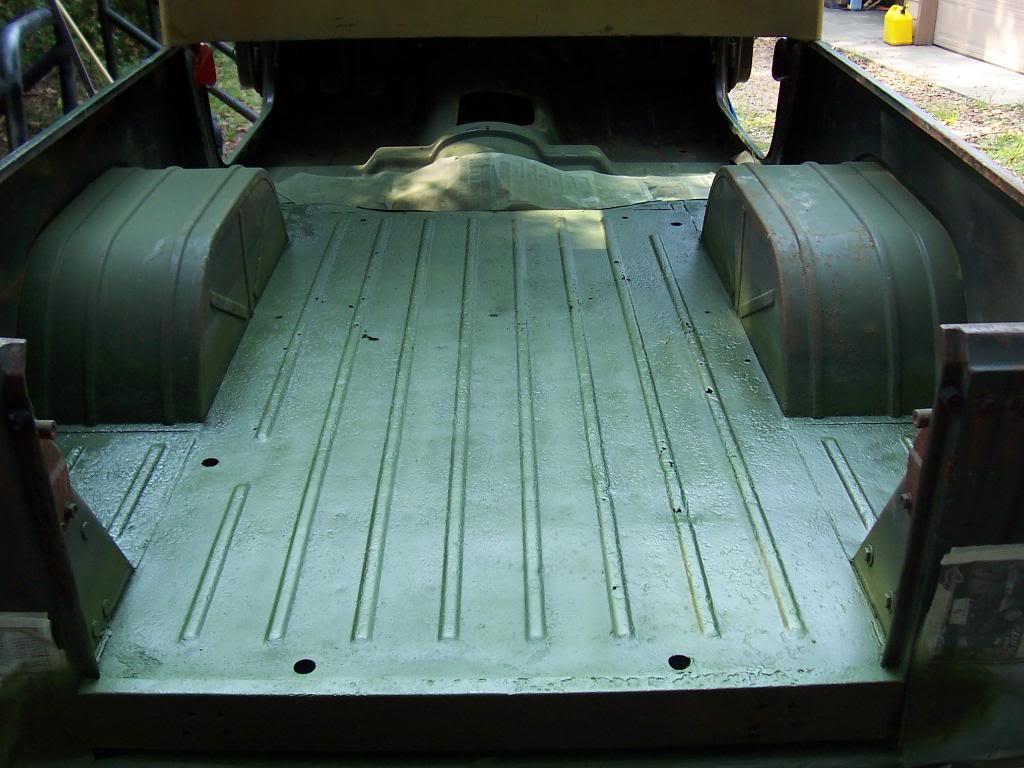
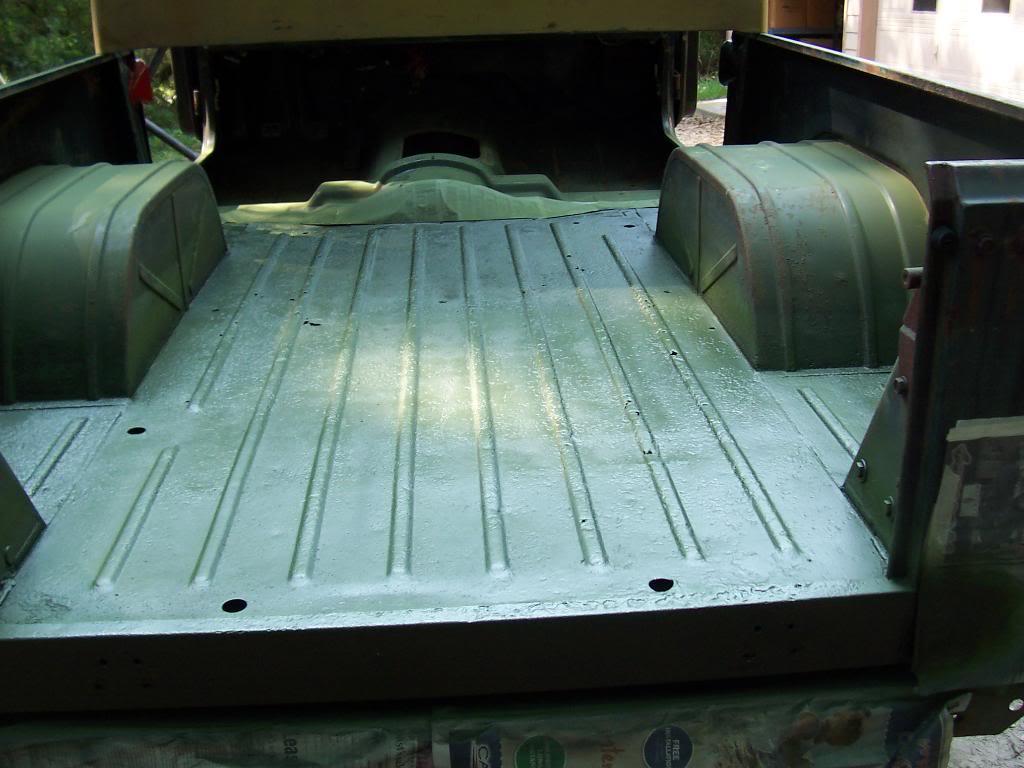
I wiped down the bed one last time, and sprayed a coat of this primer on top of the other primer.
This top primer layer gave me a nice, consistently colored primer layer to top coat over.
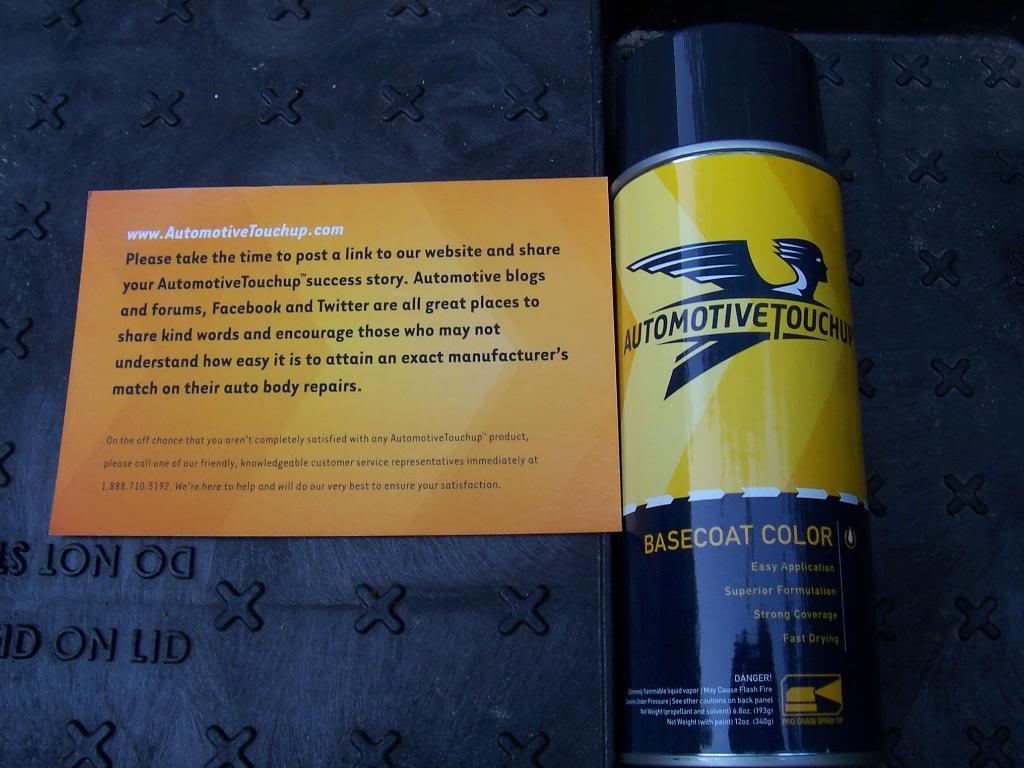
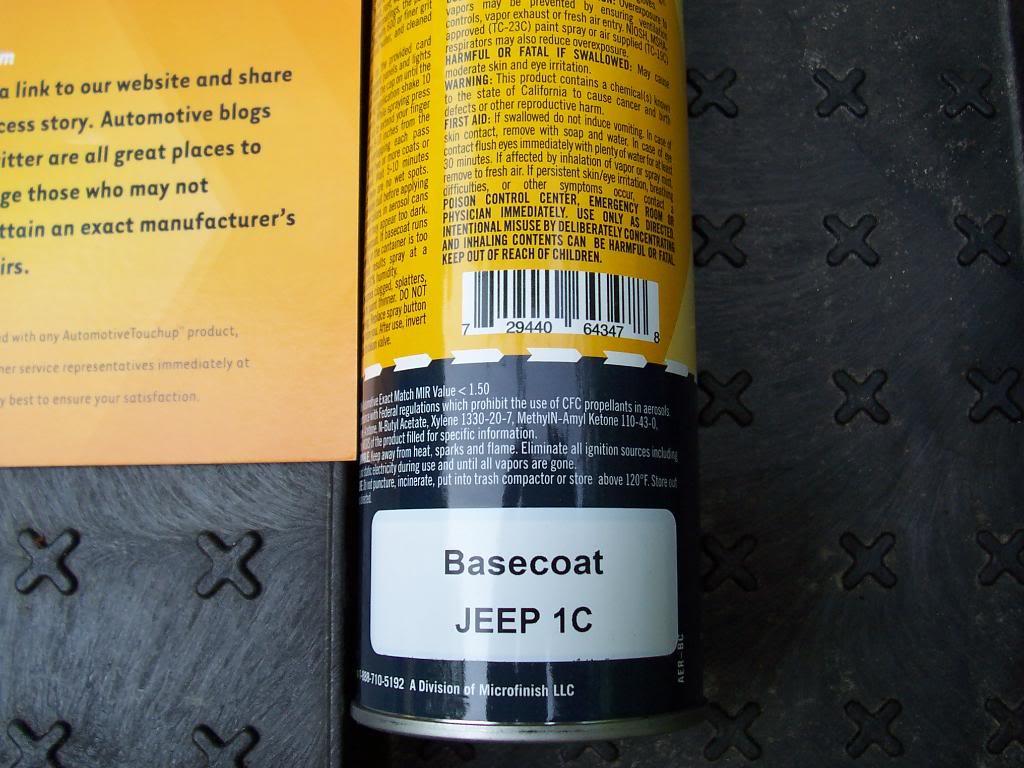
Since "jeepaddict" has had good success with this company before, I ordered 6 cans of spray paint from them.
I had ordered 6 cans, hoping that it would be enough for everything on the entire jeep that I wanted to repaint (bed floor, tailgate, under body,etc). But, this paint goes on very thin, so I ended up spraying all 6 cans just on the bed floor. I would get about one thin coat on the floor per can, so it has six coats of paint on it. The following pictures show how the paint gets a little darker with each successive coat.
- City
- Biloxi
- State
- MS
And two more pictures of what the color coats ended up looking like.
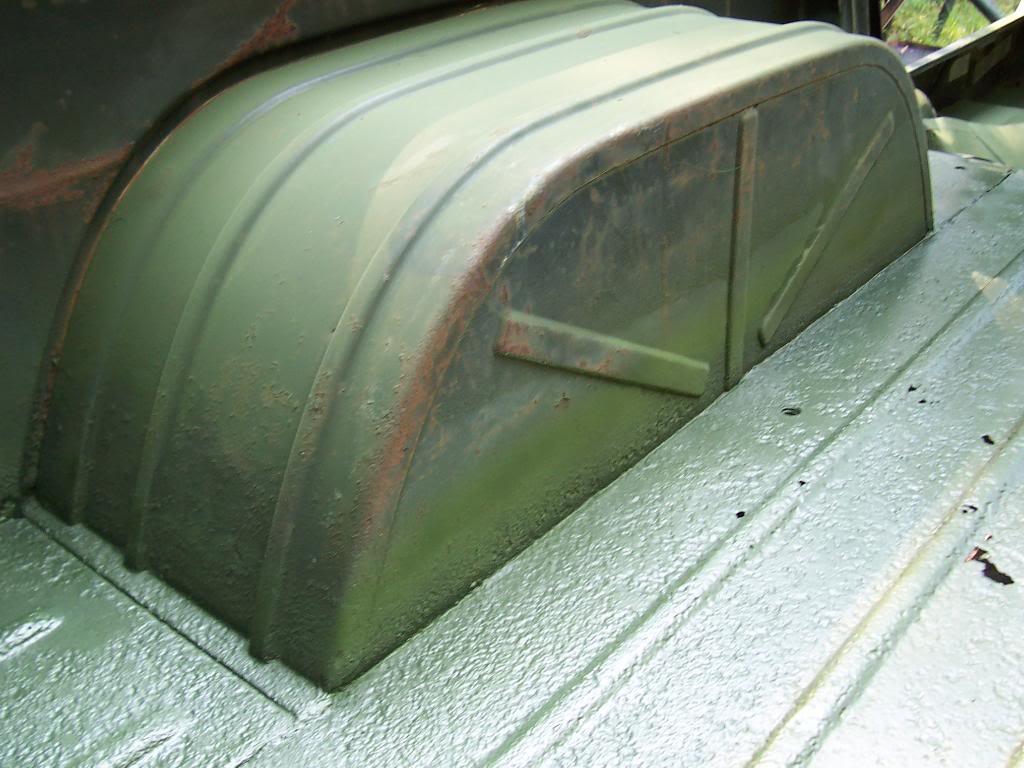
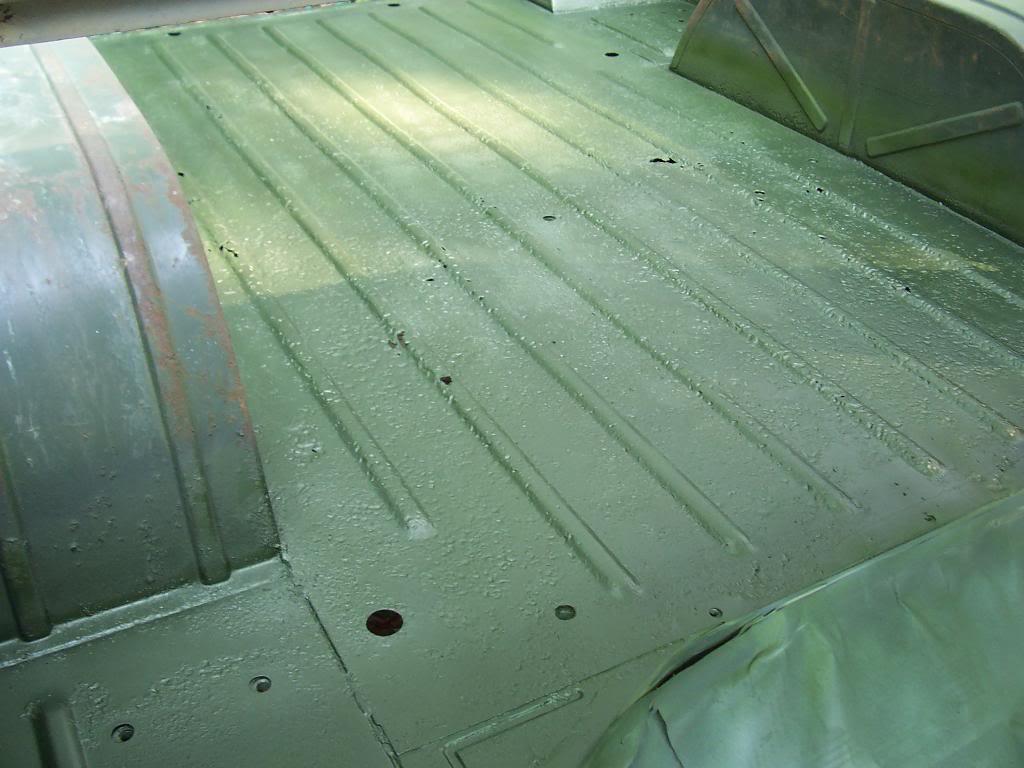
In my opinion, this color is not near dark enough to match "Sherwood Green Metallic". This particular color looks a little too "light" to me. Maybe if I would have sprayed a darker color primer first, maybe the paint would have came out darker? But, this paint is marketed as "touch up" paint, so maybe it is formulated "light", so that you can keep adding coats to make it darker. I will say this, it is a very high quality paint. It sprays out of the can very thin/atomized well. It will work perfect for its intended "touch up" purposes, maybe not so good at repainting an entire vehicle?
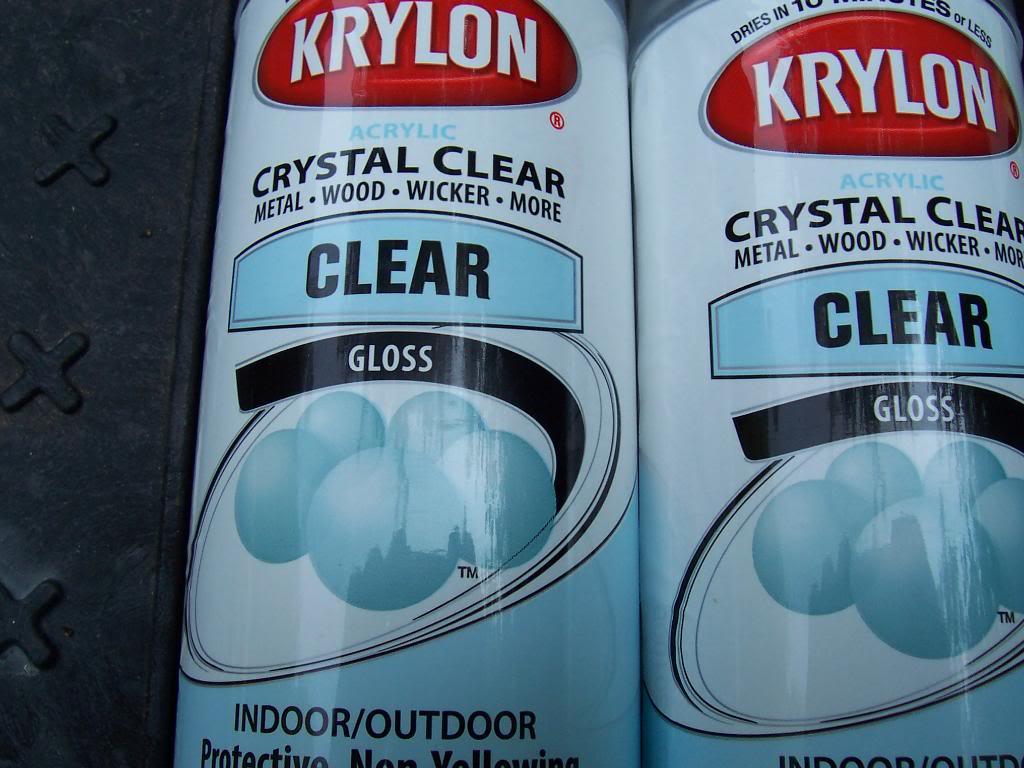
And of course, I forgot to order the "clear" when I ordered the base coat. This particular paint is an "acryllic urethane", so you can't top it with enamel or laquer. I used the below pictured clear to top coat, and it worked well, i.e. it did not attack the base coat. I used 4 cans of clear.
And what my finished paint job looks like.
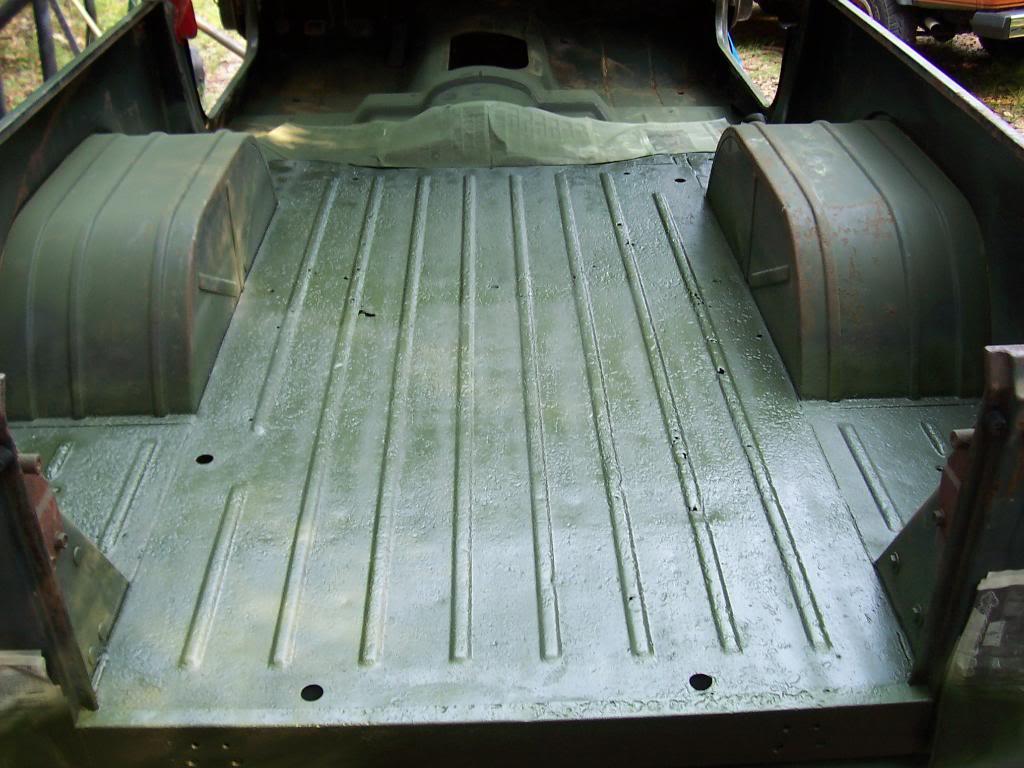
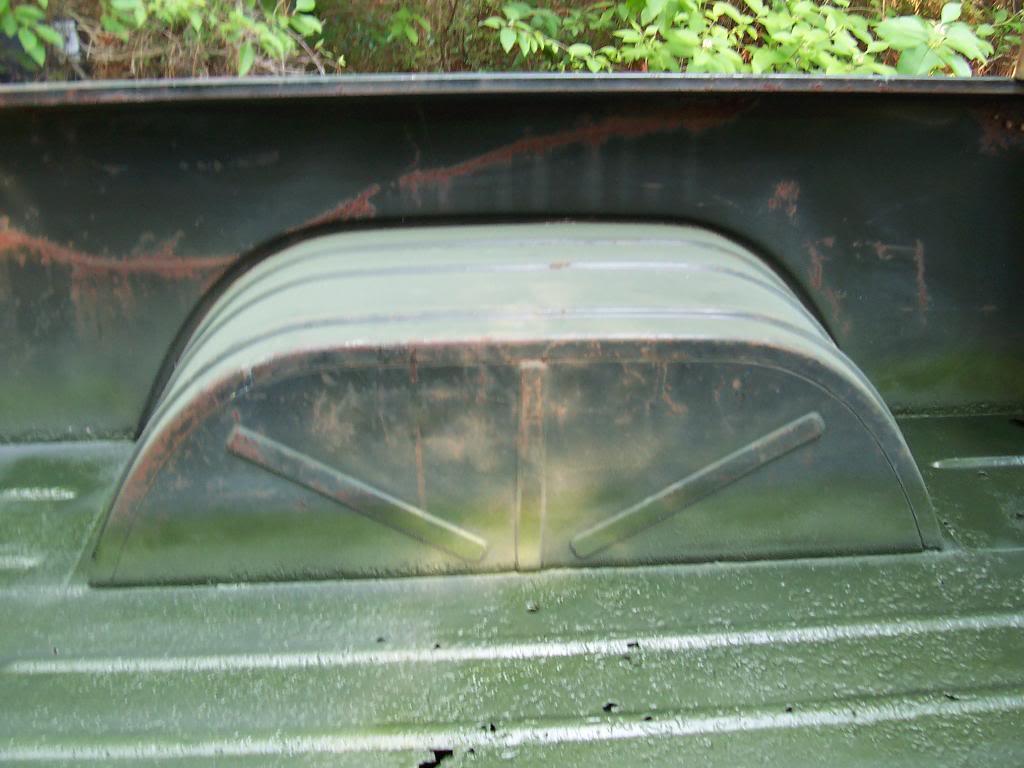
The more I look at it, the happier I get about how "light" the green color came out. It actually matches the rest of the faded paint pretty good. I still need to wash/scrub the bed and surrrounding sheet metal off, since everything is covered in a light mist of overspray particles, but it came out OK. Since this is a "budget" build, all in all, I think it came out pretty good. It definitley is better then what it was before.
BEFORE
AFTER
That's it for now.
In my opinion, this color is not near dark enough to match "Sherwood Green Metallic". This particular color looks a little too "light" to me. Maybe if I would have sprayed a darker color primer first, maybe the paint would have came out darker? But, this paint is marketed as "touch up" paint, so maybe it is formulated "light", so that you can keep adding coats to make it darker. I will say this, it is a very high quality paint. It sprays out of the can very thin/atomized well. It will work perfect for its intended "touch up" purposes, maybe not so good at repainting an entire vehicle?
And of course, I forgot to order the "clear" when I ordered the base coat. This particular paint is an "acryllic urethane", so you can't top it with enamel or laquer. I used the below pictured clear to top coat, and it worked well, i.e. it did not attack the base coat. I used 4 cans of clear.
And what my finished paint job looks like.
The more I look at it, the happier I get about how "light" the green color came out. It actually matches the rest of the faded paint pretty good. I still need to wash/scrub the bed and surrrounding sheet metal off, since everything is covered in a light mist of overspray particles, but it came out OK. Since this is a "budget" build, all in all, I think it came out pretty good. It definitley is better then what it was before.
BEFORE
AFTER
That's it for now.

- City
- Merton
- State
- WI
I used a spray can of Sherwood Green Metallic purchased at my local napa to repaint a windshield wiper motor cover. I used a grey primer below the top coats. I stopped counting, but I probably shot more than a dozen coats and used up the whole can of paint. The color eventually becomes the perfect match. The green color is very thin and the metallic doesn't help either. I did not clear coat the top. Patience is key, the color will get there with more coats.
Jeff
Jeff
Last edited:
- City
- Biloxi
- State
- MS
I used a spray can of Sherwood Green Metallic purchased at my local napa to repaint a windshield wiper motor cover. I used a grey primer below the top coats. I stopped counting, but I probably shot more than a dozen coats and used up the whole can of paint. The color eventually becomes the perfect match. The green color is very thin and the metallic doesn't help either. I did not clear coat the top. Patience is key, the color will get there with more coats.
Jeff
I believe you are correct, if I used more coats, it would definitely get darker
But, it also came down to economics

The 6 cans of paint that I sprayed on the bed floor cost $130.00. I think it would take at least another 4 coats to get close to the "darker shade" that I desire

For now, I am going to leave the bed floor as is
I might just take the easy/less costly way out and paint the under body blackI would rather paint everything "Sherwood Green Metallic", but the cost in spray cans would be astronomical
I am not sure if I can get "jeepaddict" to buy about $500 worth of spray paint
I might just prep and prime the under body, rear bed floor (again), and tail gate at home, go buy some regular automotive paint and primer, and paint the Scrambler at the mechanics shop at work, where there is a compessor/spray guns. It would be more cost effective/quicker/better

- City
- Biloxi
- State
- MS
Well, I have not done any work to "Yard Scrambler" in a long time, been too busy with the other Scramblers
But, last night I met up with "JeepAddict" in Slidell, LA. He bought a complete, running, recently rebuilt (supposedly) 258 from a guy that just swapped in a 350 in an '84 CJ7. We got the engine, exhaust, radiator, everything, for a good/fair price, cheaper then what it would cost me to buy just an engine rebuild kit We hauled the engine back to Gulfport, where I am storing it inside my buddies shop.
Well, now that I have a complete/running engine right down the road from my house, I have a renewed sense of energy for project "Yard Scrambler"
I will probably start to disassemble the rest of the body this weekend. I still want to do some rust preventative under body tub work. Once I remove the body, clean up/paint the sheet metal and frame, reassembly can start.
I told my buddy I would have the engine out of his shop before January 1, to give myself a deadline/goal/sense of urgency. Hoping to get this Scrambler at least running again before Christmas, MAYBE driving by then, too
Will update as progress resumes, that's it for now
But, last night I met up with "JeepAddict" in Slidell, LA. He bought a complete, running, recently rebuilt (supposedly) 258 from a guy that just swapped in a 350 in an '84 CJ7. We got the engine, exhaust, radiator, everything, for a good/fair price, cheaper then what it would cost me to buy just an engine rebuild kit
We hauled the engine back to Gulfport, where I am storing it inside my buddies shop.Well, now that I have a complete/running engine right down the road from my house, I have a renewed sense of energy for project "Yard Scrambler"
I will probably start to disassemble the rest of the body this weekend. I still want to do some rust preventative under body tub work. Once I remove the body, clean up/paint the sheet metal and frame, reassembly can start.
I told my buddy I would have the engine out of his shop before January 1, to give myself a deadline/goal/sense of urgency. Hoping to get this Scrambler at least running again before Christmas, MAYBE driving by then, too
Will update as progress resumes, that's it for now

