

You are using an out of date browser. It may not display this or other websites correctly.
You should upgrade or use an alternative browser.
You should upgrade or use an alternative browser.
New To Me 83--Parts Needed
- Thread starter Jeep Addict
- Start date


- City
- Biloxi
- State
- MS
What is the rust preventative plan for the under body? After your fun with the red scrambler is assume it is not bed liner type material
Is one of your shelf full of T5's going behind the 258?

I am just going to wire brush the surface rust off, then rattle can prime and paint, low-buck solution

I am going to put a T176 four speed behind the engine in this one - overdrive with 3.31 gears and 32" tires wont make any sense, plus I already have both T176 driveshafts
- City
- Biloxi
- State
- MS
- City
- Biloxi
- State
- MS
At your rate you will have two done before I get one finished!
Maybe, but yours will be much more refined/better finished product compared to good old "Yard Scrambler"


- City
- Baton Rouge
- State
- La
Maybe, but yours will be much more refined/better finished product compared to good old "Yard Scrambler"
What! Wait a minute, what just happened?

- City
- Biloxi
- State
- MS
What! Wait a minute, what just happened?
In my best Dr. Evil laugh:
Muahhhhhhhhhhhhhhhhhhhhhhhhhhhhhhhhhhhhhhhhhhhhhhh
Muahhhhhhhhhhhhhhhhhhhhhhhhhhhhhhhhhhhhhhhhhhhhhhh
Muahhhhhhhhhhhhhhhhhhhhhhhhhhhhhhhhhhhhhhhhhhhhhhh
Muahhhhhhhhhhhhhhhhhhhhhhhhhhhhhhhhhhhhhhhhhhhhhhh


Last edited:
- City
- Biloxi
- State
- MS
Unfortunately, looks like Hurricane Isaac is going to delay the restart of "Project Yard Scrambler"
I need to clean up around it/strap it down/ and secure it the best I can tonight
Or, get a big $$$ stated insurance policy on it based off pictures of my green Scrambler, wait till after the storm, and bingo
I need to clean up around it/strap it down/ and secure it the best I can tonight
Or, get a big $$$ stated insurance policy on it based off pictures of my green Scrambler, wait till after the storm, and bingo
- City
- Baton Rouge
- State
- La
Unfortunately, looks like Hurricane Isaac is going to delay the restart of "Project Yard Scrambler"
I need to clean up around it/strap it down/ and secure it the best I can tonight
Or, get a big $$$ stated insurance policy on it based off pictures of my green Scrambler, wait till after the storm, and bingo
Reinsert Dr. evil face. Good luck weathering the storm I'm sure the surge will be high. people here freaking out,we've been out of gas since Saturday luckily I filled up an hour north of town last night on my way home To prepare for the hurricane party.
- City
- Biloxi
- State
- MS
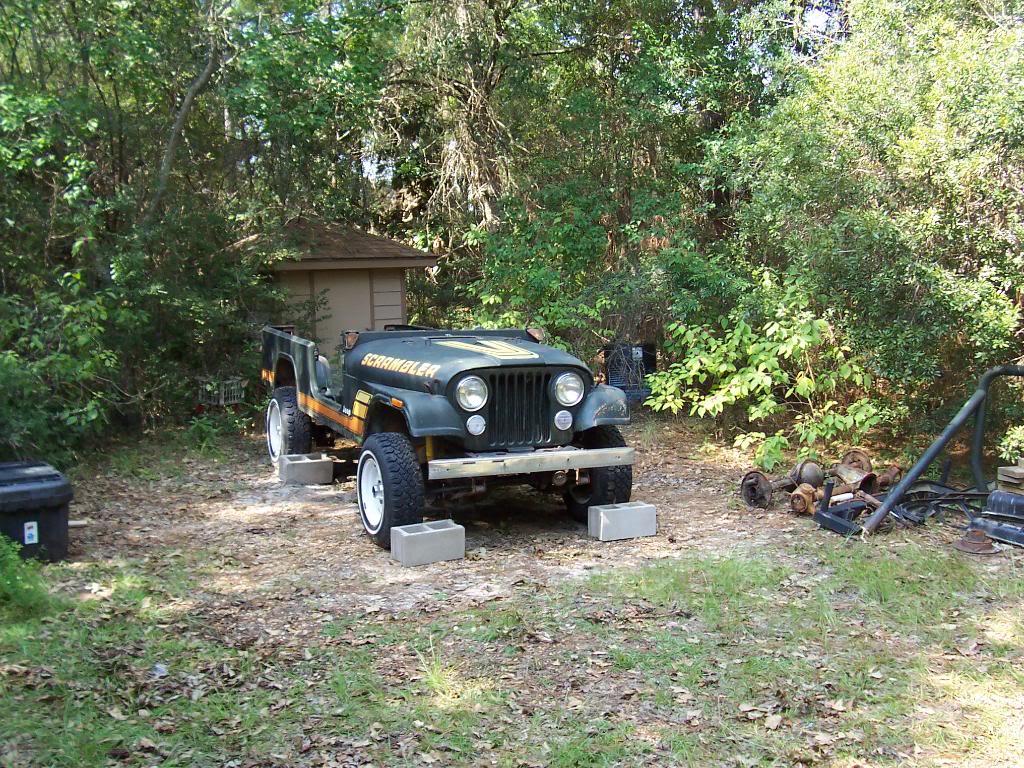
I finally got off my lazy butt and got back to work on "Yard Scrambler". Hurricane Issac and a cold/sinus infection slowed me down, so I only worked on it for about 6 hours Labor Day.
Since I am replacing the engine, the dash, and the body mounts, I figured what the hell, lets pull the body tub. I almost forgot how much stuff there is on these things. But, the second time around goes faster.
What I am starting out with:

And the easy stuff off (top, doors, windshield):
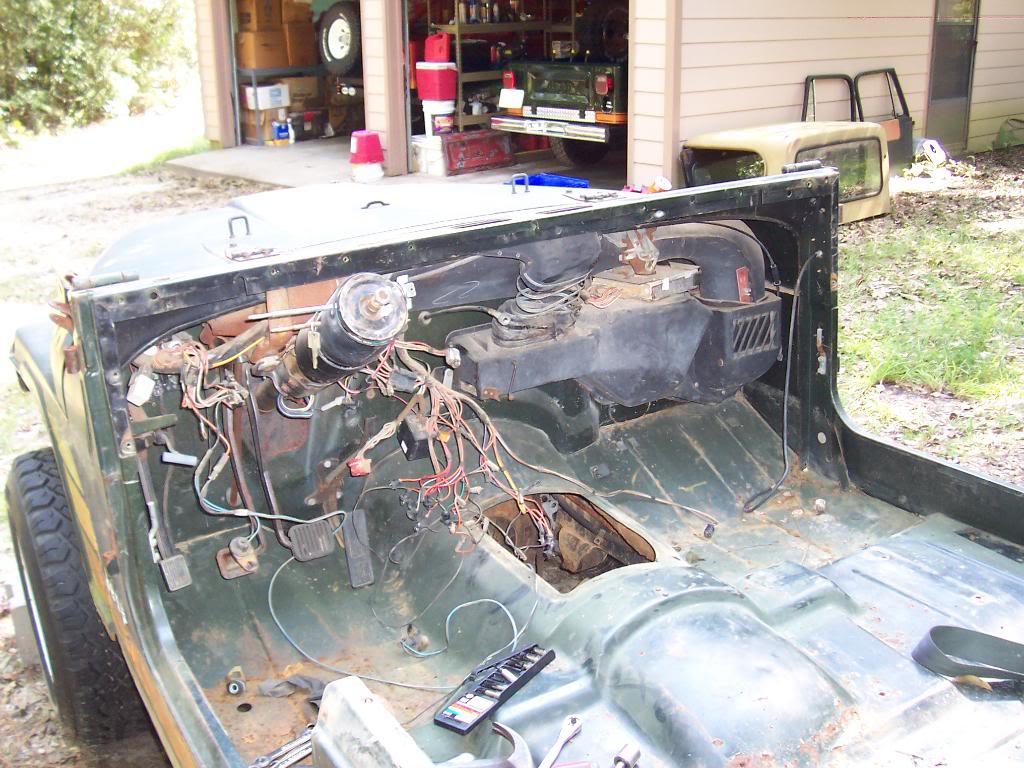
And pulled the dash out, the original is rusted out:
Driver side fender and hood off:
Just light surface rust found where the fenders meet the body tub. I will hit it with a wire brush and some rattle can primer/paint and it will be good.
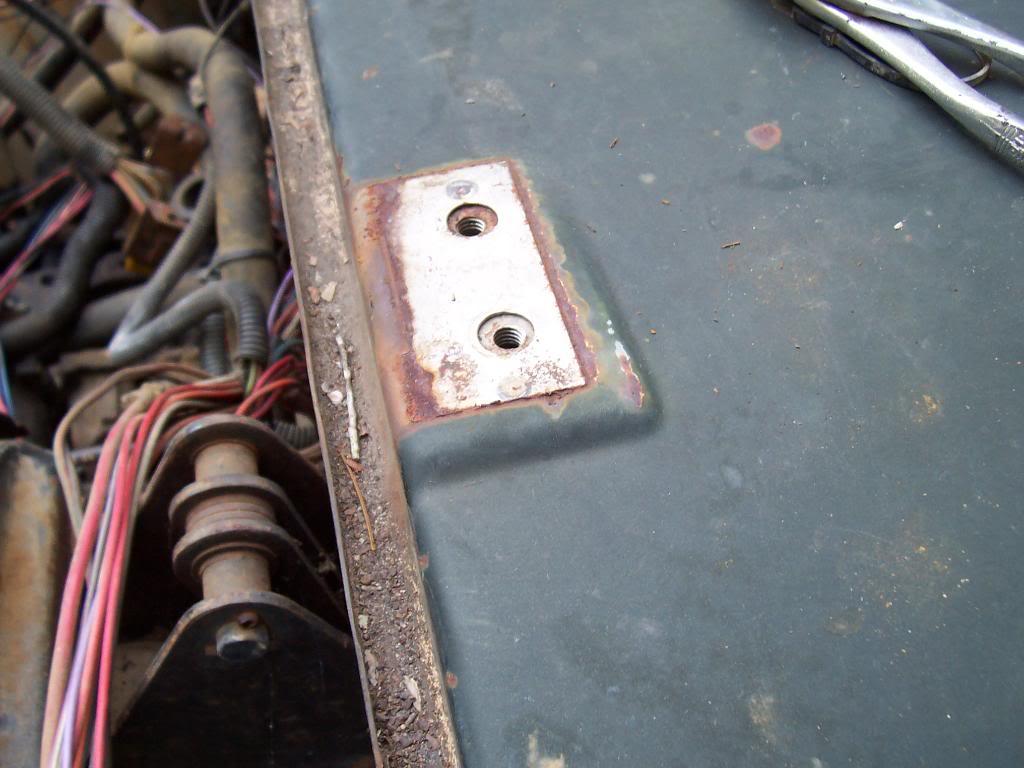
Picture of the factory steel underneath where the hood hinge sits on top of the cowl. I guess the factory assembled the components, then painted the entire vehicle. I found bare metal under the roll bar, windshield hinges, and a few other places. They just don't build them like they used too !!!
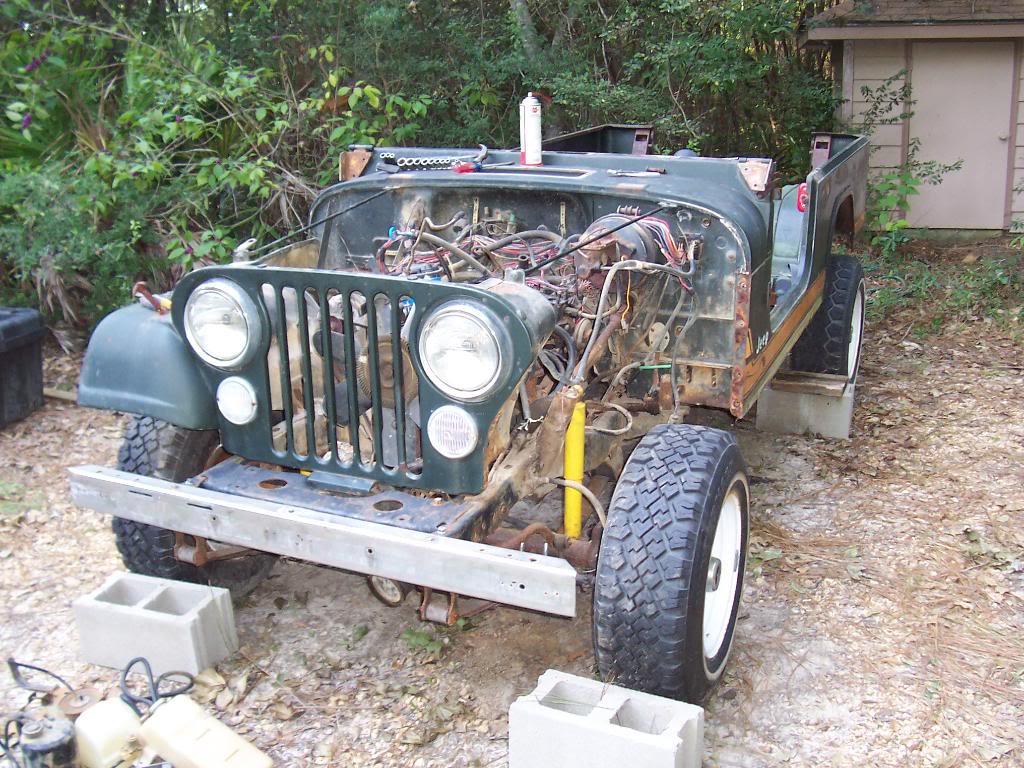
And now it looks like we are getting some where, the entire front clip removed. And of course, the captured nut inside the grill that holds the body mount bolt spun, but that was an easy fix.
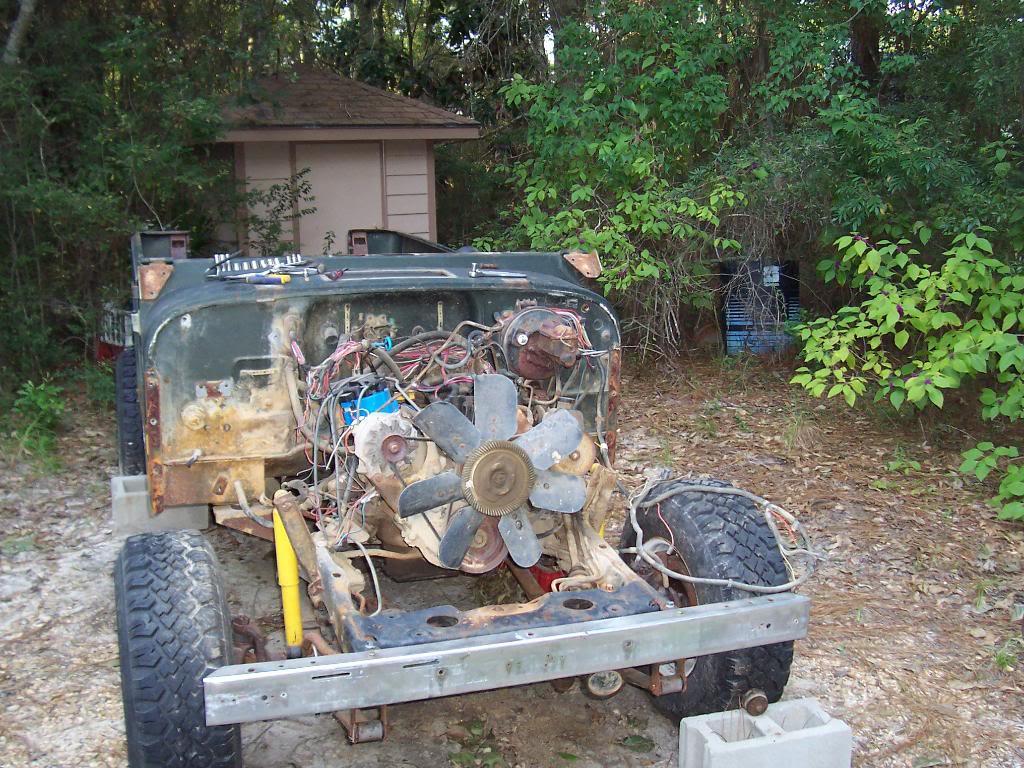
A quick picture of the under hood wiring situation. This is not something I did, this is a previous owner disaster, but its not too too bad. I will have to spend a little bit of time with this to get the new motor running, but since I am deleting the computer controlled carb/distributor, it will eliminate some of this mess.
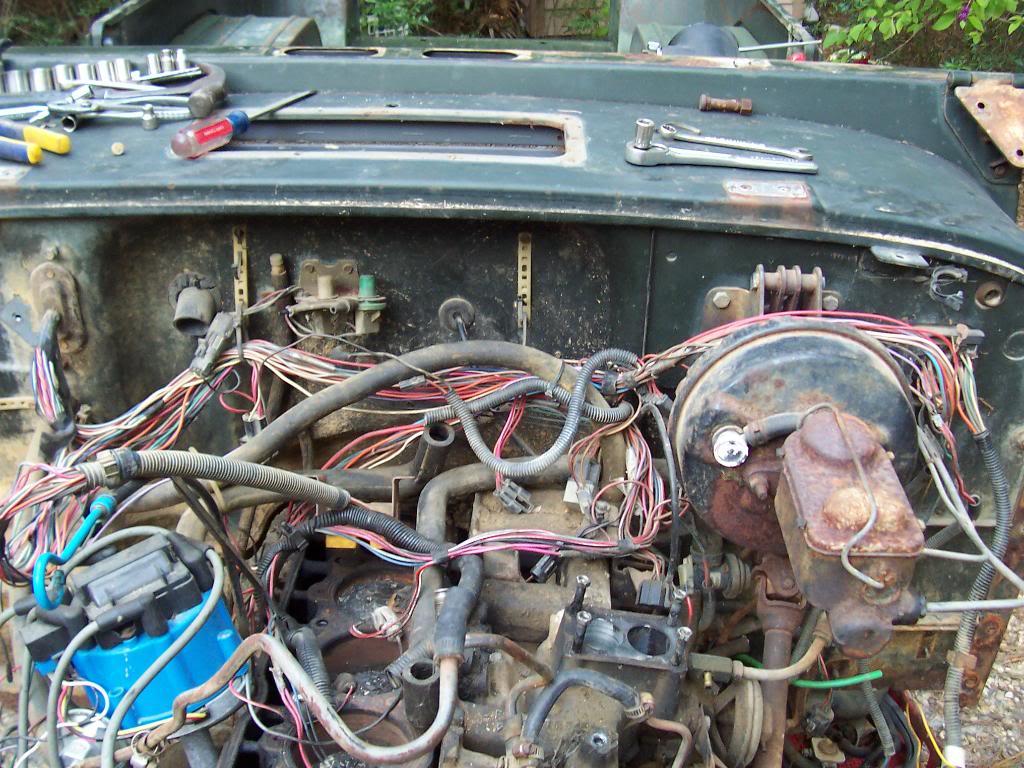
Quick picture showing the engine bay, after removing all the wiring and most of the hoses, tubes, etc.
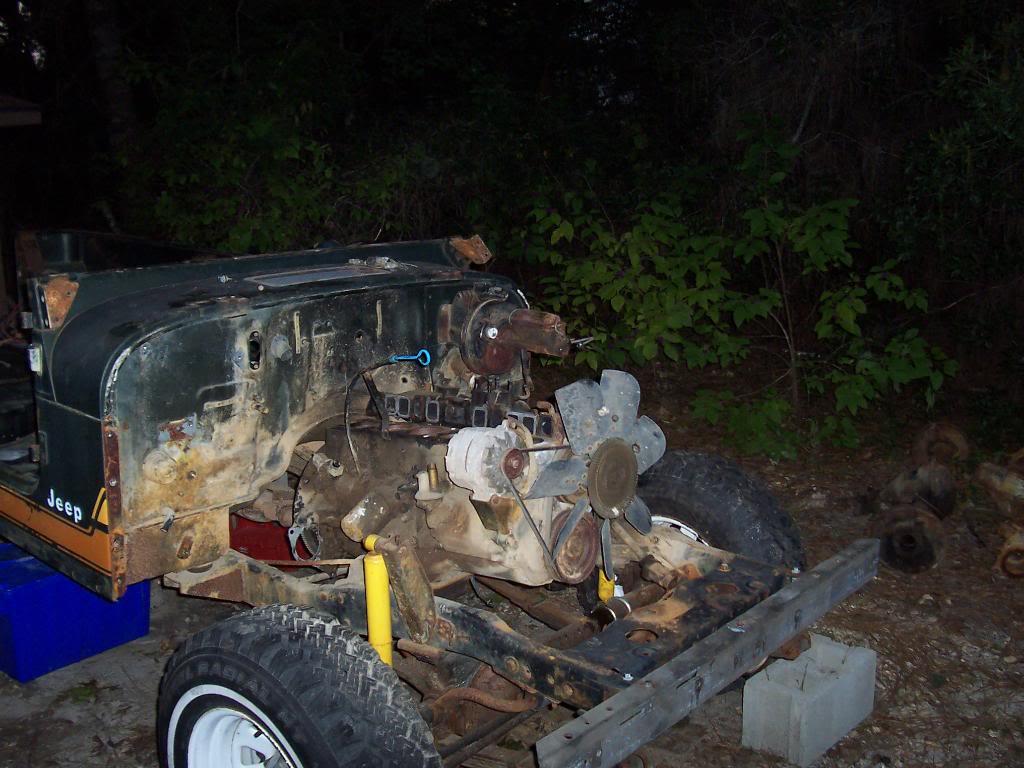
Picture showing the the front clip wiring harness, the computer wiring harness, and the ignition/charging/starting harness. I still need to pull the under dash/fuse block harness and the rear light harness for all the wiring to be out. So far, all the wiring looks great/original/uncut, except for the wiring around the distributer/coil.

My plan for the rest of this week, before the weekend:
Remove exhaust/intake manifold and piping
Pull brake booster/master cylinder
Pull under dash harness and fuse block
Pull under dash heating boxes out
Remove remaining parking brake components
Pull steering column
And a few other things. I want to be ready to pull the body tub and engine by this weekend.
That's it for now.
Since I am replacing the engine, the dash, and the body mounts, I figured what the hell, lets pull the body tub. I almost forgot how much stuff there is on these things. But, the second time around goes faster.
What I am starting out with:
And the easy stuff off (top, doors, windshield):
And pulled the dash out, the original is rusted out:
Driver side fender and hood off:
Just light surface rust found where the fenders meet the body tub. I will hit it with a wire brush and some rattle can primer/paint and it will be good.
Picture of the factory steel underneath where the hood hinge sits on top of the cowl. I guess the factory assembled the components, then painted the entire vehicle. I found bare metal under the roll bar, windshield hinges, and a few other places. They just don't build them like they used too !!!
And now it looks like we are getting some where, the entire front clip removed. And of course, the captured nut inside the grill that holds the body mount bolt spun, but that was an easy fix.
A quick picture of the under hood wiring situation. This is not something I did, this is a previous owner disaster, but its not too too bad. I will have to spend a little bit of time with this to get the new motor running, but since I am deleting the computer controlled carb/distributor, it will eliminate some of this mess.
Quick picture showing the engine bay, after removing all the wiring and most of the hoses, tubes, etc.
Picture showing the the front clip wiring harness, the computer wiring harness, and the ignition/charging/starting harness. I still need to pull the under dash/fuse block harness and the rear light harness for all the wiring to be out. So far, all the wiring looks great/original/uncut, except for the wiring around the distributer/coil.
My plan for the rest of this week, before the weekend:
Remove exhaust/intake manifold and piping
Pull brake booster/master cylinder
Pull under dash harness and fuse block
Pull under dash heating boxes out
Remove remaining parking brake components
Pull steering column
And a few other things. I want to be ready to pull the body tub and engine by this weekend.
That's it for now.
Last edited:
- City
- Biloxi
- State
- MS
I was able to get about one solid hour of work in last night before the rain started coming down again Using my highly unscientific "McDonald's Large Cup" in the yard rain gauge, looks like I got another 4" of rain last night Might need to look into putting an outboard motor on the back of yard Scrambler
Anyway, was able to pull the following stuff last night:
steering shaft
steering column
brake/clutch pedal assembly
brake booster/master cylinder
fuse block and under dash wiring harness
gas pedal and parking brake assembly
The second time around on taking one of these down to the frame is much faster
And some pictures.

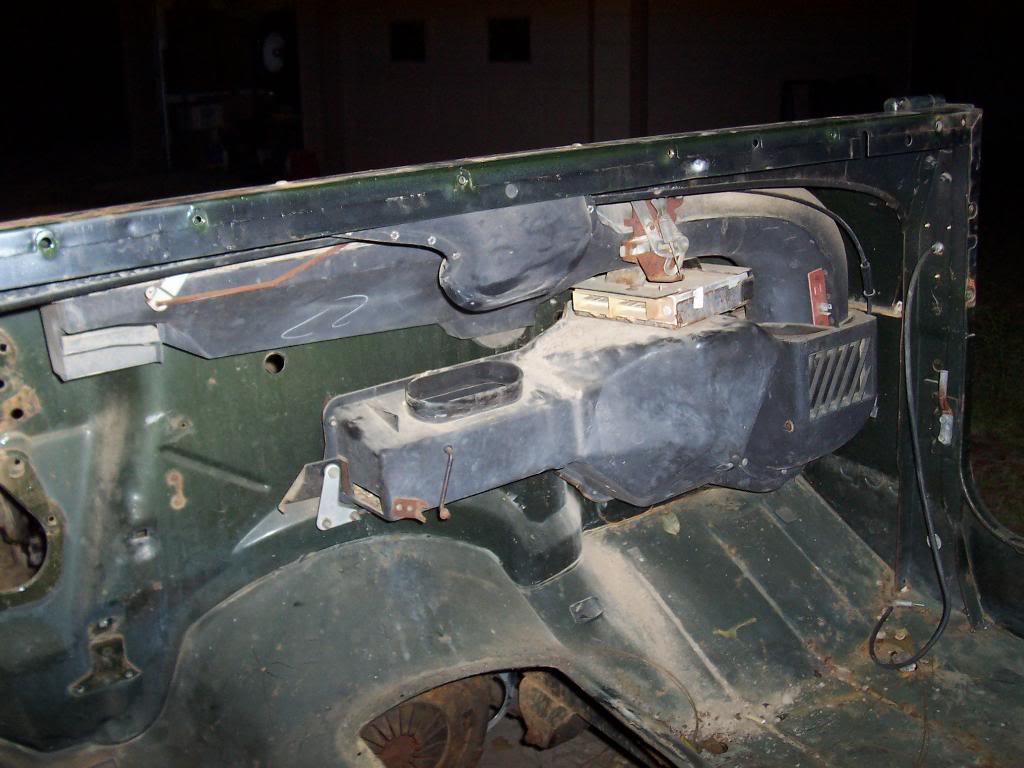

The heater box nuts are removed, but the four screws that hold the upper plastic box to the cowl have severely rust damaged heads. I can easily drill the heads off and the box will come out. Those four screw heads are located under the cowl grill, and I guess after almost 30 years of rain and moisture sitting on their heads, they had enough.
All that's left now to pull the body tub:
rear light harness
parking brake cable
body mount bolts
I am also going to start stripping the engine block down, to make it lighter/easier to remove.
That's it for now.
Using my highly unscientific "McDonald's Large Cup" in the yard rain gauge, looks like I got another 4" of rain last night Might need to look into putting an outboard motor on the back of yard ScramblerAnyway, was able to pull the following stuff last night:
steering shaft
steering column
brake/clutch pedal assembly
brake booster/master cylinder
fuse block and under dash wiring harness
gas pedal and parking brake assembly
The second time around on taking one of these down to the frame is much faster
And some pictures.
The heater box nuts are removed, but the four screws that hold the upper plastic box to the cowl have severely rust damaged heads. I can easily drill the heads off and the box will come out. Those four screw heads are located under the cowl grill, and I guess after almost 30 years of rain and moisture sitting on their heads, they had enough.
All that's left now to pull the body tub:
rear light harness
parking brake cable
body mount bolts
I am also going to start stripping the engine block down, to make it lighter/easier to remove.
That's it for now.
Last edited:

- City
- God's Country
- State
- AR
How exactly does the engine harness wiring connect/ detach?
My green Jeep is going to get an automatic hopefully over the winter. I plan on pulling the tub to do a few things, and seeing what you did helps. I need to put a new sending unit in the gas tank, cut some rust out of the tub where the drivers front roll bar leg hits the tub, and put a truetrac in the rear end, along with the T176 to TF999 swap. Looking at all these things I figure pulling the tub would be the way to go (and I have the tan Jeep with the hardtop that I drive in the winter anyhow). Ane one of those things I'd leave the tub alone, but doing all of them I think pulling the tub is the way to go.
Very informative thread! Keep posting lots and lots of pics!
My green Jeep is going to get an automatic hopefully over the winter. I plan on pulling the tub to do a few things, and seeing what you did helps. I need to put a new sending unit in the gas tank, cut some rust out of the tub where the drivers front roll bar leg hits the tub, and put a truetrac in the rear end, along with the T176 to TF999 swap. Looking at all these things I figure pulling the tub would be the way to go (and I have the tan Jeep with the hardtop that I drive in the winter anyhow). Ane one of those things I'd leave the tub alone, but doing all of them I think pulling the tub is the way to go.
Very informative thread! Keep posting lots and lots of pics!
- City
- Biloxi
- State
- MS
How exactly does the engine harness wiring connect/ detach?
My green Jeep is going to get an automatic hopefully over the winter. I plan on pulling the tub to do a few things, and seeing what you did helps. I need to put a new sending unit in the gas tank, cut some rust out of the tub where the drivers front roll bar leg hits the tub, and put a truetrac in the rear end, along with the T176 to TF999 swap. Looking at all these things I figure pulling the tub would be the way to go (and I have the tan Jeep with the hardtop that I drive in the winter anyhow). Ane one of those things I'd leave the tub alone, but doing all of them I think pulling the tub is the way to go.
Very informative thread! Keep posting lots and lots of pics!
Appreciate it, I will keep the pictures coming
As for the engine side of the firewall wiring harness(s), they connect to the back of the fuse panel on the engine side of the fire wall with a single bolt in the middle of the two plugs. Remove the center bolt, unplug the two plugs, and they are disconnected. The fuse panel is attached to the firewall on the interior side of the firewall with two torx headed screws. Remove the two screws and the fuse panel will come loose from the fire wall
- City
- God's Country
- State
- AR
That's it!!!? Wow, and here I thought I was in for a nightmare of unhooking 400 wires......
Ha, thanks. Good to know. Not sure when I'll get a start on this project but it will definitely be easier with this thread!
Ha, thanks. Good to know. Not sure when I'll get a start on this project but it will definitely be easier with this thread!
- City
- Biloxi
- State
- MS
You ARE a wealth of information!
Appreciate it Toby, but I have got a feeling you could teach me quite a few things
That's it!!!? Wow, and here I thought I was in for a nightmare of unhooking 400 wires......
Ha, thanks. Good to know. Not sure when I'll get a start on this project but it will definitely be easier with this thread!
Yes, unhooking the fuse block side on each side of the firewall is easy, it is the other ends of all those wires you have to watch out for
But, the engine side/back of the dash board is actually pretty straight forward, IF the harness is mostly original/intact. If it has had a bunch of past repairs/modifications/additions, it could get interesting
On this particular Scrambler, only having two owners and only around 70,000 miles, the entire wire harness was just as it left the factory, EXCEPT around the coil/distributor. All of the other wires were attached with factory plug together connectors (except the solenoid), so it was a simple matter of unplugging everything
Made my life easy. This is the first CJ I have seen that came with the factory radio harness, plus the optional tach/clock/cigarette lighter wires were still taped to the main harness
- City
- Baton Rouge
- State
- La
You may have little Chinese nuts but you sure know your Jeeps.
- City
- Biloxi
- State
- MS
You may have little Chinese nuts but you sure know your Jeeps.
Just for you Mr. Jeep Addict
http://www.youtube.com/watch?v=DFdyQxysQaA
- City
- Biloxi
- State
- MS
Finished removing the remaining items from the body tub last night:
heater box thing(s)
fuel tank evap stuff (unfortunately, the liquid check valve is rusted out)
rear light harness and harness mould thing in rear fender well
fuel tank fill assembly
and some other small stuff

Picture of the interior side of the firewall, pretty clean and rust free.

Even the driver side fender well underneath the plastic wire mould thing is 100% rust free. The visible rust in the picture is just surface rust.
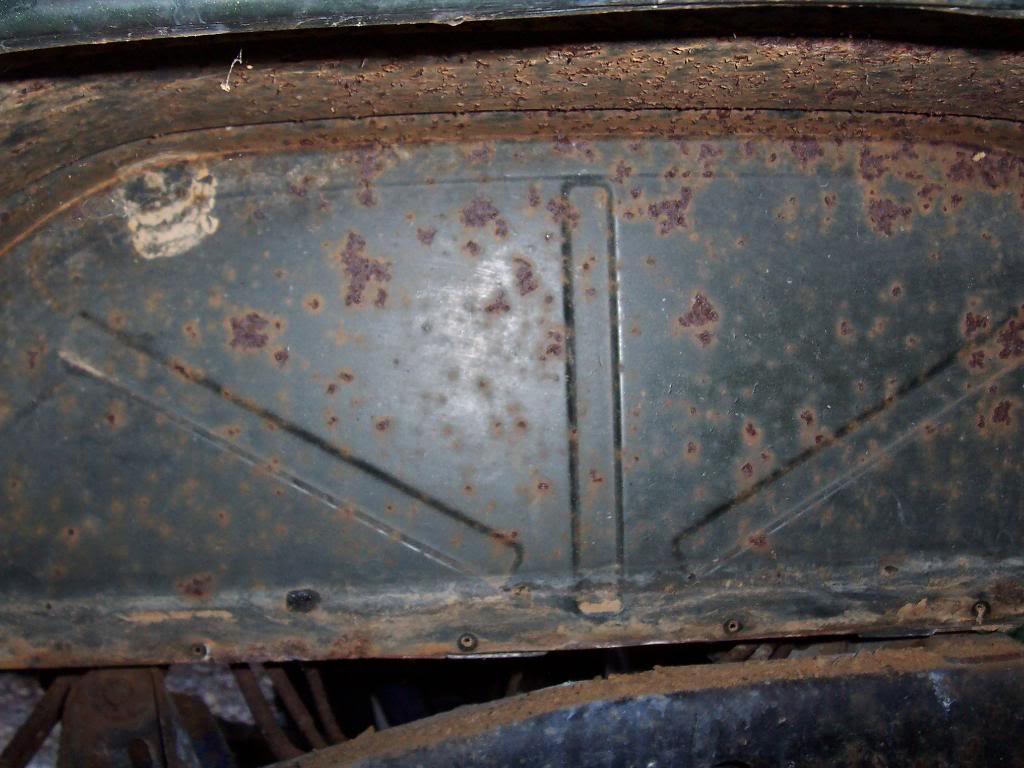
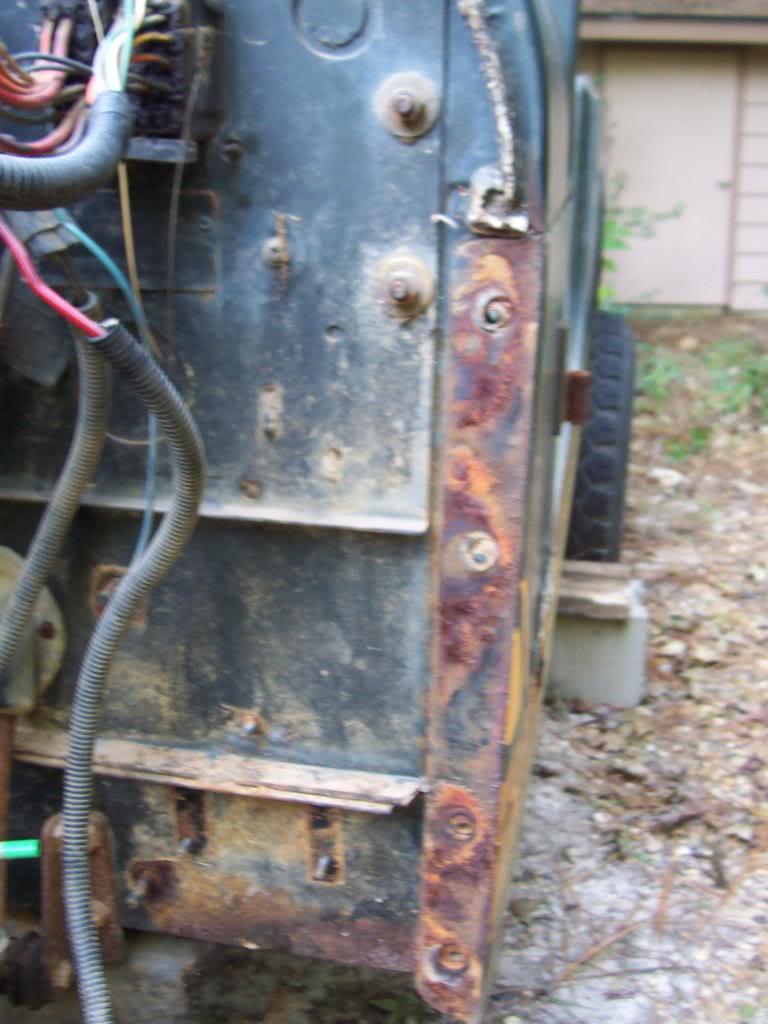
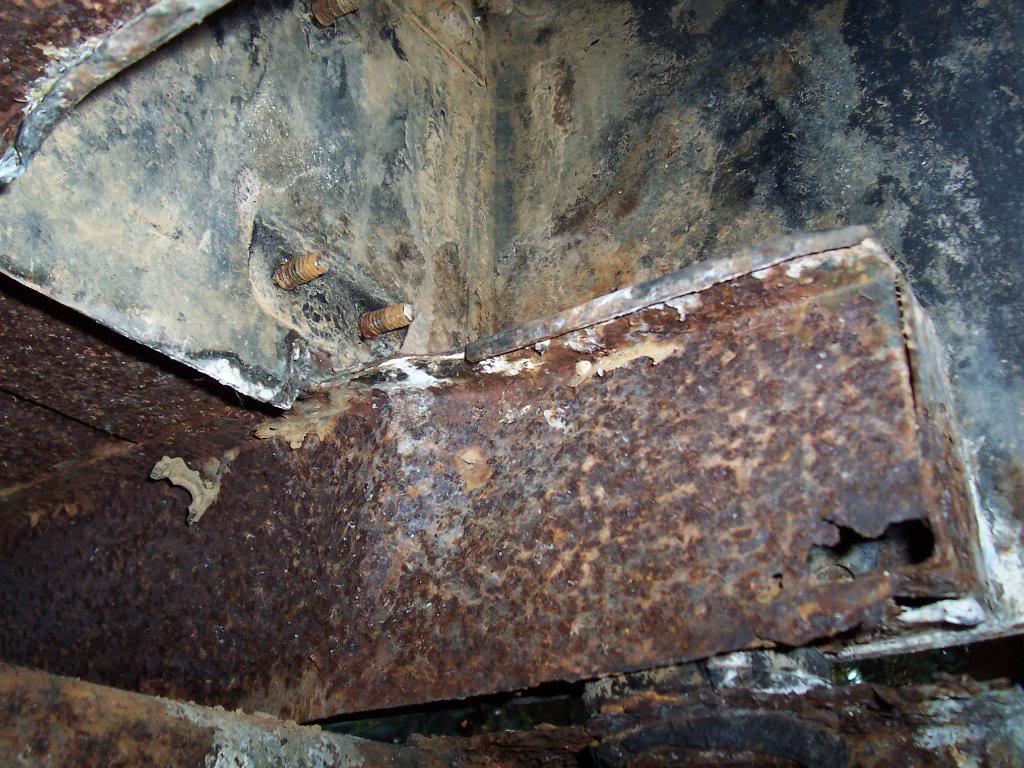
This is the worst rust on the entire under body. This is the sheet metal box thing at the very rear of the body tub. It looks really bad, but besides the visible hole, it is still solid. I hit it with a hammer repeatedly, it is still good. But, it will be wire wheeled down and repainted when the tub comes off.
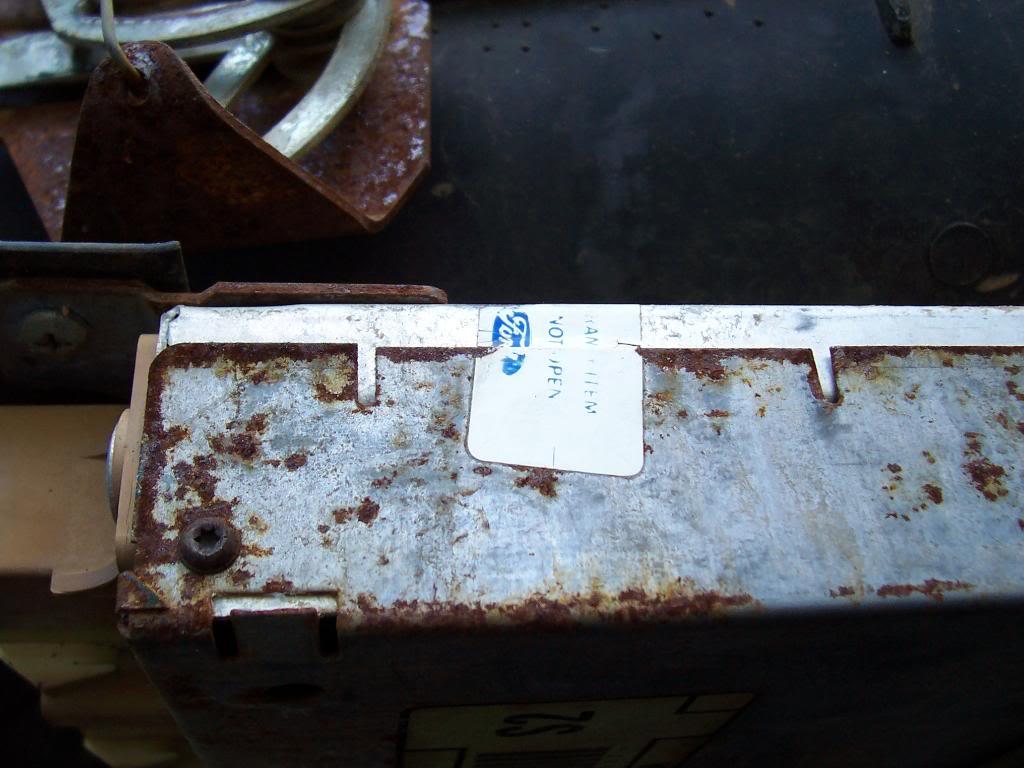
Since I have never pulled the computer out of a CJ before, I thought the AMC sticker still being present was pretty cool.

And on the other side of the computer we find the "Blue Oval" - now I know why all these computer controlled carburetors get a bad wrap, damn you FoMoCo
Stripped the front of the engine down, also removed the two manifolds that have just been kind of hanging in place. Motor is about ready to pull.

One of the previous owners removed the cylinder head along time ago. Unfortunately, they did not remove the exhaust from the manifold, and with the head not present, it is about impossible to remove the two solidly rusted manifold to flange bolts. A sawzall will fix this.

Not sure why I took this picture, I guess to show the almost 30 year old oil/mud crud mix???

I also decided to see if I get body mount bolts out, kind of the "moment of truth". There are 13 body mount bolts on a Scrambler, 1 under the grill (already removed) and 6 down each side of the body tub. I will number them 1-6, with one starting at the front of the body tub. Before attempting to remove the bolts, I heated each one with a torch for a few minutes, long enough to catch the rubber mounts on fire !!! To break the bolts free, I only used a short 3/8 drive ratchet.
Passenger Side - 1,2,3,4,5 came out with no problems. Number 6, at the very rear of the body did not come out. It reversed a few threads then broke the welds that hold the captured nut thing. That is no big deal, easy to get to that.
Driver Side - 1,2,3,5 came out with no problems. Number 6 was the same situation as the Passenger Side, so no big deal. Number 4, which is located on the inside of the frame rails right next to the front of where the gas tank would be, is a problem. First twist broke the welds on the captured nut thing, well I am about 90% sure it did. I will cut the head off the bolt to pull the tub, no big deal. And I think I already figured out an easy way to fix the broke captured nut thing using simple hand tools, stay tuned.
That's it for now.
heater box thing(s)
fuel tank evap stuff (unfortunately, the liquid check valve is rusted out)
rear light harness and harness mould thing in rear fender well
fuel tank fill assembly
and some other small stuff
Picture of the interior side of the firewall, pretty clean and rust free.
Even the driver side fender well underneath the plastic wire mould thing is 100% rust free. The visible rust in the picture is just surface rust.
This is the worst rust on the entire under body. This is the sheet metal box thing at the very rear of the body tub. It looks really bad, but besides the visible hole, it is still solid. I hit it with a hammer repeatedly, it is still good. But, it will be wire wheeled down and repainted when the tub comes off.
Since I have never pulled the computer out of a CJ before, I thought the AMC sticker still being present was pretty cool.
And on the other side of the computer we find the "Blue Oval" - now I know why all these computer controlled carburetors get a bad wrap, damn you FoMoCo
Stripped the front of the engine down, also removed the two manifolds that have just been kind of hanging in place. Motor is about ready to pull.
One of the previous owners removed the cylinder head along time ago. Unfortunately, they did not remove the exhaust from the manifold, and with the head not present, it is about impossible to remove the two solidly rusted manifold to flange bolts. A sawzall will fix this.
Not sure why I took this picture, I guess to show the almost 30 year old oil/mud crud mix???
I also decided to see if I get body mount bolts out, kind of the "moment of truth". There are 13 body mount bolts on a Scrambler, 1 under the grill (already removed) and 6 down each side of the body tub. I will number them 1-6, with one starting at the front of the body tub. Before attempting to remove the bolts, I heated each one with a torch for a few minutes, long enough to catch the rubber mounts on fire !!! To break the bolts free, I only used a short 3/8 drive ratchet.
Passenger Side - 1,2,3,4,5 came out with no problems. Number 6, at the very rear of the body did not come out. It reversed a few threads then broke the welds that hold the captured nut thing. That is no big deal, easy to get to that.
Driver Side - 1,2,3,5 came out with no problems. Number 6 was the same situation as the Passenger Side, so no big deal. Number 4, which is located on the inside of the frame rails right next to the front of where the gas tank would be, is a problem. First twist broke the welds on the captured nut thing, well I am about 90% sure it did. I will cut the head off the bolt to pull the tub, no big deal. And I think I already figured out an easy way to fix the broke captured nut thing using simple hand tools, stay tuned.
That's it for now.
- City
- Baton Rouge
- State
- La
I am just in awe and ashamed of myself and my lack of productivity.