• Notice for iPhone users: DO NOT use the image size reduction option when uploading photos to the forum. This causes portrait images to post as landscape. We have added a warning to the image insert pop-up as well.

Postal going 4.0/AW4

That's why I bought the online diagram. All the online sources left me with many "mystery" wires. The diagram told me exactly what each one was. From there, I could determine if they were necessary or not.

I confused you again, I mean that the article is showing a much simpler connector, as far as I can tell the FSM is spot on, so I have all the wires identified. What I'm up to now is trying to make the lists just like you mentioned. Trick is coming up with the list of needed items on the XJ side. I think I can make a pretty solid guess and go from there.
 
I have a tendency to overthink things....sounds like you are on the right track.:thumbsup:
 
I have a tendency to overthink things....sounds like you are on the right track.:thumbsup:

And I tend to rush things, so having y'all looking at what I'm doing is a big help ;)

I've been rolling around in my head as to how much delay I want to introduce before assembling all of this with cleaning on the frame/body/engine while it's all out... :banghead:
 
I've been rolling around in my head as to how much delay I want to introduce before assembling all of this with cleaning on the frame/body/engine while it's all out...

With your short summers and long salty winters, I wouldn't delay it much unless there was rust you needed to stop. Get it back on the road to start enjoying it while the weather is good.
 
With your short summers and long salty winters, I wouldn't delay it much unless there was rust you needed to stop. Get it back on the road to start enjoying it while the weather is good.

I agree, I gave the firewall and some of the frame a once-over last night along with the engine mounts and some of the things I thought I'd need to lean on as I worked. That's good enough, I want it back on the road :thumbsup:\\

Stopped at the auto part store on the way into town, picked up all the fluids and filters, new water pump, some new hard line and EFI hose/clamps for the gas and a serpentine belt.

After cleaning up all the crud, drain pans, buckets and fluid, and floor I started in on the D300. The novak adapter comes with a new dual-sided input seal that you have to pull the input shaft/housing, remove a snap ring, and pull the input gear to press out the stock seal and install the new one.

I got it apart (inside of the 300 looks great) and called it a night. More hopefully later today. Need a pair of external snap ring pliers and I forgot the fuel filter.
 
First an apology, the photos have been hard to manage because our old point and shoot camera (the one that I don't mind sitting around the garage/workbench while I work) has pretty much given up on me, I get about 5 photos per charge, if that, then I have to charge it to get the pics off and do it in a hurry.

I hope to get more pics up now that teardown is pretty complete and I'm starting on the install. I do have some fun ones with Laura and Kate getting in on the action :)

attachment.php
DSC_2607.JPG

attachment.php
DSC_2612.JPG

With the holiday weekend/honey do list/house projects, I didn't get anything close to the time I'd hoped to work on this, but made some progress.

Water pump, pulley, fan
I swapped out the H2O pump for a wrangler (TJ or YJ works) pump to get the correct pulley/fan shaft. The XJs use an offset mechanical fan on the idler pulley, so you have to swap the water pump to use a mechanical fan. The serpentine setup on the 4.0s spin the fan pulleys the opposite way from a 4.2 V-belt because the back (flat) side of the serp belt is on the pulley as opposed to the V-side of the V-belt (the serp 4.0s spin the same direction as a serpentine 258 though, so if you happen to have one of those, you're set for the fan, but you'll still need the pulley I think if you're using an XJ motor).

Because of the reverse rotation (compared to my V-belt 258), I needed a YJ/ZJ/TJ fan to match, so I got one cheap off eBay, complete with the clutch. This fan direction issue is the case regardless of the year/OBDI/OBDII, btw.

Boring pic of a water pump, still waiting on the pulley.

attachment.php
DSC_2644.JPG

New valve cover gasket
I pulled the valve cover to clean it up and work on the slight leak at the rear. Found I needed a new gasket, got that ordered and got a new thermostat while I'm at it.

Throttle body spacer
In a funny Jeep karma twist, I found the Poweraid throttle body spacer that I put on our old 97 XJ sitting on my shelf (removed prior to selling the XJ, meant to sell it off), so I slapped that on.

Motor mount brackets
I pulled and cleaned up the motor mount brackets from the 258. Had to grind the front edge of the left-side mount to clear a reinforcing web on the block. Swapped in new bolts and drilled the rear bolt hole on the left-side mount to fit a 1/2"-20 bolt to match the tapped hole in the block at that location. The 258 and 4.0 use different block holes, but they're all there (apparently newer ~2000+ 4.0s are more complicated than this and require fabbing mounts, check on www.cjoffroad.com if you're looking at one of those motors for a swap to make sure). I also had to cut down one oil pan stud that was interfering with the motor mount on the left side. It had a plastic tiedown to mount some wiring that I won't need. Finally, I did use one washer per location behind the left side mount, between it and the block) for a little extra clearance.

I have new PolyPerformance CJ motor mounts that I'll use when I install the motor.

Pic of the right side mount (my driver side):

attachment.php
DSC_2678.JPG

Left side mount, the rearmost hole needed to be drilled out to 1/2" to use a 1/2-20 fine thread bolt

attachment.php
DSC_2679.JPG

Tranny/tcase adapter
Pulled the front input on the tcase and installed the dual-sided input shaft seal that came with the adapter to keep gear oil from meeting ATF. Snap ring on the back side of the input gear worked my snap ring pliers for all they were worth, don't even try this without the proper pliers and get heavy-duty ones.
Reassembled the input and checked out the twin stick setup I built a long while back. Will just need to drill the holes in the shifter blocks when I fit it all up and see where the shifters need to sit and check about bending the shifters.

I put the tranny mounting studs in the 3rd of 4 sets of holes to clock the tcase. Need to play with it before I decide how far to go, I'd like it as flat as possible, but I don't want to get into an insane amount of work to fit it up.

I figure I'll modify the stock crossmember to mount the tranny end, so I cleaned that up in preparation. Figure I can pie-cut as needed or just slice and overlap with some BFH love and welding to flatten it out (can't wait for that part).

Adapter on and new input seal, green, double-sided:

attachment.php
DSC_2641.JPG

Fuel pump/regulator/lines/filter
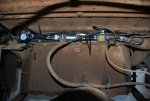
I got an E2000 pump, EFI regulator and Fram G3 filter to mount on the frame crossmember in front of the tank. Got the regulator and pump mounted. Need to cut and flare the stock gas line to pipe it all in, but I ran out of time this weekend to do any more.

Setup on crossmember, from left to right, adjustable regulator, pump, filter (EDIT - I ended up replacing the pictured regulator with an edelbrock unit):
attachment.php

DSC_2653.JPG
New fuel line:
attachment.php

DSC_2655.JPG


So that's where I'll pick up when I get home this weekend.
 
Last edited:
Nice write up Eric. I'll be keeping a close eye on your progress. Kohldad sent me the link to try and motivate me. I just returned from a wheeling trip to Katemcy Rocks, in TX and it was a blast. I drove my buddy's TJ Rubicon all weekend and now I am spoiled with the AT and 4.0 FI. Anyway, I have a 1995 XJ sitting in the garage next to the CJ ready for the swap. I just need to do it. Maybe here in the next couple of weeks, I'll start getting serious about it. I just need to find a D300 now.

Keep up the good work!!
 
Oil pan swap

If your 258 oil pan had the armor on the bottom, I would swap oil pans. You need to change the pick-up and dipstick as well. What I mean is keep the 258 stuff with the 258 pan. Other than that it is simply just changing the oil pan and you keep the armor plate on the bottom.
 
If your 258 oil pan had the armor on the bottom, I would swap oil pans. You need to change the pick-up and dipstick as well. What I mean is keep the 258 stuff with the 258 pan. Other than that it is simply just changing the oil pan and you keep the armor plate on the bottom.
Interesting, hadn't heard about doing that. I do have the armor plated one...

I brought my POS point-and-shoot camera to try to get this weekend's pictures off and it appears to be completely dead now :banghead:
 
You're right, I'm so lame. :( I'll have to get Kate to stop helping turn wrenches and start taking photos with the good camera.
 
Eric,

This thread is USELESS WITHOUT PICTURES. If you don't produce pictures, you can't ask for pictures from anyone else.

Don
 
update: still haven't gotten the photos off the old camera, but I have some others that will be coming. Trying to spend time with the family while still making progress makes for a lot of late nights.

I did get the engine and tranny in and mounted at the engine mounts after a new valve cover gasket and thermostat. On a jackstand under the tranny. I have a ZJ fan/clutch from eBay, waiting on the water pump pulley (also eBay).

attachment.php


For the oil pressure sender for the gage, I pulled the Y-block on the 258 that had the oil pressure switch and sender in it, I installed that where the 4.0 oil pressure sender was and put both the 258 and 4.0 senders into that. Worked out great after moving the wiring harness that has the 4.0 sender forward (the dizzy plug is in that same bundle and it just needed to move to the other side of the dizzy to give everything enough slack, it was wrapped around the cap before).

Stock 4.0 setup, you can see the plug going to the dizzy on the right, that's the one that needed moved over to the front side of the dizzy:
attachment.php


Y-block and sender from 258:
attachment.php


Both installed, you can see the dizzy plug is moved out of the way to the other side to get the needed slack in the harness (sorry, forgot to rotate the pic):

attachment.php


I spent the last few working hours on the PDC/engine bay wiring harness. To make up for the lack of pictures, I'm going to have a really nice excel spreadsheet (for 97 XJs only of course, but it will be a lot more than I've seen for any other OBDII swap so far and should give a solid idea on what wires to look for in any other OBDII swap) that shows the important connectors, decodes the circuit references and comments on what to do with each. I've got the harness down to something manageable and I think I've found the wires to splice into. Too late now to post it all up, I'll update my spreadsheet from my notes tomorrow. Neat thing about spending the time to really get into the wiring harness and PDC is that I have all kinds of spare circuits and a couple relays now since many of the XJ circuits aren't going to be used (HVAC blower motor, electric radiator fan, A/C compressor clutch (for OBA!) and a handful of straight fused circuits).

Still needed:
power steering connected (I hope without any new lines required, ends look the same on my stuff)
tranny cooler lines
radiator hoses (still need to figure H2O temp sender for gage to work)
fan/pulley install
connect/splice wiring
tranny mount/modify x-member
mount tcase (still unsure how much to clock it)
driveshafts
reconenct/secure vent lines
tranny filter change
twin stick setup
tranny shifter setup

Then there's things like the charcoal canister and various tricks to avoid setting off the check engine light after I get it running.
 
Don, even I give it a rest after initially bugging someone about pictures. If my stupid point and shoot camera just worked like it should have, they'd be here by now.

I pulled the new images off the camera before work this morning... just didn't have time to do that and link them all here.
 
One question I have, there's the A/C high and low pressure connectors that I left in the harness. Anyone know if they're required when converting a compressor to OBA? I think they feed back into the PCM and I imagine that's useless now that it's not used as the stock AC unit, or maybe they're needed to tell the PCM to idle up the engine if the compressor is engaged?
 
As far as the pcm is concerned, the connectors should be useless. However, if you kept the tube where the high pressure cutoff switch is located and connect your air line after it, you can use the factory high pressure cutoff switch to turn off the compressor. If you do it this way, the connector and some of the wiring could be of use.

Thinking even more, if the cherokee has an A/C button, it could be possible to just add an AC switch to the dash, feed the circuit into the PCM, and let the logic of the PCM control the compressor. You may need to open or short the low pressure switch to do this.
 
Back
Top