• Notice for iPhone users: DO NOT use the image size reduction option when uploading photos to the forum. This causes portrait images to post as landscape. We have added a warning to the image insert pop-up as well.

Retitled: 83 Scrambler resto-mod finally gaining momentum

One of my bigger expenses has been buying new bolts for everything...or at least it seems that way. It's amazing how one of those little "specialty fastener self serve" bags can hold $20 worth of stuff and still weigh hardly anything. Stainless especially. I found a seller on EBay that has great prices on stainless allen head stuff. So I stocked up. Here's an example- 25 5/16X18X1" button head allens for $3.50. You can get enough of the flat head allens to replace all your hinge screws for the same $3.50!!!

http://cgi.ebay.com/ws/eBayISAPI.dll?ViewItem&item=170482854330
http://cgi.ebay.com/Stainless-Steel...483?pt=LH_DefaultDomain_0&hash=item5d2bc24ce3

Check out their store, they have tons of stuff. Shipping is very reasonable too- $5.50 regardless of the quantity ordered.
 
Last edited:
And there's a reason you don't see stainless for chassis stuff, it's not strong enough and SHOULD NOT be used for high-strength applications. It's weaker than grade 5 by a bit I believe.
 
huh.. hadn't noticed that the graded hardware was not available in stainless... good to know!
 
Most stainless is equivalent to ungraded steel, like a grade 3. Not for structural use unless sized appropriately larger.
 
reassembly

after spending a few weeks of intermittent days working on topcoating the frame, I've finally started to get some focused progress going... with some comically bad decisions along the way..

I had a neighbor help me move the frame out of the garage so I could topcoat my axle housings and then "rebuild" all the brakes/hardware in anticipation of setting them up, and then moving the frame back on top of them..

got the axles topcoated and ready for assembly and started laying out all my brake parts, and then reveiwing my manuals/photos when my eyes happened to brush across the words "parking brake"... and I'm sure glad it made me stop to think, "huh, when in this sequence do I reinstall the e-brake cables..?"

turns out they're the FIRST thing you feed back through the backing plate, and without (a) them ready or (b) anything for them to fasten/hold on to, I had to call the neighbor back over to move the frame (again) back into the garage and start assembly, sans brakes..

next error.. ordered the "classic tube" stainless brake lines to re-plumb the chassis before the body goes on.. didn't look closely enough at my order before I clicked "pay", and got the wrong set delivered to the house.. Quadratec helped me out with a shipping label to return them, but still had to order (and now wait) for a second set, which they claim will take 3-4 weeks to get here..

I won't bore you with a thousand pictures of things that I bolted back on, as Raymond's build thread is much more detailed, and I can tell you he expended MUCH more energy and attention to detail than I did.. I've been doing much of the same style work though, with a combination of sandblasting and wire-brushing stuff, followed by spray paint, and then installation..
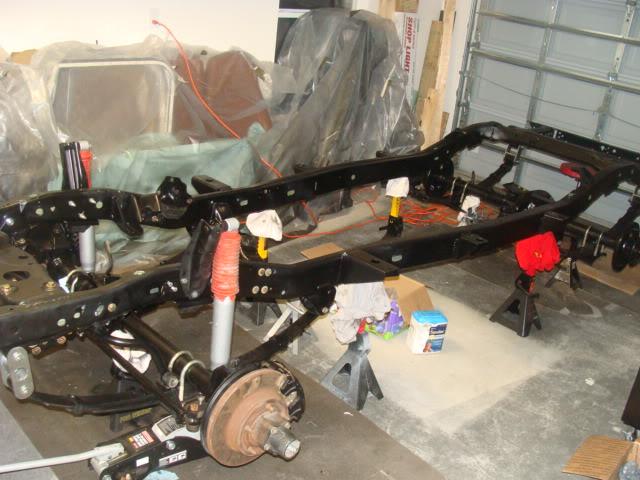
20110623chassisprogress2-1.jpg

bottom line: I've loosely assembled the front/rear suspensions, the steering links, most of the frame bolt-ons, PS gear box, front brakes, and a few odds/ends

for BW.. no Yuengling tonight..
20110623chassisprogressbeer-1.jpg


Some lessons and observations
  • spent about 80 bucks on graded and stainless hardware to replace rusty/ugly original stuff on the chassis, and still came up short a few items.. figure closer to 100$
  • was using "what came off" as the reference for "what to buy", should have gone item by item through the FSM and see how it was REALLY suppossed to be mounted
  • a fully assemble front axles is HEAVY, but I was able to manuever it in small doses using a ratchet strap over my back and legs to lift, but I scratched the hell out of my freshly painted leaf springs doing so
  • my front axle dropped right onto the index pins on the leaf springs, BEFORE I realized I hadn't put the steering stabilize mount on
  • front and rear spring shackles on my Superlift 2.5 inch lift use different lenght bolts, which I didn't remember from installing it back in 2006, found out the hard way (had both front shackles with one mismatched bolt each) and had to do a front/rear bolt swap on each side
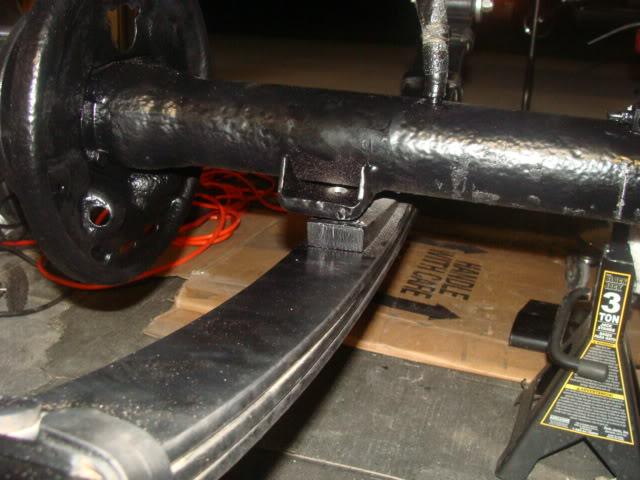
  • my rear axle did NOT fall right onto the index pins on the leaf springs, and it appeard to be about 1/2 inch too wide for the springs, solution: fully install one side with spring plate and u-bolts, and then pull the other spring outboard by hand (had my feet on the side of the diff for leverage) and get the other side of the axle to pop down over the guide pin.. not sure if this is an effect of the "frame narrowing" without the center skid plate in, or just "manufacturers tolerances"
  • I found myself constantly thinking I needed to "remember to do X" later... bottom line; recommend you have a notepad close by to jot down the hundreds of "little things" that pop up as you go, I've been incredibly frustrated with my own lack of organization and inefficiencies..

what's next: still workig on a few bolt-ons, going to start resourcing more of the "plumbing", which is a bit trick (especially when it comes to decision on fuel lines, since I'm doing a 4.0L swap on this install), have to re-seal the front/rear diff covers, clean and reinstall the fuel tank, and start cleaning/ordering parts for the 4.0L install, since the motor is functional, but dirty (and needs the CPS, VSS and other adapters to work on the CJ harness)

 
Last edited:
here's how that rear axle was "off" from the springs.. other side (you can't see in photo) is assembled
rearaxlemount1-1.jpg
 
What's up with you people and your cr@p beer? Yuengling? Shiner Bock? I think I've only seen one IPA in a thread outside of my own! :cheers:

Second, spankrjs DEFINITELY sets the standard. His build thread is like an illustrated FSM.

I know (and admire the fact) that you're trying to reuse as many fasteners as you can, but don't be afraid of using new. Bolts, by their very nature, stretch, in addition to the constant battle with rust. You may end up wasting more time and money trying to recycle, and then end up with a questionable fastener, than just buying new. Anti-seize is your friend. The bolts for the springs I recall being an odd-size that I couldn't source locally and had to order.

I've never put in an axle where everything lined-up without pushing/pulling on something.

I never found myself for want of something to work on when I was in the garage. Sometimes I made shopping lists, but the closest thing to making a "project" list was talking about what I wanted to get done in my build thread!

I have nothing productive to add. :twocents: I can't wait to see how this one turns out! :drool:
 
What's up with you people and your cr@p beer? Yuengling? Shiner Bock? I think I've only seen one IPA in a thread outside of my own! :cheers:
AK- you need to see the last post in my build thread....YUM!:cheers:

Anyways, as far as being organized, I have a locker in the garage that I tape my current "to do" list on. I tend to jump around alot, too much time on one thing and I get frustrated/bored. Keep up the good work, Bush!
 
i have a dry erase board on the wall by my work bench. I find lists get lost, dripped on, covered in grease, burnt etc.
 
IPA... while I'll admit I've enjoyed a few, a beer that was designed to stay fresh on the passage from England to India on a sailboat in that heat doesn't really come to mind as "cool and refreshing" ;)
Seriously, I love craft beers as well, but I'm getting cheaper in my old age!

I'm not reusing that many fasteners.. so far only in a pinch (ie: I somehow ran short of new stuff in the right size and it's not a critical link) but for the most part I'm using new stuff.. cheap insurace, even at the extra expense, plus it looks better.

I've taken to using my (work) notebook... it's a long story, but in the Army many people carry what we call the "green book", which is literally a light green colored hardcover notebook that's big enough to be useful but small enough to fit in a cargo pocket.. they're GSA provided.. I've been using mine from work (since I don't often use it at work, and when I'm in a meeting, I can still look at Jeep stuff ;) ). I just have to be more disciplined about using it.

The other thing I"m considering is moving my (cheaper) laptop onto the workbench so I can look at my (CD) FSM in there..
 
Last edited:
update and some questions

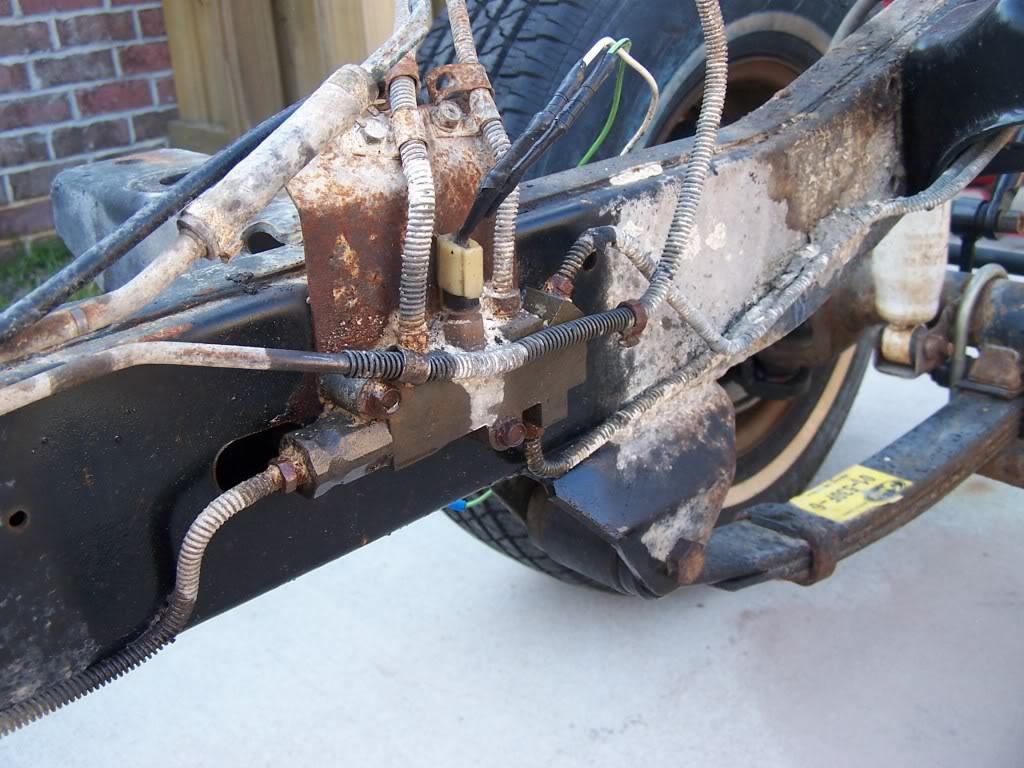
as a point of reference for this discussion, I'll start with this picture.. I was going through the hard drive tonight looking for some reference photos and found this one, which is appropriate for work I was doing today and it hit me HOW MUCH different things are starting to look..

here's a reference photo I took of the p-valve, to show brake and fuel line routing...
100_2577-1.jpg


this week I sent (back) the wrong brake lines from Q-tec (my fault, ordered wrong set) to replace my full brake routing, and in the meantime I'm still working on frame "stuff" in an attempt to reassemble everything that I can before I move to put the drivetrain in, and body on..

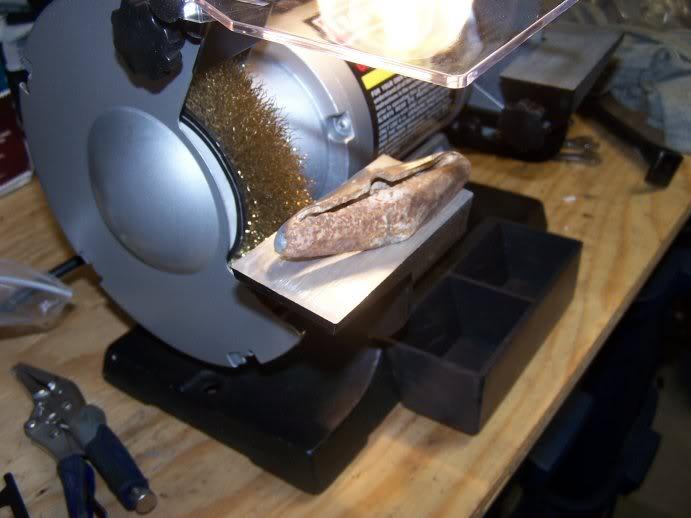
got tired of borrowing one so I bought a bench grinder to help with parts cleaning.. here's some e-brake hardware (before)
20110623ebrakehardwarebefore-1.jpg

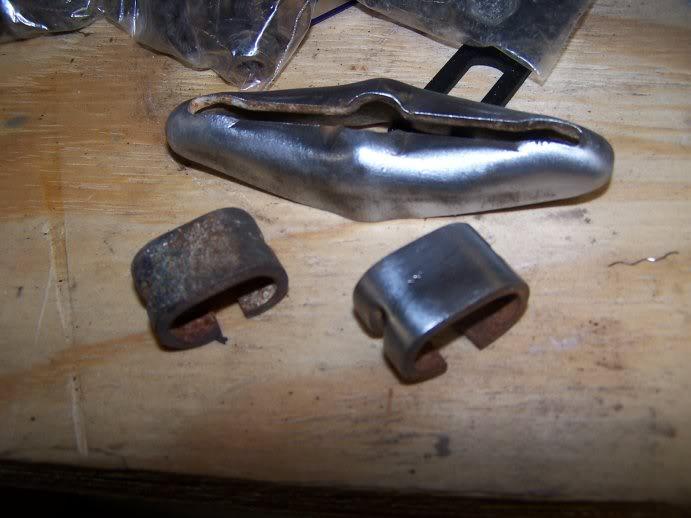
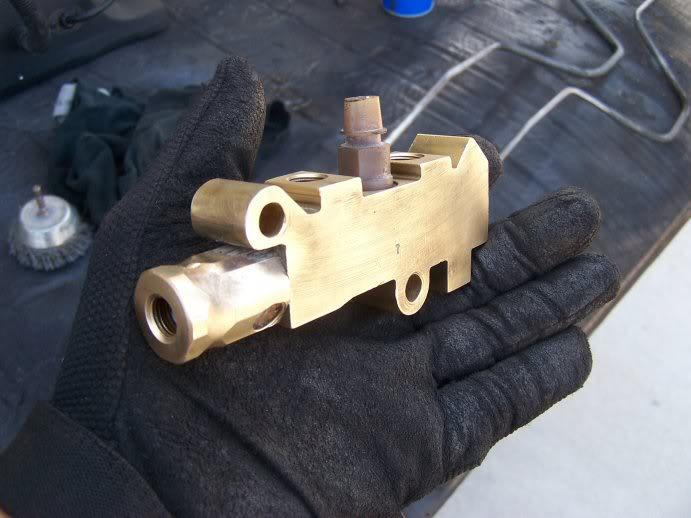
and some pics after..
20110626ebrakehardware-1.jpg

20110626brakevalveafter-1.jpg


you can't see it here but the ebrake bracket has "FoMoCo" stamped into the side, thought that was kind of fun to find under all that corrosion.. I'll have to use my dremel to get the inside edges of the links..

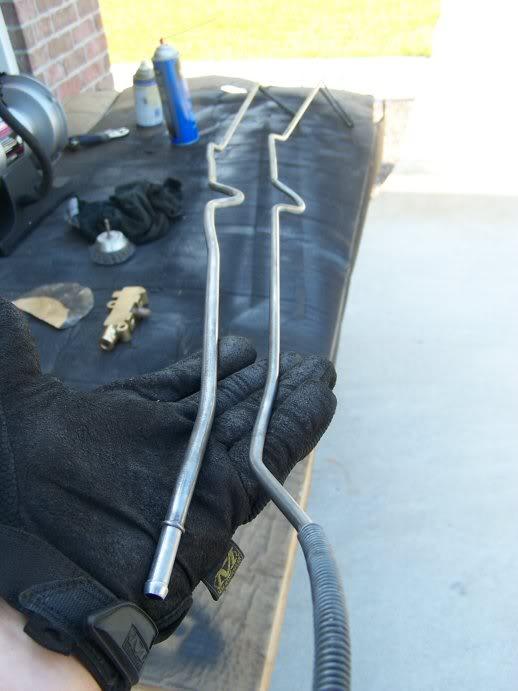
I also cleaned the fuel return/vent lines, visible dirty and not functioning in picture above and after below (inside with WD40 and brake parts cleaner spayed through until I got clear liquid coming from both ends) and outside (with the bench grinder and my drill/wire wheel), and they cleaned up nicely.. hopefully that does the trick since replacements were looking at about 70 bucks (each).. cost like that ADD UP on a frame-off!!
20110626fuelreturnlines-1.jpg


and the QUESTION: on most everything I've put back on so far, I've blasted/grinded and then painted and then reinstalled.. on the fuel lines, I had lots of dirt/ugly undercoating, but not much in the way of "rust", so I'm wondering if they're stainless from the factory or possible the benefit of an undercoating job? Either way, would you PAINT these to protect them, or is there some other means to preserve their function and looks?

Same goes for the ebrake hardware and cables.. they had lots of crud on them, and will get that way again because of how they hang out there under the truck, but is PAINT the right answer for them or is there another preservative technique? I kind of wish I could keep that clean "brushed" hardware look to them ;)

please let me know if you've had good/bad experiences with this
 
next project, and a question on it

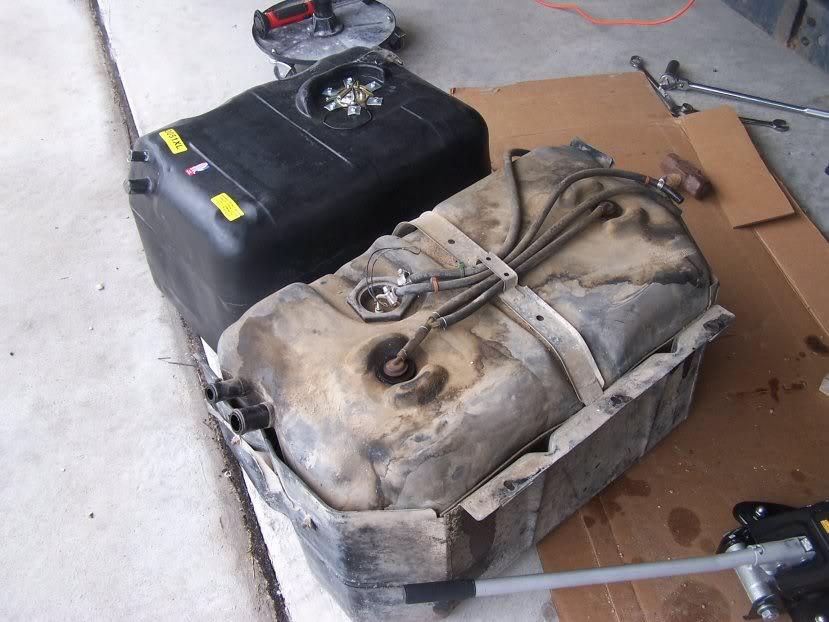
among my next priorities of work will be to clean and re-hang the factory 20 gallon fuel tank so I can finish my fuel line plumbing...

two questions:
1. does the poly or plastic tank separate from the protective "tub" it's sitting in? (disregard teh aftermarket 22 gallon tank in this pic, I've since sold it)..
2. does anyone know what those two bolts that are on the left side of this tank as you see it here (below the filler nexts) used to attach to? They're just holding a broken flap of plastic right now..
20110206comparingsizes-1.jpg


I have all kinds of rocks and dirt down in the cracks between the actual fuel tank and the "tub" it sits in and would like to clean it as best is possible, paint (at least the tub part and the metal hardwary) and get her re-installed, but don't want to damage the thing trying to force it apart.. didn't see any answers in the FSM on this..

Raymond, if you're reading along, any reason you mounted your tank after your tub? I figured it would be easier to do it on a rolling chassis than an assembled truck but wondered if there was something that would prevent this? Dont' want to have to install it twice..
 
Last edited:
IIRC, you just remove the bolt holding the strap over the top and the tank pulls out of the skid. There's a rubber insulator in there too. Don't remember on the two bolts.

I installed mine before putting the body back on.
 
among my next priorities of work will be to clean and re-hang the factory 20 gallon fuel tank so I can finish my fuel line plumbing...

two questions:
1. does the poly or plastic tank separate from the protective "tub" it's sitting in? (disregard teh aftermarket 22 gallon tank in this pic, I've since sold it)..
2. does anyone know what those two bolts that are on the left side of this tank as you see it here (below the filler nexts) used to attach to? They're just holding a broken flap of plastic right now..
20110206comparingsizes-1.jpg


I have all kinds of rocks and dirt down in the cracks between the actual fuel tank and the "tub" it sits in and would like to clean it as best is possible, paint (at least the tub part and the metal hardwary) and get her re-installed, but don't want to damage the thing trying to force it apart.. didn't see any answers in the FSM on this..

Raymond, if you're reading along, any reason you mounted your tank after your tub? I figured it would be easier to do it on a rolling chassis than an assembled truck but wondered if there was something that would prevent this? Dont' want to have to install it twice..

I put my tank back up after I put the body on so that I would not screw up and put the hose clamps facing up, where they would be impossible for me to remove once i put the body back on :rotfl::wave:

I don't know much about the factory 20 gallon tanks, but i know that it took me and JeepAddict about 1/2 hour of pulling and prying to remove the plastic tank from the metal skid;) Those tanks get stuck inside those skid plates pretty good:(
 
IIRC, you just remove the bolt holding the strap over the top and the tank pulls out of the skid. There's a rubber insulator in there too. Don't remember on the two bolts.

I installed mine before putting the body back on.

reference the two bolts, I was thinking it might have been where those flat plastic/rubber cavity covers go in the back corners (fitted between the back end of the rear wheel well and the rear corner of the tub to prevent dirt/water from getting up the backside of teh filler neck and tail light assembly....?
 
I put my tank back up after I put the body on so that I would not screw up and put the hose clamps facing up, where they would be impossible for me to remove once i put the body back on :rotfl::wave:

I don't know much about the factory 20 gallon tanks, but i know that it took me and JeepAddict about 1/2 hour of pulling and prying to remove the plastic tank from the metal skid;) Those tanks get stuck inside those skid plates pretty good:(

thanks, that's enough to make me try and separate it to clean it... and I'll drive on with installing it to the chassis..

one of my challenges in this build is I'm doing a 4.0 swap at the same time, so I have to try and think through/anticipate things like the fuel delivery system conversion (external vs internal fueld pump, inline filters, routing, wiring, etc) as I go.. hopeful that I'm not biting off more than I can chew :fingerscrossed:

if anyone has a link to a write up on in-tank fuel pump conversions in a CJ tank, please pass them along
 
reference the two bolts, I was thinking it might have been where those flat plastic/rubber cavity covers go in the back corners (fitted between the back end of the rear wheel well and the rear corner of the tub to prevent dirt/water from getting up the backside of teh filler neck and tail light assembly....?

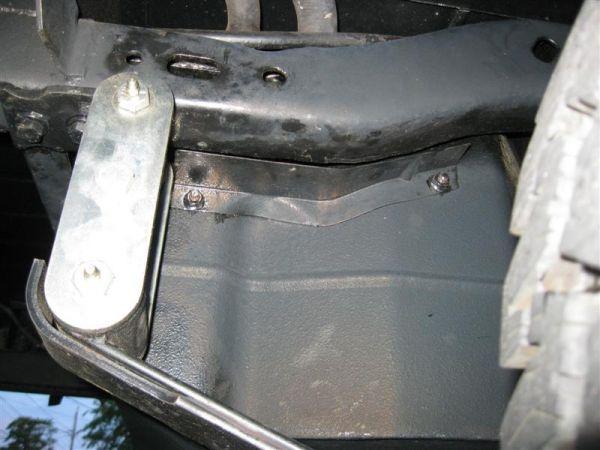
The 2 studs were used for a small metal shield to prevent dirt/water from getting up between the frame and the tank.

Tank_shieldJPG-1.jpg
 
thanks 4Miles.. that's kind of what I figured, or was trying to describe...

anyone got input on painting or preserving the fuel return lines?
 
if anyone has a link to a write up on in-tank fuel pump conversions in a CJ tank, please pass them along

Did that on my Waggy. Talk about 10 lbs of crap in a 2lb bag... It's not impossible, but trail serviceability goes down IMHO.

Here's how I did it...this is in a Waggy poly tank, there's a service hole in the floor. On my Scrambler I modified an aftermarket steel tank and used a GM fuel module- much better.
Waggy
2834785870041433204S600x600Q85.jpg

2268791640041433204S600x600Q85.jpg

Scrambler
2309745760041433204S600x600Q85.jpg

2080984370041433204S600x600Q85.jpg

2665098260041433204S600x600Q85.jpg
 
Back
Top