• Notice for iPhone users: DO NOT use the image size reduction option when uploading photos to the forum. This causes portrait images to post as landscape. We have added a warning to the image insert pop-up as well.

Retitled: 83 Scrambler resto-mod finally gaining momentum

from purchase til now...

been thinking of doing this for some time, and other events have me thinking about it again so, trying to capture a "best guess" on what I've done to the truck and general prices on what I've spent (not including insurance, registration, storage, towing, etc)

I haven't included shop fees for the work I did in military hobby shops, costs of specialty tools, or re-costing of parts that I might've installed twice due to mistakes/learning in the first try..

where I didn't remember the cost, I built a shopping list on 4wd.com and used current prices, as that's where I sourced alot of my parts..

  • initial purchase price (6500)
  • superlift 2.5 inch spring lift and new shocks (400)
  • replace front brake rotors, pads (140)
  • replace front tie rod ends (30)
  • replace front bearings (5)
  • replace front ball joints (75)
  • replace front sway bar bushings and links (25)
  • rebuild rear brakes 100% new hardware (45)
  • turn rear brake drums (14)
  • replace font/rear u-joints (15)
  • new flywheel and pilot bushing (145)
  • new clutch (242)
  • remove, rebuild, replace T5 transmission (1200)
  • install new painless wiring harness (500)
  • replace driver's seat with used CJ seat (free)
  • install .75 inch heavy duty and greasable shacklesk (170)
  • install new rear spring plate (15)
  • install Daystar 1 inch body lift (150)
  • install rebuilt MC2150 carb (300)
  • install new tailgate cables (14)
  • ongoing projects: rear main seal, new motor mounts, and new valve cover kit (~200)

I think that brings me to about 9700.. and I'm sure I've underestimated by at least 1/3 so.. let's just say that I'm easily into this thing for 12k or more
 
rear main seal replacement

first things first.. found a great writeup at this link:
http://www.neow.org/rms1.html

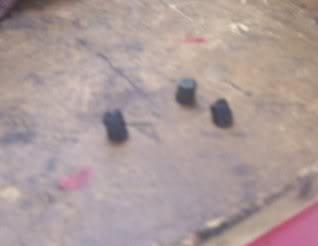
so here we go.. as I described last week, had figured I'd replace the valve cover gasket first to confirm or deny the source of my leak.. and in the process of removing the cover I managed to break/snap three of the little "nibs" that hold it in place..

02Forthewantofavalvecover-1.jpg


so that brought on an order to Qtec for an aluminum replacement cover kit, a week's delay in solving that problem, and a decision to go ahead and executed the RMS replacement anyway..

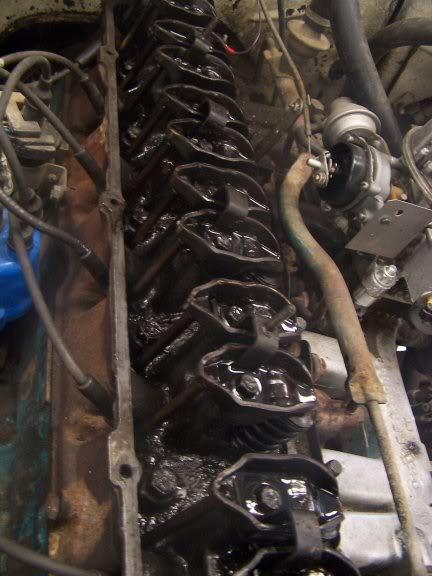
while I had the valve cover off, noticed that the valve train looked like it had been attacked by the Exxon Valdez... sort of a tar-y build up on bolt heads along the cylinder head.. which came off easily by finger contact, but I decided to try a chemical cleaning..

01Valvetrainbeforeflush-1.jpg


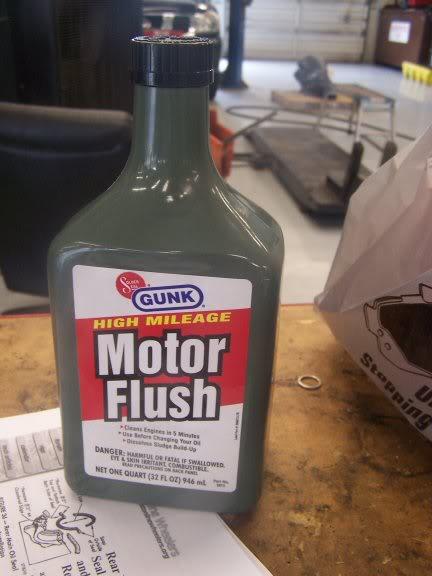
so I bought bottle of this stuff:
02Socalledenginecleaner-1.jpg

which is basically a quart of diesel fuel to run in your engine..
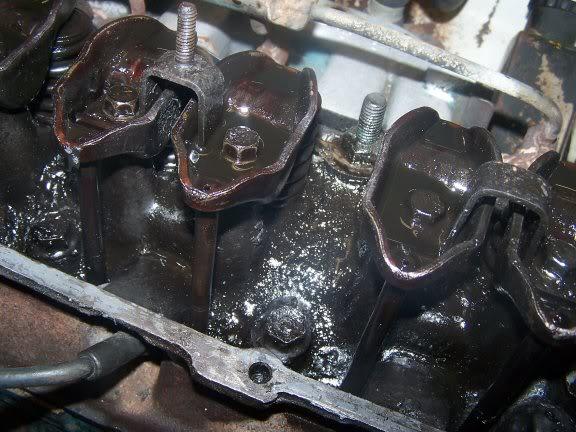
it calls for adding it to your oil with the engine cold, then running the engine for 5 minutes, and then executing your normal oil and filter change.. I did this, with the following results:
01Valvetrainbeforeflush2-1.jpg


which you can read to mean: NOTHING. I even poured the stuff directly over the valve train as I had the VC off and then replaced the cover loosely, followed the steps, and then pulled the VC again to see.. no change. So.. maybe it takes more repetition, but I'd tend to think that it basically does very little.
 
on with the show

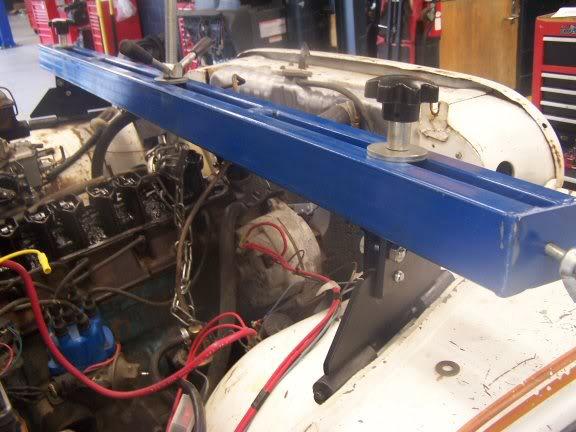
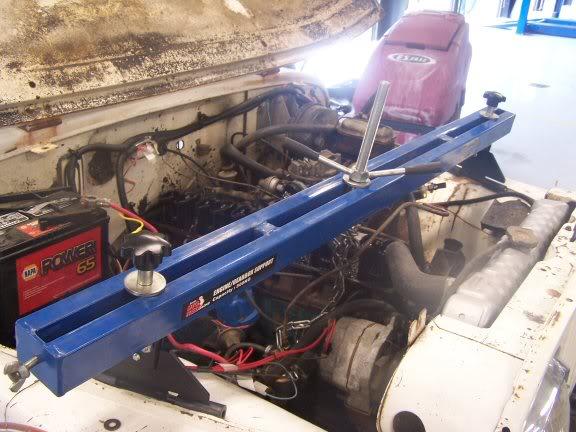
next, I started prepping for oil pan removal, which requires removing the pass side motor mount.. in lieu of an engine hoist/cherry picker, I used one of these instead:

05EngineHoist-1.jpg


05EngineHoist2-1.jpg


it's designed as an engine brace for imports, but worked well enough to hold the big 6, was easy to hook up, and most importantly, did not have any legs which slid under the vehicle to get in the way of moving around under there.. made access underneath VERY EASY.. nice piece of gear from the Tuner Boy community that came in handy...

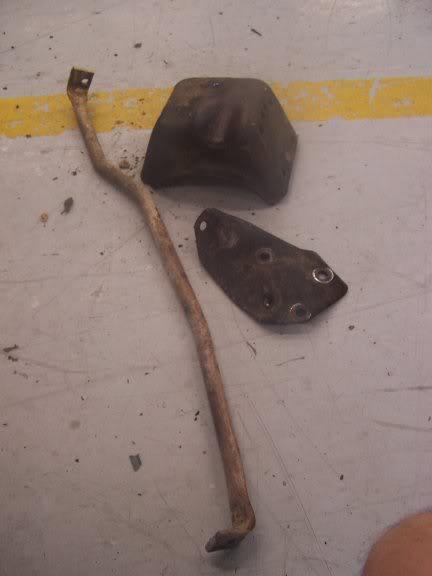
I was a little nervous working under the vehicle with the brace securing the engine on top of me, but it held fine.. followed the instructions in the link posted in my previous post, which were excellent, and the motor mount and cross brace came out easily.. based on recommendatons from this board, I'd planned to replace the motor mounts while I'm in there so... these will be sandblasted, painted and reinstalled wiht the new mounts..
07MotorMountsandcrossbarbefore-1.jpg


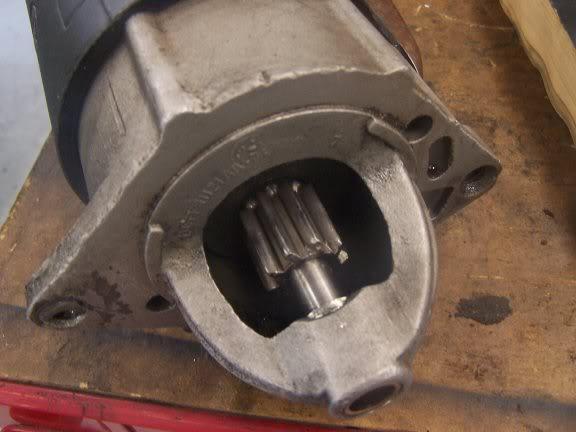
got the starter out.. I've taken this thing out many times before due to aformentioned alignment/shim problems, and I'm wary of stripping out the threads in the bellhousing, so I'm hoping it goes back in okay.. in the meantime, you can see some of the gear wear on the starter gear.. not as bad as I thought it would be based on the sounds it used to make..

03StarterGearwear2-1.jpg
 
the hardest part of this whole job

was getting the oil pan off and the block prepped..

it wasn't technically hard, it just required alot of time, patience, and muscular effort as you do the Houdini routine from above and below the motor..

remove all the pan bolts (there are alot, most of which are 7/16, four of which are 1/2), and then start a very laborious separation of the oil pan from the block, which are now cemented together by a 26 year old set of very snug gaskets.. I used a hammer, a very small screwdriver, and a LOT of taps to start wedging between the two.. then moved to a gasket scraper with hammer taps.. got the passenger side separated first (easier access from over the fender without the exhaust/intake on that side), and then carefully started prying, avoiding bending the pan..

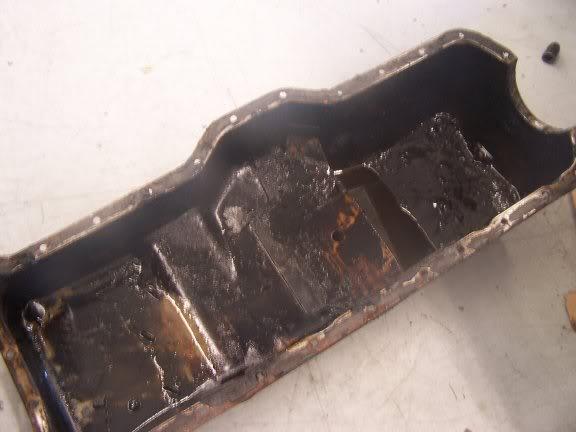
07OilPanbeforecleaning-1.jpg


cleaning this oil pan probably consumed 2 total hours as I had to hand scrape the gasket off, and then clean both the inside and outside surfaces.. outside for spray paint, inside to de-gum it and make clean for installation..

a bench grinder with a wire wheel/brush might've been handy here... or a drill bit (I don't have my power tools yet as my house isn't done)

next was the pure hardest, and certainly the dirtiest part of the job.. scraping the block surface.. your front and rear rubber gaskets will most likely stick to the block (won't come off with the oil pan), and some gummy residue of old cork mixed with years of hot oil remains along the rest.. so I sat under the truck with a safety razor/scraper for about an hour, letting my arms go to numbness and muscle failure over and over..
08aboutanhourofthis-1.jpg

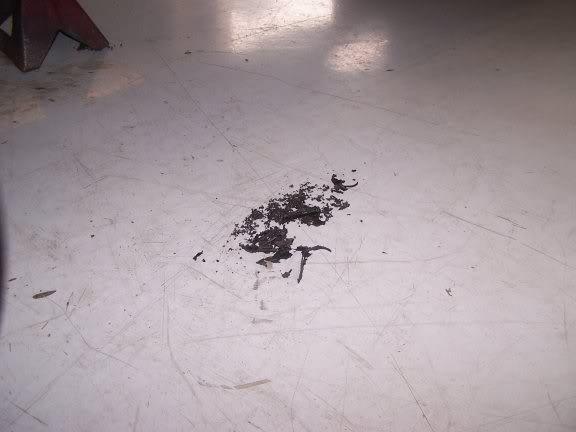
this represents about 10% of what I scraped off the thing... the other 90% went in my hair, face, eyes, and other piles on the floor I'd already swept up..
09Aboutonethirdoftheresidue-1.jpg


no technical advice here but, have a shop light (hard to see under there), be patient, and use lots of fresh razors.. swapping them out saves time in the long run..
 
RMS kit.. buy two

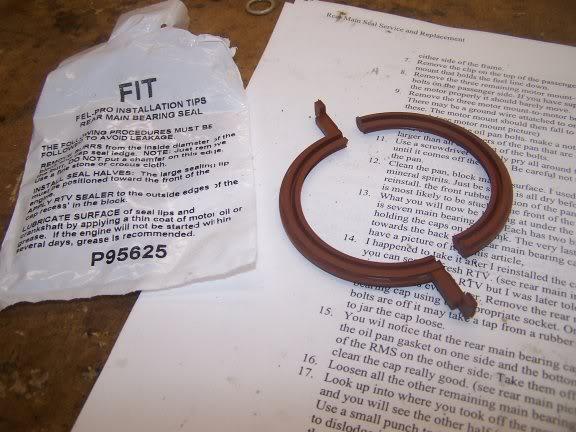
so here's the RMS kit:

08newRMSkit-1.jpg


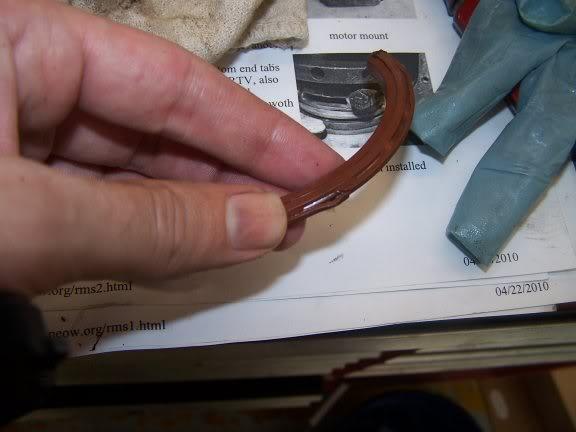
here's a comparison old and new:
10OldLowerRMS-1.jpg

10NewLowerRearMainSel-1.jpg


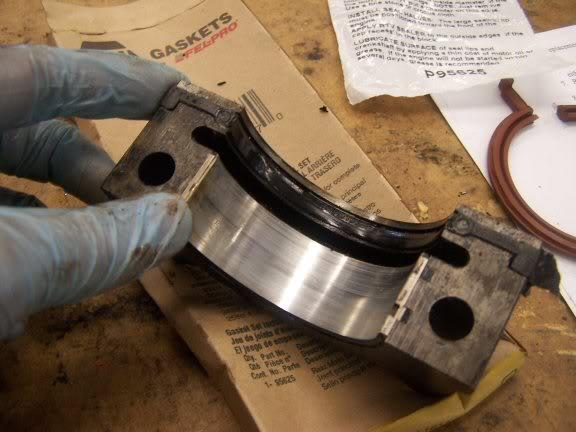
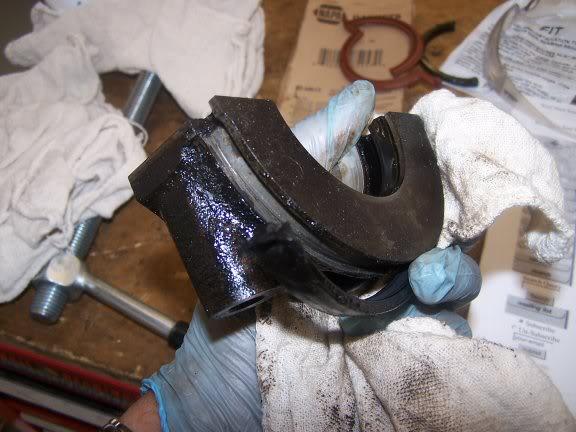
here's where the rear pan seal comes off with the bearing cap:
12RearCapandOilPanSeal-1.jpg


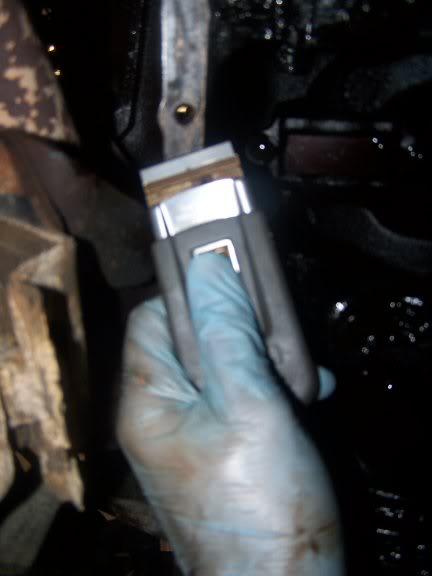
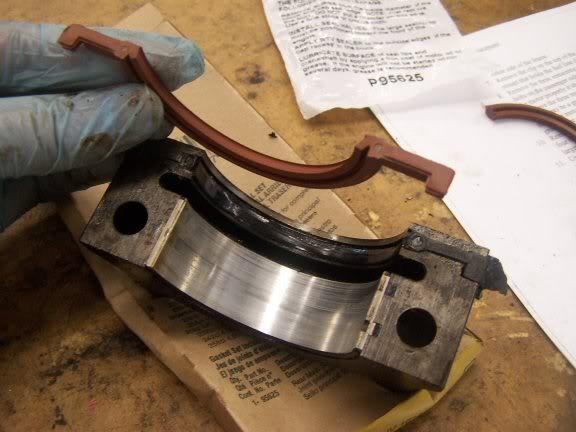
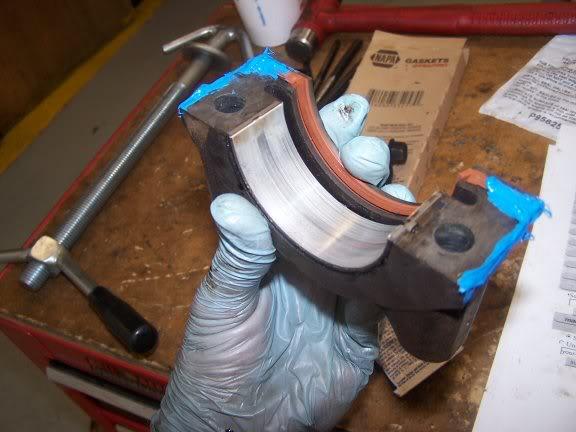
my new kit was a "one piece" oil pan seal, so the gasket you see above is replaced by what my hand is holding here:
13NewRearSealGasketonepiece-1.jpg


and here's why my post title says "buy two".. if you damage the seal at all during installation, might as well get a new one.. I ordered (thankfully) two from Napa before I got started, and as I tried to seat the first upper seal, managed to gouge it:
13FirstInstallFailureanddamagedseal-1.jpg


here's where you apply the RTV to the bearing cap and the lower RMS.. I also put fresh RTV in the grooved backside of the bearing cap that the new rear oil pan gasket sits in
14RearSealInstalledandRTV-1.jpg


so what worked? lots of dish soap coating all contact sides of the RMS that slide into the upper bearing.. you apply fresh oil to the actual gasket surface, but soap to the top/back to slide it in.. second RMS went in much easier with more soap (and pushing from the opposited side to avoid whatever sharp edge caught me in round 1)
 
oil pan back in

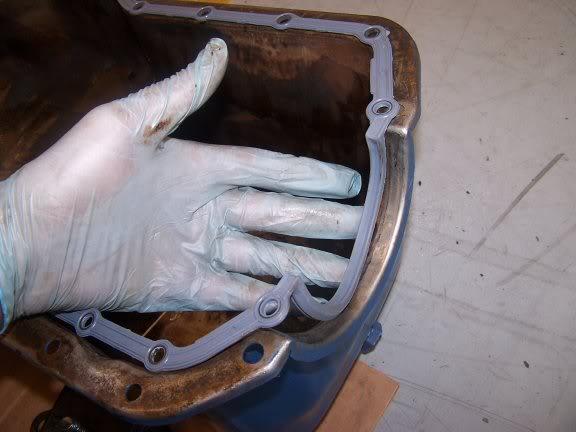
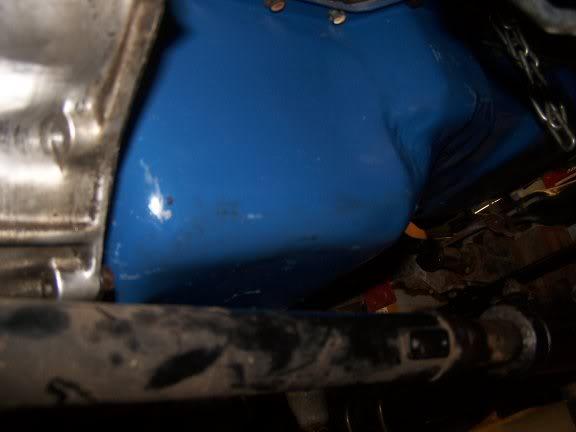
not a great pic, but all I'd say on the oil pan reinstallation is:
1. have a helper to assist in the manipulate the rather bulky pan around in the cramped quarters under the engine and help you get a few bolts threaded to hold it
2. I used gasket spray adhesive to hold the new gasket in place while all that manipulation was going on.. worked well
3. Rustoleum has an off the shelf blue color that is not nearly as aqua/green as AMC standard is, but is a cheap enough alternative for folks like me that don't care for total accuracy..
15OilPanInstalled-1.jpg


going to resintall the motor mounts tomorrow and move on to installing the alumy valve cover.. hope to have her running again tomorrow afternoon..
 
no, I'm not dead...

but it's been nearly, and rapidly, five months since I updated this thread... largely because very little has happened with the Scram in the meantime.. I did get the alum valve cover installed, but didn't get around to reinstalling the starter or getting the truck fired up until sometime in August, which it did just fine.. the truck then pooled some oil under the oil pan :angry: but later inspection revealed that it was (I think) the drain plug, and not the oil pan or RMS.. at least I hope so..
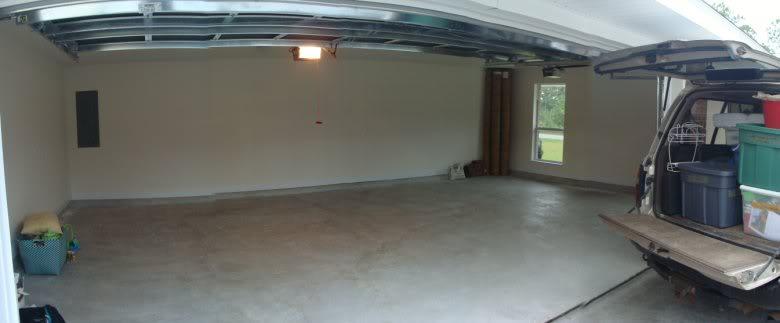
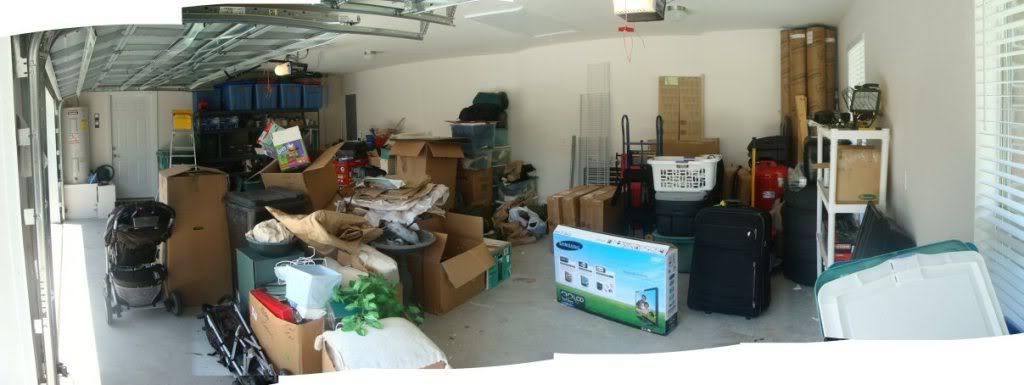
in the meantime I've done everything but work on the 8, including finally closing on our home, moving in (and all the BS that entails.. I could rant for awhile about how much I hate moving and the home purchase/ownership process and how it absorbs nearly every weekend imaginable).. been tied up for awhile just getting some basics done around here

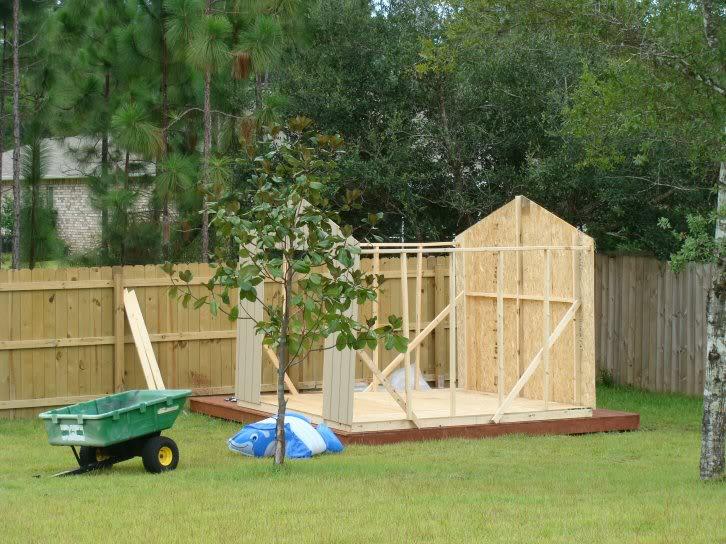
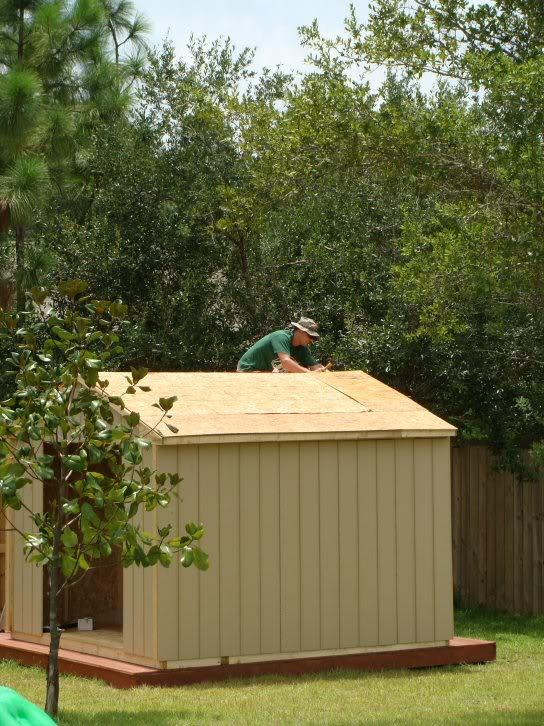
built a shed to clear out the garage.. here's what it looked like the day we moved in (so the mess began):
Garagethedaywestartedmovinginresized-1.jpg


here's what it looked like after two months of unpacking and moving sh-t around from one corner to the other
Garageafterabouttwomonthsoflivingintheho-1.jpg


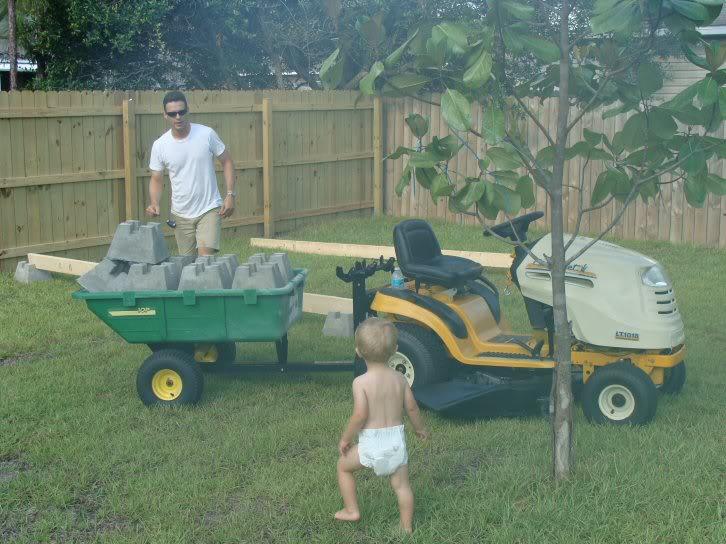
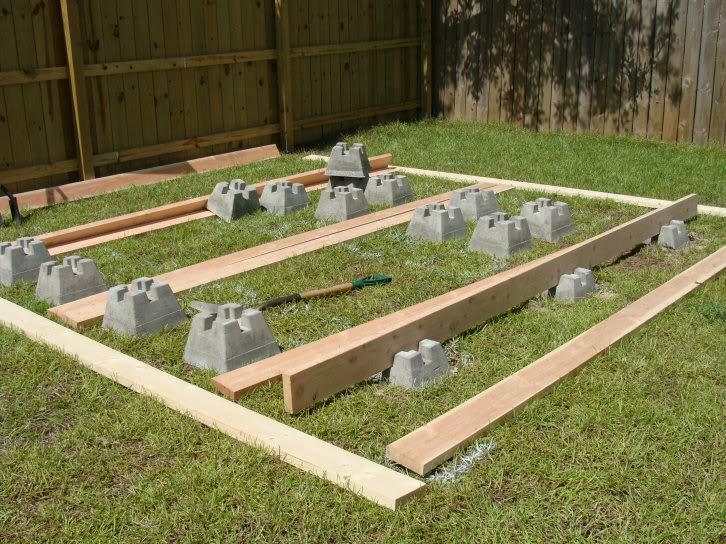
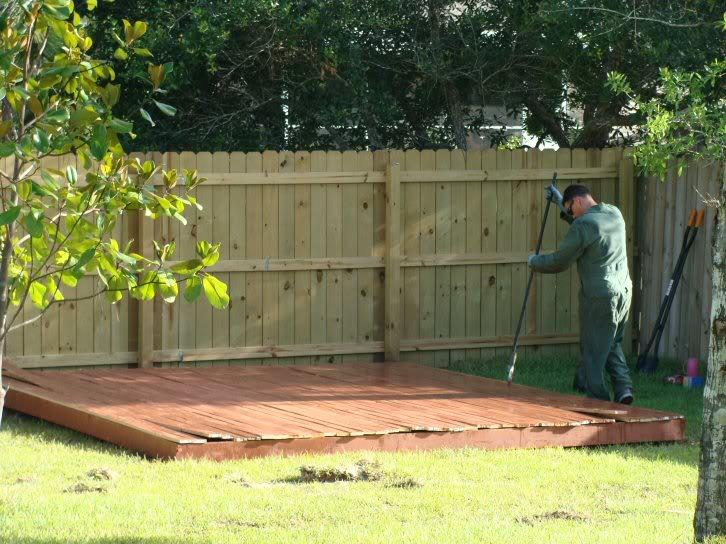
so I built a shed to get at least the garden stuff out of it, which needed to be leveled, so I built a deck first:
201007DeckHelper-1.jpg

201007Deckbuild004-1.jpg

201007strainingdeck002-1.jpg

201007ShedBuild001-1.jpg

201007ShedBuild005-1.jpg


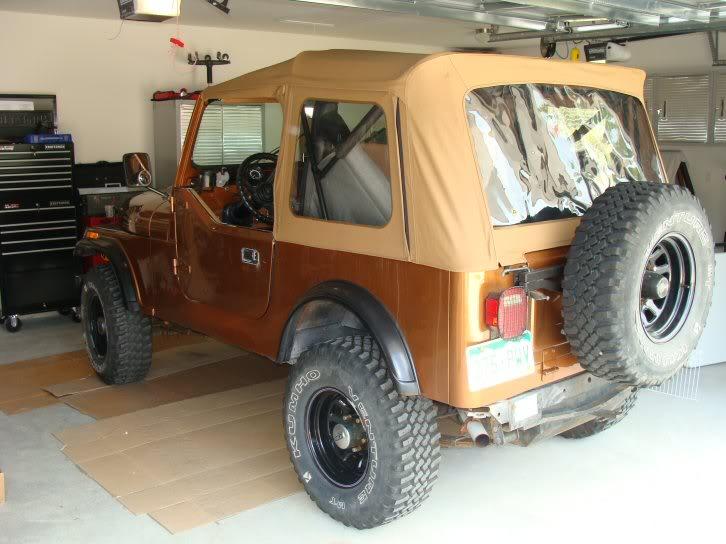
but I did finally get some space in my garage to pull a vehicle in, and with the FLA weather finally cooling to something tolerable, pulled my CJ7 out of low-use storage and put a new Supertop on it..
20100917Newsofttop-1.jpg


I continue to work on organizing the garage and hope to have the 8 home shortly, with the idea being the if it's close by, I'll be more inclined to progress on it..
 
getting us back up to speed

if you happened to read this thread over in Scramblings, you know I recently and finally put the Scrambler on the road :woot:, was driving it back/forth to work and identify (no shortage of) things to fix after five years of sitting in shops/storage...:banghead:

most pressing issue was an obvious and LOUD mechanical whine from the drivetrain.. thanks to great help from the forum and my efforts to "think my way through" the problem, I finally got it up off the ground today and on a lift to see if I could isolate the noise...

2 points for Randy. From his post:

"The other thing is "load related", and that could even be the rear end. Noise will travel up the driveshaft and really fool you".​

took it over to the shop during lunch, put it on lift, checked xfer case fluid (full and clean looking), greased all u-joints and drive shaft fittings, and then check rear diff fluid... hmm, feels low! Add some, then more and finally a whole bottle of 80W-90.. in fact a complete bottle of 80W, until the leak reappeared at the pinion seal..

lifted tires off ground, jumped in to start it and "drive" it, no start.. wrestle with bad battery/starter solenoid, battery connections for 10 minutes..:banghead: THEN start it, put it in gear, get it to 4th and 5th gear.. definite noise, and definitely from the rear diff..

as Randy noted, noise can travel up the shaft, well, I think even some vibration was travelling up the shaft, and hopefully not rattling other components loose, but for sure, my rear end is hosed..
 
Just a WAG, but if the pinion seal is leaking, could its damage have been caused by wore out pinion bearings? If the R & P don't look bad, you can just change out the 2 pinion bearings and the two carrier bearings for about $80 in parts and be back on the road quick and quiet:cheers::twocents:
 
I'm not schooled on diffs at all so, this will be (yet another) adventure in discovery learning for me.. I can tell you that it was shaking like hell when it was running with wheels off the ground, you could feel the vibration/lash through the carrier.. all of this may be moot anyway because...

as luck would have (or not have) it, I actually just purchased and received an 86 CJ Dana 44 rear end from Charlie V on this forum (owner of the "bread truck" 4BT scram in Mass).. it's geared (I think) the same as my current AMC20, but has no brakes.. the only reason I question the gearing is that my AMC is stamped "B", which tells me it's geared at a 3.31 open diff... but it sure seems to wind up rpms quickly, I could give you an approximation of speed/RPMs if either my speedo or tach worked, but I'd say it's working pretty hard in 5th gear at 50mph..running 235/75/15 tires... perhaps I'll do the billy bob test and spin the tires/watch the driveshaft rotation

I also need to do some research on whether 20/44 brake parts are interchangeable, and probably commit a weekend to do the entire axle swap.. I just put brand new brake hardware on my 20 and turned the rotors.. the brake hardware part numbers are different, so I don't think they swap, but wondering if the drums and pads do?

I also bought a set of braided stainless extended lines via a Polarfire link so, probably a good time to make that swap as well..


all of this was one of my "get to it when the time is right" projects whose time now may be "right" by force

did I mention this truck feels like work to me?
 
Last edited:
Glad you found it. At least you have a spare, and a better one than is in there now. It's easier to change a whole rear end than to change bearings.

If you're unsure about the gearing, pull the cover and look for the markings on the ring gear. You'll find a stamp that has a 43-13 or something like that. Divide the bigger number by the smaller number and you'll get the ratio.

I don't know about the brake interchangability, but I'm sure someone here will chime in.
 
I'm glad you got to leave the "beating" thread behind for the "resto" thread!

Keep the progress coming as it *can* happen.
 
hmmm.. just realized about the first 1/2 of this thread is now red "x"s for pics, not sure what happened.. if my links are broken or if I've exceeded my limit?
 
hmmm.. just realized about the first 1/2 of this thread is now red "x"s for pics, not sure what happened.. if my links are broken or if I've exceeded my limit?

Probably time for a new picture server....

Bushamster6 said:
did I mention this truck feels like work to me?

Glad that you found it, But try not to think of it as work, at least not 'Bad' work
Look at this as a great learning oportunity...frustrating yes, but you have learned alot!:woot:

As for the brakes, I cant tell you about the interchageability of them.
there is a chance that the brakes will interchange, as long as the D44 is from a CJ-7.
What parts are missing on the D44? lets start there.
Can you post a picture of the D44?

Your doing great :thumbsup: keep up the good work and Remember, you not just building a Jeep, but a family member. :cheers:
 
Last edited:
If you have to re-gear. You can get the rear axle brakes and all ready to go, and then install the axle. If you take out the front drive shaft you can go for a while with just rear 2WD.

You could even leave the shaft in, but you have to trust yourself and others who drive it not to put it into 4wd. At least leave the front hubs unlocked.

That should let you get back on the road quickly.

Looks like you have a nice ride. But yes it is frustrating to get all of those little issues fixed, but oh so satisfying when they are.


Carl
 
thanks guys.. I do appreciate both the technical assists and the inspriational messages..

tracking on the matching gears vs not engaging 4wd.. I think my fears may be exagerrated, I was driving home last night and all the "work" I was hearing may have been whining differential, not engine RPMs.. plus, with no working speedo or tach, it's futile to speculate on it now.. will confirm when I do the tear down

this process has been a reinforcement of the lesson I have to keep learning.. it's usually the simplest answer first..
- which driveline component did I know had a leak? rear diff
- which driveline component had the only wear in the last 5 years (from towing)? rear diff
- which fluid level did I check last? rear diff
- what was one of the only two components I hadn't replaced or rebuilt in five years? rear diff (plus t-case)
- of those two unserviced components, which has a reputation for being weak? rear diff

then again, we'll see what happens when I do get this thing swapped out, hopefully THEN I won't have to isolate any other issues/noises in teh drivetrain so I can tackle other (hopefully smaller) problems
 
two steps back...

spent the last few weeks with the Landcruiser occuppying all the workspace in my garage while I swapped a radiator and rebuilt my PS pump.. not hard work, not cheap (Toyota parts cost > Jeep parts costs), but it took me a long time since I'm not "familiar" with the Yota.. could do the whole thing again in one day if I had to..

so, today I started to prep my garage for the rear axle transfer (swapping a used Jeep CJ D44 for the existing/bad AMC20)..

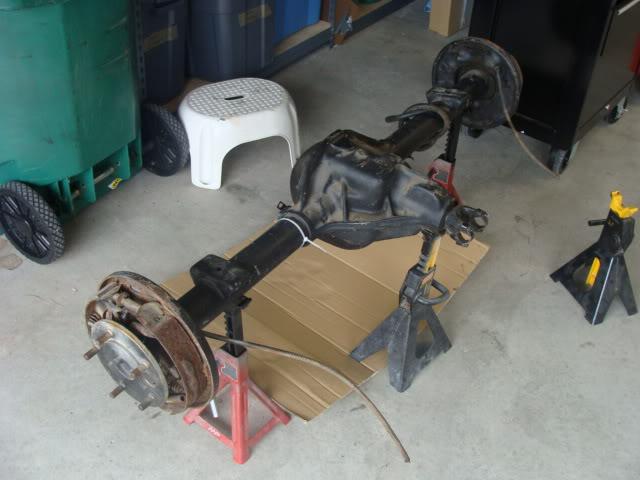
put the axle on stands to get it out of the way and elevated to do the brake parts swapping..
20101218Axleonstands1-1.jpg


I confirmed that it IS in fact a 3.31 geared axle, so that should match my front/factory setup..

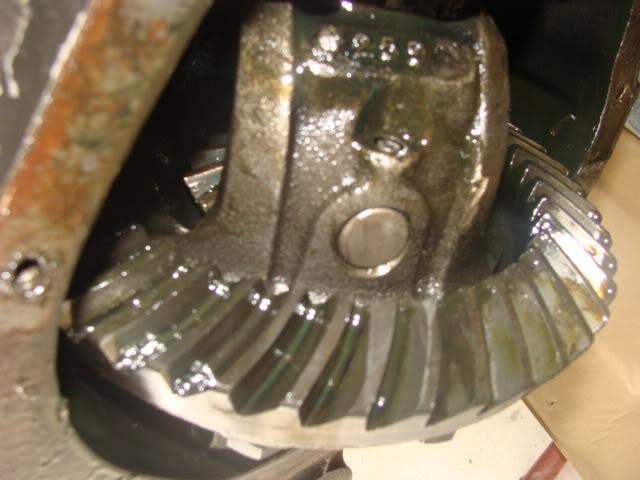
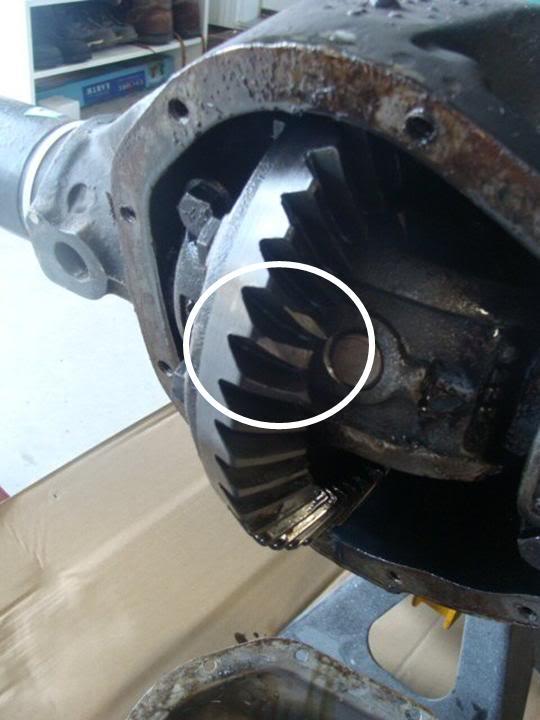
decided I ought to confirm it was empty of gear oil and pull the cover to have a look see, and this is what I found:
20101218ringgearteeth4-1.jpg

Slide1-1.jpg

I have at least three bad or damaged teeth in the ring.. :banghead:
can't tell yet if the pinion is damaged.. and without experience, I'm only guessing this is a "bad" gear, but.. since the axle is out of the truck, it makes no sense to me to install it in anything other than fully capable condition

so, instead of spending my day swapping brake parts from axle to axle, I'm now further backwards than when I started this morning..

  • I've never done work on an axle before
  • even the Moses Ludel restoration guide recommends paying for a pro to do this
  • replacement ring and pinion will cost as much or more than the axle itself
  • this opens of the can of worms of "should I put a locker in at the same time" and..
  • what else should I do "while I'm in there"?
 
Last edited:
That's a PIA. Post up in the "Wanted Section", you may find a set for close to free in that ratio.
 
I think I have a set of used 3.31 gears in my garage...I'll check later today.
 
Back
Top