• Notice for iPhone users: DO NOT use the image size reduction option when uploading photos to the forum. This causes portrait images to post as landscape. We have added a warning to the image insert pop-up as well.

Spankrjs' 1984 Long Term Project

Thanks Polarfire, Spankrjs I also just tighten them to the point that their tight yet allow movement. It didn't make sense to tighten them so tight that the sleeve and shackle allowed no movement.

Seems to be a bit smoother now, but no where near as good as the Rubicon Express lift on the Red Scrambler:thumbsup::twocents::cheers:
 
I decided to tackle one more major project before the Sand Blast trip, changing all the body mounts. Nothing like doing something at the last minute!!!! I have a few random squeaks and bangs, and the original rubber body mounts are pretty deteriorated, so hopefully this will help.

I installed a Daystar 1" body lift/body mount combination. Even with the stiff 4" lift springs, the front tires will hit the fenders if you get crossed up, so the extra clearance will be welcome.

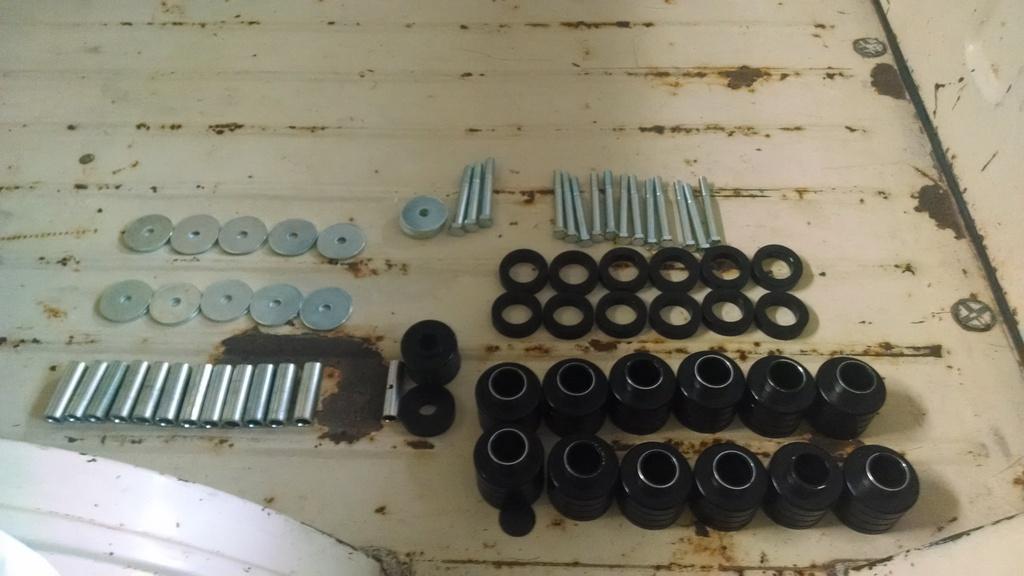
Picture of the kit contents:

IMG_20150721_174334122_zpsz7cod3uh-1.jpg


Pretty basic install. You have 12 of the same mounts, 1 special grill mount. The grill mount, and on this Scrambler, the rear cross member body mounts, use the included larger 7/16" bolts. Make sure you check the washers, there are only 6 of them that will work with the 7/16" bolts!!!


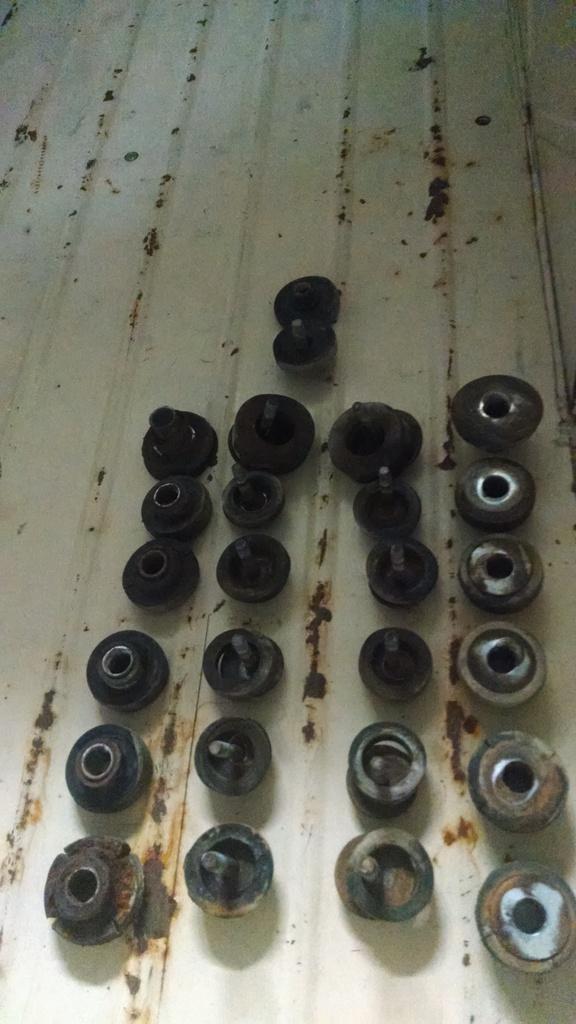
And the money shot, all the body mount bolts came out no problem. They just came right out, no heat or lube necessary, just a 3/8 ratchet. This Scrambler has been a pleasure to work on!!! I did "cheat" - I removed all the bolts the night before, ran a tap through the captured nuts, and put anti-seize on the threads. But, even on the initial bolt removal, the bolts came out easy.

IMG_20150721_191810323_zpsicqg9twg-1.jpg


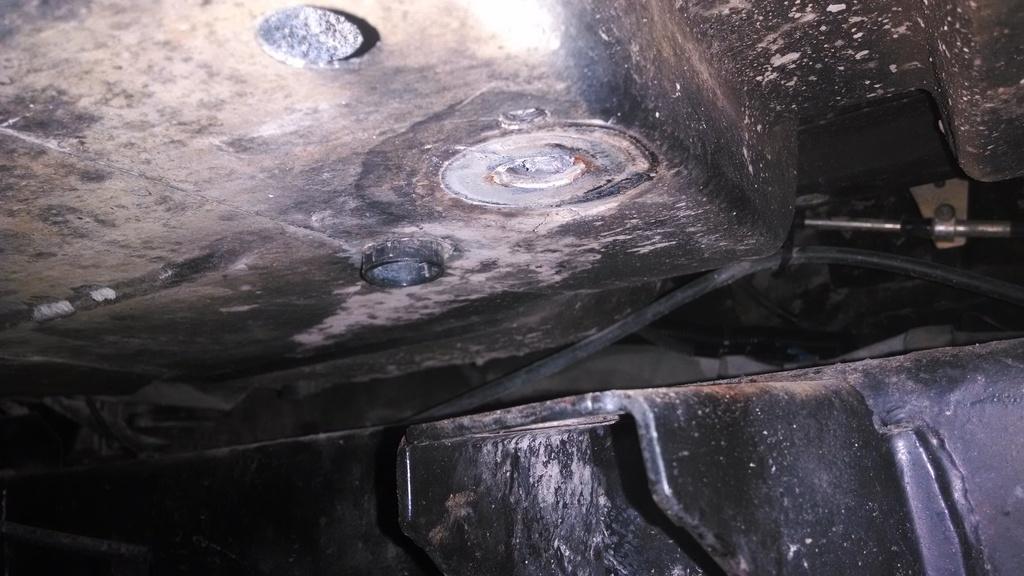
Quick picture of one frame out rigger/body mount location on the under body, no rust on 12 of the 13 spots.

IMG_20150721_180423375_zps2eaikcgu-1.jpg


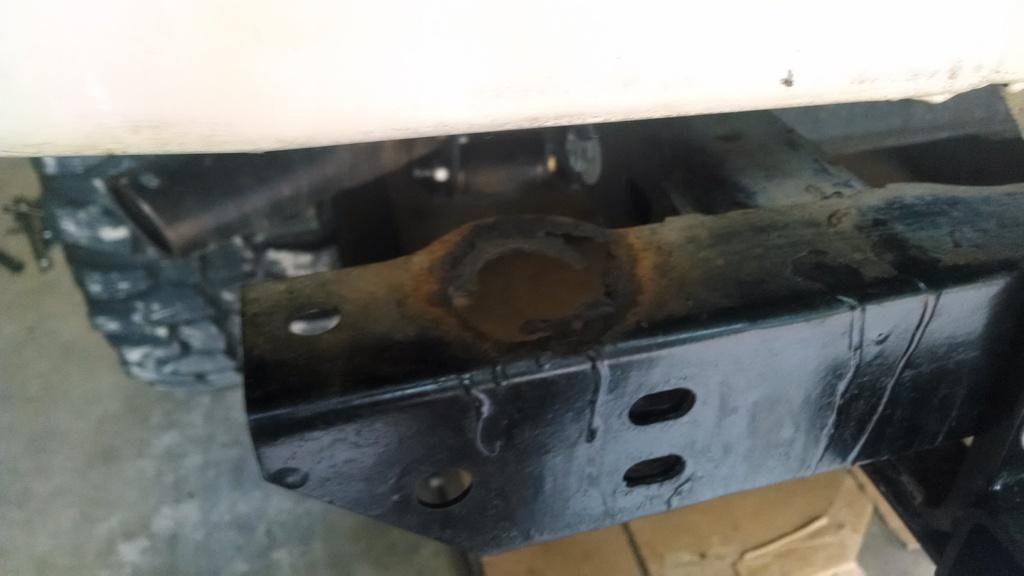
The only problem area, driver side rear cross member, time for a Chiefwahoo special!! The body mount still holds, but the cross member needs to be replaced.

IMG_20150721_180437305_zpsitorrb1t-1.jpg


The install was simple - I removed the grill bolt, loosened all the passenger side body mount bolts, then jacked up the driver side. I removed all the driver side bolts and old mounts, slid in the new mounts, then loosely bolted in these mounts. Repeated the procedure on the driver side, then changed out the grill mount. Pretty simple, no major problems with the body mount/lift install.

The only "issue" - the spacer tube for the front grill was too long. When I installed it, it would hang down past the lower bushing about 1/8". If I would have left it like this, the entire grill mount would have been loose. So, I ground down the spacer a good 1/4". Now, when I tightened the bolt, the mounts "smushed" together a bit like they should, they were not loose. I also had to add 2 washer to the head of the included bolt, it was a hair too long and was bottoming out in the grill.

But of course, with a body lift, even just 1", there can be issues. I had no problems with the steering shaft, I have a Borgeson that I recently cleaned/painted/greased, so it slid apart, no problem. Before the body lift, my lower radiator hose seemed a hair stretched too tight, and the upper hose rested on an accessory bracket. Now, they fit better!!! No issues with any wires or vent hoses, they had more then enough slack to take a 1" body lift. The Chevy fan is not exactly centered, but it is taller then the CJ radiator. Now, the tip of the fan meets the top of the fins on the radiator, and still hangs below the fins at the bottom. Before, the top of the fan was even with the top tank on the radiator. Hopefully, I wont have any cooling issues, still need a fan shroud:fingerscrossed: If it runs hot, I can always re-drill the radiator flange to drop it down one inch. Since I have an automatic transmission, I didn't have any clutch linkage issues like I had on my red Scrambler. But, that is an easy fix. The gas filler/vent hose seem OK, too. Since I ran short pieces of rubber hose to connect the transmission cooler to the hard lines, I had enough slack, no problems.

I was most worried about my transfer case shifter hitting the floor. On a stock Jeep, a 1" body lift wouldn't cause any problems. But, my 350/700R4 combo pushes the Dana 300 way back. I already had to "Custom Bend" a stock Dana 300 shifter to work, but even that was close to hitting. The good news, I can shift into 4 High, but the lever hits the floor when you make the initial shift. The shifter does not make contact once it engages 4 High. 4 LOW, 2wd, and neutral work fine. I can trim the floor plate a bit more without cutting the actual body, so I will do this. With poly body mounts, motor mounts, and transmission mount, I don't get excessive movement between the body/power train, so I should be good to go.

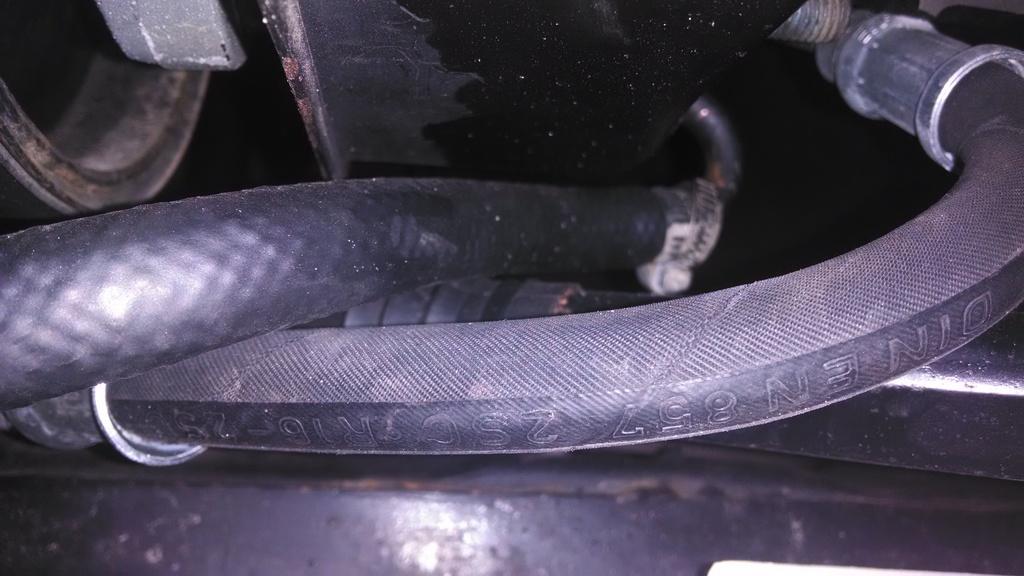
The one problem I do have, and I never would have guessed - my PS return hose was resting on the steering shaft boot after the body lift install:

IMG_20150721_203321038_zpsoacscaqq-1.jpg


This is more of an issue caused by my Chevy engine install/PS reservoir. My engine is not centered in the vehicle. It is offset to the driver side. You have to do this if you run a 700R4 and stock width axles. If you don't offset the engine, the front driveshaft coming off of the Dana 300 will not clear the transmission case/pan. My PS reservoir return line is goofy, it comes out the back then does a 180 degree turn to face the front. To fix the return line rubbing the Borgeson steering shaft, I simply installed a longer piece of rubber hydraulic line. The longer line loops up and away from the shaft. It is still close, but it clears. If I had more time, I would swap out the PS pump reservoir for one with a straight out the back return line fitting, like a stock 6 cylinder CJ style. For now, it works:thumbsup:

Hopefully, the last thing I do is trim the floor plate and install my front bumper flag mount. Then, time to pack up and head toward Michigan:thumbsup:
 
OMG!!!! they all came out without heat and witchcraft and penetrating oils and spells from the old country?
I need to get more projects from rust free zones!

Looking good!

cb
 
OMG!!!! they all came out without heat and witchcraft and penetrating oils and spells from the old country?
I need to get more projects from rust free zones!

Looking good!

cb

Yep, the freight I paid to ship it from California was $$$ well spent:twocents::thumbsup:

Besides the windshield frame and surface rust, this Scrambler only has three minor rust issues:

1) On the passenger cowl side, where an aftermarket antennae was mounted, slight issue
2) Center of the bed, under the bulkhead, slight rust spot around center bulkhead to floor bolt, will need a 2"x3" piece of metal
3) Driver side rocker, under/side behind seatbelt thingy bolted behind door opening, not too bad

It has been really nice to actually "work on the Scrambler", and not "work on stuff caused by rust":twocents:

Trying to make up my mind on keeping this one, and fixing minor rust and repainting it the factory color, or selling it on......................
 
Well, this Scrambler just drove to Michigan, wheeled a week, and made it back home in one piece:headbang:

Only issues:

1) Slightly loose DS front wheel bearing, fixed at Toby's shop in Michigan, no problem since then.

2) Battery cables worked slightly loose on the way home, tightened them back up, good to go.

3) Slight vapor locking issue in Alabama only. I am going to get rid of the Caprice Classic metal fuel lines that rest on the driver side valve cover/intake manifold, and run the truck style fuel lines. This should cure this issue. Filling the tank up with fresh, cold gas when it hits 1/2 a tank solves the problem, too.


The new engine did great, did not leak/burn any oil, averaged 15mpg at 75-80 mph.

About the only thing I am not happy with is the stiff springs, might have to swap them out soon:twocents:

Just need to change the oil and grease this one back up, then it will be ready to return to the its less glorious role of yard clean up Scrambler.

That's it for now:ZZZ:
 
It's been awhile since I updated this thread. This Scrambler is still running fine and driving fine, and it has been earning its keep helping me do a bunch of yard work.

My only real complaint: I was hoping that the Superlift springs would get softer with use, but they have not :banghead:

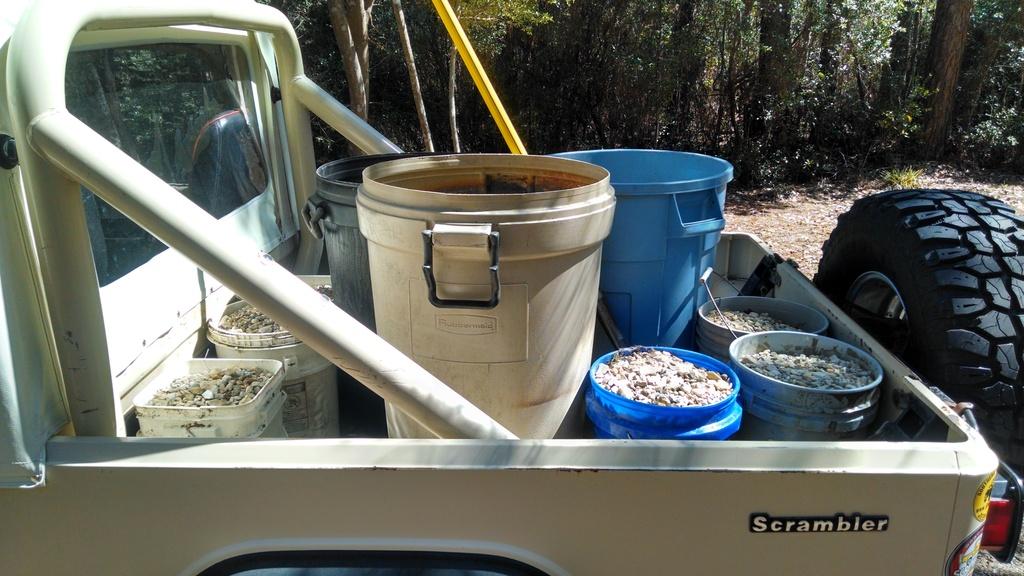
To give you an idea of their spring rate, this is approximately 1,400 pounds of gravel in the bed of the Scrambler :eek: :crazy: I know its too much weight, and I only did this twice on smooth roads for about 20 miles total, , but it gives you an idea.

Quick picture of my gravel hauling operation [(x3) 5 gallon buckets + (x2) 4 gallon bucket + (x3) trash cans with 40 gallons in each = 143 gallons @ approximately 100lbs each = 1430lbs]

001_zps9rpa1oga-1.jpg


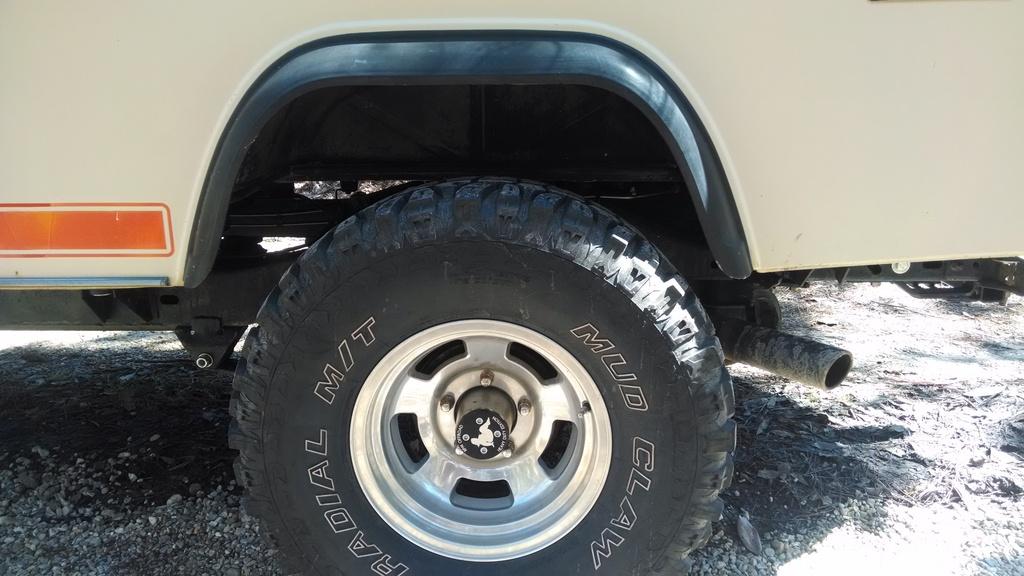
The rear springs deflected maybe 1" :shrug:

002_zpsiwoaaap3-1.jpg


So, as long as I ride around with about 1,500 pounds in the bed, it rides pretty smooth :rotfl:


I thought about removing some leafs from each spring pack, but I picked up a deal on a Rubicon Express 4.5 lift, so I am just going to take the easy way out and swap out the suspension. I am just waiting on the Bilstein shocks to show up, and I ordered some heavy duty shackle hangers. I have this same suspension set up on my red Scrambler and have been happy with it. So, hopefully soon, no more stiff ride.

I will take some more pictures and post them up once I swap out the suspension.

That's it for now :wave:
 
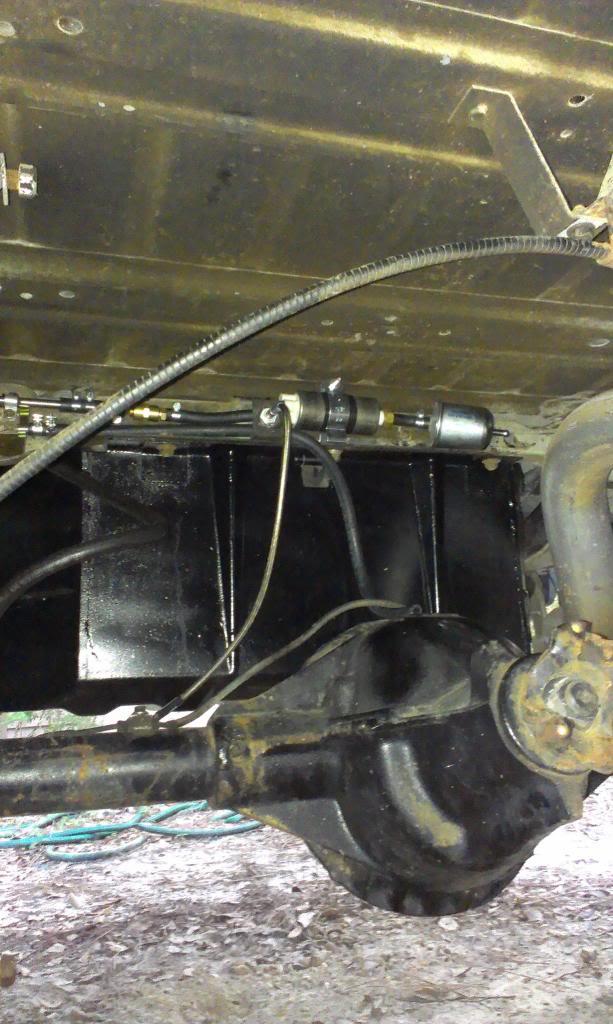
I started mounting my fuel pump/filter and lines, and at least figured out what I want to do/have to do. Quick picture, still a work in progress....

IMAG1259_zpsb054f023-1.jpg


This weekend, I hope to:

1) Finish all the fuel plumbing
2) Mount transmission (with single mount for now, will modify if necessary)
3) Finish wiring (TBI/charging/starting/fuel pump/etc)

Do you remember what fuel pump and filter you went with? I'm looking at mine doing mine now and I have the exact set up you do only I'm running a Edelbrock 1406 carb, not TBI.
 
Do you remember what fuel pump and filter you went with? I'm looking at mine doing mine now and I have the exact set up you do only I'm running a Edelbrock 1406 carb, not TBI.

I am running the TBI injection, so the fuel pressure is higher then a carb. You can't use the fuel pump I have with a carb.
 
I think I have a fuel injection fuel system with and external fuel pump that I order but decided to use a in tank fuel pump instead if you are interested. I also have a brand new 15 gallon fuel tank because I decided to go with the Genright 20 gal tank. I'll make a member a good deal on all my extra parts. I have a D300 since I went with the 241C TC. I also have a 4l60e to d300 adapter kit all brand new. Almost Sure I have some other stuff too. I'm not looking to give it away but I sure don't expect to get full price for everything either.
 
Do you remember what fuel pump and filter you went with? I'm looking at mine doing mine now and I have the exact set up you do only I'm running a Edelbrock 1406 carb, not TBI.

As noted in your thread, your low-pressure pump will be fine since you're not running that motor with the TBI system.
 
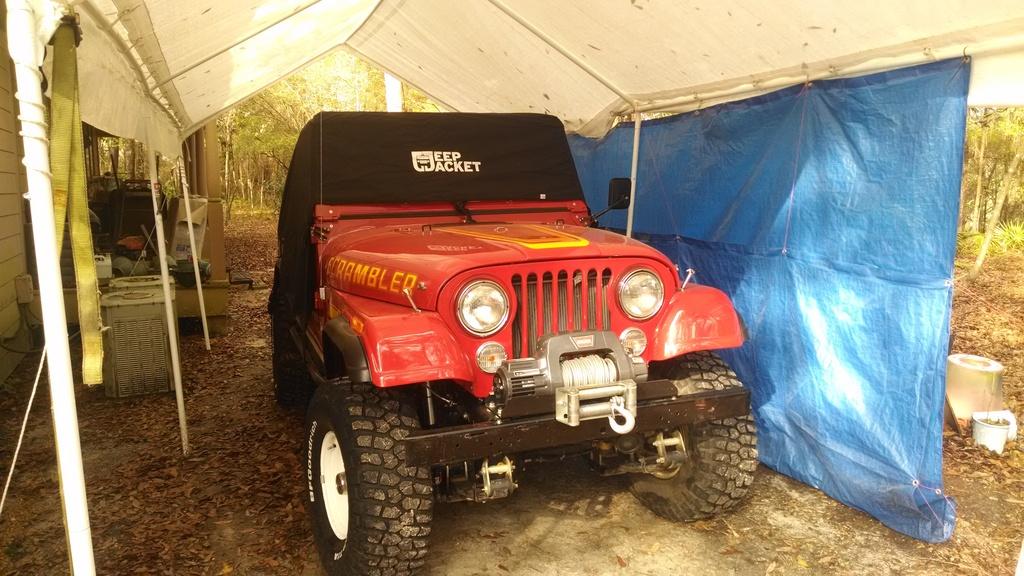
I took a break from my green Scrambler and finally swapped out the suspensions on my Tan Scrambler. The old 4" Superlift system was too stiff for me. Pulling leaves from the packs might have helped, but this was the second time I have pulled all the suspension off this Scrambler, I didn't want to have to do it again. I pulled this lift off last year before Sand Blast to grease all the bushings, wish I would have had the stuff then to swap in.

Anyway, had to move the red Scrambler out of the garage and underneath the Harbor Freight canopy. This also gave me a chance to install my Gr8Tops Jeep Jacket, which is very nice :thumbsup:

IMG_20160319_090725689_zpsgvl0ptdk-1.jpg


My red and tan Scramblers are set up similar - both will have RE 4.5" suspension lifts/1" Body Lifts/33x12.50 tires on 15x8 wheels. The red Scrambler has some miles on it, so the springs have settled. I will have to pull some measurement off of it to compare to the new lifts installed height.

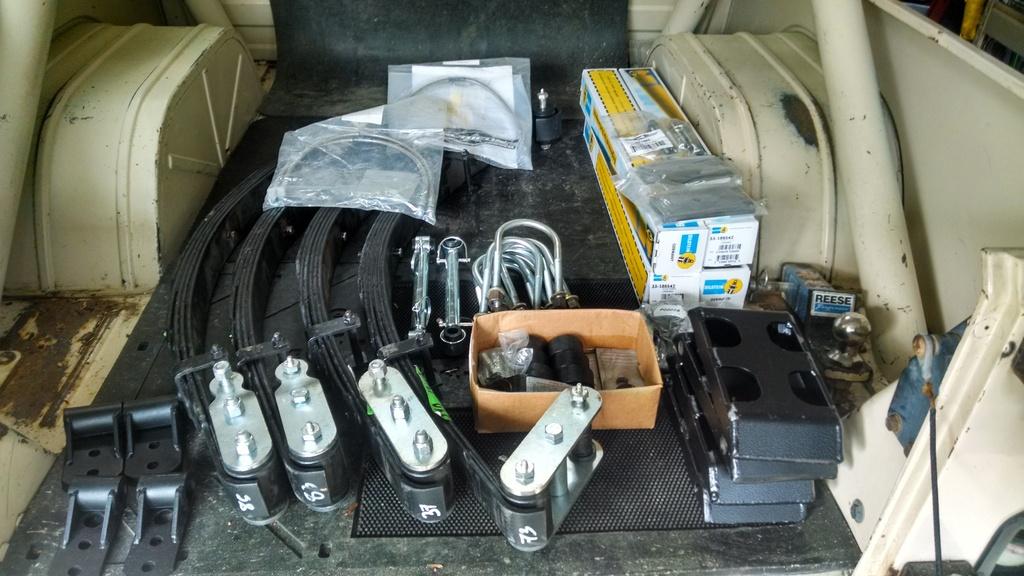
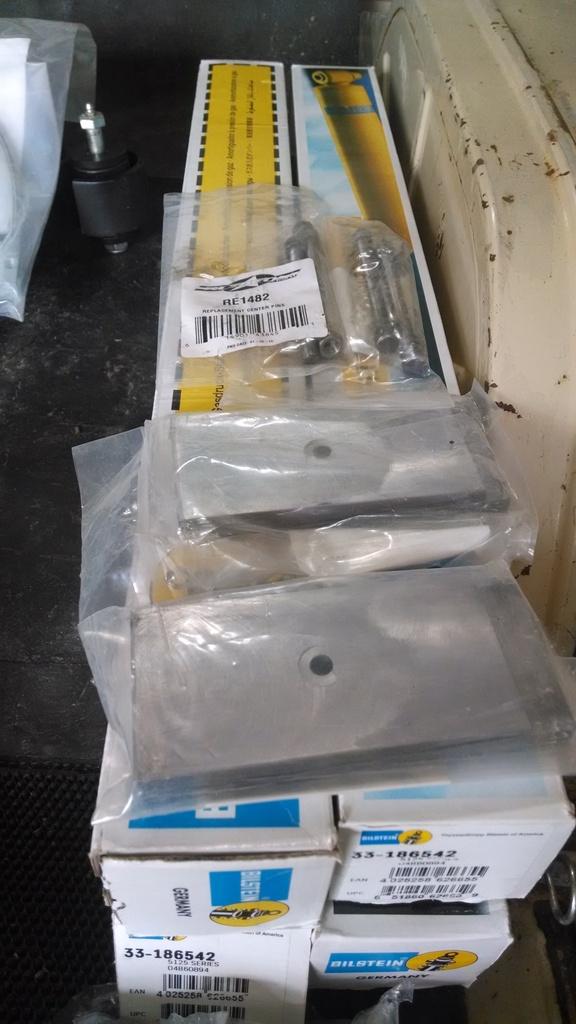
Picture off all the goodies:

IMG_20160319_092510661_HDR_zpsu27okbce-1.jpg


I bought the basic kit from a member of the site, "Tadjt". It was only "used" on a rolling chassis, so everything was like new. I bought Bilstein shocks to install, and the only other parts I had to buy to complete the kit were the U-Bolt skid plate things. But, you don't necessarily have to use those. I wanted to because I keep cracking the passenger side rear stock u-bolt spring plate on this Scrambler, not sure if the V8 has something to do with that ??!!

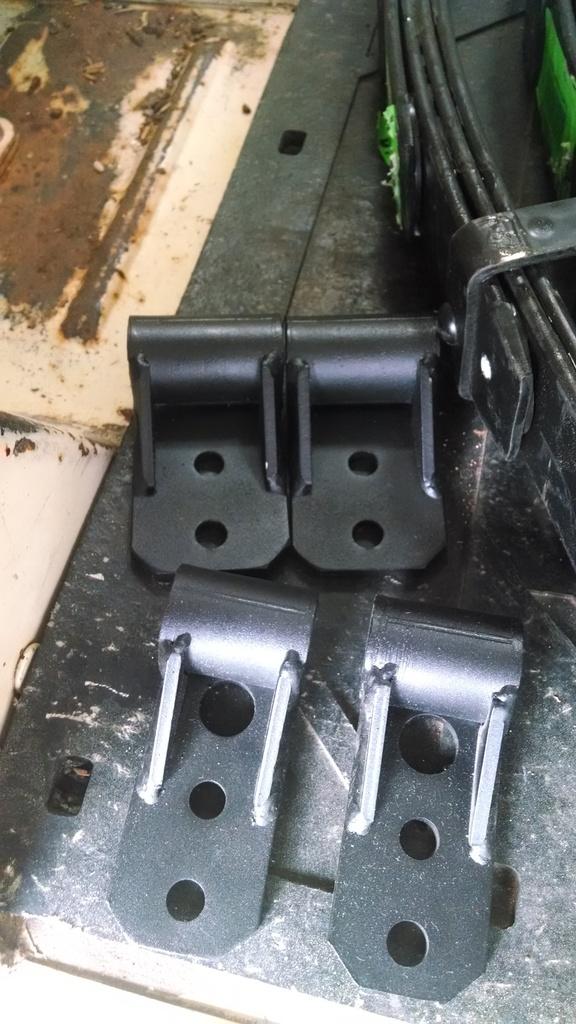
I also upgraded the shackle hangers to Warrior HD mounts. I use these on my red Scrambler, no complaints. You do have to trim a little bit of the reinforcement off of the driver side front hanger, inside web, it will interfere with the steering box mount. Two minutes with a Dremel fixes this issue.

IMG_20160319_092516908_zpsyrkwk2w5-1.jpg


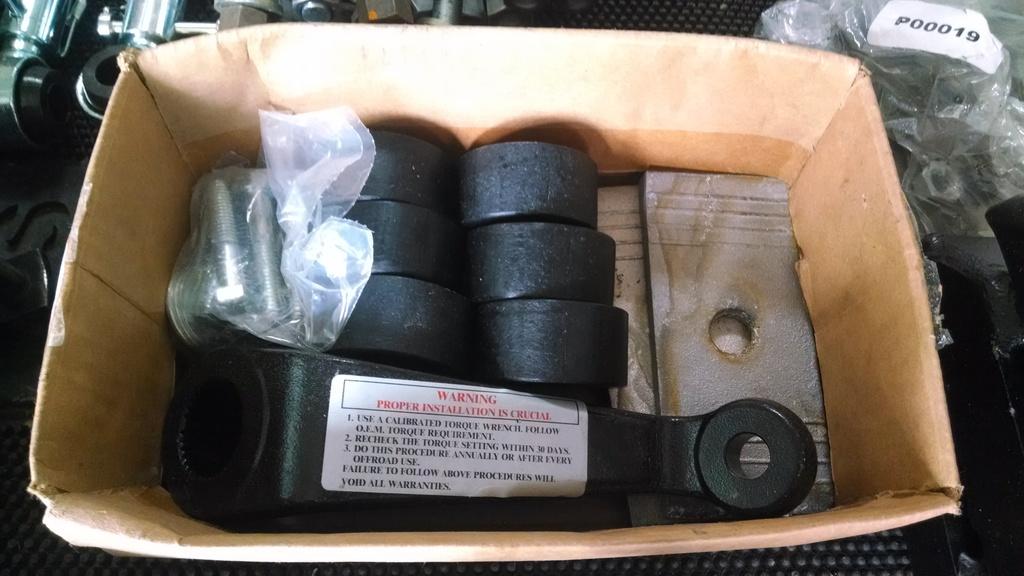
Parts included with the kit I am NOT using:

IMG_20160319_092522732_zpshohmw2lc-1.jpg


Drop Pitman Arm - I don't need this because I flipped the steering linkage to the tops of the knuckles
Aluminum Shims - they will break
Skid Plate drop pucks - I already dropped my skid to fit the 700R4, don't need to drop it anymore


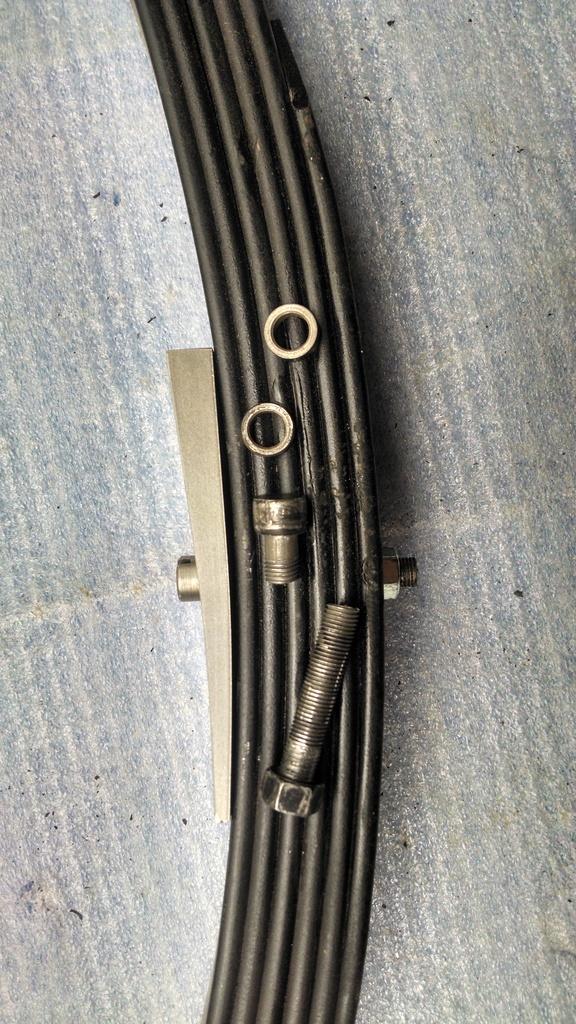
I also bought two sets of steel 4 degree shims, and new center pins:

IMG_20160319_092528389_zps42dic4i8-1.jpg


I use 4 degree shims in the rear for pinion angle, and at the front for caster. On my red Scrambler, I had to go back and add the front shims, so I just went ahead and installed them from the get go on this one. The RE shims have a 5/16" hole in the center, had to drill them out to 3/8 to fit the included/stock sized center pins, no big deal.

I bought new center pins, but of course I bought 5/16 instead of 3/8. I had to replace the rear spring pack center pins with ones sourced from NAPA due to this:

IMG_20160319_133329381_HDR_zpsvnyf07xb-1.jpg


My rear springs did not come with shims installed, so I had to pull the spring packs apart to add the shims. It has been my experience that the spring center pins that RE uses are made of butter. I have broke all four of the center pins on my red Scrambler, so I went ahead and upgraded all four of these, too. The center pins used on the front spring packs are not long enough to use shims, so they have to be pulled/replaced for longer center pin bolts. No big deal, except when you are in the middle of the project and have to run to the parts store.

The RE center pins also come with little spacers under the heads of the bolts. I have found that the little spacers have to be pulled off the rear to fit an AMC 20/stock perches. If they are not removed, the center pin head hits the axle tube before the perch sits flat on the shim. The front axle center pin spacers can stay.

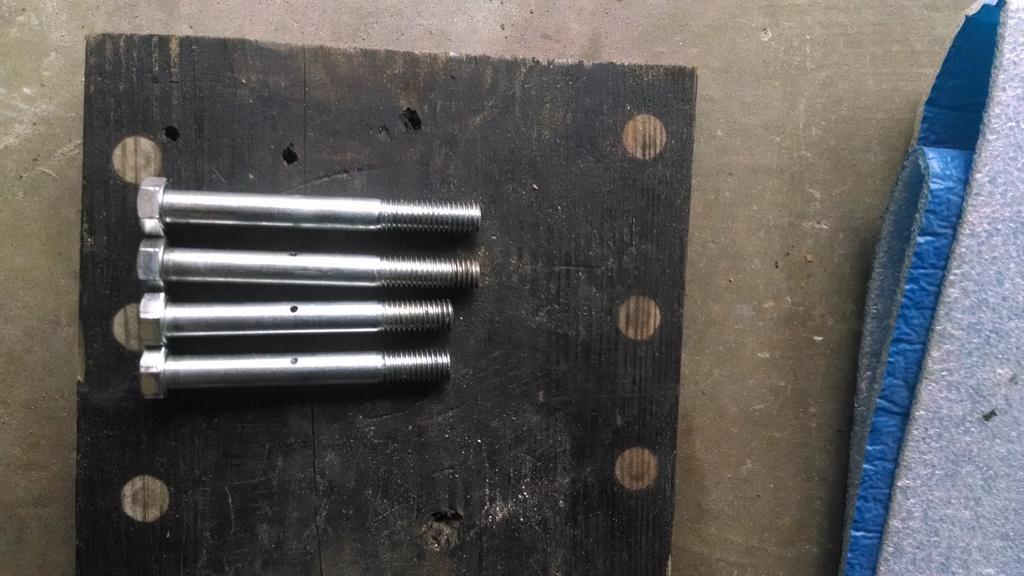
The only other major modification I had to perform was at the rear shackle hangers. The stock length RE greasable bolts will hit the factory 20 gallon gas tank skid plate. It is easy enough to cut off the bolts. Top is stock length, bottom is cut off.

IMG_20160319_150245434_zpstlxgld5o-1.jpg


The grease fitting holes for the bolts are on the heads, that is why you can't just flip them around, like the factory did with the non-greasable bolts on CJ's that came with 20 gallon tanks.

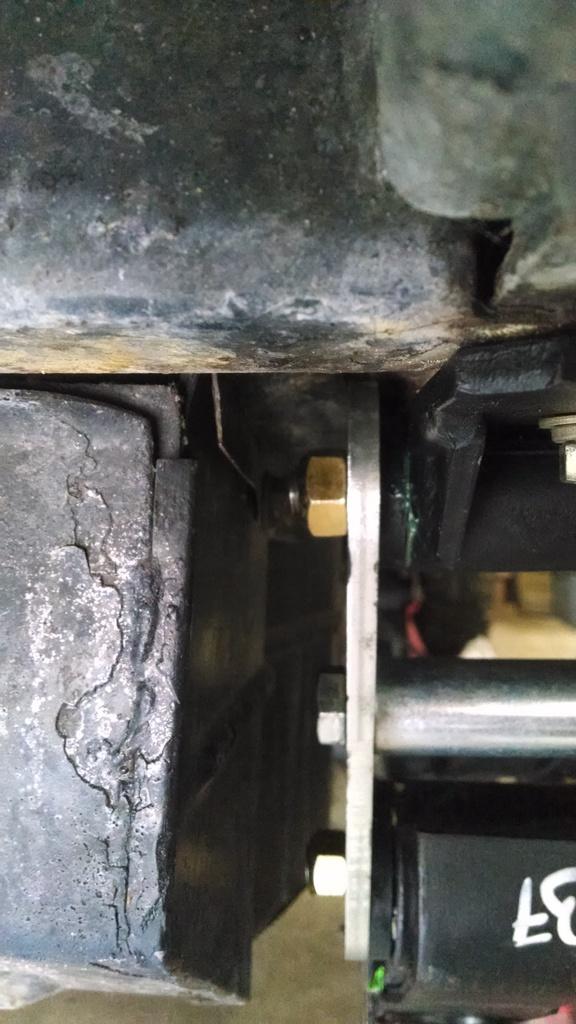
Picture of the rear shackle installed. Note the cut off bolts, and I used a metal lock nut, instead of the supplied nylock nuts, due to the shorter height of the nuts:

IMG_20160319_153928417_zpsjn1esrgr-1.jpg


Plenty of room with a stock/thin 20 gallon skid plate now. On my red Scrambler, with a GenRight 20 gallon skid plate, it is closer, but they clear.

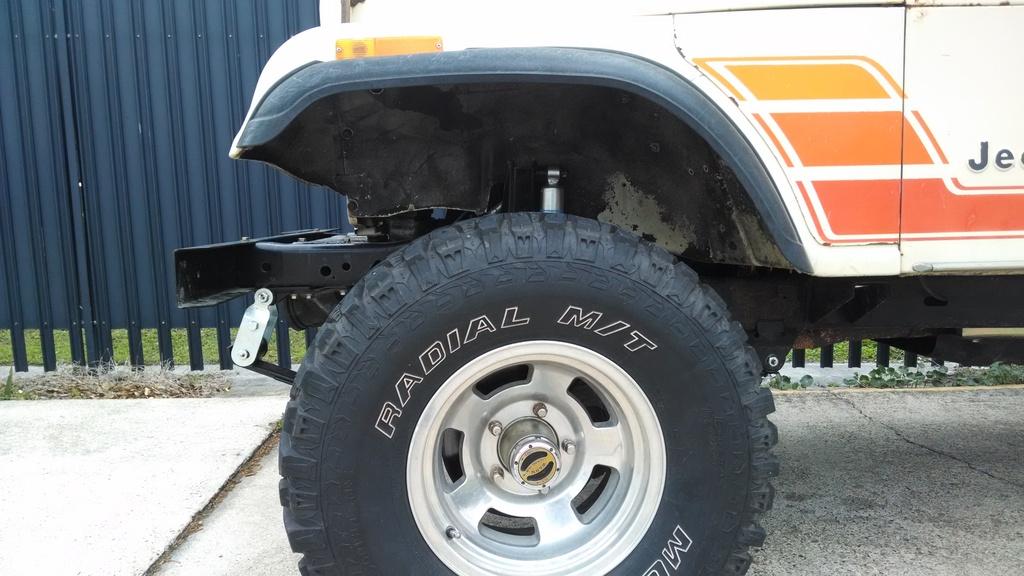
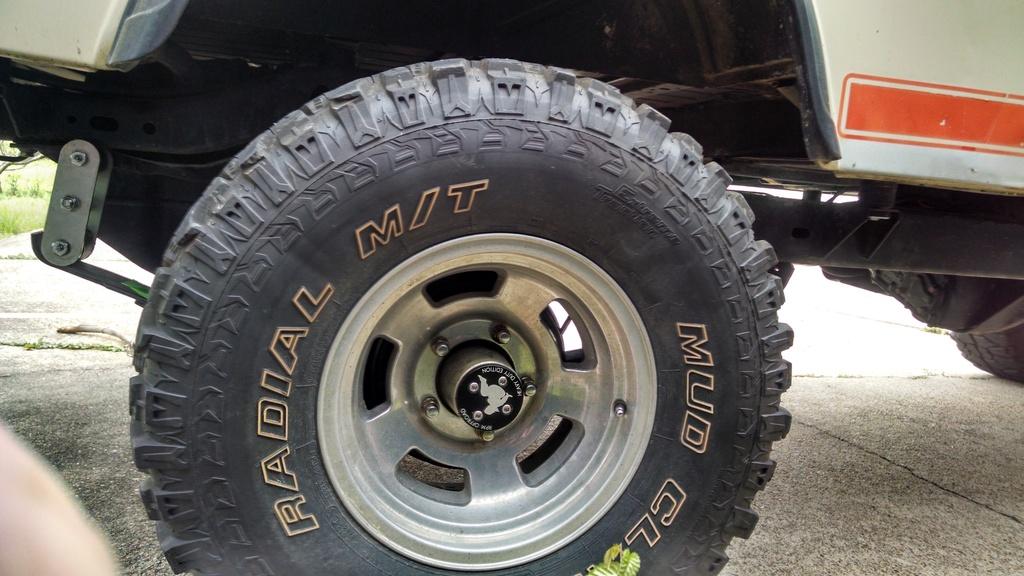
I will have to take some pictures of the Scrambler with its new "lift" on. I pulled some measurements, it sits higher now then before:

Before DS Top of front bumper - 27-1/2"
Before PS Top of front bumbler - 27-5/8"
Before DS Top of rear crossmember - 26-5/8"
Before PS Top of rear crossmember - 26-5/8"

After DS Top of front bumper - 29-1/4"
After PS Top of front bumbler - 29-1/2"
After DS Top of rear crossmember - 29-1/4"
After PS Top of rear crossmember - 29-1/2"

The after measurements were taken as soon as it was back on the ground. It sits roughly 2" higher now all the way around, with a 1/4" driver side lean.

Plenty of room for 35's now, but once the springs settle, 33's are the max I would run.

That's it for now:wave:
 
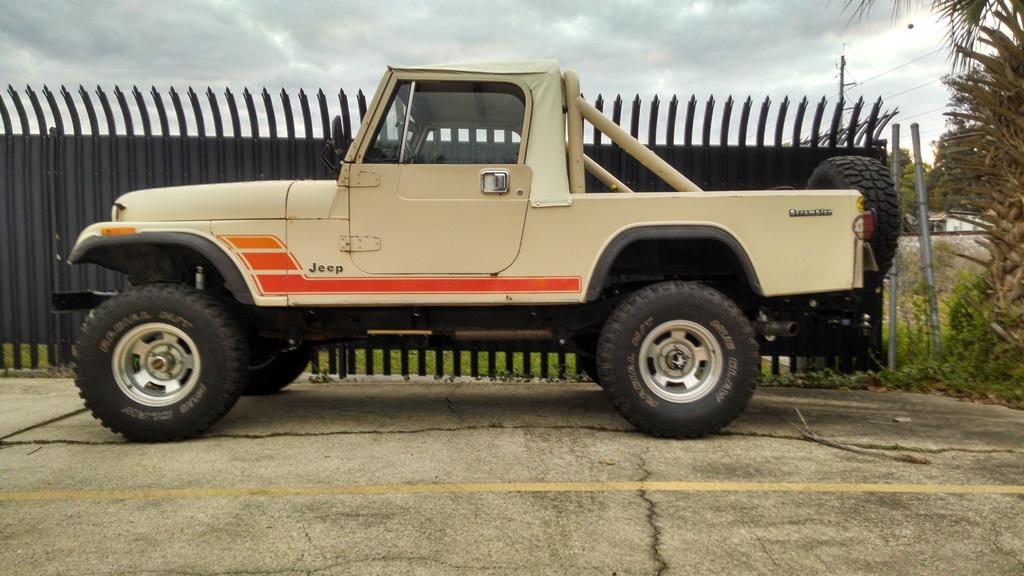
Picture from the side, room for 35's now, but it will settle; I think it looks good:

IMG_20160323_070230563_HDR_zpsqhs4bsue-1.jpg


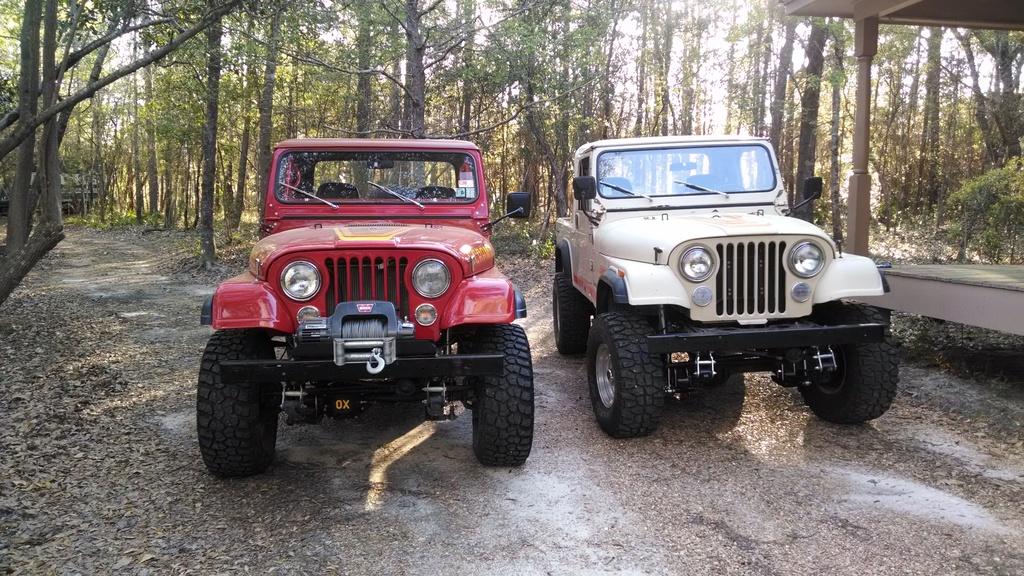
Next to my red Scrambler; both have RE 4.5" lifts, 1" body lifts, 33x12.50's on 15x8 rims:

IMG_20160322_174314018_zpsyem85yby-1.jpg


I will pull some measurements on the red Scrambler, but I am pretty sure the tan one is sitting a bit higher due to the new springs.

The ride quality difference is night and day - the Rubicon Express/Bilstein shock combo is much better then the old Superlift/Superlift shock combo that was on it.

I have a little bit of bump steer on the tan Scrambler, due to the springs. Once they settle, that should go away. I haven't been driving it "hard", but so far, no axle wrap. I was a bit concerned about this, soft springs+V8+Detroit Locker in the rear. So far, it is behaving well.

I should have changed out the suspension a long time ago, much better now :twocents: :thumbsup:

Now, why I love the soft ride 90% of the time, the old stiff Superlift springs did "handle" better when driving over 80mph. Stiff springs are more stable at higher speeds. But, the new suspension still handles interstates speeds fine, just does not feel as "planted", if that makes sense.

The 4 degree shims added to the front end seems to have the caster close, I have decent return to center. I am going to get the alignment checked after driving for a few weeks to see where its at.

After just a few miles of driving, some settlement. Front shackle angle looks good, I am sure the Chevy V8 weight helps:

IMG_20160323_080918891_zpsfuw0q2mr-1.jpg


Rear shackle angle, not as good as the front yet, but I only have a little Honda push mower loaded up in the back LOL:

IMG_20160323_080931445_HDR_zpsqmdufg13-1.jpg


My only real issue:

IMG_20160323_080959951_HDR_zpsfoy94rc1-1.jpg


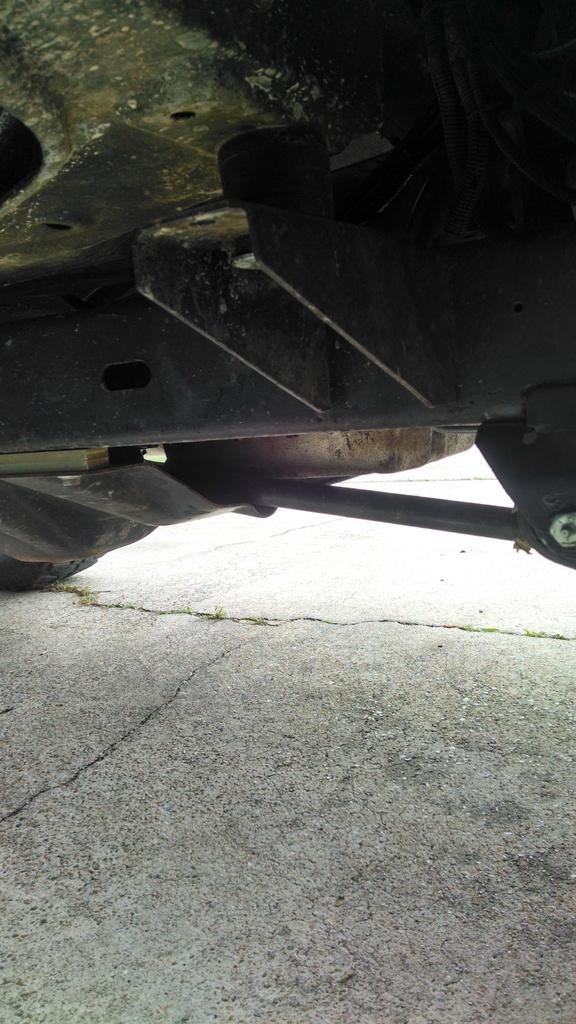
At full droop, the front drive shaft is hitting the skid plate so hard you can't turn it by hand. I might trim a little off the skid plate, and/or slightly limit the droop. I didn't have this problem with the T5/T176/AX15, I think the length of the 700R4 is the biggest factor here :twocents:

All in all, I am very happy, again, with the ride quality of the RE 4.5" lift. I will be interested to see how BigWalton likes his new BDS lift, especially since he swapped out a RE lift.

That's it for now:thumbsup:
 
Rear shackle angle, not as good as the front yet, but I only have a little Honda push mower loaded up in the back LOL:


if you're trying to add horse power... you're doing it wrong.
 
Since I am having engine problems in my red Scrambler, I am going to have to get the tan Scrambler ready for South Dakota and Michigan. I was planning on the Michigan trip for the tan Scrambler, but not South Dakota, which is less then two weeks away, so time to get wrenching :crazy:

I am not having any real issues with this Scrambler, I just need to get caught up on maintenance/minor issues:

Oil Change - easy
Rotate tires - easy
Alignment - need to find time to take it, might not need it, but good to check
Re-Torque all suspension - easy, but PIA
Grease drive shafts/steering/suspension - easy
Leak in one tire - same time as alignment, easy
Steering column noise - medium dificulty, work in progress
Swap on a 1/2 hard top (soft top is loud on cross country trips) - should be easy enough
Rear brake shoes worn - easy enough

Two other issues, but probably wont have time to get fixed before South Dakota:

1) exhaust pipe got smooshed in a little by front drive shaft, still runs fine, but probably not the best
2) I am assuming the "top gear switch" in the 700R4 is still inoperable, still runs fine, so not too worried

I am "hoping" to get a large chunk of this work knocked out this week and weekend :fingerscrossed:


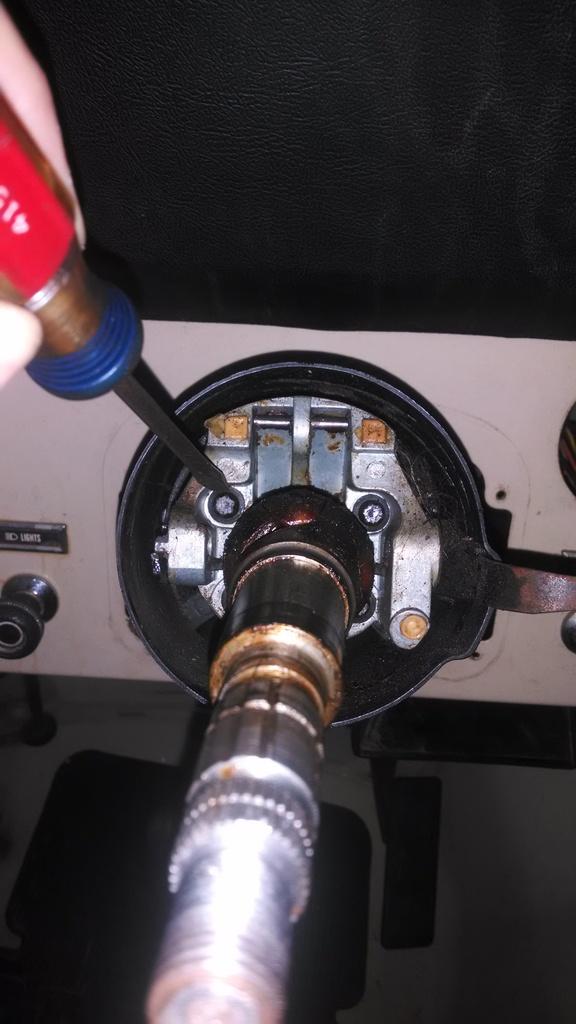
I started out with the "unknown/potential to have to order parts" steering column noise. The tilt column in this Scrambler has been making an annoying squeak from time to time. No other issue, just annoying. The odometer is showing 168,000+ miles, and I have never tore this column down, so I took it apart to check the four bolts that hold the tilt joint together:

IMG_20160614_064537680_zpsf7aotwgh-1.jpg


Sure enough, all four bolts were loose. I am going to remove the bolts one at a time, clean them, then reinstall with Lok-Tite. That should keep them tight.

Of course, the steering column fought me while taking it apart. I do not believe it has ever been apart. I bent the cheap bolts that came with the steering wheel puller tool, then ripped some threads off the same tool, but the wheel finally came off. Next, even with the lock spring compressor, the little snap ring fought with me for about 30 minutes, but I frinally got it off, too. Other then that, no problems.

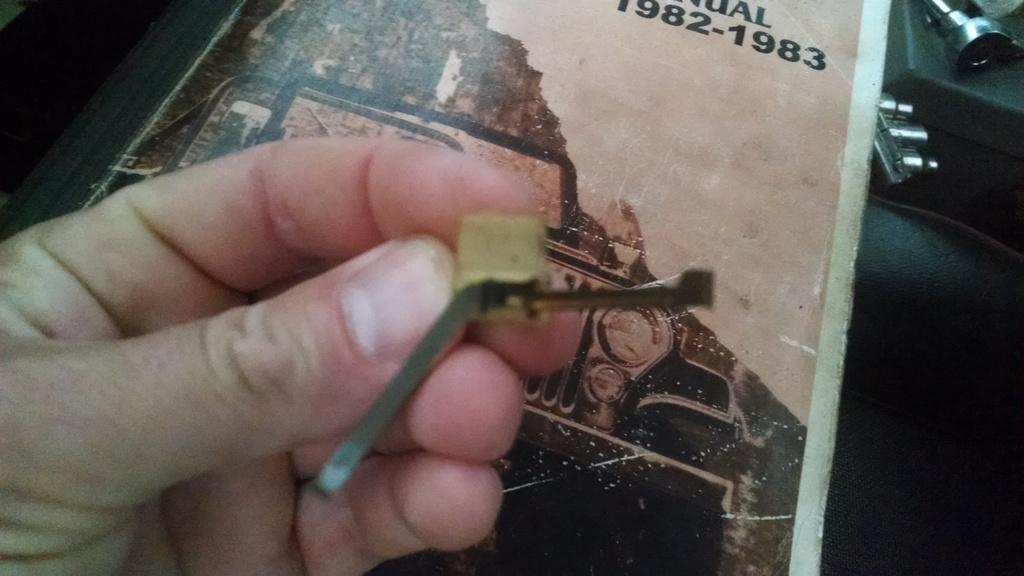
I did run across this piece in the column, I have never seen this in the other ('81 and '83) columns that I have been in:

IMG_20160614_064601927_zpscco4ifbl-1.jpg


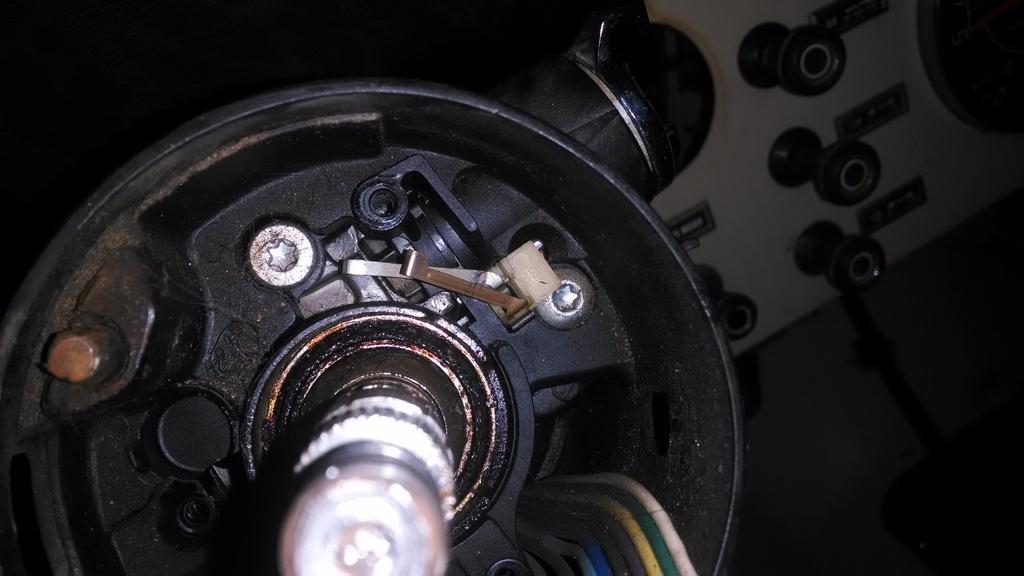
You can see it installed, below the lock cylinder, partially covering one of the silver Torx head bolts:

IMG_20160613_190336063_zpsz1tp9tgu-1.jpg


I would "guess" it is some type of contacter, but for what, not sure :shrug: It looks like the copper band is bent the wrong way, but maybe not? The horn was not working in this Scrambler, but I assumed that was due to the surface rust on the horn contact parts?

Any information on this part will be appreciated, my '82/'83 FSM does not mention it :thumbsup: :wave:

I should be able to get the column back together tonight, fingers crossed!!!!!!!!!!!!!!
 
Back
Top