• Notice for iPhone users: DO NOT use the image size reduction option when uploading photos to the forum. This causes portrait images to post as landscape. We have added a warning to the image insert pop-up as well.

Spankrjs 1985 Spring Special CJ-7

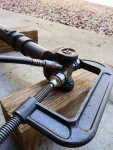
Another "Redneck Ray" trick:

31.jpg

I will "lightly" install the C-clamp, grease the u-joints before installing the driveshafts in the vehicle. It is easier to clean up all the excess grease this way. I always run grease-able driveshaft u-joints, but realistically, on a stock/non-submerged in water often application, sealed u-joints would probably work fine, and stay cleaner. My 2005 TJ still had all the Spicer sealed u-joints on it when I sold it with 165,000 miles on it, my current LJ has 130,000 miles on the sealed u-joints.

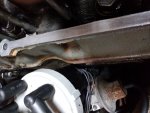
While the driveshafts were out, I decided to do some under body cleaning/degreasing. It started with just the yokes, but I went ahead and cleaned the bottom of the body (the rear pinion seal must have been leaking for a long time), skid plate, Dana 300, etc.

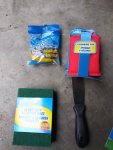
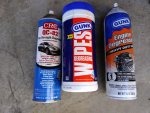
I bought some cheap supplies at the Dollar Store:
32.jpg

The "Gel" Gunk worked really well, the CRC stuff is awesome for spray on/wipe off/won't hurt paint applications. The wipes are OK at best for this type of crud.
33.jpg

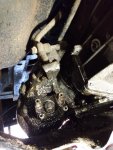
Rear output shaft yoke before:

34.jpg

Dana 300 before:

35.jpg

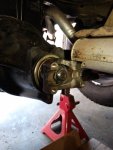
Dana 30 yoke before:

36.jpg

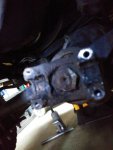
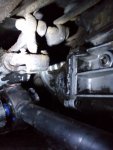
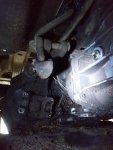
Dana 300 front output shaft yoke and surrounding area before:
37.jpg

Skid plate bird/rat nest:

38.jpg

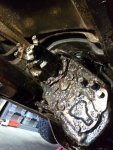
I dug/scraped a lot of crap off by hand. I used the CRC stuff on the bottom of the body tub, spray on/wipe off. The Gunk Gel, I sprayed it on, let it sit a couple of hours. I did all this cleaning in the garage, with cardboard on the ground. I had to wait until after the driveshafts were back in to push it outside and hose it off. Worked out well, but I was pretty much covered in crap from head to toe. Steam cleaner works great, BUT it is not garage/paint/seals you don't want to change out friendly.

Gunk Gel on the Dana 300:
39.jpg

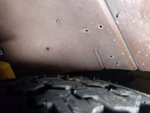
CRC on the floor pan:
40.jpg
 
Gunk Gel on the front output shaft area:
41.jpg

Rear yoke after:
42.jpg

Dana 30 yoke after:

43.jpg

Front output shaft area after rolling it outside and hosing it off:

45.jpg

Dana 300 after hosing it off:

46.jpg

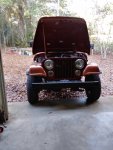
Back outside, cleaned up, ready to go:

47.jpg

This Jeep is old, has sat up a long time, and came from out west where the climate dries out rubber. It will not surprise me if the transfer case output shaft seals, Dana 30 pinion seal, or various engine seals start leaking. Cleaning things up might speed up the process. Regardless, it needed to be cleaned. And with it cleaned up, that's half the battle already won if/when I have to go in there and start changing other seals/gaskets.

I would rather deal with seals/gaskets then rust any day of the week :twocents:
 
  • Like
Reactions: SKT
Got it cleaned up, went for test drive, I still had a grinding noise from the rear driver side.

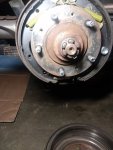
Pulled off the brake drum, one retainer spring and its two cups were rolling around in the drum:

48.jpg

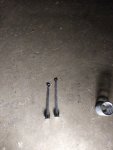
The pin fell out:

49.jpg

I dug through all my old drum brake parts and found four shorter pins. The only thing I can figure, the pins that came with spring kit are too long.

50.jpg

I went ahead and changed out the passenger side pins, too. No more rubbing.

It makes sense that the driver side rubbed and not the passenger - the driver side has the shims between the brake backing plate and the axle housing, shortening the distance between the wheel hub and brake backing plate.

I should have caught this earlier, the spring cups on both sides were protruding past the edge of the shoes, they should not.
 
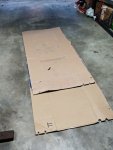
After all of the cleaning, I was worried about new leaks. I put down some new cardboard, and after a couple of days/miles, only some minor drips from the engine bay area:

1.jpg

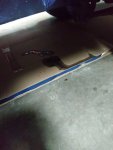
I was glad to see no leaks from the rear axle, transmission, or transfer case (yet?). A couple of trips later, the engine became a gusher:

2.jpg

The leak is coming from the rear of the engine, where it meets the bell housing. Not dripping out of the bell housing, so I believe the rear main seal is OK for now.

The oil fill cap has been leaking, so I fixed it first. I cut out a piece of cork, slid it under the rubber seal to fatten/tighten it up, fixed that leak.

3.jpg

4.jpg

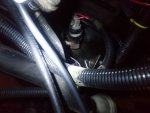
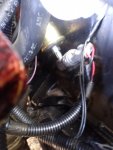
There was a lot of oil at the driver side/rear portion of the block, around the oil pressure gauge sending unit/oil pressure switch area:

5.jpg

The oil pressure gauge has been reading low, so I took a $20 gamble and changed the sending unit. NAPA does not list a sender for a 1985 CJ-7, but they do for a Scrambler, go figure:

6.jpg

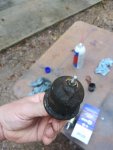
The old sender had a lot of build up on it, so maybe it was leaking? Seems to be way too much build up for just random stuff sticking to it:

7.jpg

I cleaned up this portion of the block really well, including the oil pressure switch:

8.jpg

The sender from NAPA will work, BUT the housing does rub on the block a little bit when you tighten it down. The other sender has a slightly small OD, and a shorter "stalk" to clear the block. The new sender does fit, but it does rub. This should not be a problem?

9.jpg

The sender does work, and my oil pressure reads higher then before, so happy about that. And, no leaks from this area.

Bad news - the valve cover is leaking out the back at a pretty good clip :banghead: :crazy:

I "might" try to reseal the OEM plastic cover, IF it is not warped. Or, I might just swap to an aluminum cover, I have better luck with the aluminum covers. But, I am trying to stay "stock", and I just did reinstall two piece rear axles..........................
 
Instead of messing with the valve cover, I worked on something easier - shocks. I have been having a strange, low speed "bouncing/hopping" lately, figured I would change out the shocks.

I wanted to use "off the shelf" shocks on this Jeep. In the past, I went to NAPA, purchased some stock shocks for my green Scrambler. NAPA, and most other places, will list different part #'s for front and rear shocks, with slightly different lengths. I have no idea why? If you measure mounting point to mounting point, front and back, on a "wide track" CJ, the lengths are almost identical. On my red Scrambler, which is lifted, but has stock shock mounting points, I use the same Bilstein Shock front and rear, no problem.

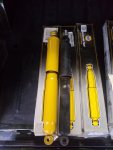
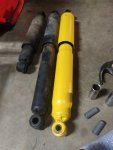
NAPA has two shock options listed for this year CJ. The "cheaper" option, is a 94009 for the front, 94008 for the rear. They have a "better" option for the front, but not for the back. Since front and rear lengths are almost identical, I bought four new front shocks:

20191227_162947.jpg

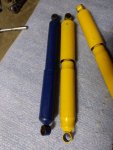
New front shock versus the front shocks I removed. If you look at different manufacturers listing for shocks, the lengths are all over the place. These new shocks are slightly longer then the shocks I removed:

20191227_164320.jpg

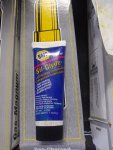
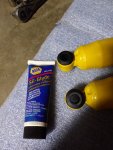
I use this stuff to lube the bushings:

20191227_164327.jpg

Front shocks bolted up, no problem:

20191227_165042.jpg

I need new front springs, eventually, the existing front springs are sagging:

20191227_165052.jpg

On to the rear, where there is a slight issue. The front shocks lower bushings are different then the upper bushings. The lower bushings are sleeved for the mounting bolt. On the rear, the lower bushing needs to fit over the 5/8" mounting stud. You can also see that the new front shocks for the rear are slightly longer then the rear shocks I removed:

20191227_175330.jpg

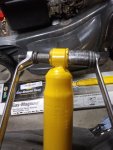
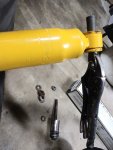
First step, I used a long bolt, some washers, a nut, and one of the new sleeves to push out the lower metal sleeves:

20191227_181158.jpg

I pressed the sleeves out about this far:

20191227_181545.jpg

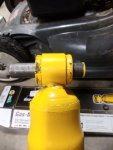
I then used vice grips to grab the sleeves, wiggled them around/pulled them out:

20191227_181858.jpg

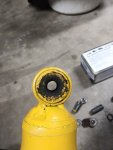
You are left with this, sleeveless lower bushings:

20191227_182027.jpg
 
I know in the past that when looking for shocks, there was the difference between moutning on the axle vs. the older style of mounting on the spring plate... which results in the need for a 2-3" longer shock... but as for this, I don't see why what you chose to do wouldn't work... nice on getting the sleeve out.

cb
 
Even without the sleeves, the ID of the lower bushings is too small, they will not slide over the 5/8" mounting studs.

You have some options here:

1) try to drill out the lower bushings, which would probably not work out well
2) replace the lower bushings with new rubber bushings, I could not find a part # to work
3) Energy Suspension Polyurethane shock bushings, part #9.8141. These will work with these shocks since they have a straight bore in the mounting eye. No one local had them in stock

I chose option #4 - I gave my buddy the very slightly used NAPA shocks off my green Scrambler. He gave them back to me, I pulled out the upper bushings, perfect match.

So, I pulled out the lower bushings. I used a 6" socket extension, stuck it in the bushing about 3/4's of the way in, popped them out:

20191227_184340.jpg

20191229_165308.jpg

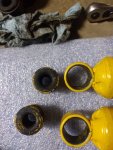
Correct bushings from the "used" shocks on the left, wrong bushings on the right:

20191229_115426.jpg

I put a little lube on the shock mounting eye and was able to push the bushing in by hand. It was not an easy slip fit, took some muscle, but not terrible. I imagine if I would have went the polyurethane bushing route, I would have had to have rigged up a "install" tool with a bolt and washers:20191229_165704.jpg

These new shocks have a slightly larger OD then the shocks I pulled off, and the "cheaper" NAPA shocks. This Jeep has all new replacement exhaust components, which matches the factory parts exactly. I was worried the shocks might hit the exhaust, but they clear:

20191229_171821.jpg

20191229_171833_HDR.jpg

Not the best pictures, but they clear just fine, should not be any contact.

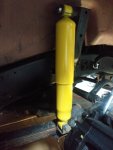
And the rear shocks installed:

20191229_171844.jpg

That's it for now.
 
I have been having a random "engine completely shuts off while warming up" situation recently, maybe 5-6 times over the last few months. Engine is running fine, then just cuts off like you turned the key off. It will instantly start back up.

I also just started having a terrible "surging" condition at light throttle/low speed cruising/light acceleration. It goes away under hard acceleration or at high speeds.

I have not done any real diagnosis, other then the fact that it just started happening out of the clear blue sky. It was running perfect after the carb rebuild/timing/emissions adventures. I don't like to "throw money" at problems, but since I had a spare/known working ignition control module, I threw it on there.

Since everybody likes pictures, here are a few.

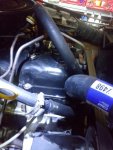
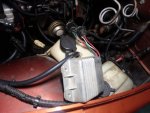
The ignition control module hides underneath/at the bottom of the coolant overflow bottle on the driver side inner fender. You can see a sliver of silver in the picture beneath the yellow coolant bottle, that is the ICM:

20191230_173405.jpg

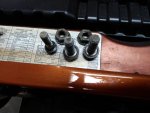
The three missing bolts (holes visible) hold it to the fender:

20191230_173708.jpg

When I cleaned up the under hood wiring, I kept the ICM wire pigtails loose. This way, I can unbolt the ICM, pull it up top, then worry about undoing the two wire plugs.

20191230_173718.jpg

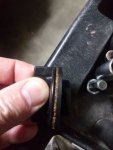
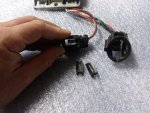
The little clips on the ICM plugs will usually snap off. They are just plastic, get brittle with age. I try not to break them, but it happens:

20191230_173949.jpg

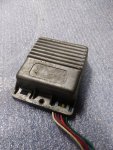
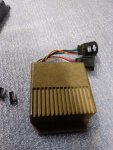
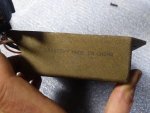
I have never quite seen an ICM like this, or with these markings. No visible damage, i.e. epoxy dripping out of it.

20191230_173953.jpg

20191230_174003.jpg

About the only visible damage I could find, the four prong plug had a bit of green corrosion on the terminals, but not terrible:

20191230_174226.jpg

Two prong plug looks good:

20191230_174232.jpg

IIRC, my spare ICM came from O'Reilly's, it is a Borg Warner brand, lifetime warranty:

20191230_174016.jpg

And of course, my three favorite words:

20191230_174027.jpg

So, plugged the new module up, bolted it in, Jeep started up, but I still have the surging condition.

I will have to actually try to "diagnose" the problem:

1) fuel - filter plugged up/low fuel pump output/old gas/low float level/accelerator pump/vacuum leak
2) ignition - weak coil/timing/emissions stuff

First thing I will do, since it is easy - I last filled this Jeep up with gas (87 octane non-ethanol) back in June, 293 miles/6 months ago. I will put some fresh gas in and see if that fixes the problem. The tank is getting low, about one needle width from completely covering the last line on "E".

Then, since I have removed/reinstalled the carb/intake, check all the bolts/check for vacuum leaks.

If still, I have a coil tester/spare coil somewhere.

And then, take a look inside the carb. It has ran perfect since the rebuild, so I don't think any of my settings need to be changed. I cheated last week and "slightly enriched the mixture", thinking maybe it was running lean, no improvement.

Fun, fun, fun!!!!!!!!!!!!!!!!!!!!!!!!!!!!!!!!!!!!!!!!!!!!!!!!
 
Even with stabilizer, every fall I drain the fuel from my shop equipment and run new 91 octane fuel/with stabilizer. If I didn't use a piece of equipment over the year, the fuel is yellow and has a varnish smell. Work truck I bought 10 yrs ago had a rear tank that the previous owner hadn't use for 2 yrs (bad fuel pump). I drained the fuel, washed out the varnish, tried to light a cup of the fuel and it wouldn't burn. I really dislike what they've done to today's fuel.
 
I decided to tackle the leaking valve cover next, no sense getting oil all over my nice clean undercarriage. And, in keeping with my "try to keep it stock", I have decided to try to reseal the OEM plastic valve cover. Much like my decision to stay with the two piece axles, I decided to keep the OEM cover sense it had no apparent damage. BUT, in my opinion, a switch to 1 piece axles/aluminum valve cover are two wise choices.

This entire process took me about 9 hours total. That is a bunch of time to attempt to reseal the OEM plastic valve cover, and this should be considered when trying to decide between keeping the plastic valve cover or upgrading. I have had mixed results in the past when trying to keep the plastic covers leak free, but I decided to give it one more shot. It is going to REALLY suck if I have to pull all this apart again, soon.

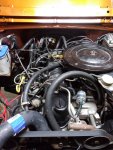
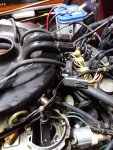
The reason why it takes so long to mess with the valve cover, look at all the junk that is in the way. This is a 1985 model, with all emissions/MCU stuff operable. Miles of hoses and wires and doo-hickeys in the way:

20200101_091850.jpg


Just on the air cleaner: two pulse air hoses, PCV fresh air hose, one wire plug, three other vacuum lines:

20200101_092317.jpg


After about an hour of work:

20200101_101747.jpg


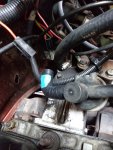
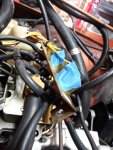
It took me about 6 hours to redo all the vacuum lines, ECM wiring, doo-hickys awhile back. So, when I took this stuff apart, I labled everything with blue tape, to hopefully speed up reassembly:

20200101_101759.jpg

20200101_101803.jpg

20200101_101807.jpg

20200101_101812.jpg

20200101_101822.jpg


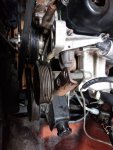
And, sense I have the serpentine belt set up (dealer installed AC has a similar bracket), I had to pull this bracket off the engine to enable the valve cover removal:

20200101_101842.jpg


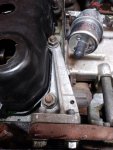
Bolts removed, Idler pulley/PS pump assembly swung out of the way. There are two nuts on the head studs, two bolts for the idler pulley, and one bolt that goes into the front of the engine. In this picture, all hardware removed:

20200101_103130.jpg
 
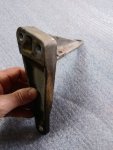
Idler pulley bracket attaching hardware, and bracket:

20200101_103138.jpg

20200101_103216.jpg

A quick public service message about this bracket and aluminum valve covers: Make sure there is clearance, and you will probably have to space this bracket up, between the bottom of this bracket and the flange on the aluminum valve cover. You will probably have to "slot" the lower mounting hole to accomplish this. If not, and you tighten this bracket down, you will repeat one of my previous $125 mistakes: broke the flange off the aluminum valve cover, no way to fix it.

IMG_20180224_163309388.jpg

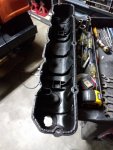
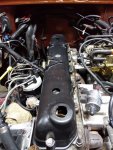
With this bracket out of the way, valve cover is finally accessible:

20200101_103425.jpg

The rear most bolt was a major PIA, not because of the firewall or the heater assembly mounting stud/nut, being in the way, but because of the valve cover itself. More on this later. Anyway, don't forget this bolt!!!

20200101_105745_HDR.jpg


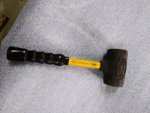
With all the valve cover attaching hardware remover, I lightly tapped the valve cover with this rubber hammer to break it free. Light tap.

20200101_110139.jpg

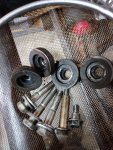
This valve cover had the following attaching hardware: bolt in front and back, three bolts on the passenger side, 4 "compression washer things" on the driver side:

20200101_110149.jpg

This valve cover had some type of RTV sealant. But, none of it stuck to the head? It all came off with the valve cover:

20200101_110317.jpg

The sealant was not even stuck that good to the cover, either:

20200101_110324.jpg

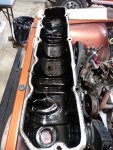
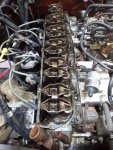
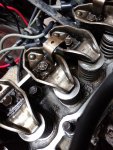
The valve train looks pretty clean. This Jeeps has a grey painted cylinder head that does not match the black paint on the block. This head has been off before.

20200101_110329.jpg
 
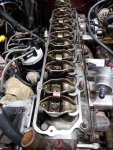
Now the fun part - cleaning the head. Even though the grey sealant did not stick to the head, there was old black RTV present, plus other gunk. I spent 2 hours cleaning the head flange where the valve cover seals. Emery cloth, brake parts cleaner ins short controlled burst, over and over and over again. I cleaned the flange until it was spotless. This will help ensure the best possible seal, plastic or aluminum valve cover. I think the reason this cover was leaking is due to poor prep work the last time it was resealed. Well, that and the fact that the last time it was sealed was over 10 years ago.

This is what a clean flange looks like. I also cleaned out all the bolt holes, and the two dowel pin holes on the driver side. I also wiped all the loose oil off the valve train. If ANY oil/foreign substance gets between the head/sealant, or the cover sealant, it will leak. When I though it was clean enough, I would go around again. And Again. Two hours worth of cleaning.

20200101_143036.jpg

Head studs/nuts completely cleaned to prevent old oil/crud getting on the sealing surface.

20200101_143048.jpg

Ran a tap through all threaded holes, picked out all the old sealant, and completely dried them out:

20200101_143057.jpg

I also cleaned the edge of the head below the flange. No chances are being taken.

20200101_143102.jpg

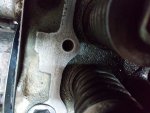
Clean/dry dowel hole. One of these holes was 1/2 full of old dried up sealant. This kept the cover from sitting flush to head in this area.

20200101_143113.jpg

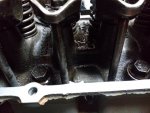
The PIA to get to rear flange/threaded hole.

20200101_143122.jpg

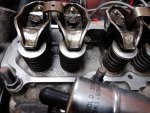
All oil wiped off the valve train. I did not want any oil to get on the sealant during its 24 hour cure time. OCD is necessary.

20200101_143128.jpg

20200101_143140.jpg

It has to be perfectly clean to even have a fighting chance at a good seal.
 
This Jeep is a 1985 Spring Special. From what I read, they were ordered/built late '84/earl '85 to be available for spring of 1985. The head on this Jeep is stamped "84" everywhere. But, this head might not be the head that came on this engine.

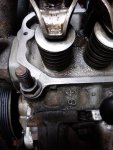
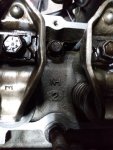
Anyway, some pictures of the casting marks I found on the cylinder head:


20200101_143151.jpg

20200101_143158.jpg

20200101_143207.jpg

20200101_143212.jpg

20200101_143217.jpg

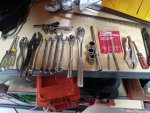
Random picture of all the tools that I used on this project. Nothing exotic, except for the 5/16" and 1/4" bottom taps used to clean ou the treaded holes in the head. Not really exotic, you should be able to get them most places, but make sure they are BOTTOM taps.

20200101_143240.jpg

The plastic valve cover itself was easy to clean. I used the most important tool ever made, the broken flat headed screw drivers, and a soft brass wire brush to clean the old sealant off the cover sealing surface. I cleaned the entire valve cover with engine de-greaser and Dawn dish washing soap. Again, OCD is necessary. No old gunk left behind, no stray stuff to run out the valve cover into your still curing sealant.

20200101_153031.jpg

20200101_153037.jpg
 
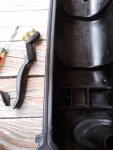
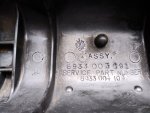
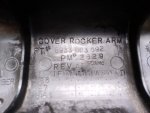
Markings inside the valve cover:

20200101_153057.jpg

20200101_153112.jpg

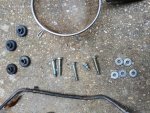
Attaching hardware. This is before I cleaned the bolt threads. Again, OCD.

20200101_153259.jpg

Before I proceeded any further, I test fit the valve cover to the head. It fit flush/tight to the head, no "rocking" or "gaps". I also "test" installed the valve cover multiple times, trying to find the best way to install it once it had sealant on its bottom flange. This is why I spent so much time moving everything out of the way - you want to easily/cleanly put the valve cover in position WITHOUT wiping the sealant off or having to slide it into place. Basically, when it is "GO" time, you have one shot.

During my test install procedures, it became quickly apparent that I would have to pull the MAP sensor off the firewall. I also took this time to remove/run a tap through/reinstall the heater core housing attaching nut that is behind the valve cover in preparation of future work.

20200101_160857.jpg

In the picture above, to the right of the exhaust manifold, on the firewall, you can also see the biggest flaw with this body - previous owner drilled a bunch of small holes to make a big hole so that they could run a mechanical temperature gauge sender through the firewall. Lovely. I plan on putting a large fender washer on both sides of this hole, run a short bolt though it, to seal this hole. Future project.

After all the test fitting, one final wipe down of the head/valve cover flange. It is so clean you can run a piece of paper towel around it the entire circumference without anything showing up. Again, OCD is necessary.20200101_155832.jpg

If your fingers are not hurt/sore/bleeding, it is not clean enough.

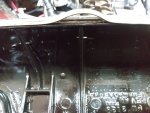
When I was taking the valve cover off, it was a major PIA to get a socket on the rear bolt. It was not stripped out, or rounded off, but the valve cover itself had some type of mold flash line preventing a socket from going straight down on to the head of the bolt:

20200101_163224.jpg

I always keep what is left of the Dremel cut off discs, never knew why. Now I do:

20200101_164052.jpg

20200101_164106.jpg

Now I can easily get a 1/4" drive socket on to the rear most bolt head.


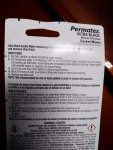
And finally, what sealant to use. Hell, I have no idea what the "best" product is. I used this stuff, mainly because I had a new tube of it in the garage. Reading the packaging, seems like it should work. I hope so:

20200101_164155.jpg

I also followed the products instructions, no weird stuff:

20200101_164209.jpg
 
The "valley" on the valve cover flange makes it easy to put a nice bead of goop on. I used the plastic nozzle that comes with the RTV, cut it to size, and ended up using about 3/4 of the tube on the valve cover. I kept the valve cover on my tool cart, chest high, so I could easily put the bead on.

20200101_165937.jpg

I used a bead about this wide, and was worried that it might not be enough, more on this in a bit:

20200101_165941.jpg

Using "muscle memory" from all of my previous "test fits", I deftly installed the valve cover on to the head in one fell swoop without contacting anything/smooshing/removing any goop:

20200101_170908.jpg


At this point, I just "finger tightened" all the hardware. This had me worried, because there was next to no goop squished out anywhere:

20200101_170934.jpg

20200101_170949.jpg

20200101_171007.jpg

But, I followed the RTV instructions and did not touch the bolts/nuts for an hour.

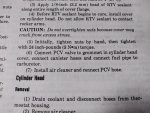
The RTV instructions mimic the FSM instructions:

20200101_171447.jpg
 
I went inside, took a shower/watched some football, and waited in dread for the one hour to pass. When it did, I went and "torqued" the hardware.
24 inch pounds is only 2 foot pounds, and I do not have anything that accurate. With that being said, the "compression washer nuts" on the driver side bottom out on the head nuts, so you can't over tighten them. The front and rear attaching bolts have a "shoulder" so they too bottom out and prevent you from over tightening them. The three bolts on the passenger side are the only ones to watch. I simply barely hand snugged them up.

After this, I had a nice/even amount of RTV "squish out" everywhere:

20200101_182255.jpg

20200101_182319.jpg

20200101_182336.jpg

20200101_182350.jpg

20200101_182414.jpg


Hopefully, fingers crossed, praying, I have a nice RTV seal all around the valve cover. I did everything in my power to accomplish this. Now, I wait 24 hours for a full cure before I start it up.

I still have about two hours worth of work to reassemble all the things I removed. After reassembly/24 hour cure time, then it will be the moment of truth.

20200101_182433.jpg

Will it work, or will I be tearing it all back down again?
And, if it works, how long will it last?

:shrug::fingerscrossed:
 
It'll work... and it'll last a looong time! :thumbsup:
 
Back
Top