• Notice for iPhone users: DO NOT use the image size reduction option when uploading photos to the forum. This causes portrait images to post as landscape. We have added a warning to the image insert pop-up as well.

Spankrjs 1986 "Ploy-Boy" CJ-7

Oakley

BENEFACTOR
Gold Member
Lifetime Member
SOA Member
City
Cumming
State
GA
Wellll ya know with all the climate change drama you may want to keep that plow right where it’s at for when you get that first 3 foot of snow down there
 

spankrjs

Scrambler Junkie
Lifetime Member
SOA Member
City
Biloxi
State
MS
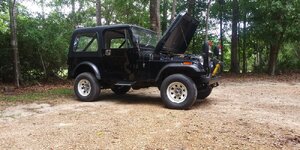
Played on tractors all day at work today, 95% ready to test run this one in the morning:

20230519_192151_HDR.jpg

Yes, the PS pump is laid over, previous owner installed way too long of a belt, I see this quite frequently???

Need to get this one stabilized, another patient will be arriving soon, and the National will be here sooner rather than later!!!!
 

spankrjs

Scrambler Junkie
Lifetime Member
SOA Member
City
Biloxi
State
MS
A few reference pictures before I removed all this stuff:

Front view:

20230521_101423_HDR.jpg

Plow "feet":

20230521_101428_HDR.jpg

Plow "carriage":

20230521_101432_HDR.jpg

The Jeep frame bracket that holds the plow "carriage":

20230521_101439_HDR.jpg

Control valve assembly, driver side fender:

20230521_101448_HDR.jpg

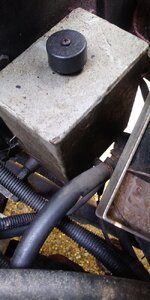
Hydraulic oil tank, passenger side fender:

20230521_101502_HDR.jpg

Engine driven hydraulic pump, passenger side, pump bracket bolts to alternator bracket:

20230521_101509_HDR.jpg

The two control levers in the cab; left raises\lowers the blade, right pivots the blade left/right:

20230521_101525_HDR.jpg

Time to get messy!!!!
 

spankrjs

Scrambler Junkie
Lifetime Member
SOA Member
City
Biloxi
State
MS
A bunch of disassembly pictures, brief notes.

The yellow plow blade, and all of these other parts are heavy. Work smart, use your head, very easy to get hurt bad/quick. Use the hydraulics to help you, and jacks, cribbing, pry bars, etc. No worse then dealing with tractor implements, if you are familiar with that type of stuff.

I removed the two springs on the back of the blade, laid the blade down:
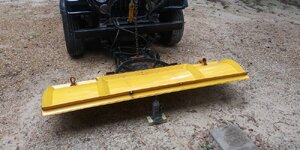
20230521_105002_HDR.jpg

Remove the two big pins that hold the yellow blade to the carriage:
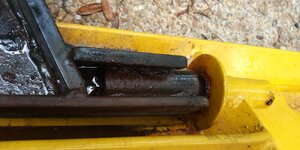
20230521_105009_HDR.jpg

Used the hydraulics to raise the carriage off the blade:

20230521_110151_HDR.jpg

Removed the lifting chain, disconnected the two hydraulic quick connects, and then the two big bolts that hold the blade carriage to the Jeeps frame bracket, backed the Jeep away from the carriage:

20230521_111704_HDR.jpg

This next part is a bitch, unless you drop the front shackles off the frame. I did not have to do this, but a big PIA.

I jacked the frame up to raise the suspension, and disconnected the sway bar to get some room. Four big bolts hold the carriage to Jeep sub frame assembly.

20230521_115731_HDR.jpg

Then, wiggle worm, curse, shove, get the sub frame out. This part fits tight between the leaf springs, and then has wings that go outward. So, you have to twist and pull and curse and it will come out, but sucks with the leaf springs in the way, but doable:

20230521_123132_HDR.jpg

Looks like progress!!!

20230521_123306_HDR.jpg
 

spankrjs

Scrambler Junkie
Lifetime Member
SOA Member
City
Biloxi
State
MS
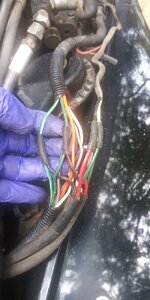
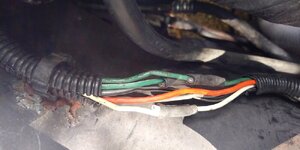
The "antler lights" are spliced into the OEM wire harness, and had to be cut out. I left the splices in my harness, cut the "antler light" wires off the splices:

20230521_133010_HDR.jpg

These wires went into the cab, not sure why?

20230521_133016_HDR.jpg

All of turn signal/running/brake lights work, headlights do not, sure this is part of the reason why LOL!!!

20230521_133241_HDR.jpg

Pulling the front bumper off to gain access to the two big bolts that hold the "antler frame" to the Jeep frame:

20230521_145754_HDR.jpg

And I might add that this Jeep has one of the cleanest/straightest/rust free front bumpers thst I have ever seen!!!!

20230521_145803_HDR.jpg

Besides surface rust, the front frame horns are in great shape:

20230521_150615_HDR.jpg

20230521_150620_HDR.jpg

Now we are starting to look like a Jeep AND not an insect!!

20230521_155515_HDR.jpg

The only part I did not remove, the crank pullet for the pump.

20230521_170707_HDR.jpg

I will pull it off tomorrow. I spilled hydraulic oil all over the place, washed it off the Jeep, did not feel like laying in the mud to pull the pulley off!!!
 

spankrjs

Scrambler Junkie
Lifetime Member
SOA Member
City
Biloxi
State
MS
Did I mention there are a lot of parts to this contraption!!!!!

20230521_170714_HDR.jpg

20230521_170722_HDR.jpg

20230521_170728_HDR.jpg

20230521_170734_HDR.jpg

20230521_170743_HDR.jpg

20230521_170748_HDR.jpg

The blade measures 6'-6" wide:

20230521_170757_HDR.jpg

I would probably say all the plow parts weigh at least 500 pounds.

As scary as some parts of this Jeep look, I was able to remove all of these parts with no damage. Lots of penetrating oil, sure, but I unbolted all of these components. Three minor notes:

1) all bolts came out, BUT one tore the threads off, and some of the cylinder to frame bolts are bent

2) I cut slits in the two rubber hoses that come off the hydraulic tank, they would not pull off, they had become one with the steel fittings

3) I did not remove the two lines off the pump. The low pressure return hose can be cut off. The high pressure line's fitting feels seized on the pump. I am sure it will come off, the line is still good, so I did not risk removing it.
 

spankrjs

Scrambler Junkie
Lifetime Member
SOA Member
City
Biloxi
State
MS
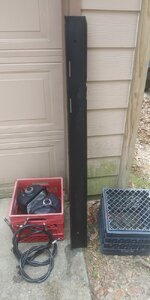
Put all the plow parts inside the garage to keep them out of the weather, except the big yellow blade, it's still leaning against an oak tree:

20230521_174357_HDR.jpg

Still pretty busy under the hood with all of the emissions/feedback carburetor stuff everywhere, but much more serviceable!!!

20230521_174554_HDR.jpg

I am going to remove the super heavy duty battery tray and the short coolant overflow bottle, install stock parts, and put the removed items with the the plow stuff.

After all that work, went for a quick drive. Jeep feels more responsive since it lost weight, sits even front to back. Even with the HD suspension package the Jeep still drives well, not harsh at all. And with the low miles it just feels so solid, hard to explain unless you have drove a really low mile CJ. It feels "new".

I definitely think it is worth saving. Sure, it won't be original paint and all original hardware, but it will not be rusting away, either!!

20230521_174827_HDR.jpg

I originally thought that the cooler bolted to the grill was for the plow hydraulics, but it is not, it is an auxillary transmission cooler. It will stay for now, maybe forever.

Anyway, long productive day, well worth the effort IMO. Need to store this one away again in a few days to shift gears on a new/short term project.


That's t for now :woot:
 

Kim Dawson

CJ-8 Member
Member
City
Molalla
State
Or
That plow was an impressive bolt on accessory. Do you know what the dealer charged to install? Or what the cost of a factory add on was? I hadn't thought about all the parts it takes to add this to a Jeep, but seeing your disassembly has given me more respect for the design and installation. Thanks for showing this.
 

spankrjs

Scrambler Junkie
Lifetime Member
SOA Member
City
Biloxi
State
MS
That plow was an impressive bolt on accessory. Do you know what the dealer charged to install? Or what the cost of a factory add on was? I hadn't thought about all the parts it takes to add this to a Jeep, but seeing your disassembly has given me more respect for the design and installation. Thanks for showing this.
No idea what the cost for the plow was back in the day? The plow is not listed on the window sticker, BUT it has that DOT sticker on driver side rocker panel with the plow information? Maybe the plow kit came with the DOT sticker??
 

barrys

Scrambler Junkie
Lifetime Member
City
East Norriton
State
PA
Looks like most of that could be replaced with a Meyers e47/e60 pump. Not much to a CJ setup with an electric pump.
 

spankrjs

Scrambler Junkie
Lifetime Member
SOA Member
City
Biloxi
State
MS
Yes, the engine driven pump/hydraulic tank/control valve assembly take up a lot of real estate under the hood. But, seems like a really heavy duty set up, suited for continuous operations all day long, built to last??
 

spankrjs

Scrambler Junkie
Lifetime Member
SOA Member
City
Biloxi
State
MS
I remember saying at SandBlast I was going to take a Jeep vacation when I got back home. Well, that lasted about 3 days LOL!!

Haven't touched this one in two months, cleaned it back up:

20230806_105346_HDR.jpg

Got tired of moving the carpet out of my way, so aired it out and installed it:

20230806_105357_HDR.jpg

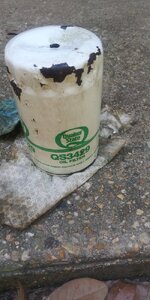
Did some basic maintenance: engine oil and filter change, air filter, fuel filter and new battery cables.

20230806_113148_HDR.jpg

Not a lot for me, but since it is over 115 with the humidity, enough!!!!

20230806_120451.jpg

Not correct:

20230806_120508.jpg

Correct:

20230806_132143_HDR.jpg

Picked up 100HP with the correct fuel filter orientation. Now if only I would do something about the missing exhaust manifold bolt........


Not too much trash in the fuel filter, did not expect much considering the Jeep has the OEM 20 gallon plastic tank and swapped on copper fuel lines.

20230806_121133.jpg

Kind of makes sense, Pennsylvania Jeep......

20230806_135255_HDR.jpg

Not sure when the last time the oil was changed, it was time.
 

spankrjs

Scrambler Junkie
Lifetime Member
SOA Member
City
Biloxi
State
MS
Interior is mostly complete:

20230806_143519_HDR.jpg

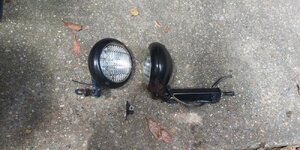
Still need to fix the headlights, previous owner hack for the plow lights. Surprisingly, really the only bad "hack" on the Jeep.

20230806_143653_HDR.jpg

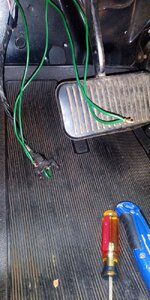
And trace/eliminate these two wires, pretty sure they were somehow plow related.

20230806_143655_HDR.jpg

Swapped out the battery/starter cables. Nothing the matter with them, just a bit to bulky for my tastes.

20230806_145039_HDR.jpg

20230806_145045_HDR.jpg

Fixed a minor transmission line cooler leak, swapped out all the underhood rubber fuel lines, a few other miscellaneous maintenance items.

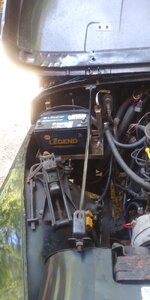
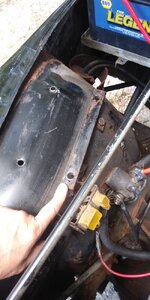
Going to put all this stuff back in the OEM location, plow stuff necessitated this arrangement on the passenger side fender/firewall.

20230806_145028_HDR.jpg


I don't have insurance or tags on this one, but made a few quick laps of the neighborhood, depreciating it a little bit more everyday!!!

20230806_153519_HDR.jpg

20230806_155028_HDR.jpg

Put it back up, will piddle along on a few more simple repairs, too hot for major work right now.

20230806_162125_HDR.jpg

That's it for now :thumbsup:
 

spankrjs

Scrambler Junkie
Lifetime Member
SOA Member
City
Biloxi
State
MS
Worked on this one some more this morning. Too hot outside to get motivated to tackle some bigger projects, so piddled on some small tasks.

Was happy to find that the wiring modifications for the plow lights really only affected the high/low beam switch harness. The headlight switch wiring/harness was not touched.

20230812_102220.jpg

Briefly bypassed the high/low switch to take it out of the loop, reconnected the wires:

20230812_103136.jpg

Voila, high/low beams work, and the high beam indicator inside the speedometer is functional, too. Hard to take pictures of headlights in the bright sun, but success:

20230812_103158.jpg

Would have preferred to cut out the original butt connectors but they are too close to the fuse box to mess with. My repair works, and once wrapped up in electrical tape transparent, but still bugs me. Might have to find/build a new mini harness......

20230812_110056.jpg

The "driver side fender/grill/light" harness was tapped into for the plow lights, too. Still functional, but bugs me, so like I mentioned above........

20230812_112357_HDR.jpg

The two original owner installed loose red wires that were hanging out from below the dash board were part of his auxillary reverse light system. I removed one red wire from this tap, pulled the remaining 6' of red wire from the driver side loom that runs under the driver side rocker/over driver side rear fender/exits body at driver side rear cubby hole behind driver side tail light/crosses over to the passenger side cubby hole.......

20230812_112420_HDR.jpg

Removed the auxillary reverse light components:

20230812_114840_HDR.jpg

Brings the rear almost back to OEM:

20230812_115225_HDR.jpg

Trying to work in the shade outside, way too hot inside the garage!!!
 

spankrjs

Scrambler Junkie
Lifetime Member
SOA Member
City
Biloxi
State
MS
Trying to clean up/properly mount the passenger side inner fender components.

The OEM jack bracket was bolted on top of the passenger side fender to make room for some previously removed snow plow hydraulic components. The hydraulically oil tank IIRC. This custom made steel piece was fabricated to keep the jack plate straight and level. This little piece might be useful when I mount a TJ air box to the passenger side inner fender on my red Scrambler....

20230812_130536_HDR.jpg

This OEM vacuum storage canister has seen better days!!!

20230812_131322.jpg

What the little vacuum fitting piece looks like on the inside.

20230812_131358.jpg

I have a NOS vacuum storage canister floating around somewhere to install.

Both front fenders are filthy from hydraulic oil/grime. They also have numerous extra mounting holes drilled through them from the previously removed hydraulic snow plow components. They also have some rust. For now, I am just going to clean them up and reinstall all the OEM components. I have two almost perfect/rust free use OEM front fenders in my parts stash to swap on eventually.

Going to piddle around with a few more easy fixes under the hood in the near future before I tackle some "real" work.

20230812_123548_HDR.jpg

That's it for now :thumbsup:
 

bigwalton

Alaskan Postal nutjob
FORUM MANAGER
SOA Member
City
Dexter
State
MI
May I change this thread title to "Plow-Boy"? or was that intentional to mock the uselessness of a plow Jeep down there in hell... er, I mean Mississippi.
 
Top