• Notice for iPhone users: DO NOT use the image size reduction option when uploading photos to the forum. This causes portrait images to post as landscape. We have added a warning to the image insert pop-up as well.

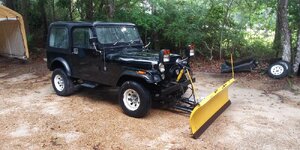
Spankrjs 1986 "Ploy-Boy" CJ-7

Did something to this one today that I have been wanting to do for awhile - removed the plow!!!! Well, the "easy" part of it. Some of these pictures are for my reference, especially the first one.

I had 8 links of chain dangling, 9th link in the slot:

20230305_162037.jpg

I had to block the plow up to take the chain out, reinstalled with more slack, like 4 links hanging:
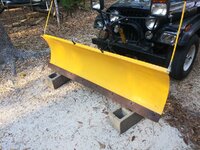
20230305_162047.jpg

Raised the plow up, removed the concrete blocks, set the plow directly on the ground, removed the lifting chain. Undo the two hydraulic lines, quick connect fittings:

20230305_162440.jpg

Pull the two quick disconnect pins, one on each side:
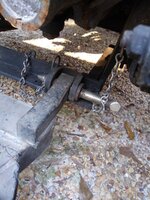
20230305_162606.jpg

The two pins hold the black lower sub assembly that holds the big yellow blade to the sub frame assembly that remains bolted to the Jeep's frame:
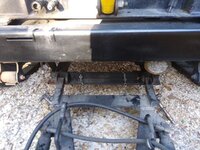
20230305_162808.jpg

Simply back away leaving the plow behind:

20230305_163041.jpg

20230305_163048.jpg

Plug the pins and keepers back in place for safe keeping:

20230305_163057_HDR.jpg

The Jeep frame mounted lower assembly can be removed by unbolting it from the front frame cross member (similar to a winch mount with the big angle side plates):
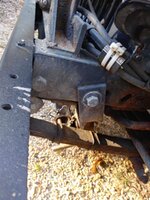
20230305_163102_HDR.jpg

And a bolt through each frame side rail back by the motor mount bolts:

20230305_163109.jpg

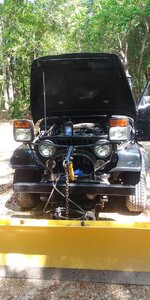
Removing the front plate/lift cylinder assembly/"antlers" that hold the plow lights would entail disassembly of the hydraulic system, so not for today. For now, the plow is out of the way and I can easily hook it back up to move it around the yard, if needed.
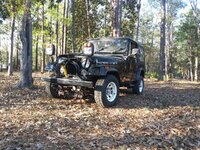
 
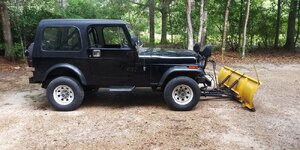
Looks a million times better, no more "reverse Carolina Squat"!!!

20230305_163423.jpg

The black frame assembly with the two cylinders attached to the yellow blade is not that heavy. That big yellow blade weighs a ton, I could not get even one side to budge by hand!! Jeep drives much better without the plow, much more peppy. That lower plow sub frame hangs low below the Jeep, will kill lots of armadillos and such!!!!

Anyway, the lack of the plow will ease future work.

That's it for now :wave:
 
After we removed the plows we would block them up at the attachment point so it would be very close to the right direction the next time we installed it. Because they'd sit for long periods apply a thin layer of grease to the exposed cylinder rods to ward off corrosion, and douse the connection fittings with a heavy oil.
Looks great!
 
I finally caught up on this thread, another very detailed excellent job Raymond! It makes me cringe seeing you tackling the oh so common rust we have here in the Northeast!
 
I finally caught up on this thread, another very detailed excellent job Raymond! It makes me cringe seeing you tackling the oh so common rust we have here in the Northeast!
Yep, I cringe, too!! Will have to really dig in soon to see how bad, hopeful as always.....................
 
Finally started digging, time to see how bad the cancer/crud is.

Remnants of paint and undercoating that make the frame look terrible. Before:

20230506_092318_HDR.jpg

Scrape/dig/scratch it off, solid underneath. After:

20230506_092322_HDR.jpg

Same exfoliation on the bottom of the floor boards. Scraped it off in the middle of a spot:

20230506_092333_HDR.jpg

Knocked the pollen off on Saturday, decided to get nasty on Sunday:

20230506_094640_HDR.jpg

Best way to see if this thing is salvageable, pull the body mount bolts. If you can get the 10 tub bolts out, kind of a good litmus test. I got them all out, but not all unicorn rainbow farts. Left side is driver side, right side is passenger side:

20230507_151944_HDR.jpg

I did not try to pull the grill mount due to the snow plow crap in the way. Penetrating oil did not do much good, torch heat works best. I heated each bolt up for about 5 minutes straight with my little MAP torch, basically caught the lower mounts on fire. Used the lowest setting on my impact, mostly successful.

All four 3/8" bolts came out perfectly on the passenger side. On the driver side, the front bolt broke its captured nut. No big deal, ground the bolt head off with an angle grinder and pushed it up and out. Number 3 and 4 came out fine. Number two's captured nut broke its cage, which sucks. BUT I got very lucky. I jambed a pick in an access hole, pegged the square nut, got it out!!! Better to be lucky than good sometimes!!!!!!!

20230507_151912_HDR.jpg

Usually, if you spin one of these hidden captured nuts you have to cut an access hole to remove them. I was able to get the bolt out, re-tap the nut, and reinstall a bolt. Lucky.

Both rear 7/16" captured nuts gave me problems. On each side the little metal cage that secures the nut was rusted away. Passenger side not as bad as the driver side. I peeled back the sheet metal on this rear body support to gain access to the big square nut. Passenger side came out no drama. Besides me peeling the face back, no structural damage here. It even looks really clean looking back inside this structural box beam:

20230507_133246_HDR.jpg

20230507_133246_HDR.jpg

The driver side is not in as good as shape. The bottom of the box beam feels a little soft, and I could see it flexing when I was removing the body mount bolt. Its not gone, but not long for this world, either.

20230507_134106_HDR.jpg

I was able to run a tap/bolt through all the captured nuts and reuse them, including the three that I removed.

For some reason I saved the OEM body mounts/bolts that I pulled off my ex-Tan Scrambler quite a few years back. I ended up using these old bolts/washers/lower bushings to temporarily re-secure the body to the frame. California vs Pennsylvania body mount bolts!!!

20230507_170833_HDR.jpg

Part of the problem with the OEM body bolts is the factory used some type of thread locker on them. You can see remnants of this stuff on the CA bolts, the yellow gunk. I have ran into this stuff before on the OEM AMC 20 diff cover bolts. Torch is the only thing that will loosen its grip.
 
Trac-Lock in the rear still works, note the remnants of the very rear body mount captured nut cages, plus other detritus!!!

20230507_171730_HDR.jpg

What to do now?

20230507_171044_HDR.jpg

Not sure if I am ready to pull the tub off quite yet to tackle that work. All bolts and screws from the windshield frame down to the floor have been removed, threads chased, mostly new hardware installed with anti-sieze. I think I am just going to keep removing/cleaning and chasing threads/reinstalling hardware to make future disassembly easier.

The only way to save/preserve this 6,800 mile Jeep is to pull the tub, clean and repaint everything. No other way. It won't be original anymore, but realistically the only way to make it a "survivor". By the time I get done it will be a complete rebuild/rehabilitation. The mechanical components seem solid, but even though it only has 6,800 miles on it, it is close to 37 years old. So, lots of deferred maintenance needed, too.

Not necessarily what I wanted to do, but really no choice. It will be good when I finish, but this will be a project for sure. Oh well, it will keep me out of trouble for awhile and keep me from wasting money on a 392 Wrangler!!!

That's it for now :wave:
 
Do you have a scope you can look inside the frame rails? If there's no spreading in there at the bottom then her soul is sound. I say clean up, kill and encapsulate the body seam rust as best you can and enjoy her. Rhino lining over the rust really will stop it for a long time so long as you kill it first.
 
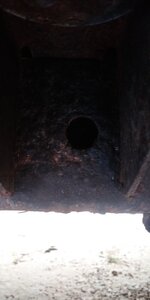
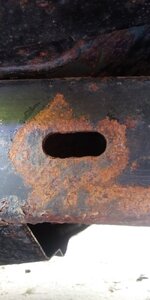
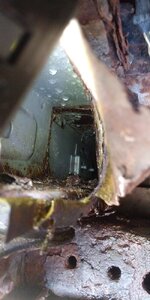
Frame is solid. I was most concerned about the driver side, last 6-12 inches, due to the body having the most damage here. I beat on the frame with a hammer here, and all over, solid.

That being said, I don't think all the bolts that thread into frame's interior weld nuts will just twist out. Lots of heat.......

So, after removing/reinstalling all the body bolts, I will probably start pulling/replacing all the frame bolts - shackle hangers, steering box, sway bar, transmission/Dana 300 skid plate, etc.....

Absolutely no Rhino Liner for me!!!!!

I am going to strip the entire bottom down to bare metal, multiple coats of an oil based rust killing/sealing primer, and repaint it black.

Previous dude that had it had his painter repaint the interior, but it looks like shit. Lots of trash in the paint. So, in the future, I will probably have a shop repaint the exterior/interior. Or maybe the whole damn thing once I disassemble it......
Do you have a scope you can look inside the frame rails? If there's no spreading in there at the bottom then her soul is sound. I say clean up, kill and encapsulate the body seam rust as best you can and enjoy her. Rhino lining over the rust really will stop it for a long time so long as you kill it first.
 
This one decided to start leaking power steering fluid a few weeks back. At first, just a little, now about a quart in 30 seconds!!!

20230514_104049_HDR.jpg

Did not appear to be leaking from the box or pump, and the fluid was dumping out about 1/2 way between the two major components:

20230514_104104_HDR.jpg

Filled it with fluid, started up the engine, have a rust pin hole in the pressure line that self empties the system out fairly quickly:

20230514_104113_HDR.jpg

Was not planning on doing any mechanical work until after I get the body under control, but need to fix this so the Jeep can stay mobile a little bit longer. Will install a new pressure and return line. This will entail pulling the radiator out to gain access, which sucks with the plow crap in the way. Anyway, wanted to work on more body stuff so I left it broke down in the middle of the driveway for now.

I ordered (x50) 5/16"-18 stainless screws to replace all the original body Torx bolts: tailgate, door hinges, cowl to windshield frame brackets. This is in keeping with my "do all the PIA work now to make future disassembly easier" strategy.

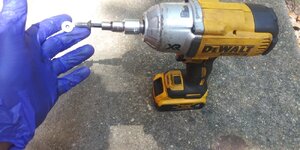
Using my 1/2" drive Dewalt impact on the lowest setting, a big hammer to drive the Torx bit into the heads, lots of lube, and the old "in and out" with the impact, I was able to get it done.

20230514_110037_HDR.jpg

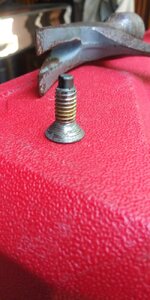
Not the best picture, but you can see the factory yellow thread locker/sealant still on one of the OEM bolts. This combined with the stupid Torx heads leads to lots of cursing.

20230514_120104_HDR.jpg

All 8 of the OEM flange nuts inside the cowl that help secure the windshield frame lower hinges to the body were still in great shape:

20230514_114644_HDR.jpg

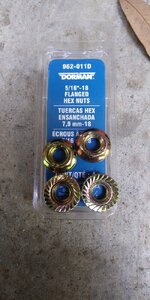
Since I was installing all new screws, I installed 8 new nuts, too. Damn OCD!!

20230514_143407_HDR.jpg

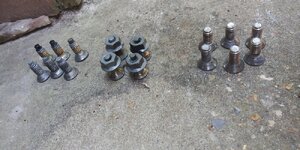
I would remove one bolt, tap the hole, clean it out, install anti-sieze to the new screw, install. And repeat.......Passenger side door/windshield area bolts below:

20230514_121502_HDR.jpg

All new stainless bolts installed into original threaded plates. The stainless contrasts sharply with the black paint, makes it easy for me to see where I've been!!!

20230514_121452_HDR.jpg
 
Hit the tailgate next. I was worried about the lower bolts due to the corrosion I ran into last weekend when I removed the very rear corner body mounts. No problems at all with these smaller captured nuts:

20230514_131928_HDR.jpg

Will have to do some more digging/investigation, but i might be able to just repair the outboard corners of the rear body box beam where the body mounts are. The center of this beam is still 100% good to go.

And the driver side door/cowl area completed:

20230514_151449_HDR.jpg

The driver side flange nuts are a PIA to get to by yourself vs the passenger side!!! The parking brake assembly/reinforcement brace is all up in the way. Quick picture shows the new gold nuts, one appears silver due to excess anti-sieze LOL!!

20230514_155918_HDR.jpg

The above picture shows how solid/rust free the cowl area is. There are multiple exterior paint bubbles present on this Jeep, but so far I believe most of it is the result of previous crappy respray paint jobs. I have "popped" a few of these pimples and no rust through...... Will have to see if my luck holds!!!!

Pretty successful day, all bolts came out with no issues. I could reuse all of these OEM bolts in the future, if I choose. No stripped heads, no drilling/torches/welding needed. For as bad as certain areas of this Jeep looks it still surprises me with how good it is in other areas.

20230514_155421_HDR.jpg

Other areas like the above mentioned power steering pressure line, or what could quite possibly be the worlds rustiest still operational 258 OEM mechanical fuel pump!!!!!!

20230514_160332_HDR.jpg

Just really strange how corrosion really attacked certain things (fuel pump, PS pressure line, all of the frame mounted OEM hard brake/fuel lines) and other areas are perfectly fine?? Who knows, just glad that the frame and hopefully the body tub are OK. About the only body bolts left to pull/replace are the grill/fender/hood bolts. I'll get to them soon enough, then start on frame bolts.

After all the successful bolt removal, dropped back to PS line replacement prep work. Need to pull the radiator to gain access to the steering box, so drained the radiator:

20230514_172822_HDR.jpg

I'm going to fix the PS line next, but before I do any more work I am going to video the plow in operation and then remove it. It is a huge PIA to work around.

That's it for now :wave:
 
The Jeep looks so nice on the top side, and so crusty rusty underneath. I'm amazed you were able to remove the body mount bolts and other screws without breaking them. I use a torch to heat them up but it doesn't work on all of them. Nut plates spin and screws twist off. Maybe it's your low setting impact driver that shakes them loose. Whatever it is, you've got the magic touch.
 
Successfully pulled the radiator and fan shroud tonight, both appear to be in good shape. Radiator will get a repaint eventually, especially the steel mounting brackets. Fan shroud is in great shape, plastic doesn't rust :rotfl:

20230515_184009_HDR.jpg

And again, for whatever reason, the driver side of this Jeep has more rust then the passenger side. In the above picture, compare the driver side radiator mounting bracket to the passenger side. Odd.....

With the radiator/shroud out of the way I can access the lines on top of the steering box. If not for the plow crap in the way I would pull the grill. Going to try to swap the lines with the grill in place :fingerscrossed:

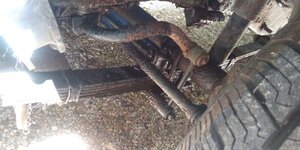
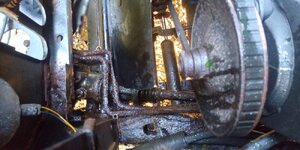
Note how rusted the OEM bare steel PS lines are. I can see now why all the OEM steel fuel/brake lines rotted out and were replaced with copper lines.

20230515_184028_HDR.jpg

20230515_184041_HDR.jpg

Lines are definitely shot, frame solid. Pictures make everything look worse then reality due to 3 quarts of power steering fluid coating everything.

Yep, this whole Jeep is going to have to be completely disassembled, cleaned/sanded/blasted, then primed and painted. In for a penny in for a pound and all that jazz...........I'll be happy to just successfully remove and replace the PS lines for now!!!!


That's it for now :fingerscrossed:
 
2.5 hours for 1 hose, 1 bolt, and 3 line nuts, but I got them mothers off!!!!!

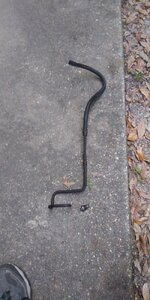
Took the return line off first, the line whose fitting on the steering box is closest to the frame. This was the "easy" one. 18mm line wrench "double wrenched" with a 3/4" wrench, cracked loose, then proceeded to twist the line till it tore.

20230516_181238_HDR.jpg

20230516_181249_HDR.jpg

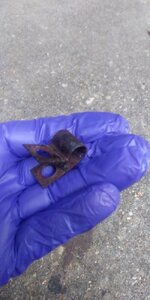
As bad as the metal lines are, the frame bolt that holds the little thin metal line clamps to the frame, the little clamps, and the OEM return hose line clamp are fine:

20230516_181318_HDR.jpg

20230516_182042_HDR.jpg

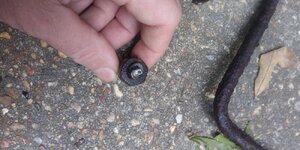
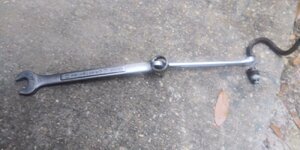
For the pressure line, the line wrench was not gonna get it, even double wrenching. I was bending the 3/4" doubler, starting to open up the slit in the line wrench. So, I snapped the metal line off, slipped the 12 point end of a regular 18mm wrench over the nut, put the 3/4" doubler on the end, it broke loose with a loud crack sound that scared the crap out of me!!!!

20230516_185624_HDR.jpg

Put the two old plugs back in the steering box ports to keep moisture/debris out. I was very happy to be able to successfully remove these two original lines with the grill/fender/snow plow in the way, did a happy dance for sure!!!

20230516_185752_HDR.jpg

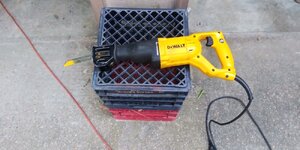
After that fight, I figured the pump end fitting of the pressure line would be a piece of cake. WRONG. No rust, but that damn fitting would not loosen. So, when was the last time you used a Sawzall to change power steering lines!!!! Had to go 100% RedneckRay on it's azz!!!

20230516_190625_HDR.jpg

Cut the line off close to the fitting on the back of the pump, snapped the line off. Used a 16mm socket, 3/8 drive ratchet, AND a short cheater pipe to break it free!!!

20230516_192342_HDR.jpg

The big fitting came out with the line fitting, no big deal, I can put it in a vice to remove the fitting:

20230516_192352_HDR.jpg

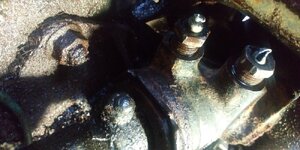
Some of the rust issues do not even make sense??? The lines are wasted, but the thin metal line clamps are fine. The only non rusted parts of the lines are where the little clamps were:

20230516_192700_HDR.jpg

No idea. Frame is fine.

Anyway, that was fun!!!!! Rust free is boring!!!!!

It's always hard to take it apart, reassembly should be easier. Famous last words..........
 
1.5 hours to reinstall two new PS lines, but I got them in the end:

20230518_185035_HDR.jpg

This is always a huge PIA with the grill in place IMO. The replacement lines are close, but not exact, so they always take some tweaking. It's more work to remove the grill, but it make installing these lines so much easier it is worth the effort IMO.

If I had any doubts about pulling the plow, they are gone now. It is such a huge PIA working around all the plow stuff, not just up front, but underneath AND under the hood. So, once I get this jewel running again the plow is coming off.

Frame looks terrible in the above picture, but it is not that bad. Some pits for sure, but still solid. It will clean up well. This is the worst looking part of the entire frame.

Regardless, this Jeep is going to have to have the tub/frame removed, cleaned, prepped and repainted, a la "Yard Scrambler". Only way to save it.

That's it for now :thumbsup:
 
That rust free frame looks great! You sure know how to get your money’s worth with your hose.
 
Back
Top