• Notice for iPhone users: DO NOT use the image size reduction option when uploading photos to the forum. This causes portrait images to post as landscape. We have added a warning to the image insert pop-up as well.

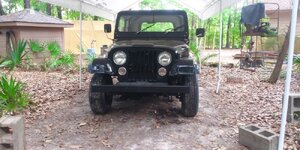
Spankrjs 1986 "Ploy-Boy" CJ-7

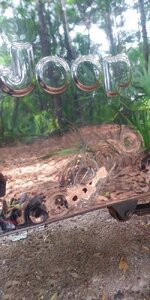
This one makes Vintage Red look like a diamond 💎

That's the kind of rust I'm used to seeing up here. Maybe our rust is a tad bit worse, you have no holes in the frame. That Jeep would be labeled "rust free" up here :crazy:.
 
  • Haha
Reactions: SKT
No way he will take this one back, this one is mine, unfortunately :(
Trade for work on the orange race rocket? Get that out of there and suddenly space for this one. :unsure:
 
More deconstruction and exploration today.

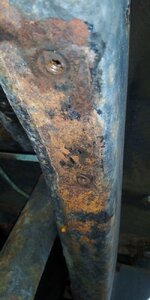
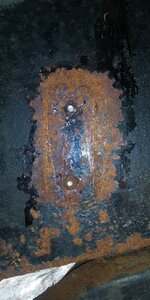
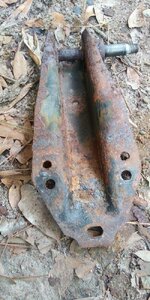
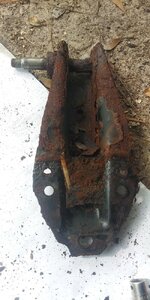
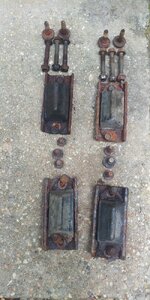
Removed the rear bump stops off the frame rails:

20240427_085904.jpg

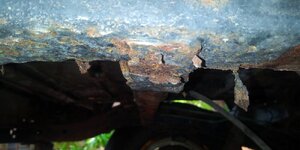
Compared to the above picture, same exact area of the frame that was under the bump stop, the old undercoat/paint just flakes off, solid metal underneath:

20240427_085955.jpg

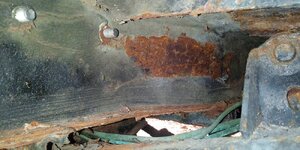
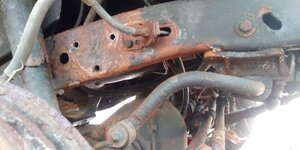
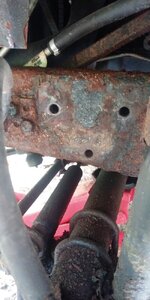
Second from last frame cross member, the one that holds the front of the gas tank. Again, stuff just flakes off, solid metal underneath.

20240427_090007.jpg

20240427_090039.jpg

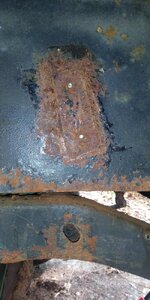
More rust porn, body tub step up riser. Peeling this crap off with a hand scraper is addictive, like popping bubble wrap!

20240427_092752.jpg

One of the wheel wells, driver side IIRC, before and after around fold and tumble rear seat bracket plate thing:

20240427_092802.jpg

20240427_093248.jpg

Passenger side:

20240427_090500.jpg

Going to knock both of these off to clean underneath them.

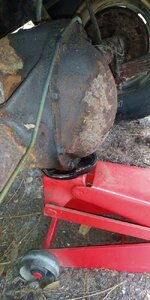
Besides rust and peeling paint and undercoating, there is also some type of grey/white powder dirt crud on the rear end. It knocks off easy enough. You can see it on the rear differential/cover/u-bolts etc.

20240427_093339.jpg

Again, why I'm doing this outside, big mess!!

20240427_094513.jpg
 
  • Like
Reactions: SKT
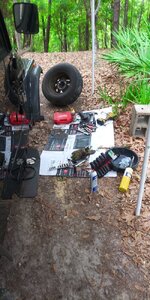
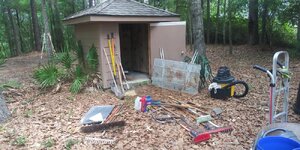
Somehow all the tools end up outside!

20240427_121640.jpg

Pulled the passenger side front bump stop and sway bar bracket to bottom of frame bolts. While I was there, also pulled off the front shock towers to inspect the frame:

20240427_141852.jpg

Frame still in great shape, relatively speaking. No rust through, solid, beat on it with a hammer. Front passenger shock tower after scraping the crud out, no issues.

20240427_141859.jpg

Passenger side looks a bit worse, but solid. I believe leaking hydraulic fluid from plow stuff on this side stripped/damaged the undercoat and OEM paint.

20240427_152831.jpg

Before scraping out the driver side tower. Just crud, still solid, no issues.

20240427_152841.jpg

When you scrape off the crud/rust/paint/undercoat, clean metal.

20240427_154921.jpg

All in all, happy with the frame. About 95% confident that it does not have any problem areas, except the whole thing is covered in surface rust/flaking paint LOL.

So, removed and replaced rear bump stops, skid plate bolts, front bump stops, front shock towers, and lower sway bar bracket to frame bolts:

20240427_161305.jpg

If your keeping score, I have removed every frame bolt that goes into one of the OEM inner frame welded nuts without spinning or damaging anything. Pretty happy about that, pretty sure this frame will be alright with a thorough cleaning/stripping/priming/painting, inside and out.

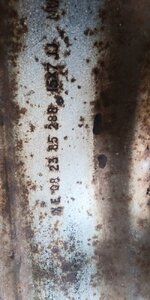
Date on one of the wheels:

20240427_144320.jpg
 
The body has been a mixed bag, did some preliminary investigations.

Driver side rear corner to side panel seam. Some bubbles, popped them, no holes, just paint over rusty metal/no prep. No through rust here.

20240427_093740.jpg

Looks like a skim coat of bondo over surface rust then paint. Shitty work.

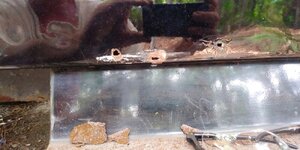
Passenger side rocker. The guy I bought this Jeep from had his body guy do some work on the ends of both rockers where they end at the wheel openings. Well, he must have stopped 3" from the edge. Supposedly welded in new steel. I guess this is where he stopped. Rust through, BUT below the floor panel to rocker joint.

20240427_112303.jpg

Note white bondo over surface rust. Nice job.

Moving forward a couple inches, more of the same. Rust through, BUT below the floor panel to rocker joint.

20240427_112251.jpg

Same rocker, at the front of this panel. More through rust BUT below the floor panel to rocker joint.

20240427_112257.jpg

Need to dig on the driver side rocker panel, too. So far, what I have found, all the rust through is at the bottom edges of the exterior panels, nothing above the floor board line.

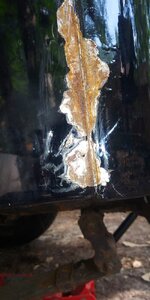
Driver side rear corner, again, back side behind where the license plate would be. This is where the tailgate support box beam thing rusted out. You should see OEM spot weld dimples here NOT bulges. Scrape the bulge what do we find:

20240427_171129.jpg

More white filler over the top of rusty metal. So, all that nice shiny black paint will be ground off eventually.

Hard to know who did all of this crap work. Pretty sure the original owner resprayed this Jeep, and I know the second owner sprayed parts of it, too. Both did shitty work for sure.

The only thing I am happy about is so FAR all the rust through I have found is down low, no more than say 2" from the bottom edge of the exterior panels (except driver side rear corner in the above picture, maybe 4" but due to tailgate box beam rusting out). All below the floor line. Will have to do some more digging and see how rotten this apple is. What I've found so far is meh, but OK, fixable. Not ready to pull trigger on new tub just yet. On a positive note at least the rolling chassis will clean up nicely!!

20240427_163021.jpg

That's it for now.
 
The body has been a mixed bag, did some preliminary investigations.

Driver side rear corner to side panel seam. Some bubbles, popped them, no holes, just paint over rusty metal/no prep. No through rust here.

View attachment 113509

Looks like a skim coat of bondo over surface rust then paint. Shitty work.

Passenger side rocker. The guy I bought this Jeep from had his body guy do some work on the ends of both rockers where they end at the wheel openings. Well, he must have stopped 3" from the edge. Supposedly welded in new steel. I guess this is where he stopped. Rust through, BUT below the floor panel to rocker joint.

View attachment 113510

Note white bondo over surface rust. Nice job.

Moving forward a couple inches, more of the same. Rust through, BUT below the floor panel to rocker joint.

View attachment 113511

Same rocker, at the front of this panel. More through rust BUT below the floor panel to rocker joint.

View attachment 113512

Need to dig on the driver side rocker panel, too. So far, what I have found, all the rust through is at the bottom edges of the exterior panels, nothing above the floor board line.

Driver side rear corner, again, back side behind where the license plate would be. This is where the tailgate support box beam thing rusted out. You should see OEM spot weld dimples here NOT bulges. Scrape the bulge what do we find:

View attachment 113513

More white filler over the top of rusty metal. So, all that nice shiny black paint will be ground off eventually.

Hard to know who did all of this crap work. Pretty sure the original owner resprayed this Jeep, and I know the second owner sprayed parts of it, too. Both did shitty work for sure.

The only thing I am happy about is so FAR all the rust through I have found is down low, no more than say 2" from the bottom edge of the exterior panels (except driver side rear corner in the above picture, maybe 4" but due to tailgate box beam rusting out). All below the floor line. Will have to do some more digging and see how rotten this apple is. What I've found so far is meh, but OK, fixable. Not ready to pull trigger on new tub just yet. On a positive note at least the rolling chassis will clean up nicely!!

View attachment 113514

That's it for now.

Just take it inside and save the trip to your tool chest. If you don’t have a broom, I’ll bring you one in June.
 
… tool chest...
What in the world is that? I thought people from southern states only used cardboard boxes or if they are high class, diamond plate aluminum boxes in the bed of their truck.
 
What in the world is that? I thought people from southern states only used cardboard boxes or if they are high class, diamond plate aluminum boxes in the bed of their truck.
If you look close in these pictures you will see cardboard boxes and oil drain pans holding my tools :rotfl:
 
What in the world is that? I thought people from southern states only used cardboard boxes or if they are high class, diamond plate aluminum boxes in the bed of their truck.

I feel attacked......
 
I'll post all this here, since everyone loves pictures LOL.

I need some storage space so I can take this Jeep to pieces. Garage is full, so let's build a shed!!

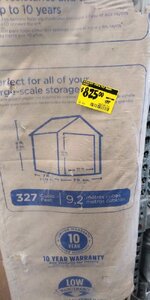
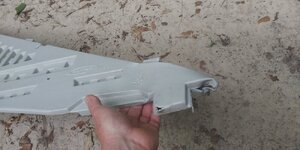
Termitse, rust and rot are a concern in my yard, so I bought this plastic shed kit from Home Depot. Pretty good markdown due to damaged box.

20240502_172733_HDR.jpg

20240502_172738_HDR.jpg

My yard is all jungle, it has never been cleared out. So, anytime you want to build something, huge PIA.

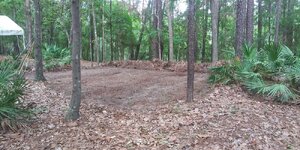
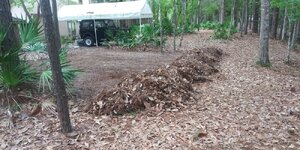
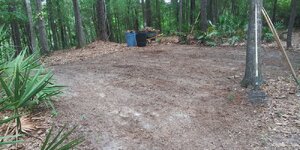
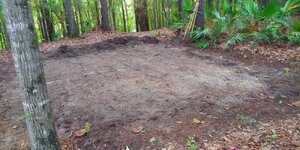
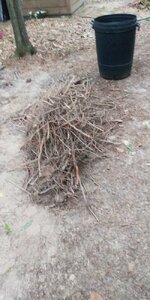
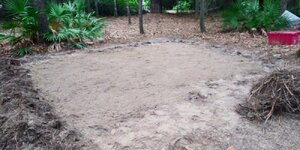
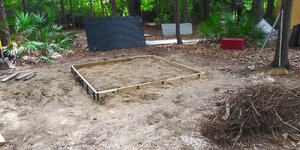
Raking out a 20'x20' area, probably 2" of leaves pine straw:

20240504_100616_HDR.jpg

20240504_100633_HDR.jpg20240504_104440_HDR.jpg

Down to top dirtish layer.

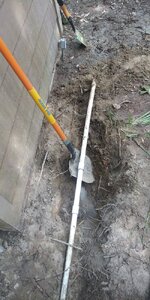
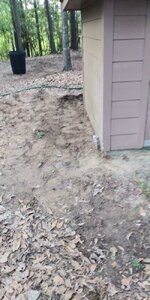
Sicne I had the shovels out, I needed to knock down/dig out the dirt aound the pump house which is adjacent to this new shed build site. Termites have ate this thing once, so if a little maintenance can keep me from having to rebuild it, well worth the effort!!

Cleaned it out first;

20240504_112857_HDR.jpg

In the picture below, I have already dug out the left side, right side needs to be knocked down still. Not good to have dirt/leaves right up to the siding. I am digging down/leaving about 4" of concrete visible all the way around.

20240504_124315_HDR.jpg

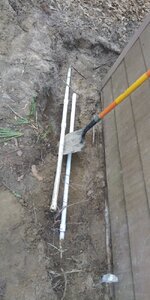
Decided to get rid of this stupid palmetto bush thing. Had it cut free, was twisting it out the ground, yep broke the 1" water line that feeds the house!!

20240504_133718_HDR.jpg

20240504_141712_HDR.jpg


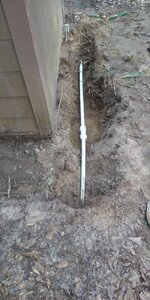
So, put on my plumber's hat, cut out the broke piece of pipe:

20240504_152645_HDR.jpg
 
  • Like
Reactions: SKT
Dug out about 3' either side of the break, put on rigid couples and a short piece of pipe, and broke the pipe further down stream!

20240504_153611_HDR.jpg

Back to Lowe's, longer piece of pipe, another ridgid coupler, repair sleeve:

20240504_164213_HDR.jpg

And fixed and buried:

20240504_171233_HDR.jpg

20240504_183834_HDR.jpg

Turned the downstairs bath tub on before I turned the water back on, filled it up with all the dirt/sand that got in the line. That was a fun detour!!!

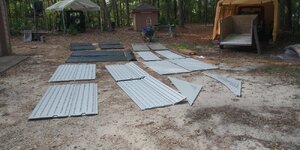
Shed kit parts, like a big Lego/Tamiya RC car kit!!

20240505_173444_HDR.jpg

One damaged part:

20240505_173459_HDR.jpg


20240505_173515_HDR.jpg

I contacted Suncast, they shipped me out a new part pronto, no charge, great customer service!!!


Anyway, I'm sure assembling the shed will be fun, the foundation work, not so much. Decided to pour a concrete slab, nothing like some good ole fashioned shovel work!

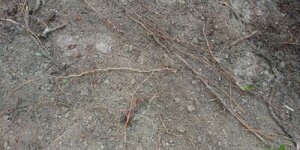
At this below leave level you have another 2" of thousands of roots:

20240506_184841.jpg


20240506_184855.jpg
 
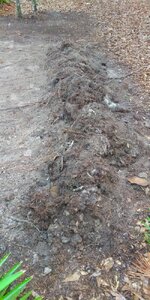
Raking out the thatch with a hoe:

20240506_184908.jpg

20240508_185059.jpg

Used an ax to basically chop up every square inch of the slab site, lot's of roots!!

20240508_185104.jpg

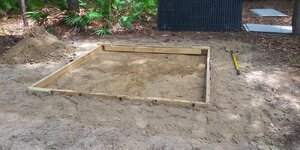
Finally down to the good clay/sand/dirt layer. No freeze crap here, 2" below grade is good enough for me, and I'm on hard ground.

20240508_185111.jpg

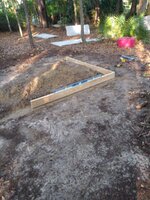
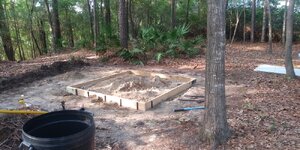
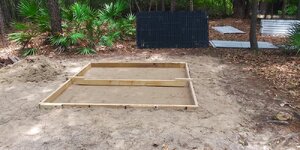
Grading/forming/squaring/leveling up:

20240508_185112.jpg

20240511_180641_HDR.jpg


20240512_100633_HDR.jpg

20240512_110547.jpg

20240512_121426.jpg

20240512_125332.jpg
 
  • Like
Reactions: SKT
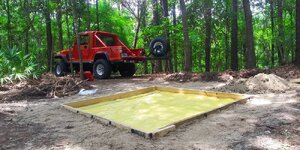
Found this left over super thick vapor barrier in a warehouse at work, put it to good use!!

20240512_130134.jpg

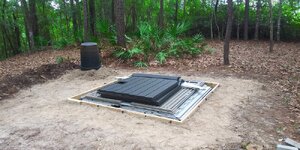
Made sure the shed floor fits LOL!!

20240512_130611.jpg

Stacked up all the other parts on top, covered it up with a tarp, we will have rain all this week.

20240512_150130.jpg

20240512_150626.jpg

Just need some dry weather to make/pour some concrete. I need .67 yards, no small batch deliveries around here, so I'll buy a pallet of 80lb Quickrete and a Harbor Freight Concrete mixer, hope to pour next weekend depending on rain.

And you thought all I worked on were Jeeps LOL!!!

I don't want @Jeeperdd to make fun of me, I didn't set up any batter boards, theodolite, or break out the laser plane. I just "3/4/5" the corners, used a 4' level, good enough for this project :crazy:

Once I get the shed built I will start working on the black 7 again.
 
Nice. I thought maybe you were going with the 60 X 80 shed. Let me know if you want a little help with it. I have time on my hands now that I’m retired. :thumbsup:
 
Found this left over super thick vapor barrier in a warehouse at work, put it to good use!!

View attachment 113652

Made sure the shed floor fits LOL!!

View attachment 113653

Stacked up all the other parts on top, covered it up with a tarp, we will have rain all this week.

View attachment 113654

View attachment 113655

Just need some dry weather to make/pour some concrete. I need .67 yards, no small batch deliveries around here, so I'll buy a pallet of 80lb Quickrete and a Harbor Freight Concrete mixer, hope to pour next weekend depending on rain.

And you thought all I worked on were Jeeps LOL!!!

I don't want @Jeeperdd to make fun of me, I didn't set up any batter boards, theodolite, or break out the laser plane. I just "3/4/5" the corners, used a 4' level, good enough for this project :crazy:

Once I get the shed built I will start working on the black 7 again.
shits going to be crooked for sure...:ROFLMAO:
 
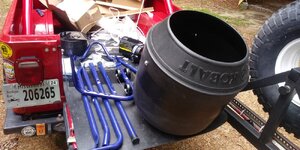
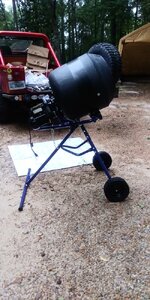
Bought and built this tonight, hope to pour Sunday depending on rain!!

20240517_165421_HDR.jpg

20240517_180312_HDR.jpg

20240517_192006_HDR.jpg


Only took about an hour to assemble. Harbor Freight had one of their mixers on display and it seemed really cheap/flimsy. The Home Depot version of the Lowe's thing I bought had a weak support leg that looked liked it would collapse. No Tractor Supplies or Northern Tools near me had anything in stock, this was 5 minutes from the house, decision made.

Plan is to dump concrete from mixer into wheel barrel, dump wheel barrel into form. This mixer cylinder high off the ground and I don't want to be dropping/splattering concrete from that high up.
 
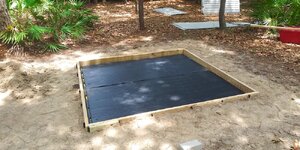
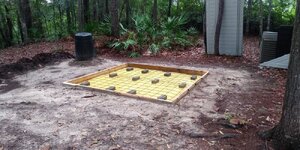
Rain cleared out early so uncovered my forms, dried off the plastic, put my concrete bricks and wire inside the forms:

20240518_091938_HDR.jpg

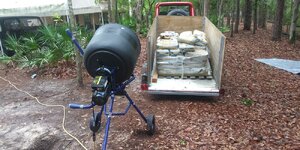
Bought 50 50 pound bags of Quickrete down the street at Lowe's. The 50 pound bags are much more manageable than the 80 pound bags, especially when your working alone. Scrambler and the HF trailer with upgraded axle had no problems pulling 2,500 pounds. Below is my mixing station, mixer close to trailer full of concrete.

20240518_111406_HDR.jpg

I mixed three 50 pound bags at a time, mixer had no problems, motor never even got warm. I ran it non-stop for 1.5 hours and was able to mix all the concrete for this pour. Used 47 of the 50 bags, was getting a little nervous toward the end LOL. I would add enough water for two bags, add one bag, let it mix a minute, add the second bag, and then go dump the previous batch. Would go back add a third bag and enough water to mix it. Repeat over and over. Really not bad at all, mixer did all the hard work. 150 pounds of concrete in a wheel barrel is not too bad.

Cloud cover and thick plastic helped me out. Most of the moisture had to wick up and out due to vapor barrier, clouds kept the concrete from setting up too fast, so got it all down and screed off with time to spare. Below is the initial hand float and hand edger treatment, still a hair loose, you can see the trowel marks.

20240518_142219_HDR.jpg

Let it sit up while I ran the pallet back to Lowe's to get my $26.00 pallet deposit back LOL!!! Got back and worked it for about an hour, good to go.

20240518_155825_HDR.jpg

For the record finishing something this big with a 4"x12" finish trowel sucks, but can be done. I'm happy with it. And the shed floor covers it all up anyway LOL. I'm sure it will have a bunch of leaves and pine straw in it by morning.

Glad I'm done with this chore!! I'll let it sit up a day or two before wrecking the forms/rubbing out any ridges, and grouting any honey combs.

All in all, happy with how it turned out, and very happy with the performance of the Lowe's mixer. I have other concrete projects I can now easily tackle with this tool.

That's it for now!!!
 
Back
Top