You are using an out of date browser. It may not display this or other websites correctly.
You should upgrade or use an alternative browser.
You should upgrade or use an alternative browser.
The Descrambler Project
- Thread starter W.R.Buchanan
- Start date


- City
- Redmond
- State
- OR
Nice work, as always!
The first thing I thought was the same- That valve will get taken out. I haven't had problems with rocks or the like, but with vegetation- branches and junk getting all sorts of places it shouldn't.
Maybe build a mini-skid off the main skid to protect it?
Have you seen these drain valves? I know, they're overseas, but- they're slick as snot and work awesome. I've used them on engines for years with no problems. Might be a low profile valve for your tank.
http://www.fumotousa.com/

Then again, seeing as it's a drain, and how often will it really get used- how about just a threaded plug?
I know...here we are overthinking things that aren't even an issue...
The first thing I thought was the same- That valve will get taken out. I haven't had problems with rocks or the like, but with vegetation- branches and junk getting all sorts of places it shouldn't.
Maybe build a mini-skid off the main skid to protect it?
Have you seen these drain valves? I know, they're overseas, but- they're slick as snot and work awesome. I've used them on engines for years with no problems. Might be a low profile valve for your tank.
http://www.fumotousa.com/
Then again, seeing as it's a drain, and how often will it really get used- how about just a threaded plug?
I know...here we are overthinking things that aren't even an issue...
Last edited:




W.R.Buchanan
Legacy Registered User
- City
- Ojai
- State
- CA
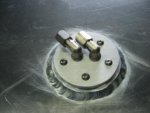
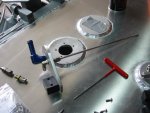
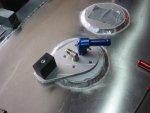
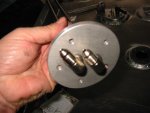
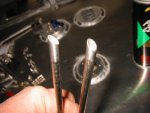
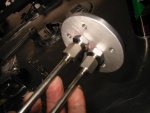
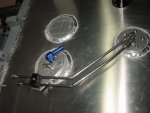
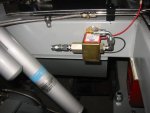
Well I finally finished plumbing the tank and the rear half of the fuel system. Had to make a bunch of lines and bend a bunch of tubes to get there but it's there now. Here's some pics of the plumbing on the tank itself.
Randy
Randy
Attachments
-
 Scrambler 1039.JPG40.3 KB · Views: 173
-
 Scrambler 1041.JPG53.4 KB · Views: 171
-
 Scrambler 1042.JPG45.7 KB · Views: 172
-
 Scrambler 1043.JPG41.9 KB · Views: 172
-
 Scrambler 1045.JPG46.3 KB · Views: 172
-
 Scrambler 1044.JPG44.9 KB · Views: 172
-
 Scrambler 1046.JPG49.4 KB · Views: 172
-
 Scrambler 1048.JPG49.2 KB · Views: 170
W.R.Buchanan
Legacy Registered User
- City
- Ojai
- State
- CA
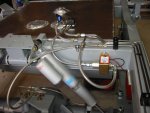
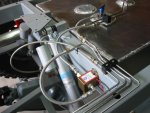
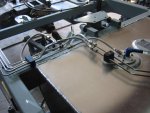
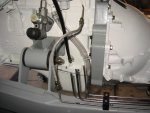
Here's pics of the flexible lines made and hooked up. Still have to attach everything at the front to the engine and fuel cannister.
Randy
Randy
Attachments

Bioyak
Basic User
- City
- Burnet
- State
- Tx
Here's a picture of the doors you were looking for on a Scrambler that is on Abilene CL. It's in Santa Anna Texas which is about half way between Abilene and Brownwood (North Central TX). It actually looks a lot like mine - ironically I sold a full Acme top and an old set of Figerglass doors to help finance my latest project. Really like yours! TREY

Last edited:
W.R.Buchanan
Legacy Registered User
- City
- Ojai
- State
- CA
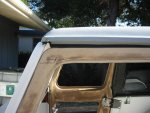
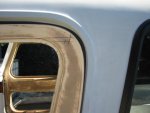
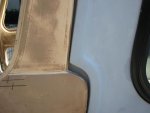
Whereas those doors are similar they are not the same as the ones I have. They are a later version.
If you notice, the top edge of your doors angle up towards the front of the door. These doors would fit into a factory half cab or full cab had they ever made one. Also stock hard doors would fit into the opening in your top or my top whihc is made to accept stock hard doors.
My doors are completely different in that regard. The top edge of my doors are not angled up and there is a huge gap I have to fill inorder for them to seal properly. The doors I have were made to fit an earlier ACME top.
I wish I had the doors off your top! It would be a much simpler attachment. I am looking at literally weeks of work to get these doors modified so they seal correctly.
Randy
If you notice, the top edge of your doors angle up towards the front of the door. These doors would fit into a factory half cab or full cab had they ever made one. Also stock hard doors would fit into the opening in your top or my top whihc is made to accept stock hard doors.
My doors are completely different in that regard. The top edge of my doors are not angled up and there is a huge gap I have to fill inorder for them to seal properly. The doors I have were made to fit an earlier ACME top.
I wish I had the doors off your top! It would be a much simpler attachment. I am looking at literally weeks of work to get these doors modified so they seal correctly.
Randy
Attachments
Last edited:

gaducker
Legacy Registered User
- City
- Newnan
- State
- ga
Are you runnning the pick up and return side by side inside the tank? I picked up air in the fuel when I did this. I had to end up moving the return up in the fuel filler neck so the fuel could run back down the filler hose to let the air get out before it hit the tank.
W.R.Buchanan
Legacy Registered User
- City
- Ojai
- State
- CA
No, the return goes in in the 3/16 line that is next to the blue vent line in the front of the tank.
The two lines in the rear hole are the pickups. One is for the Electric Fuel Pump and the other is just open. Both feed a cannister which will have about 2 qts in it and will feed the engine when the pickups are uncovered so the engine doesn't run out of fuel if on a sever downhill.
The hole with the tape still on it is for fuel level sender. see pics above
Randy
The two lines in the rear hole are the pickups. One is for the Electric Fuel Pump and the other is just open. Both feed a cannister which will have about 2 qts in it and will feed the engine when the pickups are uncovered so the engine doesn't run out of fuel if on a sever downhill.
The hole with the tape still on it is for fuel level sender. see pics above
Randy
- City
- Redmond
- State
- OR
Both feed a cannister which will have about 2 qts in it and will feed the engine when the pickups are uncovered so the engine doesn't run out of fuel if on a sever downhill.
Great idea!
I've run those Napa fuel pumps before, and found them noisy and not 100% reliable. The Holley and Edelbrock pumps are much quieter and reliable. (And larger and more expensive, too...)
W.R.Buchanan
Legacy Registered User
- City
- Ojai
- State
- CA
Randy,,, the purpose of the electric pump is to fill the fuel cannister and help the lift pump on steep climbs. It is not a continuous usage type of application.
When the pump is turned off "theoretically" the lift pump could suck fuel thru the pump, however the majority of fuel will be sucked thru the open line (the other pickup).
When purging the cannister the pump will fill the cannister and then overflow back thru the open line.
The whole idea here is to prevent fuel starvation on steep decents with low fuel levels where the fuel pickups could become uncovered. With the electric PP back at the back anytime fuel was sloshing over the pickup it would suck fuel in, and fuel would be immediately transferred forward to the cannister. Not necessarily so with the engine lift PP at the front of the vehicle.
Restarting a fuel starved diesel on a trail is not something I want to have to do.
I have used the NAPA pumps also and found them to be reliable and I actually like the clicking noise as it shows the thing is running. However in this usage unless I got caught in one specific circumstance it will hardly get used. It is more a fail safe device than anything else.
It will be OK. I think? + I have a spare
Randy
AS a side note I will probably just tee both of the fuel supply lines together up front so the lift pump sucks thru both of them. I can prime both lines with the Electric PP just as if the cannister was there.
When the pump is turned off "theoretically" the lift pump could suck fuel thru the pump, however the majority of fuel will be sucked thru the open line (the other pickup).
When purging the cannister the pump will fill the cannister and then overflow back thru the open line.
The whole idea here is to prevent fuel starvation on steep decents with low fuel levels where the fuel pickups could become uncovered. With the electric PP back at the back anytime fuel was sloshing over the pickup it would suck fuel in, and fuel would be immediately transferred forward to the cannister. Not necessarily so with the engine lift PP at the front of the vehicle.
Restarting a fuel starved diesel on a trail is not something I want to have to do.
I have used the NAPA pumps also and found them to be reliable and I actually like the clicking noise as it shows the thing is running. However in this usage unless I got caught in one specific circumstance it will hardly get used. It is more a fail safe device than anything else.
It will be OK. I think? + I have a spare
Randy
AS a side note I will probably just tee both of the fuel supply lines together up front so the lift pump sucks thru both of them. I can prime both lines with the Electric PP just as if the cannister was there.
Last edited:
- City
- Redmond
- State
- OR
Ahh...I understand. For intermittent use it should be OK. I have used them for continuous duty and they never last longer than 6 mos. I have a couple on hand that I use for transfer pumps. (I also have an old Ford electric lift pump that makes a great transfer pump, and is amazingly quiet.)
The clicking noise on the Napa pump drove me crazy. But you're right, you can tell when they're working- and if they are pumping or cavitating just from the sound of the clicks.
You could put a mercury type switch on it so it only activates at a predetermined degree of incline.
The clicking noise on the Napa pump drove me crazy. But you're right, you can tell when they're working- and if they are pumping or cavitating just from the sound of the clicks.
You could put a mercury type switch on it so it only activates at a predetermined degree of incline.
Last edited:
W.R.Buchanan
Legacy Registered User
- City
- Ojai
- State
- CA
I just dumped a major post and I ain't got it in me to redo it.
Working on Air and Vent lines.
Need to running battery cables front to rear and then I can start the engine.
We'll see how it goes.
Randy
Working on Air and Vent lines.
Need to running battery cables front to rear and then I can start the engine.
We'll see how it goes.
Randy
W.R.Buchanan
Legacy Registered User
- City
- Ojai
- State
- CA
It really irritates me as that post was about 6" long and had a bunch of detailed verbage in it. Surprisingly all I did was to hit the back arrow to see something someone said in an earlier post. Dumped the whole thing.
There is also a key or combination of key,s that when I hit them dump whatever I'm doing.
This makes me throw stuff!
It was so humid here today(80%) I had to quit in the garage, I was dripping in sweat and I find it impossible to do my best work when these conditions are afoot.
Randy
Randy
There is also a key or combination of key,s that when I hit them dump whatever I'm doing.
This makes me throw stuff!
It was so humid here today(80%) I had to quit in the garage, I was dripping in sweat and I find it impossible to do my best work when these conditions are afoot.
Randy
Randy
- City
- Redmond
- State
- OR
There is also a key or combination of key,s that when I hit them dump whatever I'm doing.
I have the same issue...somewhere on the lower left side there is a key that makes everything go away...it's by the "fn" key...maybe it is the f'n key!
W.R.Buchanan
Legacy Registered User
- City
- Ojai
- State
- CA
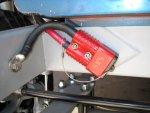
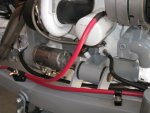
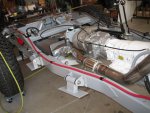
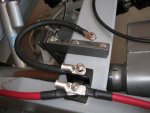
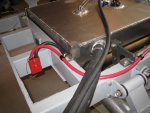
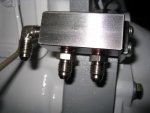
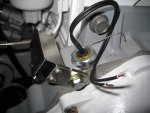
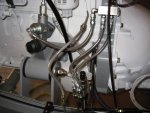
OK some updates. finished the lines and everything. also the battery system is in.
Had to deviate from the original fuel canister on the Firewall plan to a simpler fuel manifold mounted on the adapter.
It works pretty much the same way, there is just no fuel saved. The pump worked great and pumped fuel all the way forward in about 10 seconds.
Attempted to start the engine Saturday but the starter was frozen. It is due back from rebuild tomorrow so it will get done soon.
Had to deviate from the original fuel canister on the Firewall plan to a simpler fuel manifold mounted on the adapter.
It works pretty much the same way, there is just no fuel saved. The pump worked great and pumped fuel all the way forward in about 10 seconds.
Attempted to start the engine Saturday but the starter was frozen. It is due back from rebuild tomorrow so it will get done soon.