

You are using an out of date browser. It may not display this or other websites correctly.
You should upgrade or use an alternative browser.
You should upgrade or use an alternative browser.
The Descrambler Project
- Thread starter W.R.Buchanan
- Start date


W.R.Buchanan
Legacy Registered User
- City
- Ojai
- State
- CA
OK guys, sorry I haven't been here much but I have been working hard on many aspects of assembling this Jeep, and it is just too much to keep two websites updated.
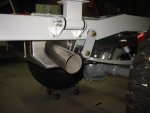
I just finished the exhaust system today. It is 3" SS tube from the turbo to the Flowmaster Muff to the tail pipe and dumps out the right side behind the rear wheel.
At this point the vehicle is nearly ready to have the body reinstalled. All that is left on the frame is plumbing all of the fuel, air and brake lines.
I found a good local source for brake line piece parts today in Chatsworth near a business I use frequently so Monday I will be picking up the needed doodads for the brake lines.
Got a whole years work dumped on me last week so I have to balance work production with Jeep work. Usually I reserve Sat and Sun for Jeep work. I have even stopped shooting until I get this thing done,,, Err drivable. Probably won't be completely done for a long time.
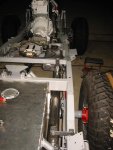
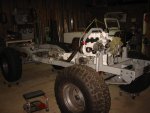
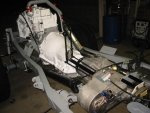
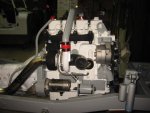
Here's some pics to bring you guys up to speed or if you like you can goto www.4BTSWAPS.com thread name" Here's the DeScrambler." For comentary and literally hundreds of "in process" pictures on all of my thnking on this car along with fab techniques. The thread is approaching 50,000 views and there is easily 400+ pics to see. Lots of info there and it takes about 3 hours to read and see everything. Lots of pics of the details, and there are plenty of "details."
Randy
I just finished the exhaust system today. It is 3" SS tube from the turbo to the Flowmaster Muff to the tail pipe and dumps out the right side behind the rear wheel.
At this point the vehicle is nearly ready to have the body reinstalled. All that is left on the frame is plumbing all of the fuel, air and brake lines.
I found a good local source for brake line piece parts today in Chatsworth near a business I use frequently so Monday I will be picking up the needed doodads for the brake lines.
Got a whole years work dumped on me last week so I have to balance work production with Jeep work. Usually I reserve Sat and Sun for Jeep work. I have even stopped shooting until I get this thing done,,, Err drivable. Probably won't be completely done for a long time.
Here's some pics to bring you guys up to speed or if you like you can goto www.4BTSWAPS.com thread name" Here's the DeScrambler." For comentary and literally hundreds of "in process" pictures on all of my thnking on this car along with fab techniques. The thread is approaching 50,000 views and there is easily 400+ pics to see. Lots of info there and it takes about 3 hours to read and see everything. Lots of pics of the details, and there are plenty of "details."
Randy
Attachments
Last edited:

W.R.Buchanan
Legacy Registered User
- City
- Ojai
- State
- CA
Congrats to gaducker for his 4BT install.  Good to see others using this power plant in Scramblers.

Randy
Good to see others using this power plant in Scramblers. Randy
W.R.Buchanan
Legacy Registered User
- City
- Ojai
- State
- CA
Plumbing the Frame
After I got the exhaust done I started looking for all the piece parts to plumb the frame for fuel, air and brakes.
My original intention was to use all Stainless Steel Fittings, however after I saw the prices on this stuff versus the aluminum or plated steel parts, I took another look at it. Then yesterday I found a bunch of brake line fittings that I didn't use when I redid the Yellow Jeep 10 years ago. All brand new and still in plastic bags.
After doing inventory I will need to buy 3 more fittings.
All of these fittings are the reusable style of AN fittings used with SS Braided flex lines. In fact I am also using some of the fittings off the Yellow Jeep as they still look pretty new.
I will still use Stainless hard lines running on the drivers side frame rail fore and aft and then flex lines to the diffs and then on to the calipers.
I started making some Clamp Blocks to hold the lines in place on the frame yesterday and they are just pieces of left over black delrin I had made for handles for the Omniturn cabinet sliding door. They are chunks 1/2 x 3/4 x 3" cut to 2" long.
To do this you bolt or clamp two pieces together with a piece of plastic shim stock in between and then drill a 3/16 or 1/4" hole thru the center of the whole part. One 10-32 bolt holds the whole thing on the frame and when you remove the shim you have just enough tension on the lines to hold them in place.
This is nothing new and you can buy this stuff from various places, however it is difficult to find exactly what you need and since I only need 4-5 for the whole project I'll just spend and hour or so making them exactly like I want.
The brake system is pretty strait forward. I need a single line running back to the rear, and one going forward to the front, not much there.
The fuel system is a little more complicated,,,, In an earlier post I talked about how there was going to be a fuel cannister on the firewall for the lift pump to draw fuel from. It took a while to actually figure out how to make it work.
There is three lines running to the tank. Two1/4" supply/pickup lines that run to the bottom of the tank and one 3/16" return line coming from the engine.
The two supply lines work like this. One runs thru an electric fuel pump which is a back up for the lift pump and will be used on steep climbs, the other line is open and fuel will flow thru it as the lift pumps sucks it forward.(path of least resistance) Both of these lines go to the fuel cannister on the firewall. To purge all air out of the system all you do is run the electric pp which will fill the cannister and then overflow thru the open pick up line. The Lift Pump is fed from the bottom of the cannister.
The only time air could get into the system is if the tank was nearly empty and one or both of the pickups was above the fuel level. And then the air bubble which would end up in the cannister would be purged out of the cannister as soon as the pickups were covered and the Electric PP ran.
One of the problems I am trying to solve is having some clear lines in the system so I can see flow happening. I want to be able to see fuel running in the lines to verify that it is happening the way I think it should. Just a matter of finding some clear plastic line that is compatable with Diesel and will last 20 years. Another Idea might be some small sight glasses on the lines, then I could run braided lines for the rest of the flex lines. Still cogitating on these details.
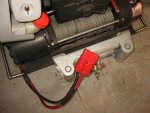
I also have to run my Large Electrical cables to the front and rear for the winch and to the plug out back to power jumper cables or whatever . This is 1/0 welding cable except you buy it from Del City Wire and it comes in Red and Black.(good stuff!) The plugs on the ends are just standard electric forklift charging plugs and I get them from McMaster-Carr. The winch plugs into the front plug and can be disconnected to plug the Jumpers in. That way you never have to clip someones jumper cables to your batterys, or even open the hood. Plus that the batteries were wired so that the winch or jumpers only draw from the "B" battery unless both batterys are hooked together. IE you always have the start/run battery isolated so you can't kill it with the winch unless you want to.
My Jumper cables also have one of these plugs on one end so they can be plugged directly into my Jeep and then clipped onto the other vehicle with the clamps. I have never used them , but they are nice to have along.
Lots of stuff to do in this plumbing phase. I'll also be going back and forth to the body details that must be done before it can be reinstalled after the plumbing is done.. Lots to do there but the list is definately getting shorter.
Randy
After I got the exhaust done I started looking for all the piece parts to plumb the frame for fuel, air and brakes.
My original intention was to use all Stainless Steel Fittings, however after I saw the prices on this stuff versus the aluminum or plated steel parts, I took another look at it. Then yesterday I found a bunch of brake line fittings that I didn't use when I redid the Yellow Jeep 10 years ago. All brand new and still in plastic bags.
After doing inventory I will need to buy 3 more fittings.
All of these fittings are the reusable style of AN fittings used with SS Braided flex lines. In fact I am also using some of the fittings off the Yellow Jeep as they still look pretty new.
I will still use Stainless hard lines running on the drivers side frame rail fore and aft and then flex lines to the diffs and then on to the calipers.
I started making some Clamp Blocks to hold the lines in place on the frame yesterday and they are just pieces of left over black delrin I had made for handles for the Omniturn cabinet sliding door. They are chunks 1/2 x 3/4 x 3" cut to 2" long.
To do this you bolt or clamp two pieces together with a piece of plastic shim stock in between and then drill a 3/16 or 1/4" hole thru the center of the whole part. One 10-32 bolt holds the whole thing on the frame and when you remove the shim you have just enough tension on the lines to hold them in place.
This is nothing new and you can buy this stuff from various places, however it is difficult to find exactly what you need and since I only need 4-5 for the whole project I'll just spend and hour or so making them exactly like I want.
The brake system is pretty strait forward. I need a single line running back to the rear, and one going forward to the front, not much there.
The fuel system is a little more complicated,,,, In an earlier post I talked about how there was going to be a fuel cannister on the firewall for the lift pump to draw fuel from. It took a while to actually figure out how to make it work.
There is three lines running to the tank. Two1/4" supply/pickup lines that run to the bottom of the tank and one 3/16" return line coming from the engine.
The two supply lines work like this. One runs thru an electric fuel pump which is a back up for the lift pump and will be used on steep climbs, the other line is open and fuel will flow thru it as the lift pumps sucks it forward.(path of least resistance) Both of these lines go to the fuel cannister on the firewall. To purge all air out of the system all you do is run the electric pp which will fill the cannister and then overflow thru the open pick up line. The Lift Pump is fed from the bottom of the cannister.
The only time air could get into the system is if the tank was nearly empty and one or both of the pickups was above the fuel level. And then the air bubble which would end up in the cannister would be purged out of the cannister as soon as the pickups were covered and the Electric PP ran.
One of the problems I am trying to solve is having some clear lines in the system so I can see flow happening. I want to be able to see fuel running in the lines to verify that it is happening the way I think it should. Just a matter of finding some clear plastic line that is compatable with Diesel and will last 20 years. Another Idea might be some small sight glasses on the lines, then I could run braided lines for the rest of the flex lines. Still cogitating on these details.
I also have to run my Large Electrical cables to the front and rear for the winch and to the plug out back to power jumper cables or whatever . This is 1/0 welding cable except you buy it from Del City Wire and it comes in Red and Black.(good stuff!) The plugs on the ends are just standard electric forklift charging plugs and I get them from McMaster-Carr. The winch plugs into the front plug and can be disconnected to plug the Jumpers in. That way you never have to clip someones jumper cables to your batterys, or even open the hood. Plus that the batteries were wired so that the winch or jumpers only draw from the "B" battery unless both batterys are hooked together. IE you always have the start/run battery isolated so you can't kill it with the winch unless you want to.
My Jumper cables also have one of these plugs on one end so they can be plugged directly into my Jeep and then clipped onto the other vehicle with the clamps. I have never used them , but they are nice to have along.
Lots of stuff to do in this plumbing phase. I'll also be going back and forth to the body details that must be done before it can be reinstalled after the plumbing is done.. Lots to do there but the list is definately getting shorter.
Randy
W.R.Buchanan
Legacy Registered User
- City
- Ojai
- State
- CA
Finally got my SS line material ordered. It was kind of a pain to find what I wanted and took several days to finally Suss out.
All of it should be here by Tuesday and then I can get to bending lines.
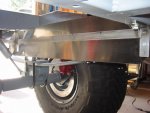
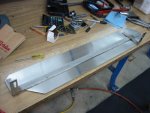
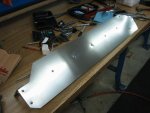
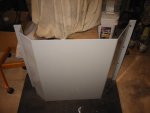
In the mean time I made a Heat Sheild to shield the tank from the exhaust pipe yesterday.
It is .008 stainless shim stock I have had for the last 25 years and is hooked to a SS frame that bolts to the end bolts of the skid plate.
It will reflect most all of the heat from the pipe and any that is absorbed will be disapated quickly as the material has very little mass.
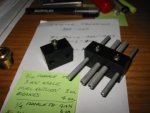
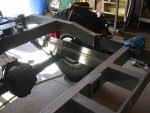
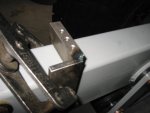
I also made a drill jig to place the holes for the delrin line blocks directly on the center of the frame rail.
Here's pics
Randy
All of it should be here by Tuesday and then I can get to bending lines.
In the mean time I made a Heat Sheild to shield the tank from the exhaust pipe yesterday.
It is .008 stainless shim stock I have had for the last 25 years and is hooked to a SS frame that bolts to the end bolts of the skid plate.
It will reflect most all of the heat from the pipe and any that is absorbed will be disapated quickly as the material has very little mass.
I also made a drill jig to place the holes for the delrin line blocks directly on the center of the frame rail.
Here's pics
Randy
Attachments
-
 Scrambler 955.JPG43.2 KB · Views: 297
-
 Scrambler 958.JPG53.8 KB · Views: 300
-
 Scrambler 960.JPG51.1 KB · Views: 298
-
 Scrambler 964.JPG56.8 KB · Views: 298
-
 Scrambler 965.JPG50.3 KB · Views: 299
-
 Scrambler 962.JPG54.8 KB · Views: 299
-
 Scrambler 967.JPG39.7 KB · Views: 299
-
 Scrambler 959.JPG38.4 KB · Views: 300
-
 Scrambler 953.JPG55.3 KB · Views: 298
W.R.Buchanan
Legacy Registered User
- City
- Ojai
- State
- CA
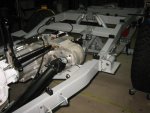
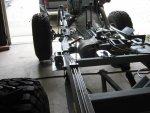
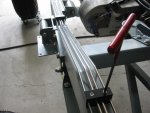
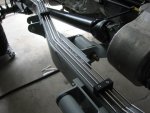
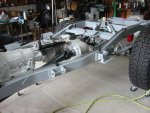
Installed hardlines front to rear today. All stainless steel 3/16" for the brake lines and fuel return and 1/4 for the fuel supply.
Here's pics of the result.
Randy
Here's pics of the result.
Randy
Attachments

W.R.Buchanan
Legacy Registered User
- City
- Ojai
- State
- CA
Surprisingly it only took me about an hour to bend those 4 tubes.
As soon as I get the axles plumbed and fuel tank installed I can finish with the tubing runs under the body.
Very close to being ready to install the body. Bunch of work needs to be done to it before it goes on.
The list gets really short after the body goes on.
Randy
As soon as I get the axles plumbed and fuel tank installed I can finish with the tubing runs under the body.
Very close to being ready to install the body. Bunch of work needs to be done to it before it goes on.
The list gets really short after the body goes on.
Randy

- City
- Columbia
- State
- MO
randy, that is dead sexy.
x121397482314120.888312345!
W.R.Buchanan
Legacy Registered User
- City
- Ojai
- State
- CA
PF: that's a big number,,,, Thanks
Randy
Randy
W.R.Buchanan
Legacy Registered User
- City
- Ojai
- State
- CA
Bits and Pieces of the Brake System
Been burried in Navy work for the last few weeks.
Still trying to do a little bit here and there on the DeScrambler. It's been brutally hot here in beautiful Ojai CA so working on the project is confined to between about 7 and 9PM in the evening depending on how I feel.
Proper routing of brake lines on a Jeep is kind of a big deal. Leaving lines out in the open flapping in the breeze is just asking for trouble, and believe me loosing your brakes on a difficult trail sucks outright. I laugh everytime I see brake lines coming from the frame down to the axle just hanging out there saying "Hey rip me off, I'm not that important ."
Lost mine on the Swamp Lake trail once when I ran over a little pine tree and it picked my left rear line off. The reason why I ran over the little pine tree in the first place was because my steering shaft had came loose from the steering box and I had no steering. Fixed that only to find I had no brakes. Had to tow another Jeep down and out for the last 5 miles of the trail and use his brakes to stop us both. took 3 hours to go 5 miles on a dirt road!
As a result all of my brake lines are now routed right next to or behind big pieces of steel.
When I grabbed ahold of my steering gear that day to shove the shaft back on, I immediately became aware of the need for a Power Steering oil cooler, as the fluid and machinery gets plenty hot pushing those big tires around. Still trying to figure the best place to put that item on this Jeep, but it will be part of the program from the start.
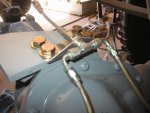
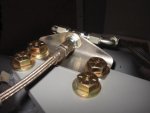
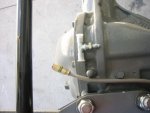
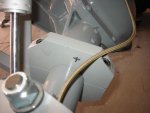
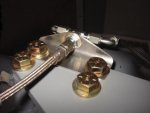
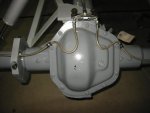
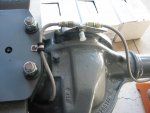
Made a bracket to hold the rear axle Brake Line Tee. It was pretty easy and I used a rem from the fuel tank baffle material, and it was bolted to the traction bar mount which is directly on top of the rear diff. see pics. The material is 16 ga. 6061-T6 so it is pretty stiff and strong stuff.
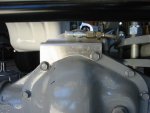
The front axle was a different story and it had to have a Z bend to be mounted in a favorable position. The only place to attach it was to pick up the top two diff cover bolts.
The bracket couldn't just be a strait piece as the lines would have been sticking out in front of the diff which is not a real safe place. So it had to be a Z bend. I had to inlist the help of a new buddy named Fred that has every sheet metal device known to man. We quickly took an existing piece of material and put another 90 degree bend into it making a step that will be about 1" behind the front of the diff cover.
The bulkhead tee will mount to that and exit right next to the air line for the ARB and the Vent line for the diff. All 3 lines can be tie wrapped together and move together as the axle articulates.
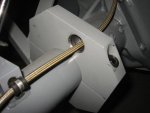
The big part of this plumbing job is the part where I get to drill holes thru the front spring perches for the lines to go thru. I am an idiot for not doing it when I made them like I did on the rear ones.
I originally thought that I would route the lines inbetween the perches and the U bolts, however after looking at it if the axle shifts at all it would pinch the lines and cause a problem. I will just have to suffer thru drilling the holes in seriously awkward positions.
I also have to drill a hole in the top clamp for the traction bar so the Left rear line can go thru it, instead of over the top. I can do this on the mill so it won't be that bad.
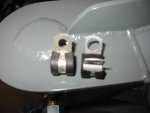
The last little tidbit is making 1/4" P clamps with 3/8" hold down holes. Those Harbor Freight step drills come in handy for all this type of work. I have used them alot on this build and they are definately worth the $10-12 they cost for the set of three. They've paid for themselves many many times. Since domestic made step drills are $30-50 each these Imports are really good value.
Here's some pics and I'll post more when the front is done. I also have to run the plastic air lines for the ARB's and Vent lines.
Randy
Been burried in Navy work for the last few weeks.
Still trying to do a little bit here and there on the DeScrambler. It's been brutally hot here in beautiful Ojai CA so working on the project is confined to between about 7 and 9PM in the evening depending on how I feel.
Proper routing of brake lines on a Jeep is kind of a big deal. Leaving lines out in the open flapping in the breeze is just asking for trouble, and believe me loosing your brakes on a difficult trail sucks outright. I laugh everytime I see brake lines coming from the frame down to the axle just hanging out there saying "Hey rip me off, I'm not that important ."
Lost mine on the Swamp Lake trail once when I ran over a little pine tree and it picked my left rear line off. The reason why I ran over the little pine tree in the first place was because my steering shaft had came loose from the steering box and I had no steering. Fixed that only to find I had no brakes. Had to tow another Jeep down and out for the last 5 miles of the trail and use his brakes to stop us both. took 3 hours to go 5 miles on a dirt road!
As a result all of my brake lines are now routed right next to or behind big pieces of steel.
When I grabbed ahold of my steering gear that day to shove the shaft back on, I immediately became aware of the need for a Power Steering oil cooler, as the fluid and machinery gets plenty hot pushing those big tires around. Still trying to figure the best place to put that item on this Jeep, but it will be part of the program from the start.
Made a bracket to hold the rear axle Brake Line Tee. It was pretty easy and I used a rem from the fuel tank baffle material, and it was bolted to the traction bar mount which is directly on top of the rear diff. see pics. The material is 16 ga. 6061-T6 so it is pretty stiff and strong stuff.
The front axle was a different story and it had to have a Z bend to be mounted in a favorable position. The only place to attach it was to pick up the top two diff cover bolts.
The bracket couldn't just be a strait piece as the lines would have been sticking out in front of the diff which is not a real safe place. So it had to be a Z bend. I had to inlist the help of a new buddy named Fred that has every sheet metal device known to man. We quickly took an existing piece of material and put another 90 degree bend into it making a step that will be about 1" behind the front of the diff cover.
The bulkhead tee will mount to that and exit right next to the air line for the ARB and the Vent line for the diff. All 3 lines can be tie wrapped together and move together as the axle articulates.
The big part of this plumbing job is the part where I get to drill holes thru the front spring perches for the lines to go thru. I am an idiot for not doing it when I made them like I did on the rear ones.
I originally thought that I would route the lines inbetween the perches and the U bolts, however after looking at it if the axle shifts at all it would pinch the lines and cause a problem. I will just have to suffer thru drilling the holes in seriously awkward positions.
I also have to drill a hole in the top clamp for the traction bar so the Left rear line can go thru it, instead of over the top. I can do this on the mill so it won't be that bad.
The last little tidbit is making 1/4" P clamps with 3/8" hold down holes. Those Harbor Freight step drills come in handy for all this type of work. I have used them alot on this build and they are definately worth the $10-12 they cost for the set of three. They've paid for themselves many many times. Since domestic made step drills are $30-50 each these Imports are really good value.
Here's some pics and I'll post more when the front is done. I also have to run the plastic air lines for the ARB's and Vent lines.
Randy
Attachments
Last edited:
W.R.Buchanan
Legacy Registered User
- City
- Ojai
- State
- CA
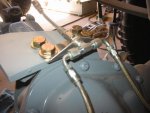
Drilled the holes in the spring perchs yesterday. Way too hot to do anything here today so I'm hiding in the house. Got an owwee on my right hand when the drill caught and smashed my hand between the drill motor and the brake caliper. Luckily my blood is the same color as the brake cailper so there was no real clean up. still hurts!
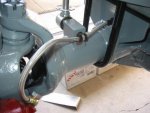
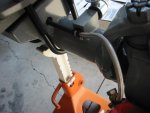
Got the lines made for the front axle and am pretty happy with the routing and the way everything turned out. Will probably add some fuel hose for a chafing guard on the right front where the line goes thru the spring perch.
After looking at the rear lines I think I am going to replace the 90 degree fittings with strait fittings like in the front. I am also going to shorten the lines a little and thread on some fuel hose for chafing guards where the lines go thru hard stuff.
All that is left on the flexible line portion of the brake system is to make the jumper lines from the diffs to the frame. I really need the hard lines terminated in order to do that and as a result I am having to buy a 37 degree flaring tool which I really don't want, as it won't get used very much. I need to do 4 flares! Cheapest tool I've found that will do Stainless lines is $86! or about $21.50 per flare.
Maybe I'll build a bunch more Jeeps?
Here's some pics.
Randy
Got the lines made for the front axle and am pretty happy with the routing and the way everything turned out. Will probably add some fuel hose for a chafing guard on the right front where the line goes thru the spring perch.
After looking at the rear lines I think I am going to replace the 90 degree fittings with strait fittings like in the front. I am also going to shorten the lines a little and thread on some fuel hose for chafing guards where the lines go thru hard stuff.
All that is left on the flexible line portion of the brake system is to make the jumper lines from the diffs to the frame. I really need the hard lines terminated in order to do that and as a result I am having to buy a 37 degree flaring tool which I really don't want, as it won't get used very much. I need to do 4 flares! Cheapest tool I've found that will do Stainless lines is $86! or about $21.50 per flare.
Maybe I'll build a bunch more Jeeps?
Here's some pics.
Randy
Attachments
-
 Scrambler 984.JPG52.4 KB · Views: 181
-
 Scrambler 985.JPG39.5 KB · Views: 182
-
 Scrambler 992.JPG38.8 KB · Views: 181
-
 Scrambler 993.JPG40 KB · Views: 180
-
 Scrambler 996.JPG52.9 KB · Views: 182
-
 Scrambler 991.JPG44.3 KB · Views: 183
-
 Scrambler 1002.JPG49.8 KB · Views: 181
-
 Scrambler 999.JPG50.2 KB · Views: 182
Last edited:
W.R.Buchanan
Legacy Registered User
- City
- Ojai
- State
- CA
Randy: it can happen at the worse possible time.
Proper routing of brake lines on a Jeep is kind of a big deal. Leaving lines out in the open flapping in the breeze is just asking for trouble, and believe me loosing your brakes on a difficult trail sucks outright. I laugh everytime I see brake lines coming from the frame down to the axle just hanging out there saying "Hey rip me off, I'm not that important ."
Lost mine on the Swamp Lake trail once when I ran over a little pine tree and it picked my left rear line off. The reason why I ran over the little pine tree in the first place was because my steering shaft had came loose from the steering box and I had no steering. Fixed that only to find I had no brakes. Had to tow another Jeep down and out for the last 5 miles of the trail and use his brakes to stop us both. took 3 hours to go 5 miles on a dirt road!
It is kind of manditory as sooner or later they will get picked off if it is possible for them to get picked off. Murphy does exist, it's only a matter of time til he visits all of us.
Best to plan like he's your next door neighbor.
Randy
Proper routing of brake lines on a Jeep is kind of a big deal. Leaving lines out in the open flapping in the breeze is just asking for trouble, and believe me loosing your brakes on a difficult trail sucks outright. I laugh everytime I see brake lines coming from the frame down to the axle just hanging out there saying "Hey rip me off, I'm not that important ."
Lost mine on the Swamp Lake trail once when I ran over a little pine tree and it picked my left rear line off. The reason why I ran over the little pine tree in the first place was because my steering shaft had came loose from the steering box and I had no steering. Fixed that only to find I had no brakes. Had to tow another Jeep down and out for the last 5 miles of the trail and use his brakes to stop us both. took 3 hours to go 5 miles on a dirt road!
It is kind of manditory as sooner or later they will get picked off if it is possible for them to get picked off. Murphy does exist, it's only a matter of time til he visits all of us.
Best to plan like he's your next door neighbor.
Randy
Last edited:
- City
- Colorado Springs
- State
- CO
Can I have some close up pics of the t-case shifter assembly? I'm looking at pics of mine and just realized I may be able to do without the cable shifters and run just mechanical ones now that I'm rebuilding the floor tunnel... 
W.R.Buchanan
Legacy Registered User
- City
- Ojai
- State
- CA
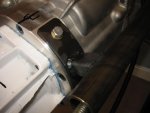
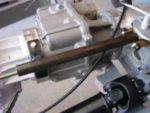
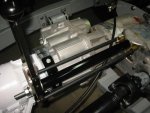
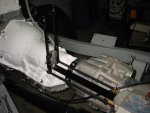
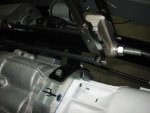
The shifter is an extended Atlas. I extended the tube about 14" and made a standoff that bolts to the adapter to support it. The shift rods are all thread with heat shrink tube on it to hold the length.
This may not work on a D300 as it is, but I see no reason why an extension could not be made to to accomidate a twin stick shifter mounted further forward, however it will have to be supported like this one is.. Should be something nearby to hook onto.
Randy
This may not work on a D300 as it is, but I see no reason why an extension could not be made to to accomidate a twin stick shifter mounted further forward, however it will have to be supported like this one is.. Should be something nearby to hook onto.
Randy
Attachments
Last edited:
- City
- Colorado Springs
- State
- CO
Thank you sir! Have to add that to the next head scratcher mini project on my heep...