

You are using an out of date browser. It may not display this or other websites correctly.
You should upgrade or use an alternative browser.
You should upgrade or use an alternative browser.
The Descrambler Project
- Thread starter W.R.Buchanan
- Start date


W.R.Buchanan
Legacy Registered User
- City
- Ojai
- State
- CA
Thanks Mike
Randy
Randy
W.R.Buchanan
Legacy Registered User
- City
- Ojai
- State
- CA
W.R.Buchanan
Legacy Registered User
- City
- Ojai
- State
- CA
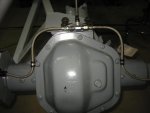
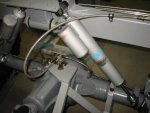
Just ordered all of the rest of the fittings I need to complete the plumbing project. $300!
I also found out I could have all the brake lines I made pressure tested at DMP when I pick up the fittings Saturday. This will give me some peace of mind knowing they have been tested and won't blow at the first sign of heavy use.
Been real busy with work and my gun hobby and haven't done much to the Jeep over the past few weeks, mainly due to needing to procure all of the fittings needed. It took two weeks just to figure out what I needed and then find them. Used mostly XRP components purchased thru DMP Fasteners in Chatsworth CA. Good outfit to deal with, and Caroline has been most helpful.
More when I have something to show.
Randy
I also found out I could have all the brake lines I made pressure tested at DMP when I pick up the fittings Saturday. This will give me some peace of mind knowing they have been tested and won't blow at the first sign of heavy use.
Been real busy with work and my gun hobby and haven't done much to the Jeep over the past few weeks, mainly due to needing to procure all of the fittings needed. It took two weeks just to figure out what I needed and then find them. Used mostly XRP components purchased thru DMP Fasteners in Chatsworth CA. Good outfit to deal with, and Caroline has been most helpful.
More when I have something to show.
Randy

- City
- Colorado Springs
- State
- CO
Yup.... Lookin' yummy!
Two questions... What kind of clamp is this? Do you have a picture of it?
In my second pic... what is this bushed thing for on the cross member (Yellow arrow)??
Two questions... What kind of clamp is this? Do you have a picture of it?
In my second pic... what is this bushed thing for on the cross member (Yellow arrow)??
W.R.Buchanan
Legacy Registered User
- City
- Ojai
- State
- CA
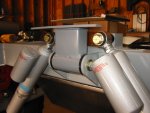
Your pics didn't show up but if you are talking about the thing between the two shock absorbers? It is a body mount .
There are seven body mounts, three on each side of the frame located in the floorboard in front of the seats, behind the seats near the rear of the floor board, and in the rear below the rear rollbar mount. The seventh is near the center of the cargo area.
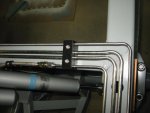
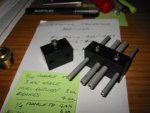
The black tube clamps? Were made by me out of Black Delrin.
There are seven body mounts, three on each side of the frame located in the floorboard in front of the seats, behind the seats near the rear of the floor board, and in the rear below the rear rollbar mount. The seventh is near the center of the cargo area.
The black tube clamps? Were made by me out of Black Delrin.
Attachments
- City
- Colorado Springs
- State
- CO
Call me curious but why do the body mounts that way?
And the clamp I was referring to isn't the cool ones you made out of Delrin but the one that looks like a crazy vise grip. Its in the pic on page 8, post 108, 7th pic down from the top of the page.
And the clamp I was referring to isn't the cool ones you made out of Delrin but the one that looks like a crazy vise grip. Its in the pic on page 8, post 108, 7th pic down from the top of the page.

- City
- Colorado Springs
- State
- CO
Man, I just feel so inadequate when I check out this thread.
Me too Brotha... Me TOO!


W.R.Buchanan
Legacy Registered User
- City
- Ojai
- State
- CA
The actual clamp is a "Kant Twist Clamp." The thing it is clamping is the drill jig for the delrin line clamps, which spaces the holes perfectly so that they will line up with the clamps themsleves.
The reason for the body mounts is to help isolate the engine vibration a little better and to positively locate the body over the frame.
I wanted the body stood off the frame 2" but I didn't want conventional bushings, as at 2" long they would not locate the body and prevent it from sliding around on top of the frame.
This system will.
Randy
The reason for the body mounts is to help isolate the engine vibration a little better and to positively locate the body over the frame.
I wanted the body stood off the frame 2" but I didn't want conventional bushings, as at 2" long they would not locate the body and prevent it from sliding around on top of the frame.
This system will.
Randy
W.R.Buchanan
Legacy Registered User
- City
- Ojai
- State
- CA
Also I appreciate the compliments, however there is no need to feel inadequate.
The whole idea of me posting all this stuff is so others can get ideas on how to do things that they don't already know how to do.
They can use my ideas and designs as they see fit (as long as they don't take credit for them!)
The whole idea is to advance the Jeep thing.
So don't feel bad, just do the best you can, and most importantly, don't be willing to settle for a second rate product. If it ain't right,then make it right.
If you had any idea how many things on this project I have redone or thrown in the trash because they didn't come out right the first time, you'd fully understand where I'm coming from.
Perfection is unattainable, however that doesn't mean you shouldn't try for it every time you make something.
I try for perfection on everything I make. I never get there, but I do get better everytime I try.
This is how you grow as a fabricator.
Randy
The whole idea of me posting all this stuff is so others can get ideas on how to do things that they don't already know how to do.
They can use my ideas and designs as they see fit (as long as they don't take credit for them!)
The whole idea is to advance the Jeep thing.
So don't feel bad, just do the best you can, and most importantly, don't be willing to settle for a second rate product. If it ain't right,then make it right.
If you had any idea how many things on this project I have redone or thrown in the trash because they didn't come out right the first time, you'd fully understand where I'm coming from.
Perfection is unattainable, however that doesn't mean you shouldn't try for it every time you make something.
I try for perfection on everything I make. I never get there, but I do get better everytime I try.
This is how you grow as a fabricator.
Randy
Last edited:

CJ ATE
Legacy Registered User
- City
- Vinton
- State
- VA
Also I appreciate the compliments, however there is no need to feel inadequate.
The whole idea of me posting all this stuff is so others can get ideas on how to do things that they don't already know how to do.
They can use my ideas and designs as they see fit (as long as they don't take credit for them!)
The whole idea is to advance the Jeep thing.
So don't feel bad, just do the best you can, and most importantly, don't be willing to settle for a second rate product. If it ain't right,then make it right.
If you had any idea how many things on this project I have redone or thrown in the trash because they didn't come out right the first time, you'd fully understand where I'm coming from.
Perfection is unattainable, however that doesn't mean you shouldn't try for it every time you make something.
I try for perfection on everything I make. I never get there, but I do get better everytime I try.
This is how you grow as a fabricator.
Randy
Build an idea think of a better one scrap it and start all over again . . . yep been there more times than I can count over the years!


But in the end I learned from each and every idea that went in the pile.
Nice work btw Randy!

W.R.Buchanan
Legacy Registered User
- City
- Ojai
- State
- CA
Finally got back to the project. It has been relatively cold here 30's and 40's in the shop so I have avoided it all thru the holidays. Concentrated my efforts on buying guns, and staying warm in the house.
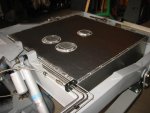
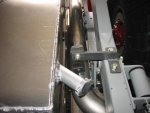
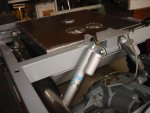
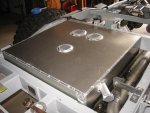
Got back to it yesterday and installed the fuel tank.
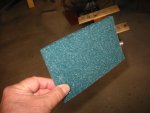
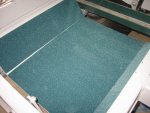
I first had to glue some material onto the skid plate which I have talked about before.It is polyurethane foam packaging material and this paticular stuff conducts static electricity and is used in electronics storage cabinets.It was left over from a job.
Once I got the tank in place I designed some little hold down brackets which I might fab up today.
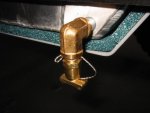
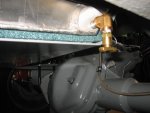
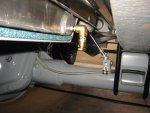
I also installed the drain cock for the tank. Since it is made of Solid brass I had to use a steel 1.5" long nipple to isolate the brass from the aluminum tank so there would not be a dissimilar metal reaction.
Today I hope to make the tank brackets and some delrin plugs for the holes in the frame for the bumpstop attachment bolts, along with getting closer to the final design on my new sling shot.
See pics below.
Got back to it yesterday and installed the fuel tank.
I first had to glue some material onto the skid plate which I have talked about before.It is polyurethane foam packaging material and this paticular stuff conducts static electricity and is used in electronics storage cabinets.It was left over from a job.
Once I got the tank in place I designed some little hold down brackets which I might fab up today.
I also installed the drain cock for the tank. Since it is made of Solid brass I had to use a steel 1.5" long nipple to isolate the brass from the aluminum tank so there would not be a dissimilar metal reaction.
Today I hope to make the tank brackets and some delrin plugs for the holes in the frame for the bumpstop attachment bolts, along with getting closer to the final design on my new sling shot.
See pics below.
Attachments
Last edited:
W.R.Buchanan
Legacy Registered User
- City
- Ojai
- State
- CA
On another note: I applied some snot called Shark Hide to the tank before I installed it.
This stuff is a protective coating that keeps metal clean and looking new. It actually works.
In the case of this bare aluminum tank it would have had white aluminum oxide corrosion all over it in a matter of a few months. You'll notice in the pics above that the tank appears to be pretty clean. it will stay looking like that for along time.
I also intend to wipe this stuff on all of my bolts and nuts that are plated. Might help them look nice for a longer time.
You'll have to Google Shark Hide to find the source or look on Amazon. It is not cheap at about $60 for a 1 quart can, but it could be worth it if it keeps your vehicle looking good for a period of time.
Jeeps by their very nature get used harder than most cars . Anything you can do to slow the aging process is money in the bank as far as I'm concerned.
Randy
This stuff is a protective coating that keeps metal clean and looking new. It actually works.
In the case of this bare aluminum tank it would have had white aluminum oxide corrosion all over it in a matter of a few months. You'll notice in the pics above that the tank appears to be pretty clean. it will stay looking like that for along time.
I also intend to wipe this stuff on all of my bolts and nuts that are plated. Might help them look nice for a longer time.
You'll have to Google Shark Hide to find the source or look on Amazon. It is not cheap at about $60 for a 1 quart can, but it could be worth it if it keeps your vehicle looking good for a period of time.
Jeeps by their very nature get used harder than most cars . Anything you can do to slow the aging process is money in the bank as far as I'm concerned.
Randy
Last edited:
- City
- Colorado Springs
- State
- CO


W.R.Buchanan
Legacy Registered User
- City
- Ojai
- State
- CA
If that petcock gets hit I've got bigger problems than losing fuel. Like no rear axle?
No really, It is pretty well guarded. It is about 8" behind the axle and about 3" above it. It could concievably get hit ,but it would be a really weird combination of rocks and extremely bad driving on my part to make it happen.
If it reallly starts to bug me then I can put another 1/4 turn on the elbow so it sits flat or just slightly angled down.
Not worried at all.
Randy
No really, It is pretty well guarded. It is about 8" behind the axle and about 3" above it. It could concievably get hit ,but it would be a really weird combination of rocks and extremely bad driving on my part to make it happen.
If it reallly starts to bug me then I can put another 1/4 turn on the elbow so it sits flat or just slightly angled down.
Not worried at all.
Randy
Attachments
Last edited: