• Notice for iPhone users: DO NOT use the image size reduction option when uploading photos to the forum. This causes portrait images to post as landscape. We have added a warning to the image insert pop-up as well.

Spankrjs' 1984 Long Term Project

]
Don't worry, the end caps were broken before I got it:banghead:

They were?? :crazy: And you said this bumper was damaged?? You shoulda yanked it before abusing it, for you could have got two spare transmissions for its value for the red scrambler ! :rotfl:

Lest anyone forget ! :P

IMAG2289_zps969cd66e-1.jpg
 
]

They were?? :crazy: And you said this bumper was damaged?? You shoulda yanked it before abusing it, for you could have got two spare transmissions for its value for the red scrambler ! :rotfl:

Lest anyone forget ! :P

IMAG2289_zps969cd66e-1.jpg

Aww that picture makes it even worse :(


Kind of, pictures can be deceiving.

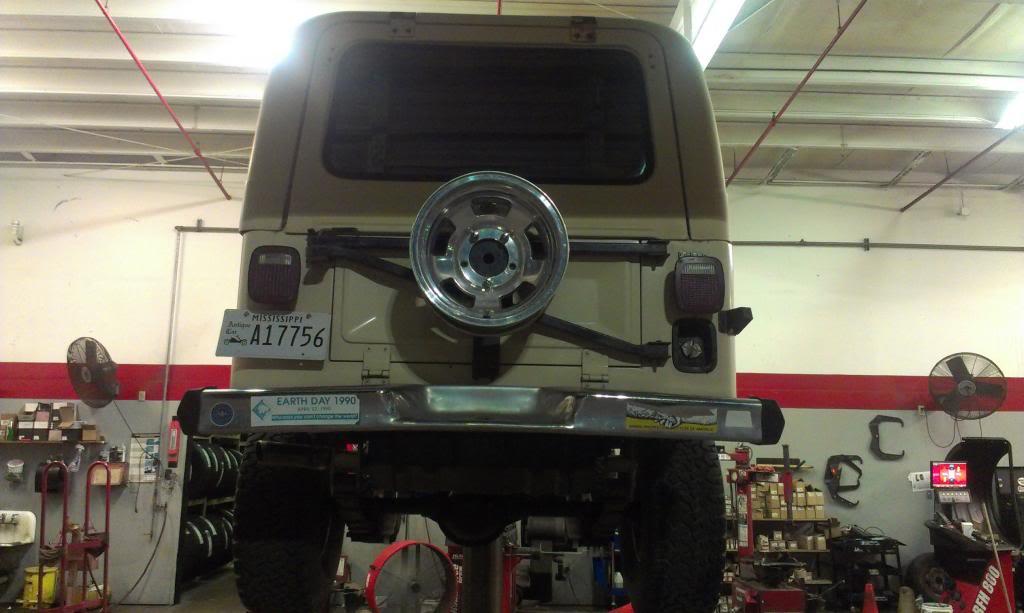
The bumper had a slight twist to it. So, it was in "decent" shape, but not "excellent" shape. It worked, but was probably a 5 out of 10. It had a pretty fair amount of corrosion on the back side, too.

The end caps, were still there, but they were cracked. The pictures make them look "great", but they were "OK". I feel bad about the end caps, I could have epoxied the cracks and reinforced the back sides of them, and with a repaint, they would have been good "driver" material:shrug:

The first off road trip pretty much destroyed the end caps. I didn't mean to, but just the dirt/mud flinging off the back tires destroyed them:banghead: I don't know what Jeep was thinking using plastic end caps on a rear bumper, they are super weak. I think an original magazine cover shot of a "Scrambler Review" shows the end caps being obliterated.

I do feel bad about destroying the bumper. It was not my intent, it just sort of happened. With each trip off the pavement, the rear bumper depreciated a little bit more :eek:

I guess let it be a lesson - no stock rear bumpers can be used off road, at least with my driving:thumbsup:

And your right JJ, I could have easily got at least 3 more T5's with that bumper:rotfl::wave:

The bumper did do its job, though: no body/frame cross member damage.
 
So everyone can sleep better, two pictures of the bumper in the condition I received it:rotfl:

0691-1.jpg


IMAG2238_zpsddb30d1a-1.jpg


And the little bit of mud that liberated most of the broken end caps. If you look close, you can see the missing end cap fronts:


Still sucks it got completely trashed, it was decent enough for a "driver", which this Scrambler definitely is:twocents::thumbsup:
 
Haha we are all joking. Don't apologize too much :p. spanks knows we are ribbing him. And if you knew the legend of the bumper ends cap you would see why :crazy:
 
I should put the bumper/end cap remnants on eBay and see how much I get for it:rolleyes:

"Here we have a 100% authentic spankrjs modified 100% factory stock resto-mod stock factory rear Scrambler bumper, super uber rare, 1 of only 100 made in 1984, one of only 3 known surviving examples out of California, and the only one with Earth Day and Animal Institute of America bumper stickers. This rear 100% factory stock NOS resto-mod rear bumper will be the crowning achievement of any real Scrambler aficionado ..............................."

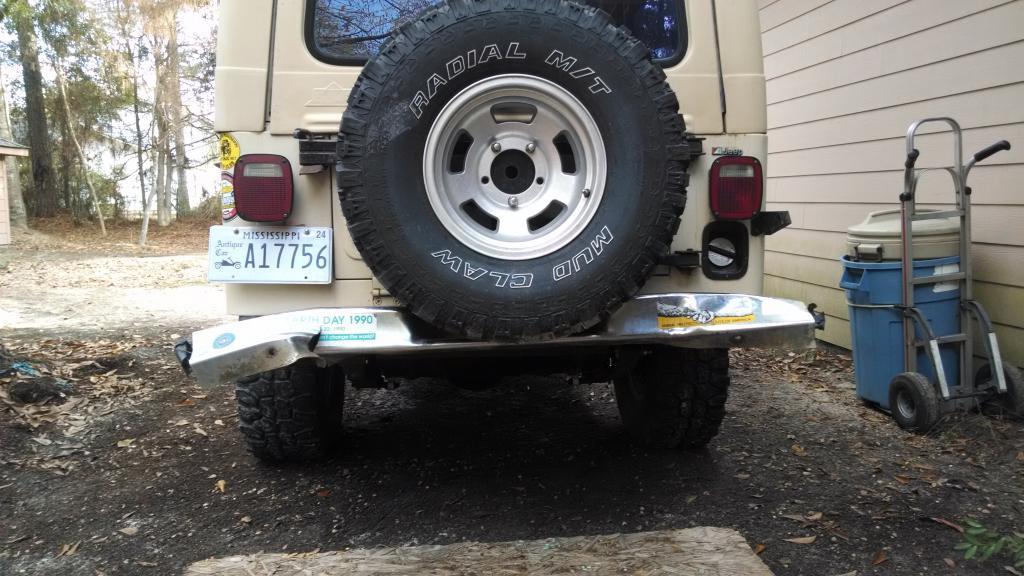
:rotfl::rotfl::rotfl::thumbsup::wave:
 
I should put the bumper/end cap remnants on eBay and see how much I get for it:rolleyes:

"Here we have a 100% authentic spankrjs modified 100% factory stock resto-mod stock factory rear Scrambler bumper, super uber rare, 1 of only 100 made in 1984, one of only 3 known surviving examples out of California, and the only one with Earth Day and Animal Institute of America bumper stickers. This rear 100% factory stock NOS resto-mod rear bumper will be the crowning achievement of any real Scrambler aficionado ..............................."
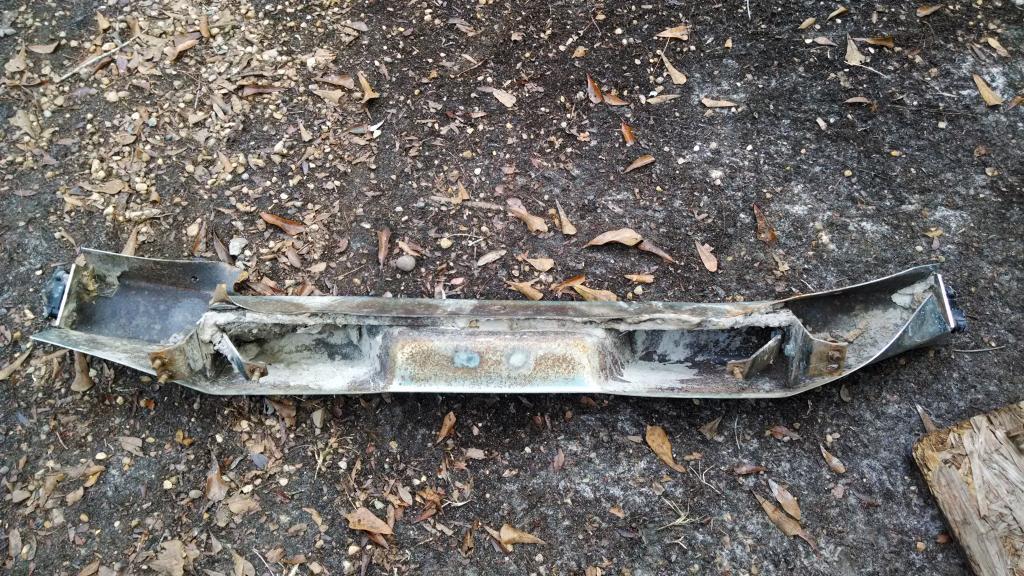
:rotfl::rotfl::rotfl::thumbsup::wave:

$100!!!
 
I'd say you got your money's worth outa' that bumper. Just needs a good re-plating and off to eBay it goes.
 
Well, time to end the "bumpergate" saga:rotfl:

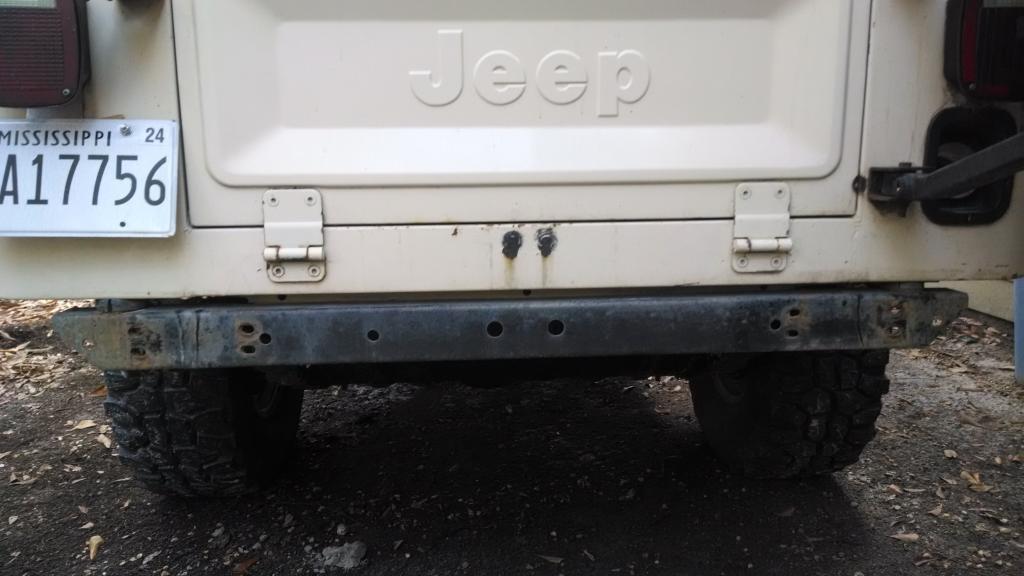
A few last pictures, chrome does not get you home!!!

IMG_20141226_084255310_zpsce2bf6c7-1.jpg


IMG_20141226_085615515_zpsbdbe8339-1.jpg


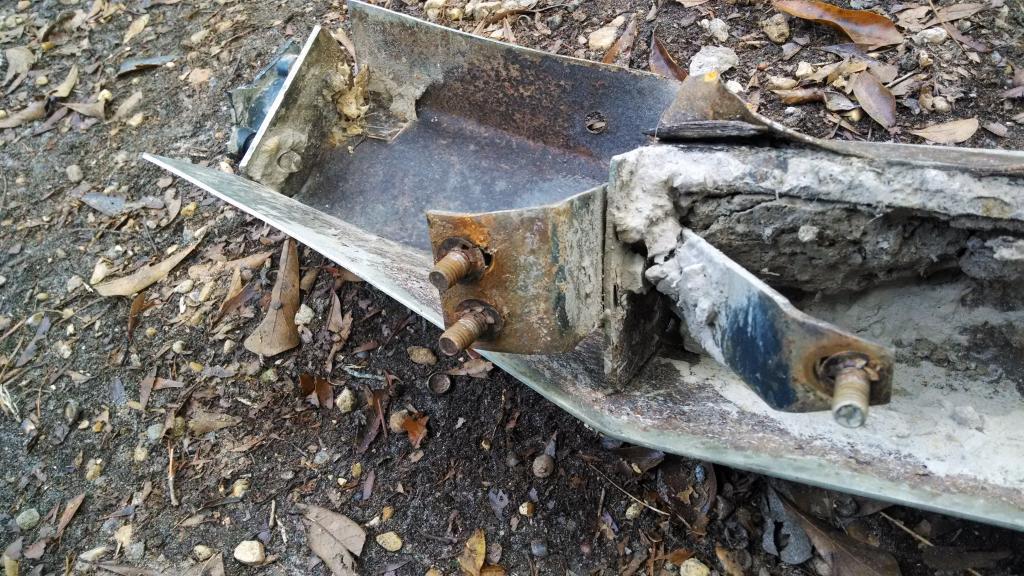
Thankfully, no rear cross member damage, and no rust.

IMG_20141226_085607728_zps53571608-1.jpg


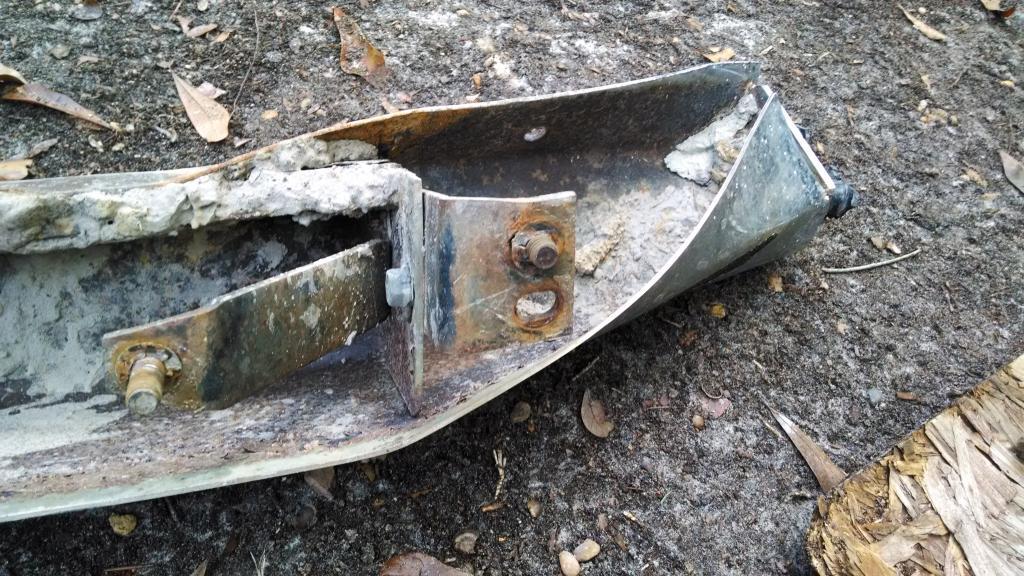
Unfortunately, the two larger "L" brackets got slightly tweaked, it will be easy to bend them back into shape.

IMG_20141226_085623247_zps66be4c8b-1.jpg


IMG_20141226_085628647_zps995c454f-1.jpg


One interesting thing about the above two pictures, note the little round "clips" that are holding the bolts into the brackets. Pretty sure that would have been a "factory installed bumper procedure"???

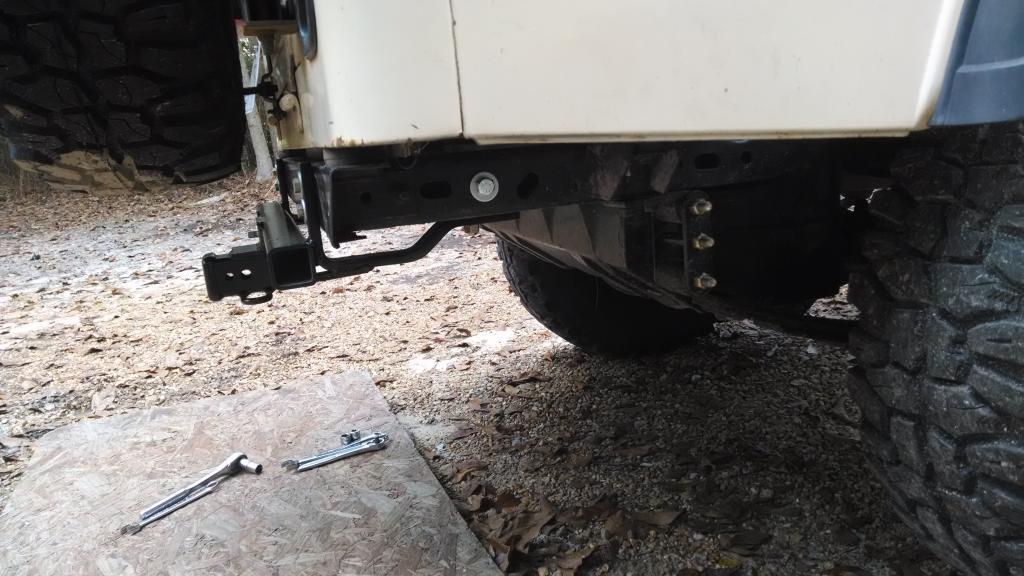
Another great thing about the CA Scrambler, with just minimal slight surface rust on some of the bolts, I was able to remove the rear bumper in about 20 minutes with just a 3/8 ratchet. I should have removed it before I damaged it:banghead:

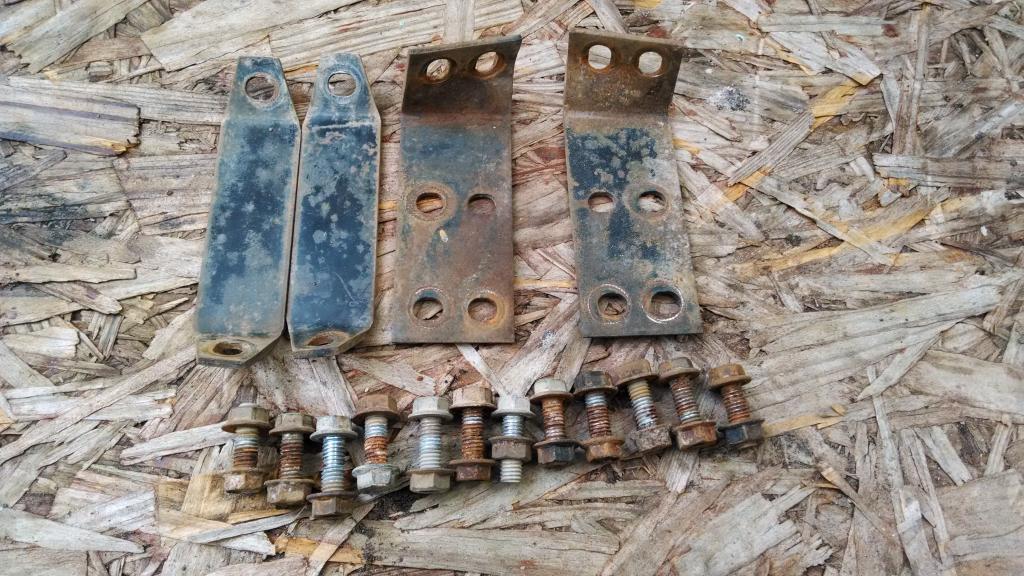
Quick picture of the attaching hardware/brackets. You can see the slight bends in the two "L" brackets.

IMG_20141226_092803162_zps2c274c71-1.jpg


I am waiting on my "Hidden Hitch" 2" receiver hitch to show up so that I can install it, and have a solid "extraction point", as well as a method to safely attach my "yard working" trailer.

That's it for now:wave:
 
Not sure to laugh or cry.. At least u got the supports and bolts out.. 😃😭
 
Since the stock rear bumper got killed, I had to install a hitch for my towing needs, so I spent the New Year holiday working on this Scrambler, and the HF trailer!!!!!

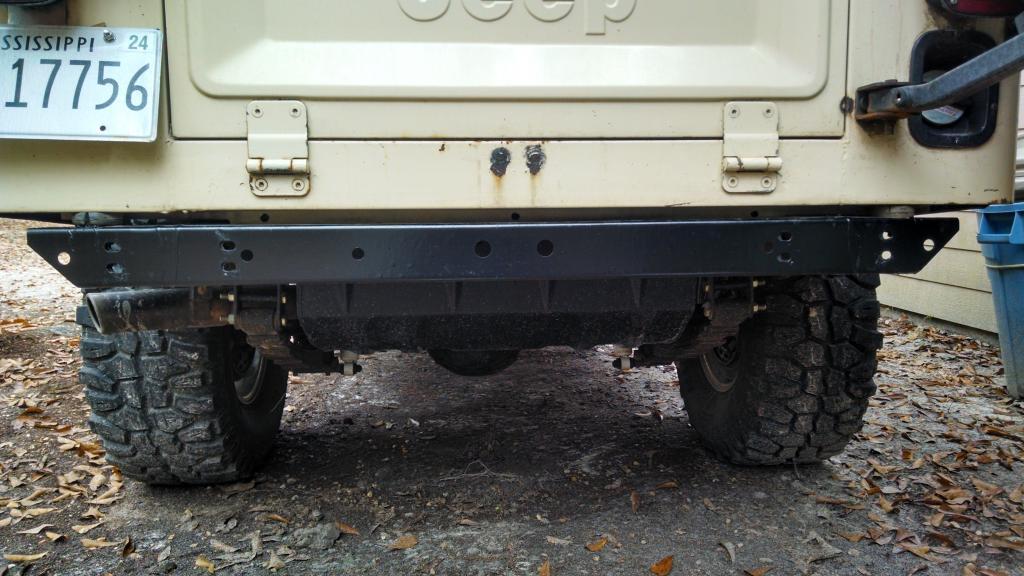
Quick coat of paint on the stock rear cross member:

IMG_20150101_092026615_HDR_zps25793b0a-1.jpg


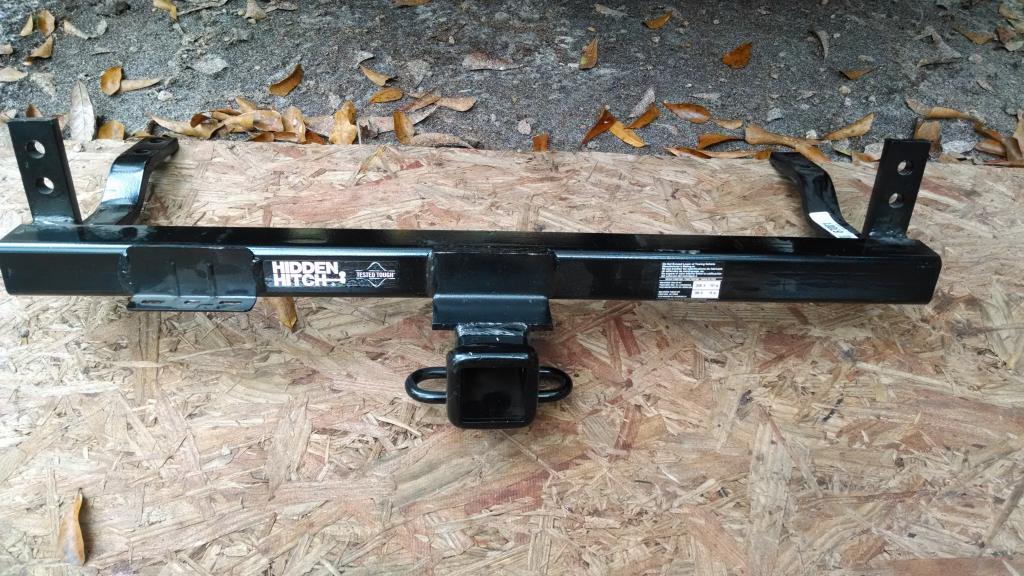
I used a "Hidden Hitch", but it is not really hidden??

IMG_20150101_093026562_zpsc563630a-1.jpg


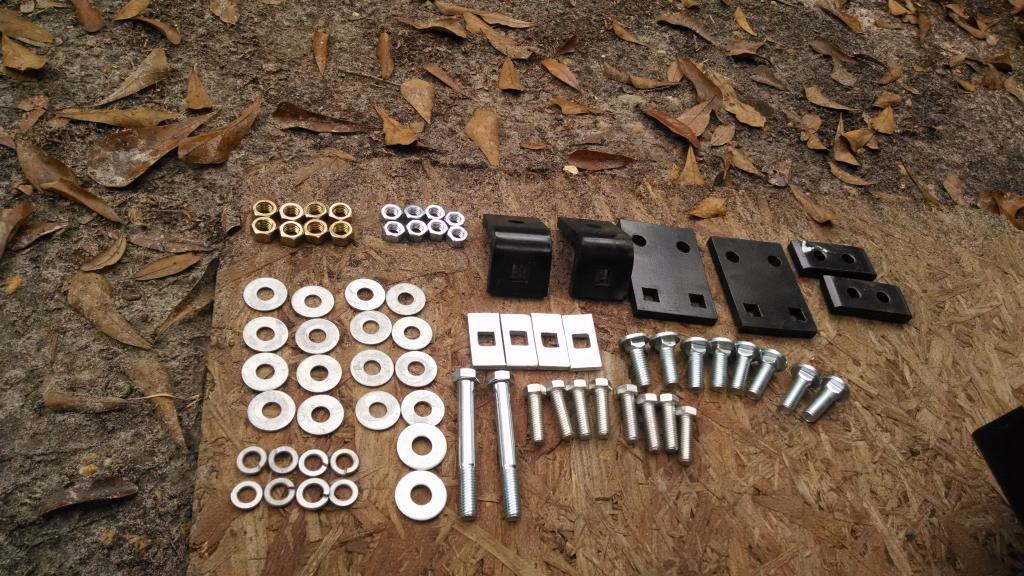
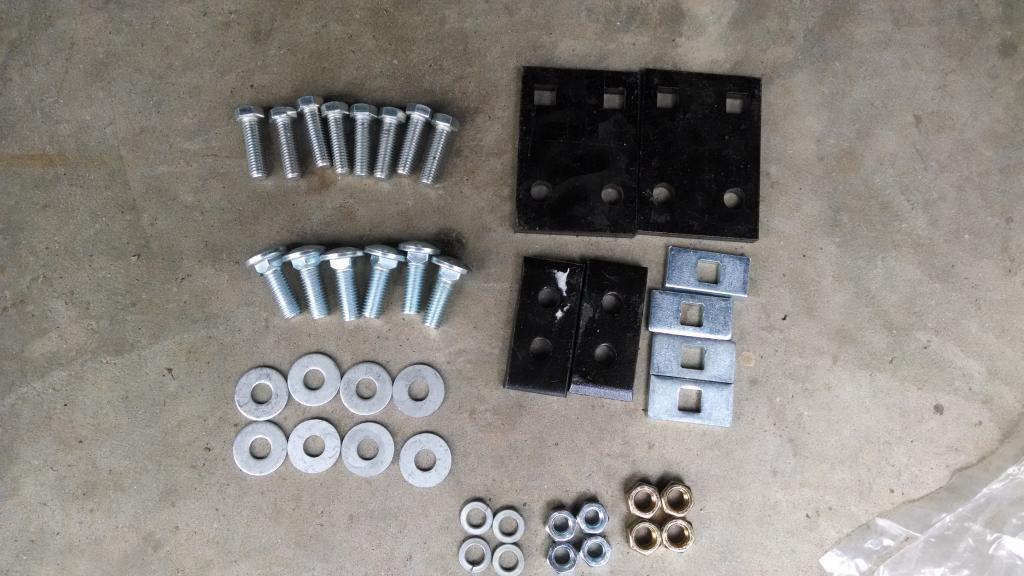
It came with all of this:

IMG_20150101_093032416_zpsab07b68d-1.jpg


And all of this is not used!!!!

IMG_20150101_105058626_zps48fef2dd-1.jpg


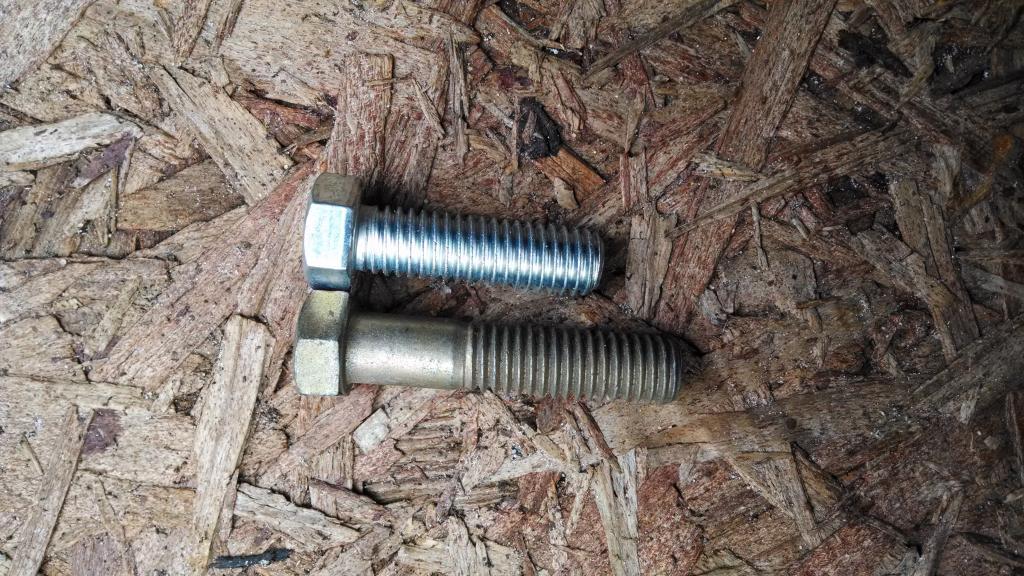
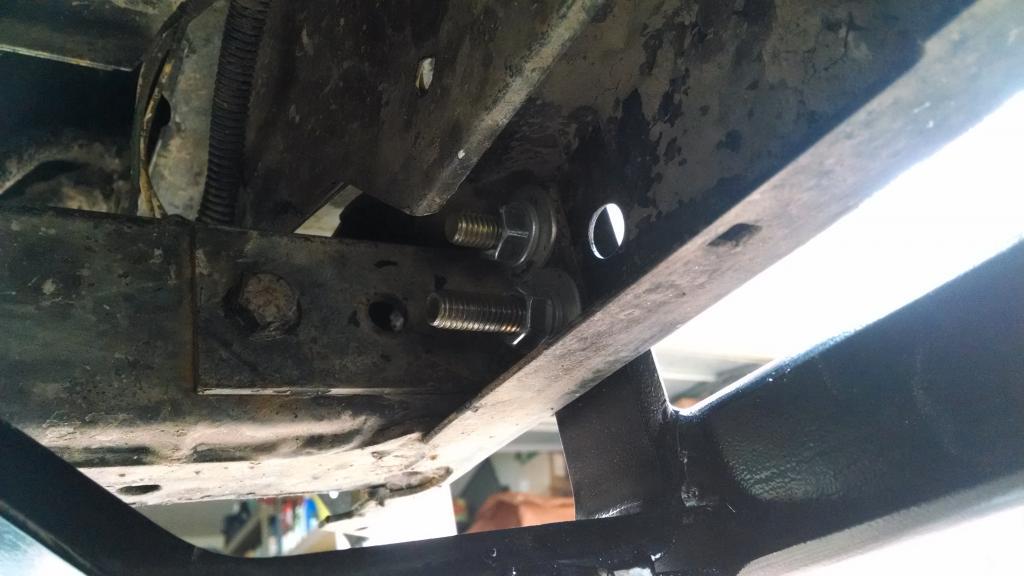
Basically, it just bolts on. The bolts that it came with are too short to use lock washers, if you have the stock "frame reinforcing" angle pieces that bolt to the frame/cross member.

IMG_20150101_101311063_HDR_zps506112cd-1.jpg


I had some longer bolts in the spares box:

IMG_20150101_101316134_zps8fe8c9ef-1.jpg


Picture showing the "frame reinforcing angle pieces". One of the bolts I used is a bit long, but it works:

IMG_20150101_105133596_zps485529f3-1.jpg


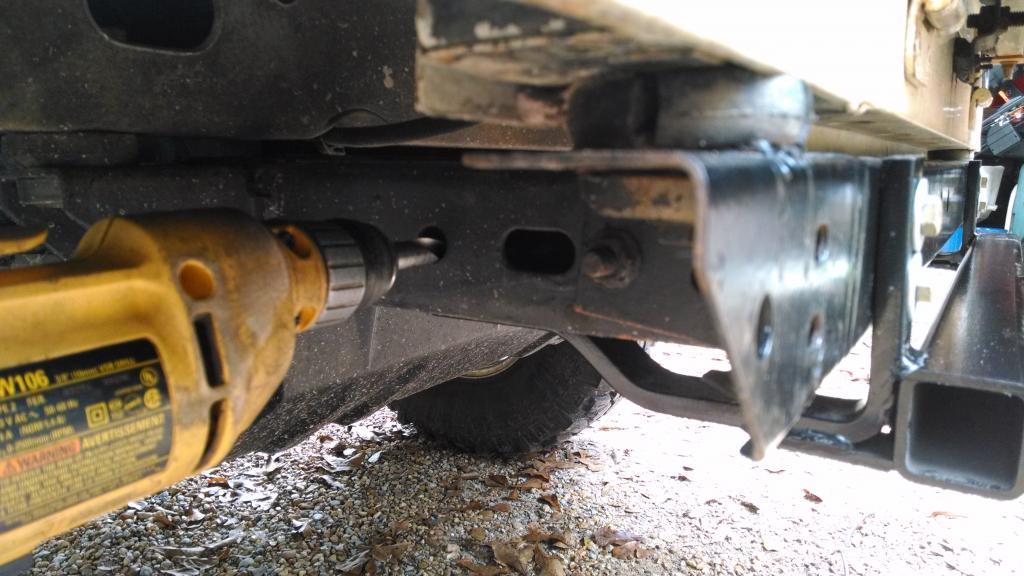
You have to drill two holes. The frame has the holes already in the outer frame face, you just have to drill out the inner frame face at this location, each side.

IMG_20150101_104203628_HDR_zpsb8b33a6e-1.jpg


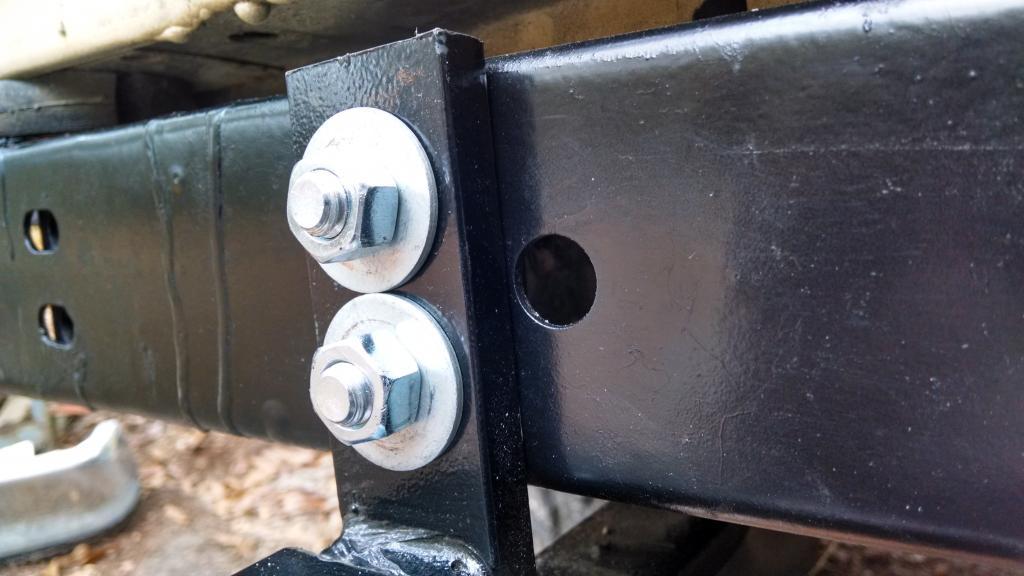
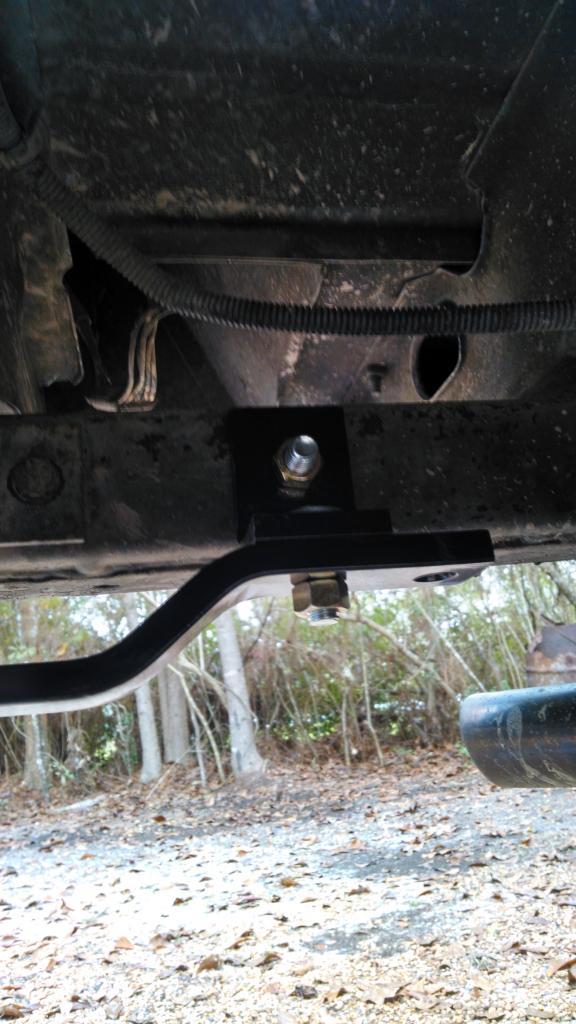
Picture showing the rear attaching parts/assembly:

IMG_20150101_105117853_HDR_zpse76c1321-1.jpg
 
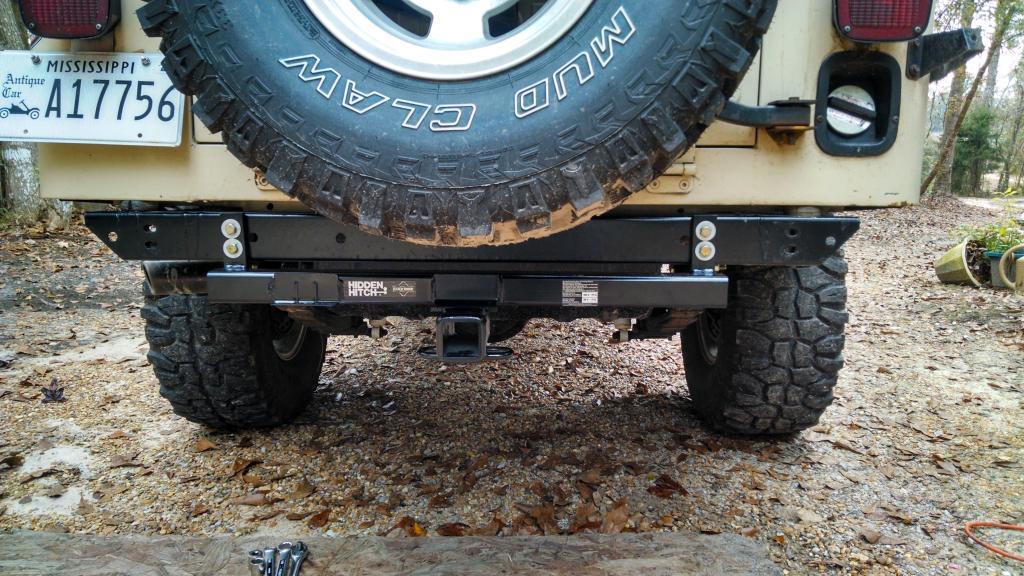
And the installed hitch.

IMG_20150101_105153713_HDR_zps415b8c41-1.jpg


IMG_20150101_105204190_zpse8d45a76-1.jpg


Like I said, not very "hidden". It also drops down a good bit, so not the hot ticket for severe off road use. But, for around the house work, it will work fine.

I think with some spacers, you could mount this hitch to the inside of the rear frame cross member, and still be able to mount it at the sides without drilling any new holes through the frame. Not sure, but you probably could, and then you could run the stock chrome bumper, too:shrug:

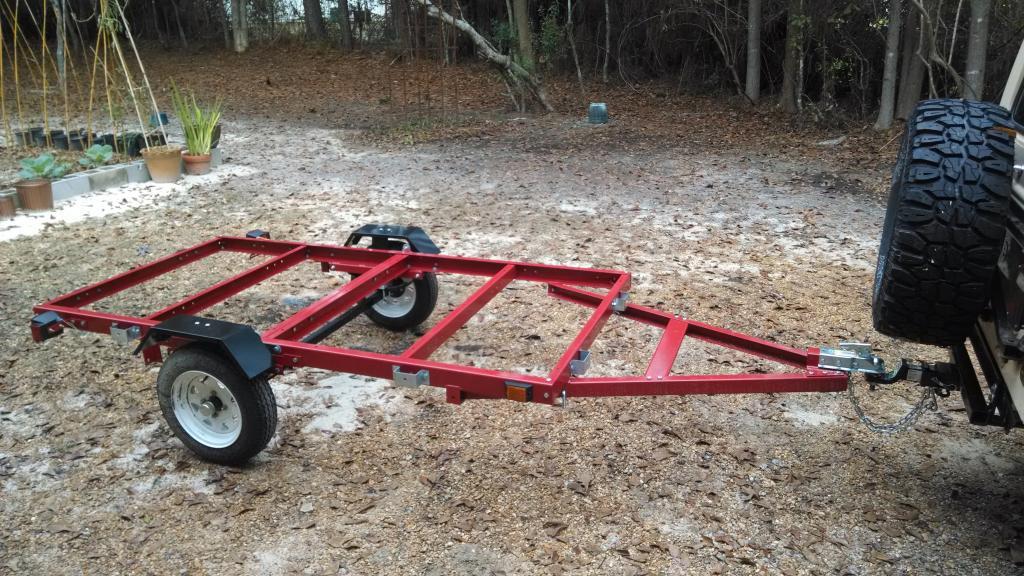
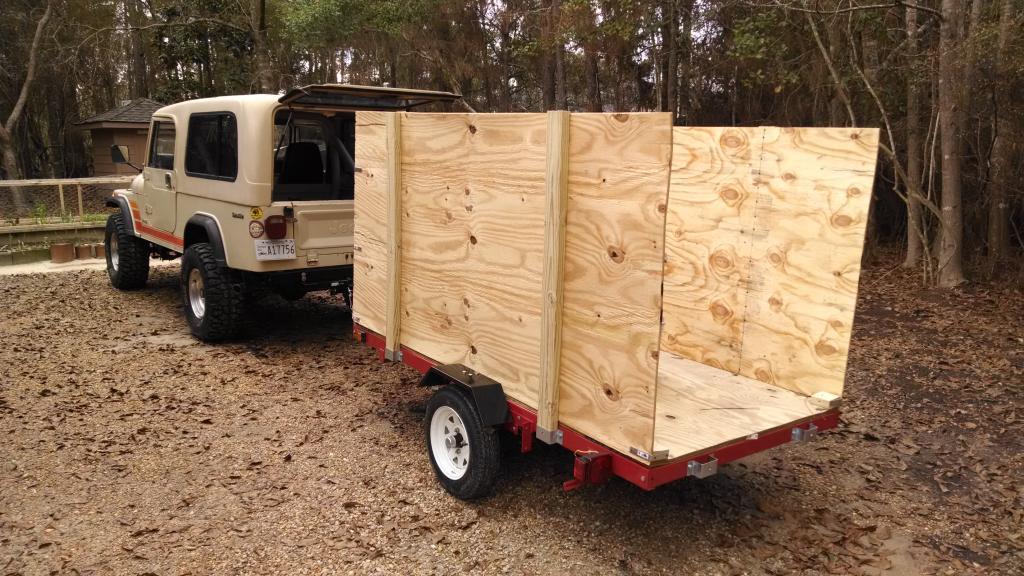
This is what it is towing, the Harbor Freight "put it together your self trailer kit that only costs $250 with a 20% off coupon", Model #90154.

IMG_20150101_155800144_zps200d82a0-1.jpg


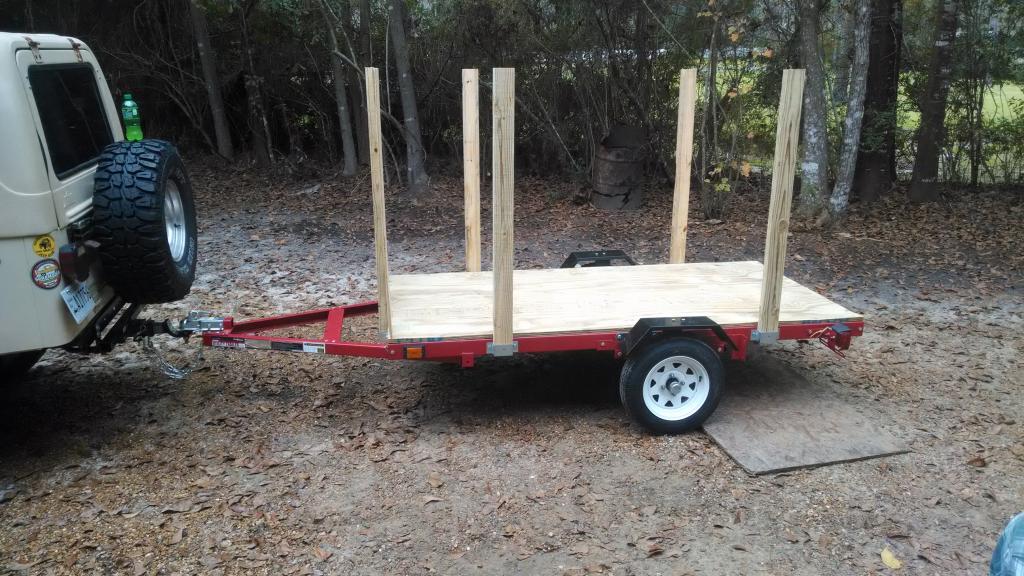
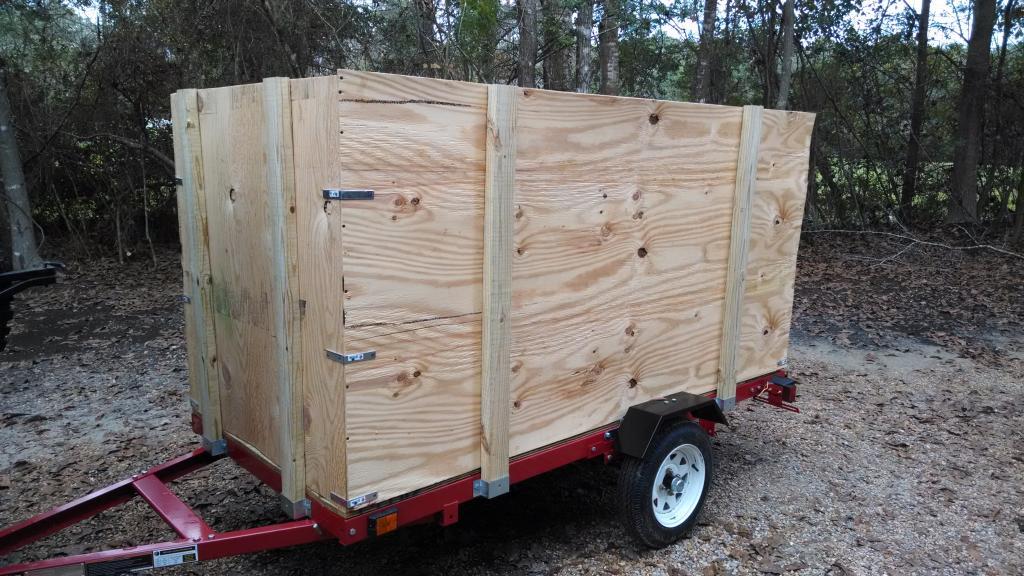
And what it looks like after a trip to Lowes to get some wood to finish it up:

IMG_20150102_145400756_zpse934c933-1.jpg


IMG_20150104_152726847_zps73428bb9-1.jpg


IMG_20150104_152741313_zps14f347ed-1.jpg


I am using the trailer to haul yard debris to the road for the county to pick up. The trailer took about 16 hours total, to put together and build all the sides/floor. I have not wired up the lights, and I might pull them off, so that I don't smash them. The trailer went together easy enough, two minor issues:

1) The silver colored stake holders are too small for 2x4's. You have install the stake holders on the 2x4's first, then bolt them on the trailer. The way it is, you can not pull off the sides without loosening all of the stake holder bolts, PIA.

2) The trailer hubs come assembled, with the rear seals installed. The instructions tell you to disassemble the hubs, clean out everything, and re-grease. Kind of lame. Since I am just using the trailer around the yard, I left the Chinese grease in the bearings, but packed the rest of the hub with grease, then used a grease gun to pump the hubs full of grease through the included zerk fittings. I will probably pull the hubs apart and re-grease everything before any long road trips.

I made one short tip with the trailer, about 10 miles. It handles/pulls fine. I got it up to 70 mph, with about 150 pounds of stuff on it, worked fine. One hub was a bit warmer then the other, but not bad.

I used a sheet of 3/4 treated decking for the floor, and some cheap 3/8 sheathing for the sides. I am using this thing to haul trees/limbs in, so sides/floor will depreciate fast. This trailer can be folded up, but I bolted it together solid.

All in all, a good little yard tool:thumbsup:

That's it for now:wave:
 
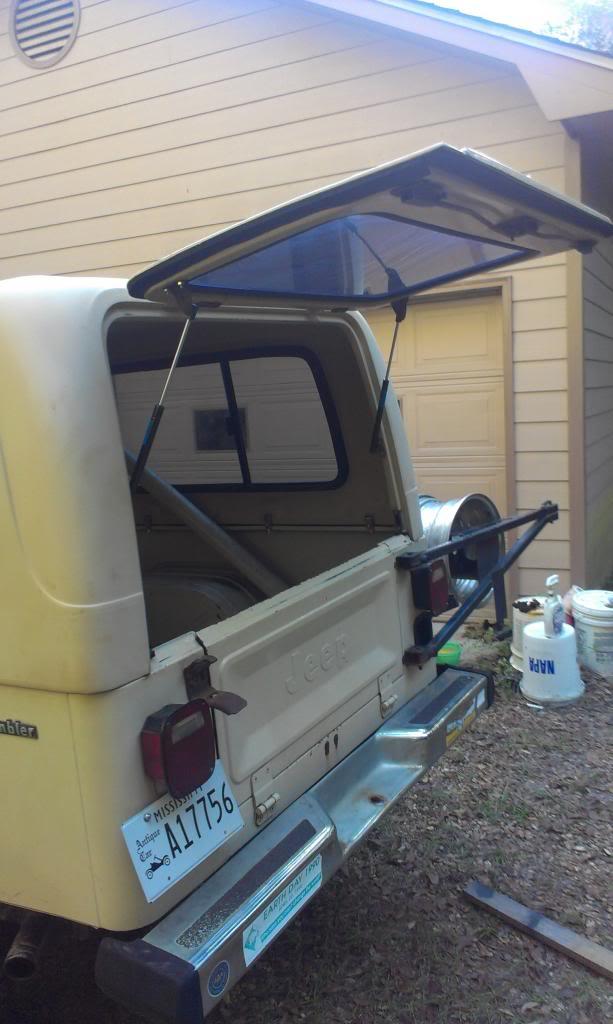
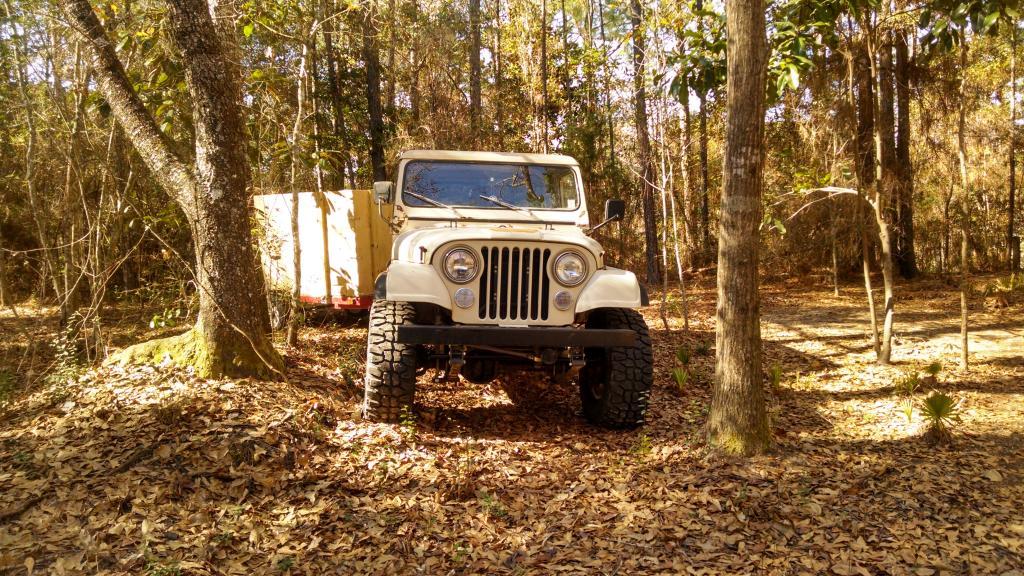
This Scrambler has been doing yard clearing duty the last month or so with the Harbor Freight trailer, been working out pretty good.

IMG_20150208_134534750_HDR_zpst2xk7kzb-1.jpg


I have temporarily taken this one out of commission to fix a few nagging problem/issues. When I rebuilt/finished this project Scrambler, I did not change any under hood parts, everything worked. Now, some issues are starting to pop up:

1) Starter Bendix is super weak, starter disengages early:(
Easy fix, change the starter.

2) Squeaky belt, water pump front bearing shot, fan is about to fall off:eek:
Easy fix, change the water pump.

3) Since draining coolant, change out the coolant temp sensor (it shows the coolant at 123 when it is 190):shrug:
Easy fix, change the sensor.

4) Address some squeaks/rattles from the full hard top
Hopefully easy, I will update with more pictures/part #'s. Basically, three issues:

A. I am using the wrong weather stripping on the lift gate so it rattles.
B. I am using the wrong weather stripping under the top. I need to use rubber, the foam is too weak.
C. I need to repair the little angle pieces that secure the hard top to the tub, one on either side of the lift gate opening.

I will update with more pictures and info when I start fixing stuff:wave:
 
I'm jealous of the green in the back ground, can't wait to see green here in Cleveland:rotfl:
 
This Scrambler has been doing yard clearing duty the last month or so with the Harbor Freight trailer, been working out pretty good.

IMG_20150208_134534750_HDR_zpst2xk7kzb-1.jpg


I have temporarily taken this one out of commission to fix a few nagging problem/issues. When I rebuilt/finished this project Scrambler, I did not change any under hood parts, everything worked. Now, some issues are starting to pop up:

1) Starter Bendix is super weak, starter disengages early:(
Easy fix, change the starter.

2) Squeaky belt, water pump front bearing shot, fan is about to fall off:eek:
Easy fix, change the water pump.

3) Since draining coolant, change out the coolant temp sensor (it shows the coolant at 123 when it is 190):shrug:
Easy fix, change the sensor.

4) Address some squeaks/rattles from the full hard top
Hopefully easy, I will update with more pictures/part #'s. Basically, three issues:

A. I am using the wrong weather stripping on the lift gate so it rattles.
B. I am using the wrong weather stripping under the top. I need to use rubber, the foam is too weak.
C. I need to repair the little angle pieces that secure the hard top to the tub, one on either side of the lift gate opening.

I will update with more pictures and info when I start fixing stuff:wave:

Be sure and write down part numbers and sources for how you fix the top issues! Will save me some work when I put the ACME top on our Scrambler.
 
Been awhile since I updated this thread. I did a bunch of weather stripping work on the rear hatch and top, I will have to update his thread with some new pictures/information.

The exhaust has been a bit stinky, the MPG dropped from around 16-17 to 11-12 on the highway. To make a long story:

https://www.cj-8.com/forum/showthre...ghtly-stinky-exhaust-quot-and-not-as-good-MPG

short, 120psi on cylinder #3, 60psi on #6. All the other cylinders were around 190-200. Quick leak down test revealed a bad valve on #3, blown rings on #6:eek:

So, watch this space, I will be swapping in another motor, soon:wave:
 
"Sand Blast 8" is rapidly approaching my friend. :wave:
 
Back
Top