• Notice for iPhone users: DO NOT use the image size reduction option when uploading photos to the forum. This causes portrait images to post as landscape. We have added a warning to the image insert pop-up as well.

It's time to start making some changes.....

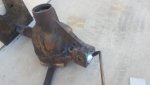
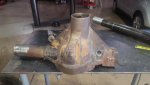
So I guess since we had the database failure, I need to update my thread. Since I had a driveshaft issue in Moab this past EJS, I decided that when I put the 3 link up front, I'll get rid of the Ford 9" that I have up there right now. By making the change, the pinion will be higher and more to the passenger side. With the 9", the pinion is really low and closer to the center of the frame than the side. I found a Dana 44 from a F250 but it's a driver's side drop. So after cutting and hacking, it's now a passenger side high pinion Dana 44.

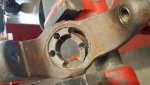
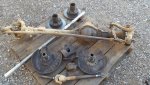
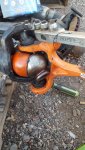
I ended up buying a front Dana 44 that a guy had built but never run which had Reid knuckles, RCV shafts, and an Eaton E-locker on the cheap. So now most of those parts will go on this build. So just a note to self if you ever planned on buying RCV's, they are a HOLY HELL to assemble/disassemble in the traditional Dana 44 knuckles. You have to separate the CV from the seal ball, then get the CV off of the shaft, then drop(pry) the knuckle down enough to get the CV out of the inside of the knuckle. Holy crap that's a JOKE. SMH
So now the axle is loosely assembled enough so I can gut the current front end out from under the Jeep now and then get my links temporarily in place to mock things up with the new front axle assembly. I think the day after Thanksgiving is when it's all going to start. Just think....Because I only work on this on Saturdays other than the week between Christmas and New Years, I only have 21 days to finish the work before EJS 2018 is here at the end of March. YAY ME!
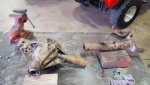
 
Cutting up the Dana 44
 

Attachments

  • driver side drop dana 44_5.jpg
    driver side drop dana 44_5.jpg
    56 KB · Views: 92
  • driver side drop dana 44_8.jpg
    driver side drop dana 44_8.jpg
    55.7 KB · Views: 92
  • driver side drop dana 44_7.jpg
    driver side drop dana 44_7.jpg
    51.6 KB · Views: 93
More progress-
 

Attachments

  • 20170812_172830.jpg
    20170812_172830.jpg
    103.2 KB · Views: 93
  • driver side drop dana 44_2.jpg
    driver side drop dana 44_2.jpg
    81.4 KB · Views: 92
  • driver side drop dana 44_5.jpg
    driver side drop dana 44_5.jpg
    56 KB · Views: 93
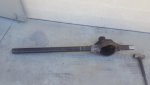
And now a driver's side drop high pinion Dana 44
 

Attachments

  • driver side drop dana 44_15.jpg
    driver side drop dana 44_15.jpg
    32.3 KB · Views: 93
  • driver side drop dana 44_14.jpg
    driver side drop dana 44_14.jpg
    40.7 KB · Views: 93
  • driver side drop dana 44_11.jpg
    driver side drop dana 44_11.jpg
    43 KB · Views: 93
This is how complicated the RCV components are in a traditional Dana 44
 

Attachments

  • Dana 44 RCV_1.jpg
    Dana 44 RCV_1.jpg
    75.4 KB · Views: 96
  • Dana 44 RCV_4.jpg
    Dana 44 RCV_4.jpg
    88.1 KB · Views: 96
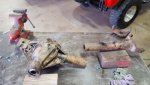
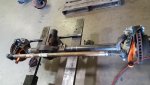
This is how it's going to be until it goes under the Jeep. I'll put the gears in after it's moving under it's own power again and then I'll measure for new shafts and get them ordered then.
 

Attachments

  • High pinion Dana 44 drivers side drop_1.jpg
    High pinion Dana 44 drivers side drop_1.jpg
    58 KB · Views: 321
  • High pinion Dana 44 drivers side drop_3.jpg
    High pinion Dana 44 drivers side drop_3.jpg
    47.6 KB · Views: 331
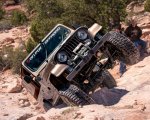
This is the reason why I'm building a high pinion axle-
 

Attachments

  • 20170409_141022_zpstl4gfo3k-1.jpg
    20170409_141022_zpstl4gfo3k-1.jpg
    63.1 KB · Views: 327
  • Moab EJS 2017 Patriot Crawl Jeep Scrambler.jpg
    Moab EJS 2017 Patriot Crawl Jeep Scrambler.jpg
    121.3 KB · Views: 331
Very cool. I'm in the process of building a 44 for the front as well. I'm not nearly as ambitious though! My current plan is to outboard the front springs and run a 44 that I have from an SJ. I ran across the RCV axles when I was shopping for parts... nice stuff.
 
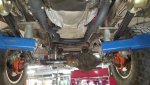
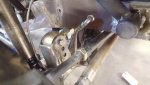
Slowly it's going together. I purchased some brackets to speed things up but as usual, none fit with what I'm trying to do. As of right now, all of the parts are tacked in place. The lower mounts are located, the panhard bar is built and in, the tie rod is built, and the upper link mount is on too. The rear mount for the upper link is built and ready to be placed also. The next thing for me to do is pull the exhaust and place the upper link. Already the room that is available for all of these moving parts is closing in FAST! I still have to find a place to mount the front coilovers without the springs crashing into the frame when flexed.
 

Attachments

  • 20171125_130635.jpg
    20171125_130635.jpg
    76.9 KB · Views: 235
  • 20171125_130617.jpg
    20171125_130617.jpg
    58.8 KB · Views: 233
  • 20171124_135508.jpg
    20171124_135508.jpg
    68.1 KB · Views: 237
This brings back memories of the wedge, move, move again, move stuff out of the way, cycle suspension, move other stuff, hope it works, weld it............:fingerscrossed:

Looks like is coming together nicely.

Are you going to have to rework the exhaust? or just remove and reinstall?

Is there room for coilovers, or are the inner fenders going to get some "trimming"?
 
Are you going to have to rework the exhaust? or just remove and reinstall?

Is there room for coilovers, or are the inner fenders going to get some "trimming"?

I'm probably going to rebuild the entire front side of the exhaust back to just behind the door area. I may even start with a new pair of headers and work from there. Once I get the upper link mounted and installed, then I can compress the suspension and find out what I have to work with. The entire front section of the exhaust may end up for sale....
I still don't know what I'm working with for room for coil over mounting. I thought that I was going to mount the lower to the lower link mount but I can see already that isn't going to happen. It'll end up sitting in the hole between there and where the caliper comes in at full lock. I's like to mount the upper inside the fender with only a small hole for a cross bar support but I will not know until I get the suspension in place. I also am going from 35's to 37's so even more clearance issues with that too. Those tires should be showing up near the end of the week. :)
 
The front coil overs are rebuilt and revalved now. Today's project was to make upper and lower mounts. The lower mount is just in a hole that is made from the lower link bracket and the caliper when at full lock. There's not a whole lot of room in there either...... The upper is just some tube with the shock tab just offset from that. I'm still not sold on the upper mount yet. I think I'd like the tube on the inside of the inner fender panel with the shock mount just poking thru a hole there. I need to cycle the suspension to find out if the tire will contact the spring or not. That would make my decision pretty easy then. So far at full compression, the panhard bar just touches the bottom of the frame about the same time it touches the top of the axle housing. I'll probably notch the frame there and put a bend in the panhard bar eventually. It looks like it will turn out to have decent travel. I set it up with 4" up and 6" down. If I get froggy, I might try a set of 14" coilovers for more down travel.
 

Attachments

  • 20171209_144905.jpg
    20171209_144905.jpg
    47.5 KB · Views: 162
  • CJ-8 front coilover extended view_9.jpg
    CJ-8 front coilover extended view_9.jpg
    58.9 KB · Views: 162
  • 20171209_145308.jpg
    20171209_145308.jpg
    57.1 KB · Views: 161
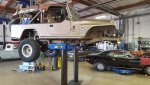
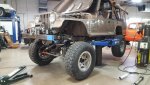
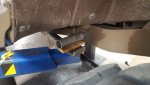
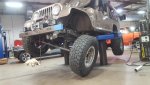
Another day of work and some good progress. I pulled the exhaust today and fabbed up the upper link mount. One thing that I never thought of was the placement of the upper mount on the frame and the ability to remove the rod end bolt with a transmission so close. With some creativity, the problem was solved. Now that all the links are in place, I was able to cycle the suspension and find out what's crashing and what's not. As usual, you tack it into place, cut it back off and move it, tack it again, cut it back off and move it one more time, tack it back in place, then decide it's still not going to work and build a new piece. That's pretty much how it has all been going. For the most part now, it's all sorted out. I have to rebuild the frame bracket for the panhard bar about 2" lower than what I have now so I can not have bump steer. Other than that, there's a lot of parts that come close to crashing now but don't anymore. At full compression on the passenger side, the drag link just lays on the frame along with the panhard bar on the axle housing. With the 37" tires, they really fill out the front fenders well too. I had a set of 12" coilovers but after fitting everything, a set of 14" coils will work much better. In the pics, I have the axle down to replicate the down travel with the 14" coilovers in place. It's pretty flexy now......... I also made some lifting sleeves that go thru the frame so I can lift the Jeep up without being under the frame now that the lower links are in the way.
 

Attachments

  • CJ-8 front coilover extended view_18.jpg
    CJ-8 front coilover extended view_18.jpg
    56.8 KB · Views: 115
  • CJ-8 front coilover extended view_24.jpg
    CJ-8 front coilover extended view_24.jpg
    69.3 KB · Views: 114
  • CJ-8 front coilover extended view_28.jpg
    CJ-8 front coilover extended view_28.jpg
    40.9 KB · Views: 114
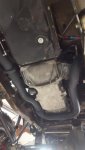
And also it looks like I'm going to need to completely re-engineer the front section of the exhaust so more than likely the headers along with the front crossover and midpipe will go up for sale not long from now. It's all freshly ceramic coated too. It would save somebody a lot of time and effort with a LS swap. :bacon: :headbang::banghead:
 

Attachments

  • CJ-8 front coilover extended view_19.jpg
    CJ-8 front coilover extended view_19.jpg
    61.6 KB · Views: 112
  • CJ-8 front coilover extended view_21.jpg
    CJ-8 front coilover extended view_21.jpg
    53.1 KB · Views: 113
  • Jeep Scrambler CJ-8 LS1 exhaust.jpg
    Jeep Scrambler CJ-8 LS1 exhaust.jpg
    39.7 KB · Views: 114
Back
Top