

You are using an out of date browser. It may not display this or other websites correctly.
You should upgrade or use an alternative browser.
You should upgrade or use an alternative browser.
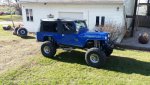
My old 1981 SCRAMBLER returns 25 years later
- Thread starter jbeemer
- Start date




- City
- Conklin
- State
- MI
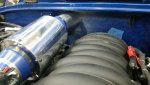
I did make a little more progress on the Jeep. The temporary intake that was under the hood was sucking 80* to 120* air when it was 50* outside.
So I ordered a 4" inline filter, welded up some aluminum tubes, a couple silicone connecters, and now it pulls air from the cowl vent in front of the windshield.
Today We did some cruising around the farm and the intake air temp stayed within a couple degrees of outside air temp most of the time. The most it went up was 13*, and that was after sitting idling. Once we took of and the rpm's came up it dropped right back down.
Attachments

- City
- Conklin
- State
- MI
Had some other projects to get done, so progress has slowed done a bit.
I did test the steering pressure. It was right at 1600 psi. So I am blaming the leaking steering box cover on the ram over-stroking it when the drag link was out of adjustment. I did the AGR box off the shelf, drilled and tapped it, cleaned it up. So it's ready to install. And I made some good hard stops out of 3/4" hex stock, just to make sure the ram can't overcome them.
My engine oil thermostat showed up, and its going to be simple to mount, and just needs a couple short lines.
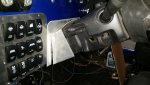
The steering column trim is started, but it's going to take a few pieces and some tig work to get it finished and ready for wrinkle paint.
Attachments




- City
- Gonzales
- State
- La
So I ordered a 4" inline filter, welded up some aluminum tubes, a couple silicone connecters, and now it pulls air from the cowl vent in front of the windshield.
I like that idea but how do you keep the water out in a hard rain.
- City
- Conklin
- State
- MI
I like that idea but how do you keep the water out in a hard rain.
If I'm not moving it's no problem. The drain in the bottom of the cowl is about an inch below the bottom of the intake tube. As far as when I'm driving, I think it will be OK. I had a snorkel on my last crawler. It was at the roof line and facing forward. My air filter never got noticeably wet, even when driving in the rain.

I have considered putting a scoop on the cowl. If I could face it toward the windshield it would help keep debris and rain out...............
- City
- Conklin
- State
- MI
Do you get any gas or engine smell through the heating system? Especially after a long drive after the engines shut down.
I haven't done much driving yet. But I think it should be ok. When it's hot after driving, if there is any smell, it should go up and out. In the past when I've checked there was heat rising out of the vent from the heater core. I'll let you know after some cruising next spring. ........
- City
- Gonzales
- State
- La
April 1 will be here before we know it.[/QUOTE
Will someone closer than me please slap MrBeep. lol
- City
- Conklin
- State
- MI
April 1 will be here before we know it.
Will someone closer than me please slap MrBeep. lol
I'm ready for some warmer weather..........20* and wind with snow today..............
However time has been flying by waaaayyyyyy toooooo fast lately.............and they say it gets worse with age

- City
- Conklin
- State
- MI
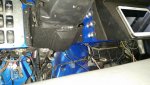
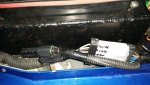
finished up the column cover and sprayed it with wrinkle black. And I'm still looming, tying, and replacing wire nuts with solder and metripack connectors.
Attachments

- City
- Conklin
- State
- MI
still putting stuff back together.
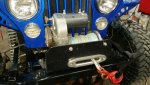
The paint on the front bumper is fresh again. The winch is reinstalled, With a fresh 6 HP motor. Next is the new winch wiring and the Albright style solenoid.
The paint on the front bumper is fresh again. The winch is reinstalled, With a fresh 6 HP motor. Next is the new winch wiring and the Albright style solenoid.
Attachments


- City
- Redmond
- State
- OR
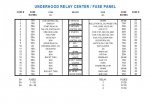
Nothing too exciting, started making the spread sheets so I know what the fuses are for.
Beats the heck out of my hand-written chart. I thought I had a lot of fuses- you've got me beat hands down. Did I miss the picture of your fuse panel?
- City
- Conklin
- State
- MI
Beats the heck out of my hand-written chart. I thought I had a lot of fuses- you've got me beat hands down. Did I miss the picture of your fuse panel?
There are some pics in the thread a few pages back. I'll try to get some updated pics tonight
