• Notice for iPhone users: DO NOT use the image size reduction option when uploading photos to the forum. This causes portrait images to post as landscape. We have added a warning to the image insert pop-up as well.

1984 SL Restoration

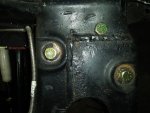
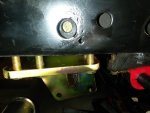
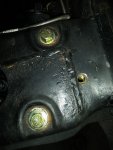
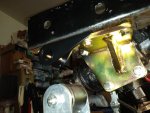
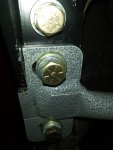
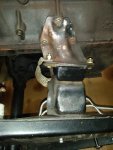
Changed some of the motor mount bolts. Need to find some 3/4" long 3/8" bolts for the engine block. I can swap them out one at a time later on.

Driver side:
20201129_093408.jpg

Passenger side:

20201129_093420.jpg

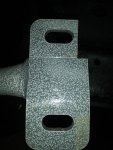
Technically, I should have painted the engine mount plates, but since I am not painting the engine, I wil live with the Patina.

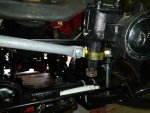
Where I am NOT taking shortcuts, the important stuff. Since I have to swap out the power steering box for a new one, I am also going to upgrade the steering box mount, front shackle hangers, and add a steering box cross brace. Ordered all these parts from M.O.R.E., just waiting for them to be delivered.

This Jeep might not ever go off road, but the bigger tires kind of dictate these upgrades IMO. And, its tore down this far, might as well do the upgrades now.

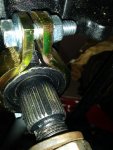
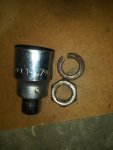
Pulling the Pitman arm nut and washer off, 1-5/16" socket needed:
20201129_094248.jpg

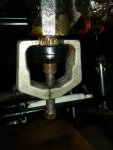
Trusty oiled up pitman arm puller installed:
20201129_094329.jpg

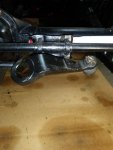
I would tighten the puller up with the impact, smack the pitman arm with a hammer, repeat. Pitman arm off:
20201129_094610.jpg

I also pulled the front bumper out of the way. If I have to swap a steering box out, pulling the grill off makes to much sense, it is a PIA to loosen up/reinstall the PS lines with the radiator/grill in the way.

Room to work:
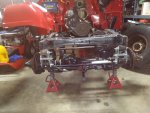
20201129_103023.jpg

I dropped the shackles down out of the way, removed the bushings from the shackle hangers, for safe keeping:
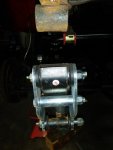
20201129_104820.jpg

Removing any bolts from the frame that thread into the "welded inside the frame captured nuts" is always fun. I don't care if the Jeep is 100% rust free, I always respect these bolts. Even without rust, I am pretty sure AMC applied some type of thread lock to these bolts when originally installed.

I don't even try any "magic lube snake oil" anymore. I go right for heat. I use a little MAP gas torch, heat each bolt for about 4 minutes before I even think of putting a wrench on it. Even after it breaks free, if it gets tight again, I reheat. I have the most success this way. Just have a fire extinguisher handy, use common sense. Any old chemicals inside the frame rails can/will catch fire. Also, wear gloves. Your sockets and wrenches will get hot, too.

Started on the easy side, success!!!
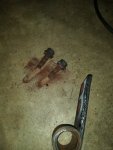
20201129_105749.jpg

When you initially break the super heated bolts loose, it is usually accompanied by little rust dust cloud explosions LOL.

Anyway, hard side done, too. Heat is your friend!!!
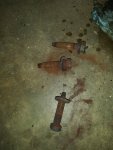
20201129_113017.jpg

Favorite pick, all 5 of these bastards out without damaging the internal frame nuts!!!
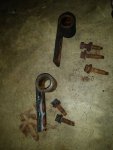
20201129_125433.jpg
 
Before removing the 3 driver side frame bolts, loosen up the two upper steering box mount bolts.

I got the steering box/brackets off the frame with no drama.

20201129_125453.jpg

The only drama: in the above picture, you will see one broken bolt. It is one of those PIA 12 point hardened OEM bolts that secures the box to one of the mounting plates. Even using heat and the right socket, one of them rounded off.

Wanting to be a good "core donor", I ended up cutting the head of the bolt off with the Dremel/cut off wheel. Then, used a big grinder to carefully grind down the bolts head/washer. I then removed the mounting bracket. This left me with a headless bolt sticking out of one of the steering boxes threaded bosses. I then heated this bolt for 5 minutes with the torch, twisted it out with vice grips.

20201129_125507.jpg

I did this outside in the rain, since all the grunge/PS fluid kept catching fire. If the leaking seals were not shot before, all this heat definitely did not do them any favors!!!
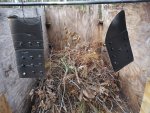
A lot of work for a few parts, but done.

20201129_125519.jpg

I ran a tap through all the internal frame nuts, so ready for putting this thing back together once the M.O.R.E. suspension/steering parts show up. All the OEM parts are in good shape, they will be kept as spares for stock Jeeps.

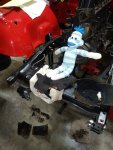
After the torch was put away, my little blue helper showed back up to take credit. Cheeky little SOB:

20201129_140420.jpg

More cleaning and prep work the next few days/nights so I can eventually start reinstalling parts.

That's it for now.
 
I've got the MORE motor mounts still in the box, but I want to do like you, get their box bracket and brace.
 
Back in the saddle again.

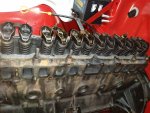
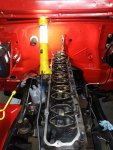
Removed the plastic valve cover. It had a cork gasket with RTV on both sides of the gasket. Evidence of leakage on the driver side. Easier to change it out now.

20201204_163401.jpg

Used a scraper between the plastic valve cover and gasket, popped it off pretty easy. Valve cover was NOT an OEM cover.

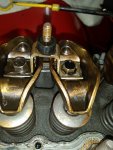
This engine has not ran in 10 years. The only visible oil anywhere up here:

20201204_163411.jpg

Never know what you can find up here, including an old plastic zip tie LOL:

20201204_163419.jpg

Before I even manually turn the engine over by hand, I am dumping this crank case oil. It is pretty black.

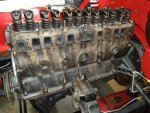
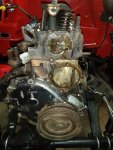
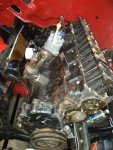
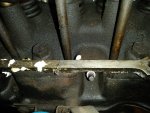
Before I pulled the valve cover, cleaned up the block. It was pressure washed 10 years ago, but still grungy in places. Cleaned it up in the garage with hand wipes, worked well.

20201204_171919.jpg

20201204_171928.jpg

20201204_171938.jpg

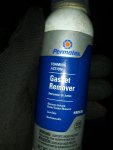
The wet/white stuff on the head, water pump hole, and t-stat hole is this stuff:

20201204_172237.jpg

Works great. Brush it on, let it sit 15 minutes, cork/paper/RTV/grunge scrape right off.

20201204_172310.jpg

That stuff is my first step, of many, of getting the valve cover flange cleaned up and ready for a new seal/gasket/valve cover.
 
Some goodies showed up this week.

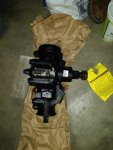
NAPA rebuilt power steering box:

20201204_171957.jpg

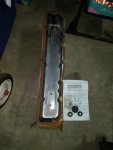
Made in China aluminum valve cover kit. I have installed quite a few of these, they are serviceable:

20201204_172008.jpg

They always smash the damn gasket all up in the valve cover and it gets all kinked up. I put it in place, jam the bolts through it, to hold/reshape it.

Made in USA, all from M.O.R.E., HD steering box mount, steering box cross over brace, HD shackle hangers front and rear:

20201204_171949.jpg

I use the stock width front CJ shackle hangers with the Rubicon Express lifts, even though they use 2.5" width springs up front, just like the rear. Rubicon Express includes front shackles that are made to work with the OEM 2" wide hangers. You could swap to the wider hangers and rear shackles if you wanted. Over 45k miles on my red Scrambler, I have equally tore up front and rear suspension/shackle hanger bushings, so I've never felt the need to swap the wider stuff up front. Also, it gets interesting with the steering box bracket on the driver side with a 2.5" shackle hanger.

My green Scrambler has BDS YJ springs and front conversion kit. It uses the 2.5" width shackle hangers up front. It works, but a little more work to get it all to bolt up. Only benefit I see - only need to keep one set of spare shackle hanger bushings.

I also keep the narrower front shackle hangers up front to piss off @bigwalton LOL.

Will probably work on cleaning/painting stuff tomorrow, since it wont be raining. Will save all the fun/easy install work for rain days/nights.

That's it for now!!!
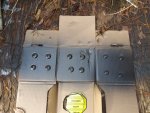
 
, I have equally tore up front and rear suspension/shackle hanger bushings, so I've never felt the need to swap the wider stuff up front.


I also keep the narrower front shackle hangers up front to piss off @bigwalton LOL.

That’s decidedly not my experience. I went through three sets of front bushings before I felt the need to replace the rear. So either I had crappy bushings or I work the front springs much harder than you or you work the rear springs much harder than me ;)
 
Got some more work completed today.

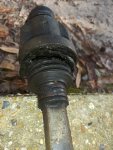
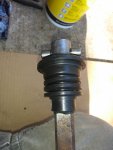
Rebuilt the OEM steering shaft's lower coupler. The upper joint is good and tight, lower coupler had a tore boot.

20201205_090040.jpg

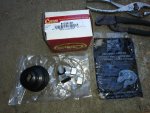
For some reason I bought the below kit, and NOT the kit with the new "bell" part:

20201205_094611.jpg

The "bell" was OK. I use the above pictured 5th wheel grease as lubricant.

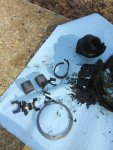
Someone was in here before, big snap ring instead of the wire boot retainer clip, two of the little metal tangs that push outward on the little square things instead of just one:

20201205_094620.jpg

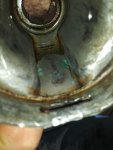
The bell had marks where the little square things ride, but the bell was not damaged, it all still fits together tight, no slack/play:

20201205_094636.jpg

20201205_094644.jpg

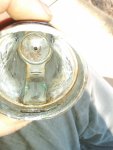
The outer edge of the bell by one of the clip holes was dented in:

20201205_094652.jpg

On the right side, you can see where it is not quite round anymore:

20201205_094659.jpg

I was able to round it back out with some plyers, hammer and punch.

The little end cap/plate popped out, but I was able to drive it back in. Never had that little round plate fall out before?

20201205_094705.jpg
 
I was able to get the new boot over the cross shaft without removing the shaft. Easier to fight/pry it over the shaft, versus trying to remove the shaft:

20201205_102509.jpg

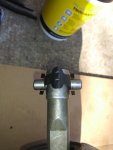
A few picture of how it goes together before I loaded it up with grease. Little metal spreader piece:

20201205_102519.jpg

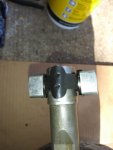
Then the little metal nubs:

20201205_102532.jpg

Then it slides inside the bell.

20201205_102713.jpg

Then, slide the boot down into the coupler, secure it with the wire clip, finished:

20201205_105937.jpg

I will have to go back and secure the upper part of thr boot with either a low profile hose clamp or zip tie, since the OEM metal clamp is ruined.

This shaft is still in great shape. Not as good as a Borgeson shaft, but it can be swapped out relatively easy in the future if needed.
 
Since it eventually warmed up to 60 degrees today, I spent the rest of the day cleaning/prepping/painting a bunch of parts. I will let these parts dry a couple of days, then start assembly them back on to the Scrambler as needed.

"Redneck Ray" paint stands all over the yard with freshly painted Jeep parts everywhere:

20201205_132542.jpg

20201205_142136.jpg

20201205_142141.jpg

20201205_142152.jpg

20201205_142158.jpg

20201205_142203.jpg

20201205_142214.jpg

Will probably get the steering box/front suspension put back together tomorrow, and work on cleaning/prepping the head for the new valve cover if time allows.

That's it for now.
 
Since it wasn't raining earlier today, did some more outside work. Only got 1.5 chores complete, but progress none the less.

The parts I messed with today are not needed at this time, but they will be bolt on ready when the time comes. That is over half the battle, i.e. repairing, cleaning, painting, finding, purchasing, organizing so you can finally bolt stuff back together.

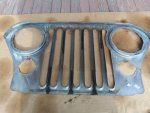
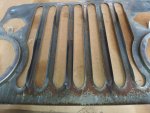
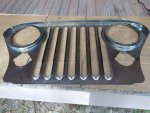
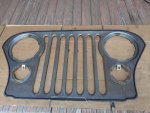
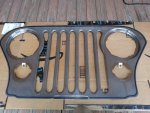
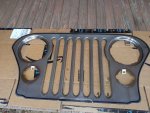
Anyway, since this is a Laredo, lets clean and polish the OEM Laredo grill. I am no expert at this stuff, just a redneck, this is what I did.

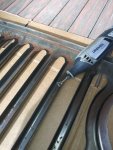
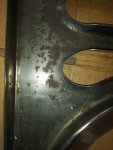
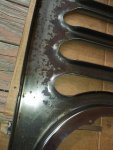
The back of the grill had goop, tape, and heavy corrosion.

20201206_091923.jpg

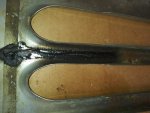
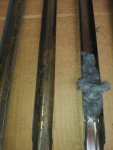
The black goop was mainly on the grill slat cavities, maybe to glue the overlay to the grill, prevent rattles or paint scratches?

20201206_091928.jpg

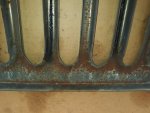
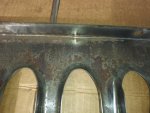
Pretty heavy corrosion at the top of the overlay. Not worried about aesthetic issues, but do not want old rust crud digging into new paint.

20201206_091933.jpg

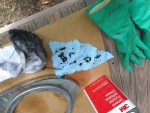
The black goop responded well to removal using 3M Adhesive Remover. This is strong smelling stuff that I only use outside.

20201206_093522.jpg

Cleaned off easily with the 3M remover.

20201206_093530.jpg

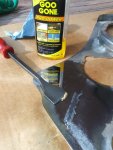
The grill also had remnants of old tape along the bottom edge. I would presume double sided tape was also used to hold the overlay to the grill? The 3M stuff would not touch it, but Goo Gone got it off:

20201206_094238.jpg

20201206_095620.jpg

The reason for removing all the old gunk is not just OCD. I knew I would be using steel wool back here to knock off the corrosion. All this goop would just clog up the steel wool and/or smear and make a bigger mess.

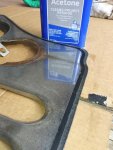
On the face of the overlay, there was under coating over spray. I dabbed a rag with Acetone and removed most of the over spray, being extremely careful around the original Laredo overlay pin stripe decals.

20201206_101027.jpg

So, three different chemicals so far.

Back to the back of the overlay, rust removal. I started with the trusty Dremel/wire wheels to remove the bulk of it.

20201206_102357.jpg

Next, the finger numbing steel wool. I had this stuff left over from some OEM chrome wheels I polished awhile back. Went through 3 different grades of steel wool.

20201206_103735.jpg
 
Last edited:
The steel wool knocked most of the rust out, but the top of the overlay was still crusty:

20201206_111730.jpg

20201206_111737.jpg

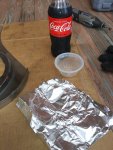
So, I tried the old "Coke and Aluminum Foil" trick.

20201206_112555.jpg

Basically, pour Coke on the rust, scrub with aluminum foil. The acid in the Coke aids with rust removal, the aluminum foil is softer then the chrome so it will not scratch the chrome. This trick worked great on a few small spots of rust on one of my chrome wheels. On this much heavy corrosion, even after an hour of scrubbing, negligible results.

20201206_114012.jpg

20201206_123114.jpg

All the scrubbing DID smooth out the corrosion. I cleaned the Coke off, did a final polish with steel wool and called it done. The corrosion is knocked back smooth with the surrounding chrome, so it wont gouge into the paint. I might put a thin stip of tape over the rust to keep it off the paint. Will revisit this later.

After wearing out my fingers on the back side of the overlay, time to polish the front side.

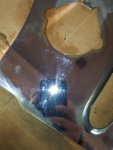
Not terrible, not perfect, close to 40 year old chrome.

20201206_125232.jpg

After 3 grades of steel wool:

20201206_133139.jpg

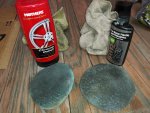
Finally, first polish, then wax. My Mother's PowerBall blew up after about 30 seconds, so back to hand polishing.

20201206_140904.jpg

Anyway, a lot of work, but looks better, picture is not the best.

20201206_140911.jpg
 
In keeping with "up front" repairs, I decided to get the replacement radiator ready to bolt up.

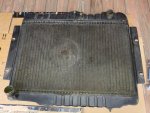
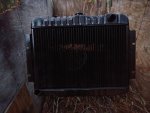
This Scrambler's OEM 3 core radiator has a smashed/cracked lower hose pipe. I have a good OEM 3 core radiator I pulled out of my 1985 Spring Special to swap into Tommy's Scrambler.

On my '85, someone swapped in the 3 core radiator, but left the 2 core clutch and fan in place, which does this:

20201206_141516.jpg

Luckily, only superficial damage to the little fins, no tube damage.

20201206_141523.jpg

This radiators little fins run "zig zag" between the tubes. If they were straight fins running between the tubes, I could simply use an "AC condenser fin comb" and straighten the fins. Besides aesthetics, the bent fins kind of reduce the cooling.

More OCD then anything else, but I decided to straighten them out. The only way I know to do it: get comfortable, get a little flat screw driver, start straightening.

To the left of the screw drivers, "repaired" side:

20201206_150227.jpg

Once I complete the "repairs", a little paint will make it hard to detect. And the fan will hide it anyway LOL.

That's it for now!!
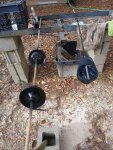
 
That is one thing that I have never been a big fan of. The over lay or whatever it is. Maybe they should have just chromed the whole grill. :shrug:
 
Finishing up the radiator aesthetic repairs.

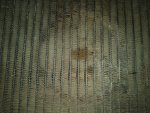
Not perfect, much better. No blocked passages from crushed fins, so should cool better than before.

20201211_164716.jpg

20201211_164727.jpg

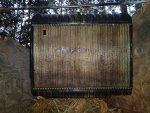
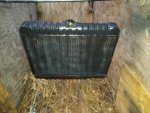
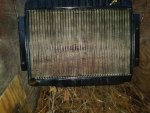
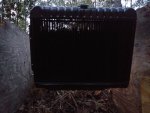
I went ahead and sprayed some black paint on it. I only ever lightly paint radiators to prevent gumming up all the fins. Basically, one light horizontal coat, one light vertical coat. The next pictures were taken with the flash on, looks like no paint at all on the core!!!
20201211_170617.jpg

20201211_170633.jpg

20201211_170717.jpg

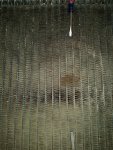
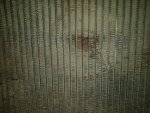
With the flash off, looks better. You can see day light through the core from over the top of the trailer, yard trash through the core in the other picture.

20201211_170840.jpg

20201211_170743.jpg

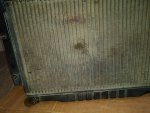
You can see the old "clutch fan ring" better after it was painted LOL. Oh well, looks better IMO, and the old "clutch fan ring" won't be to noticable from the engine compartment side once the it is back in place.

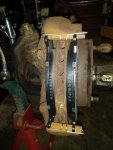
Another simple chore, installed new brake pads, anti rattle clips, and calipers on the front axle.

Pads and clips:

20201211_173741.jpg

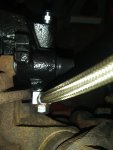
Install the brake line to the caliper before bolting the caliper to the steering knuckle.

20201211_174951.jpg

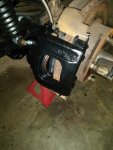
And finished with this easy task:

20201211_175004.jpg

With the old calipers and pads off, the front wheel hubs turned free and easy, no play. The OEM lock in hubs work properly, too. Axle shafts turn fine, ring and pinion spins nice and easy, no apparent play. For now, this is as deep as I am going into the front axle, besides an eventual cover removal to change out the oil. The outer bearings seem OK. Axles turn nice and easy. Lock in hubs work fine. If Tommy wants to install new ring and pinions, or performance differentials, then I can pull all this stuff apart. Or, once I get it running and driving, easy enough to revisit. For now, I have enough I have to do before I start looking for problems LOL.

The calipers were rough. Slide pins and bushings shot, bleeder screws frozen solid in place. It was easier in time, money, and sanity to just swap on a pair of rebuilt loaded calipers. Live to fight another day.
 
Started to work on installing the M.O.R.E. HD steering box mount.

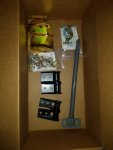
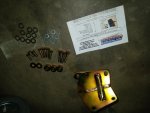
What the kit comes with:

20201211_185432.jpg


I always install this optional/additional third cross member bolt. You have to temporarily bolt the bracket on top of the cross member to mark this new, 3rd hole:

20201211_183633.jpg

It is kind of a PIA to mark the cross member, the upside down bracket is in the way. So, I put anti-seize on the new bolts end, thread it through the hole to mark the cross member:

20201211_183649.jpg

To the right of the old weld line, center punched and ready to drill the new 1/2" hole:

20201211_183923.jpg

IIRC, previous owner welded a winch mount to the front cross member. When Tommy had some body mount repairs made, they cut this plate off. Pretty sure a 8274 will end up on the bow of this one, so I am just going to grind off the bit of weld that will interfere with this new, 3rd bolt.

Anyway, mocked up the steering box mount in place, all 6 bolts in, pretty happy with that:

20201211_185253.jpg

20201211_185303.jpg

That's it for now!!
 
Power steering box/mount/shackle hanger/steering box brace install work.

The steering box mount comes with 3 big spacers and one thin spacer. Thin spacer goes here:

20201212_093421.jpg

Bolting the steering box to the mounting plate. I used red lock tite on the grade 8 bolts:

20201212_095356.jpg

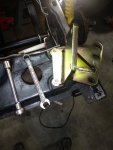
Hanging the heavy assembly up, using two of the cross member bolts:

20201212_100126.jpg

Installing the MORE HD shackle hanger with the steering box mount. They fit together fine, no modifications required. The smaller gusset goes toward the inside of the frame rail:

20201212_100235.jpg

20201212_101124.jpg

In the above picture, 5 of the 6 bolts are in. This is a "dry run", no lock tite or lock washers.

Of course, the 6th hole I drilled did not line up perfect. I think I have installed 4 of these steering box mounts and I have never got this additional hole in the right spot the first time!!!
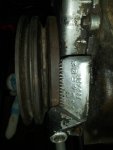
20201212_101136.jpg

A few minutes with the Dremel die grinder bit to open up the hole, then a few minutes using a Dremel cut off wheel as a grinding disk to smooth down the old weld so a washer would fit correctly:

20201212_103201.jpg

Happy now, all 6 bolts will go in:

20201212_103216.jpg

Pulled each bolt out, one at a time, added a little red lock tite and a lock washer to each one, torqued to 45 foot pounds, done with this side:

20201212_104819.jpg

Time to install the passenger side HD shackle hanger and the steering box cross over brace:

20201212_104935.jpg
 
This side was actually more aggravating than the driver side.

Loosely clamp the brace to the bottom of the steering box first:

20201212_114125.jpg

Make sure you have the clamp slid up high enough on the box that it completely clears the pitman arm area:

20201212_114137.jpg

The other end of this brace uses the rear most shackle hanger bolt, and the previously unused third hole/welded nut in the frame. I would guess this 3rd hole/nut would be for a right hand drive steering box mount?

Anyway, the brace will not clear the MORE HD shackle hanger brackets outer most gusset.

So trim a little:

20201212_120929.jpg

And then some more:

20201212_125204.jpg

Now it fits like a glove, and is jammed tight against the shackle hanger gusset. A stock, or different style shackle hanger would not have this issue. Anyway, no big deal, little mods like this should be expected. All bolted up:

20201212_131050.jpg

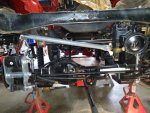
Front end all back together, thanks Parts Monkey!!
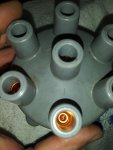
20201212_131100.jpg

20201212_145835.jpg

Now that the front axle/suspension was reattached to the frame, I could lower the Scrambler back down level to make it easier to work on the engine.
 
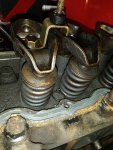
This engine has been sitting up for 10 years. Now, that is not necessarily terrible, especially considering it has been sitting up in a climate controlled warehouse. Still, to be safe, I pulled all the spark plugs out the other day, shot a bunch of PB Blaster in each combustion chamber, down around each lifter, down the push rods, etc. Finally put a socket/ratchet on the crank, the engine turns over freely by hand. So, that is good. I spun it over by hand for a few minutes, listening to it go "poof poof poof" and watching all the rockers go up and down. Everything seems to be turning freely/easily, even got oil coming out the push rods on the rockers, just by spinning thr crank over by hand, good sign!!!!
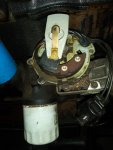
Anyway, I will still probably pull the distributor and spin the oil pump over with a drill/old screw driver, just to be safe. But, seems to be good to go.

Just a few pictures showing TDC. I am going to paint the harmonic damper line/timing marks with a white paint pen to be easier to read with a timing light:

20201212_145910.jpg

The above picture is close to TDC. The existing distributor cap has a "1" on it showing where the #1 plug should be at TDC:

20201212_145936.jpg

And where the rotor should be at TDC:

20201212_145945.jpg

Just a little side trip.

Back to cleaning the cylinder head, prepping it for the new valve cover install.

After initial chemical RTV remover, and one emery cloth pass:

20201212_155139.jpg

Still a ways to go before it is ready, but looking good.

When ever I go to install a new valve cover on a 258, my OCD kicks in to high gear. I will spend hours cleaning the cylinder head, and all the threaded holes. They have to be perfectly clean to get a good seal. If not, you are just pissing against the wind.

For example, running a tap down the rear most hole, that looked clean in the above picture, is forcing this ooze out:

20201212_155124.jpg

You thread a bolt down in that hole, force that old oil into your fresh gasket sealant or RTV, instant leak.

Yummy:

20201212_155535.jpg

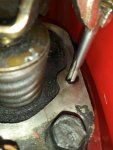
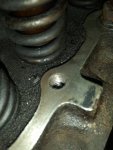
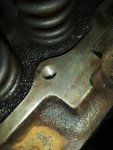
I made a few more cleaning passes, ran a tap down all the threaded holes, and finished tapping the two dowel holes on the driver side of the head. A previous owner started to tap these two holes, but did not tap them to the bottom. I guess they did not have a bottom/plug tap?

20201212_162342.jpg

20201212_162405.jpg

Still have an hour or two of cleaning work, then I can start to dry fit the new valve cover, see what mods/bolts/washers it will need for a successful installation.

That's it for now.
 
Any thoughts to replacing the valve stem seals while you are in there? I ask since it is next on my to do list and always appreciate the tips you provide.
 
Back
Top