You are using an out of date browser. It may not display this or other websites correctly.
You should upgrade or use an alternative browser.
You should upgrade or use an alternative browser.
82 UK Spec Laredo Scrambler Build No 2
- Thread starter Dave The Sparky
- Start date

- City
- Rockville
- State
- VA
My thought too. Can you slot the holes enough to move it up a half inch or so?Nice!
Can you move the rad up?

Dave The Sparky
Rebuilding my CJ8 very,very slowly...
- City
- Halifax
- State
- UK
Nice!
Can you move the rad up?
My thought too. Can you slot the holes enough to move it up a half inch or so?
Its only ally so would slot or re-drill easily just not sure how much material i have to go at or the clearance above it without looking.
Hopefully the 1" body lift will be enough to cure these issues, also means the intended 33s should fit that little bit easier too i hope!

- City
- Redmond
- State
- OR
A 1” body lift can make so many things easier/fit better. I tried my current build without, and eventually gave in and added the spacers.Its only ally so would slot or re-drill easily just not sure how much material i have to go at or the clearance above it without looking.
Hopefully the 1" body lift will be enough to cure these issues, also means the intended 33s should fit that little bit easier too i hope!
Dave The Sparky
Rebuilding my CJ8 very,very slowly...
- City
- Halifax
- State
- UK
Body lift landed and installed, huge difference everywhere now i think it needed one anyway as @Randyzzz stated think it will make lots of things easier.
The radiator lower hose is certainly no longer a problem, the D300 locknut and shaft that holds the transfer shift lever is still too close to the body tub for my liking though.
Not sure whether to lower the transfer case a little to get it to clear or could shift it sideways just a little, just dont want to screw up the clearance for the front prop shaft its all very close as it is.
Either that or maybe a power bulge in the floor or make a bulged access panel that way i can undo the D300 shifter locknut more easily or i could simply just lop the end off the shaft that holds the lever!.
Will have a beer and think about this one a bit more....
The radiator lower hose is certainly no longer a problem, the D300 locknut and shaft that holds the transfer shift lever is still too close to the body tub for my liking though.
Not sure whether to lower the transfer case a little to get it to clear or could shift it sideways just a little, just dont want to screw up the clearance for the front prop shaft its all very close as it is.
Either that or maybe a power bulge in the floor or make a bulged access panel that way i can undo the D300 shifter locknut more easily or i could simply just lop the end off the shaft that holds the lever!.
Will have a beer and think about this one a bit more....
Dave The Sparky
Rebuilding my CJ8 very,very slowly...
- City
- Halifax
- State
- UK
Some pics Lower hose clearance, Need to find an ever so slightly longer hose here as well,
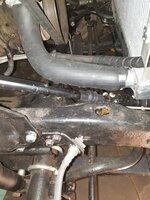
Dropped the transfer box about 1/2inch to get some clearance even now its quite close but not as close as it looks on the photo.
Once i get round to sanding all the welding off it may help too i guess
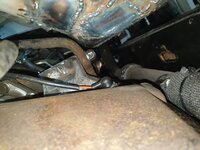
Dropped the transfer box about 1/2inch to get some clearance even now its quite close but not as close as it looks on the photo.
Once i get round to sanding all the welding off it may help too i guess
Dave The Sparky
Rebuilding my CJ8 very,very slowly...
- City
- Halifax
- State
- UK
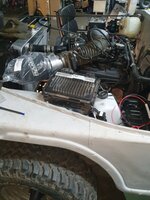
Spent today trying to get some of the rats nest of wiring sorted out, Started out with the Chevy bit so the ECU has a home now near to the boy racer air filter arrangement!.
That side is near enough done so removed the fender to make a start on the other side, purely to make life easier to get to the starter motor.
I need to run a battery cable all the way around the engine bay to get to this thanks to the battery tray being as far away as it could be this being RHD!
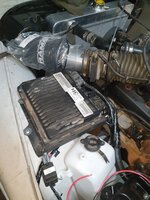
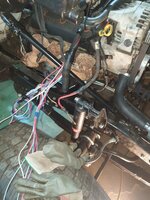
That side is near enough done so removed the fender to make a start on the other side, purely to make life easier to get to the starter motor.
I need to run a battery cable all the way around the engine bay to get to this thanks to the battery tray being as far away as it could be this being RHD!
Dave The Sparky
Rebuilding my CJ8 very,very slowly...
- City
- Halifax
- State
- UK
More wiring done today,i used this fusebox i found on Amazon to collect all the Chevy bits together.
It has 2 seperate fused ways on it so the ignition feeds are on one side and the always hot on the other side and plenty of places for grounds.
Its not the prettiest thing in the world and i would rather of hidden it somewhere else but without extending lots of cable and the possibility of faults due to extending so many cables then thats where its ended up.
Not sure i like it so i might rethink this when i strip it back down for painting but at least its up out of the way and easily accessible.
Big relay next to it is for the starter motors solenoid.
All i have left to do on the wiring now is to get the original CJ wiring loom to interface with the Chevy bit, all the lighting and then mopping up whats left,but at least its starting to take some sort of shape now.
Was hoping to get it running again this weekend, but as per usual running out of time now...
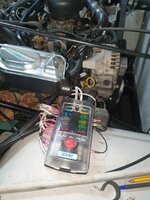
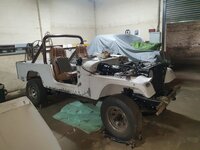
It has 2 seperate fused ways on it so the ignition feeds are on one side and the always hot on the other side and plenty of places for grounds.
Its not the prettiest thing in the world and i would rather of hidden it somewhere else but without extending lots of cable and the possibility of faults due to extending so many cables then thats where its ended up.
Not sure i like it so i might rethink this when i strip it back down for painting but at least its up out of the way and easily accessible.
Big relay next to it is for the starter motors solenoid.
All i have left to do on the wiring now is to get the original CJ wiring loom to interface with the Chevy bit, all the lighting and then mopping up whats left,but at least its starting to take some sort of shape now.
Was hoping to get it running again this weekend, but as per usual running out of time now...
Dave The Sparky
Rebuilding my CJ8 very,very slowly...
- City
- Halifax
- State
- UK
Couple of hours on this today, shoved a battery on it and initially had no power to the ECU but once i sorted out the missing wires it fired up after a few cranks.
Nice to hear it run again albeit only for a short while as there is no coolant in it yet.
Nice to hear it run again albeit only for a short while as there is no coolant in it yet.
Dave The Sparky
Rebuilding my CJ8 very,very slowly...
- City
- Halifax
- State
- UK
Surprisingly so to say it hasn't run for ages and the gas in the tank must be over 12 months old.So smooth!
Started with no hesitation this morning from cold as well so i am one happy bunny today, Nowhere near finished on this project yet though....
Dave The Sparky
Rebuilding my CJ8 very,very slowly...
- City
- Halifax
- State
- UK
Found what i think is a nice solution for my bigger connections with a fuse box mounted on the battery itself using a bit of copper bar and a clamp with a stud on it.
Bent a bit more copper bar to act as a ground bar, drilled and tapped it thus solving a lot of issues i thought i had keeping this wiring tidy.
Hung an ignition relay on the bar as well to power the fuse box on the other side, i didn't want to risk overloading the standard ignition switch as i have absolutely no idea at all what its rated at...
There is a lid there that covers the fuse box and i will sort out and tidy the rats nest of wires properly later on when the final build happens including lengthening that cable that crosses the battery, that short cable is really annoying me quite a lot for some reason.
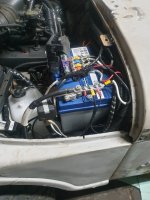
Bent a bit more copper bar to act as a ground bar, drilled and tapped it thus solving a lot of issues i thought i had keeping this wiring tidy.
Hung an ignition relay on the bar as well to power the fuse box on the other side, i didn't want to risk overloading the standard ignition switch as i have absolutely no idea at all what its rated at...
There is a lid there that covers the fuse box and i will sort out and tidy the rats nest of wires properly later on when the final build happens including lengthening that cable that crosses the battery, that short cable is really annoying me quite a lot for some reason.
Dave The Sparky
Rebuilding my CJ8 very,very slowly...
- City
- Halifax
- State
- UK
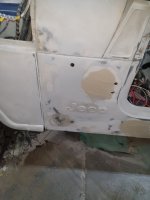
Started filling the tub to try and get some sort of flatness back in it but before i weld this up does anyone know what this hole above the J was for?, it looks factory and is in an odd place to drill through later on?.
- City
- Redmond
- State
- OR
Looks great! Easy to access too.Found what i think is a nice solution for my bigger connections with a fuse box mounted on the battery itself using a bit of copper bar and a clamp with a stud on it.
Bent a bit more copper bar to act as a ground bar, drilled and tapped it thus solving a lot of issues i thought i had keeping this wiring tidy.
Hung an ignition relay on the bar as well to power the fuse box on the other side, i didn't want to risk overloading the standard ignition switch as i have absolutely no idea at all what its rated at...
There is a lid there that covers the fuse box and i will sort out and tidy the rats nest of wires properly later on when the final build happens including lengthening that cable that crosses the battery, that short cable is really annoying me quite a lot for some reason.
View attachment 103118
No idea on the hole. Antenna maybe? But I’m just guessing.
Dave The Sparky
Rebuilding my CJ8 very,very slowly...
- City
- Halifax
- State
- UK
Antenna is on the other side, maybe they had a CB or similar?
Found a photo from when i bought it, somethings been there but then filled in?. Not to worry will get it welded up just curious as to what it could of been for.
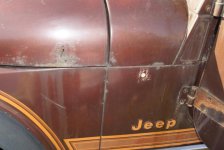
Found a photo from when i bought it, somethings been there but then filled in?. Not to worry will get it welded up just curious as to what it could of been for.

Dave The Sparky
Rebuilding my CJ8 very,very slowly...
- City
- Halifax
- State
- UK
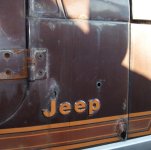
Looking like where the antenna was. Or is there one on the drivers side ?
Other side has the antenna hole (along with what were rust holes
 )
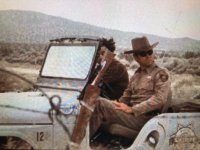
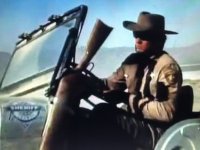
Dave The Sparky
Rebuilding my CJ8 very,very slowly...
- City
- Halifax
- State
- UK
Not much to report here, just trying to make my aftermarket frame a bit more presentable so at some point in the future it is ready to accept some paint.