

You are using an out of date browser. It may not display this or other websites correctly.
You should upgrade or use an alternative browser.
You should upgrade or use an alternative browser.
Torqueflite 999 rebuild
- Thread starter ag4ever
- Start date
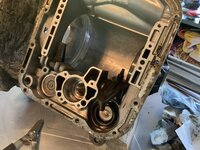
I recall using 2 pieces 3/8 allthread and straps up to a point on the gearbox housing - just jack it off with nuts.
Are you going to add a vent to the rear of the gearbox and block the vent in the top of the steel pump? (Hole to the right of the one you have circled at the top).
Google tf999 vent relocation

Are you going to add a vent to the rear of the gearbox and block the vent in the top of the steel pump? (Hole to the right of the one you have circled at the top).
Google tf999 vent relocation
- City
- Richmond
- State
- TX
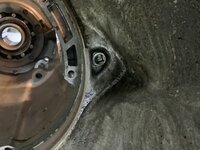
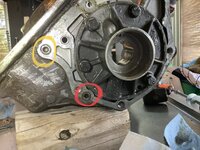
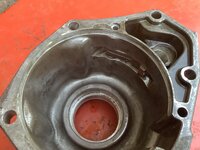
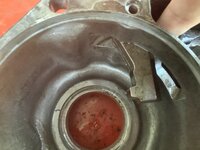
Now I am stuck at the next step. Removing the band levers. The front band pivot has a pipe plug in the bellhousing that must be removed before the pivot pin can be removed. The rear pivot pin has no front exposed face, I have no clue as to how this will be tapped out.
Front pin access

Rear pin access (yellow is apply lever pivot, red it the band anchor
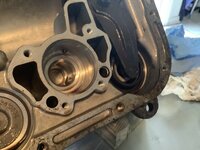


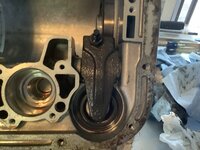
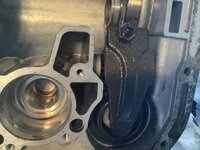
Time to research how this pin is removed.
Front pin access
Rear pin access (yellow is apply lever pivot, red it the band anchor
Time to research how this pin is removed.
- City
- Richmond
- State
- TX
I recall using 2 pieces 3/8 allthread and straps up to a point on the gearbox housing - just jack it off with nuts.
Are you going to add a vent to the rear of the gearbox and block the vent in the top of the steel pump? (Hole to the right of the one you have circled at the top).
Google tf999 vent relocation
I doubt I will relocate the vent on this transmission. I don’t plan to drive the Overlander through deep water, so it should not be needed. Using a “puller” setup would work great too. I have not seen that method before, but that would be a smooth controlled removal process. Great idea.
- City
- Richmond
- State
- TX
I picked up another book on Chrysler transmissions. It does not mention the A904 on the cover, but talks about it in the writing. I have only started reading, so I don’t know how helpful it will be.
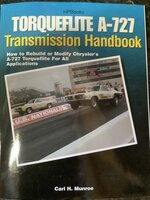
ISBN 978-1-55788-399-5
ISBN 978-1-55788-399-5
Last edited:
- City
- Richmond
- State
- TX
Well, that was easy. YouTube to the rescue.
To remove the rear lever pivot, insert snap ring pliers into the recess in the end, apply outward pressure while pulling the pin out. It slides right out, not much resistance.
Rear band apply lever, lever pivot, band anchor.
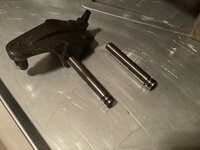
Rear output shaft support. Remove four bolts with a 1/2” wrench

Remove inner one-way clutch race
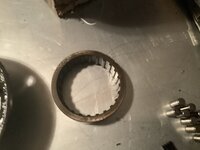
Remove one-way clutch springs and rollers. This transmission had 10 of each. Number of rollers matches number of springs

Current case status

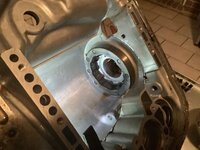
Unfortunately, I did not get a good photo of the overrunning (one-way) clutch. This is the best one I have.

TTFN
To remove the rear lever pivot, insert snap ring pliers into the recess in the end, apply outward pressure while pulling the pin out. It slides right out, not much resistance.
Rear band apply lever, lever pivot, band anchor.
Rear output shaft support. Remove four bolts with a 1/2” wrench
Remove inner one-way clutch race
Remove one-way clutch springs and rollers. This transmission had 10 of each. Number of rollers matches number of springs
Current case status
Unfortunately, I did not get a good photo of the overrunning (one-way) clutch. This is the best one I have.
TTFN
Last edited:
- City
- Richmond
- State
- TX
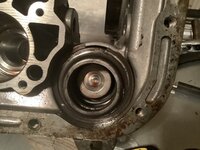
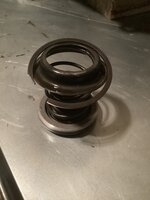
Remove the low-reverse servo by prying out the snap ring. The servo lifts out with no resistance. Center photo is left to right = top to bottom in the bore. Right photo is how it sits in the bore.

I was not so lucky with the kickdown servo. You must depress the piston with one hand while prying out the snap ring with the other hand. Real PITA. After the snap ring is removed, the piston still sticks at the ring land. I have seen a video that shows using compressed air to pop it out of the bore. I will need to try this because the spring pressure alone is not enough to get past the ring land. This will be a “move outside” task.


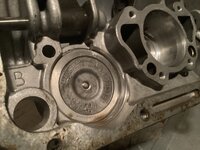
TTFN
I was not so lucky with the kickdown servo. You must depress the piston with one hand while prying out the snap ring with the other hand. Real PITA. After the snap ring is removed, the piston still sticks at the ring land. I have seen a video that shows using compressed air to pop it out of the bore. I will need to try this because the spring pressure alone is not enough to get past the ring land. This will be a “move outside” task.
TTFN
- City
- Richmond
- State
- TX
Did a little bit more before work this morning. Pull the plug for the kickdown band apply lever pivot, plug is a 1/4” square drive. A standard ratchet 1/4” extension works fine to remove the plug. Once the plug is removed, the pivot easily slides out.


I also wiggled the kickdown servo and pried it up a bit. It popped up enough to pull it out. From right to left is top to bottom. Center photo is the servo as it sits in the bore (Except snap ring goes on the top).
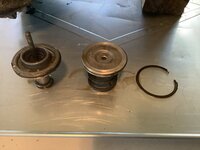

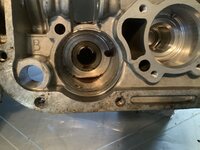
Case is fully disassembled, next step will be cleaning the case and moving to the sub-assembly disassembly / cleaning / inspection.
TTFN
I also wiggled the kickdown servo and pried it up a bit. It popped up enough to pull it out. From right to left is top to bottom. Center photo is the servo as it sits in the bore (Except snap ring goes on the top).
Case is fully disassembled, next step will be cleaning the case and moving to the sub-assembly disassembly / cleaning / inspection.
TTFN
- City
- Richmond
- State
- TX
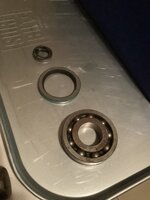
Not much to update today. I knocked the shift seal out of the case, knocked out the tailhousing seal, and the output shaft support bearing from the tailhousing. On the right image, the top seal is the shift selector.

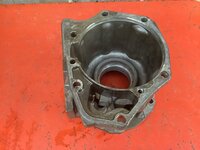
The tailhousing (transfer case adapter housing) has the parking pawl. This lever locks into the recesses on the output shaft to prevent vehicle movement. I don’t plan to remove this component. It appears to move freely, and is not used except when shifting to and from park.


The generic rebuild manuals are all aimed at car and 2wd truck transmissions, not 4wd transmissions. For that I suggest the Jeep service manual. These diagrams are from the ‘89 version. Below is an overall transmission part identification diagram.

The tailhousing (transfer case adapter housing) has the parking pawl. This lever locks into the recesses on the output shaft to prevent vehicle movement. I don’t plan to remove this component. It appears to move freely, and is not used except when shifting to and from park.
The generic rebuild manuals are all aimed at car and 2wd truck transmissions, not 4wd transmissions. For that I suggest the Jeep service manual. These diagrams are from the ‘89 version. Below is an overall transmission part identification diagram.
- City
- Richmond
- State
- TX
I took the case and tail adapter to the coin op car wash, did a so so job of cleaning them.
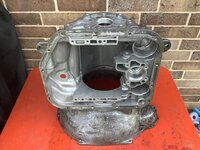
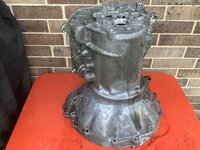
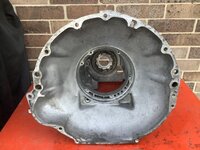
After getting home, I rinsed them in the parts washer with mineral spirits to prevent the steel parts from flash rusting in the 200% gulf coast humidity. I plan to contact a local machine shop to see if I can get them to run the cases through their heated parts washer. If that does not work, I will use my steam cleaner to methodically clean them. I can use the commercial parts washer.
The house dishwasher is NOT a viable alternative. We recently replaced it, and I am not wanting to spend that money again. Plus, I’m on septic, don’t really want that kind of grease in the tank. I should have kept the old one for a shop washer, just run the discharge on the ground.
After getting home, I rinsed them in the parts washer with mineral spirits to prevent the steel parts from flash rusting in the 200% gulf coast humidity. I plan to contact a local machine shop to see if I can get them to run the cases through their heated parts washer. If that does not work, I will use my steam cleaner to methodically clean them.
I can use the commercial parts washer.For God’s sake, don’t put it in the dishwasher unless she’s going to be gone for “at least” a few hours.
The house dishwasher is NOT a viable alternative. We recently replaced it, and I am not wanting to spend that money again. Plus, I’m on septic, don’t really want that kind of grease in the tank. I should have kept the old one for a shop washer, just run the discharge on the ground.
- City
- Richmond
- State
- TX
Here are the parts I bought years ago for the rebuild. I am sure I will need to get additional parts, just don’t know what yet.
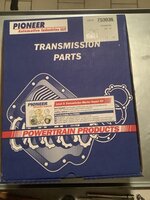
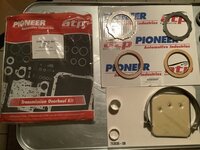
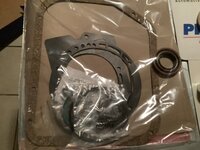

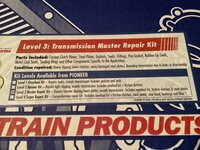

This kit included a new low reverse band (rear), but not a new kickdown band (front).
I am sure it does not have the adapter housing bearing and seal. Nor the transmission to transfer case seal.
I need to get a new pan, just for the drain plug. (I hate the fact almost all stock transmission pans do not have a drain plug!)
I will be adding a “shift kit” to the build. This is the lowest level. I want firm shifts, but not filling poppers.


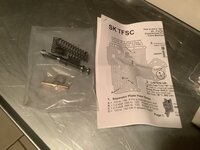
TTFN
This kit included a new low reverse band (rear), but not a new kickdown band (front).
I am sure it does not have the adapter housing bearing and seal. Nor the transmission to transfer case seal.
I need to get a new pan, just for the drain plug. (I hate the fact almost all stock transmission pans do not have a drain plug!)
I will be adding a “shift kit” to the build. This is the lowest level. I want firm shifts, but not filling poppers.
TTFN
Last edited:


Dave The Sparky
Rebuilding my CJ8 very,very slowly...
- City
- Halifax
- State
- UK
Nice write up, i did like you are doing and just bought a manual and a rebuild kit and set to it and it turned out great..Here are the parts I bought years ago for the rebuild. I am sure I will need to get additional parts, just don’t know what yet.
Trying to remember how i got round it but the 999 has i think one extra clutch plate and one extra friction disc than a 904 has.
There isn't enough of them in a 904 rebuild kit and i cant remember for the life of me if i just saved and used the best of the old packs or used what i was given in the kit, all i can remember is measuring the thickness of it all with the verniers. to ensure it was essentially the same as what came out.
Should of documented it lin photographs ike you are to help remind me!.
- City
- Richmond
- State
- TX
Not much progress last 2 days. I know I said I was not gonna pull the park pawl (sprag), but after going to the coin op it was evident the person I bought the tail housing from had spray painted it over top of oil and grime. As a result, I stripped it down, taped it off and sent it through the sand blast cabinet.
Before
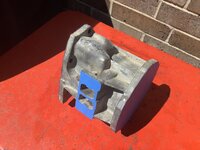
After

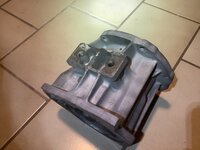
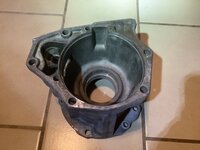
Now I am slowly steam cleaning the main case. Using a McCulloch steam cleaner. Does a good job with the brass brush tip.

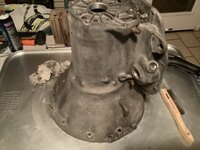
After the car wash, before steam cleaning.

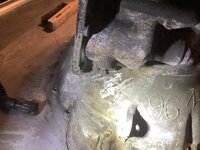
Before
After
Now I am slowly steam cleaning the main case. Using a McCulloch steam cleaner. Does a good job with the brass brush tip.
After the car wash, before steam cleaning.
- City
- Richmond
- State
- TX
Here are the park components.

The pin in the “Plug and Pin Assembly” goes into a hole in the housing.
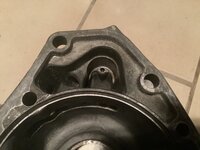
To pull the pivot pin, I inserted the tip of a pocket screw driver into the end and applied a “wedging” pressure on the side while pulling it out. Came out fairly easy, not as easy as the lever pins, but not terribly difficult.
The pin in the “Plug and Pin Assembly” goes into a hole in the housing.
To pull the pivot pin, I inserted the tip of a pocket screw driver into the end and applied a “wedging” pressure on the side while pulling it out. Came out fairly easy, not as easy as the lever pins, but not terribly difficult.
- City
- Richmond
- State
- TX
Nice write up, i did like you are doing and just bought a manual and a rebuild kit and set to it and it turned out great..
Trying to remember how i got round it but the 999 has i think one extra clutch plate and one extra friction disc than a 904 has.
There isn't enough of them in a 904 rebuild kit and i cant remember for the life of me if i just saved and used the best of the old packs or used what i was given in the kit, all i can remember is measuring the thickness of it all with the verniers. to ensure it was essentially the same as what came out.
Should of documented it lin photographs ike you are to help remind me!.
So far, the most helpful book is the one by Tom Hand. All others are repetitive and don’t explain the process as clearly. The next most helpful is the Jeep service manual. It shows the 4WD specific parts. ALL of the rebuild books are based on cars, NONE detail the unique aspects of the 4WD parts.
On the friction materials, I am not 100% sold on using the kit parts. I am thinking of buying raybestos or borgwarner frictions and steels. Not too keen on running old parts with new parts and you hit the nail on the heads regarding A904 vs A998 vs A999.
A999 = more clutch plates and a wider low reverse band
A998 = more clutch plates, uses narrow A904 band
- City
- Richmond
- State
- TX
Once I start reassembly, I will be using the Slippery Stick by Sonnax and Assemblee Goo.
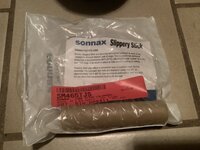

I used the Goo when I rebuilt my NP241C transfer case, stuff works great!
Several of the books recommend “Door Ease” instead of the slippery stick. I’ll bet they are the exact same product, but not sure.
I need to get some “Anti-Seize Cleaner“ for valve bodies and governors to lubricate those parts during cleaning and rebuilding.
I also need to get cooler flush to flush out the lines and trans cooler in the Jeep. Best that all old crud is cleaned out. The service manual calls for mineral spirits to flush the lines and cooler.
I used the Goo when I rebuilt my NP241C transfer case, stuff works great!
Several of the books recommend “Door Ease” instead of the slippery stick. I’ll bet they are the exact same product, but not sure.
I need to get some “Anti-Seize Cleaner“ for valve bodies and governors to lubricate those parts during cleaning and rebuilding.
I also need to get cooler flush to flush out the lines and trans cooler in the Jeep. Best that all old crud is cleaned out. The service manual calls for mineral spirits to flush the lines and cooler.
- City
- Richmond
- State
- TX
Hit a stumbling block. I need to replace the adapter housing bearing. This one is seized up.
I think the markings are:
SKF
A 15 150 W
6207751.5517VB558
The mopar part numbers are:
04130537
4130537
J8132499
The bearing is 2.83” OD, 1.23” ID, 0.67” Wide
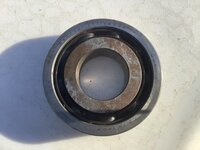
The seal for the adapter housing is 4269956 = National 710058

I think the markings are:
SKF
A 15 150 W
6207751.5517VB558
The mopar part numbers are:
04130537
4130537
J8132499
The bearing is 2.83” OD, 1.23” ID, 0.67” Wide
The seal for the adapter housing is 4269956 = National 710058

FLCJ8
Legacy Registered User
- City
- Palm Bay
- State
- FL
If you are unsure of the part number or alternate bearings I would suggest checking with CJ7Pilot (member here).Hit a stumbling block. I need to replace the adapter housing bearing. This one is seized up.
I think the markings are:
SKF
A 15 150 W
6207751.5517VB558
The mopar part numbers are:
04130537
4130537
J8132499
The bearing is 2.83” OD, 1.23” ID, 0.67” Wide
View attachment 105783
The seal for the adapter housing is 4269956 = National 710058
View attachment 105784
I don't remember his qualifications but he in a great resource for everything to do with bearings.
Possibly a 6207 bearing 35mm x 72 mm x 17 mm? - check the size in metric units.Hit a stumbling block. I need to replace the adapter housing bearing. This one is seized up.
I think the markings are:
SKF
A 15 150 W
6207751.5517VB558
The mopar part numbers are:
04130537
4130537
J8132499
The bearing is 2.83” OD, 1.23” ID, 0.67” Wide
View attachment 105783
The seal for the adapter housing is 4269956 = National 710058
View attachment 105784