• Notice for iPhone users: DO NOT use the image size reduction option when uploading photos to the forum. This causes portrait images to post as landscape. We have added a warning to the image insert pop-up as well.

1984 SL Restoration

Thanks for the tip on the trunk paint!

I had considered painting my rocker trim but the local powder coat shop did such a good job on the tail lamp housings that I think I’ll have them coated to match.
 
Nice work, Spanks! I've been toying with the idea of painting my rocker moldings as well.

Thanks!!

They came out pretty nice for doing them at home with off the shelf stuff. Maybe a light sand blast to surface them, etching primer and paint, or powder coat, would turn out very nice, too.

I was surprised to see the amount of rock chips/minor pits on the bottom of the rocker trim pieces. Rocks getting thrown from the front tires will chip any finish, though.
 
Yeah they did! I hadn't considered doing anything to the moldings I sourced- just though I'd give them a good cleaning and then installing with the brushed aluminum exterior. However, given how nice yours turned out, I'm definitely going to look into doing that on my set. And as a bonus, you've also demonstrated just how much more versatility that hitch haul of mine has in it. And to think all I've been doing with mine is hauling coolers and firewood :thumbsup:
 
Thanks for the tip on the trunk paint!

I had considered painting my rocker trim but the local powder coat shop did such a good job on the tail lamp housings that I think I’ll have them coated to match.

I am sure the powder coat will turn out awesome :thumbsup:
 
Yeah they did! I hadn't considered doing anything to the moldings I sourced- just though I'd give them a good cleaning and then installing with the brushed aluminum exterior. However, given how nice yours turned out, I'm definitely going to look into doing that on my set. And as a bonus, you've also demonstrated just how much more versatility that hitch haul of mine has in it. And to think all I've been doing with mine is hauling coolers and firewood :thumbsup:

Yep, the good old hitch hauler is like a Swiss Army knife LOL :cheers:

I was trying to figure out a good way to hold all this stuff for painting, Hitch Haul sits outside next to my "paint booth", put two and two together, worked great. ?

As a bonus, all the primer/paint over spray covers up/protects it from rusting :rotfl:
 
Decided to ease back into this project.

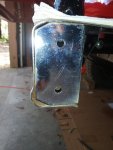
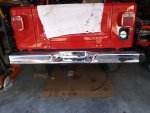
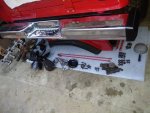
I had some of Kim Dawson's aluminum end caps to install on this Scrambler's OEM rear bumper. I had previously marked, drilled, tapped, and installed some 5/16" studs into the end caps. I had also painted them.

The 5/16" studs would not perfectly line up with the 5/16" holes in this bumper. IIRC, I used my green Scrambler's bumper as a template. No big deal, I ran a 3/8" bit through the bumper holes, problem solved.

20201122_133032.jpg

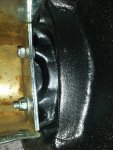
I had mocked up the end caps on my green Scrambler's bumper after I installed the studs, they fit perfect. Well, not all bumpers are the created equal. To get the caps to fit this bumper correctly, I had to shim them, a few washers between the end caps and the bumper plates. I secured the end caps with self locking nuts.

20201122_140848.jpg

I could have also ground down the inside of the caps a bit here and there, but a few washers was the easier route.

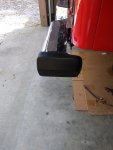
Anyway, I am very happy with these end caps. I need to get a set for my green Scrambler so I don't accidently break my OEM plastic caps.

Look great, I highly recommend Kim's caps!!20201122_140806.jpg

20201122_140820.jpg

20201122_140828.jpg
 
Last edited:
Now, to go totally OCD.

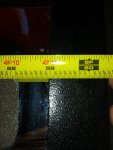
Green Scrambler, OEM caps, about centerline of bumper:
20201122_140928.jpg

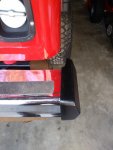
Tommy's red Scrambler, Kim's caps, and this is after I shimmed them with washers, pretty damn close!!!

20201122_140952.jpg

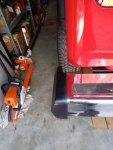
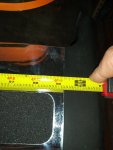
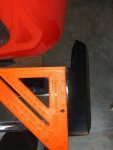
One thing that bugged me a bit, I could not get the aluminum caps to fit perfectly square to the bumper. They are close, not perfect:

20201122_141049.jpg

20201122_141101.jpg

Then I checked the OEM caps, they are not perfectly square either!!!

20201122_141122.jpg

20201122_141133.jpg

Using a square or level on any AMC product is kind of pointless. Regardless, the caps fit and look great, better then OEM. I could spend a bit more time and make the fit perfect, but this is more then good enough.

Anyway, looks great. Thanks to Kim for making such a great replacement part!!!

20201122_141150.jpg
 
After the end cap install, I really had to straighten out the garage before I could move forward on the Scrambler. I had been doing nothing but hurricane clean up the last few weeks, so I had yard tools everywhere, needed to clean and service the chain saws, Dr. Brush mower, trailer, etc.

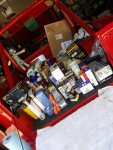
Got all the yard stuff squared away, loaded up the Scrambler's bed with all of its needed parts. Nothing like a "Redneck Ray" Christmas in July!!!!!

20201122_132311.jpg

Parts Monkey Approved.

Basically, a bunch of under hood stuff (belts, hoses, PS lines, wire loom, water pump, t-stat, ignition stuff, intake and exhaust gaskets, fluids), and a bunch of brake parts (shoes and pads, calipers, rear drum parts, parking brake cables from Randy), and a bunch of gear lube.

I will start under the good, then brakes, then lube, then Baton Rouge!!!!!!!
 
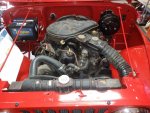
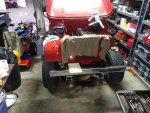
This thing last drove 10 years ago. Time, and Tommy, have not been kind.

20201122_141435.jpg

I bolted the whole front clip on when I was in Baton Rouge to make transport easier, knowing I would eventually being pulling it back apart to ease access.

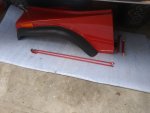
I have a bunch of stuff to do on the driver side (busted exhaust manifold bolt, intake/exhaust gaskets, motor mounts, brake lines that go between proportioning valve and master cylinder, clutch linkage, steering shaft rebuild, PS lines, etc.) that spending 20 minutes to pull a fender off is a no brainer.

20201122_141444.jpg

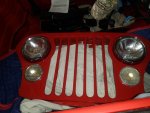
Same situation up front with the grill - water pump, t-stat, pulling PS pump out to pull manifolds, PS lines, probably valve cover, probably PS box. Easier to pull freshly painted body parts out of the way for protection and easier access.

20201122_141451.jpg

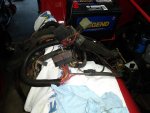
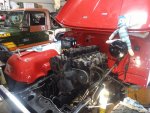
All of the wiring was just thrown in here. After I took this picture I realized the only thing holding all this stuff in place was the reverse light/4wd light harness connector!!

20201122_163901.jpg

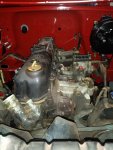
After removing miles of rotted vacuum lines, fuel lines, coolant hoses, wires, and the carburetor:

20201122_163914.jpg

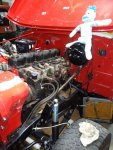
Fender removed:

20201122_164009.jpg

Going to remove the grill and a few other parts, then I can get to work.

Parts Monkey kicked this thing back into gear today!!!

20201122_165223.jpg

That's it for now!!
 
Decided to ease back into this project.

I had some of Kim Dawson's aluminum end caps to install on this Scrambler's OEM rear bumper. I had previously marked, drilled, tapped, and installed some 5/16" studs into the end caps. I had also painted them.

The 5/16" studs would not perfectly line up with the 5/16" holes in this bumper. IIRC, I used my green Scrambler's bumper as a template. No big deal, I ran a 3/8" bit through the bumper holes, problem solved.

View attachment 89164

I had mocked up the end caps on my green Scrambler's bumper after I installed the studs, they fit perfect. Well, not all bumpers are the created equal. To get the caps to fit this bumper correctly, I had to shim them, a few washers between the end caps and the bumper plates. I secured the end caps with self locking nuts.

View attachment 89165

I could have also ground down the inside of the caps a bit here and there, but a few washers was the easier route.

Anyway, I am very happy with these end caps. I need to get a set for my green Scrambler so I don't accidently break my OEM plastic caps.

Look great, I highly recommend Kim's caps!!View attachment 89166

View attachment 89167

View attachment 89170

Thanks for showing the end cap pictures and details. After the first bunch of end cap, I started drilling and tapping them by popular demand. I use 1/4-20 bolts and they have a better chance of fitting. You are correct, not all bumpers are the same when it comes to the shape of the ends.
 
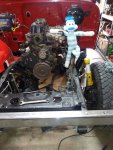
Body parts under the Scrambler:

20201127_101203.jpg

Body parts in the Scrambler:

20201127_101213.jpg

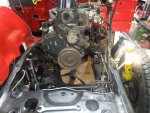
Easy access:

20201127_101228.jpg

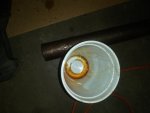
Only this small amount of PS fluid was left in the pump, the rest leaked out the steering box all over my floor LOL:

20201127_101236.jpg

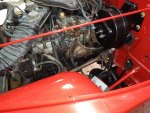
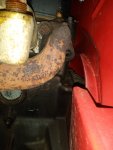
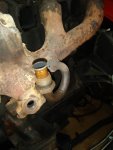
Missing this rear exhaust manifold bolt, all the manifold bolts were loose, exhaust manifold actually just hopefully knocked out of alignment, cylinder head threads seem good to go:

20201127_101252.jpg

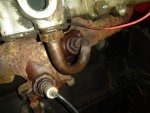
The O2 sensor and EGR cross over tube are always fun to remove:

20201127_101244.jpg

Getting some parts off the intake manifold to clear a path:

20201127_101304.jpg

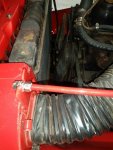
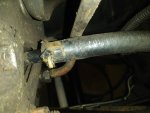
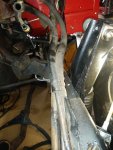
Rotted out PS return line:

20201127_101319.jpg

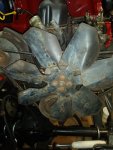
Not sure if this fan is OEM or not, 7 blade fixed fan?

20201127_101527.jpg
 
Two reference shots for later use, power steering pressure and return line routing:

20201127_114934.jpg

20201127_114946.jpg

Alternator, power steering pump, and associated brackets removed:

20201127_114958.jpg

Temporary floor storage:

20201127_115010.jpg

Cheeky little parts monkey:

20201127_115432.jpg

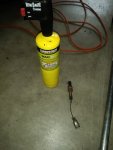
Had to heat up the O2 sensor with torch to remove it. I am probably going to "Nutter Bypass" this Jeep, but I still wanted to remove the O2 sensor. I will plug the O2 hole if it is not used right now. If this Jeep gets injected in the future at least it will be easy to install a new O2 sensor:

20201127_131359.jpg

But, "a man has to know his limitations", and I could not get the EGR cross over tube to break free out of the exhaust manifold. I did not want to break or damage the tube or the manifold so it can stay put. I can reassemble/reinstall the two manifolds with the crossover tube stuck in position, so not the end of the world.

20201127_131412.jpg

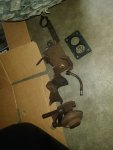
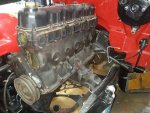
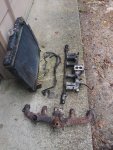
Manifolds, water pump, and t-stat housing removed:

20201127_135921.jpg

Found this stuck in the primordial goop on the timing scale LOL:

20201127_135847.jpg
 
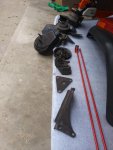
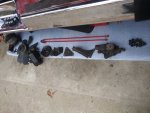
A bunch of dirty parts and hardware to clean and inspect:

20201127_135943.jpg

More big dirty parts:

20201127_135950.jpg

I have another OEM 3 core radiator to install into this Jeep. This radiator will go into the repair pile:

20201127_135958.jpg

Miracle of the internet, a bunch of cleaned parts and hardware:

20201127_164115.jpg

I still have quite a bit of parts cleaning, obtaining new and additional parts, new hardware gathering before I start reassembling all this mess.

So, more cleaning and disassembly in the near future.

I will probably clean the engine, clean and install all new motor/transmission mounts and associated parts.

Then, I will have to put Jeep on jack stands to swap out the leaking power steering box.

After that, I can start bolting all the engine parts back on.

I will have to spend the weekend cleaning parts since I have day light. After I get most of this stuff cleaned up/new hardware where needed, I can bolt it all back together at night, since the garage has lights LOL.

So, it will seem really chaotic the next few days, but there is a method to my madness. I think.

That's it for now.
 
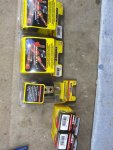
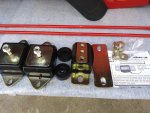
Swapped out the original, rotted out rubber transmission/motor mounts today. I have been using these poly mounts in all my other Jeeps with no problems. Not opposed to rubber, but I do not know of any quality rubber replacement mounts.

20201128_092713.jpg

20201128_092932.jpg

I bought two boxes of the torque arm mounts because the description says only one piece per box. Well, each box had two mounts inside. Oh well, cheap spares.

Tommy had pressure washed the Scrambler 10 years ago when the body was off the frame, so it was 90% clean.

Stock T5 mount/bolt locations on the OEM steel mounting plate:

20201128_102454.jpg

20201128_102504.jpg

How all the washers/spacers/bushings assemble on the torque arm mount:

20201128_102512.jpg

I cleaned up the OEM plate, but had to use new bolts. Besides OCD, the OEM bolts are a hair short for the thicker aftermarket mount and plate.

20201128_110909.jpg

Check your bolt length, you do not want too long of a bolt that could bottom out in the blind center hole.

Swapped in a new poly motor mount on the driver side. Piece of cake with the fender out of the way. I cleaned the OEM steel brackets/plates, temporarily reused the cleaned OEM bolts. Will replace the old bolts with new grade 8 hardware. I also cleaned and reused the OEM ground strap.

20201128_135902.jpg

Passenger side is a bit more of a PIA, but pretty easy with the grill out of the way. Just need to swap the hardware, damn OCD!! This is a picture of the OEM mount and associated bracket/negative battery cable connection before I swapped the mount. Reference pic for later.

20201128_135915.jpg

I have all the new mounts in place, just need to swap out the motor mount hardware in the morning.

Going to try to get the steering box out tomorrow so I don't have to pay the $150.00 core on Monday when I pick up the new power steering box.

That's it for now!!
 
I bought two boxes of the torque arm mounts because the description says only one piece per box. Well, each box had two mounts inside. Oh well, cheap spares.
I'm no where near my Jeep or parts... any way those mounts could be used for the seatbelt to roll bar mount through the half hard top?
 
Where did you pick up the Energy Trans mount at ? I got a rubber one at Napa and not to sure I want to use it
 
Where did you pick up the Energy Trans mount at ? I got a rubber one at Napa and not to sure I want to use it

I think I ordered it from Summit. Advance Auto or AutoZone usually keep them in stock, too. They fit GM trucks. Summit says this part number wil not work for CJ's but it does.
 
Back
Top