• Notice for iPhone users: DO NOT use the image size reduction option when uploading photos to the forum. This causes portrait images to post as landscape. We have added a warning to the image insert pop-up as well.

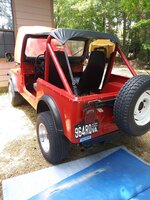
1985 4 cylinder Base Model CJ-7

New oil fill cap and front PCV valve components installed:
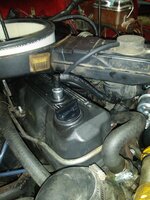
20220514_114714.jpg

Finally installed/hooked up the PCV fresh air hose components on the rear of the valve cover, too. For now, I used a long piece of 3/8 hoes inserted inside short pieces of 1/2 hose on both ends. Works fine, and the long hose is handy for removing the air cleaner housing.
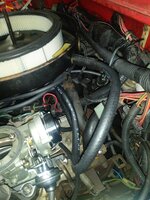
20220514_114726.jpg

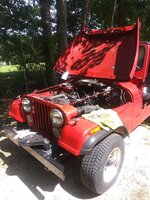
Pushed the Jeep back outside, adjusted both Sol-Vac idle speeds:
20220514_151947.jpg

To adjust the idle mixture on this carb, you have to use a Dwell meter hooked up the diagnostic port. It is supposed to read around 30 (orange scale). I can not get any better then 40. No amount of "in/out" on the mixture screw will get it any closer. I was able to dial in the old carburetor, but not this one?
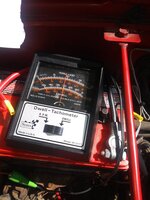
20220514_151959.jpg

I finally just leaned it in till is stumbled, backed it back out till it smoothed out, called it good, for now.

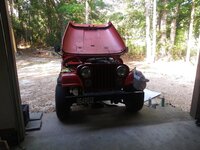
I also changed the engine oil and filter, and the air filter:
20220514_162626.jpg

Oil just had the slightest tinge of "fuel" smell, and it was pretty black. Hopefully this latest oil change removed most of the old carbon/fuel that was in the engine/combustion chambers.

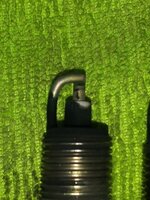
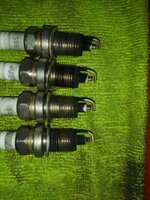
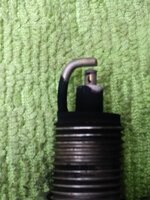
Swapped in new spark plugs, too. The white portions shows heavy contamination, the firing parts look clean:
20220514_163925.jpg

20220514_163943_Burst01.jpg

20220514_163948.jpg

Again, I am thinking all the carbon deposits are just excess washing out. This thing had been running stupid rich, now it is good, so hopefully it will be good to go. I'll check the plugs again after a couple hundred miles. Was glad to see no "oil fouling" present.

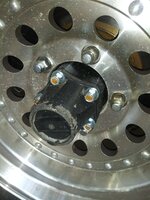
Installed 10mm flat washers over the 3/8" studs, 3/8 nylock nuts on the studs to secure the lock in hubs.
20220514_175708.jpg

Those studs do flash rust easy, a bit of paint on the ends will clean them up. I used nylock nuts in case JeepAddict or some future owner wanted to remove the lock in hubs in the near future for some reason. Nylocks could also be a good long term solution???
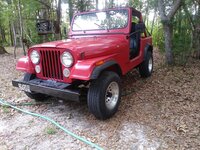
 
So, I left it like this Saturday afternoon:

20220514_175752.jpg

But of course, could not leave well enough alone.

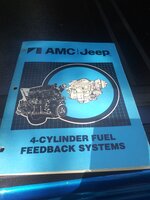
Decided to revisit the idle mixture adjustments. JeepAddict bought this cool book off of eBay:

20220515_104740.jpg

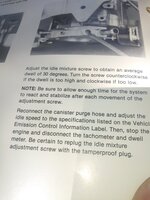
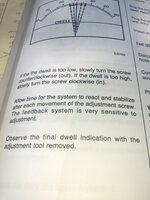
And I love how it contradicts the Factory Service Manual!!

Blue Book off eBay:

20220515_104809.jpg

Factory Service Manual:

20220515_104820.jpg

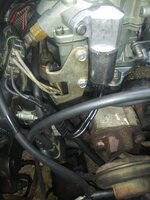
Just for the record, adjusting the idle mixture on the Carter YFA sucks ballz. The mixture screw faces the valve cover, PIA to get to.

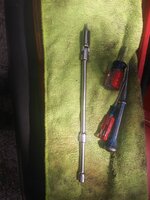
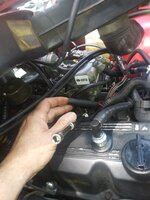
Using 1/4" extensions, u-joint, and flat bit:

20220515_105521.jpg

PIA:

20220515_105557.jpg

I even swapped in the "new" mixture solenoid that came with the eBay carburetor, and swapped back and forth between the two older mixture solenoids:

20220515_112916.jpg

The best I can get the mixture to, on this carburetor is 40. The "mixture" solenoid on the side of the carburetor is basically a computer controlled air bleed. So, even though you have a idle mixture screw, like a normal carburetor, this solenoid also comes into play. But, for whatever reason, I can make large adjustments to the idle mixture screw, but it has minimal impact on this carburetor. It idles fine, exhaust smells fine, and the plugs look good, even after an hour of idling/fiddling with it. For now, it is good. But it bugs me............................
 
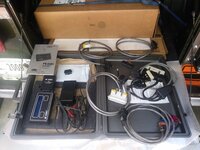
Besides the cool Blue Book, JeepAddict bought his very own ET501 scan tool, and dropped it off last weekend,

20220515_134317.jpg

I have one of these things and love it!!!!!!!!! If you are keeping the stock carburetor/feedback system this tool is the bomb!!!!!!!!

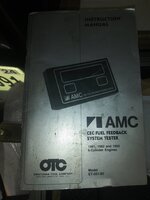
The one Tommy bought came with this booklet:

20220515_134324.jpg

His came with this 6 cylinder module (which I also have):

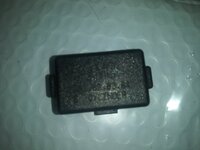
20220515_134338.jpg

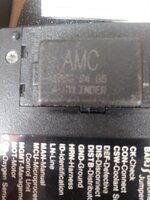
More importantly, it came with the 4 cylinder module, which I don't have:

20220515_134502.jpg

Like I mentioned above, if you like fiddling with the OEM feedback system, buy one of these tools!!!!!!!!!!!
 
So, since the Jeep seems to be running fine, and I have the four cylinder module, I ran a diagnostic check on this Jeep.

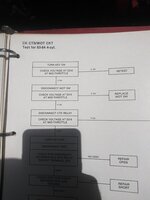
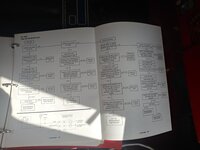
The first error code I got referred to the WOT switch on the carb. Reviewing the book that came with one of my scan tools, it referred me to this flow chart:

20220515_135843_HDR.jpg

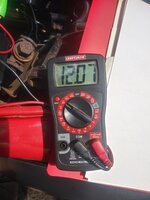
Using my volt meter on the correct pin at the diagnostic connector:

20220515_135849_HDR.jpg

Going through the chart, I found I had a bad WOT switch. Swapped on a new one, rescanned, good to go on that code.

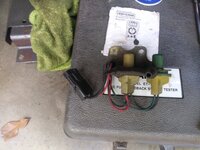
On the second scan, no WOT code, but I got a message saying to check the Vacuum Solenoid Assembly (a primitive MAP sensor). Going through the book, you check the four cylinder the same as a six cylinder.

20220515_144449_HDR.jpg

I ran this test a few times, and scanned multiple times. On the paper test it checks out fine. With the tool, it keeps saying to check. I think with the tool, and the way it tells you to rev engine and hold, I am just not doing it right.

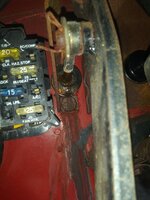
I swapped in another vacuum switch, same results.

20220515_153745.jpg

Anyway, 99% sure there is no problem here.

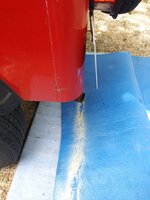
When I first met this Jeep, the clutch master cylinder was empty. It has been fine this whole time, until yesterday:

20220515_161231.jpg

Yep, leaking, and you can see evidence of past leaks on both sides of the firewall. I ordered a new clutch master cylinder from NAPA, will swap it in whenever it gets here. For now, clutch works fine, but it is leaking.

I have never had a problem with the regular mechanical linkage, even when really twisted up off road. The hydraulic clutch is a bit easier to push, but you also lose a little "feel" IMO. All in all, I am not a fan of hydraulic clutches, just something else to leak/break/leave you stranded. Unfortunately, on this Jeep, no way to swap in mechanical linkage, so I will repair the OEM hydraulic system.

Filled it up with gas yesterday before going on an hour long drive, all gauges working:

20220515_161659.jpg

All in all, this little thing runs and drives great!!!!!!!!!! With stock size tires and 4.10 gears, it is "peppy". I can obviously tell it is not a 258, but it is not terrible. Back roads and in town driving are fine. Open highway over 65, not so much. I did drive it on the interstate yesterday for 5 miles. It seemed "happy" at 65. It can go faster, but you are pushing it.

Getting down to the nitty gritty on this one, only a few more repairs:

1) clutch master cylinder (ordered)
2) catalytic convertor (in the back of my truck)
3) parking brake cables (ordered)

One last picture, that's it for now!!!

20220515_163723.jpg
 
It was a hot miserable weekend. Yard work and cutting down 2 palmetto trees and helping the next door neighbor with his Tahoe did me in, and I wasn’t even getting over something.
 
When I first got Copper it had the Iron Duke, a T176, 3.73 gears, and 235 tires. It was a hoot to drive around town, only drawback was on the highway with a headwind or on a grade. But it had over 200k miles on it , and was real tired. I’ve often wondered how a healthy Iron Duke would feel.
 
I wished now I would have tried my new sniper on my AMC 4 cylinder before I removed it. Only real problem was interstate and mountain sides.
 
When I first got Copper it had the Iron Duke, a T176, 3.73 gears, and 235 tires. It was a hoot to drive around town, only drawback was on the highway with a headwind or on a grade. But it had over 200k miles on it , and was real tired. I’ve often wondered how a healthy Iron Duke would feel.

But, this is the much improved AMC 4 cylinder, not the GM "Iron Duke" :thumbsup:

In all seriousness, I would guess both four cylinder engines have about the same performance. This one only has +/-70k on it, seems pretty "peppy" to me. I'm sure the stock tires, 4.10 gears, and the 4 cylinder T5 gear ratios all play a part, too. Also, this Jeep is stripped - no back seat, no top or doors, OEM front bumper, no back bumper, no nothing. I would imagine it is fairly light. I would even guess the aftermarket aluminum wheels help to some small degree, too (would look better with OEM steel base wheels IMO). I imagine you slap a winch on it, bigger tires, add a few people and some gear, performance would diminish. But, for regular driving/commuting, it is fine. For a regular "knock around truck/Jeep" I would be happy with the 4 cylinder engine. If/when it eventually failed, I would probably swap in a 258/4.0. Unless the four cylinder could be rebuilt very economically :twocents:

It accelerates quickly, 1 through 2. Once in third, I tend to leave it there a bit longer/wind it up more then a 258, before shifting to fourth. Not making it scream or anything, just tend to hold it in second gear a bit longer.

You can shift to 5th at 35 and it is still OK. You will not accelerate fast in 5th at this speed, but normal driving it pulls fine, surprisingly.

Once over say around 50, if you are in fifth, and want to "move", down shifting to fourth is wise.

It maintains 65 on the interstate in 5th gear with no problems, BUT it is flat here. I would be safe to assume that any grade, long or short, would require a downshift to fourth. Basically, with the four cylinder, you are going to be shifting more often to keep the engine happy. The bigger six cylinders/V8's, with more torque, have much broader "I'm happy to only be at this RPM lugging along" torque ranges, if that makes sense?

But all in all, it really is not bad. Different, sure, but with todays gas prices, the four cylinder might be the way to go :evil: :thumbsup:
 
I wished now I would have tried my new sniper on my AMC 4 cylinder before I removed it. Only real problem was interstate and mountain sides.
I wonder if the Sniper system could "turn itself down" enough to work on these smaller engines?? :shrug: I would think the injectors, even with the pulse width turned to super short, would be too big for the 2.5 liter engines?? I could be wrong, but does anyone (Holley/Howell/etc.) market their systems toward the four cylinder engines? I have never noticed??

I kind of half assed "Google Searched" for AMC 2.5 fuel injection swaps, but I could only find guys with four cylinder fuel injected YJ's wanting to swap on carburetors :eek: I wondered if you could swap the YJ TBI system on to the AMC four cylinder CJ engines?? Like, swap the entire intake from the YJ to the CJ?? Not sure, would be interesting :popcorn:

When I talked to you about your plans, I think you will be much happier with the fuel injected 6 cylinder engine, especially on longer highway trips, grades, at altitude, off camber, etc. :thumbsup:

Even if you could add TBI to the CJ four cylinder, I don't imagine it would add much power? Drivability/off highway performance/cold starts would improve, but I am just not sure how much more (reliable) power could be made from an AMC four cylinder :shrug:
 
I have been piddling with the exhaust system the last few days.

Magnaflow offers a "supposedly" direct fit catalytic convertor, part#23222. It costs around $270:


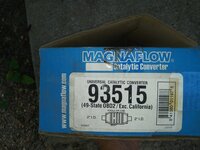
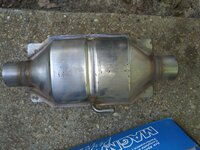
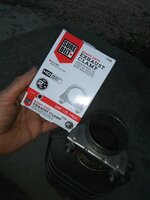
I picked up this Magnaflow "universal cat" from a local exhaust shop. Judging by the dust on the box, it was there for a long time, so I was able to get it for almost 1/2 the cost of the "correct" Magnaflow convertor:

20220516_170519.jpg

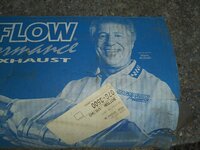
Hell yeah, I add 50HP with this dude's endorsement alone!!!!!!!!!!!!!

20220516_170529.jpg

Most importantly, it has the little "air injection inlet port":

20220516_170556.jpg

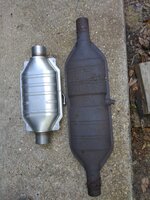
Obviously, way shorter then the OEM convertor, but no hill for a stepper!!!!

20220516_170714.jpg

So, the only real difference between the cat I bought and the "correct" model, mine odes not have longer pipes on either end. The "correct" models overall length is 27", this is way shorter. According to Magnaflow, they both have the same 2" inlet/outlet. Yeah..........

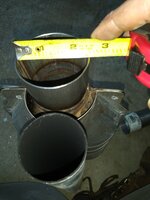
I will be the first to admit I have no idea where exhaust components come up with their sizes?? If you tell me 2", I assume 2". Unfortunately, in "exhaust land", 2" actually measures 2-3/8"!!!!!!!!!!!!!!!!!!!!!!!!

20220516_184509.jpg

In the picture above, a "real" 2" pipe is pictured below the "make believe" 2" inlet?????/!!!!!!!

Not just blaming Magnaflow, NO exhaust components make sense to me, as far as WTF they measure, ID/OD with regards to wall thickness, whatever.

So, like a good RedneckRay, I took a piece of 2" pipe, my muffler and catalytic convertor to NAPA, and proceeded to sit on the floor of the exhaust section until I could find some adapter pipes that work. Sadly, the people of the local NAPA are no longer surprised by my antics, and instructed the new counter guy to just let it slide, this is normal RedneckRay behavior/shopping ritual!!!!!!!

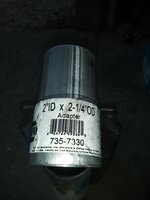
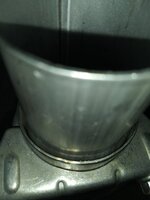
Found this adapter, again, I have no idea where these "magical measurements" come from, but this adapter fits tight inside a "real" 2-3/8" ID opening!!!

20220516_184537.jpg


And for some reason, a 2-1/4" clamp works on a real 2.5" OD!!!!!!!!!!!!!!!

20220516_184616.jpg

This takes care of the inlet side adaptation, for now. It clamps tight, BUT I will probably get this piece welded to the catalytic convertor. See the nice weld gap/space/valley!!!!!!!!!!

20220516_190015.jpg

Kind of half ass mocking up:

20220516_191644.jpg

In the above picture, the catalytic convertor is too far back IMO. I want to move it closer to the front/existing air injection tube:
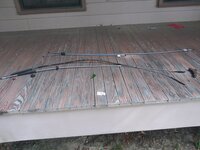
20220516_191726.jpg

I cut this tube off as flush as I could with the OEM convertor, this is why it still has a 90 degree turn at the end (pictured above). This will not jive with the straight pipe coming off the catalytic convertor.
 
Using a hose clamp and the trusty Dremel, I cut the end of the OEM downstream air injection pipe off. It is actually thicker then what I thought it would be (sidewall thickness).

20220517_184812.jpg

NOTE - in the picture above, the air injection pipe is NOT in the correct location, I just put it like this to make cutting easier. This pipe runs outboard of the exhaust pipe, i.e. on the frame side.
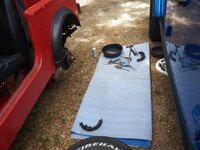
More temporary mock up:


20220517_194338.jpg

20220517_194354.jpg

20220517_194405.jpg

In the last picture, I bought a new piece of pipe and used a "tubing expander" to make it fit better to the muffler, This new found technology might make me abandon the "adaptor" pipe fittings, buy "kind of closer fitting tubing", and "expand" it to fit. The tool is only $30 at NAPA.....
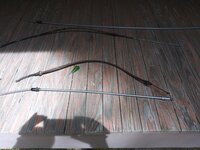
I also need an adapter bushing for the cat/downstream air injection pipe, 5/8"ODx1/2"ID (easy to find, I probably have something in the garage).
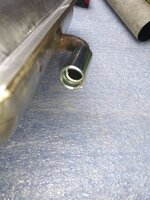
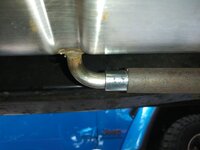
In the middle picture, the end of the downstream pipe is kind of bent at an odd angle. If I need to, I can cut the last 3 or 4 inches off the end of this pipe to get to a straighter section, slide the catalytic convertor up more forward to fit. Still thinking, playing around.

Just about got this figured out..............................................
 
I should have ask you if you could use any of my exhaust system. Sitting behind the shed in the back. It is after market with no little pipe off the converter. Don’t think it would work with the new engine.
 
I wonder if the Sniper system could "turn itself down" enough to work on these smaller engines?? :shrug: I would think the injectors, even with the pulse width turned to super short, would be too big for the 2.5 liter engines?? I could be wrong, but does anyone (Holley/Howell/etc.) market their systems toward the four cylinder engines? I have never noticed??

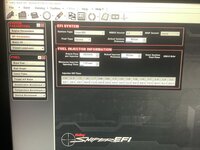
The Holley Sniper BBD has (2)100 lb / hr fuel injectors. The setup wizard asks many questions to get the initial fuel maps close. The first question is 4cyl, 6 cyl, 8 cyl. Then engine size in cubic inches. Also the style of cam, stock, mild, aggressive.

I think it could be used on a 4 cylinder just fine. If the pulse widths are too low, the injectors could be swapped for smaller ones, but you would need to customize the setup in the PC software.

B1E0967D-E8E4-4350-AFBD-2BF23AA70052.jpeg

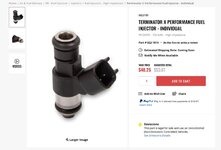
I have not verified the part numbers, but I think these are the injectors used on the BDD setup.

15E57644-B44A-4D1F-8B85-482E125EDFBB.jpeg
 
Thanks for the detailed writeups (as always). I am normally in the camp of purging any "extra" old wiring and vacuum lines. Its been really neat to watch you keep this 7 as a time capsule. Pretty cool to see you troubleshoot and work on this with old shop/dealership tools. Keep up the good work!
 
I really like reading your detailed posts when working on these old Jeeps.

What you do is what I imagine myself doing, but instead I buy parts, set them on a shelf in my shop, and keep driving my beat up old CJ's, patching them together and keeping them running, but always doing the "I'll fix that....someday" on most of the stuff on them that could use attention.
 
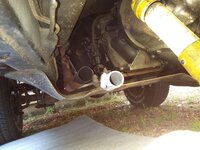
Finished up the exhaust system rebuild yesterday.

Old shock stud sleeve worked perfect, 5/8" OD with 1/2" ID:

20220521_110138.jpg

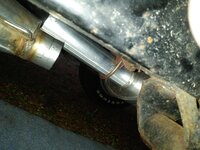
Air tube installed, almost 3/4" engagement, I'm happy.

20220521_115131.jpg

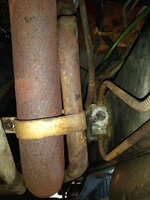
Reinstalled the OEM strap that holds the downstream air injection pipe to the exhaust pipe, near the firewall/brake proportioning valve:

20220521_115106.jpg

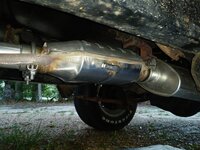
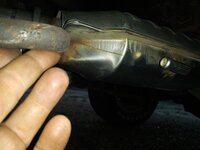
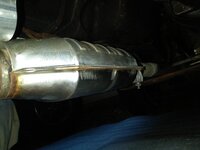
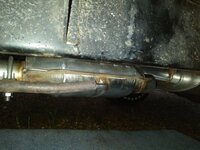
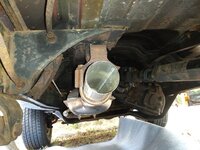
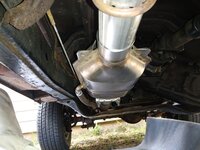
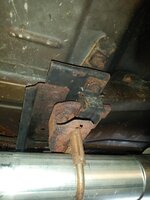
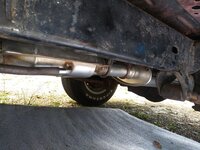
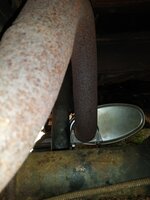
Catalytic convertor and downstream air injection pipe installation complete. The adapter pipe between the cat and muffler is used to install the mounting hanger.

20220521_115232.jpg

20220521_115243.jpg

20220521_115259.jpg

I had to cut this pipe three times, while mocking up the muffler, until I had everything like I wanted it.

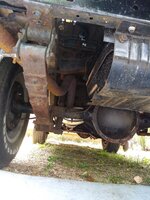
Muffler and tailpipe installed, plenty of shock body clearance.

20220521_130034.jpg

20220521_130302.jpg

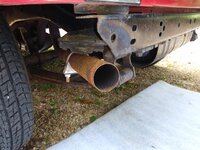
And plenty of tailpipe clearance, happy with the exit point.

20220521_130318.jpg

20220521_130326.jpg
 
Two final exhaust install pictures.

20220521_130338.jpg

20220521_130354.jpg

I am waiting on a 3/4" clamp for the air injection pipe, should be here tomorrow.

I used clamps, like OEM, but all of these connections could be welded up, too, in the future, if desired.

Since I was able to reuse the down pipe and the tail pipe, this wasn't too terrible. Pretty happy with the results, and I also appreciate my local exhaust shop professionals more, too :twocents:
 
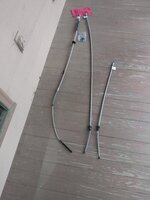
Installed all new parking brake cables today. All 3 of the original cables were completely rust frozen. Ordered the new cables from Inline Tube:

20220522_094503.jpg

I Installed the front cable, first. Not the best picture, but the old cable appears shorter than the replacement. It is, but only because the cable is rust frozen inside its sheath.


20220522_101104.jpg

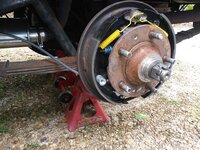
Two install the two other cables, your best bet is to go ahead and disassemble the drum brakes completely. You might be able to sneak them in there with the brakes assembled, and if so, I tip my hat to you!!

20220522_105149.jpg

The driver side cable is the shorter of the two cables. Again, the OEM cable was completely rust froze.

20220522_105218.jpg

Driver side complete:

20220522_111525.jpg

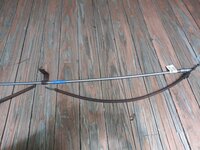
The passenger side cable is the long one. The OEM cable has the little bracket that attaches to the bottom of the body tub, to suspend it over the rear driveshaft. The replacement cable does not have this little bracket. You could hang it with almost anything, but I went ahead and cut the cable off on either side of the bracket, pulled the little piece out that was left, carefully pried the bracket open, and slid it on the new cable.

20220522_120415.jpg

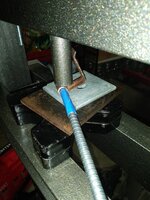
The blue tape shows me where the bracket needs to be. I measured one side before I removed the bracket.

I used my press and carefully re-crimped the bracket on to the new cable. Don't get crazy or you will pinch the cable and ruin it.

20220522_120707.jpg

I installed this cable, adjusted the cable assembly, and thought I was finished.........
 
Back
Top