• Notice for iPhone users: DO NOT use the image size reduction option when uploading photos to the forum. This causes portrait images to post as landscape. We have added a warning to the image insert pop-up as well.

Another Scrambler Purchase/Road Trip - UPDATE- BODY ON FRAME AGAIN

well I guess everyone is crazy in their own way. I am going to search for a tub if I can't find one Im going to rebuild mine with a little help from anyone who lives close by and likes cold beer and pulled pork.

if that falls through i guess Ill just wait 3 or 4 years untill I can afford a repro tub.


Unfortunately, it is expensive to take the route that I am taking:( I have been saving up money for quite a few years so that I would be able to take on a project of this scope:confused:

You should be able to find some people in a "local to you jeep club" to help you out. I had numerous people wanting to do the welding for me, but their lack of experience in body work kinda of scared me. But, then again, everybody has to learn somewhere:thumbsup:
 
I think the body work your having done sounds reasonable, I've had quotes much higher. I was getting quotes for inside and out paint only, no sheet metal replacement.
 
Last edited:
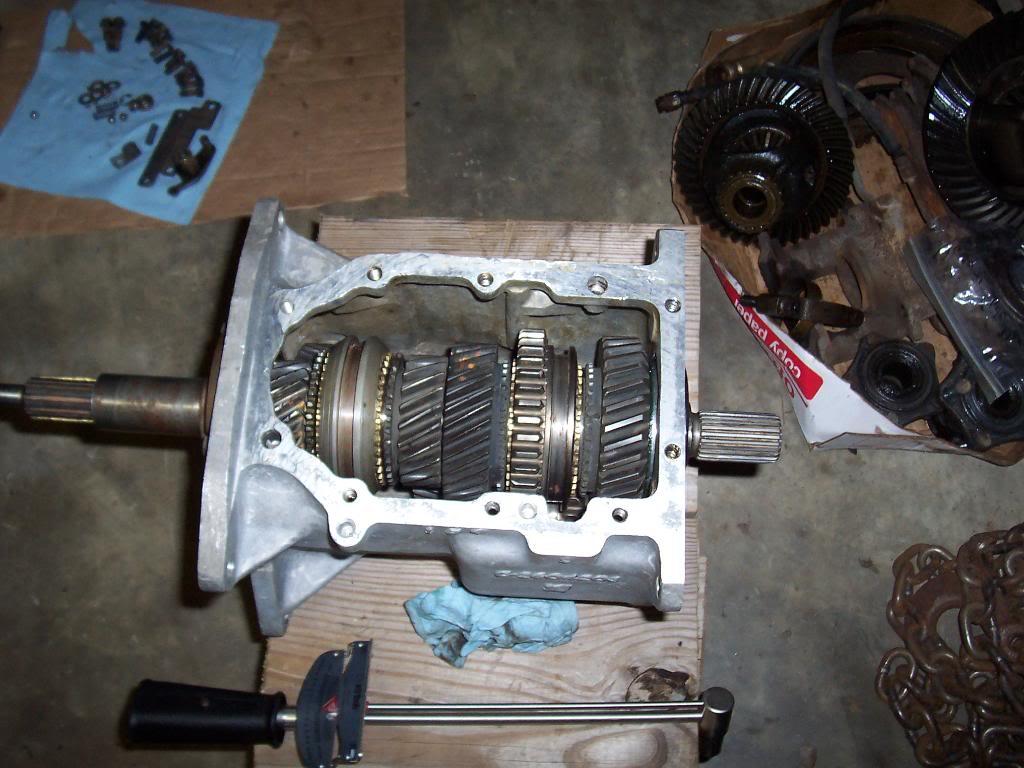
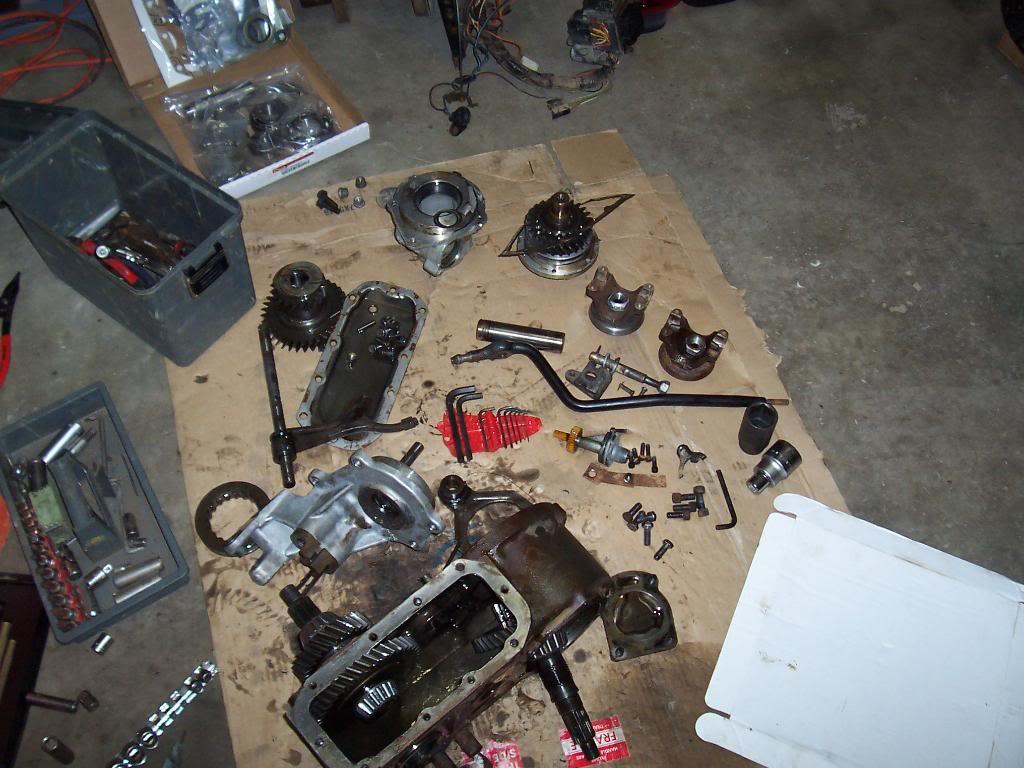
Finally decided to put transmission back together.

100_4605-1.jpg


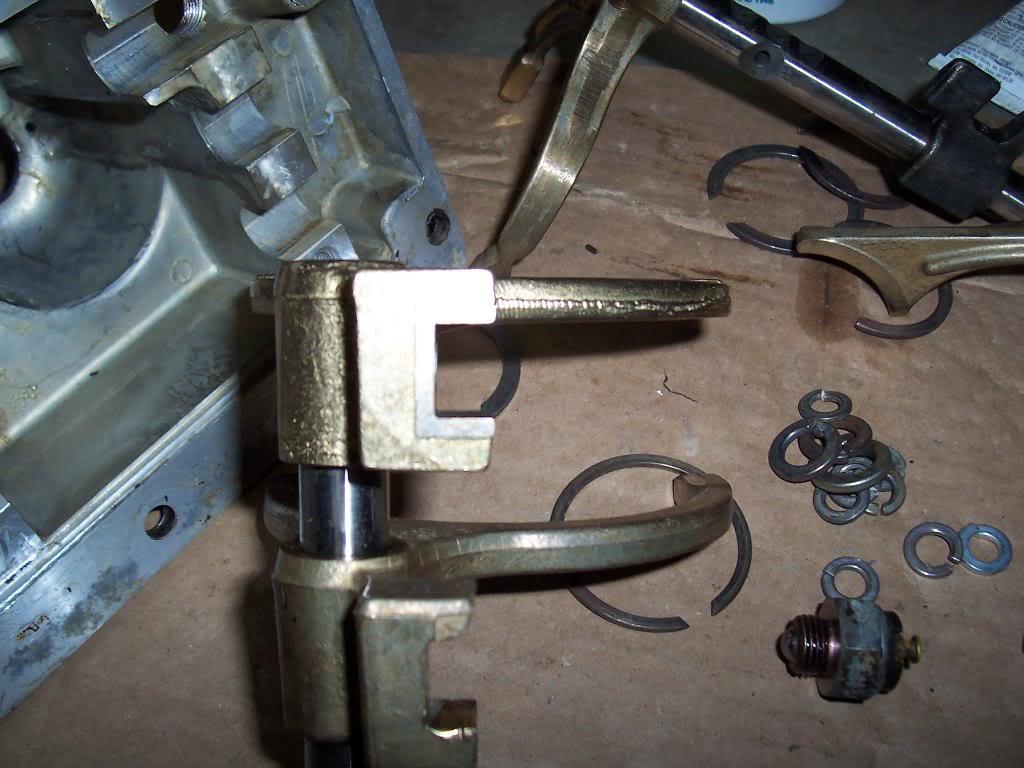
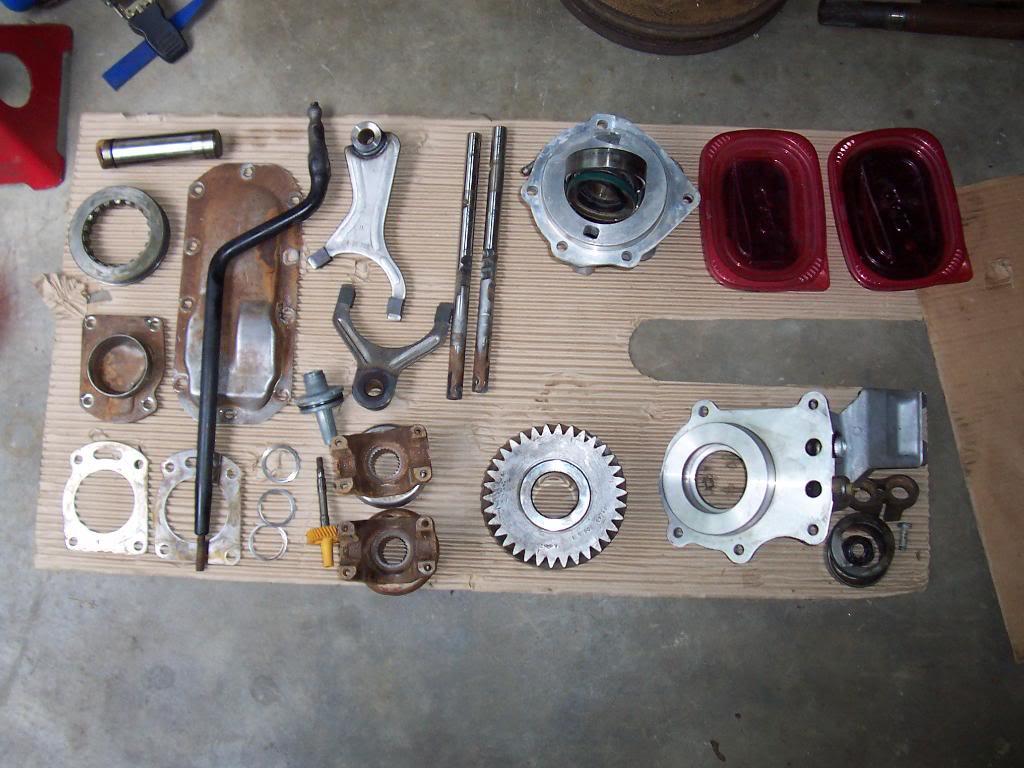
Pic of the new vs old shift fork.

100_4607-1.jpg


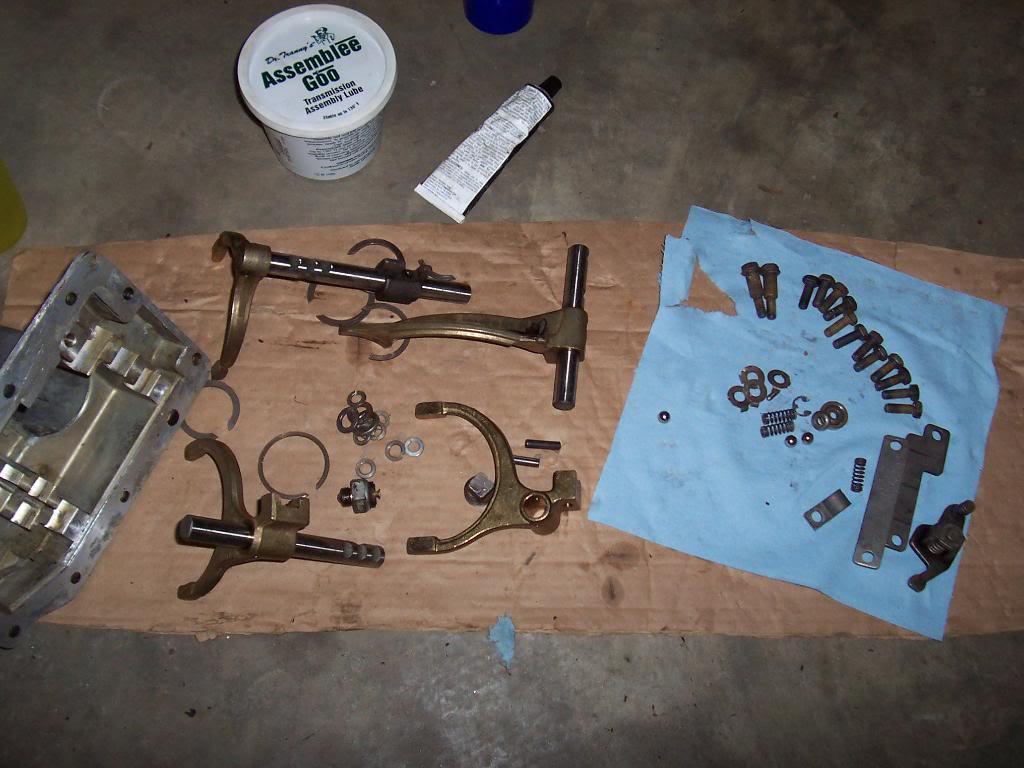
Pic of all the shifter housing parts.

100_4606-1.jpg


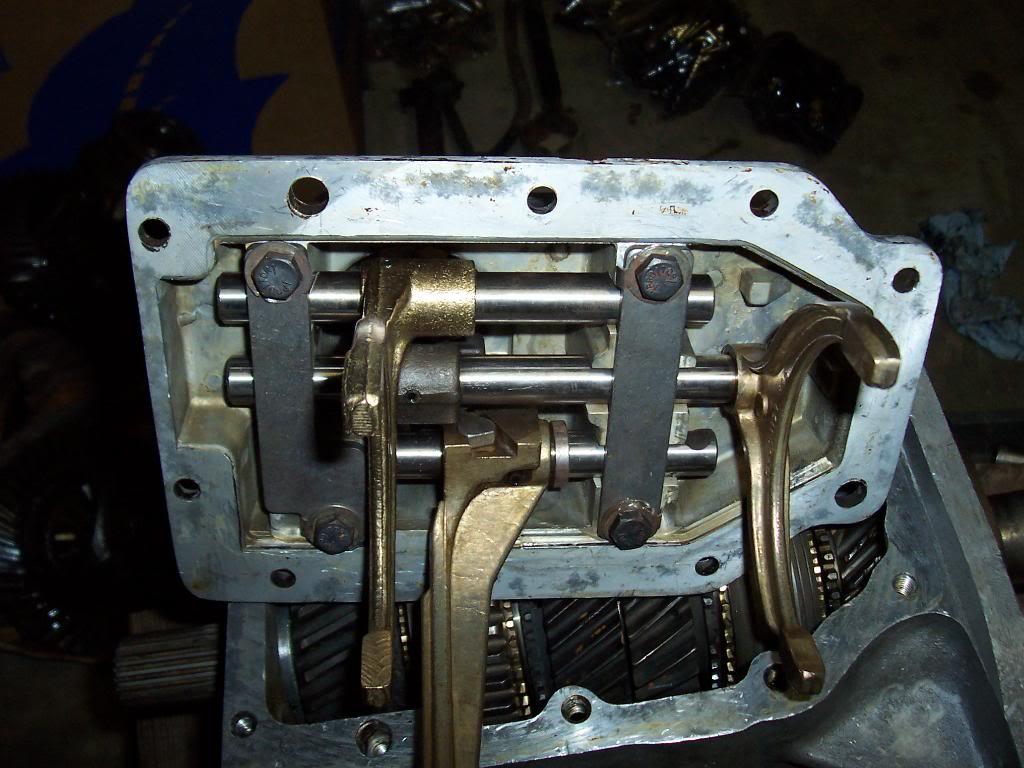
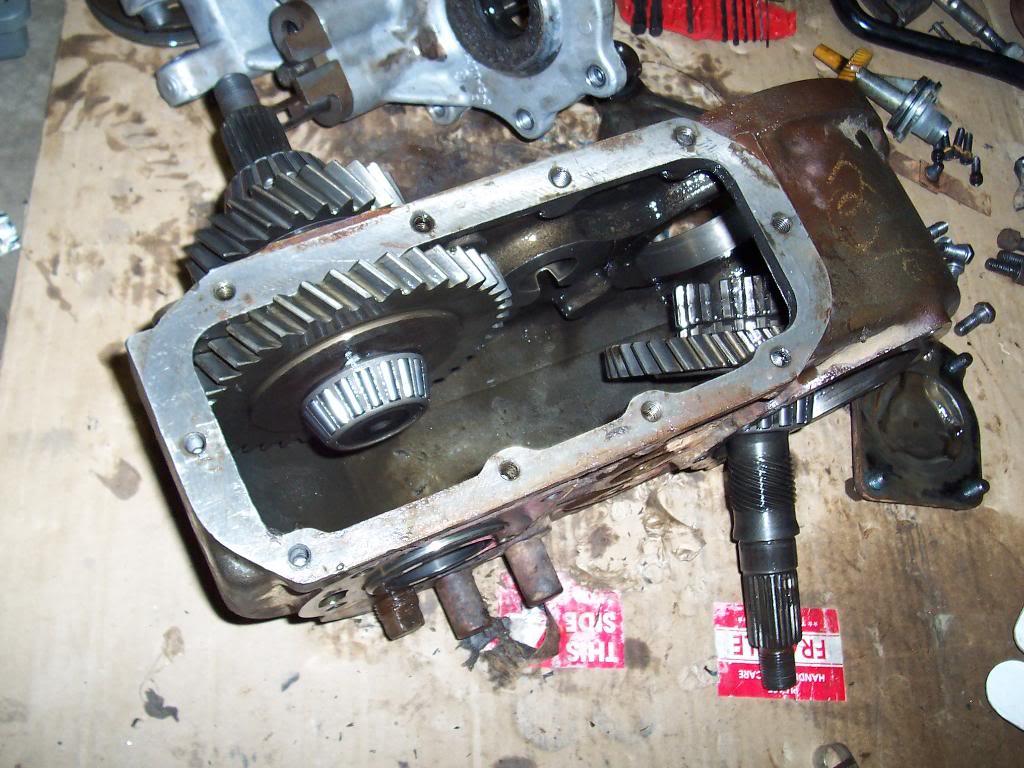
And with all the shifter parts installed.

100_4610-1.jpg


Just need to get the top part bolted to the bottom part again and the transmission assembly will once again be whole.
 
What all did you replace inside the tranny? Are there any places in the tranny where the main and counter shafts or idler shaft ride metal-on-metal with the case or case top? Or are they all on bearings? Just wondering if the tranny case is prone to wear or if it will last indefinitely. Thanks:thumbsup:
BTW.. love the thread just went through it twice.

Also, what kind of engine does that brown cj7 have?

I replaced all the bearings and seals in the transmission. The mainshaft rides on large ball bearings that fit into the front and back of the case. The counter shaft and reverse idler shaft do ride in machined bores inside the case. These shafts dont turn, the gears spin on needle bearings around these shafts. I guess these could eventually wear out, but I think that the transmission would have to be pretty FUBAR before it would mess up the case. On all three shafts there are "thrust washer" that prevent direct gear to transmission case contact. Besides the two above mentioned large ball bearings, the rest of the gears (on the mainshaft, reverse idler shaft, counter shaft) ride on needle bearings. I replaced all these as well. The main reason I decided to rebuild the transmission was because I had no idea how many miles were on it or what kinda shape it was in. Rebuild kit cost about $100, alot better to spend a little money now vs having wore out bearings that cause the big expensive gears and shafts to self destruct, costing many hundreds of dollars:thumbsup:

The brown CJ-7 has a 1974 AMC 304. Bored out 30 over, lots of head work, rv cam, edelbrock ceramic coated headers, edelbrock 4 barrel intake, holley 670 truck avenger, DUI HEI ignition, etc. Lots and lots of power:evil:

Thanks for the thread comment ;-)
 
And finally put the tranny back together. I was concerned at how hard it was to move the shift forks by hand, so I took it back apart to make sure everything was OK. It was, shifted the tranny into all gears by hand, eveything is good. It is just really hard to move the shift forks by hand, I guess the little balls and springs are doing their jobs. The new shift fork made a dramatic reduction in the amount of slop that was present in my shifter housing.

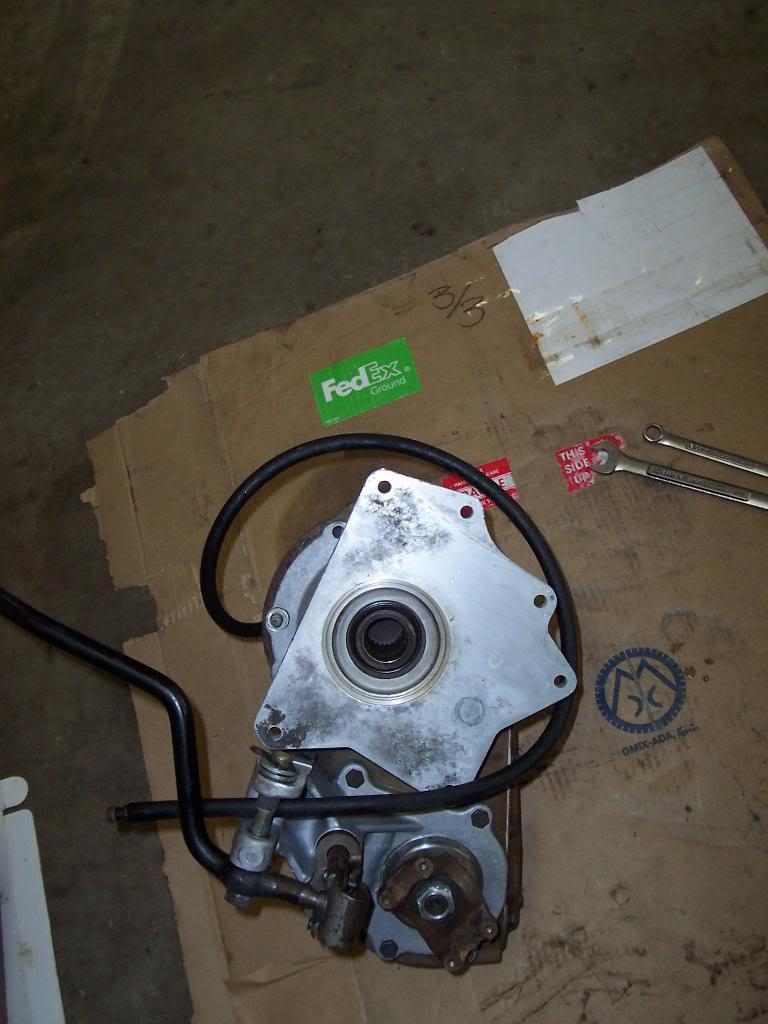
First pic, took the adapter piece off the transfercase

100_4612-1.jpg


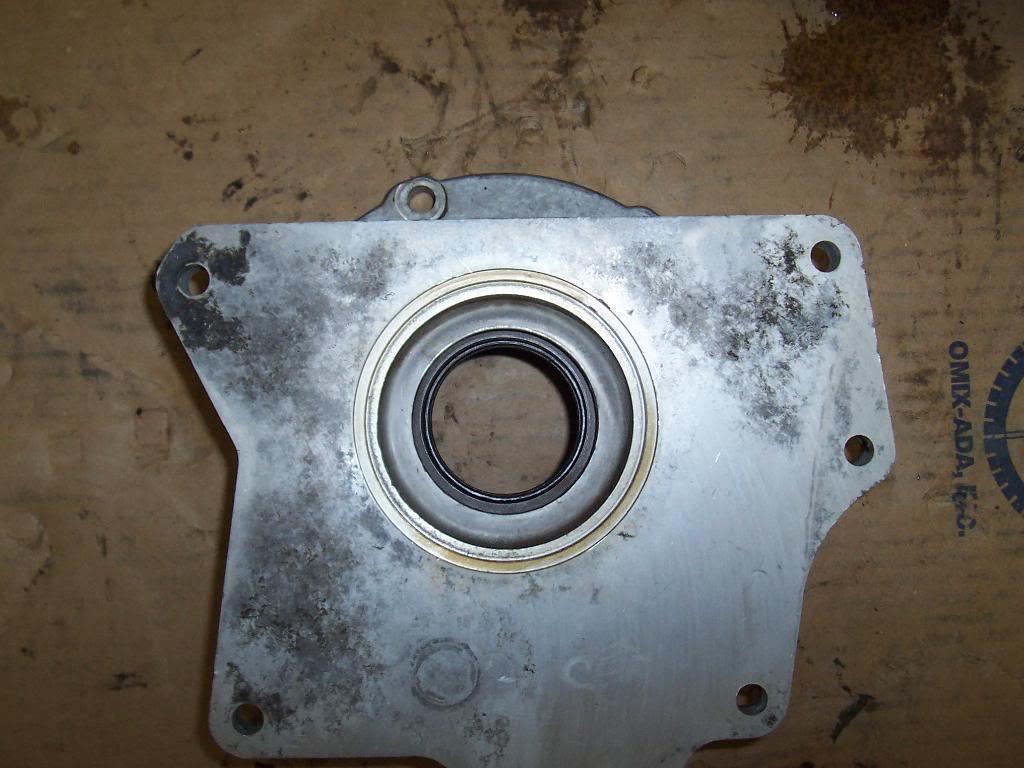
Put the new seal in the adapter housing

100_4613-1.jpg


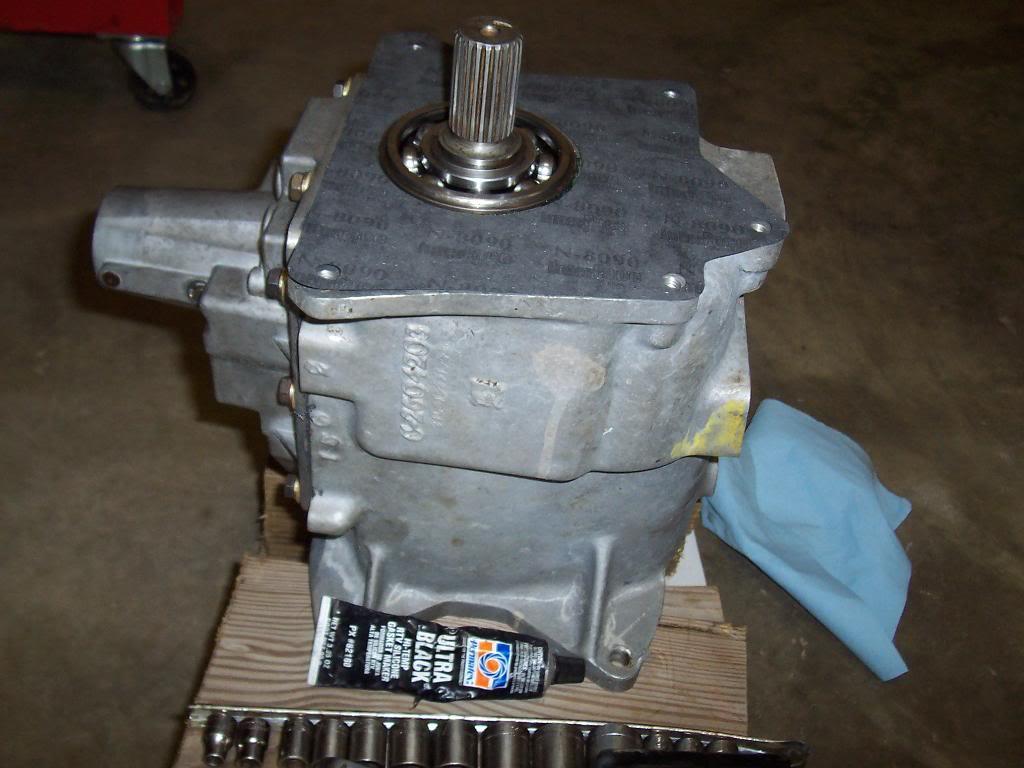
Put a new transmission to adapter housing gasket on

100_4611-1.jpg


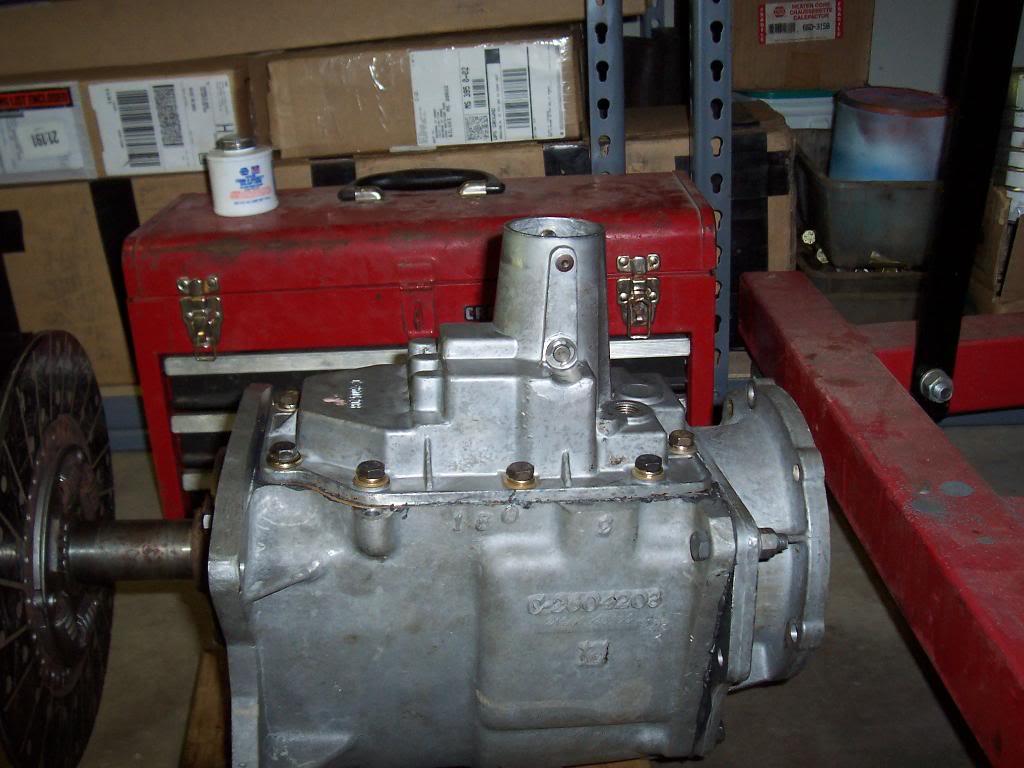
And voila, the transmission is back together and I didnt have any left over parts

100_4614-1.jpg


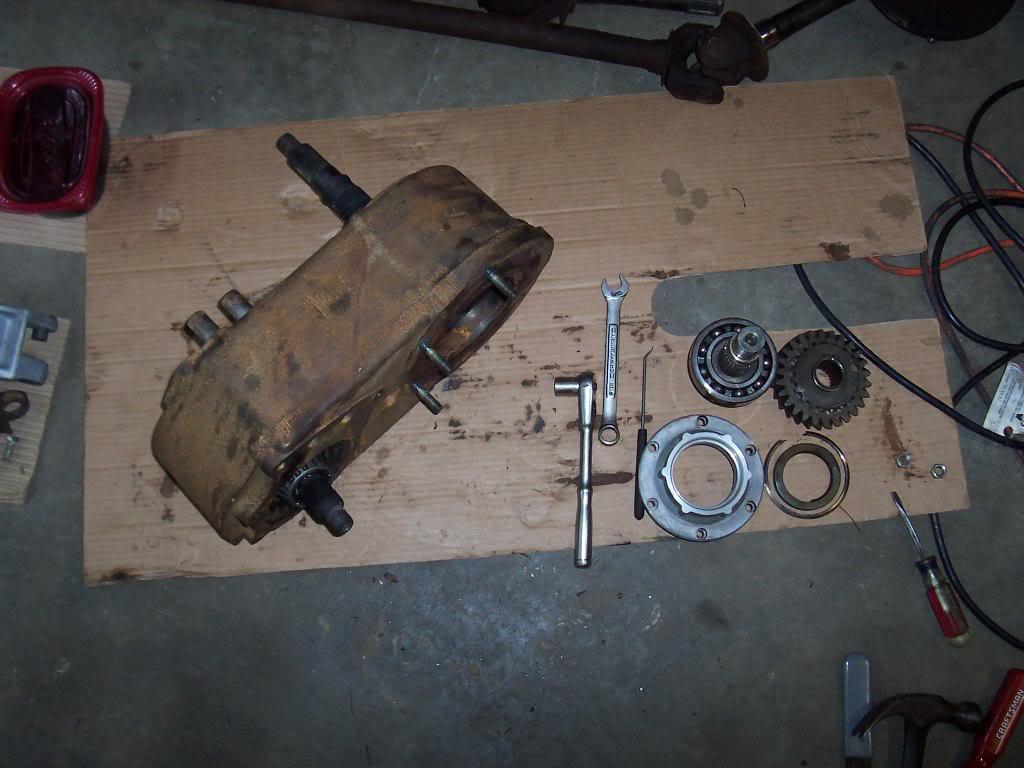
After finishing with the transmission, the transfer case was next

100_4615-1.jpg


100_4616-1.jpg


100_4617-1.jpg


I will have to take whats left of the transfer case to work and use the press to finish taking it apart.
 
Last edited:
I replaced all the bearings and seals in the transmission. The mainshaft rides on large ball bearings that fit into the front and back of the case. The counter shaft and reverse idler shaft do ride in machined bores inside the case. These shafts dont turn, the gears spin on needle bearings around these shafts. I guess these could eventually wear out, but I think that the transmission would have to be pretty FUBAR before it would mess up the case. On all three shafts there are "thrust washer" that prevent direct gear to transmission case contact. Besides the two above mentioned large ball bearings, the rest of the gears (on the mainshaft, reverse idler shaft, counter shaft) ride on needle bearings. I replaced all these as well. The main reason I decided to rebuild the transmission was because I had no idea how many miles were on it or what kinda shape it was in. Rebuild kit cost about $100, alot better to spend a little money now vs having wore out bearings that cause the big expensive gears and shafts to self destruct, costing many hundreds of dollars:thumbsup:

The brown CJ-7 has a 1974 AMC 304. Bored out 30 over, lots of head work, rv cam, edelbrock ceramic coated headers, edelbrock 4 barrel intake, holley 670 truck avenger, DUI HEI ignition, etc. Lots and lots of power:evil:

Thanks for the thread comment ;-)

No problem, I really do enjoy a good frame off rebuild more than anything else.

Yeah, I figured if it was a tow rig that it weren't no 258 puttin power to the wheels on that 7.

Any special tools besides the good ole socket set required for that tranny rebuild?
So far I've got snap ring pliers, bearing puller, and maybe a torque wrench?

I'm about to do a tranny rebuild on a t176 in my auto-to-manual swap in my cj7, so thats the reason I ask.

Thanks

I'm drooling over that all original green sr that pops up from time to time in your pictures....:drool:
 
The T176 rebuild is pretty straight forward. Besides just basic sockets, a good pair of snap ring pliers, torque wrench (dont really need one, I used one because I am anal retentive:crazy:), make sure you have some old screwdrivers for prying on stuff.

Besides the snap ring removal, the hardest part is removing the two large ball bearings from the front and rear of the case. The FSM shows some kinda crazy puller, which I dont have. A normal gear pullers jaws wont work unless the part that hooks behind the part being pulled is perfectly flat, like around 1/8 inch. What I did to remove the two bearings was to use two large pry bars (large screwdrivers), one on each side of the bearing with the tip of the screw driver inserted into the bearing retainer recess, then I evenly applied pressure to both sides and was able to pop the bearings out without too much drama. The front bearing can be knocked off the clutch shaft with a large brass drift, press isnt really needed.:thumbsup:

I will miss the V8's power, but not the mpg:rolleyes:

The green 83 SR makes for great reference material for the other 83 that is currently in pieces, although it was an expensive piece of reference material:D
 
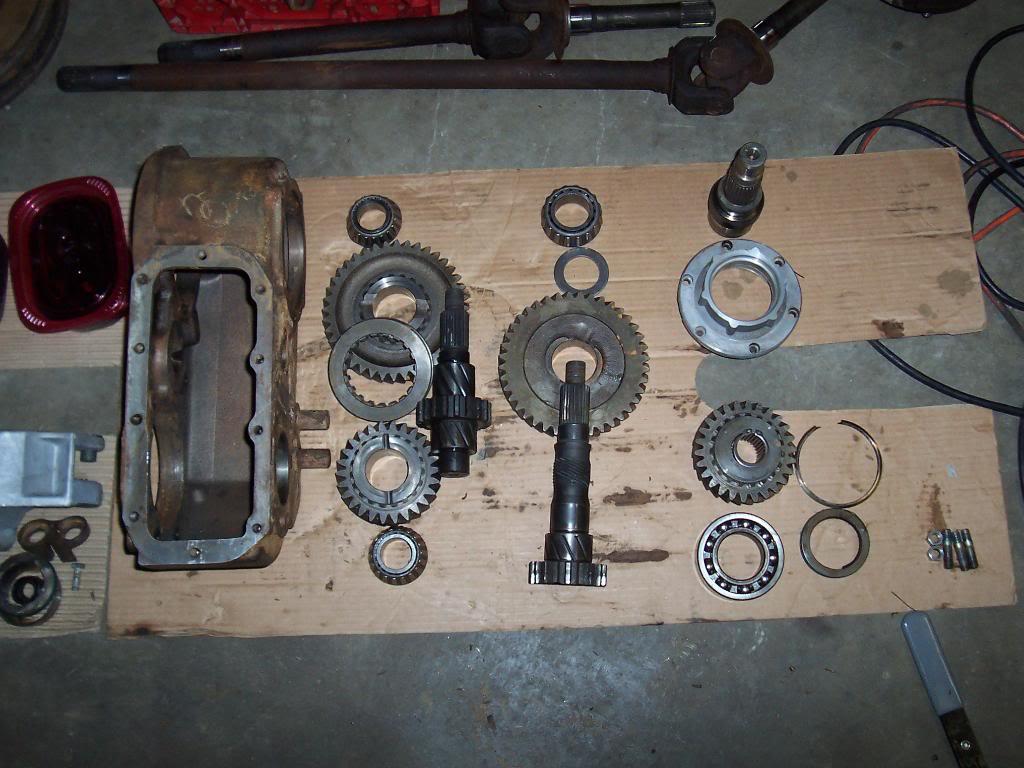
Cleaned and inspected all the tranfer case parts. Everything is in great shape.


100_4629-1.jpg


100_4630-1.jpg


The parts I had to press out of the case, the front and rear output shafts. I was kinda concerned about this part being difficult, but they pressed apart very easily.


100_4633-1.jpg


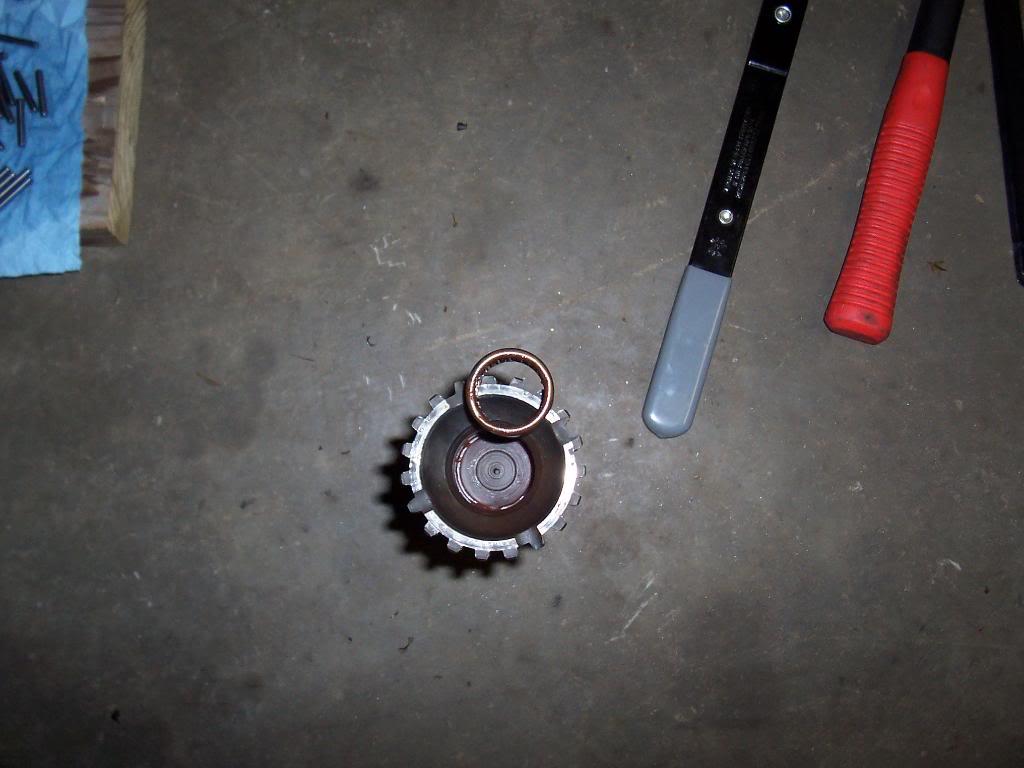
Pulled the old caged needle bearing out with a slide hammer.

100_4636-1.jpg


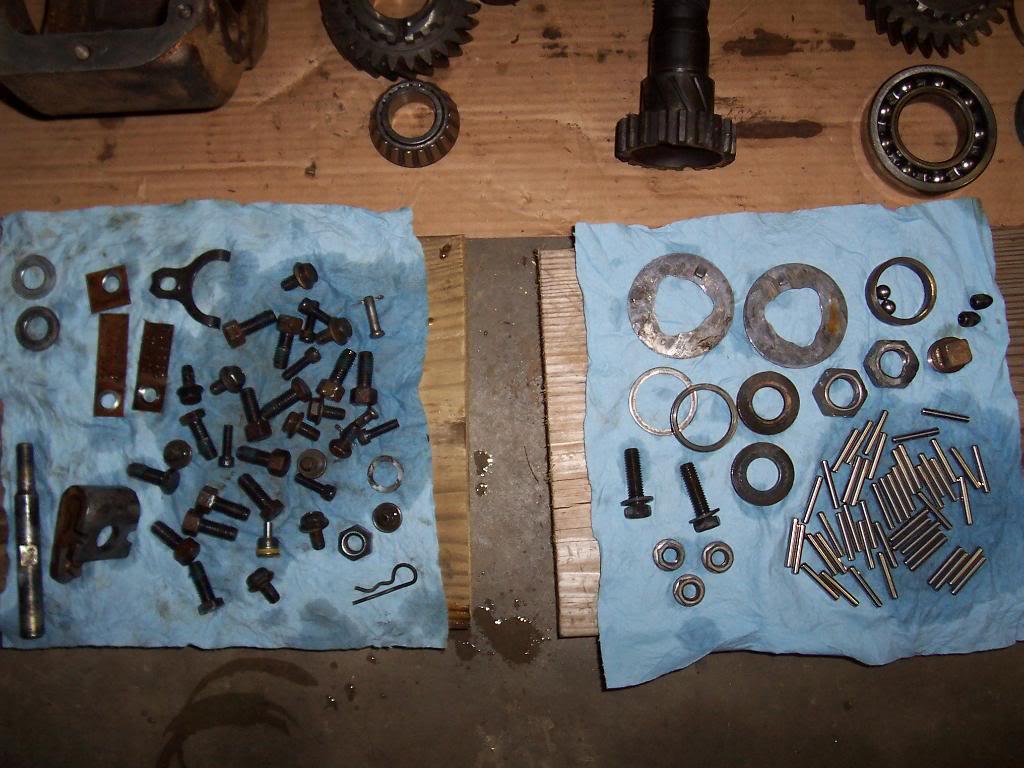
Pic of all the "small parts". I soaked them in a container full of "Purple Power" for 24 hours, cleaned all the crud and oil off reallly well.

100_4634-1.jpg


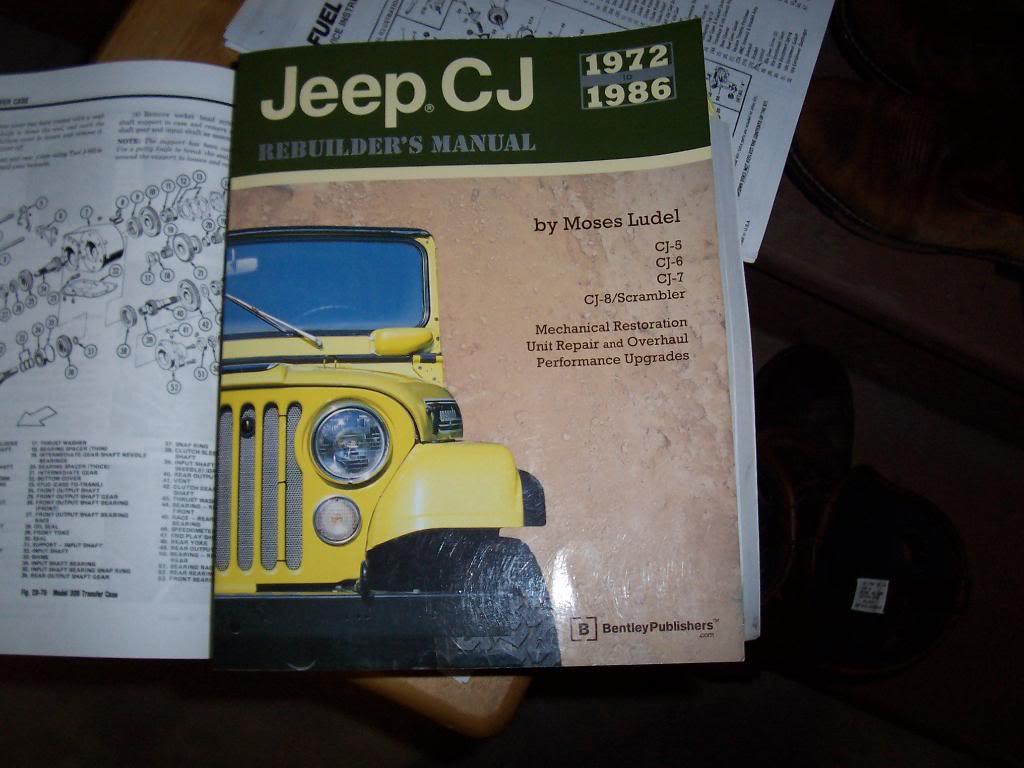
Quick pic of a great reference book I have been using. It has very detailed rebuild instructions for the Dana 300,with lots of pics. Book is perfect if you are rebuilding a Scrambler with stock powertrain parts. Lots of great info, including setting up Ring and Pinions and diffs. Underneath this book is the Factory Service Manual.

100_4635-1.jpg


I am going to repaint the cast iron part of the transfer case with some engine paint. Once its painted I will put it back together. Thats it for now.
 
Last edited:
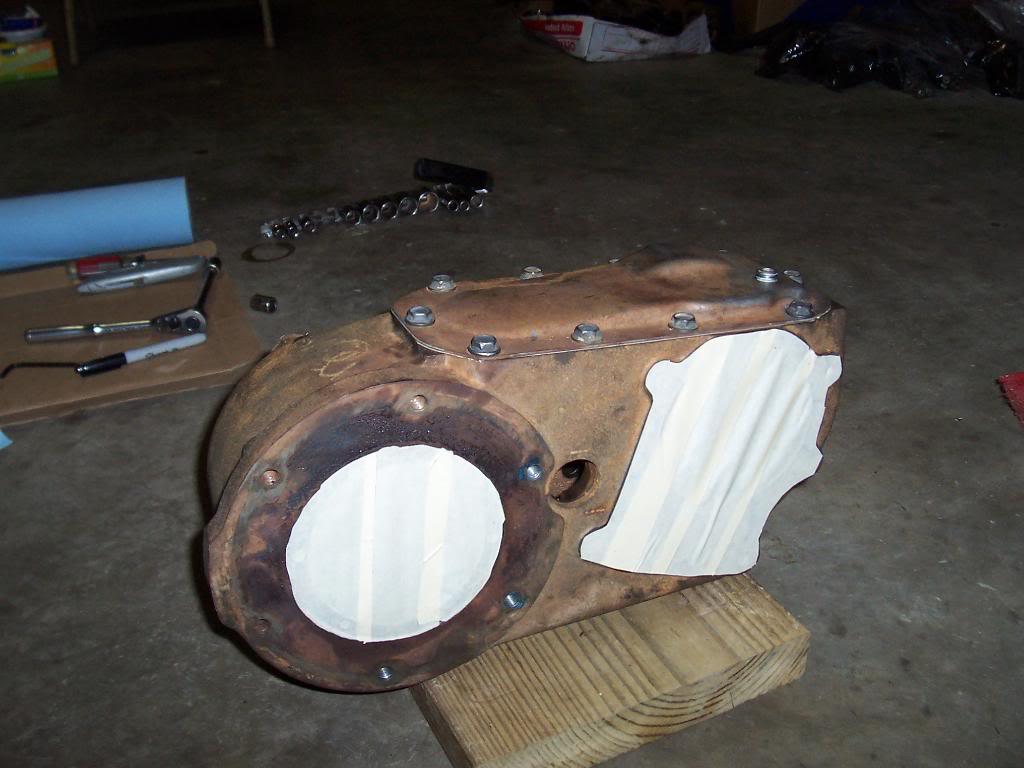
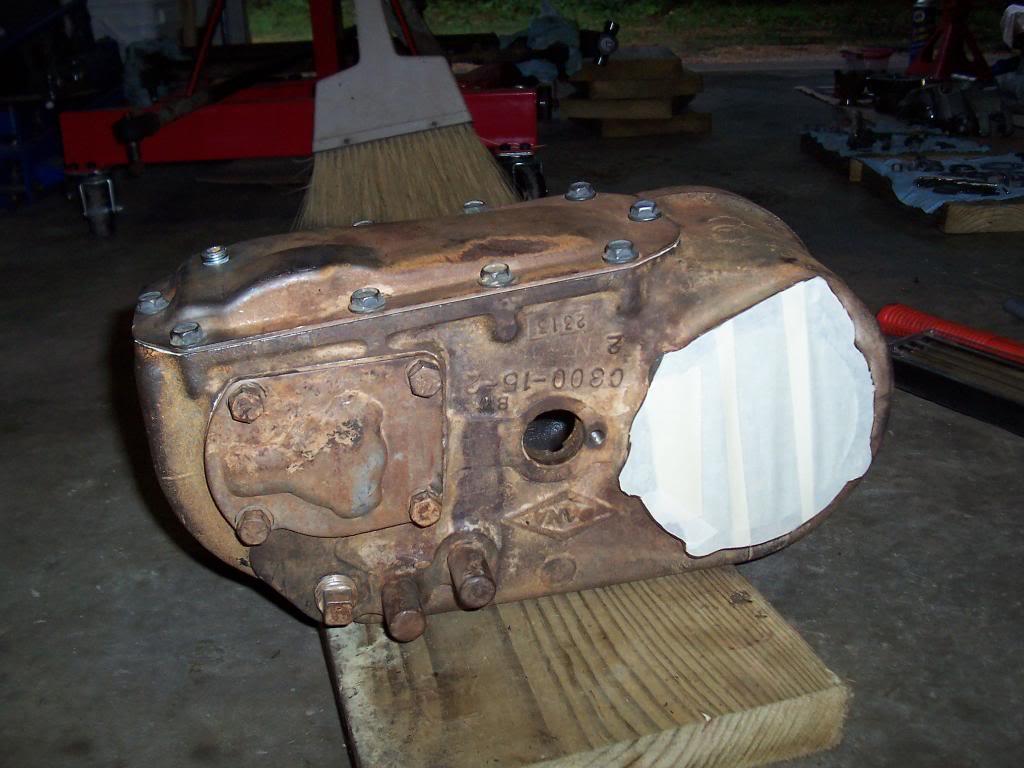
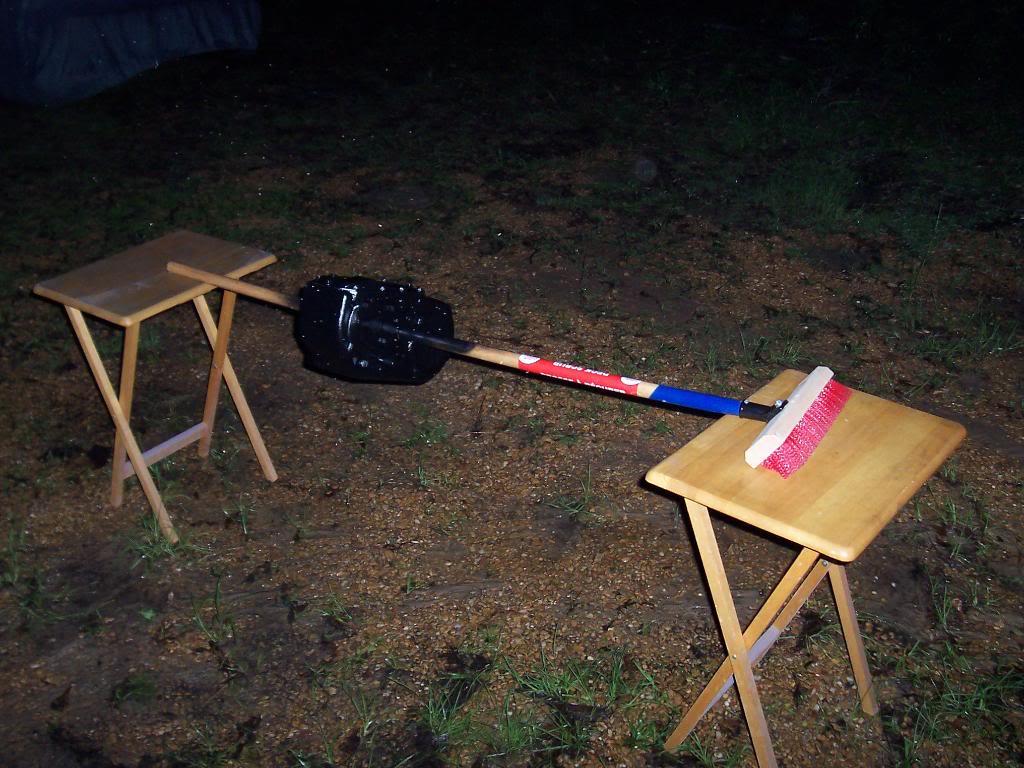
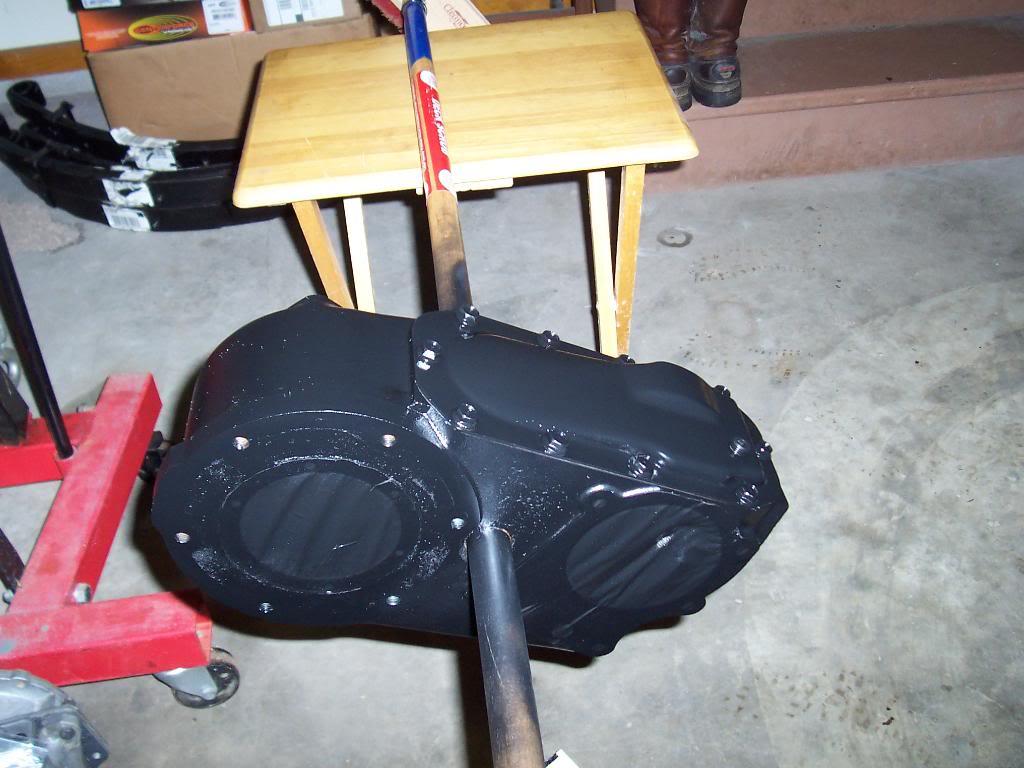
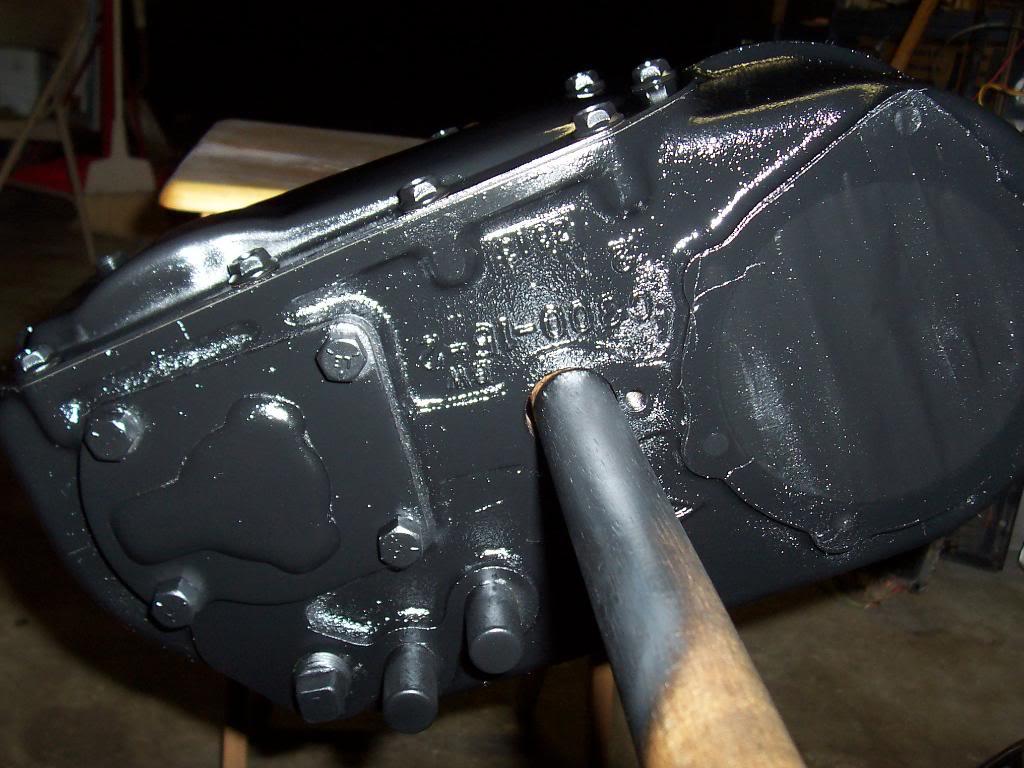
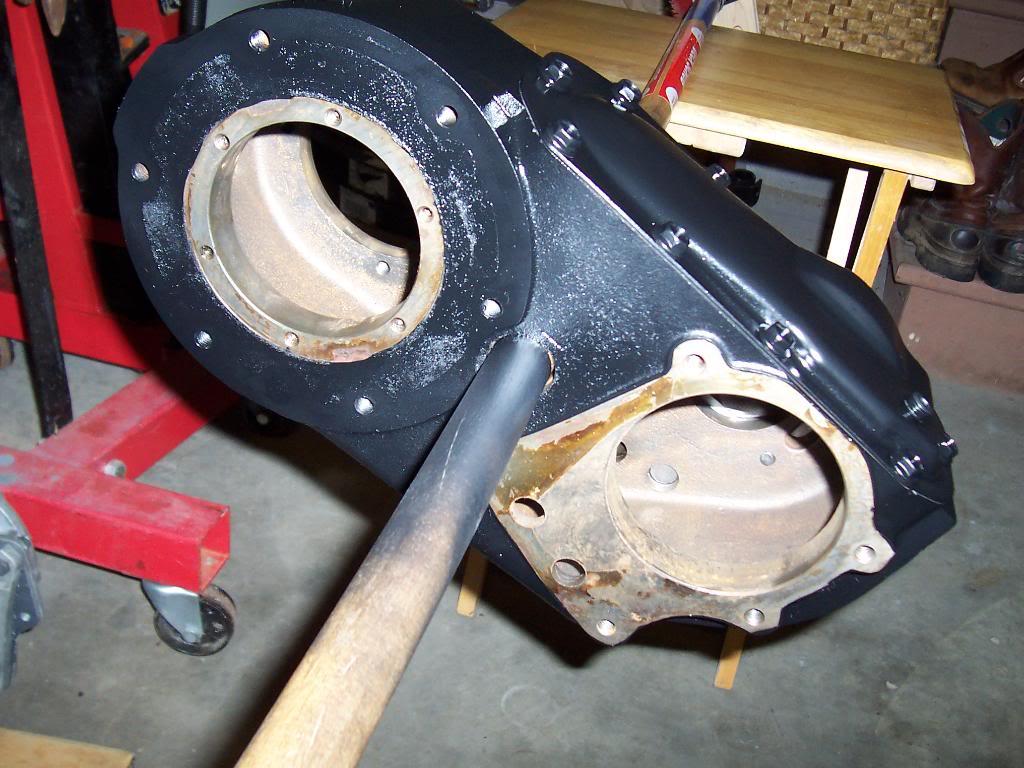
Painted the transfer case last night in between the rain.

Pics of it masked up:

100_4637-1.jpg


100_4638-1.jpg


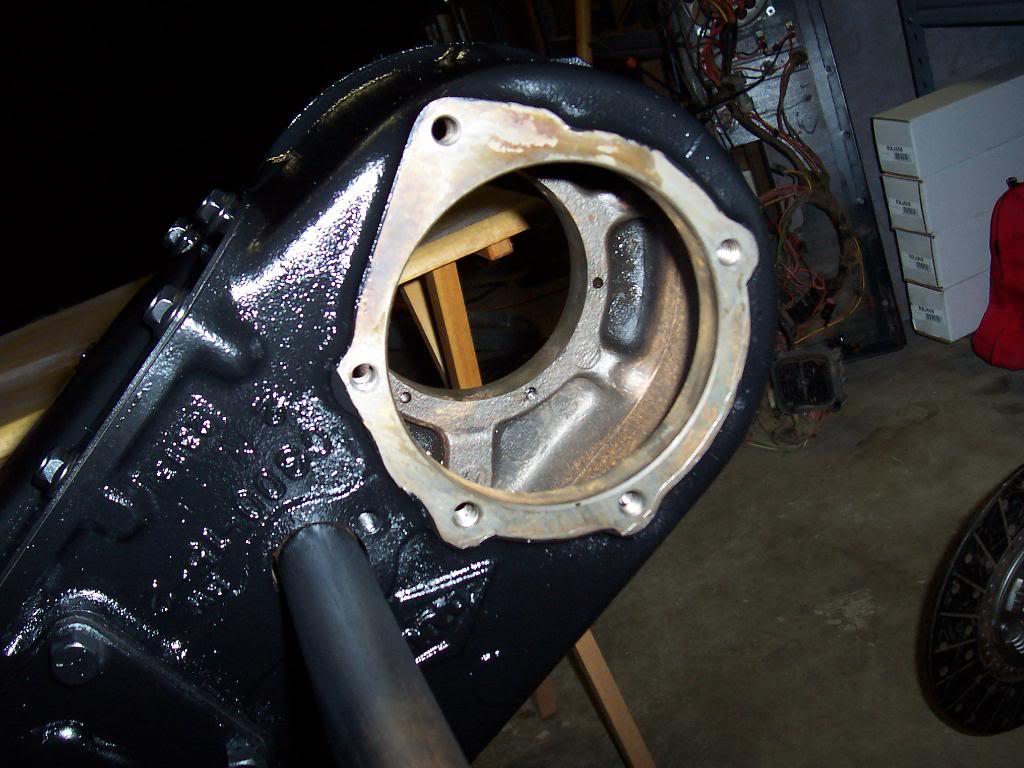
Pic of my "paint stand" LOL. Worked perfect. The wood handle fit tight inside the idler shaft hole and allowed me to rotate the case around to get good paint coverage.

100_4639-1.jpg


And all painted up:

100_4640-1.jpg


100_4641-1.jpg


My 5 year old masking tape still works LOL

100_4643-1.jpg


100_4644-1.jpg


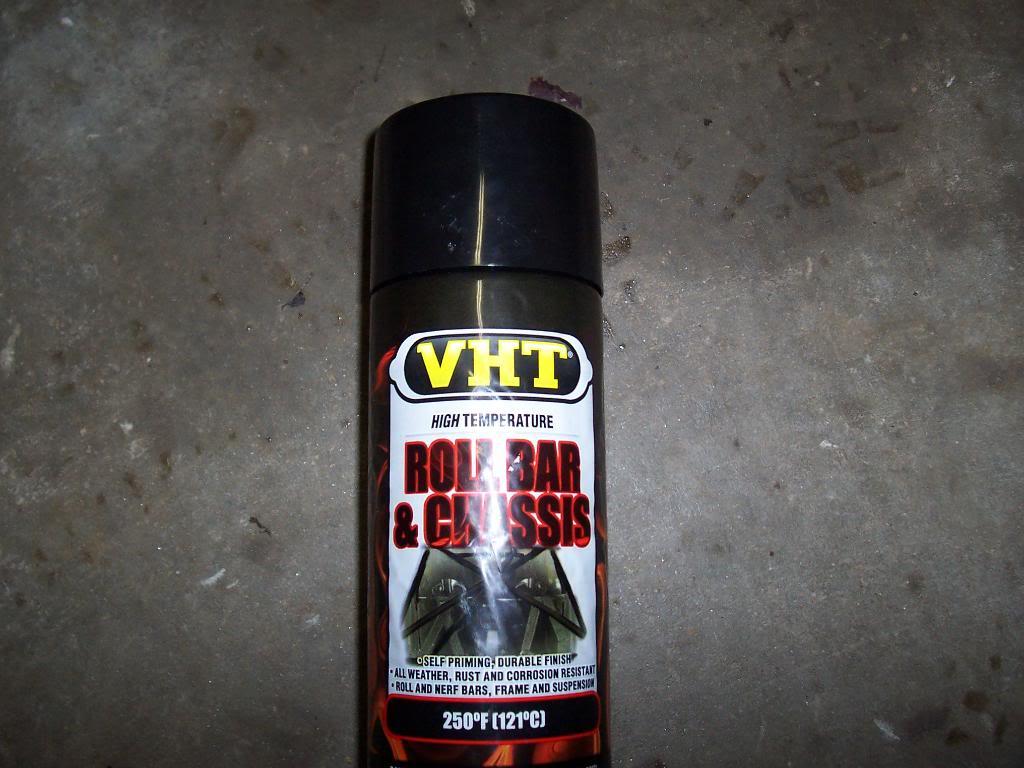
Pic of the paint I used. I bought it at Advance Auto Parts. I chose this paint because it said it didnt require a primer, which was important, because I was trying to paint this outside between rain showers. I was very impressed by this rattle can paint. It was the finest mist of paint I have ever seen come out of a can. It laid down perfectly. It also dries fairly quickly. I will use this paint for now on to paint bumpers, chassis parts, etc. Cost about $6.00 a can. It said it is good up to 250 degrees, which if my transfer case ever gets this hot, the least of my problems will be how well the paint is adhereing to the case LOL.

100_4642-1.jpg
 
Last edited:
Looks great. You're a braver man than me. All those parts and parts and parts. Good for you. I may have missed it, but didn't you buy a georgous dark green 8 a few months back. Are you taking this 8 to those specs? If you didn't buy it, sorry; wasn't paying attention. If you did, I may need some pics of the green 8 to reassemble mine. What year are the stripes on it?
 
Looks great. You're a braver man than me. All those parts and parts and parts. Good for you. I may have missed it, but didn't you buy a georgous dark green 8 a few months back. Are you taking this 8 to those specs? If you didn't buy it, sorry; wasn't paying attention. If you did, I may need some pics of the green 8 to reassemble mine. What year are the stripes on it?

I laid all the parts out into subassemblie as I took the transfer case apart to make it easier for me to put it back together, plus I took lots of pics:thumbsup: Since all the parts will really only go back together one way, as long as I dont have any "leftover" parts I will be in great shape:D

The dark green '83 Scrambler that pops up in the pics from time to time is the one I bought last year (early 2009). It is all stock with repro '83 decals on it. The second owner, from whom I bought the Scrambler from, repainted the Scrambler in its original '83 Sherwood Green color. Before he removed the factory decals, he made exact measurements of the factroy decals and had a local guy make these decals.

Here is the thread for the green '83:
https://www.cj-8.com/forum/showthread.php?t=23045

This thread has a more current pic of the green CJ-8:
https://www.cj-8.com/forum/showthread.php?t=26034&highlight=nutmeg

This Scrambler (the one in million pieces right now) will be my trail rig. I am keeping the stock powertrain but I am adding some strategic improvements to the stock parts (Mopar MPI, Warn FF rear axles, Warn Chrome Moly Dana 44 sized front shafts, lockers, 4.5" lift, roll cage, etc). I plan on painting this one Sebring Red with the '82 decals. So, this one wont be a stock restoration, but everything I am putiting on this build doesnt require any permanent mods to the Scrambler:thumbsup:

I still have a long way to go to get my build to where yours is at, which by the way looks great:thumbsup: Just let me know what pics you want off of my Green '83 and I can help you out:D
 
Last edited:
I thought I remembered the Sherwood Green 8. I will follow up regarding the decals. I'm using '82 decals on my '83, so there might be a difference in the shape of them, but we'll see. Good luck on yours; I'll be watching.
 
Started to reassemble transfer case. I need to take the case and some of the parts to work in order to press them back together. A few quick pics.


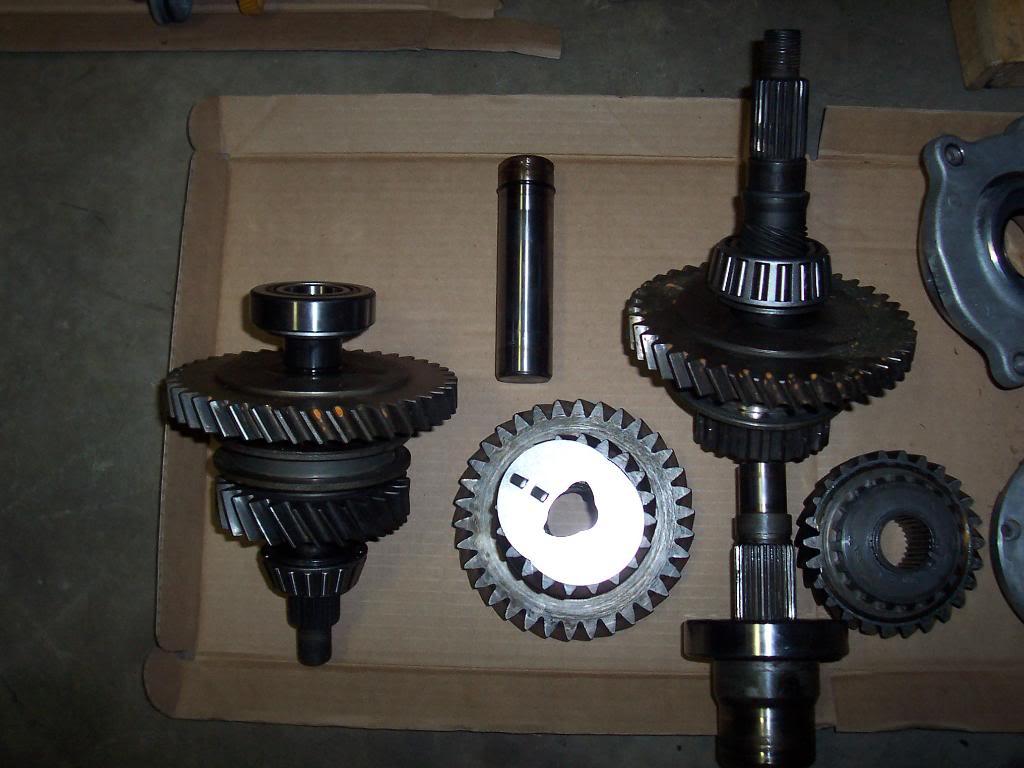
Pic of the three shaft assemblies that make up the transfercase. Bearings are just sitting loose, they still have to be pressed on. From left to right: Front Output Shaft, Idler Gear, Input Shaft/Rear Output (small gear to the right goes on input shaft)

100_4646-1.jpg


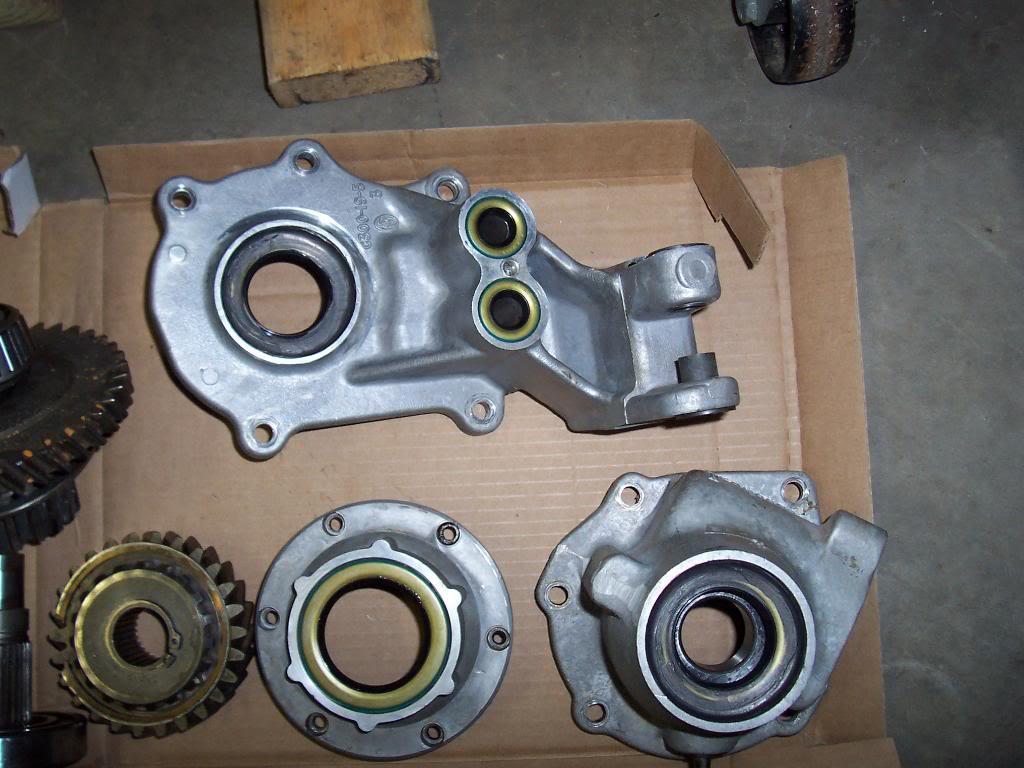
Installed the seals into the various aluminum housings. Top is the Front Output Shaft Housing, Lower left is the Input Shaft Housing, Lower right is the Rear Output Shaft Housing. The black stuff on top of some of the seals is RTV, just extra insurance. Built up a small ridge of RTV around the outer edge of the seal, where it meets the aluminum housing, NOT on the rubber part of the seal itself. Those two seals (front and rear output shaft seals) dont sit flush with the outer edge of the housing, like the input shaft seal does.

100_4647-1.jpg


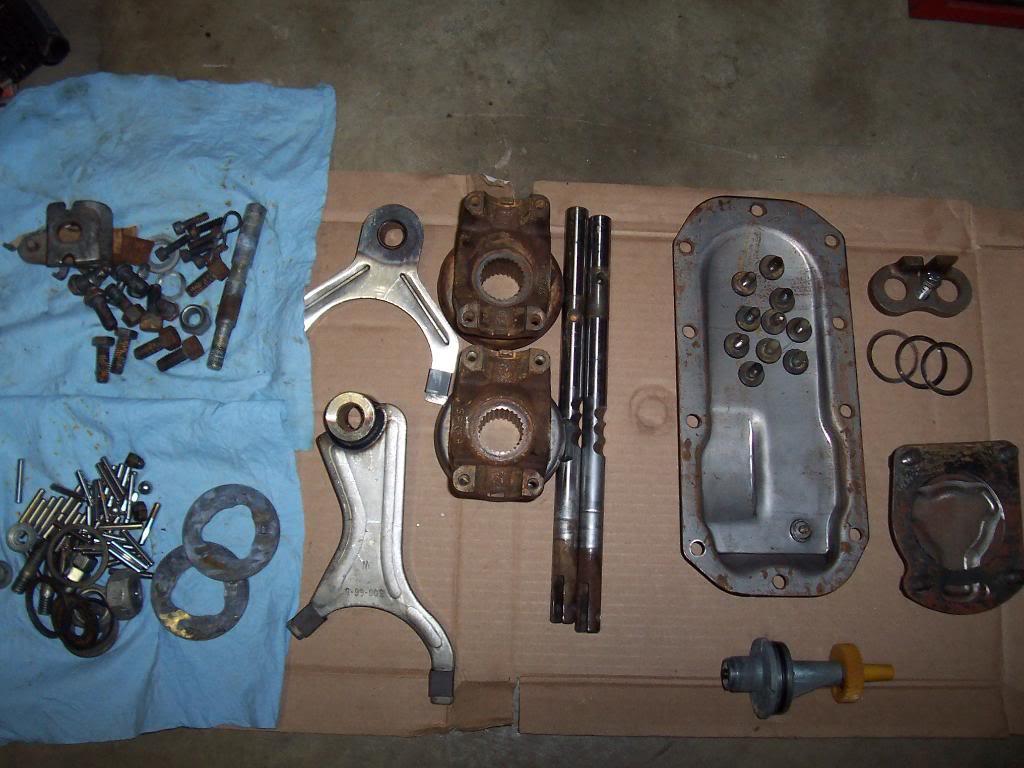
Pic of the remaining parts left to put the transfer case back together.

100_4648-1.jpg


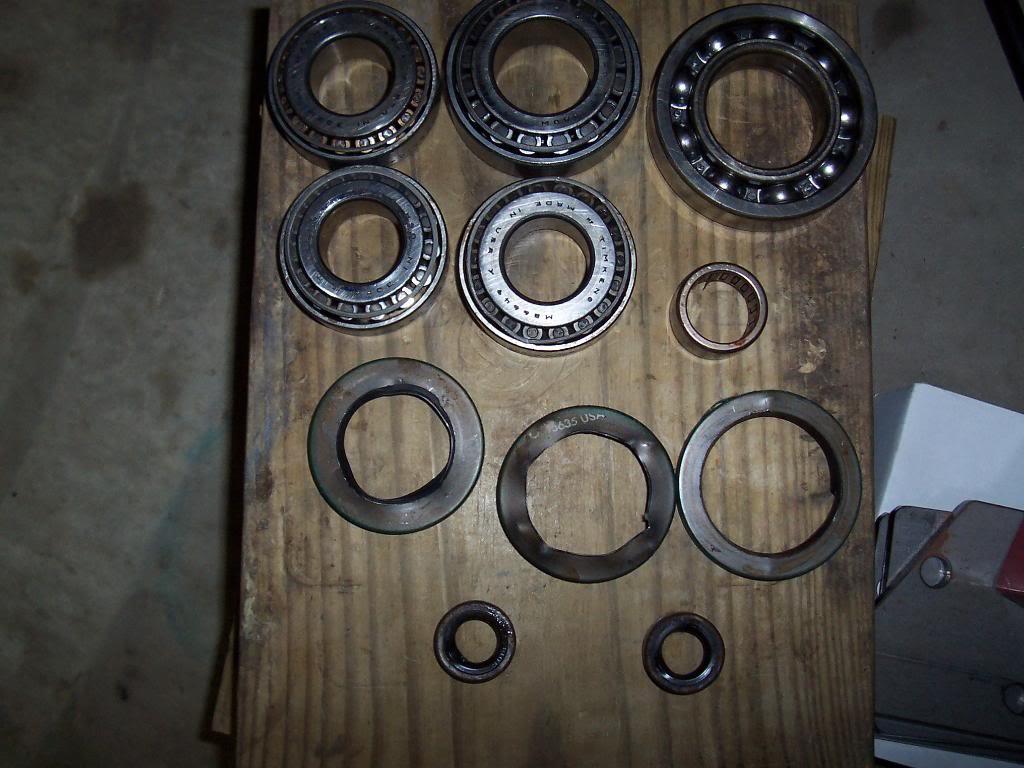
Pic of the parts that were replaced, 6 bearing assemblies and 5 seals.

100_4649-1.jpg


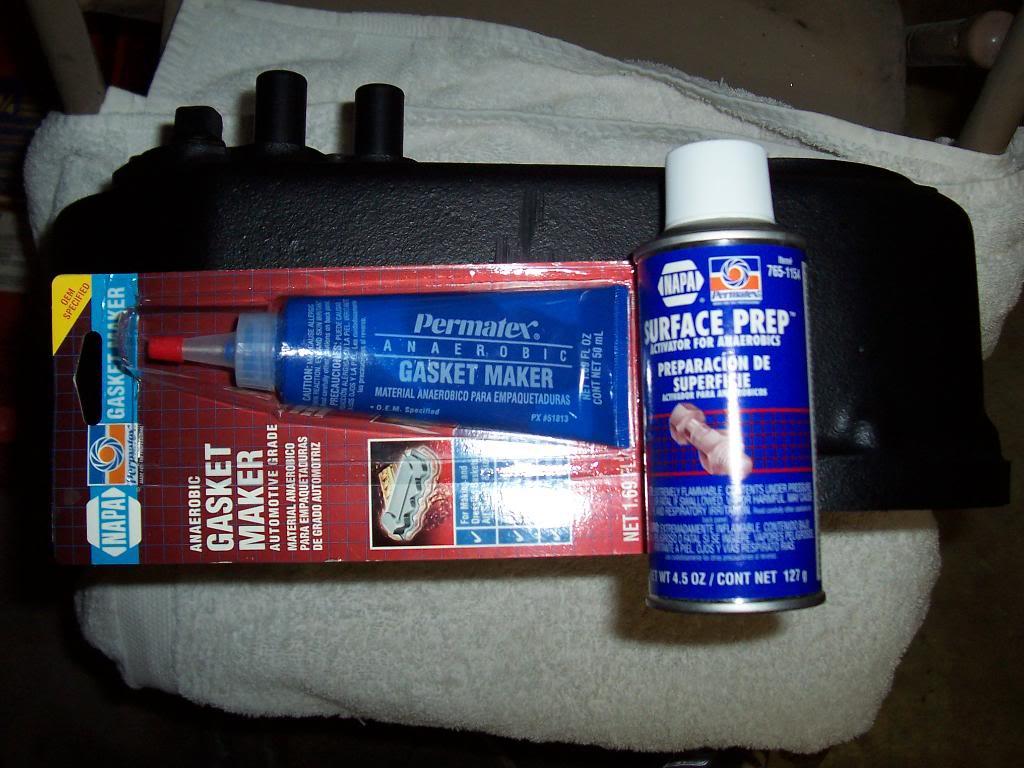
Quick pic of "Anaerobic Sealant". Looking at $40. Supposed to use this sealant when you install the aluminum housing assemblies into the machined bores of the cast iron center section of the transfer case. It must be super thin, since these parts are such a tight fit. I think I read that this stuff only cures in the absence of air. I guess it just fills in any slight imperfections in the two mating surfaces.

100_4645-1.jpg
 
I should have thought to mention this, but there's a double-sided seal that is a direct replacement for the input shaft seal, it's part number is #14095609 and it's what Novak includes when you get a tcase-tranny adapter. Like your black RTV, it's just an extra bit of protection. I found it at Rock Auto for $4 (Novak wants $20 for it :eek: )

That special gasket material is probably what I needed for putting on that housing when I just did mine this week, and I bet it's what I saw when I removed that housing to replace the seal. But I searched online and found instructions on the tera-low 4:1 gear set that just mentioned using RTV there... if it's on the internet, it must be correct, right?? Hope mine holds :banghead:
 
So far I have taken 400 (ish) images of my tear down... I can see we are going to get along. :cheers: I am about a week or 2 from doing exactly this to my transfer case and all of these images and info are extremely helpful. Your project looks great. Keep it up!

With all of this positive peer pressure on the site there should be a load of new "done right" Scramblers running around on the roads soon. (Soon is a word with a very loose and individual interpretation :rotfl: )
 
I should have thought to mention this, but there's a double-sided seal that is a direct replacement for the input shaft seal, it's part number is #14095609 and it's what Novak includes when you get a tcase-tranny adapter. Like your black RTV, it's just an extra bit of protection. I found it at Rock Auto for $4 (Novak wants $20 for it :eek: )

That special gasket material is probably what I needed for putting on that housing when I just did mine this week, and I bet it's what I saw when I removed that housing to replace the seal. But I searched online and found instructions on the tera-low 4:1 gear set that just mentioned using RTV there... if it's on the internet, it must be correct, right?? Hope mine holds :banghead:

The FSM doesnt mention the Anaerobic sealant, but the other book does. I think one of my pics shows some of the old Anaerobic sealant still on the case where one of the aluminum pieces sits tight to it. Very thin/clear type stuff, like dried up CA glue. Not sure if you really need it or not, but since I tore the whole thing apart I want to try to give it the best chance at not leaking LOL:thumbsup:

When I had to change the rear output shaft on my Dana 20, I just RTV'd the output housing to the face of the case, no special sealant, and it didnt leak:) Hopefully you will have the same luck:thumbsup:

The rear transmission bearing lack of seal does have me kinda:angry: It is almost like a built in leak, the factory knew about it and provided a drain hole in the factory trans to t-case adapter:crazy:

I dont know if a double sided seal on the t-case input housing will help here or not. I will have to look and see, but I dont think that the tcase input housing rides flush against the rear tans bearing in the adapter housing:confused: If it doesnt, then there will be a gap where oil can leak through. But I think it (it being the t-case input housing) must ride against this bearing or oil would just flow right out. I will take a look and see, thanks for the heads up:cheers:

What brand seal did that Part # come from?

The entire factory trans to t case sealing interface is kinda crappy. Not just the 300's, the 20's are , too. My T150 to Dana 20 interface leaked all the time. When I swapped in a Ford T18, using an Advance Adapter kit, the new trans rear bearing was a 1 piece sealed bearing. The adapter plate (1" thick aluminum, I think it has a raised ridge on the t-case side that pluged into the open hole of the Dana 20 input situation) never leaked. If I would have been smart I should have looked for a 1 piece sealed bearing to replace the open ball bearing in the rear of the T176.

Well now that I think about it, the trans to t-case adapter sits flush against the rear trans bearing and acts as a "seal" against oil flowing into the open cavity where the trans output plugs into the t-case input:crazy: I will still look into that "double seal, though :-)

 
So far I have taken 400 (ish) images of my tear down... I can see we are going to get along. :cheers: I am about a week or 2 from doing exactly this to my transfer case and all of these images and info are extremely helpful. Your project looks great. Keep it up!

With all of this positive peer pressure on the site there should be a load of new "done right" Scramblers running around on the roads soon. (Soon is a word with a very loose and individual interpretation :rotfl: )

You need to post up some more pics:thumbsup::cheers:

"Soon" for me hopefully will mean by the end of this year, but I might be so broke by the time I get it put back together I wont be able to put tires on it:rotfl:

The T-Case rebuild is very straight forward, the books make it sound more complicated then it really is. The only thing to really watch for is the "end play" on the shafts. Just keep track of where the shims go. If everything is in good shape and all you do is change bearings (like what I am doing) the end play should come out fine:cheers:

Thanks for the compliment, yours looks great, too:thumbsup:
 
I'm not saying the double sided seal will keep the fluid in the tranny, you're exactly right on that being a built-in leak. I'd forgotten about the fact that the tranny fluid would just spill out all over when I cracked the tcase off the tranny and ended up totally covered in the junk. :banghead: I couldn't get out of the way because at that point I was on the creeper holding the tcase up to keep it from crushing me, so I just had to take it.

I don't recall the brand on the seal, but just plugging that number into google led me to rock auto as a supplier. It's a very unique aqua colored box, I immediately recognized the new ones as the same as the one that came with the adapter originally.

All the double sided seal gets you is one more barrier to tranny fluid getting in or gear oil getting out of the tcase. If it were me, I definitely would NOT undo what you did just for the sake of the double sided seal, that's the stock setup, so you're almost certainly fine. I'm only saying that for other folks who are reading along. :thumbsup:

I didnt have any gear oil come out of the tranny when i pulled my T-Case, but I left the adapter housing bolted to the tranny, and I forgot that the adapter housing contains the rear trans seal, which I already installed:rotfl: So, hopefully, I will be sealed up good and tight:thumbsup:

Pic of the rear trans seal, the one that I forgot that I already installed:rotfl:


100_4613-1.jpg
 
Back
Top