• Notice for iPhone users: DO NOT use the image size reduction option when uploading photos to the forum. This causes portrait images to post as landscape. We have added a warning to the image insert pop-up as well.

Another Scrambler Purchase/Road Trip - UPDATE- BODY ON FRAME AGAIN

Did you have any trouble get the inspection cover on the bell housing with the longer flywheel bolts?

I haven't tried to put the inspection cover on yet so I don't know. I hope not:eek: If I do have a clearance issue, I will probably just grind the excess threaded portion of the bolts off. I will check it tonight and report back:thumbsup:
 
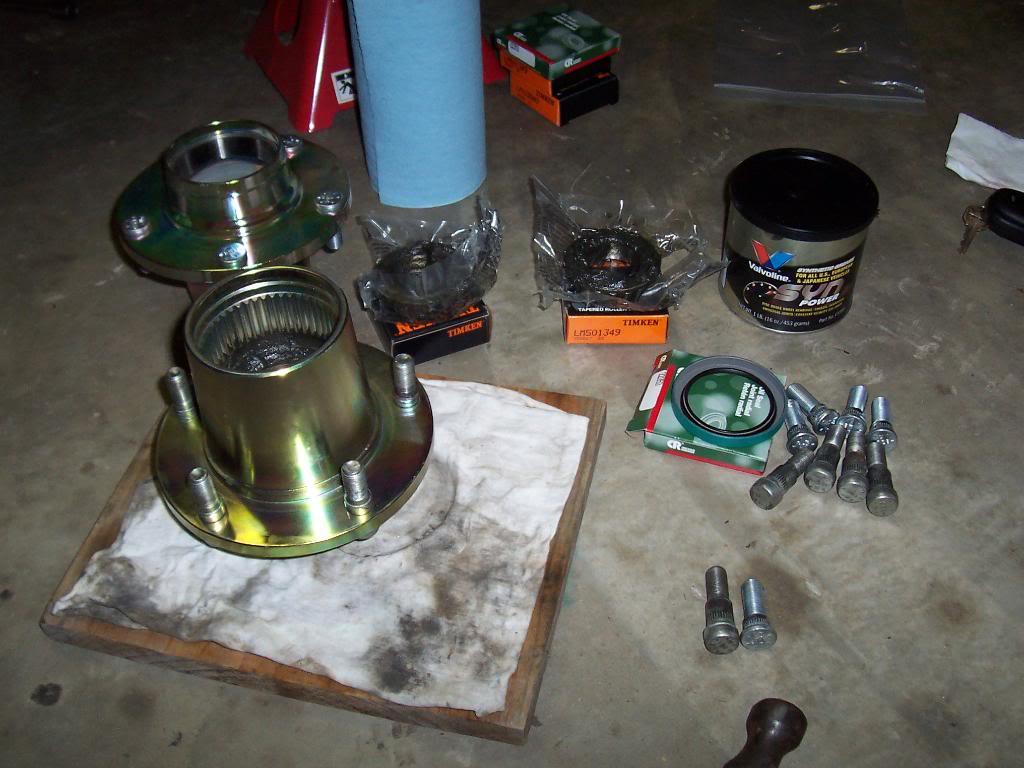
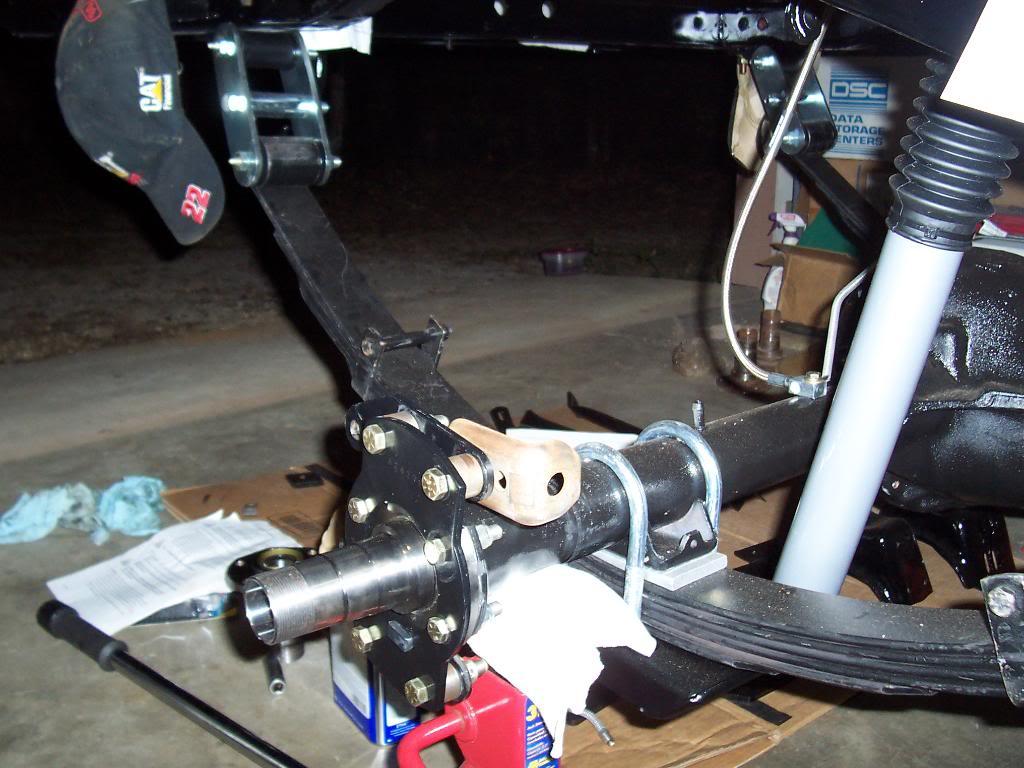
Started doing some work on the rear axle full float conversion and disc brake parts. Packed the wheel bearing and installed 1 hub seal. I damaged the other hub seal, should get a replacement tomorrow. Pics of some of the parts.

100_5107-1.jpg


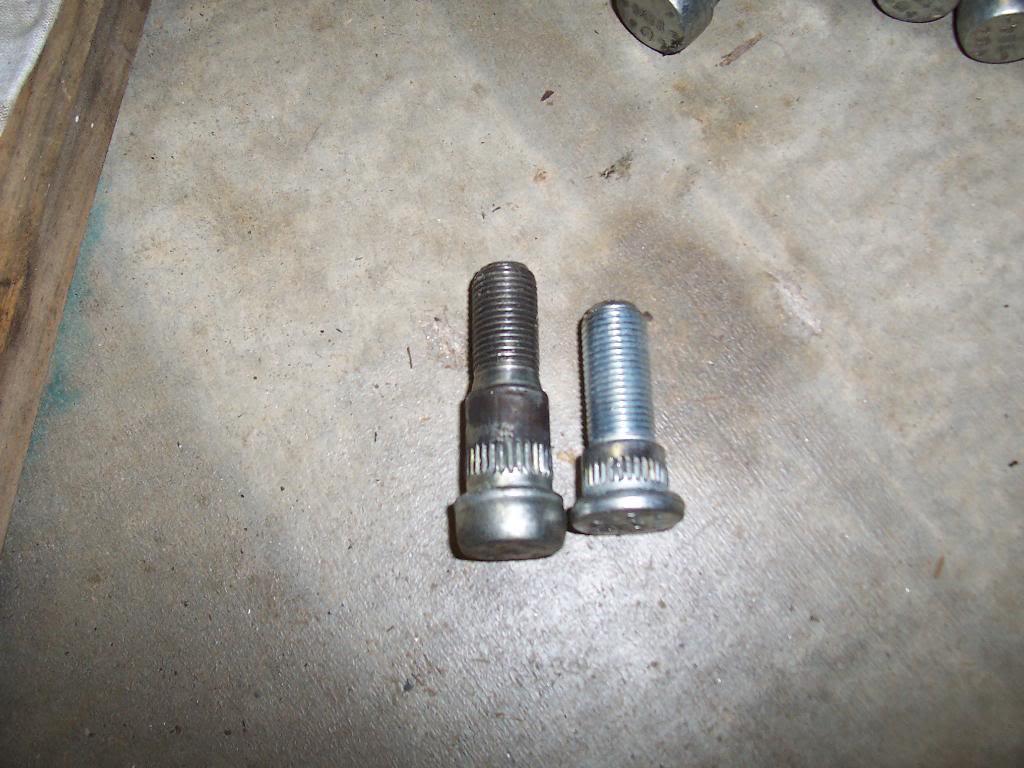
The Warn rear hubs came with studs installed, but they are too short for the SSBC kit. Installed some longer studs that came with the SSBC kit. Stud comparison pic.

100_5108-1.jpg


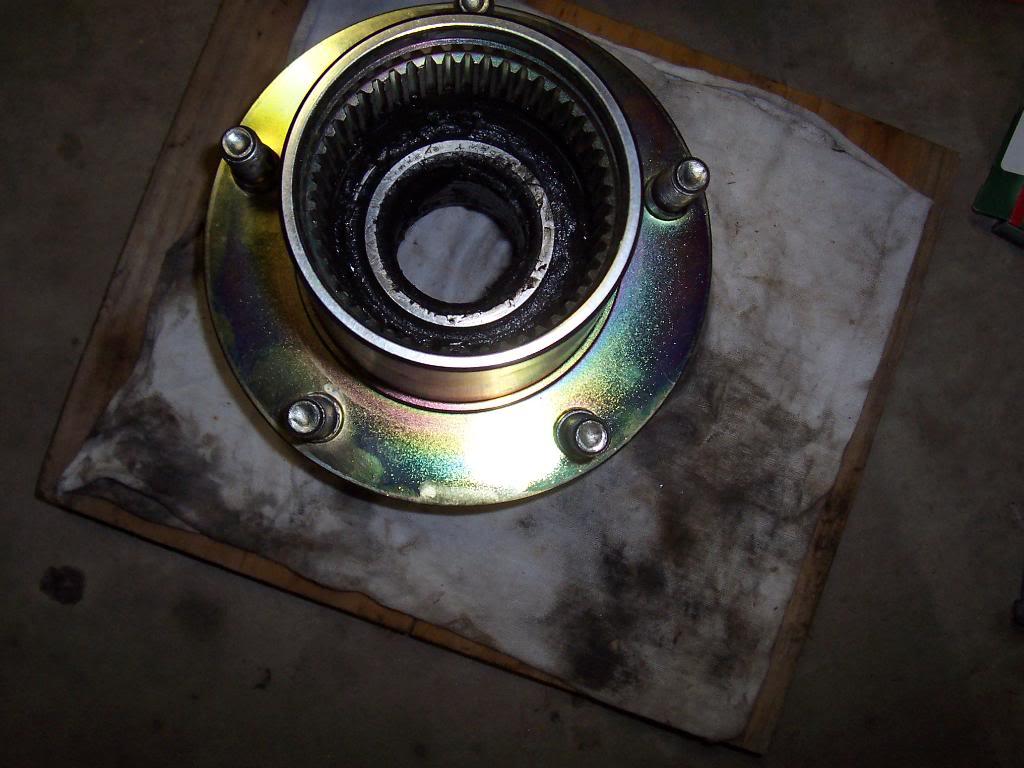
Pic of the bearings and new studs installed in a wheel hub.

100_5109-1.jpg


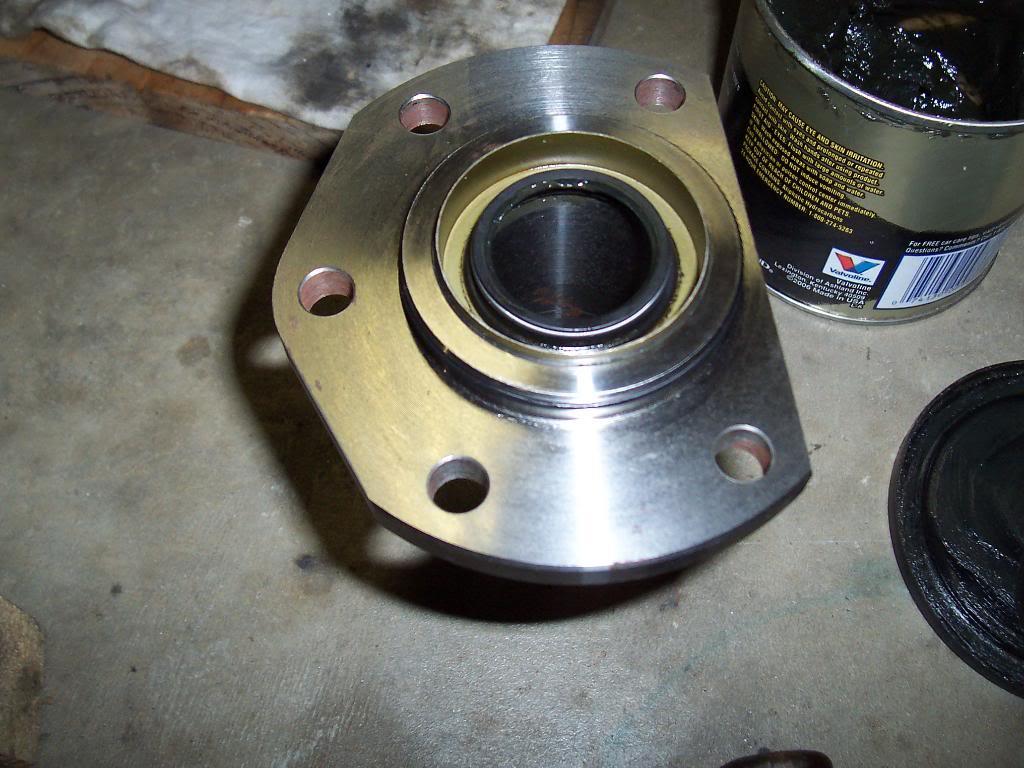
Installed the spindle seals. These take the place of the inner axle oil seals. These spindles have an O-ring around them to seal them tight to the axle housing. One side seems to fit tight but not the other side. I added RTV to this area to hopefully prevent leaks. If it leaks, I will have to track down an oil seal with the same OD of the factory seal but with a bigger ID to accommodate the larger Warn Shafts.

100_5111-1.jpg


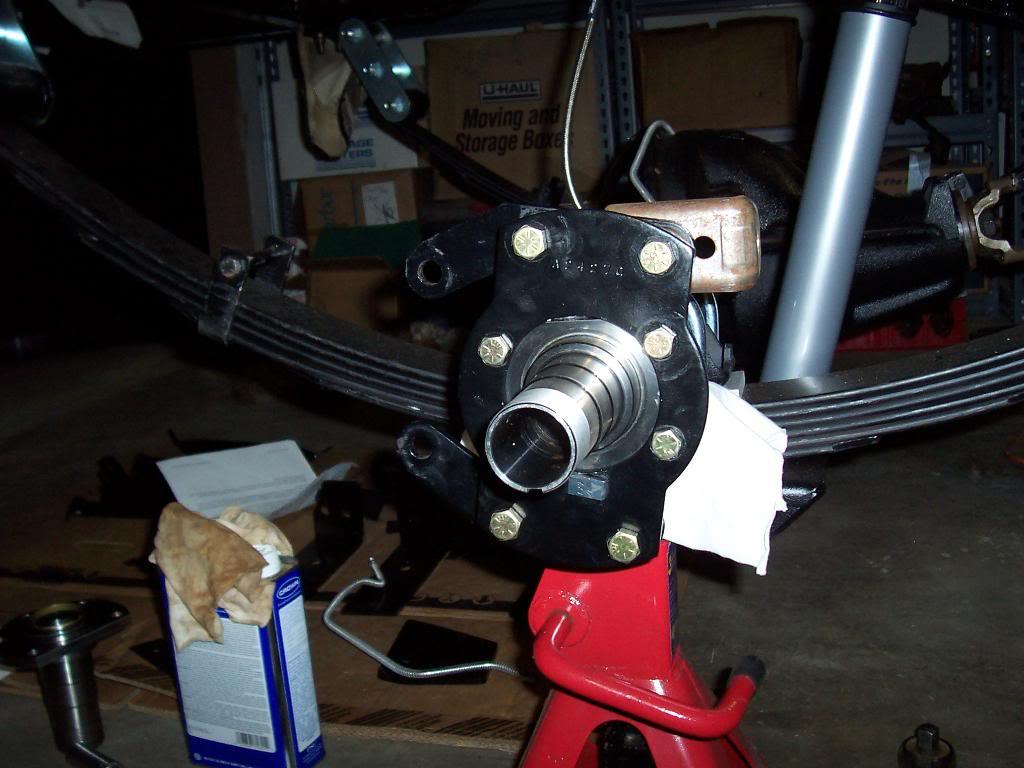
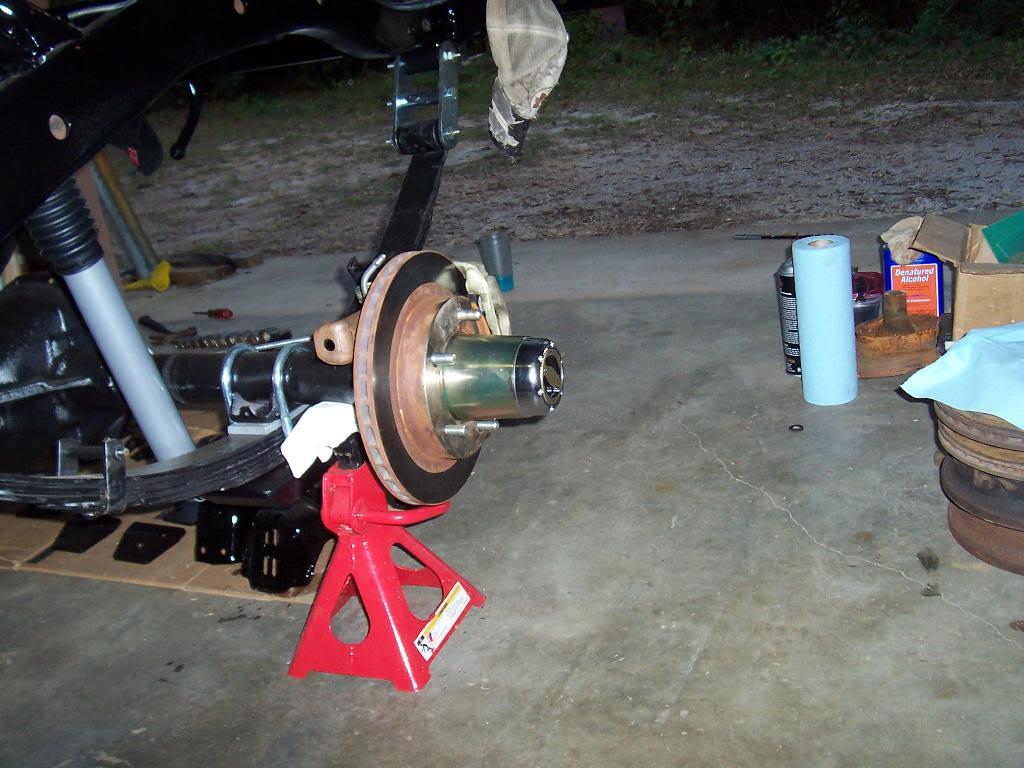
Pics of the installed spindle and SSBC caliper bracket. These parts bolt on.

100_5112-1.jpg


100_5113-1.jpg


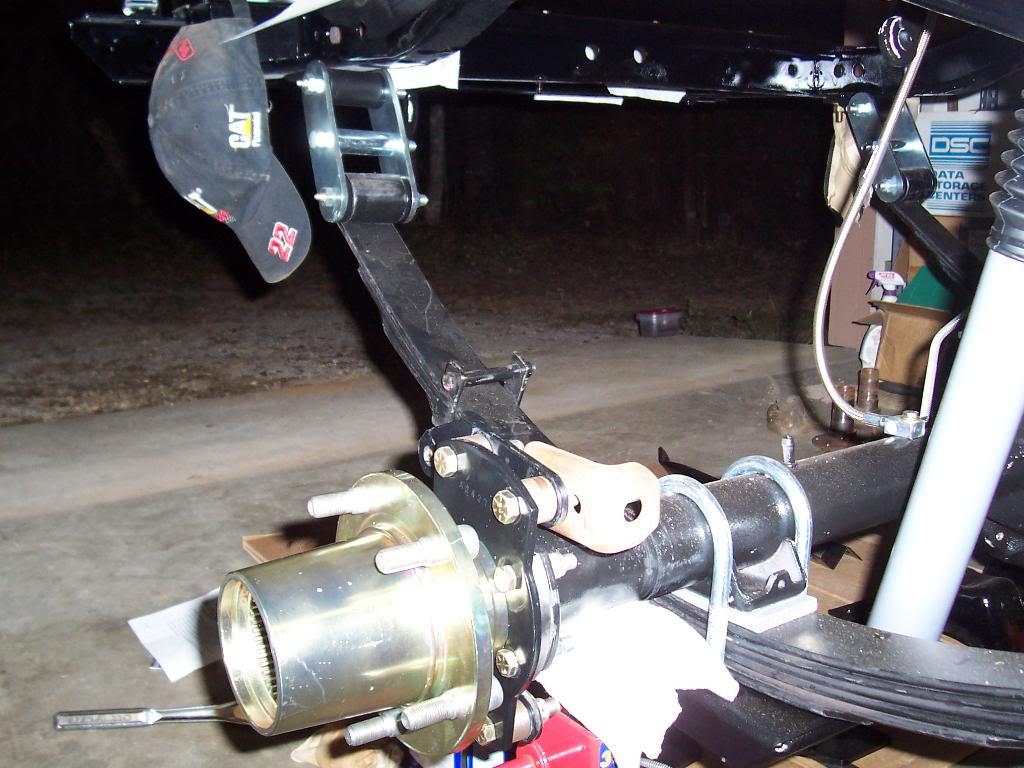
And a pic with the wheel hub installed.

100_5114-1.jpg


Pic of the kit supplied spindle nuts. I cant exactly remember, but it seems like the other Warn FF rear axle kit I installed had two nuts (with little tits on them) and the washer with the little holes. I know that the Warn front hub conversion comes with this style spindle nut system, which seems to be better. I tightened the outer nut to 150 ftlbs (per the instructions) and will have to wait and see if it holds torque. If the kit supplied spindle nuts work loose during use, I have an extra set of front spindle nuts (the kind with the little tits and the washer with holes) to put on. I only bring this up due to the fact that I have seen some discussions dealing with the kit supplied nuts working loose. I do know that Dana 30 spindle nuts will thread onto the Warn spindles, I am not 100% sure if Dana 44 spindle nuts are the same size/thread count etc. If 44's are the same, then I should be able to readily buy a new set of the "tits and holes" spindle attaching nuts. Just throwing it out there. I have never had the "tits and holes" style nuts work loose, I don't think I have ever had the style like what is pic below come loose, but i do know that the factory Dana 30 style set up is junk when used with larger tires. They would loosen up after 2500 miles.

100_5115-1.jpg
 
"tits and holes"

:rotfl: :rotfl: :rotfl:

sharp looking stuff

I didn't know how else to describe them:D

I might actually look into using the "Stage 8" spindle nut fastening system for the front and back. Its not too hard to pull the locking hubs off and change these nuts:cheers:
 
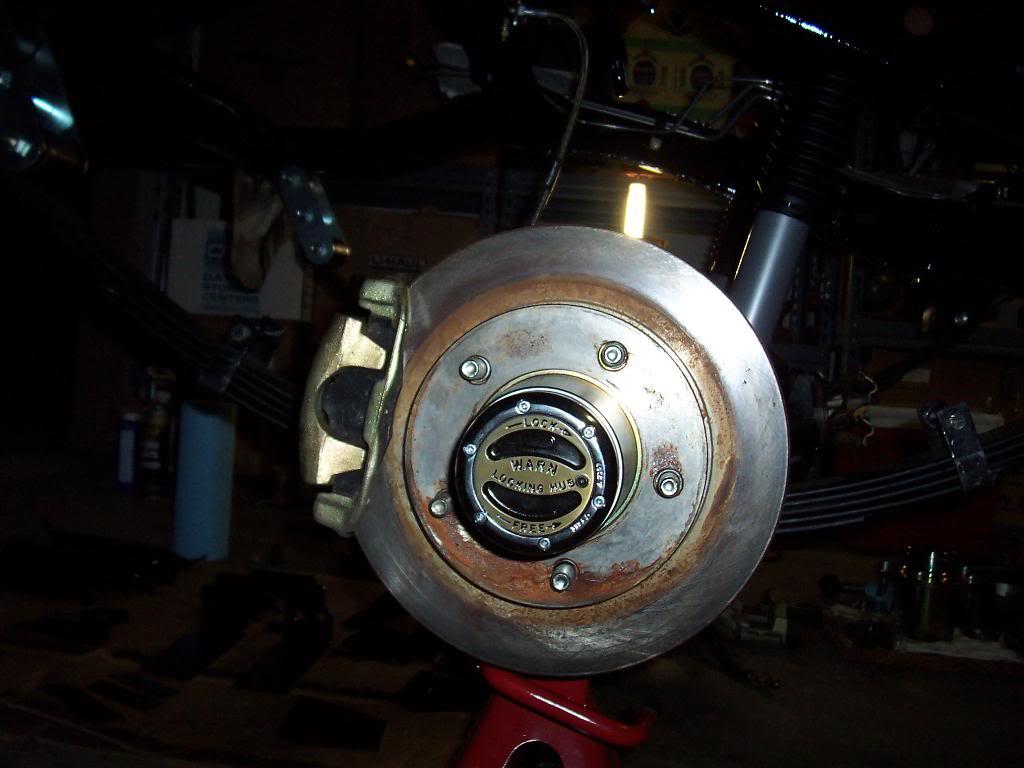
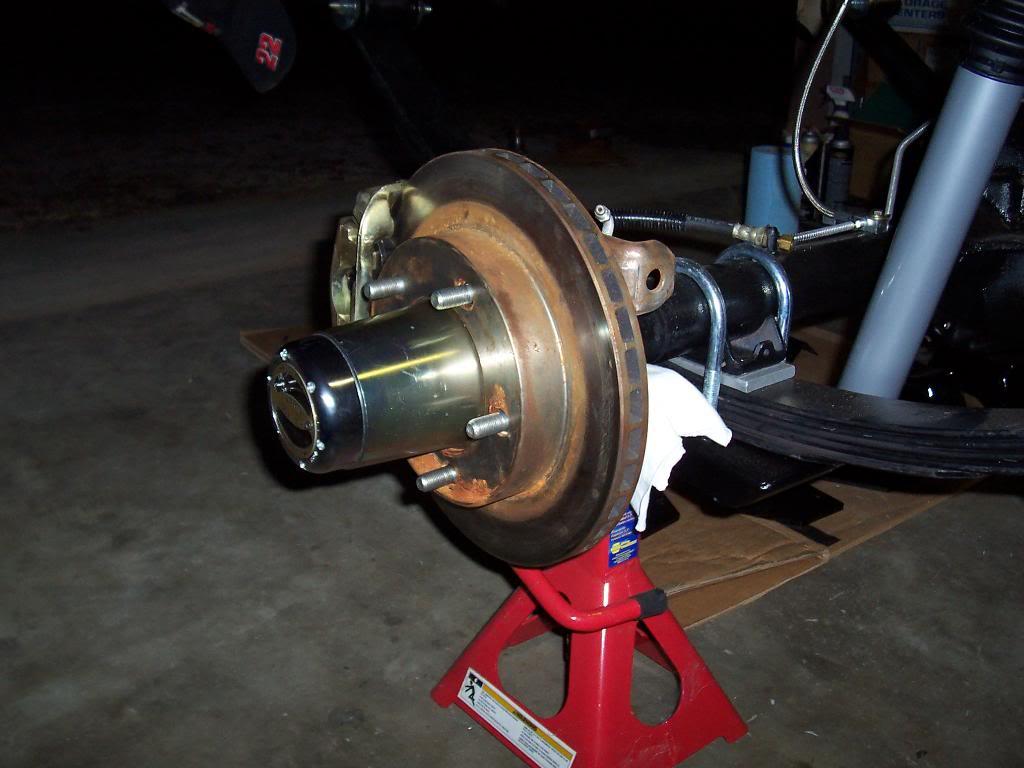
Got a little bit more done this weekend. Got the brake parts installed.

100_5116-1.jpg


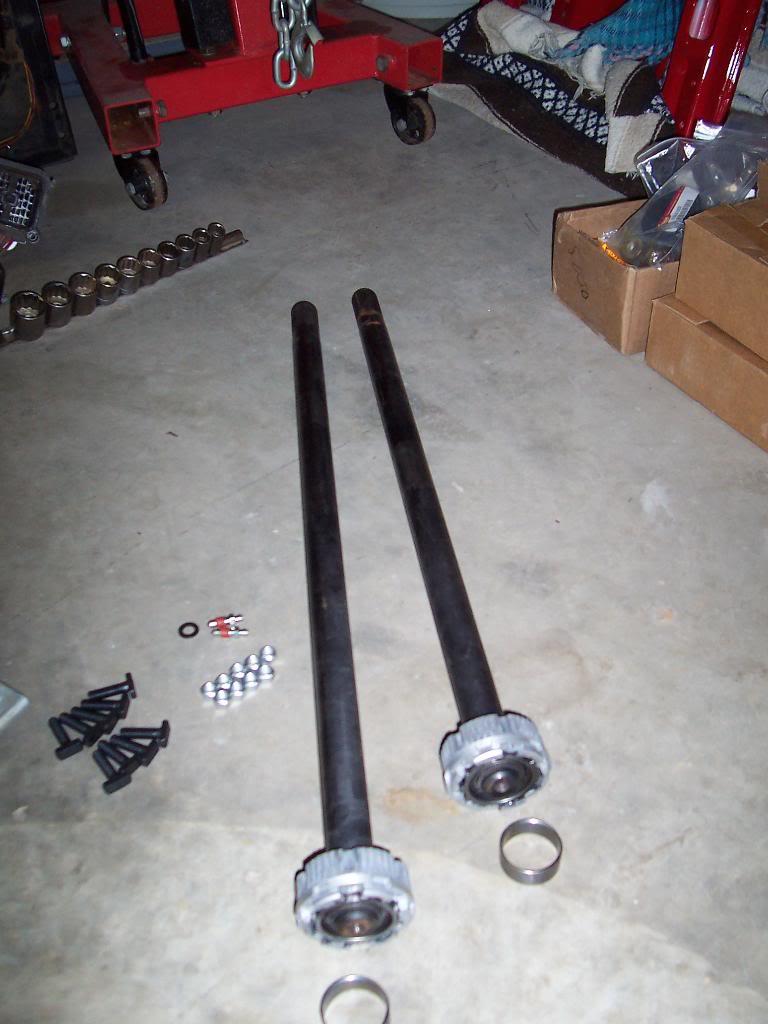
Pic of the two axle shafts. I installed the inner portion of the lock in hubs on each, secured with a small snap ring on the end of the axle. The collar things on the ground are part of the lock in hub dials. They insert between the inner and outer portion of the lock in hubs. They some how prevent the hub locks from wanting to disengage. They make it a little harder to lock and unlock the hubs, but all you have to do is rock the wheel back and forth and they will lock and unlock.

100_5117-1.jpg


Slid the axle in, inserted large snap ring in the hub, bolted dial on, and passenger side finished. There is also a set screw on the dial of the lock in hubs that helps to keep them locked in place. You have to remove the set screw before you can engage or disengage the hubs. It is really useful at keeping pranksters from unlocking you rear hubs.

100_5118-1.jpg


100_5120-1.jpg


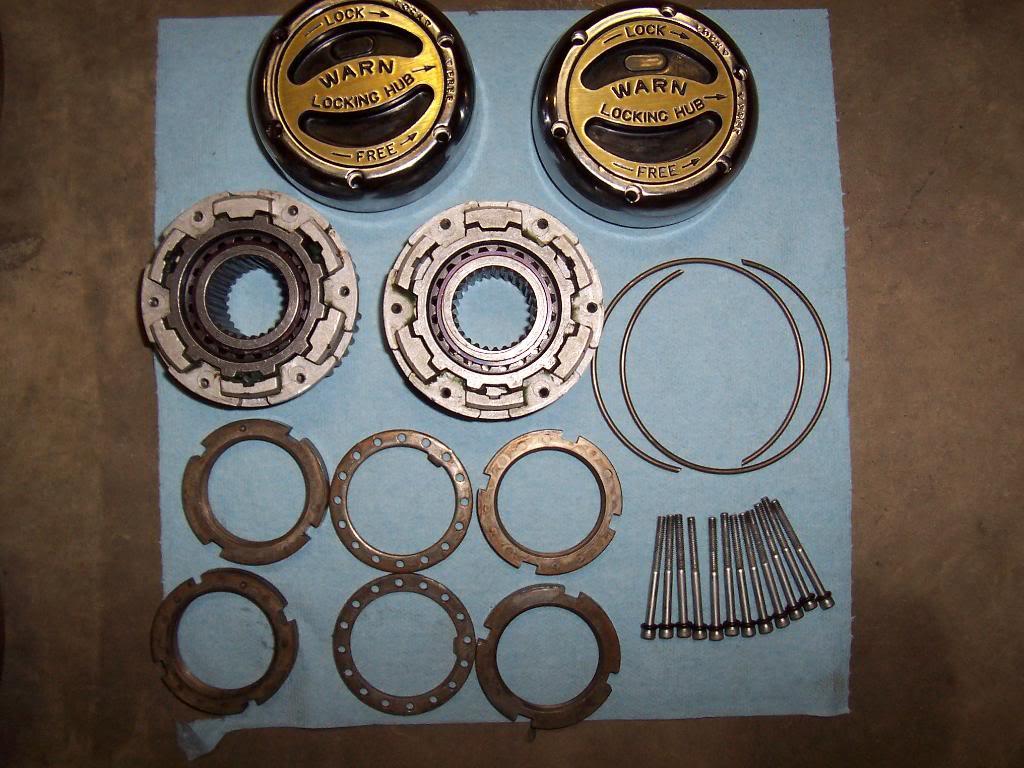
Cleaned up my Warn front hub conversion parts. I bought this set used locally. The lock in hubs are almost brand new. The actual wheel hubs are stained/discolored, but they are mechanically in excellent shape. The factory center caps will cover up the stained hubs. Also pictured are the "tits and holes" spindle nuts I was talking about. Might upgrade to Stage 8 system, but i have never had a issue with this style set up.

100_5122-1.jpg


100_5123-1.jpg


100_5124-1.jpg


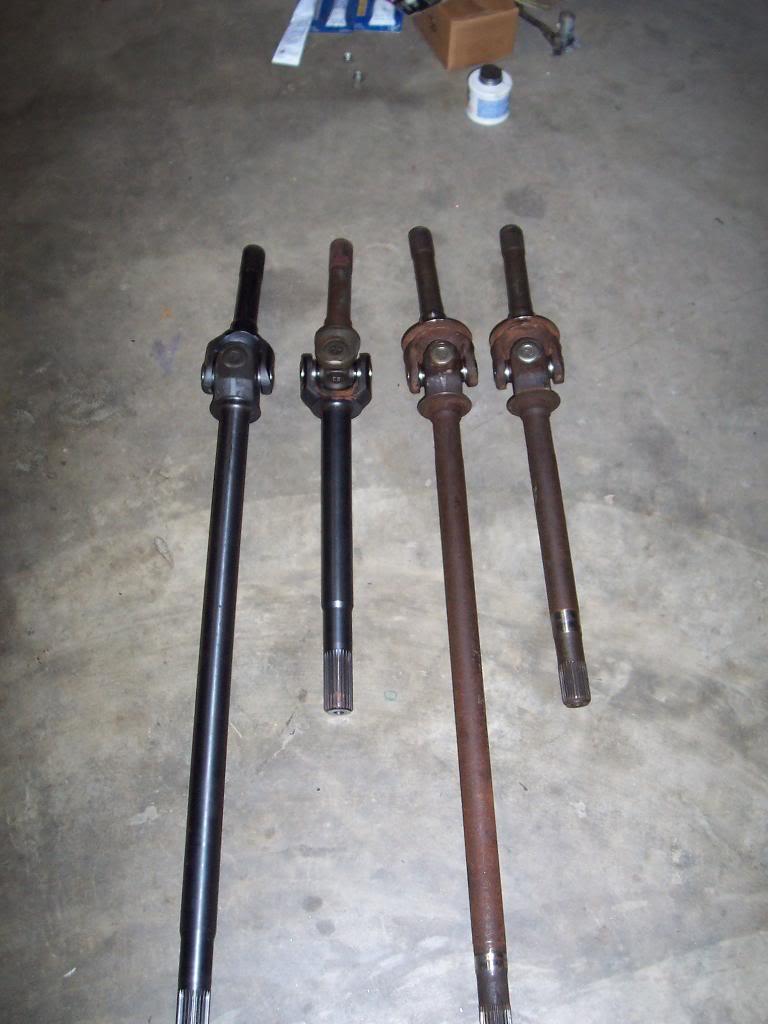
Installed some new Spicer u-joints into the Warn chrome molly Dana 44 sized shafts. I also installed some new u-joints in the factory axles, I will keep these as spares, just in case.

100_5125-1.jpg


Finally broke down and removed the ball joints from the knuckles. I had been dreading this. But, our mechanic at work came to the rescue. He let me borrow his "OTC" brand ball joint tool, and it made this work super easy. Only took about two minutes to remove all 4 ball joints. I will borrow this tool again to install the new ball joints, after I clean and repaint the knuckles.

100_5126-1.jpg


And duplicated all rear axle work on drivers side.

100_5127-1.jpg
 
Last edited:
So the Warn rear kit is still essentially a two-piece axleshaft setup? I know the vehicle weight is off of them, but I'd always assumed that the locking bit for the hub engagement was an integral part of the shaft, not something separate that engaged with splines. I didn't notice that in the pics of the kit in the box. Learn something every day...

Definitely looks like a slick setup though.

Kinda sorta I guess so:thumbsup: On a typical full float, correct me if i am wrong, the axle shaft and the "driver" (i.e. the part that actually drives the wheel hub, like on an F350 the round thing that is part of the axle shaft that externally bolts to the wheel hub) is made as 1 piece. With this set up, the axle shaft "drives" the internal hub (which is a super tight splined fit on the axle shaft). The hub lock dial engages the wheel hub to the internal hub and transmits power. In a way, the F350 set up i mentioned is probably stronger since the axle shaft and driver are 1 piece. However, the way this is set up, I believe that you would blow the lock in hub to pieces way before you bust a shaft. So in a sense, I kind of have a fusible link, i.e. the lock in hubs (which I have spares). Warn also makes a "drive flange" that eliminates the lock in hub and solidly fuses the wheel hub to the drive axle. I like the hubs, wheeled with this kit (plus close to 150,000 on road miles) for 10 plus years in my CJ-7 with a V8 and Super Swampers with no problems what so ever:thumbsup: The drive flanges would be stronger, but I would rather blow a hub then bust a shaft, if that makes sense:cheers:

EDIT - The pic below explains how it functions, too. The rear end engages exactly like the front end. The outer splines on the axle shaft engage the inner hub(the silver/grey part that is inserted into the big gold wheel hub). The inner hub(grey/silver part) wont engage the wheel hub(big gold part) unless the hub dial is turned to 4x4. When the dial is twisted to 4x4, it engages the blackish colored inner ring into the gray/silver inner hub, and voila, the axle turn the wheel hub which turns the tire. Lots of moving parts, some inherent, albeit very minor backlash. Drive flanges are stronger and have no inherent play, but I like my lock in hubs :- )
 
Last edited:
I love me some interwebz shopping[:D] Found a lightly used spare Warn front hub and hub-lock to keep as a spare in case I ever break one of mine. Now, if I can just find another Warn AMC 20 Wide Track Full Float axle kit (used or new) I will be set[:D]

100_5129-1.jpg
 
The guy I bought the above mentioned wheel hub and hub-lock said he found the other gold wheel hub and will ship it to me:bow: Now I will have 2 new (around 7,000 miles) shiny front wheel hubs to match my pretty new rear wheel hubs:thumbsup: I will keep my other two dirty ones as spares. The sun shines even on a dogs arse every once in awhile:cheers::smokin:
 
It's coming along and looking good. If you run across another set of hubs, I'd like a spare set for mine. Also, I don't see the two snap rings for the axle, in your pic of the Warn front conversion.
 
I knew how the hubs worked, it's just that I thought the rears would be different because you don't have the need for the shaft to come in from the back of the spindle like in the front (due to the u-joints). I figured it would look just like the picture where you've installed the pieces on the end of the shaft, just as one piece.

I definitely see how it could be the fuse in the rear axle to have that piece be replacable, Warn actually sells "hub fuses" for the front that are a weaker versions designed to go first.

I carry one of the drive flanges rather than a spare hub as a trail spare for my front axle. Less to carry around and it will get you back home to your actual spare hubs.

Good find on the extras. I definitely keep my eye out for the full floater kit for you. :thumbsup:
 
It's coming along and looking good. If you run across another set of hubs, I'd like a spare set for mine. Also, I don't see the two snap rings for the axle, in your pic of the Warn front conversion.

I will definitely keep my eyes open for another set of front hubs for you jallan:thumbsup: I assume you want the big gold wheel hubs, I believe Warn still makes the actual locking hubs:thumbsup:

I have the two big internal snap rings that hold the inner hub in but I still need to buy two new small snap rings that go on the ends of the stub shaft.The larger Warn shafts will use the stock Dana 30 stub shaft snap rings, I just have to pick up two new ones:cheers:
 
I knew how the hubs worked, it's just that I thought the rears would be different because you don't have the need for the shaft to come in from the back of the spindle like in the front (due to the u-joints). I figured it would look just like the picture where you've installed the pieces on the end of the shaft, just as one piece.

I definitely see how it could be the fuse in the rear axle to have that piece be replacable, Warn actually sells "hub fuses" for the front that are a weaker versions designed to go first.

I carry one of the drive flanges rather than a spare hub as a trail spare for my front axle. Less to carry around and it will get you back home to your actual spare hubs.

Good find on the extras. I definitely keep my eye out for the full floater kit for you. :thumbsup:

Appreciate it:cheers: I would love to find another complete full float rear end kit to keep as spares. I never had problems in the 10 plus years I ran the other Warn Full Float kit (33" Swampers, Detroit Locker, V8) but it is nice knowing you have spares, just in case:cheers:
 
Pics of ball joint installation.

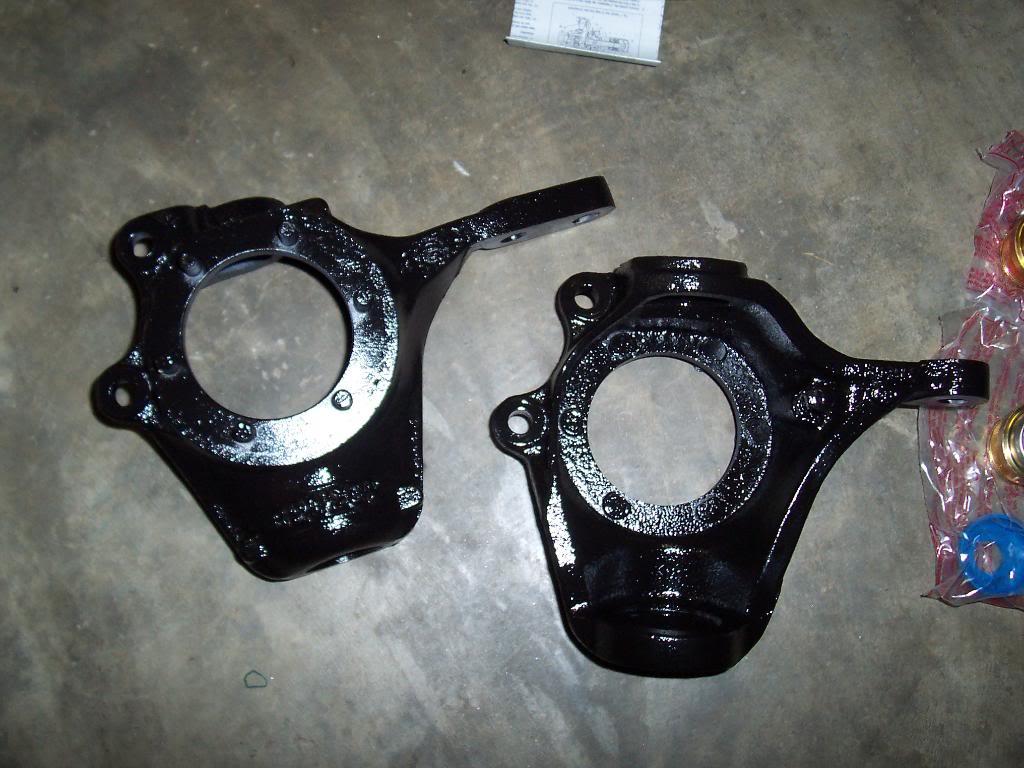
Pic of my freshly painted knuckles. They got a little scuffed up during the ball joint installation process.

100_5130-1.jpg


Pic of new ball joints.

100_5131-1.jpg


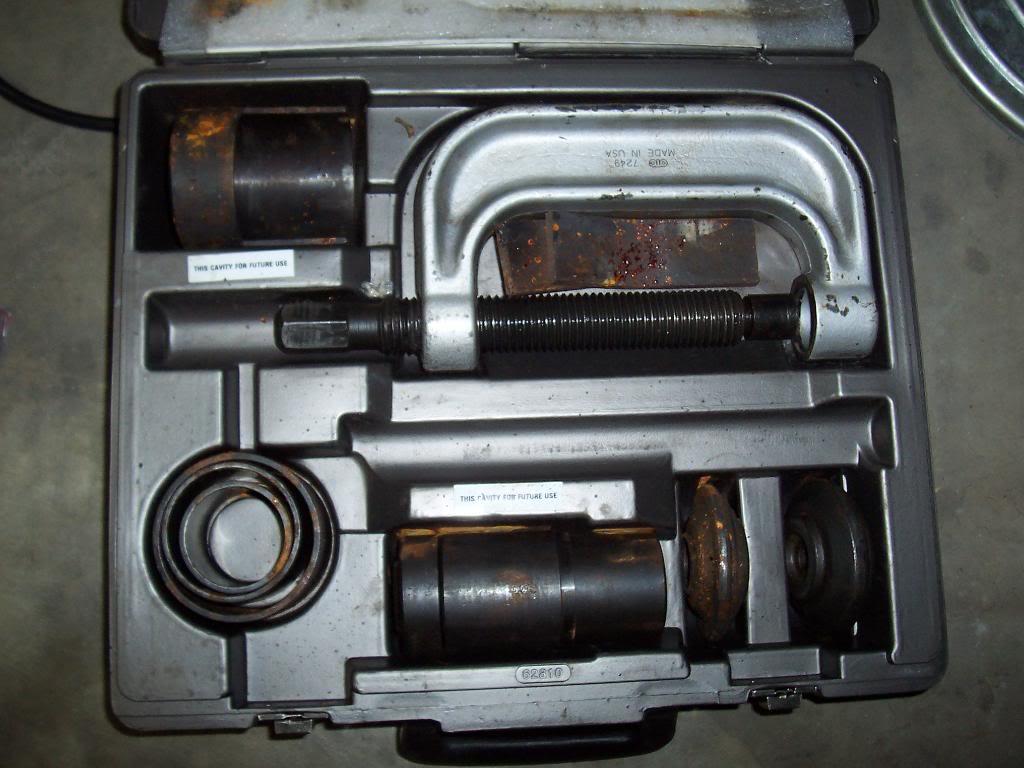
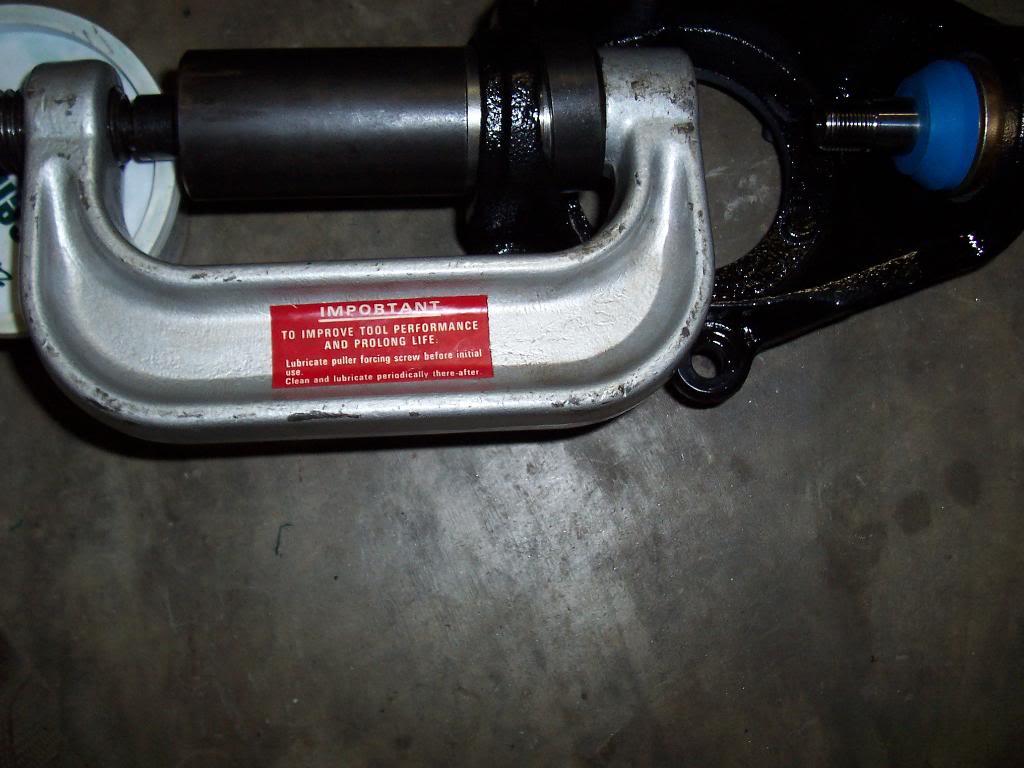
Pic of the install tool I used. It is a "OTC" brand, part #7249, "3-in-1" service set. This tool is about 1 zillion times better then the stuff you can buy at Auto-zone etc. I think it costs around $300, thank God I know someone who lets me borrow theirs. This tool made the install go super easy, almost enjoyable.

100_5134-1.jpg


Cleaned all the paint from the ball joint bores in the knuckles.

100_5135-1.jpg


Pressing in lower ball joint.

100_5136-1.jpg


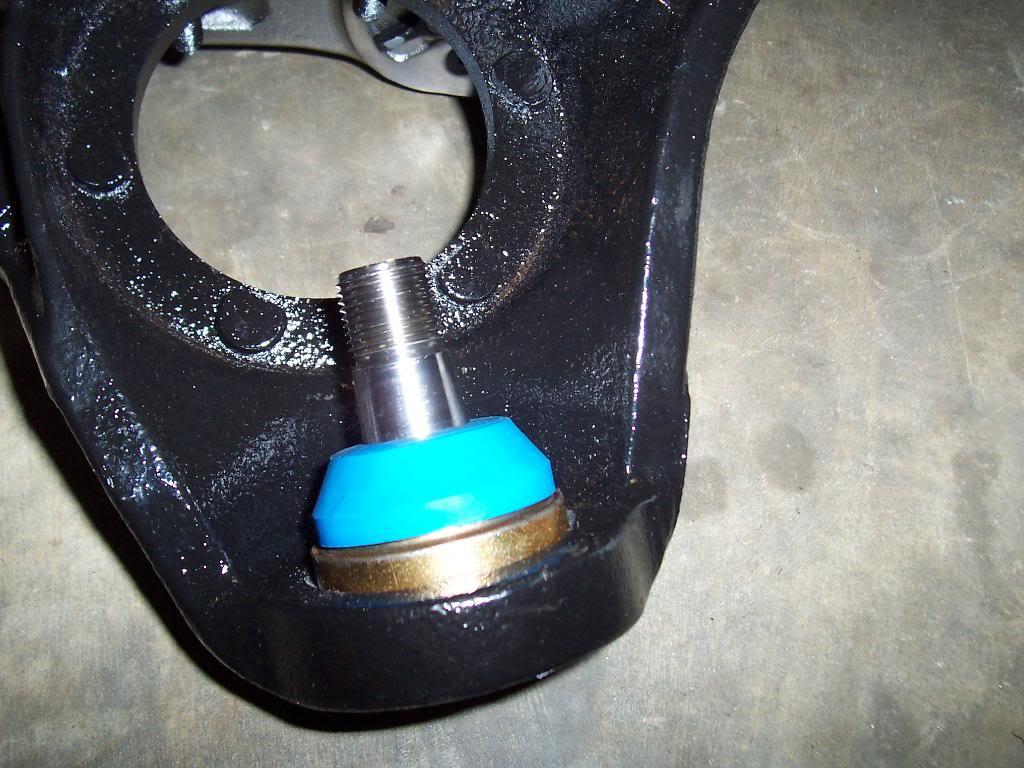
Installed lower ball joint.

100_5137-1.jpg


Close up, not too clear, showing the lower ball joint fully pressed in. It takes some muscle to get the lower ball joint pressed all the way in. I had to use a 3/4" drive ratchet (2' handle) with a short cheater pipe to fully seat the joint.

100_5138-1.jpg


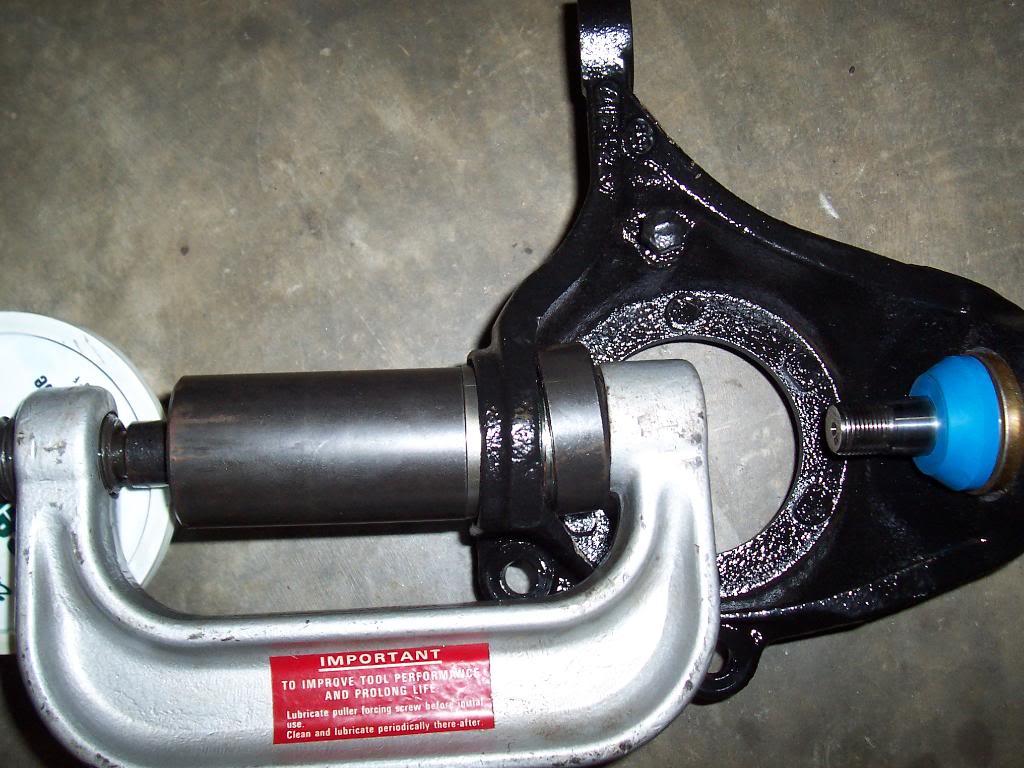
Pressing in upper ball joint.

100_5139-1.jpg


Even with this tool, the shape of the inside of the knuckle prevents the bottom spacer cup from sitting perfectly square. I just had to make sure the bottom cup wasn't binding on the ball joint. Looks kinda weird, but it works.

100_5140-1.jpg


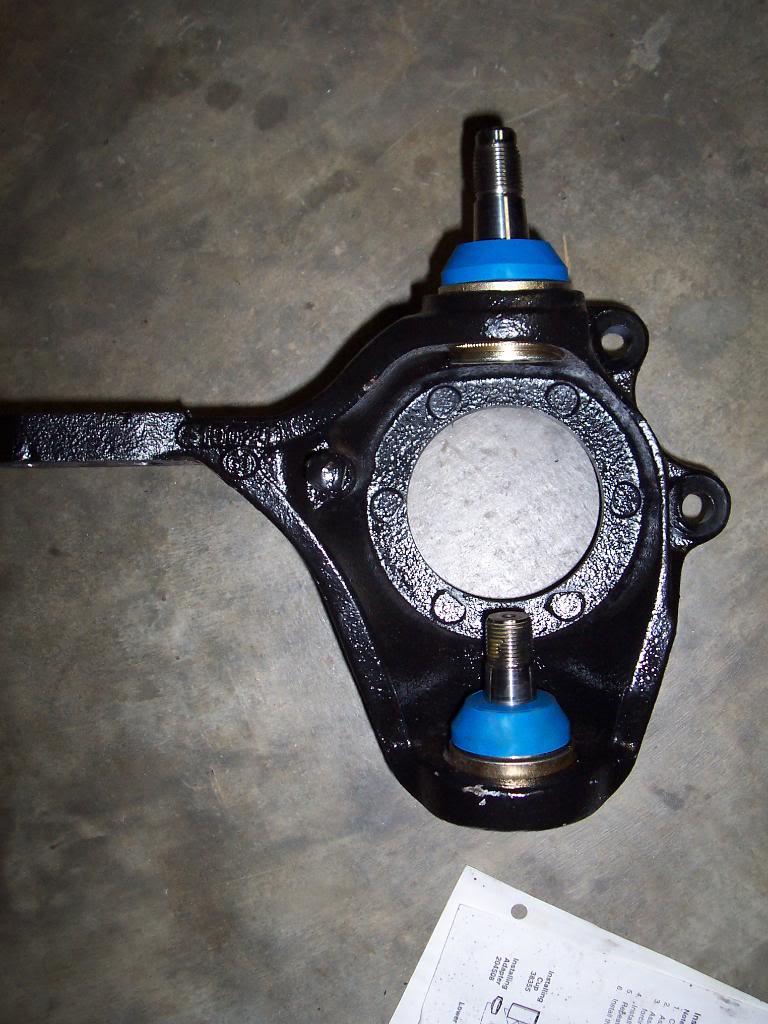
And a pic showing both upper and lower ball joints installed.

100_5141-1.jpg
 
I used a similar kit on mine at the military auto craft shop.. you're right, the right tool makes it almost easy.. only thing I'd add is that a nice big bench vise helped alot to (to hold the knuckle while you hammer away with the impact wrench).

Looks great!
 
I used a similar kit on mine at the military auto craft shop.. you're right, the right tool makes it almost easy.. only thing I'd add is that a nice big bench vise helped alot to (to hold the knuckle while you hammer away with the impact wrench).

Looks great!

Appreciate it:thumbsup:

And x1,000,000 on the big bench vise:D
 
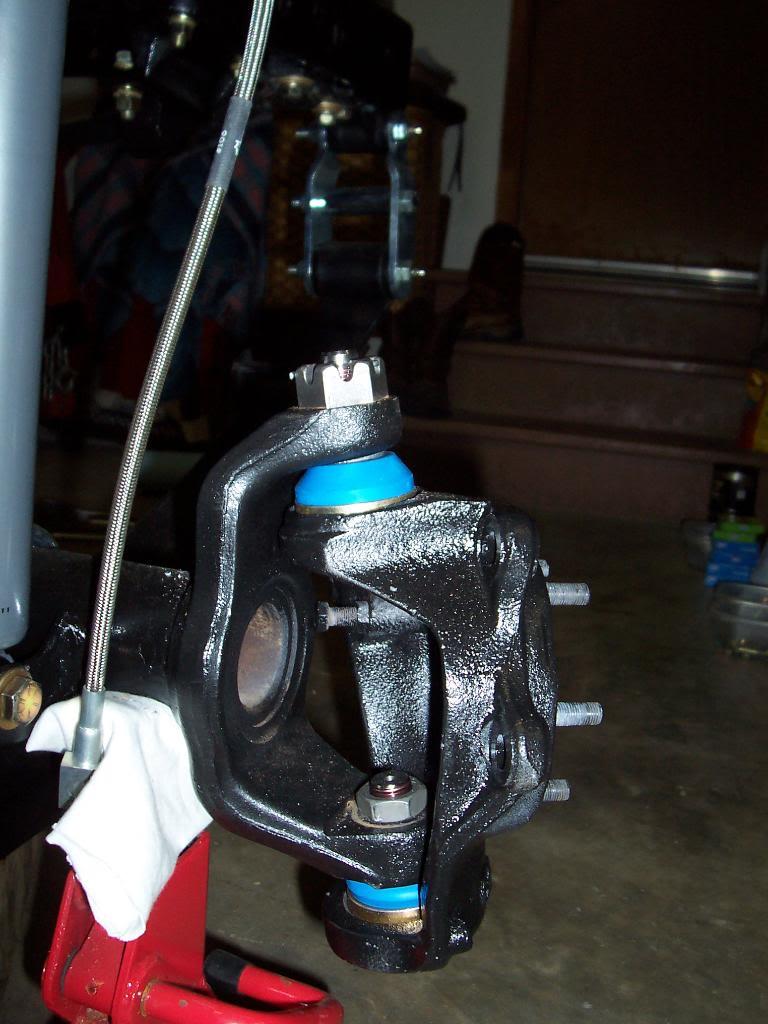
Did a little bit of work last night. Still waiting on 1 upper ball joint (one of the ones I picked up was a cheaper joint that wasn't as strong as the other 3). So, I installed one knuckle on the axle. Fairly simple process. Slide it on, tighten bottom nut to 85 ftlbs, then tighten upper inner split ring to 50 ftlbs, and finally tighten upper nut to 100 ft lbs.

100_5143-1.jpg


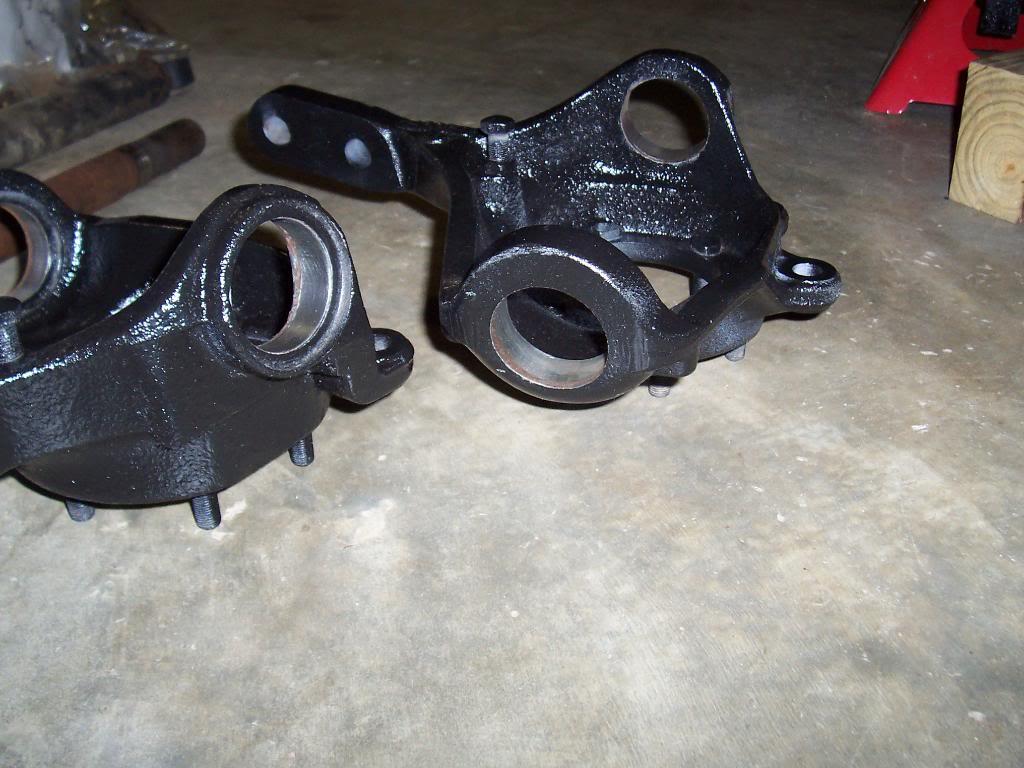
Kind of at a stopping point due to lack of advanced parts procurement on my part. One of the 2 used spindles I picked up the other day was damaged, so I finally just went ahead and bought 2 new ones. They should be here early next week. Waiting on one front gold wheel hub, should be here today. Picking up my 2 new front rotors today. Hopefully, I can at least (if I get my wheel hub today) get the following done this weekend, in between a birthday party, a wedding, and the Saint game:

1) Assemble rotors to wheel hubs with new studs
2) Pack all 4 new wheel bearings with grease, install them in the wheel hubs
If I get that much done, next week when my spindles come in I should be able to:

1) slide front axle shafts in
2) bolt spindles on
3) install pre assembled rotor hubs
4) bolt in lock in hubs

Quick pick of some front end parts.

100_5144-1.jpg


I love Fastenall! Pic of a bag of self locking nuts (the ones that hold the spindles to the knuckles). Only need 12, but since I currently have 3 CJ's, just bought the whole bag of 50 LOL. Its the simple things that make me happy ..........

100_5145-1.jpg


That's it for now, might be no updates next week due to Talladega.

 
Back
Top