• Notice for iPhone users: DO NOT use the image size reduction option when uploading photos to the forum. This causes portrait images to post as landscape. We have added a warning to the image insert pop-up as well.

Another Scrambler Purchase/Road Trip - UPDATE- BODY ON FRAME AGAIN

Decided to tackle one last project I have been meaning to do for the last 10 years - install extended bump stops for the suspension. I have been using the stock bump stops, which are way too short. I have not damaged any shocks, yet, from not having the correct length bump stops, since most of the time when I bottom out a shock it is at low speeds. However, still not a good idea to use the shocks as bump stops. Also, my springs have sagged a good bit, so the correct length bump stops will prevent some not so minor tire/sheet metal contact.

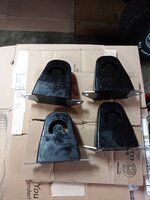
Of course, no one makes bolt on longer CJ bump stops anymore, that I could find. I purchased the following, made for the front end of a YJ Wrangler, KJ09120BK:


They look like this:

20210605_132855.jpg

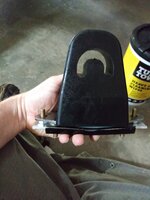
Much longer than stock:

20210605_132913.jpg

But, the bolt holes do not line up with frame holes on a CJ:
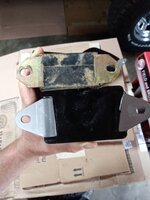
20210605_132950.jpg

'Redneck Ray" fabrication time. Piece of aluminum:
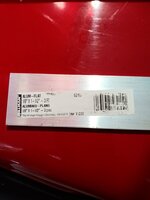
20210605_133415.jpg

Hack saw and a drill press (never mind the one set of holes that is slightly off center, that is before I got the drill press involved LOL):
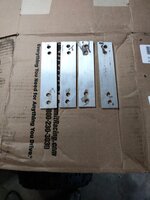
20210605_133428.jpg

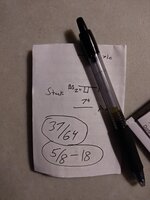
"Redneck Ray" math showing how I came up with this length bump stop being correct front and back:
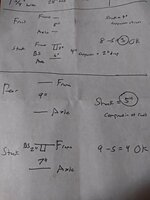
20210605_141719.jpg

Basically:

Front shocks have 4" compression at rest before they bottom out, but OEM bump stop to axle distance is 6".
Rear shocks have 5" compression at rest before they bottom out, but OEM bump stop to axle distance is 7".

By adding the bump stops, I am not losing any travel, I am just preventing the shocks from being the defacto bump stops.

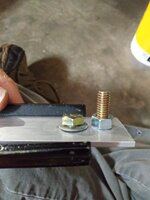
I am using the OEM steel bump stop plates, with my adapter plate, to make all of this work:
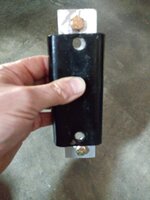
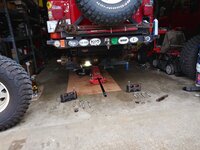
20210605_142339.jpg

20210605_142350.jpg

20210605_143509.jpg

20210605_143525.jpg

Basically, bolt the steel plate/aluminum adapter plate to the frame, AFTER you install the downward facing bolts that hold the bump stops to the aluminum plate. Once the plates are bolted to the frame, slide the bump stops on to the downward facing bolts. Done.

I am not concerned about the aluminum plate bending, because the steel plates on either end of the bump stop are bearing on the bolt heads that secure the whole thing to the frame. The bolts that secure the bump stops to the aluminum plate are right next to the frame bolts, so I should not bend the aluminum over a 1.5" distance. If the aluminum does bend, easy enough to make steel plates. The other reason I used aluminum - it was raining all weekend so i could not paint steel plates!!!
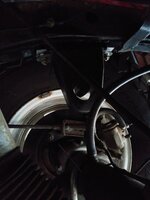
 
And of course, mission creep: "Well, why I am down here, let me change out these slightly bent rear lower shock mount studs".

This is an ongoing issue, I bend these studs all the time. The stock/RE rear lower shock mounting points hang down low, inboard of the frame, so they frequently get smashed into rocks.

Well, I got the first one out, or at least 2/3 of it!!!

20210605_160900.jpg

Here is the other 1/3:

20210605_160909.jpg

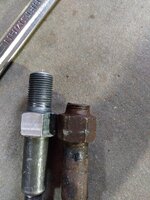
New, next to broke:

20210605_161036.jpg

I drilled it out, but the biggest bit I had on hand was 17/32". And, I do NOT have a 5/8"-18 tap.

20210606_094148.jpg

What I needed, and what you will NOT find on a Saturday night/Sunday morning:

20210605_190415.jpg

The good news, Rubicon Express uses the same lower U-bolt skids at all four corners. And, they are universal. AND, they include a threaded insert on either end of the plate.

20210606_094152.jpg

So, "simple" swap the two rear plates, side to side. This will put the damaged end to the rear of the driver side, where I do NOT need it.

20210606_110236_HDR.jpg

Long term plan: I need to flip the rear U-bolts, relocate the rear lower shock mounts, get them out of harms way. I also need to get a "flat belly" center skid plate. The rear axle, and center skid plate, have extensive rock dragging gouges. I get hung up on these rear u-bolt skids quite often. Since I am NOT going with bigger tires, I need to maximize my existing set up.

These "skid plates" see some action, hence the bent studs:

20210606_110250.jpg

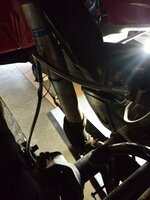
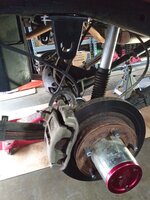
Better picture of a rear bump stop, since the tires were removed for the u-bolt removal, and a "rear end completed" shot:

20210606_120645.jpg

Got all that buttoned up, finished a few more fluid checks, started packing up for PA:

20210606_124052.jpg

That's it for now!!!
 
Made it to Pennsylvania, no problems!!

Once in PA, took a 4 hour each way side trip to lend moral support to @bigwalton, no problems!!

Wheeled one day at Rausch Creek, no problems!!

Last day in PA, scenic trip, no problems. but a new "noise", kind of ignored it!!

On the way home last Thursday, in northern VA, problem!!!!!! The front bearing in the water pump bit the dust. This was the new "noise" from the day before that kind of sounded like a bearing going south. No leaks or warning. Luckily, I stopped for gas in Harrisonburg, VA, which is a pretty good sized town. Fueled up, went inside, came back out, looked under the Scrambler, anti-freeze all over the ground. Opened the hood, grabbed the fan, loose. Luckily, a NAPA 5 miles away had a water pump in stock. Drove the Scrambler there, changed out the water pump in the back parking lot, got back on the road, so only about a two hour delay. No other problems, except driving through the tropical storm Friday morning for the last two hours of the trip. Wipers worked!!!!!!!!!!!!!!

On the water pump, I need to investigate some more. The pump that failed only had around 20k miles on it, so kind of random it would fail so soon. I am almost wondering if the weird sound I have been complaining about/couldn't find was the water pump bearing? Right before the water pump failed, when I went to turn into the gas station after 2.5 hours of interstate driving, I had no power steering assist. No other complaints about the power steering, except the fluid has been getting dark rather quickly. I might swap in a new PS pump, just to be safe. Maybe a failing PS pump put additional load on the water pump front bearing? Anyway, I will dig further into it.

All in all the Scrambler did great. According to the phone GPS, I averaged 73mph on the way to PA and back home, averaged 15.5 MPG. Not too shabby. I ran "medium" trails the one day I wheeled, took some bypasses, but no complaints on the off-road abilities. Really, my only limiting factors off road is ground clearance (33" tires) and not wanting to beat the hell out of the Scrambler, so happy with it.

Not too many pictures, here are a few.

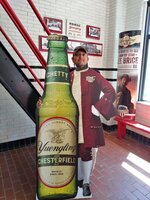
Jason Adams took this picture of yours truly at the brewery tour!!

20210616_112134_HDR.jpg

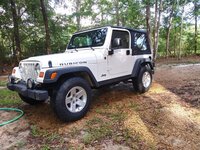
Got home Friday, fixed my girlfriend Tiffany's 2004 Rubicon (original plugs changed out, coil rail replaced to fix a miss, dry rotted tires swapped out for 4 new tires, wash job):

20210619_174920_HDR.jpg

Still need to finish cleaning this one, I did pressure wash and clean the engine/underneath to get rid of all the anti-freeze/coal dust coating:

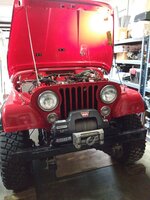
20210624_072539.jpg

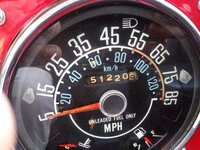
I "finished" rebuilding this one in April of 2011. So, 10 years later, 51,000+ miles, lots of fun!!!!!!!!!!!!!!

20210624_072608.jpg

In 51,000 miles, only "major" issues:

1) Went through (x3) T5 transmissions, lesson learned. If I would have kept the original T176 in place, probably never would have had a problem. But, I am very happy with my Novak 4:1 1st gear AX15, that I finally swapped in after the T5 issues!!!

2) Original engine cracked a piston skirt after about 30k miles of use (no complaints, I didn't rebuild engine when I built the rest of Jeep!!!)

3) Started with 35's, quickly went to 33's, much happier

4) Started with the carb, quickly installed the Mopar MPI, one of the best upgrades made

5) Swapped in the Dana 300 4:l low range gear set from JB conversions, very happy with it

6) Swapped out the 15 gallon tank for 20 gallon tank for increased range, happy with it


Here's to the next 50k miles :cheers:


Will be heading up to Michigan in a few weeks. Between now and then, I need to pull the transmission out and see where the clutch noise is coming from, so, not much time to waste :crazy: :wave:
 
Last edited:
"Swapped out the 15 gallon tank for 20 gallon tank for increased range, happy with it"

Does anyone make a 20 gallon tank which uses the 15 gallon sender hole that you know of? I really want to do this swap but i love my Holley in tank pump and don't want to lose it
 
"Swapped out the 15 gallon tank for 20 gallon tank for increased range, happy with it"

Does anyone make a 20 gallon tank which uses the 15 gallon sender hole that you know of? I really want to do this swap but i love my Holley in tank pump and don't want to lose it

IIRC, the sender hole in a 15 gallon tank is the same size as the 20 gallon tank. The sending units are secured differently;

OEM 15 gallon steel - uses a metal lock ring with tabs and an o-ring to secure sender in the hole
OEM 20 gallon tank - uses a big threaded plastic nut thing with o-ring to secure sender

An OEM 20 gallon sending unit and 15 gallons sending unit are almost identical except for the float arm and depth of the pick up tube IIRC :shrug:
 
That's encouraging. I've never seen them side- by- side lije you but now I'm tempted to try it and see. I'd love an Aerotank 32 gallon tank but the $450 shipping part looses my interest.

Where did you get your 20 gallon tank? Do you recall what all you had to order to do the swap? Thanks!
 
Have to keep the AX15 granny low in mind. Have one as well as a T19. Rather go the AX route with the 4.0, no fussin around other than the 300 adapter.
Hard to get that beer up here. Black and Tan.....that's good stuff.
 
Marlin Crawler is the expert on those and similar transmissions.
 
That's encouraging. I've never seen them side- by- side lije you but now I'm tempted to try it and see. I'd love an Aerotank 32 gallon tank but the $450 shipping part looses my interest.

Where did you get your 20 gallon tank? Do you recall what all you had to order to do the swap? Thanks!
There was a 20g tank amidst a bunch of other stuff for sale in a post a couple days ago - Corpus Christi. Don't know if it still available?
 
With the Michigan trip coming up soon, spent the day after the 4th pulling the transmission out of my Red Scrambler to see where the noise was coming from.

I have been having a noise, clutch pedal depressed ONLY, coming from the clutch area. Does not matter if the transmission is in gear or not, I will get a "bad bearing sound". I assumed it was the the throw out/release bearing, I was wrong.

Very glad I pulled the transmission out NOW, instead of putting any more miles on it, I dodged a ,major bullet.

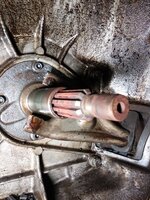
I will start with the good news, the transmission input shaft and front bearing are fine. The input shaft has some rust discoloration on the end that will clean off with some steel wool. No pits, grooves, or damage, so very happy about that. Note the "red rust" dust. The black stuff inside the bell housing is grease from the throw out bearing.

20210705_125959.jpg

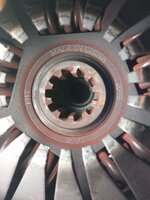
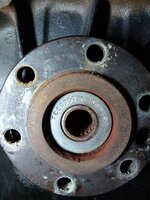
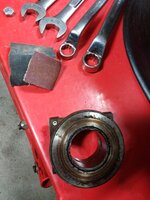
Here is where the noise was coming from, the pilot bearing:

20210705_130046.jpg

20210705_131029_HDR.jpg20210705_131124.jpg

I caught this just in the nick of time. The "pellets" behind the bearing are what I assume are remnants of the grease that the bearing came "packed" with, more on this in a bit. All the rollers are still in place, and spin, but obviously bone dry. This bearing was definitely on borrowed time. I have not "submarined" this Scrambler under water, so the grease did not wash out. The release bearing, which is more prone to wash out, is still mostly fine/full of grease, as evident by the inside of the bell housing. The original grease was just not up to snuff, I guess??

Since I grew up/still drive manual transmissions, and Lord knows I have done my fair share of clutch jobs/transmission rebuilds, I am very conscientious about the clutch pedal: basically, I only use it to shift. I do not ever sit at red lights, or on the trail, with the clutch pedal depressed. I always put the transmission in neutral, let the clutch up. I know what a PIA changing out a pilot bearing/throw out bearing is, so I try to prolong their life as long as possible. This bearing started "singing" two years ago.

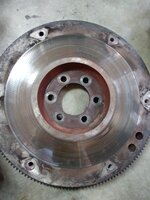
Flywheel looked good, no grooves or discoloration:

20210705_131747.jpg

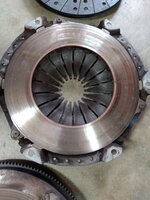
Pressure plate looks good:

20210705_131755.jpg

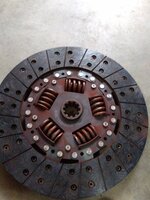
The disc looks fine, too:

20210705_131801_Burst01.jpg

Since I have it tore down, I am installing a new flywheel, clutch disc, pressure plate, throw out bearing, and pilot bearing.

I am using a stock 4.0 pilot bearing. I tried to remove it with the old "pack some bread behind it and drive it out with hydraulic force", that was a big no. I do NOT like beating on the crank shaft, or using a slide hammer on it, so I drilled the bearing out. More time consuming, but less risk of damage to the crank shaft bearings, IMO.

I tried to pry it out, broke the pry bar. No amount of "grease or bread" packing was going to get this sucker out!!!

20210705_160752.jpg

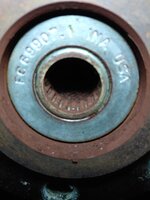
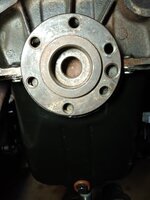
The remnants of the pilot bearing. I drilled out the outer spacer, then cut it with a Dremel cut off wheel/router bit, like removing a pressed on axle bearing inner collar. Once it was cut all the way through, the pressure is relived , it came right on out.

20210705_160739.jpg

NAPA was going to warranty it, IF I could have got it out in one piece. It was not worth it.

Besides a very slight mark where the drill bit went a hair deep at 6 o'clock, no damage to the crank.

20210705_160804.jpg
 
The throw out bearing, which I "assumed" was the cause for the noise, was actually still OK. Turns free, can feel it is still full of grease, has very slight concentric play, but not really that terrible.

20210705_190229.jpg

So, I "assume" that this pilot bearing was the cause of my two problems:

1) Nosie with the clutch pedal depressed
2) I could not get a perfectly smooth clutch engagement anymore, some times (I guess this bad pilot bearing resulted in some not smooth input shaft/to transmission main shaft speed differential engagement???)

The replacement bearing, just like the one I removed, came "packed" with this yellow grease:

20210705_190218.jpg

This yellow grease is what failed on the bearing I just removed.

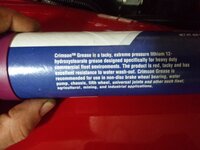
So, I am thinking of cleaning this grease out 100%, and packing it with a "better" grease. But what would be "better" for this application?

It needs to be sticky so it just doesn't fling off and contaminate the disc. Not sure if wheel bearing grease, or chassis grease, would be the best choice?

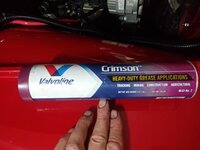
Maybe a high content (70% or higher) molybdenum grease, something like this: (I have a tube already for RC car stuff LOL)


Or, maybe brake caliper lubricant:


Open to suggestions?
 
The throw out bearing, which I "assumed" was the cause for the noise, was actually still OK. Turns free, can feel it is still full of grease, has very slight concentric play, but not really that terrible.

View attachment 95372

So, I "assume" that this pilot bearing was the cause of my two problems:

1) Nosie with the clutch pedal depressed
2) I could not get a perfectly smooth clutch engagement anymore, some times (I guess this bad pilot bearing resulted in some not smooth input shaft/to transmission main shaft speed differential engagement???)

The replacement bearing, just like the one I removed, came "packed" with this yellow grease:

View attachment 95371

This yellow grease is what failed on the bearing I just removed.

So, I am thinking of cleaning this grease out 100%, and packing it with a "better" grease. But what would be "better" for this application?

It needs to be sticky so it just doesn't fling off and contaminate the disc. Not sure if wheel bearing grease, or chassis grease, would be the best choice?

Maybe a high content (70% or higher) molybdenum grease, something like this: (I have a tube already for RC car stuff LOL)


Or, maybe brake caliper lubricant:


Open to suggestions?
Possibly Lucas “Red and Tacky”? It’s one of the best greases out there IMHO.
 
Have you considered using a bushing instead of a bearing? I've never been a fan of bearings. When they go bad they can chew up the input shaft on your trans. I've seen this more than once. Bushings are a lot more forgiving.
 
Have you considered using a bushing instead of a bearing? I've never been a fan of bearings. When they go bad they can chew up the input shaft on your trans. I've seen this more than once. Bushings are a lot more forgiving.
I second that!
 
Have you considered using a bushing instead of a bearing? I've never been a fan of bearings. When they go bad they can chew up the input shaft on your trans. I've seen this more than once. Bushings are a lot more forgiving.
Yes, but it would take some searching/work.

I am running a 4.0, T176 bell housing, and AX15. I am using the larger/outer opening in the back of the crank for the stock 4.0 pilot bearing. The input shaft does not go all the way into the small cavity at the end of the crank, where a bushing could go.

That being said, I could remove the bearing from the larger outer ring and install a bushing, but I will need to find something that will fit.

If you look at the earlier pictures, you will see the input shaft end is riding on the bearing in the outer ring of the crank.

The stock 4.0 pilot bearing is a two piece deal, an outer adapter donut and the inner bearing in the center.
 
I used a bronze bushing on the CJ5 4.0 swap. Seem to remember that the 4.0 to T18 via 176 housing didn't allow for a pilot bearing so a bushing it was. The 4.0 was a 94. No complaints.
 
Back
Top