

You are using an out of date browser. It may not display this or other websites correctly.
You should upgrade or use an alternative browser.
You should upgrade or use an alternative browser.
CJ-8 resin master build-up...step by step
- Thread starter jeffs396
- Start date


 Sorry I could'nt chat longer had friends coming over to help with the trike build.

Jeremy
Scrambler Fanatic
- City
- Carlisle
- State
- PA
model kit
Your fit and finish is MUCH better than the one I built a few years ago, ( I have it around here some where, its probably broken in a box, If I find them I'll post up my build in what ever sad state they are in. I started mine with a Revell and monogram CJ7s (same kit), built the rear of the body with evergreen plastic. The motor a 4.0 from a wrangler kit, replaced the buick V6 the cj7 kit came with It would be relatively easy to back date the 4.0 to a 4.2 engine by adding the carb from the Cj motor and a little file work. Spark plug wires are dental floss dipped in glue for the boots then dipped n paint and left to dry before attaching them. Radiator hoses were stretched sprue The high back bucket seats, mirrors and taillights also came out of a Tamyia YJ wrangler. The Tamiya kit is much higher quality in the detail parts.
My BFG MT came off a 1/20 scale Lindberg Baja racer GMC Sonoma pick up kit number 72505, the only parts of that kit I used. They scale out to 36" in 1/24 scale If you do this you will need to make new springs, the red model used layered ever green to make of the spring packs the blue model used brass and soldered together. You will also have to putty up the recesses in the axle molding as they will be visible. if you lift your model. I used stretched sprue for brake lines and evergreen tube and kit parts for the exhaust.
The BFG AT came off a 1/20 scale police chevy blazer kit form about 1980, They were slit left right plastic moldings that were almost impossible to make look right. regardless they are another choice if you plan on lifting your kit and can find the donor kits.
If you need anything let me know. Going to go find my model now.
Edit found them all busted up. I wish I had photos of them done and complete. These where made maybe 10 years ago well before I started resin casting or airbrushing. Even so I was pretty pleased with some of the scratch built parts like the seat belts (scale 3" wide fabric medical tape with paper clip buckle and leave springs.
That said your master looks much better than my attempts so I will be interested in a couple to fix up these basket case wrecks. The blue body turned out a little better than the red one. I never did quite get the rear fender flares sculpted right from squadron putty. Sorry for the shaky pictures my good camera does not have a charge on it.


Your fit and finish is MUCH better than the one I built a few years ago, ( I have it around here some where, its probably broken in a box, If I find them I'll post up my build in what ever sad state they are in. I started mine with a Revell and monogram CJ7s (same kit), built the rear of the body with evergreen plastic. The motor a 4.0 from a wrangler kit, replaced the buick V6 the cj7 kit came with It would be relatively easy to back date the 4.0 to a 4.2 engine by adding the carb from the Cj motor and a little file work. Spark plug wires are dental floss dipped in glue for the boots then dipped n paint and left to dry before attaching them. Radiator hoses were stretched sprue The high back bucket seats, mirrors and taillights also came out of a Tamyia YJ wrangler. The Tamiya kit is much higher quality in the detail parts.
My BFG MT came off a 1/20 scale Lindberg Baja racer GMC Sonoma pick up kit number 72505, the only parts of that kit I used. They scale out to 36" in 1/24 scale If you do this you will need to make new springs, the red model used layered ever green to make of the spring packs the blue model used brass and soldered together. You will also have to putty up the recesses in the axle molding as they will be visible. if you lift your model. I used stretched sprue for brake lines and evergreen tube and kit parts for the exhaust.
The BFG AT came off a 1/20 scale police chevy blazer kit form about 1980, They were slit left right plastic moldings that were almost impossible to make look right. regardless they are another choice if you plan on lifting your kit and can find the donor kits.
If you need anything let me know. Going to go find my model now.
Edit found them all busted up. I wish I had photos of them done and complete. These where made maybe 10 years ago well before I started resin casting or airbrushing. Even so I was pretty pleased with some of the scratch built parts like the seat belts (scale 3" wide fabric medical tape with paper clip buckle and leave springs.
That said your master looks much better than my attempts so I will be interested in a couple to fix up these basket case wrecks. The blue body turned out a little better than the red one. I never did quite get the rear fender flares sculpted right from squadron putty. Sorry for the shaky pictures my good camera does not have a charge on it.


Last edited:

jeffs396
mini Scrambler
- City
- NE
- State
- OH
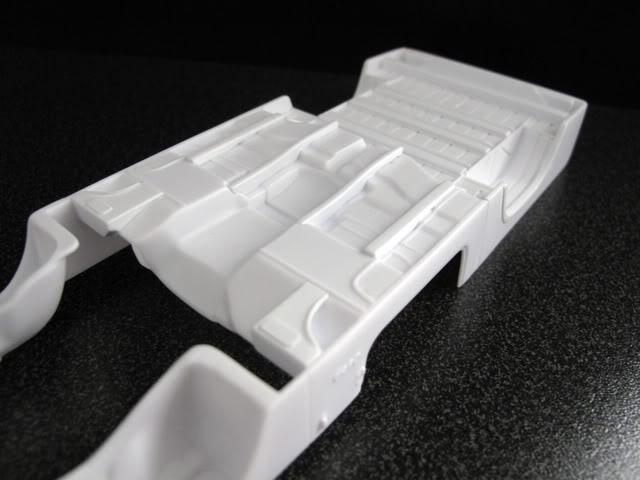
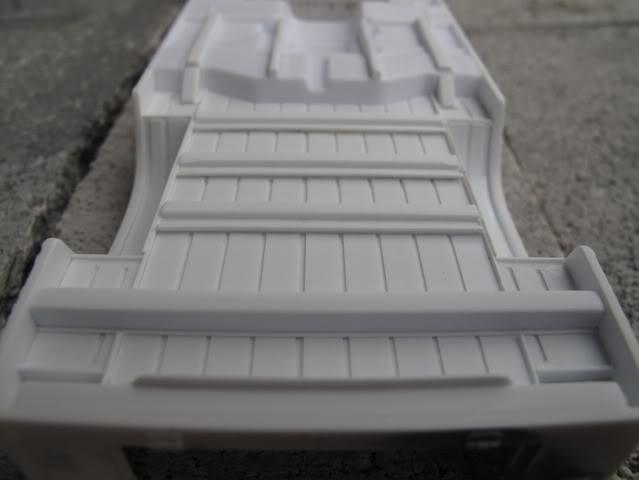
Sometimes you have to go backwards before you can proceed...another one of Revell's inaccuracies reared it's ugly head. After building the fuel filler & staring at the rear tub, something didn't look quite right...a quick measurement revealed the distances from bedside to taillight varying by .060" from one side to the other. That's almost 1.5" full size! Too much I say, so out comes the razor saw to cut off the tailgate frame...under-tub detailing almost completed here also...

Here's how much it was off...

Here's how much it was off...

jeffs396
mini Scrambler
- City
- NE
- State
- OH
Still pluggin' away at this...wow, I've got over 100 hours into this & still not finished! Getting close though...didn't think the details would take this long  Anyway, here's the bulkhead, almost finished...have about 12 hours just in it...
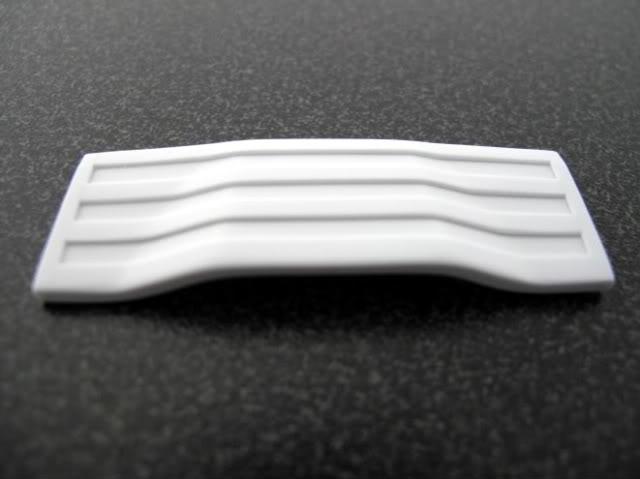
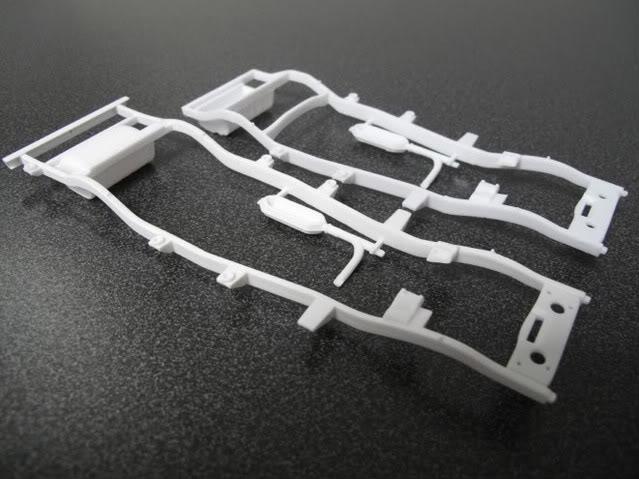
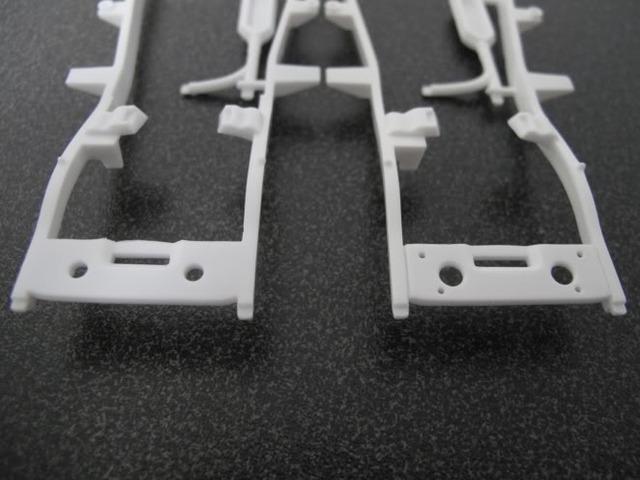
Here's the frame...wasn't originally going to include a frame with the transkit, but it takes so much work to convert the -7 frame over, I decided to have it cast also...It'll save everyone a bunch of time, so you can enjoy your little Scrambler sooner
Front crossmember detail...20 minutes of time can make a big difference!
Anyway, here's the bulkhead, almost finished...have about 12 hours just in it...
Here's the frame...wasn't originally going to include a frame with the transkit, but it takes so much work to convert the -7 frame over, I decided to have it cast also...It'll save everyone a bunch of time, so you can enjoy your little Scrambler sooner
Front crossmember detail...20 minutes of time can make a big difference!
Last edited:

1x1_Speed_Craig
Simplify...
- City
- Greeneville
- State
- TN
Amazing work, Jeff. Nice job.

- City
- Dexter
- State
- MI
Still pluggin' away at this...wow, I've got over 100 hours into this & still not finished!
Sounds like a Jeep project to me!

Looks great!

- City
- Cincinnati
- State
- Oh
Sounds about right.Great progress, Jeff. 112 hours for a 1/24 scale Scrambler....so I'm on track for almost 2700 hours for a full sized Scrambler, then....

jeffs396
mini Scrambler
- City
- NE
- State
- OH
Amazing work, Jeff. Nice job.
Sounds like a Jeep project to me!
Looks great!
Great progress, Jeff. 112 hours for a 1/24 scale Scrambler....so I'm on track for almost 2700 hours for a full sized Scrambler, then....
Thanks, guys! Yeah, 112 hours and not finished yet
 Wife keeps asking if I'm done with my "toy" yet My daughter asks all the time if the little Jeep is done, and why I'm not working on the real one in the garage...this one doesn't take funds to work on, that's why!


- City
- Thayer
- State
- KS
Jeff,
I just received word from Don Briney (Bobcat) that you are donating (3) kits for our raffle at this year’s SOA National Event. That is awesome and behalf of the SOA Events Committee I want to thank you and let you know that we really appreciate it. I will get it posted on the official list for the raffle items.
I have really enjoyed this thread and admire your talent.
Pappywaho
Event Committee Chairman
I just received word from Don Briney (Bobcat) that you are donating (3) kits for our raffle at this year’s SOA National Event. That is awesome and behalf of the SOA Events Committee I want to thank you and let you know that we really appreciate it. I will get it posted on the official list for the raffle items.
I have really enjoyed this thread and admire your talent.
Pappywaho
Event Committee Chairman
jeffs396
mini Scrambler
- City
- NE
- State
- OH
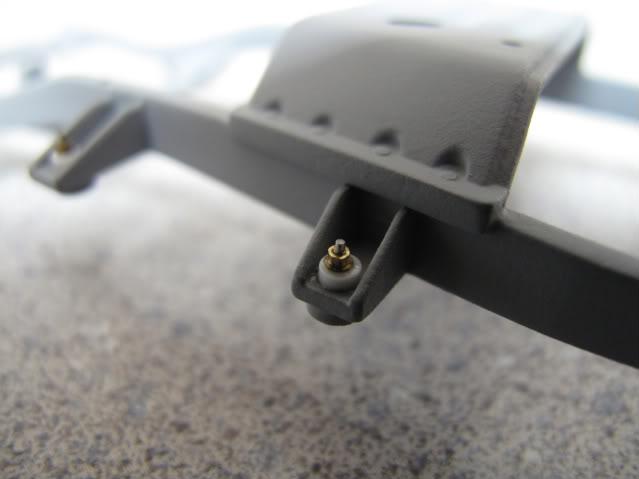
Frame is finished! Here's the tiny brass nuts & washers I added with styrene spacers for body mounts...*EDIT*...that's what I get for looking at my Jeep for reference! I see that your Scramblers use bolts installed into threaded inserts in the tub...my J20 uses bolts dropped down thru like this. No biggie, after I get these back from the caster, I'll sand off the exposed threads and make it look like a bolt head...I'll have a bit of other cleanup to do before I ship to you anyway 
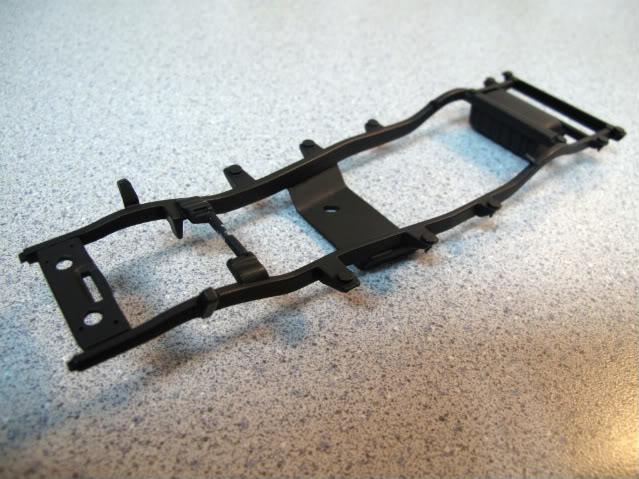
Here's the frame primed...it's on it's way to the caster now! The rod in between the motor mounts is there as a passage for resin to flow in the mold...I'll remove it from each copy before shipment.
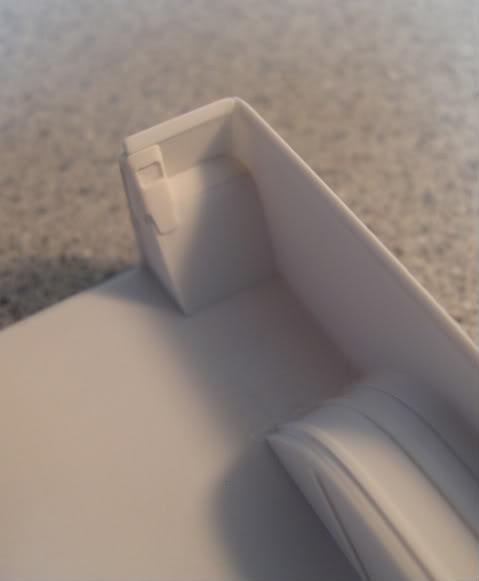
Still working on the little details of the tub...
Here's the frame primed...it's on it's way to the caster now!
The rod in between the motor mounts is there as a passage for resin to flow in the mold...I'll remove it from each copy before shipment.
Still working on the little details of the tub...
Last edited:
1x1_Speed_Craig
Simplify...
- City
- Greeneville
- State
- TN
This project just amazes me, as much or more than 80% of the actual Jeep projects I have seen. 