• Notice for iPhone users: DO NOT use the image size reduction option when uploading photos to the forum. This causes portrait images to post as landscape. We have added a warning to the image insert pop-up as well.

IAFFCJ 81 Scrambler

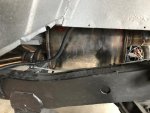
Took Chiefwaho’s advice and installed some outer seals to keep the mud from getting back in the axle. Wasn’t looking forward to pulling them all apart again but second time in a month went much faster. Also some unsolicited advice be sure the axle tubes are very very clean or you will play heck getting these to go in. Driver side very hard. Spend more time cleaning up passenger side and it slid right in.
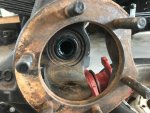
CD92085D-DF9B-42AD-B098-E89CD10D552D.jpg
 
HUGE MILESTONE TODAY

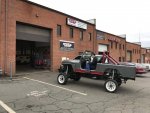
I drove the scrambler out of the garage and around the cul de sac. It was awesome. Of course the transfer case won’t shift in to high range and the lack of exhaust brought most of the neighbors out but for me awesomeness.

Spoke to advanced adapters today and we determined that due to the used case I bought sitting with no oil for so long the synchronization gears are bound up. I’m gonna have to pul the case and break it open to get everything moving again. Does not sound hard but not something o wanted to do. Well out comes the transfer case tomorrow.
 
Congrats on the first drive! That’s a great feeling.

Where did you get the motor for your 8274?
 
Congrats on the first drive! That’s a great feeling.

Where did you get the motor for your 8274?

From DB electrical. They have a regular website along with an eBay store. I got mine from the eBay store.
 
The wife helped me pull the Atlas today and I cracked it open. After some work with a pry bar everything moved as it should. Took the chance to adjust the cable shifters before I installed everything again. Now it’s all back together and shifts as it should.

Took it for a short test drive that pulled the neighbors out to the street again. I will say that with little tires and low gears the 0 to 60 is pretty quick. And with open headers it is awesome loud. ?

Off to the exhaust shop early next week.
 
Got into the exhaust shop yesterday. They went a little different route than I had in my head but I asked for high and tight and that's what I got. They did a great job stuffing the exhaust in the small area above the flat skid. I also asked the owner to make it sound good but not hateful and I think they hit that right on the head with the muffler the chose. Overall I am quite happy to have a full stainless exhaust that sounds good and is tucked up out of the way.

IMG_3129.jpg
IMG_3135.jpg
IMG_3137.jpg
 
Quick update: I have spoken to the shop that did a lot of the work on my axles and has built quite a few cages for folks in the area along with quite a few Ultra 4 cars. I have made the decision that this is where I want to get the work done and we have made a plan to move forward. However they are booked up until the end of August so the cage work won't happen before Nationals this year. I had come to terms with this in my head but still would have liked to have it done for June. As work has gotten in the way for the shake down runs I had planned it probably is for the best as I will just stick with the moderate stuff and figure out what she can do then add the cage later.

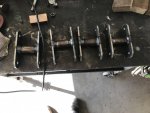
I also kept looking at the long shackles that i had on this originally and liked them less and less each day. So out came my tape measure and I decided I wanted to go with 4.5 in shackles not the 6.5s that I had. I started looking for a set. Well very few companies tell you the hole to hole measurement of their shackles just how much lift they provide.
so sick of doing that math and not finding what I wanted I set out to build the set I wanted knowing that if they don't work they would be great on my CJ7.

IMG_3139.jpg
IMG_3140.jpg
IMG_3141.jpg
IMG_3142.jpg

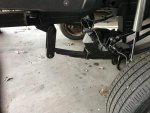
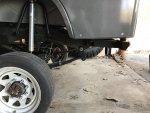
This also gave me a reason to play with the welder which has been sitting a while. The effort was absolutely worth the reward and It lowered the stance a full inch all the way around, made the caster and pinion angles for the front axle significantly better and made everything just look right.

Went from this:
IMG_3145.jpg

To this next step is to put some big shoes on this and see if they ride OK.
IMG_3144.jpg
 
Have the big tires on it by next week and I pick it up and test it out! :cheers: :D
 
Quick update: I have spoken to the shop that did a lot of the work on my axles and has built quite a few cages for folks in the area along with quite a few Ultra 4 cars. I have made the decision that this is where I want to get the work done and we have made a plan to move forward. However they are booked up until the end of August so the cage work won't happen before Nationals this year. I had come to terms with this in my head but still would have liked to have it done for June.

Just come up to Kansas a couple weeks before the National, bring a trailer of beer and we can bend up some tube.
 
Just come up to Kansas a couple weeks before the National, bring a trailer of beer and we can bend up some tube.

If I had the time to take off I would do this in a second.
 
After some drive shaft adjustments and driving around the neighborhood and fixing a few small issues I think the Scrambler is ready to go mechanically a trip out wheeling will probably be the next test.

With the MUST happens stuff finished I was able to knock out some stuff that had been bothering me. When I made the seat bracket for the passenger seat I failed to take into account the offset of the mounting holes on a flip forward bracket and the passenger seat was set in 2 in too far and made hard contact with my console. So I pulled the seat and brackets and added some outriggers so I could move the seat out to its proper location.
Sorry forgot to take pictures.

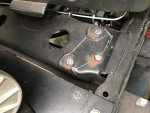
I then was quite bothered by the fact that my steering shaft just hit the power steering pulley when I turned to lock on pass side. I had tried many ways to get some clearance and finally thought that maybe the fact that I used a MORE bracket that moved everything forward changed the angles I needed. So I picked up the stock location bracket from MORE (I will use the other one on the 7 it needs it badly) and mounted everything up. Well this was not the problem everything hit just like before. After a few hours trying to get everything to work the way I wanted I decided It was time to make it work and filled the mounting holes in the frame and moved them to where I needed them so everything cleared as it should. Made for a few more adjustments once done but all seems to clear and work as it should now. :thumbsup:
IMG_3242.jpg

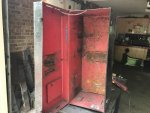
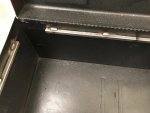
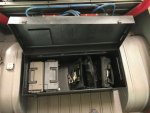
I have also been trying to figure out what to do for tool storage and couldn't decide on what route i wanted to go so i went with build it from what you have lying around. Years ago the fire station was throwing out a storage box for a K-12 saw and i saved it from the dumpster. With some scrap wood and some truck bed coating in a spray can voila tool storage. Now I just need to figure out what I am going to do for a jack not sure the high-lift will lift the tires off the ground.

IMG_3231.jpg
IMG_3232.jpg
IMG_3233.jpg
IMG_3235.jpgIMG_3237.jpg
IMG_3238.jpg
IMG_3239.jpg
 
Good idea with the tool storage!

I have had this box for almost 15 years and think it might have been at least that old before I got my hands on it. The top tray made for a pretty good amount of room for sure. Now I have to fill it and I have no clue what tools to put in it. I was pretty good with what I need with teh brown one this one just not sure I am sure it will be too much for the first few trips anyway.
 
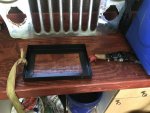
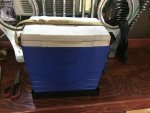
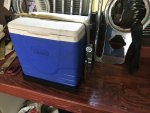
Used some stuff I had lying around and built a cooler mount to keep everything where it should be when bouncing around. Just need to figure out where I’m gonna mount it.

A48677E5-E00A-4BA6-8BD7-912CA8A60849.jpeg196F0960-E633-43E0-AFD0-E83BA033827C.jpeg6DE577D6-8A09-40B8-9B76-F139A5F61496.jpeg
 
Back
Top