

You are using an out of date browser. It may not display this or other websites correctly.
You should upgrade or use an alternative browser.
You should upgrade or use an alternative browser.
IAFFCJ 81 Scrambler
- Thread starter IAFFCJ
- Start date

- City
- Manassas
- State
- VA
I've tried the small flair tools and never had much luck. Think you talked me into checking them out. Jeeps coming out nice.
Thank you it’s getting ver close to drive around time. Going to measure for drive shafts today and try to find some money to order them.
The flair tool has taken some of my hatred for doing brake lines away.
- City
- Manassas
- State
- VA
Brake line fix yesterday seems to have worked ill try and bleed them tomorrow maybe. While I had fluid all over the floor I decided that I would put the transmission temperature sensor in the pan, i knew that if I left it for later it would never happen. ordered a weld in bung and pulled the pan. I was expecting a huge mess but was pleasantly surprised and only had a little drip when I was moving the shifter to check for clearance.
Measured a bunch of times and finally found a spot to put it that would be go in the pan and be out of drive shaft and shifter linkage pathways. Cleaned it all up and drilled a hole in my transmission pan. Then was hoping that I was skilled enough with the welder to make a leak free weld. so far so good and I even made sure the fluid was up over the sensor to check for leaks.

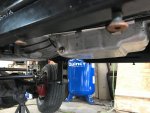
I also spent some time doing some interior wireing. Getting pretty close to ready it will be great when my dash comes back and I can tie the wireing up and make it all neat. So far everything is going as planned. I figured out that I had my ram plumbed backwards so I swapped that around and welded the mounts all in. Ram is mounted I will need figure out some hose management as it looks like one will end up right under my bump stop at full stuff. Progress.
Measured a bunch of times and finally found a spot to put it that would be go in the pan and be out of drive shaft and shifter linkage pathways. Cleaned it all up and drilled a hole in my transmission pan. Then was hoping that I was skilled enough with the welder to make a leak free weld. so far so good and I even made sure the fluid was up over the sensor to check for leaks.
I also spent some time doing some interior wireing. Getting pretty close to ready it will be great when my dash comes back and I can tie the wireing up and make it all neat. So far everything is going as planned. I figured out that I had my ram plumbed backwards so I swapped that around and welded the mounts all in. Ram is mounted I will need figure out some hose management as it looks like one will end up right under my bump stop at full stuff. Progress.
- City
- Manassas
- State
- VA
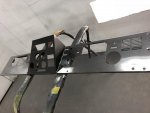
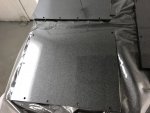
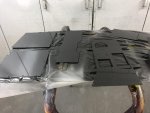
Guy who was helping me out with paint on the dash and console just text that they are done. I should have time next week to make a big loop of northern and central Virginia to pick these up and another large addition if all works out. Spent the last three days trying to get all the wiring ready for the console to come back. I think I’m ready. Things are coming together.



- City
- W-S
- State
- NC
This one's gonna be nice!


- City
- Manassas
- State
- VA
Looks great! If you’re in the neighborhood, give be me a call.
Might just be. Should be next week if I can get everyone involved lined up. I’ll give ya a shout when I get it figured out.

- City
- Manassas
- State
- VA
If you get close to Indiana.......
It’s a big loop just not quite that big. ?

- City
- Gordonsville
- State
- VA
Funny I think I've seen these parts somewhere...


- City
- Manassas
- State
- VA
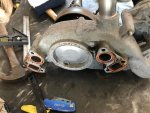
Now that the engine runs and I have been running it from time to time i have started to find all the leaks. Had a coolant leak that I was guessing was a water pump gasket. So off came the water pump and sure enough pretty obvious leak. First water pump removal on an LS for me and it was relatively easy. Still make a mess but not to difficult.

Also made a support for the air intake. To make everything fit I had to use a soft 90 on the throttle body and i was pretty sure it was going to move around without some help. Was able to use some existing bolt holes on the head and some scrap I had lying around. some heat and a hammer and voila intake support.
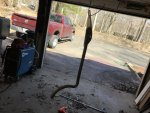

The Wife also helped me bleed the brakes today. Not 100% sure they are done but they will stop it when I roll it around in the garage. Pretty sure that I have found all the leaks, man this break system has been a bear.
Also made a support for the air intake. To make everything fit I had to use a soft 90 on the throttle body and i was pretty sure it was going to move around without some help. Was able to use some existing bolt holes on the head and some scrap I had lying around. some heat and a hammer and voila intake support.
The Wife also helped me bleed the brakes today. Not 100% sure they are done but they will stop it when I roll it around in the garage. Pretty sure that I have found all the leaks, man this break system has been a bear.
- City
- Manassas
- State
- VA
Spent the day running around central Virginia picking up parts. Console and dash fro JeeperDDs place. Then a set of rollers fro another friend down that way and finally over and picked up a set of 42s that will fit my H1 rims. Now time to see if I figured everything right. Hope they fit.


mysunnshine
Legacy Registered User
- City
- Phoenix
- State
- AZ
You have been building the suspension without the tires that you were going to use?
- City
- Manassas
- State
- VA
You have been building the suspension without the tires that you were going to use?
Well yes. I’ll be the first to admit I should have done many things in different orders it just kind of all happened the way it did. I have learned a great deal about what needs to happen when and could have been done long ago if I hadn’t had to back track a few times.
This was the original plan for tire size just took until now to find some that I could afford. Will certainly start withtores and wheels at the beginning of any other build.
- City
- Manassas
- State
- VA
$$$$$$
Saw saw time!
That's right I will not hesitate to cut the interference out. These ARE going on.

- City
- Kingman
- State
- Ks
Will it fit through your garage door or do you have another place to keep it once the 42's go on? Mine is on RE1.5" SOA springs and 37" tires and the soft top bow keeps me from going through a standard garage door opening. I had to take tires to 4 psi to get it in. If I had the 1/2 cab on then it would probably go in.
- City
- Manassas
- State
- VA
Will it fit through your garage door or do you have another place to keep it once the 42's go on? Mine is on RE1.5" SOA springs and 37" tires and the soft top bow keeps me from going through a standard garage door opening. I had to take tires to 4 psi to get it in. If I had the 1/2 cab on then it would probably go in.
No not a chance of it fitting with the big tires. I’ll have to swap the rollers on to get it in the garage.
I have a full hard top and hard doors for winter storage once something else finds its way into the project area of the garage.
Still working on the wife for a bigger garage as I have 3 vehicles with no permanent indoor storage and I don’t like it.
- City
- Manassas
- State
- VA
I have a set of re-centered H1 rims that I am planning on using for this rig that had military tires on them so in order to mount the new tires I picked up I needed to pull them apart and get the inner ring out. Turns out that is pretty demanding a task.

Used a spray bottle with soapy water and lubed everything up really well.

Then ran a rope through the bumper of the scrambler and around the PVC insert, wedged the tire against the spring and used my weight to get the insert to spin 90 degrees.


Then readjusted the rope and used me weight to get get the insert to slip out.

Once I figured out the pattern it went pretty fast but the first one fought pretty hard. I had a hard time finding any information on how to get these out so I wanted to pass on my experience. There is lots of information on how to install them but little about removing the inserts.
Used a spray bottle with soapy water and lubed everything up really well.
Then ran a rope through the bumper of the scrambler and around the PVC insert, wedged the tire against the spring and used my weight to get the insert to spin 90 degrees.
Then readjusted the rope and used me weight to get get the insert to slip out.
Once I figured out the pattern it went pretty fast but the first one fought pretty hard. I had a hard time finding any information on how to get these out so I wanted to pass on my experience. There is lots of information on how to install them but little about removing the inserts.