• Notice for iPhone users: DO NOT use the image size reduction option when uploading photos to the forum. This causes portrait images to post as landscape. We have added a warning to the image insert pop-up as well.

It's a wreck

I got to go to work yesterday and spent a good 3 hours reading through spankyjrs build. That one is just amazing. The dedication he put into that build is unsurpassed. Beautiful ride and not a single part went back on without some paint. It makes me wish I had more time and deeper pockets, but the good Lord has blessed me immensely so I will just keep on keeping on.

So I have a few updates.
All of the body mount bolts came out without a twisted nut hidden in the body.
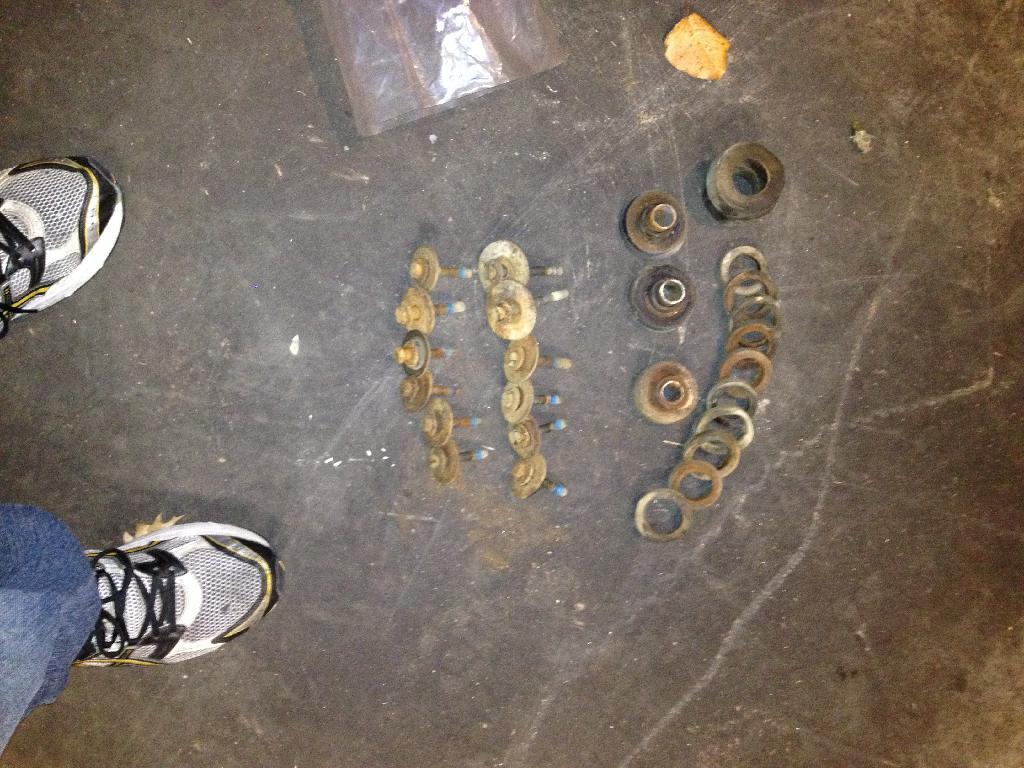
03D83BEC531A49E98E6DD1F240650E2E_zpsmgsw-1.jpg


Next I attempted to remove the factory roll bar, with some slight issues. Those dadgum torx heads are garbage and would strip if I just looked at them wrong. Got 10 of the 16 out. I think the P.O. had stripped some of them while putting them in. One of them is broke off in the nut but I think I will be able to get it out from underneath with a pair of channel locks. The ones that were stripped got a 10mm nut welded to the top of them and I eventually won the battle. The roll bar is setting next to the house now.
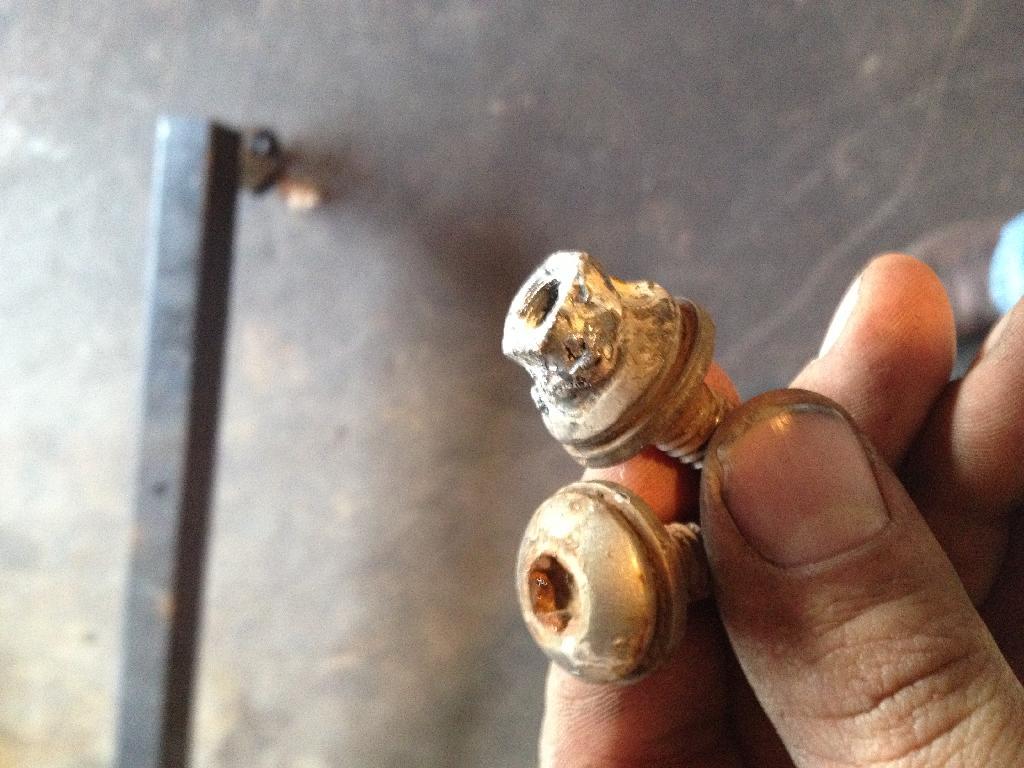
EE3B837BEB604AFDAC963F6E4613BB71_zpsihvq-1.jpg


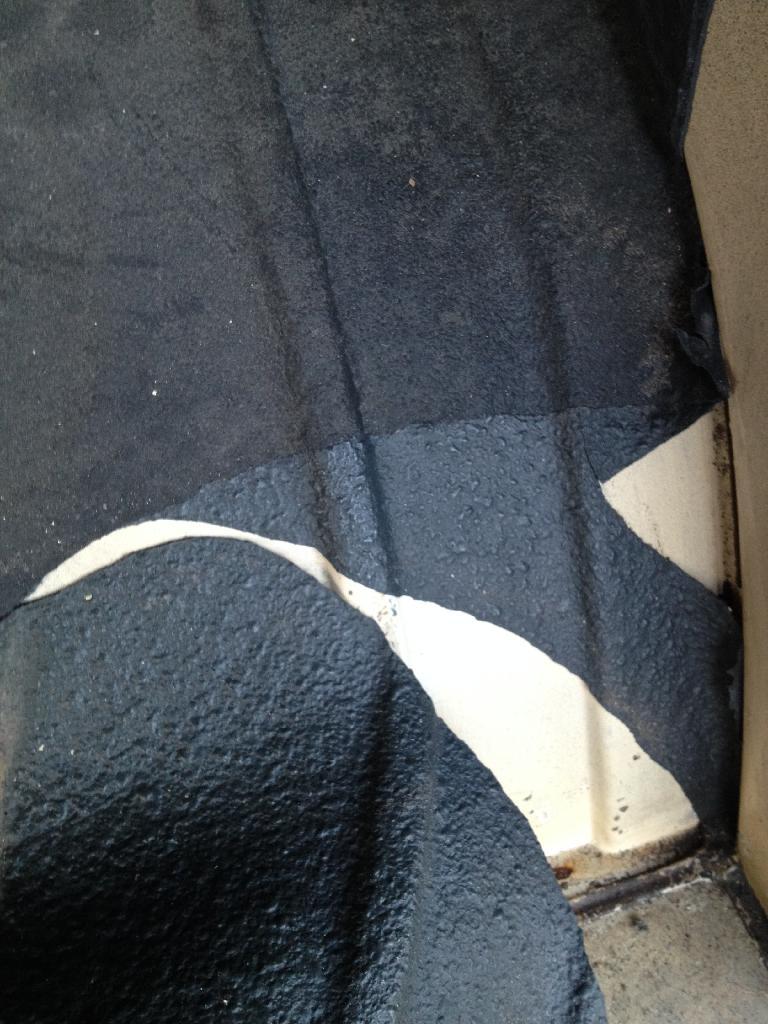
Next on my punch list today was to finish tearing all the bedliner out of the bed area. I started it two nights ago but it proved to be really in there. There were two layers and the one on top was some tough stuff. Very hard and adhered to the older liner extremely well.
41CB1637C552448EA13E27BB72F61D96_zps3k7n-1.jpg

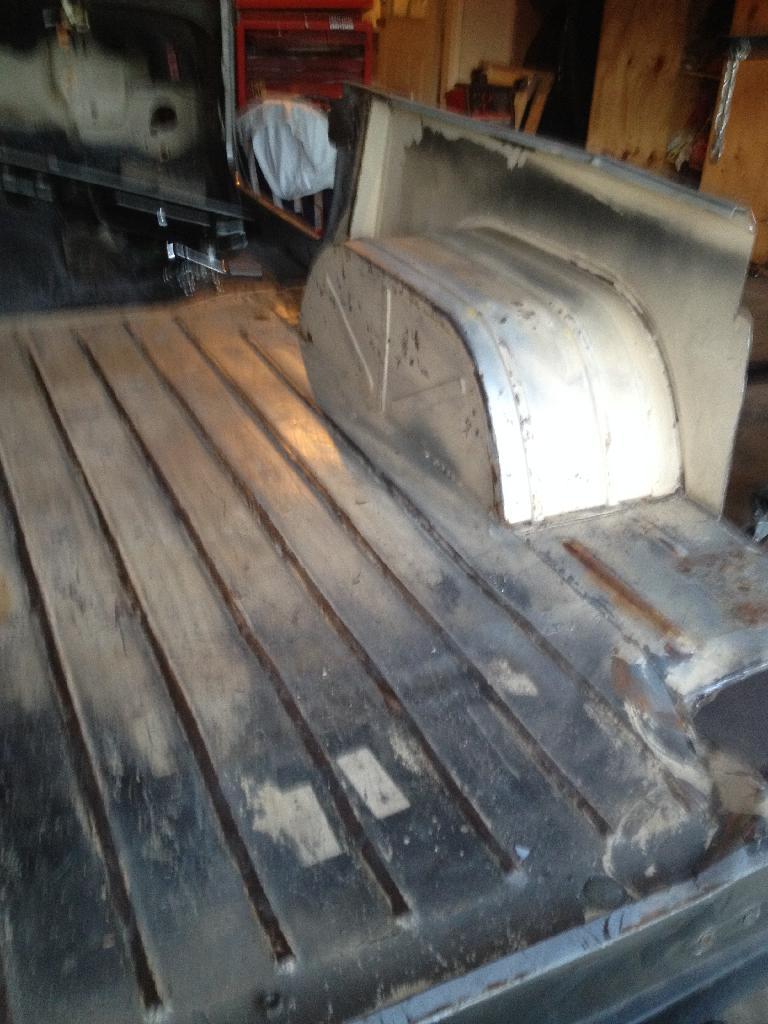
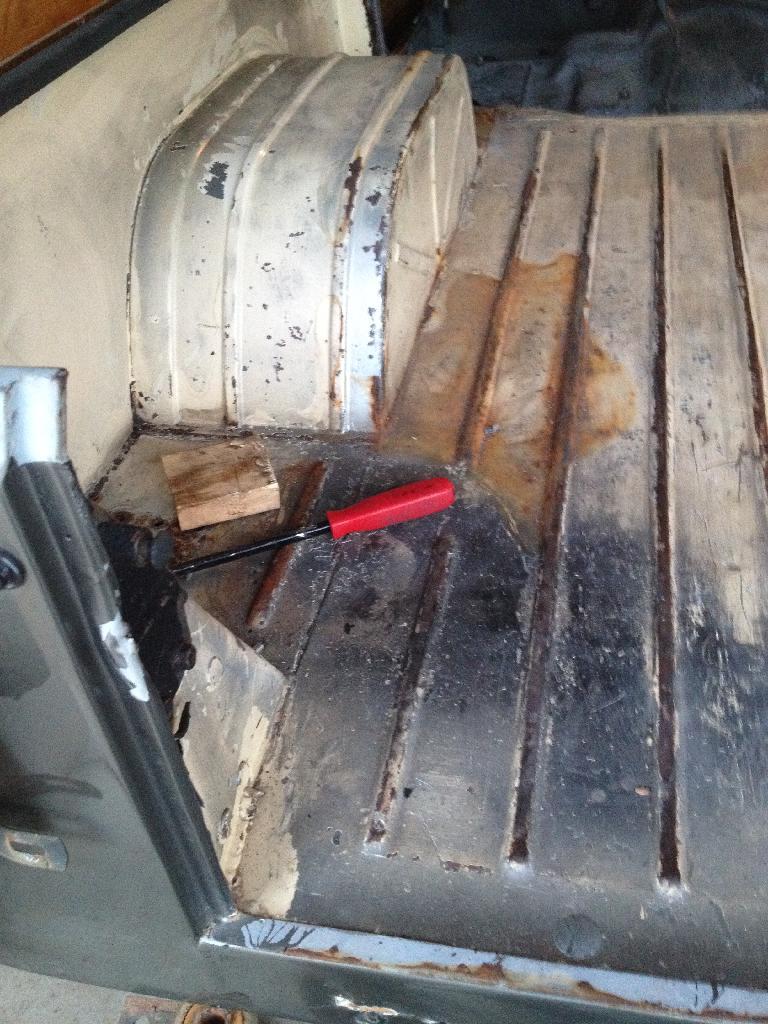
I could feel there were areas where the old liner had let go and I was a little scared to see exactly what condition the metal underneath was going to be in, but to my surprise it wasn't that bad. Some minor surface rust but overall clean.
3FDF3BCCB1904A7098D1B85EF80B998E_zpshnjb-1.jpg

F6D722B9EBD44199AEADD6E09A7A4A23_zpsrpni-1.jpg


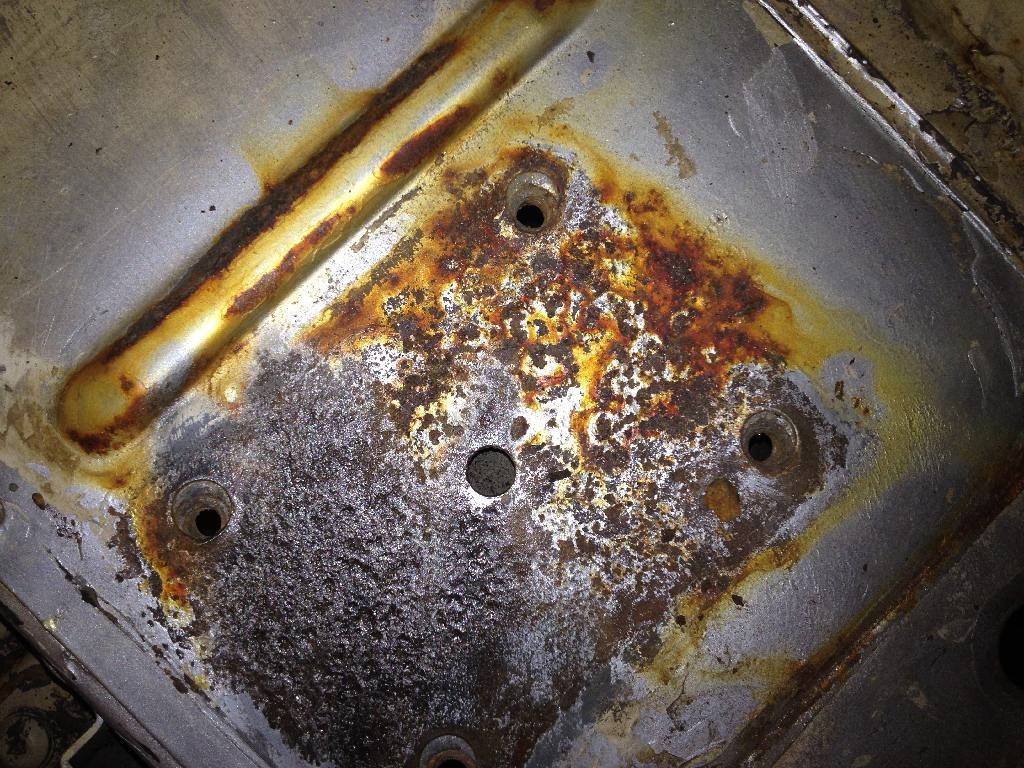
The worst areas I have found yet was the obvious area underneath the rollbar plates. It really isn't that bad though and I ran a wire wheel about halfway over one to check it out and it is pitted but not all the way through yet. I am keeping my fingers crossed that when I pull all the liner out of the cab that the floors are as fortunate as the bed.
0C5CAB6A1DC24186B5DC6376FD3F8350_zpsqqky-1.jpg


Also began to pull the dash out today but stopped when I realized that I should probably make a little wiring diagram of where it all really goes. I don't really take notes or have any method but I know I can count of looking through some of the builds on this forum and find most of what I need.

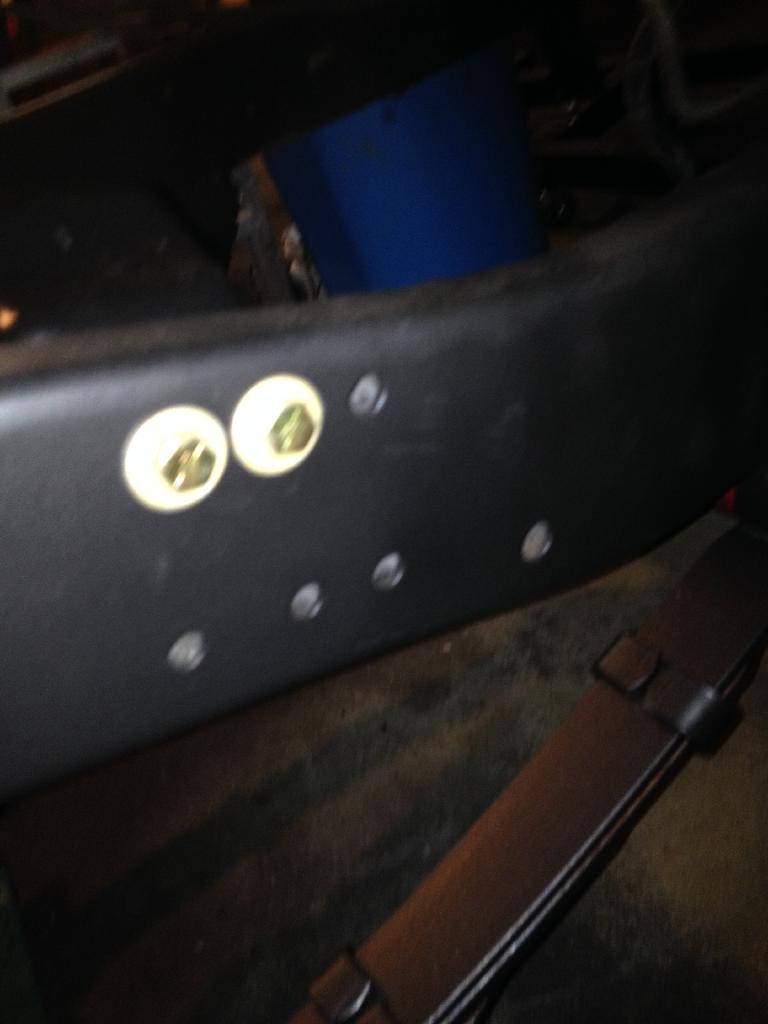
I do have a question for you guys. The following picture is of the top two bolts on the drivers side motor mount from outside the rail. I don't quite remember if it was in the forward four holes or the back four. I have six holes (two positions) that it could go into. I am quite sure that it's the front four but I may be wrong.
DE67B6A205A04CE3B1617D9233F15596_zpstbrk-1.jpg

So which is it?
 
First off..WELCOME! :wave:

Doing a great job. Keep up the good work. :thumbsup:
 
looking good, you got lucky with the bedliner or you didnt tell us how bad it really was HAHAHA.
i hope you dont find rust in all the usual areas. my build did but not like some others on here, i got lucky.
how do you plan on tackling that RR quarter panel ?????
 
My build started much like yours. Bed liner came out of the bed pretty easy but the floor pan area had adhered much better and took some serious wire wheeling to get out (still not totally done with it). I also didn't take much note of the dash wiring but it had been done so many times on here that I don't think I'll have much trouble looking it up. As for the motor mounts, I'm not sure. It all depends on what motor and what brand mounts you have. I have a 350 and AA motor mounts and use the very first two holes.
 
Congrats! Removing the roll bar and it's Torx bolts is a Scrambler owner's rite of passage into real ownership.
 
looking good, you got lucky with the bedliner or you didnt tell us how bad it really was HAHAHA.
i hope you dont find rust in all the usual areas. my build did but not like some others on here, i got lucky.
how do you plan on tackling that RR quarter panel ?????

The bed liner was actually a pain in the tail. Lots of pulling and tugging and busted knuckles. I just didn't want to sound like a complainer so early in this build. I can't wait to do something a little more fun on this project. I am tired of cleaning rust and priming and painting. I hope reassembly is a little more rewarding, but it seems so far off.

As far as the RR corner, I am not quite sure yet. I am looking to order the rear piece online somewhere, just need to price check a few sites, It also needs the interior corner piece in the back that covers up the tailight bolts and fuel filler. I have looked and looked at the side panel and really don't want to pay $250 for it. I may attempt to build one out of some 18 gauge. I am not sure about bending the tub rail or the rolled edge at the bottom of the panel but I think if I can salvage the wheel well forward it will be much less work. It has some damage to the rear crossmember but I am hopeful that I can get it straight without too much trouble. I am no body man but this stuff doesn't seem too difficult.

My build started much like yours. Bed liner came out of the bed pretty easy but the floor pan area had adhered much better and took some serious wire wheeling to get out (still not totally done with it). I also didn't take much note of the dash wiring but it had been done so many times on here that I don't think I'll have much trouble looking it up. As for the motor mounts, I'm not sure. It all depends on what motor and what brand mounts you have. I have a 350 and AA motor mounts and use the very first two holes.

This jeep is just the opposite of yours, the back was really stuck but the front is still somewhat soft and comes out without as much effort. It appears that the back was re-sprayed at some point but the front is just one layer.

As far as the mounts go, this is for the good ol' 258 that it came with. I placed the mount in the front four but it just doesn't look right. I guess I will know for sure when I set the motor back in later this week.


Congrats! Removing the roll bar and it's Torx bolts is a Scrambler owner's rite of passage into real ownership.

Yeah, I quickly learned that those torx could easily break a man. I am always looking for something to weld on though. I am a terrible welder but sure do enjoy it. Burning metal and making things stick together is my kind of fun. :evil:
 
I got very little accomplished on the scrambler today. I worked my second job this morning, fixed the washing machine, for the second time this month (replaced the pump 3 weeks ago and then the motor burns up :banghead:). Then I went and picked up my 1st grader from school and hauled a bunch of boat parts out of the garage to my dads shop for storage until I can get that project started. I need all the garage space I can get so I can get this tub off on wednesday. My next few items on the list of to do's for this week on the scrambler are as follows:
1. Finish cleaning all the liner out of the cab.
2. Pull the fuse block and get the dash out.
3. Pull the defrost duct work out
4. Pull the tub off and set it up somehow so that I can work on it and not be on the floor
5. Finish cleaning up the rest of the frame and get it primed and painted.
6. Set motor in frame.

I work 24 hours tomorrow and then off for 48 so I am going to put some serious time into the project before I go back to work on friday.

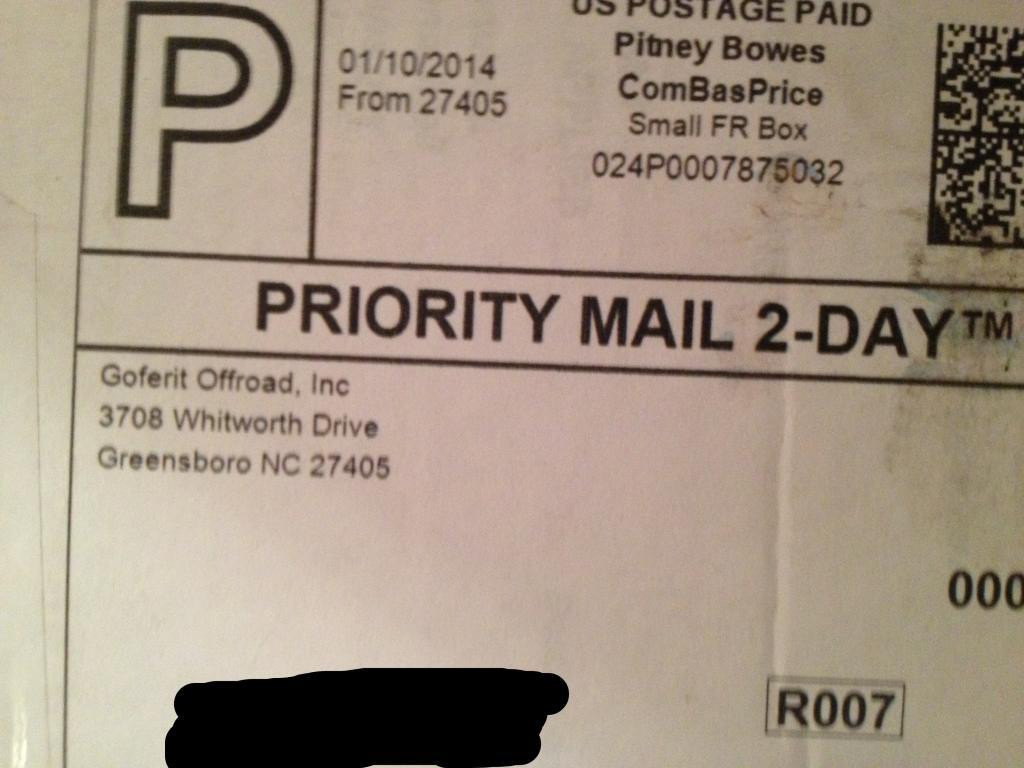
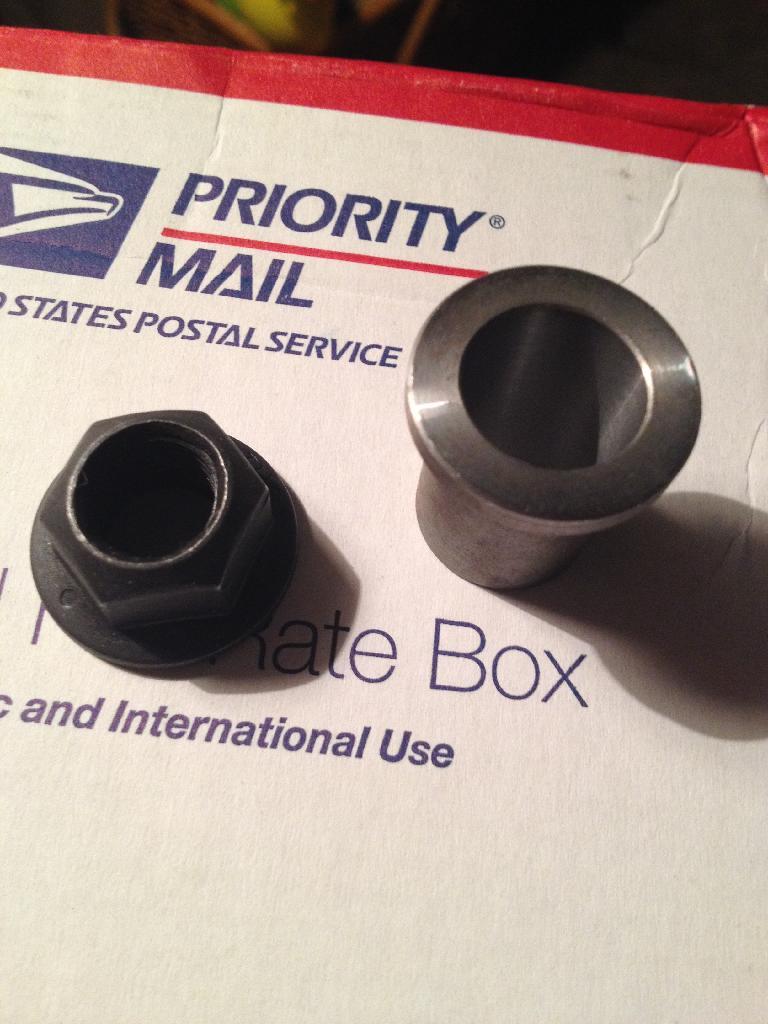
I did get a good little surprise from my friendly neighborhood postal worker today though.

522fafc82cef4c628f380dcb6c131ec8_zps87ed-1.jpg

4C195CDE59D64942BACB80CE13703DB0_zpstw3g-1.jpg


This is the goferit offroad tie rod flip insert and locknut. I could have just bought a reamer and done it the right way but this was much cheaper than a reamer that I probably wouldn't use again. My tie rod angle really isn't that bad but I would like it to be as close to horizontal as possible. I will document and post this install on wednesday.

Well that is all for today. If any of you veteran scrambler guru's see me doing anything that you wouldn't do on this build then by all means let me know. I am always open to criticism and don't know a whole lot about what I am doing on a daily basis. Have a blessed night and remember you can't spell Great without the 8(o.k. that was a little cheesy but I am tired).
 
it might be easier but maybe impossible to find a donor RR tail section to weld on; or build up like you said above and then put some crusher corners on it like i did. i think they look sweet on the 8's. my build has lots of photos that might help you out.

before:


after:

 
it might be easier but maybe impossible to find a donor RR tail section to weld on; or build up like you said above and then put some crusher corners on it like i did. i think they look sweet on the 8's. my build has lots of photos that might help you out.

before:


after:


You have an amazing looking Jeep. I would love to find an old 8 tub to hack a corner off of but there just isn't much around me that will work. I think I could use the very back part from a 7 but I will still have to fab some sheet metal due to the damage all the way up to the wheel well and the 7 corner would come up short. I'm going to try to devote some time to reading your build tonight. Looks awesome.
 
I saw a craigslist ad back almost a year ago someone in Catoosa, had a tub that they wante to sell. You might run you a craigslist add wanting a tub they may still have it. There is also a guy from Miami OK that runs allot of jeep parts on Tulsa craigslist. I will keep my eye out for one. Love your build.
You have an amazing looking Jeep. I would love to find an old 8 tub to hack a corner off of but there just isn't much around me that will work. I think I could use the very back part from a 7 but I will still have to fab some sheet metal due to the damage all the way up to the wheel well and the 7 corner would come up short. I'm going to try to devote some time to reading your build tonight. Looks awesome.
 
Who is Rommel Jaun? I went to a local jeep salvage/4wd shop here in Tulsa on my way home from work this morning and they had a full side panel from omix in the corner of the shop(he said they ordered it a couple of years ago and it was bent so they never used it. Only problem was that it was the drivers side. I stared at it for about 10 minutes trying to figure out a way to make it work but it would just be to pieced together for me so I turned it down. It has a slight bend to it but would be easy to straighten out. It is brand new if any of you guys want it let me know. He was asking 100 but I bet he would come down a little. The name of the place is Harmon 4wd and it is unbelievable what is behind the shop. Theres about an acre of jeeps/tubs/axles and fenders just sitting and rusting. I went there to look at hacking the corner out of a cj-7 tub but he wasn't keen on me hacking on anything except the ones that were too far gone. I don't blame him there are a few nice tubs sitting out there. I wished I would have taken pics. Well I am going to go out to the garage and get the day started.

Thanks Exhaustdemon, BrooklynZ28, Jeepmonkster, Motor Jack, and Jims Chop Shop for the links and advise. Keep it coming and the links are very helpful. I will be buying the back corner and interior corner from somewhere this week but still unsure about what to do about the side panel.

I will be back this evening with an update.
 
Back
Top