• Notice for iPhone users: DO NOT use the image size reduction option when uploading photos to the forum. This causes portrait images to post as landscape. We have added a warning to the image insert pop-up as well.

Meet Red, my 81 Restomod Build

Randyzzz

Blown Budget
BENEFACTOR
Gold Member
Lifetime Member
SOA Member
City
Redmond
State
OR
What about just dabbing the holes with touch up paint during installation so it serves as lube for the fastener and seals any rippling/chipping/peeling? I'm not a paint expert, so if there's something inherently dumb about that, I plead ignorance.

I would get a counter-sink bit to match the angle of the new hardware, personally. That would both touch up the chatter and also give you better fitment with the new screws.
That's what I did on these. Didn't seem to matter. The paint issue really isn't caused by the rotational friction, but by the deformation of the paint film due to the fastner pressure. On these upper hinge screws, I held the screw stationary and tightened the nut on the back. On the lower hinges I had to tighten the screw, and it actually wasn't as bad. The counter sink bit is a good thought, but then I'm looking at black hinges.
 

Randyzzz

Blown Budget
BENEFACTOR
Gold Member
Lifetime Member
SOA Member
City
Redmond
State
OR
I'm very interested in this topic - I'm close to installing my hinges.

I saw in a catalog (Eastwood?) where they mentioned using heat to soften the paint... I've put that idea in my "toolbox" - but, have never tried it.
That sounds like it might work, but I'm a bit nervous about heat. It wouldn't take much to get it too soft and the twisting screw could pull a whole patch loose!
 

Kim Dawson

CJ-8 Member
Member
City
Molalla
State
Or
You like the look of the black screws against the red. Seems the only way to keep that look would be to do what Fummins suggested and fix the counter-sink angle. I would paint factory screws before instalation and then when all is in it's final resting place, touch up with a brush. A better way would be to mask off the hinges and paint screws and hinges together when all in in its final place. One CJ7 I got had all the hinge bolts covered over with body filler for a more custom or smooth look.
 

Randyzzz

Blown Budget
BENEFACTOR
Gold Member
Lifetime Member
SOA Member
City
Redmond
State
OR
You like the look of the black screws against the red. Seems the only way to keep that look would be to do what Fummins suggested and fix the counter-sink angle. I would paint factory screws before instalation and then when all is in it's final resting place, touch up with a brush. A better way would be to mask off the hinges and paint screws and hinges together when all in in its final place. One CJ7 I got had all the hinge bolts covered over with body filler for a more custom or smooth look.
I had thought about having the hinges re-sprayed after assembly- but I really don’t want to have it at the paint shop for a month or two. I guess I’m just trying to decide between going black or just living with it. The black paint on the screws is pretty much bulletproof. I guess I can get it fully assembled and see how the doors and upper hinges turn out. If they are horrible, time to consider black. If they’re passable, I think I’ll live with it as is.

If I was really thinking, I would have welded the screws into the hinges and then used nuts on the backside. But that ship has long since sailed. Would have been a challenge on the upper windshield hinges and the tailgate…
 

rubclt

BENEFACTOR
Gold Member
Lifetime Member
SOA Member
City
Charlotte
State
NC
Similar issue on project blue… although the screw heads were body color. I used a small artist brush and touched up as needed.
 

AdamH

Scrambler Junkie
BENEFACTOR
Gold Member
Lifetime Member
SOA Member
City
Mt Holly
State
NC
I know what you’re going through. Honestly it comes down to you and your OCD tendencies. 100 people can admire your Jeep and I’d bet not a single one will notice this Unless you point it out.

BUT …. You’re not building it for others - you are building it for you. Based on your post this is an issue that bugs you. Mine were the miscolored Phoenix decals on my ‘81. I had friends And family saying it was fine - no one will notice. But I noticed so I took them off and did a new set.

I vote fix it - would factory bolts painted to match help at all? I probably have enough great ones in my stash of parts I could send you
 

Randyzzz

Blown Budget
BENEFACTOR
Gold Member
Lifetime Member
SOA Member
City
Redmond
State
OR
I know what you’re going through. Honestly it comes down to you and your OCD tendencies. 100 people can admire your Jeep and I’d bet not a single one will notice this Unless you point it out.

BUT …. You’re not building it for others - you are building it for you. Based on your post this is an issue that bugs you. Mine were the miscolored Phoenix decals on my ‘81. I had friends And family saying it was fine - no one will notice. But I noticed so I took them off and did a new set.

I vote fix it - would factory bolts painted to match help at all? I probably have enough great ones in my stash of parts I could send you
Bugs the crap out of me. But- I guess it all depends on how all the other bolts thread in. I’ve got a nifty solution for the hood bolts, and I’ve got 8 OEM bolts for the rest of the windshield frame. I’m going to get the windshield frame bolted up and then the doors and see how it all goes. If those all go well, I’ll build some custom light brackets for the hinges. If the rest of the hinges go south, I’ll have them all powder coated black.

I’m all honesty, I think the issue is caused by poor quality control on the holes in the hinges, exaggerated by modern painting techniques using high build primer everywhere.
 

Randyzzz

Blown Budget
BENEFACTOR
Gold Member
Lifetime Member
SOA Member
City
Redmond
State
OR
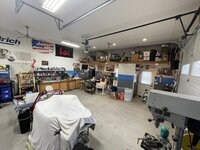
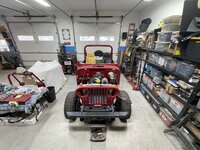
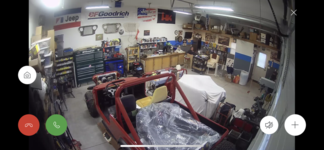
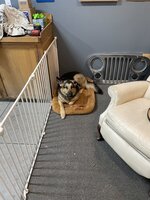
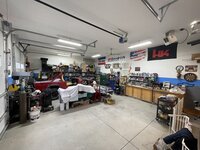
Well, this is long overdue. I’ll admit- I’ve been suffering from a case of “project burnout”. So I took some time away from Red, and concentrated on other ways to deplete my wallet. Also did a realignment of the shop layout- moved the toolboxes and project area to the far side, and the work benches and open bay to the near side, next to my “office”. This gives me plenty of room to work on Red, plus opens up a bay for bringing in other vehicles easily. E5E68DE9-4904-480B-8C3C-6BD8C427C5D4.jpegDED020F8-725A-4CDC-A29B-1F4F1A6EB3B2.jpeg8990C5F0-0D75-49F3-B9A2-05462C654900.jpegI also added a TV and will be bringing my computer out here. The gated area is for our Shepherd, Bella. She can spend time out here with me and not get into any nasty stuff. Lastly, I installed a complete alarm system complete with cameras.D5F88D32-8A14-4287-B84F-8938AE167835.pngYeah, I could hook it up as a live view web cam, but who wants to watch an old fart work at the speed of molasses and nap on occasion. (That white leather recliner is a comfortable as it looks.)
The most important news, though, is I’m going to start on getting this thing finished. I’ve let the discouragement of the hinge bolt issue go, and realized that a bit of imperfection is what it will take to let me actually drive this thing. The only other option would be to sell it, but if I was to do that I’d just be building another- and the only different thing I’d do was not have such a nice paint job. So to heck with it. Somebody’s got to marry that supermodel!

Anyways, prior to taking my break I was having difficulty with getting someone to install a windshield in a loose, newly painted frame. Well, I found someone to do it today- a shop that I should have called first but forgot about. So the windshield goes in next week, then I can get the frame installed, dash panel, dash pad…
 

rubclt

BENEFACTOR
Gold Member
Lifetime Member
SOA Member
City
Charlotte
State
NC
It’s amazing how what seems like a big shop fills up so fast. And, I know about project fatigue, like you, found time away a good cure. Looking forward to your next steps…
 

Randyzzz

Blown Budget
BENEFACTOR
Gold Member
Lifetime Member
SOA Member
City
Redmond
State
OR
It’s amazing how what seems like a big shop fills up so fast. And, I know about project fatigue, like you, found time away a good cure. Looking forward to your next steps…
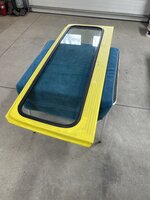
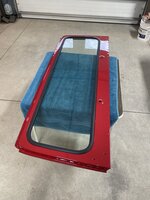
I know what you mean about space. I thought 36’ x 24’ would be plenty. Of course, if I wasn’t such a pack rat…but just last week I used a couple of plexiglass pieces that I have been hanging on to for almost 20 years!!!
 

Randyzzz

Blown Budget
BENEFACTOR
Gold Member
Lifetime Member
SOA Member
City
Redmond
State
OR
You just need a storage shed to store the stuff.
Unfortunately, I have experience with this. I just end up keeping more stuff that I’ll never use. I had a shed- chock full of goodness- for cars I don’t own. Even worse, the “slightly broken” parts end up there. You know the ones- they’re not good enough for your current build, but they’re too good to throw in the dumpster.

I’ve found that for a lot of stuff, it’s easier to buy new when you need it than to keep old junk that you will never use.


However- all those boxes in the racks have really good stuff in them. Seriously!🙄
 

John N

Addicted....Ex-SOA VP
BENEFACTOR
Gold Member
Lifetime Member
SOA Member
City
Rockville
State
VA
Unfortunately, I have experience with this. I just end up keeping more stuff that I’ll never use. I had a shed- chock full of goodness- for cars I don’t own. Even worse, the “slightly broken” parts end up there. You know the ones- they’re not good enough for your current build, but they’re too good to throw in the dumpster.

I’ve found that for a lot of stuff, it’s easier to buy new when you need it than to keep old junk that you will never use.


However- all those boxes in the racks have really good stuff in them. Seriously!🙄
I know how the pack rat syndrome impacts storage space. Also, my shepherds would never stay in that enclosure.
 
Top