• Notice for iPhone users: DO NOT use the image size reduction option when uploading photos to the forum. This causes portrait images to post as landscape. We have added a warning to the image insert pop-up as well.

Postal going 4.0/AW4

As far as the pcm is concerned, the connectors should be useless. However, if you kept the tube where the high pressure cutoff switch is located and connect your air line after it, you can use the factory high pressure cutoff switch to turn off the compressor. If you do it this way, the connector and some of the wiring could be of use.

Thinking even more, if the cherokee has an A/C button, it could be possible to just add an AC switch to the dash, feed the circuit into the PCM, and let the logic of the PCM control the compressor. You may need to open or short the low pressure switch to do this.

I did get that tube and switches and I pulled the A/C dash switch feed from the C100 connector to save for exactly the use you mentioned. I thought that it could work just like you outlined and that's why I kept the low/high pressure switch connectors in the harness. It's not an issue to make the thing run, so I won't worry too much about it now but if I had found out they were totally useless it would have been easier to pull them and the wiring now.

Never having messed with A/C stuff, I didn't get what the point of the low pressure switch was, high pressure makes sense to cut it off, but low pressure? That cuts it back on when the AC system pressure gets to a low set point? If that's the case, seems it would need to be shorted for OBA use, right?
 
Never having messed with A/C stuff, I didn't get what the point of the low pressure switch was, high pressure makes sense to cut it off, but low pressure? That cuts it back on when the AC system pressure gets to a low set point? If that's the case, seems it would need to be shorted for OBA use, right?

Low pressure cut off is there so if the system is low on charge it will shut the system down to prevent the compressor from burning up with lack of lubrecation. Oil is mixed in with freon to lube system and compressor.

Don
 
From the 97 XJ FSM on A/C operation by the PCM:
----
AIR CONDITIONING (A/C) CONTROLS—PCM INPUT

OPERATION
The A/C control system information applies to factory installed air conditioning units.

A/C SELECT SIGNAL: When the A/C switch is in the ON position, an input signal is sent to the Powertrain Control Module (PCM). The signal informs the PCM that the A/C has been selected. The PCM adjusts idle speed to a pre-programmed rpm through the idle air control (IAC) motor to compensate for increased engine load.

A/C REQUEST SIGNAL: Once A/C has been selected, the PCM receives the A/C request signal
from the clutch cycling pressure switch. The input indicates that the evaporator pressure is in the
proper range for A/C application. The PCM uses this input to cycle the A/C compressor clutch (through the A/C relay). It will also determine the correct engine idle speed through the idle air control (IAC) motor position.

If the A/C low-pressure switch or high-pressure switch opens (indicating a low or high refrigerant
pressure), the PCM will not receive an A/C request signal. The PCM will then remove the ground from the A/C relay. This will deactivate the A/C compressor clutch.

If the switch opens, (indicating that evaporator is not in proper pressure range), the PCM will not
receive the A/C request signal. The PCM will then remove the ground from the A/C relay, deactivating the A/C compressor clutch.
------

Looks like the low-pressure switch will have to be shorted to allow OBA use. Thanks for the help guys.

Next question on this topic is what pressure the stock high-pressure switch trips at, found the low pressure switch range.
 
Pictures for linking... look back through to see pics in the appropriate places :p
 
I got the power steering lines hooked up. The CJ pressure line worked (I think) in the XJ pump with some bending. I didn't have the right bolts to bolt the pump in.

I spent some time pulling the relay and wiring that I'd left in the CJ harness for the electric choke.

I realized that the stock XJ battery location is as far from my battery as it could possibly be. Will have to rework the main power cables.

Looked at how to work the gas line to the rail. I was shocked to see the way the stock line ran right down by the exhaust manifold. I'm thinking I'll run it up over the top or front of the engine since I ran the feed line up the other side.

Got the vapor canister swapped in.

I have a flared hard line that ran around the back of the engine and connected to the manifold to feed the brake booster vacuum. I'll have to run hose or cut/flare the tube off of a 4.0 fitting.

Fought the temptation to play with the A/C compressor hookup after the discussion earlier in the day :crazy:

Need to swap the tranny filter and then play with mounting the tanny off the stock X-member. Have to decide how much I want to try to clock the D300 too...

That's all I got to tonight because I spent some time sorting parts and cleaning up... need to get some sleep after last night.
 
Here's a pic of the somewhat thinned engine harness I worked on the other night.

attachment.php


Last night I got the tranny filter changed and figured out the location of the mount on the stock crossmember. I drilled the mounting holes and hole cut access to get to the tranny pan drain because it'd be impossible otherwise.

attachment.php


I'm debating about clocking the transfer case now or not. If I do, it means altering the crossmember to get rid of the huge bulge and dealing with lengthening the driveshaft in front. I don't have easy access to a shop that can do that properly. Of course if I don't do it now, it will be forever before I do... but I don't really want to delay things anymore than necessary.

Picked up bolts for the power steering pump and water pump pulley and fan today along with some fittings for the tranny to replace the cooler lines and their lame fittings with some straightforward 3/8" tube and hose.
 
Last edited:
Ok, help me here....

I got the new tranny cooler lines run up front, almost got the serp belt on but happened to grab two coarse thread bolts instead of fine thread when getting new ones for the water pump pulley and fan :banghead:

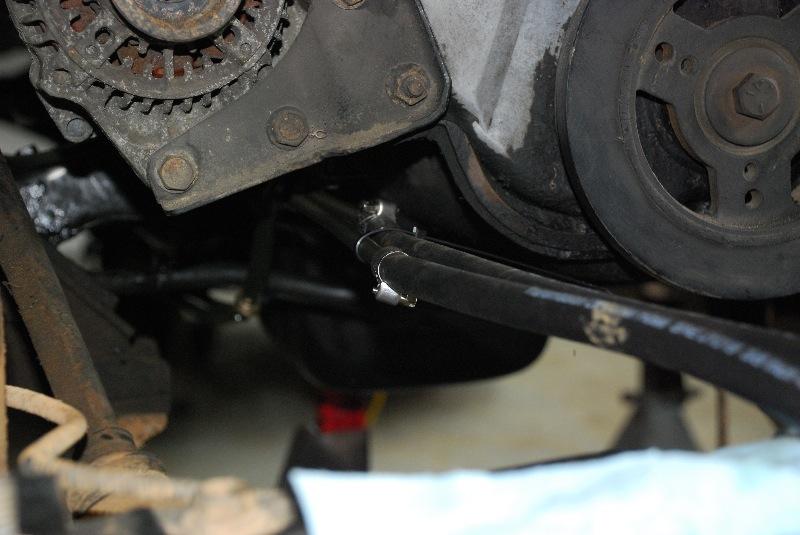
New tranny cooler lines:
new_tranny_cooler_lines2-1.jpg


new_tranny_cooler_lines-1.jpg


I'm not going to clock the tcase right now, for better or worse. I don't want to get into modifying the skidder to take advantage of the new room and I don't have easy/ready access to a shop with the proper balancing equipment to lengthen the front shaft.

I picked up what I thought was the right connector to attach at the fuel rail, but it's too big. I don't like the setup I'll have if I reuse the stock one, and it's fairly corroded. I'll have to try to find the right one to run it the way I want.

I found out my throttle cable is identical to the XJ on the engine end, so it snaps right in.

So mechanically, I'm getting really close to where I could try to start it. I still have all the wiring to do to splice in the engine harness though. I'm dying to work on the wiring to get it to fire, so I dont' want to do any more mechanical stuff than needed to test it all...

Here's where y'alls help comes in. What do I HAVE to have hooked up to safely fire it over?

I can fill the tranny and just connect the inlet/outlet lines for the tranny cooler (don't want to mount the grille/radiator just to test fire). I can mount it on the crossmember as it is now.

I don't see a need to mount the T-case.

I figure the power steering has to be full to lube/cool the pump, it's connected, so no biggie as long as I don't have to disconnect it all if something doesn't work :huh:

Coolant: can I test fire it to see if it runs without mounting/filling the radiator?

What else is my tired brain forgetting?
 
Last edited:
If you want to run it 10 seconds to make sure it runs, you need engine oil, transmission oil, and power steering fluid. For a quick run, you can just put a 6" piece of hose between the two transmission cooling lines right at the transmission, you just need enough to let the oil flow.

I wouldn't rev it, just let it fire up and idle for a few seconds.
 
Cool, exactly what I was thinking/hoping.

Didn't get into the garage at all yesterday, hopefully I can at least start on splicing in the harness today. Should only have to buy/use last 2 water pump pulley bolts, install serp belt, attatch the tranny mount, install crossmember, connect in/out tranny cooler lines, fil PS, oil, tranny and splice away.
 
Killed run side of start/run feed from bulhead connector?

Ok, I got everything bolted in/filled up and otherwise ready, then laid the engine bay harness on and spliced it in.

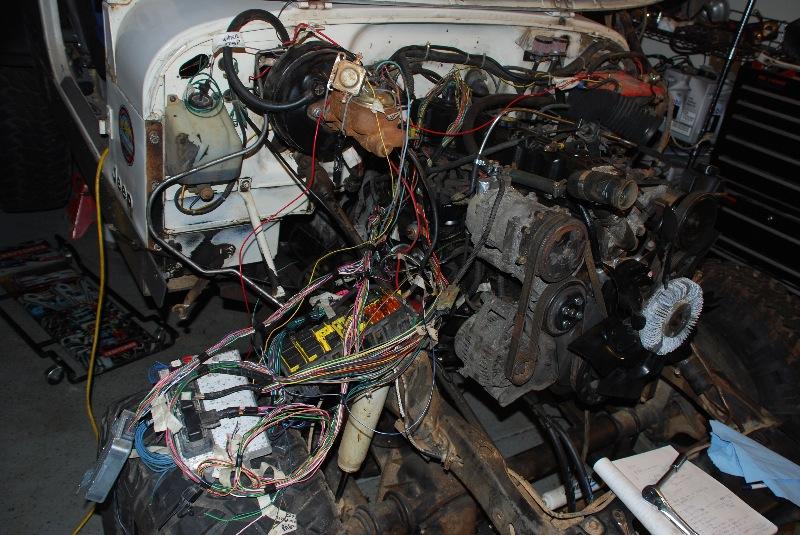
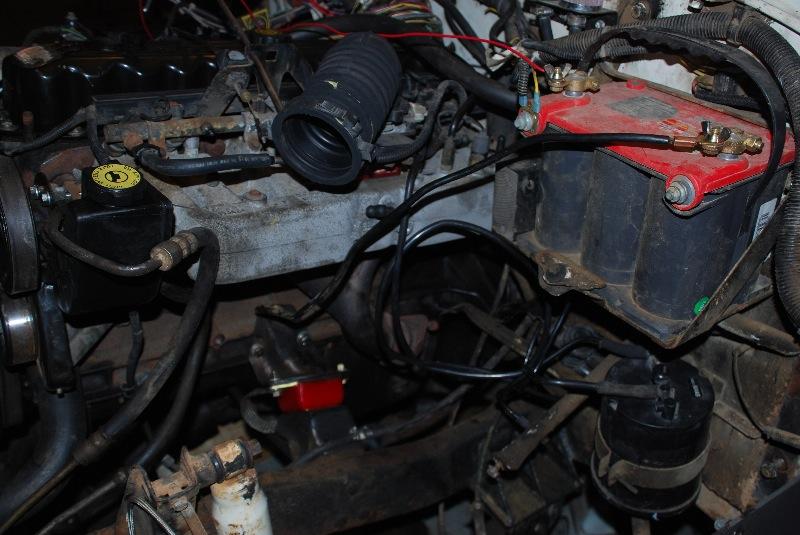
Here's the rat's nest of wiring, this is actually how it sat when I tried it. It looks worse than it is if you consider that most of what you see running on the engine are dedicated feeds to/from sensors/PCM that you don't have to bother with. There's maybe 18 wires I pulled out that CAN be hooked up for use in my application, but most of those are nice-to-haves for OBA, aux lights, etc. The ones I actually hooked up to get it to fire are listed below and aren't that numerous or hard to locate if you have the wiring diagrams/pin outs from the FSM (or my Excel sheet)

rats_nest_ready_to_fire-1.jpg


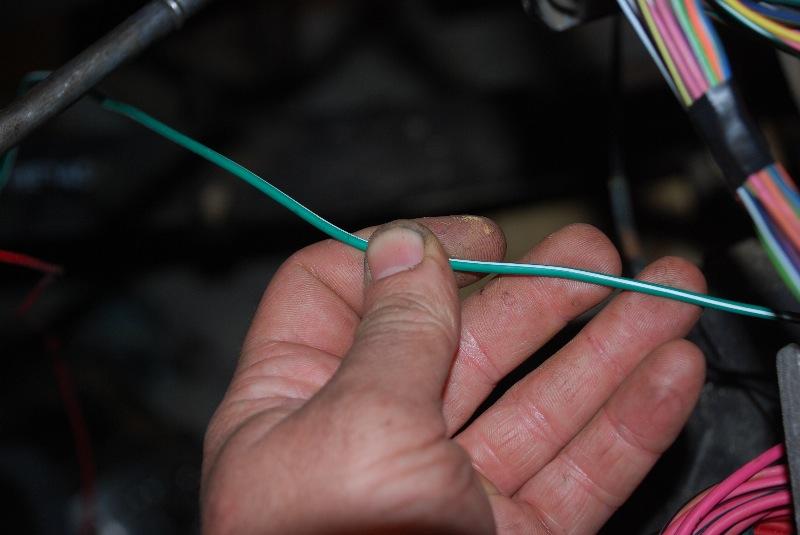
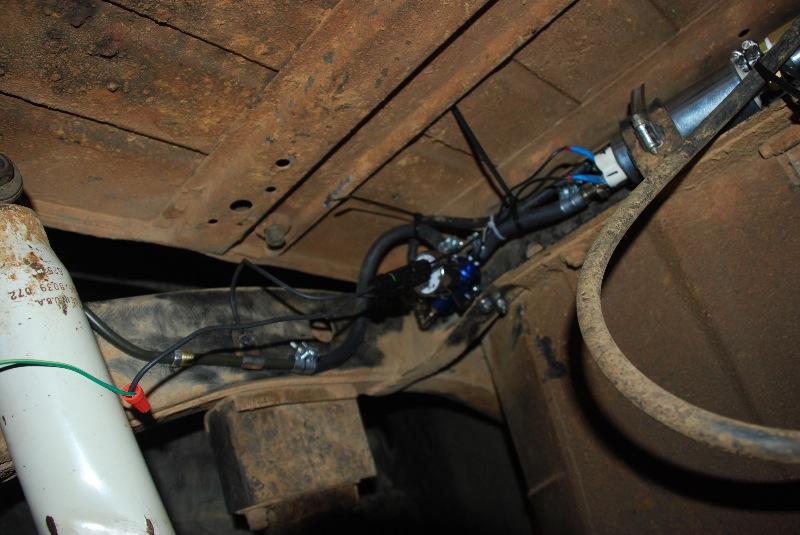
1. fuel pump + output from PDC to fuel pump (~12 or 14 ga green wire with white tracer), grounded other terminal on pump (I used a weatherpac automotive connector to make a pigtail for the fuel pump and used some silicone sealant on the screw terminals on the fuel pump to try to weatherproof the connection some since it's sitting right out there exposed under the Jeep)

feed wire from PDC
fuel_pump_from_PDC-1.jpg


weatherpac connector and wiring at fuel pump (yes the wire nut is temporary and allowed me to easily run 12V in to prime the lines/rail)
fuel_pump_wired_in-1.jpg


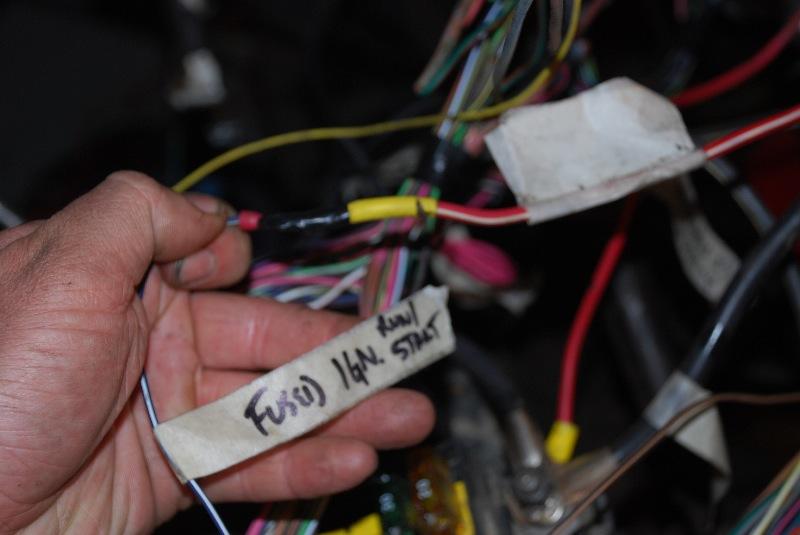
2. start/run (wire I used with the HEI) to the start/run feed to PDC (10 ga red wire with white tracer UPDATE: I found a smaller/more flexible red wire with a green tracer that is also a run/start coming out of the bulkhead connector and I'm using that, either will work)

startrun_feed_to_PDC-1.jpg


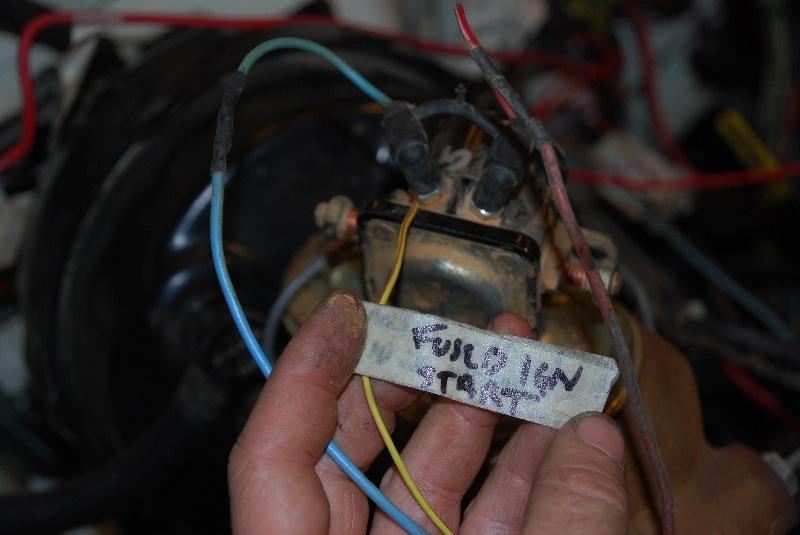
3. Start feed into PDC from wire that was on CJ starter solenoid (light blue wire)

I left things on the CJ side in place until I knew that I had the right setup to make it easier if something went wrong, that's why you see the CJ solenoid. It's now removed, along with a bunch of other stuff on the CJ side ;)
start_feed_to_PDC-1.jpg


4. Batt - from batt to block at engine mount* (batt cable)

Boring, but you can't say I didn't take the pic! I religiously use external star washers on all ground connections. I plan on picking up a couple extra battery cables and adding extra grounds later. Can never have too many (properly placed!) grounds.
batt_negative_to_block-1.jpg


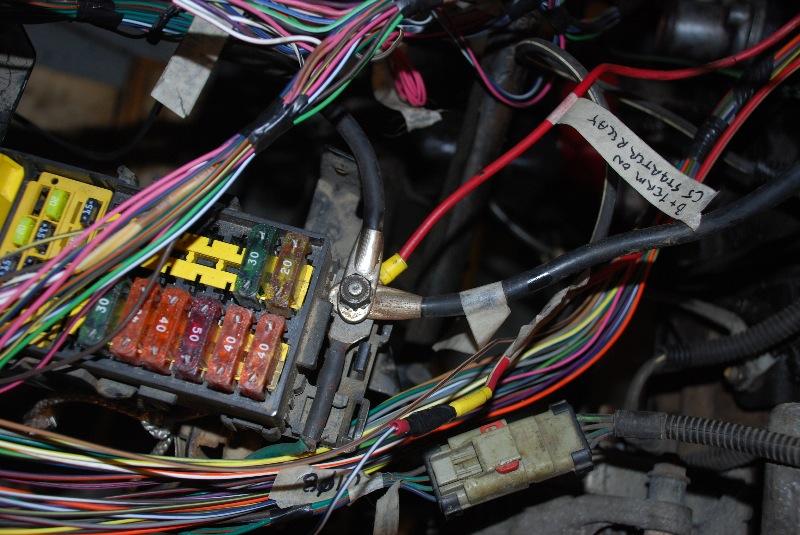
5. Batt + from my RHD battery location to the PDC input* (batt cable)
6. Batt + feed in CJ harness/bulkhead that used to go to Batt + side of CJ starter solenoid to Batt + connection on PDC (direct feed from battery) (10 ga solid red wire that goes into upper left corner in bulkhead connector)

This pic would be better labeled, but it's 2:10AM...
-the large cable heading north is to the larger terminal on the starter/solenoid)
-the 10 ga red wire heading NE is the B+ feed into the CJ bulkhead, other than gages, this is the only thing that goes INTO the CJ side from the donor side I think, as you can see from my label, this wire was originally on the B+ side of the CJ starter relay
-the large cable heading east is going to my battery + (this replaced the stock + battery cable)
-the cable heading south is the power feed from the alternator, you can see the fusible link coming off it

PDC_battery_feed-1.jpg


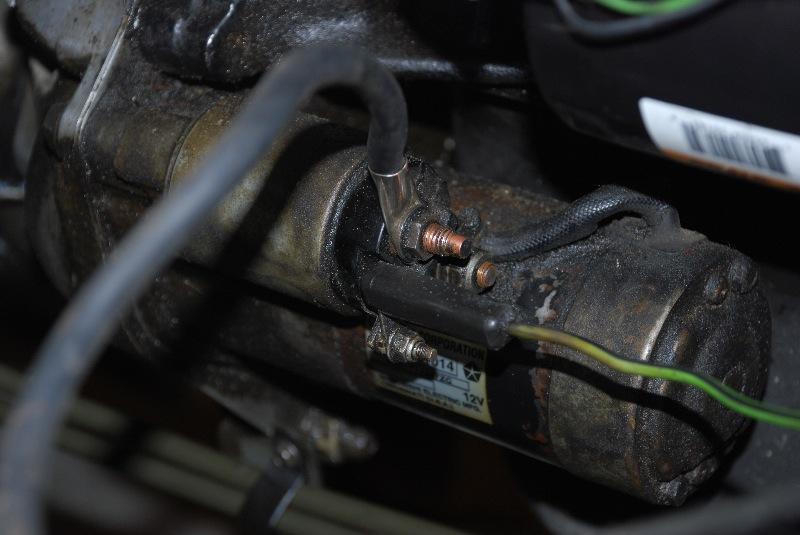
7. Batt + from Batt + connection on PDC to larger terminal on starter/solenoid (XJ starter has built-in solenoid)* (batt cable)

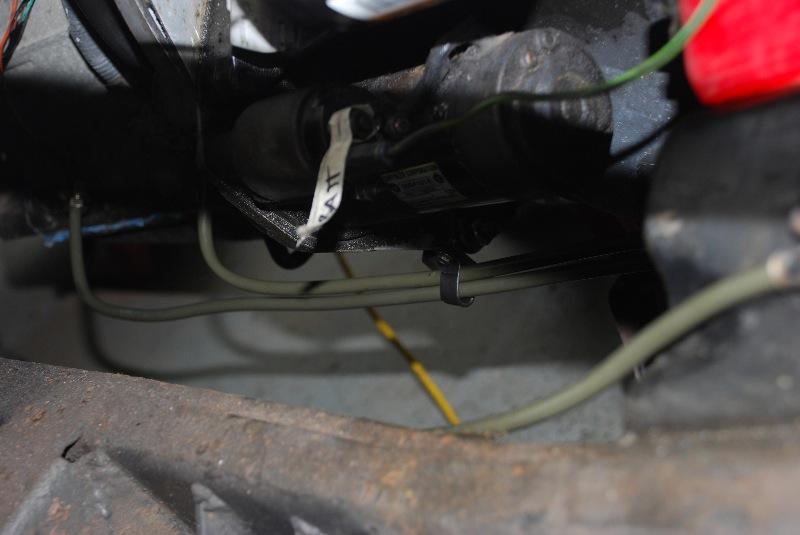
This shows the connection at the starter (it's B+ even though it's black, all my aftermarket battery cables are black for some reason). I had to slice the XJ connector in half to separate the small solenoid start feed wire (shown in picture) from the stock B+ wire. They're molded into one connector at the starter even though the two wires/eyes are actually separate.
starter_wiring-1.jpg


8. grounds left in engine bay harness after thinning. There was one wire/eye terminal that fed into a splice with two remaining wires from the donor harness. No pic, it's a 16ga black wire with an eye on the end.

*these three were only needed because of my RHD setup with the battery on the other side of the engine bay from normal. You could reuse the XJ/donor battery connections and not deal with these.

EDIT: Got it! I have to get the fuel to prime and see if she'll fire up, but I now have the proper fuel pump engagement on run and start and the motor turns over. Problem I had with losing my run feed was (typical for me) I used the wrong wire for the start feed into the PDC. There's the two wires on top of the CJ starter solenoid and I thought the red wire was the start where it's actually the light blue. Somehow, using the red wire bypassed the run side of the run/start output from the ignition switch.

In one of those REALLY bizzare twists that make you wonder about the universe... here's a long useless story that I have to share. When I finally finished double/triple checking and before I tried the key, I decided to change the satellite radio station from 90s music to classic rock. I'd have to say that my favorite band is Zeppelin and I was hoping to hear some as I got the Jeep to work with the 4.0 for the first time. I know better, but as I went to change the channel I said "If Zeppelin is on, it's gonna work". Of course no Zeppelin and I had the problem trying to get the run side of my feed to work...

I didn't hear a Zeppelin song all evening while I was trying to hunt this problem down... guess what came on as I finally found the problem? Yup, Ramble On... ain't that just FREAKY!


...and no, I'm not drunk, only one beer all night.

 
Last edited:
Found out when I went to prime the fuel system (bypassing the fuel pump relay and going straight 12V to pump) that I got the wrong kind of fuel pressure regulator off eBay. If it sounds too good to be true.... :banghead: That's what I get for trying to save a buck on an important part... I knew better. I was impressed with how easily/quickly the E2000 pulled gas from the tank with dry lines. I was worried about potential priming issues.

So I had to be content with the fact that the starter and fuel pump relays were working properly off the key and I just ordered a Mallory 4509 pressure regulator this morning. Will pick it up tomorrow. I also got a 95XJ EFI fuel filter. I read where the carb-type filter that I used before the pump doesn't filter down to what an EFI filter does, so I'm going to put this in line after the pump (since I already have the other filter plumbed in, it can serve as a pre-screen and will make the more pricey EFI filter live much longer).

Thinned out even more from the CJ bulkhead connector, and I could do more, there's a couple switched + feeds I've kept that I will probably kill in favor of coming off the PDC now. Starting to think of all the neat things I could do/replace with circuits off the PDC.

So hopefully tomorrow night will see the regulator installed and try a real test fire.

Can't fit this pic in my earlier thread, so dropping it here. Front end of the engine buttoned up with ZJ fan mounted (see later post on the details of getting it to work).

35
 
Last edited:
IT RUNS!!! Just won't turn off!

IT RUNS!!!!

:huh::cool::cheers::thumbsup::wave::flag::smokin:

WOOOHOO!!! Loud as crap with nothing but the header and it runs like poo of course, but it runs!!! I just plumbed the pump directly into the fuel line (new pressure regulator coming to the local part store in the morning) because I couldn't wait another day to try it ;)


Only problem is that it likes running so much that it won't turn off! The wires that were run/start last night (verified with voltmeter) are now just battery + and it won't shut off when you turn off the ignition... I had to disconnect a battery cable (marine terminals on the batt is the best thing ever)

I can find a hot-on-run, but the three other run/start wires are all now hot at all times... ***? How'd I manage this? I never imagined that the CJ side would be what gave me fits. The 4.0 stuff has worked perfectly!

Just printed some wiring diagrams off the CJ FSM, going to go check it out.

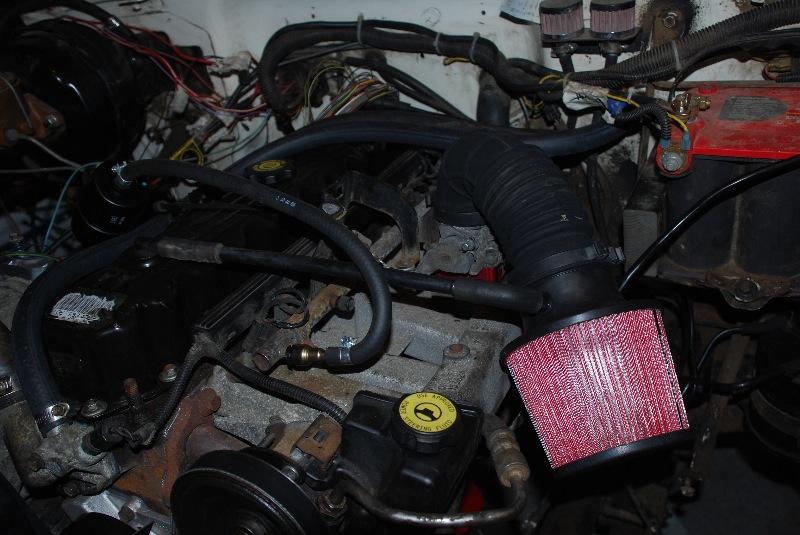
I rigged up a pretty nice looking air filter setup with a parts-store conical filter (thankfully not chrome) and the stock air tube. I cut the connecting inlet off the top of the stock airbox lid and used that to go from the tube to the filter, VERY tight fit and looks like it could be stock. They had a kit with a number of different vacuum fittings that was cheap and came with a couple of hole saws, I used that to put a fitting for the PCV line into the neck of the air filter. Just need to glue it in (grommets from the kit wouldn't work in the thick rubber neck of the filter). Also need to support the thing. Probably wait until I get the fender on and just work something off of the cap of the filter.

Pic:
air_filter_setup-1.jpg


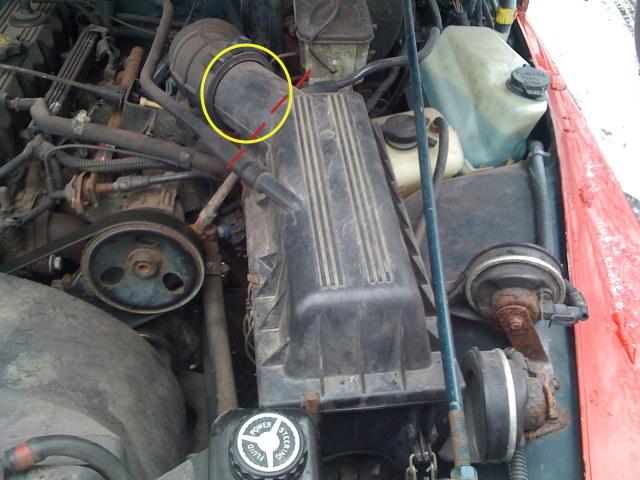
I didn't take a pic of the process, but all I did was cut off the inlet on the XJ airbox lid at the dotted line in this pic and used the circled portion to go from the stock air tube to the conical filter. The filter has a 3" inlet and it was a job to get it on, but it worked with some light prying.

rrtf85-1.jpg


Anyway, I expected to have trouble getting it to run... it fired right up, now to get it where it will cut off!
 
Last edited:
[QOUTE]

I rigged up a pretty nice looking air filter setup with a parts-store conical filter (thankfully not chrome) and the stock air tube. I cut the connecting inlet off the top of the stock airbox lid and used that to go from the tube to the filter, VERY tight fit and looks like it could be stock. They had a kit with a number of different vacuum fittings that was cheap and came with a couple of hole saws, I used that to put a fitting for the PCV line into the neck of the air filter. Just need to glue it in (grommets from the kit wouldn't work in the thick rubber neck of the filter). Also need to support the thing. Probably wait until I get the fender on and just work something off of the cap of the filter.

Anyway, I expected to have trouble getting it to run... it fired right up, now to get it where it will cut off![/QUOTE]

WORTHLESS WITHOUT PICS.... !!!!

congrats though on it firing though...

matt
 
Pics! I think we need video! congrats!
 
Wow, y'all are brutal on the pics! I trained you well ;) Staying up (yet again) way too late just so I can work on pics as I sip a celebratory Glenlivet ;)

I found the culprit on the ignition feeds. As always, walking away from it and coming back with a clear head was the trick. Last night after I got the fuel pump and starter working and after I realized the issue with the pressure regulator, I worked on the wiring some more to thin out things from the CJ side even better.

I was really puzzled tonight because I thought I only cut things out since I had it running right, then it hit me... the voltmeter. I wired the voltmeter feed that used to run to the CJ alternator plug into the batt + post on the PDC thinking that it would see the battery voltage when the engine was off and the alternator voltage when it was on. Well it did, but (thanks to the sweet dash wiring AMC did) it also back-fed all kinds of things, one of which was the start-run feed on the ignition switch. Unhooked that and everything is back as it should be. I don't know where I'll hook the voltmeter now, maybe tap one of the four non-power wires coming off the alternator through it's plug into the engine bay harness... no biggie for now.

I thought about video but Laura was already asleep by the time I got it running and it is LOUD, so I thought better of it. Maybe tomorrow morning :)

Pics coming next.
 
Mechanical fan details

One thing I forgot to comment on. I bought a used ZJ Grand Cherokee fan to use. This is because the water pump on the 4.0 runs the opposite direction from the V-belt CJ setup (if you happen to have a serpentine CJ, you're all set). The ZJ fan is set up in the right direction and matches the YJ/TJ water pump pulley size and bolt pattern (the XJ mechanical fan has a different bolt pattern than the Wrangler water pump, so you can't just move it over.)

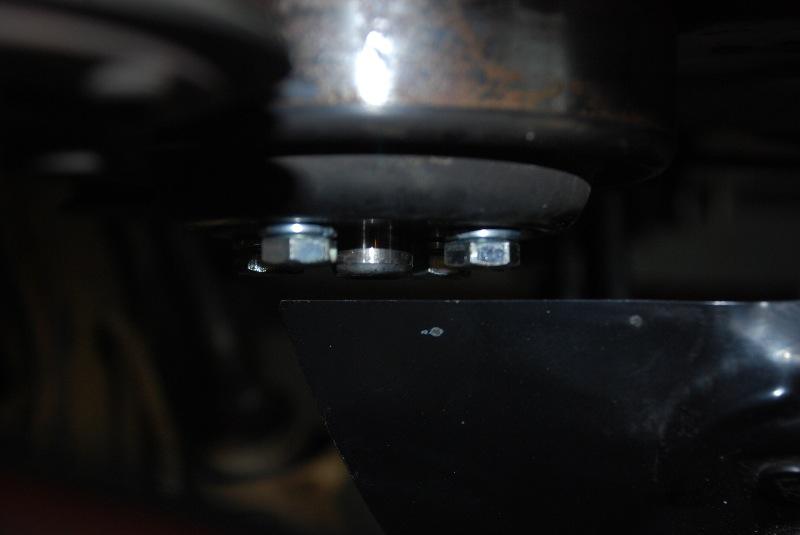
So after getting the YJ/TJ water pump and pulley, I went to mount the fan. The fan used to be offset on what's basically an idler pulley under the A/C compressor and used studs in the pulley. As soon as I went to put the fan on the water pump, it was obvious the fan and studs interfered (I just used nuts on the studs to hold the idler pulley on after removing the XJ fan). I pulled the studs to replace them with bolts and remounted the fan. There was now clearance, but not enough for my liking:

fanidler_clearance_no_spacer-1.jpg


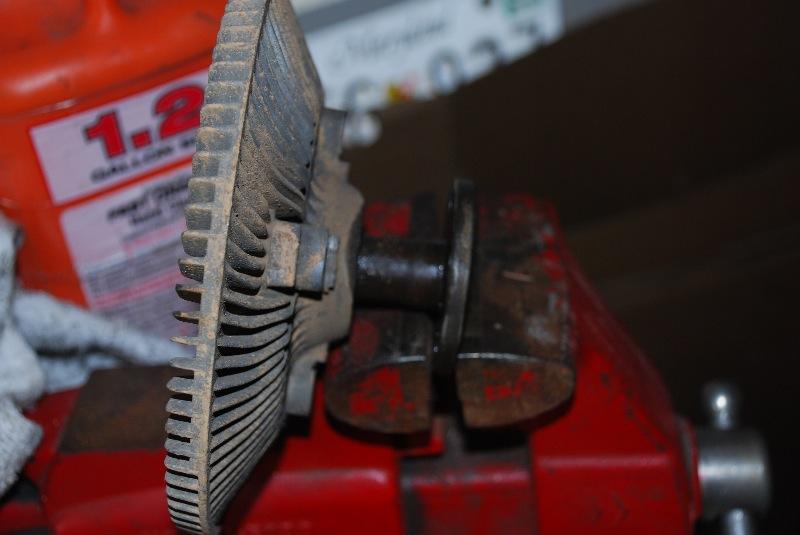
So in thinking about it for a minute, I realized I had the CJ fan/clutch sitting there useless, with the proper bolt spacing. I went about cutting off the mounting flange to use as a spacer:

CJ_fan_clutch-1.jpg


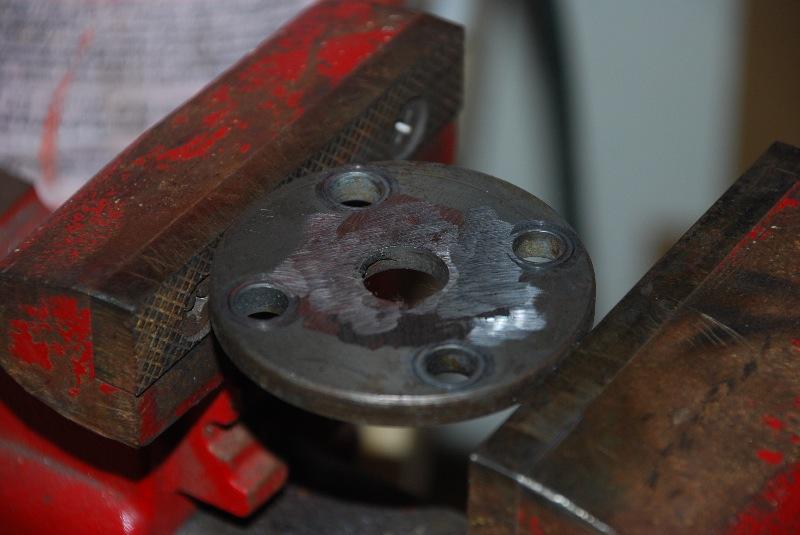
I cutt off the extra bit of shaft left over and ground it out flat:

CJ_fan_clutch_cut-1.jpg


Mounting the fan with that spacer in place got me to something I'm more comfortable with and put the fan in slightly better position to the radiator without being too close. You can see the spacer on the right.
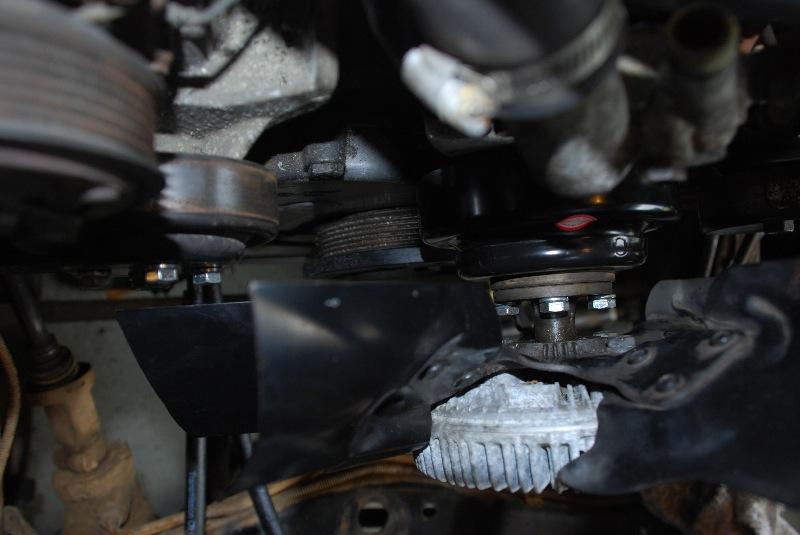
fan_with_spacer-1.jpg
 
Congradulations!

Way to go Eric.
I haven't been on here much to follow your install or I would have cought your bolt shortage. I found the canister of all the bolts from the 4.0 I saved for you sitting on the front bumper of MrBeep. Things got a little hectic before I left for work and didn't think to set them in your trailer. If you need them, I can ship it to you. Sorry for the inconvieance my friend. :o
 
Way to Go Eric,

You have twice the space between the fan and the idler pulley (without spacer) than I have. As the engine speeds up the fan blades will pull away from the pulley.

Don
 
Video, maybe....

I couldn't figure out how to convert this to a more "normal" format, it's off my BlackBerry. 3GP format, it ran in Quicktime Player on my Mac.

I'm attaching it as a zip for now, may play with it later to get it where it can show inline.

But anyway, there's a video w/ sound of it running :thumbsup: (if you can play it).
 
Back
Top