• Notice for iPhone users: DO NOT use the image size reduction option when uploading photos to the forum. This causes portrait images to post as landscape. We have added a warning to the image insert pop-up as well.

Project Panel Replacement

UPDATE: I found the brace... it was underneath the shackles... funny... I put it where I had no choice BUT to see it, and yet I failed to see it right in front of my eyes.

cb
Delete this post at once. It makes you look like theres a possibility you actually make mistakes. 🤣

Great read. I like many admire your skills and attention to detail. The only way I could ever come close is buying it when your done... If I started saving years ago. Thanks for sharing this all with us. Especially knowing it adds on to an already time consuming project. 👍🏻
 
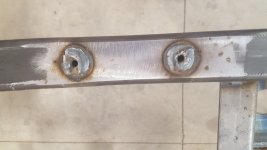
On the shot of the welded in captured nuts it got me to wondering what you were going to do for corrosion protection/prevention to the frame?
It must not be too hot in that shop of yours with everything that you're getting done here lately........
 
On the shot of the welded in captured nuts it got me to wondering what you were going to do for corrosion protection/prevention to the frame?
It must not be too hot in that shop of yours with everything that you're getting done here lately........
I have some of that spray in stuff from eastwood... figured I would give that a go and see how it is after I blow out the rails and clean out the shavings.

cb
 
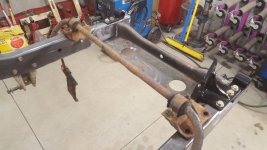
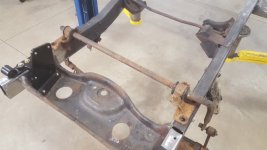
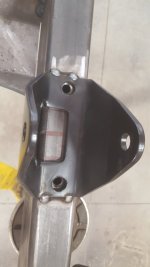
Sway bar mounts are now completed... the captured nuts are in the frame and everything is tightened up.
Even on the correct way now ;)
Had a scare, but it was only the sway bar itself I put on backwards, not the mounts...

Anywho... pics

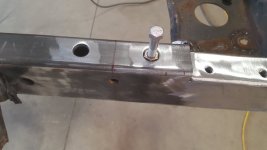
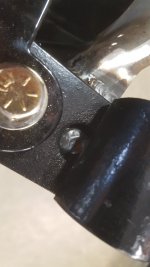
Same process as before... drill holes, nuts in frame with a removable bolt, then weld, remove bolt, grind till flat.

20220810_165811_resized.jpg

20220810_165815_resized.jpg

Still have to address the 45 degree slope that needs to go into the step down, but I need to know exactly where the sway bar mounts bolt in and then will work on that.

More holes completed:

20220810_171524_resized.jpg

Sway bar in place, bolted down and sitting the correct orientation.

20220810_175503_resized.jpg

Welded the front of the cross member to the rails as well.
I marked where the holes will be for the bumper underneath, marked in RED where I can cut back to for the 45 degree connection to the step down and also added the "nub" which was the rivet on the old setup so the front shackles stay still and in place.

Needs a little more weld/refinement, but it is pretty locked in place.

20220810_175532_resized.jpg

That's it for now... might have some more time tomorrow... I would love to see springs actually in place with the hangers fitted mid frame, but we will see.

cb
 
Removed everything (again) so I can do the 45 degree "step ups"

20220811_180736_resized.jpg

Put in some nuts for the front bumper

20220811_180739_resized.jpg

Bumper installed

20220811_181004_resized.jpg

Filled extra holes from the brake line bracketry issue

20220811_181012_resized.jpg

And finally I got to 1 spring hanger... tomorrow I hope to get the axle bump stops in place as well as the other spring hanger and reassemble it all so I can see if everything lines up or not.

Baby steps... I keep plugging away.

20220811_180757_resized.jpg

NOTE: I don't have access to a giant rivet machine, so my plan is to fully weld around all the contact points and then plug weld the centers as to re-create the rivet. It will be plenty strong. The welds from the factory are minimal (for the contact area the spring hanger has) and they rely more heavily on the rivets.

cb
 
@certifiablejeep this is coming along nicely, thanks for sharing, inspiring me to consider another build I am imagining… where did you get the new frame rails? TDK?

 
@certifiablejeep this is coming along nicely, thanks for sharing, inspiring me to consider another build I am imagining… where did you get the new frame rails? TDK?

Yeah TDK. They can ship them in a couple weeks vs frames which was 6 months. I figured this was a good experience to help expand my skills

cb
 
Here at certifiablejeep we try to achieve the highest in standards and perfection....

LOL... so we use what is on hand essentially ;)

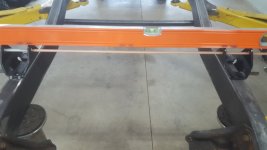
My very scientific approach to figuring out if I measured correctly.

20220812_173056_resized.jpg

All kidding aside, it works pretty good to figure out if it was square side to side.
For giggles... level?

20220812_173200_resized.jpg

I realize that none of this means anything... just more of a "feel good" as the frame is on lift arms that are all independently adjustable... but it is pretty close (which is probably better than OEM).

cb
cb
 
So, I did measure, squared it up side to side, front t back and tacked it in.

I was able to get it all mocked up (without shackles).

Pretty close I think.

20220812_181231_resized.jpg

20220812_181242_resized.jpg

Doing this upside down is pretty interesting as well, but all good.
It is all about where it needs to be.

I then hit a snag with the axles bump stops.
Where they are "supposed" to go, the frame kicks up and it leaves a void.

20220812_181321_resized.jpg

It was Friday and I was done... so I called it a night... I think it should be find, perhaps a little bend in the metal... not sure.
With my other project TDK frame I didn't end up using the base plate and just used the snubber metal tabs and bent them as the holes were already there.

cb
 
Jumped to the rear... won't bore you with the drill, nut in, weld, grind routine.
Fast forward...

20220815_182731_resized.jpg

20220815_182735_resized.jpg

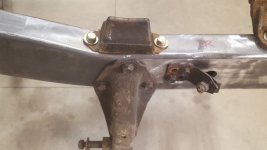
Springs in place on the front hangers...

20220815_181837_resized.jpg

20220815_181918_resized.jpg

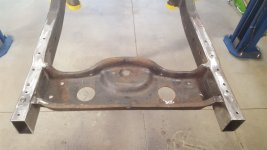
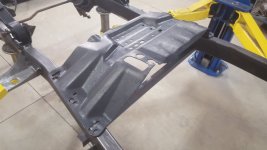
Hoping belly pan tonight... this thing is hammered though, need to find one a little less messed up.

20220815_181923_resized.jpg

Funny story... there is a tap in the frame rails.
I got a little too aggressive I guess tapping the 7/16" nuts after I welded/grinded them smooth and the tap holder let loose and I heard a "clink".
The downside is that there is really no way to get it out without removing the rear cross member.
I guess it is good news that i only tacked it in place a little... LOL.
You gotta laugh or you will cry.

cb
 
And with the magic of the Internet and a few hours... the belly pan is in place and solid.

20220816_180103_resized.jpg

20220816_185733_resized.jpg

20220816_190259_resized.jpg

NOTE: I did get the tap out of the frame rails... not fun, but lesson learned.

Next up... the axle bump stops... after that, I need to strip/flip it over and mock in the 86 axles to get the perches tacked.

cb
 
My first post didn't work... so lets try this again.
Axle snubber/bump stops in place.

The OEM holes were drilled/tapped.
I went the route of doing it the way I have done... drill/weld/grind/install.

20220818_171215_resized.jpg


20220818_171223_resized.jpg

20220818_172532_resized.jpg

20220818_172546_resized.jpg

Repeat the process on the front of the frame.

20220818_182338_resized.jpg

20220818_182341_resized.jpg

Get super strong, flip frame, get ready for the top side now...

20220818_184258_resized.jpg

20220818_184308_resized.jpg

List of topside tasks

- 2 more nuts for front bumper
- Remove cross bar for support (last one)
- 2 inadvertent holes to weld up clean/grind
- Reinstall/weld rear cross member in place (due to lost tap in frame)
- Cut off exhaust hanger/brake line attachment from old frame and install on new frame
- Drill/tap/weld holes in side frame for brake line junction / prop valve.
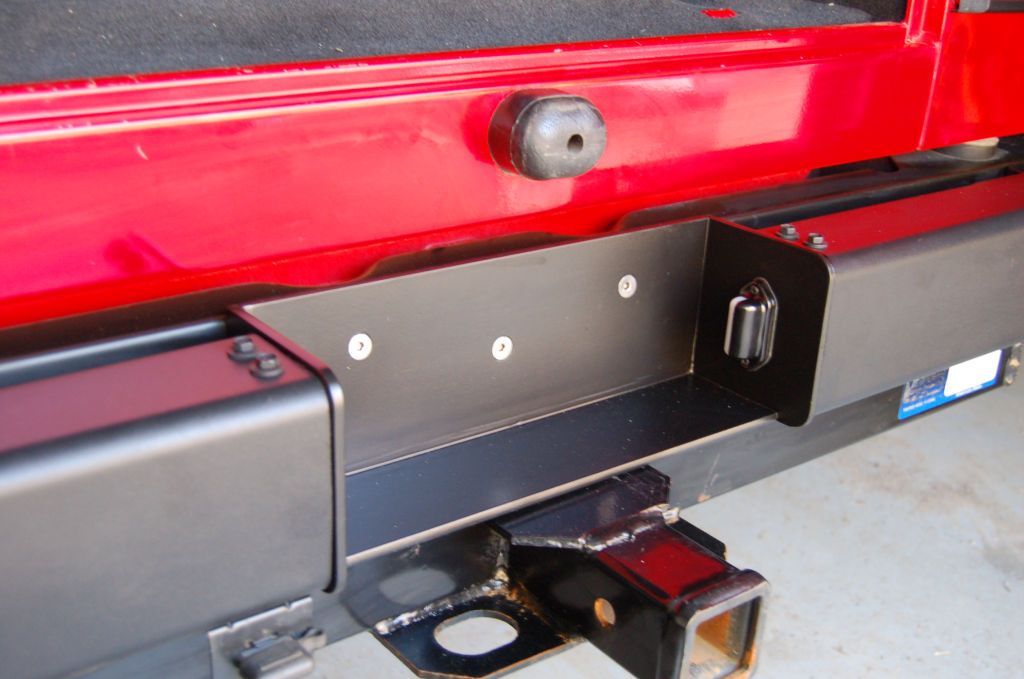
- Attempt to make rear bumper (a la @jscherb picture I saved years ago and trying to then incorporate @Kim Dawson aluminum bumper end caps) all with license place in center
- Install new axle/snubber/bump stops that showed up today to ensure fit. I used the old ones before as a guide, but they are too far one to use.

I think that is a good list for now.

cb
 
Not too much done, but small steps are better than none.

- Remove cross bar for support (last one)
- 2 inadvertent holes to weld up clean/grind
- Reinstall/weld rear cross member in place (due to lost tap in frame)
- Install new axle/snubber/bump stops that showed up today to ensure fit. I used the old ones before as a guide, but they are too far one to use.

Aside from that, I dug out all the slightly bent/twisted front bumpers that will become the rear ones.

20220819_141601_resized.jpg

20220820_154833_resized.jpg

20220820_154854_resized.jpg

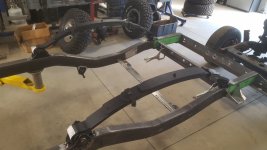
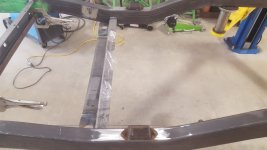
Now it looks more like a frame without all the bracing

20220820_154937_resized.jpg

Hoping today will be

- 2 more nuts for front bumper
- Cut off exhaust hanger/brake line attachment from old frame and install on new frame
- Drill/tap/weld holes in side frame for brake line junction / prop valve.

The rear bumper will be this week I am hoping.
I need to get the old frame/rolling chassis cut up and out of here as well.
I want to use the axles that are under there for mockup. I don't plan to run them permanently, but they have the spring perches welded in the stock location vs. the 1986 D44/D30 I have been rehabbing.
I want to make sure all the sprints/shackles/etc. all line up correctly for this stage.

cb
 
Feel free to make a second rear bumper for me. :P
 
- Attempt to make rear bumper (a la @jscherb picture I saved years ago and trying to then incorporate @Kim Dawson

RetroBumper.jpg


StepBumper1.jpg


StepBumper2.jpg


StepBumper4.jpg
 
I would pay for that center section. Could do the rest myself. I could probably do the center section but I'm more of a booger welder than a finish welder at this point.
 
Speaking of end caps... I dug these out last night.

20220821_144622_resized.jpg

20220821_144635_resized.jpg

I also finished up the front bumper

20220821_154317_resized.jpg20220821_161419_resized.jpg

Then not so good news...

Cut off the hanger for the exhaust/emergency brake lines.
Has a hole in it... bummer

20220821_170016_resized.jpg

20220821_170021_resized.jpg

The saddest part is the full cut off wheel I used to get this off and the hour it took.
The rest of the frame is crumbling and this guy put up a fight.

cb
 
Back
Top