• Notice for iPhone users: DO NOT use the image size reduction option when uploading photos to the forum. This causes portrait images to post as landscape. We have added a warning to the image insert pop-up as well.

Project Panel Replacement

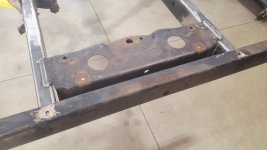
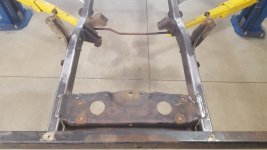
So, onto cutting up a perfectly good frame...

20220728_181918_resized.jpg

20220728_181935_resized.jpg20220728_191704_resized.jpg

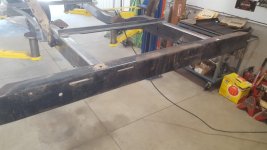
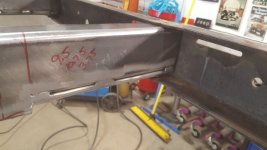
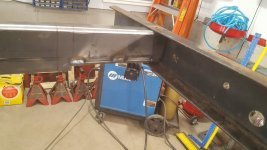
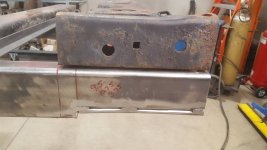
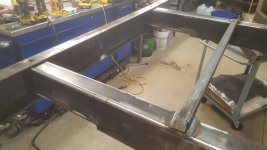
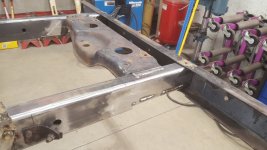
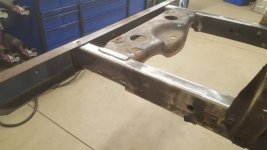
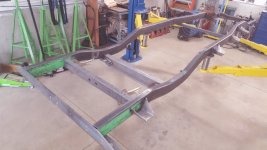
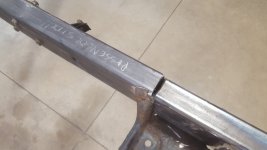
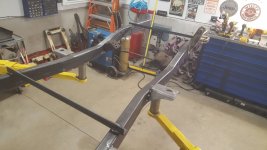
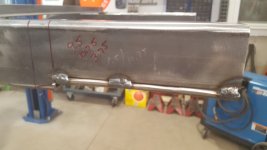
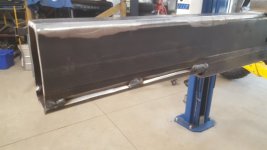
One side cut and tacked... levels all ways and parallel as well... very tough to do this perfect... the magnets help.

20220729_163853_resized.jpg

Both sides of the passenger side tacked.


cb
 

Attachments

  • 1659182066852.jpeg
    1659182066852.jpeg
    57.7 KB · Views: 0
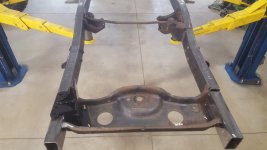
Bumper now fits across... it is funny, you need 3.5" for the cross piece in the frame, but you need 3.75" for the bumper (inside diameter).

20220729_171348_resized.jpg

20220729_171354_resized.jpg

20220729_171359_resized.jpg

Never really noticed it before, but compared to the old setup, it actually flares a bit to fit the 3.75"

20220729_175625_resized.jpg

I have to cut out the center cross piece still... that is on tap for later today.
I want that cut out and fitted today... bumper in place, snubber welded in, adn cut out the cross brace to see what we have.

Oh, also, make sure the front JEEP frame cover fits from @Kim Dawson still!

cb
 
A few more that I was able to get to this morning before heading out...

20220729_171416_resized.jpg

Half of the cover is cut off... this was a major PITA with the riveted bolt/head in there as well as all the different welded areas.

20220729_174943_resized.jpg

Just need to cut off the other side now and trim and fit it up and get it in place.

20220729_174951_resized.jpg

cb
 
"I have to cut out the center cross piece still... that is on tap for later today.
I want that cut out and fitted today... bumper in place, snubber welded in, adn cut out the cross brace to see what we have."

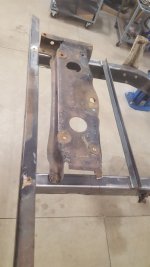
I got most of that done... snubber, crossmember in place and mostly welded in... cut out the cross brace that was holding it together... bumper is just lying there.

20220730_171123_resized.jpg

It was a long and hot day, so there is more to clean up, but all in all, I am happy with the progress

20220730_171446_resized.jpg
20220730_171502_resized.jpg

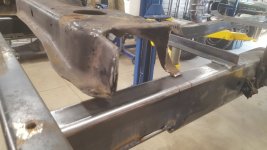
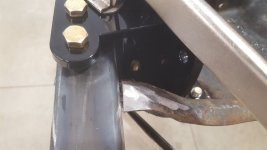
It didn't fit on the under side like I imagined, so there is some bracketry that will need to be made up... and the gap needs some refining, but all in all, it is completed.

Next is to put the P/S bracket in place and mark holes underneath and flip the frame and get that sorted.... kind of a big deal as that is how the whole front suspension is keyed off of.

20220730_171738_resized.jpg

And finally @Kim Dawson Jeep frame cover still fits, but the last of the welding needs to be ground off... doh!
I was just done for the day.
20220730_171752_resized.jpg

20220730_181231_resized.jpg
cb
 
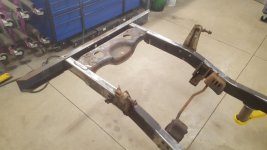
Flipped the frame... so there was something accomplished at least.
NOTE: Frame is increasing in mass and overall awkwardness... flipping by yourself presents a lot of challenge :)

20220731_162623_resized.jpg

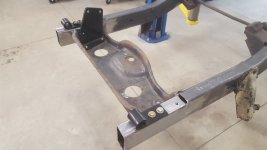
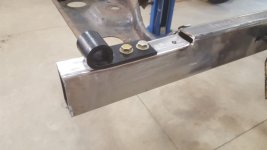
This was the area on the underside that I said needs attention.

20220731_162654_resized.jpg

Yes... both rails are marked now that I flipped them so I know what side is what... getting older sucks.

20220731_162744_resized.jpg
Test fitting the HD p/s box mount (from Rusty's)... it came with a project I bought (circa 2015) and is the old style that reinforces through the crossmember and not the frame rail... not a big deal as the cross member will be covered up and an extra hole won't be noticed.

On a very positive note, it looks like my measurements were correct with the cut down of the rails... the spacer fits perfectly and the front shackle will slip under it no issue.

20220731_162804_resized.jpg

cb
 
Over on the EB forum they're in a wadded up debate over the VIN on the frame and how most of the builders are getting away with titling a vintage EB with it's accompanying year of manufacture. They've given examples of some that have sold for north of 6 figures and having title issues.
I personally like paying property tax to the tune of $18/year on my 1973 but the guys that get hosed are the ones that spend the mega bucks and get a 2022 model year manufactured "kit car" that have to pay tax on the big number!
So I ask, if you prefer not to answer I totally understand, how is your VIN on this frame? Did you surrender a donor VIN and title and did the frame manufacturer then appropriately stamp that VIN on your frame.
Not too sure how all this stuff works, just askin'
Great progress - just remember up is down and right is left - same for forward back now that you've turtled that thing! Rock on CB!
 
If the frame that matches your title still has a readable vin, you might cut and weld it in or on your new frame.
 
I honestly haven't gotten that far yet... I have the old frame, old firewall, vins for firewall and windshield.
I am replacing the frame essentially with something far superior.
Registration is based on value in NH and the value of this will be far less than what I will have into it, so I am not worried about the price of registration.
I am a far ways off from the registration process if my history shows anything, something will come up and this will get paused unfortunately.

cb
 
Hidden stiffener that needed to be blind drilled

20220802_174146_resized.jpg

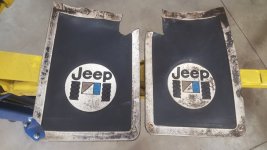
Random picture... old school flaps

1659522783502.jpeg

How I want it to lok when done... those nuts on the left need to be captured inside the frame... that is next on the list.

20220802_183418_resized.jpg

and finally the end result as I have it planned out.

1659522829286.jpeg

A little hard to see from the angle, but the center of the shock tower is right in line with the alignment pin of the spring.
So, this is ultimately how it will be once the spring hanger/shackles are in place and bushings, etc.

I am a ways off on this, but it is nice to see the measurements all appear to be in the general correct area.

Heat wave coming... not sure what will get done over the next few days... last night was too hot to get much done.

cb
 
No kidding on the heat/humidity. I came in after an hour (10pm) and was soaked.

Looking good.
 
Over on the EB forum they're in a wadded up debate over the VIN on the frame and how most of the builders are getting away with titling a vintage EB with it's accompanying year of manufacture. They've given examples of some that have sold for north of 6 figures and having title issues.
I personally like paying property tax to the tune of $18/year on my 1973 but the guys that get hosed are the ones that spend the mega bucks and get a 2022 model year manufactured "kit car" that have to pay tax on the big number!
So I ask, if you prefer not to answer I totally understand, how is your VIN on this frame? Did you surrender a donor VIN and title and did the frame manufacturer then appropriately stamp that VIN on your frame.
Not too sure how all this stuff works, just askin'
Great progress - just remember up is down and right is left - same for forward back now that you've turtled that thing! Rock on CB!
I have a set of letter/number stamps. Personally I would just recreate the stamp to match the original frame and call it good. I know there are several states that want a vehicle branded as reconstructed or rebuilt if a frame is replaced. And that is a shame because such branding decreases value even though the new parts usually exceed the quality of the original. Other states want you to bring “constructed” vehicles up to current safety and emissions standards. Recreate the original frame stamp. There is no fraudulent intent.
 
Over on the EB forum they're in a wadded up debate over the VIN on the frame and how most of the builders are getting away with titling a vintage EB with it's accompanying year of manufacture. They've given examples of some that have sold for north of 6 figures and having title issues.
I personally like paying property tax to the tune of $18/year on my 1973 but the guys that get hosed are the ones that spend the mega bucks and get a 2022 model year manufactured "kit car" that have to pay tax on the big number!
So I ask, if you prefer not to answer I totally understand, how is your VIN on this frame? Did you surrender a donor VIN and title and did the frame manufacturer then appropriately stamp that VIN on your frame.
Not too sure how all this stuff works, just askin'
Great progress - just remember up is down and right is left - same for forward back now that you've turtled that thing! Rock on CB!
When I had the Overlander “inspected” by a LEO to get a Bonded Title, the LEO looked at the VIN on the wiper motor, then ran that in the database, then signed the form.

But, I am an individual with one vehicle. Look up Unique Motorcars from Dallas and what they went through with their reproduction Eleanor Mustangs.

I personally think the VIN lives with the body, and specifically the windshield frame. But others (LEOs) might disagree. That is the only place on a Jeep with the “rosette rivets” meant to prevent VIN tampering. Heck, the VIN stamped in the frame is not even the complete number, just the first 3 digits and the last 6 series numbers. All of the middle info is not there. I doubt anybody would ever go through the trouble of looking to see if a Scrambler has anything stamped in the frame.
 
Years ago I bought a small single axle trailer that didn't have a title........Went to the DMV to have it inspected as "homemade" and the man said I did good work - they really didn't look twice at it is what I'm saying.
The EB guys are getting $10k + for a frame with title and glove box door so that the builders can circumvent the new designation on a title. The only original part on one of those is probably the glovebox door that marches the VIN on the title. Heck, ICON sells their units for $250k.
CB's gonna hit it out of the park on this one. He's probably in the shop right now holding a beer to cool off from all the welding, measuring,drilling, grinding, flipping, lifting and sweeping he's done today!
 
I personally think the VIN lives with the body, and specifically the windshield frame. But others (LEOs) might disagree. That is the only place on a Jeep with the “rosette rivets” meant to prevent VIN tatamperinge.
And that vin plate unfolds and can be bolted to another Jeep so easily. Heck I have that plate from my first Jeep somewhere. Didn't mean to keep it when I sold it, it just happened.
 
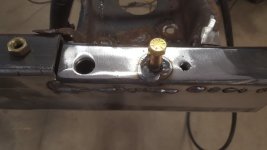
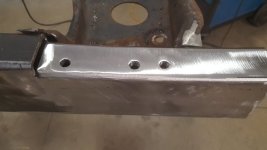
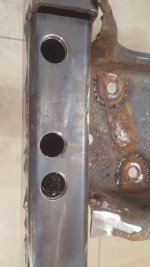
Surgery continues... tonights task was to put captive nuts in the frame.
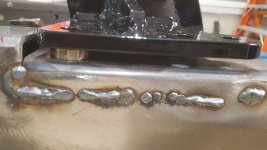
Never did this before, so just went for it... wasn't too bad, just time consuming and very hot welding.
Drilled the holes out to fit the nut... even though the bolt is 5/8", the nut is 11/16" and with it not being round, you need just shy of 3/4" hole.

20220803_165149_resized.jpg20220803_165725_resized.jpg

Used a bolt to tap it into plate and center it.

20220803_171407_resized.jpg

After 2 times using the bolt, it was pretty much wasted with the heat cycles and going in/out the hole... after each tack, I made sure the spatter/heat didn't fuse it in there, but the threads didn't hold up well on the bolt. Tapping the hole after it cooled down was always in the plan.

20220803_172238_resized.jpg

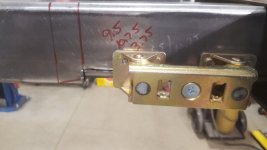
With the one side done, onto the next side and once that was done, got the shackles into place.
NOTE: I have to figure out a solution to losing the rivet that held the original front crossmember on in the front lower c-channel.
That locates the shackle and doesn't allow it to move side to side.
I will tackle that tonight.

20220803_172812_resized.jpg

All bolted down and tight... the 2x4 rails and HD mount... this baby is not going anywhere and is very solid.

20220803_172822_resized.jpg

Side view

20220803_172826_resized.jpg

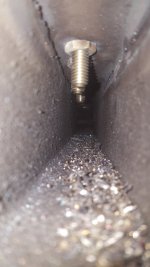
Inside view. I have to clean the shavings out, but you can see that once this is turned "right side up" and this is upside down, the nuts are in there and probably won't move too much... I think the difference to OEM factory is that they were tacked in place... and/or spot welded in place when they built the original frames. Torquing them trying to remove them easily snapped rusty spot welds due to years of decomposition/corrosion.
This way I think will outlast me. It is welded 360 degrees and recessed into the frame and not just sitting on the rail with a couple tack welds. Only time will tell.

20220803_172845_resized.jpg

20220803_180220_resized.jpg

Other side all set. Came out good... can't find my steering brace that goes from the one side to the other. I want to test fit that as well. I ordered it and put it in a "safe place".

20220803_180229_resized.jpg

Rails were cleaned up as well on the outside... looking a lot better now.

cb
 
Surgery continues... tonights task was to put captive nuts in the frame.
Never did this before, so just went for it... wasn't too bad, just time consuming and very hot welding.
Drilled the holes out to fit the nut... even though the bolt is 5/8", the nut is 11/16" and with it not being round, you need just shy of 3/4" hole.

View attachment 104361View attachment 104362

Used a bolt to tap it into plate and center it.

View attachment 104363

After 2 times using the bolt, it was pretty much wasted with the heat cycles and going in/out the hole... after each tack, I made sure the spatter/heat didn't fuse it in there, but the threads didn't hold up well on the bolt. Tapping the hole after it cooled down was always in the plan.

View attachment 104364

With the one side done, onto the next side and once that was done, got the shackles into place.
NOTE: I have to figure out a solution to losing the rivet that held the original front crossmember on in the front lower c-channel.
That locates the shackle and doesn't allow it to move side to side.
I will tackle that tonight.

View attachment 104365

All bolted down and tight... the 2x4 rails and HD mount... this baby is not going anywhere and is very solid.

View attachment 104366

Side view

View attachment 104367

Inside view. I have to clean the shavings out, but you can see that once this is turned "right side up" and this is upside down, the nuts are in there and probably won't move too much... I think the difference to OEM factory is that they were tacked in place... and/or spot welded in place when they built the original frames. Torquing them trying to remove them easily snapped rusty spot welds due to years of decomposition/corrosion.
This way I think will outlast me. It is welded 360 degrees and recessed into the frame and not just sitting on the rail with a couple tack welds. Only time will tell.

View attachment 104368

View attachment 104369

Other side all set. Came out good... can't find my steering brace that goes from the one side to the other. I want to test fit that as well. I ordered it and put it in a "safe place".

View attachment 104370

Rails were cleaned up as well on the outside... looking a lot better now.

cb
Looks great! That should hold for a long time.


I have had to stop putting things in a “safe place” myself. “Safe”=“unfindable”. I’ve started keeping a notepad and labeling shelves and cabinets- I make a note of what I put in there and it’s pretty easy to find. Plus after 10 or so times spent reading the list while searching, you sort of memorize it!
 
Looks great! That should hold for a long time.


I have had to stop putting things in a “safe place” myself. “Safe”=“unfindable”. I’ve started keeping a notepad and labeling shelves and cabinets- I make a note of what I put in there and it’s pretty easy to find. Plus after 10 or so times spent reading the list while searching, you sort of memorize it!
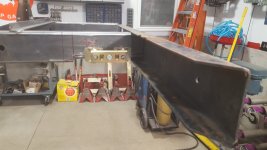
UPDATE: I found the brace... it was underneath the shackles... funny... I put it where I had no choice BUT to see it, and yet I failed to see it right in front of my eyes.

cb
 
Back
Top