• Notice for iPhone users: DO NOT use the image size reduction option when uploading photos to the forum. This causes portrait images to post as landscape. We have added a warning to the image insert pop-up as well.

Randyzzz Scrambler Restification Thread!

Yeah yeah that is it....throw some high temp paint on it and call it good. :p

Truck

After watching some of these forums for a few years, somehow it just wouldn't shock me that much if some idiot actually tried it.:cool:
 
After watching some of these forums for a few years, somehow it just wouldn't shock me that much if some idiot actually tried it.:cool:

Not this idiot!;)

I am having a hard time finding exhaust flanges, however. Anyone have any good sources? In the mean time, I'm working on the trans cooler and power steering lines.
 
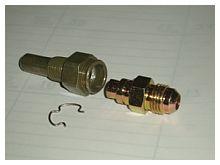
Ok...trans cooler lines mostly done. I'm planning on one of the "finned" style log coolers under the front crossmember in addition to the in-radiator cooler. The lines bolt to 3/16" tabs that are in turn bolted to existing bolts or holes in the frame. I didn't want to drill the upper frame rail and chance a place for cracks to start. The heat shield is a snap on piece, they are part of a Ford brake hose recall kit. I got a handful from work- they come in handy. The line actually goes straight, the hump is just in the heat shield.

attachment.php

attachment.php

attachment.php


I'm not 100% sure on the P/S pressure line, I may take another shot at that one. It clears the steering shaft, but only by 1/2".

attachment.php


Also, my exhaust cost just doubled.:mad: Couldn't find suitable flanges anywhere, the only ones I could find to modify were only 5/16" thick. So I'm having a pair custom cut out of 1/2" plate. $60.00 for the pair. Those shouldn't warp.
 
Last edited:
looks good randy. What connections are those going into the tranny body. Look a little more durable than the press in stock ones.
Jake
 
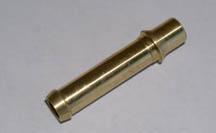
Actually those are hose barb adapters for the ends of the 5/16 cooler tubing. I'm going to run a short piece of flex hose between them ans the trans couplers. I have some snap-in to hose barb adapters ordered for the trans.
 
Exhausting progress...

Started the exhaust today for real. Used my custom flanges and some mandrel bent 2 1/2" tubing...cut/position/weld. I'm very happy with how it has turned out so far. Plenty of clearance at the driveshaft, nothing hangs below the frame. Now I have to build a Y connector...

attachment.php


attachment.php


attachment.php


attachment.php
 
Last edited:
Now, this is cool...

I didn't have enough exhaust tubing left to do the Y connector the way I wanted, and the closest exhaust shop is 25 miles away...so no more exhaust work until next week.

But....

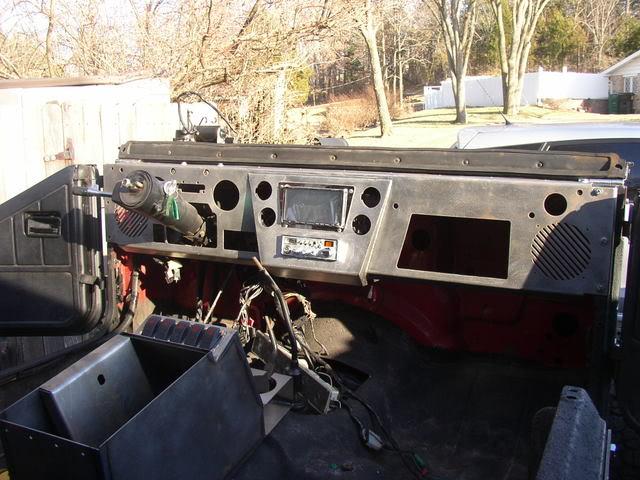
The big brown truck brought my new A/C evaporator this morning, so I got it mounted up. This was one of the items i agonized over...both cost wise and performance wise. I saved my nickles and dimes, and got a Hot Rod Air Elite Standard heat/cool/defrost. It's a tiny little thing...until you put it under the dash. I'm going to have a hard time running all the vent tubes. I'm also trying to keep the cowl vent box, sealing the passenger side so it just has a fresh air dump on the driver's side.

Here's some pics.

It fits nicely-
attachment.php


And with the dash on it doesn't hang down any further than stock-
attachment.php


From a seated angle you won't even see it!
attachment.php
 
Nice setup! :thumbsup: Maybe you could make a manifold out of the same ABS fittings you used for your exhaust mock-up...that along with flex duct should get you anywhere you want to go!

Dig the component speakers in the dash...that'll blast ya! :eek:
 
Randy that looks very nice. Where are you going to put your vents?

Truck
 
Thanks, guys. Jeff, I was thinking about some ABS tubing for some of the ductwork. The hardest obstacle is keeping the cowl vent for fresh air. If I eliminate that, it would be easy.

The vents (3) are going to be 1- above the glove box where my clock used to mount, 2-above the steering column (some fancy cutting/bracing there), and 3- below the stereo in the upturn of the center console. I'm running a cage cross brace under the dash, and will have 2 bars from the seat tubes to the underdash bar to form the console.

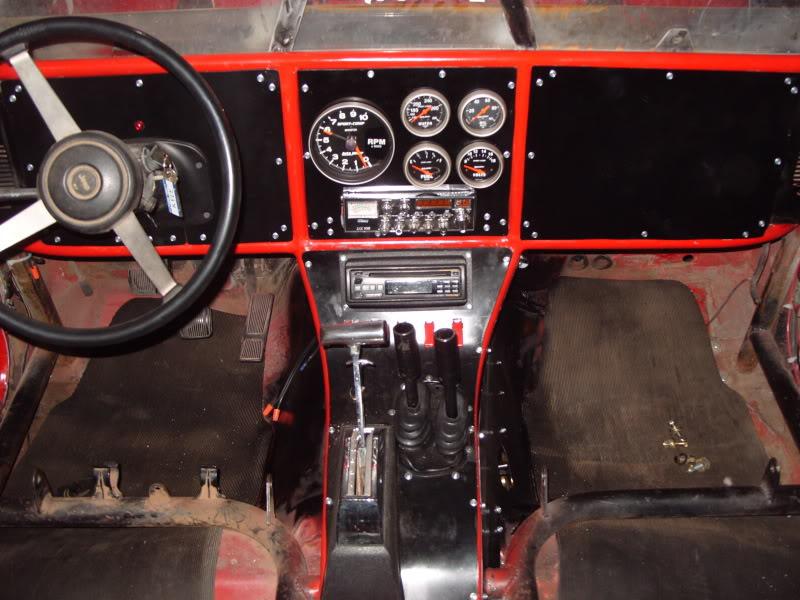
Something like this but of my own design, hopefully will "flow" better.
S1050474-1.jpg


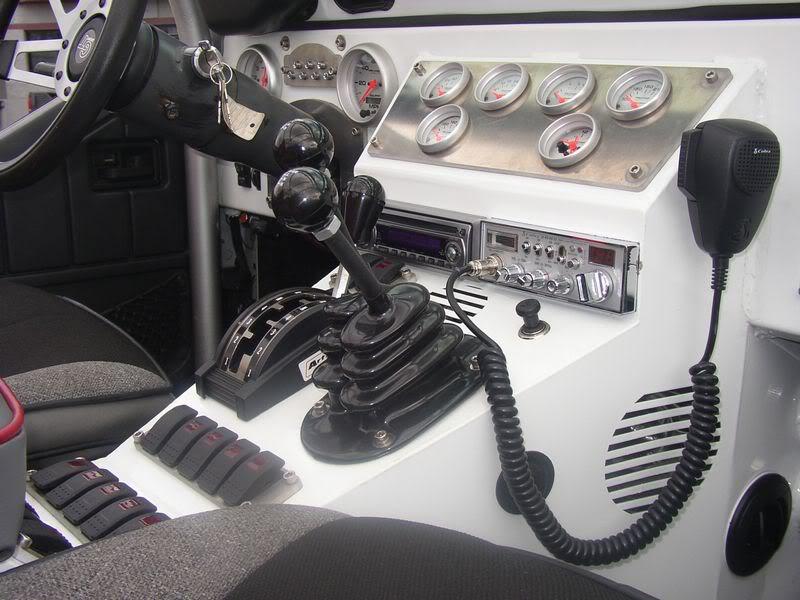
This is a bit much, but it was my original inspiration....
Tony_vehicle13-1.jpg


Along with this one...
c5_3-1.jpg


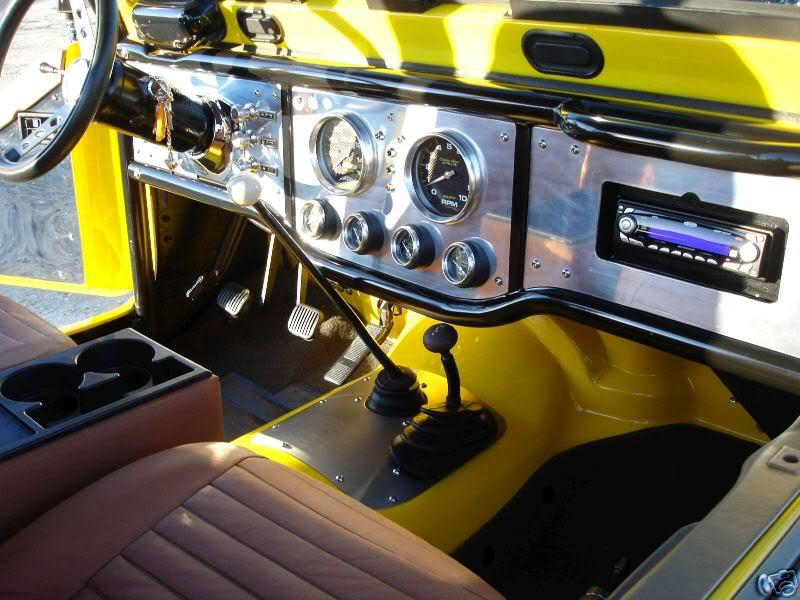
And then I found this one. Beyond cool, in my book. Has a bit of the old Willys look, with modern functionality. I think I'll be doing a combo of the yellow/aluminum one and this one.
dash_31-1.jpg

The build thread on this dash is here- http://www.pirate4x4.com/forum/showthread.php?t=740660&page=2

I really like the look of the 2 bars and the modular aspect of the yellow dash. I will probably just sell my current panel and build one like the yellow and bottom one combined. I really want more real estate and would like to panel mount my CB and use a double din stereo, like the new Jeep MyGig or the Pioneer AVIC with nav. (Not that I could afford it now, but I can plan ahead... I hopefully won't be unemployed forever....)
 
Last edited:
... I hopefully won't be unemployed forever....)

Well, the best laid plans...I talked to the owner today- last month was the worst ever. Initially they were planning on me being back full time mid July... now they don't know when. I think if I can talk them into one more day a week I can make up the difference on Ebay, maybe build some bumpers and such. Funny- my wife is actually glad, she said she likes having me home more, and says that I am much happier now that I'm not full time. She wants me to pursue the EBay stuff, and she just got a raise! (She did say something about me getting her Wagoneer running soon...)

So...it looks like I'll have time to finish the Scrambler sooner!:thumbsup: Gotta look at the good side of things.
 
Sorry to hear about your delayed recall...hopefully things will be turning around soon!

Yeah, our wives get spoiled with us home all of the time ;) I got more done at home when I worked full-time...must be a routine thing...I guess two little kids don't help my productivity either :crazy:

So...it looks like I'll have time to finish the Scrambler sooner!:thumbsup: Gotta look at the good side of things.

You'll have two to finish soon! :D
 
Progress has slowed a bit... waiting for parts. I did get the y-pipe finished, now I'm waiting for a flex coupler and then I can run the 3" out the back. Man, 3" is HUGE! I also ordered the rest of the necessary pieces to complete the fuel system, a bunch of Summit Twist-Loc fittings, tube, and AN adapters. Plus I've got an OEM fuel module coming, I've still got to figure out how to integrate it into the tank. I figured using an OEM module would simplify any field repairs at a later date. I need to go junkyard hunting to see if I can get a metal fuel tank so I can cut out the fuel module mounting ring, and then silver-solder it to my tank. Or just make one out of a steel plate and weld it on. I'll post more pics as I make progress worth looking at!

Some good news- after several additional conversations with the owner and my co-worker in parts, it looks like I will be going back to work full time in another month!
 
Last edited:
Exhaust is done!

Well, most of the parts that I was waiting for have shown up. So, yesterday and today was spent finishing off the exhaust. I took the 2.5" pipes and made a Y-pipe going to 3" tube. Then I put a braided flex couplee to minimize vibration damage. From there, a Thrush Welded muffler, and then a bunch of 3" bends and out the right rear corner. It's all mandrel bent, and should flow well. Pictures are worth a thousand words, so here goes.

Fabbed Y-pipe-
attachment.php


Flange in front of Y-Pipe so I can remove it easily-
attachment.php


A shot from the front-
attachment.php


Flex pipe-
attachment.php


And out the back.
attachment.php
 
Here's pics of how I hung the muffler and tailpipe. I used HD muffler clamps, some square tube, and some poly shock bushings.

Hanger for the muffler- It's based off the relocated parking brake mount.
attachment.php


Rear hanger- I built a mini-copy of a body mount to make this work.
attachment.php


It's tight, but there is enough clearance to be comfortable.
attachment.php


Here's a view from the back.
attachment.php


The system is mounted firmly, but with flex. The braided flex tube is a lifesaver. There is about 3/4" clearance at the tank, and I will be putting on a heat shield there, as well as under the oil pan and below the trans cooler lines. Any preference between actual aluminum heat shields or that "pipe wrap" stuff? By the back tire there is at least 6" of clearance with the suspension fully compressed. And 4-6" on the inside of the tire. The exhaust never gets near the spring or tire as it cycles. I'm confident there is plenty of room. 3" pipe is BIG, and difficult to maneuver, especially with having to cut and weld prebent pieces to make a complete pipe. I even left room for a cool stainless tip, too!:rolleyes:

Most of my fuel tubing and AN fittings showed up today, although I accidentally ordered male instead of female fittings... gotta return and reorder. I also picked up a fuel tank and a few modules to play with. I need to figure a easy and reliable way to copy the GM style flange on the tank. Any suggestions?

Once the fuel lines are done, that ends the frame work portion of my build, and I can put the body back on the frame! I got a few quarts of "Resistall" undercoating and sound deadener. I'm going to use it instead of bedliner on the underside. Hopefully next week I can post pics of that process!:thumbsup:
 
Great stuff! I have never seen flex pipe connected like that. Looks very factory. I need to go back in this thread and see if you did a work-up on how you put the flex together. I really like the dash in the yellow jeep, except I have visions of veering off the road as I reach across the jeep to change the radio station. I know, I know, that's what remotes are for.
 
Great stuff! I have never seen flex pipe connected like that. Looks very factory. I need to go back in this thread and see if you did a work-up on how you put the flex together. I really like the dash in the yellow jeep, except I have visions of veering off the road as I reach across the jeep to change the radio station. I know, I know, that's what remotes are for.

The flex pipe is one I purchased off EBay, didn't cost much. It is 3 layer stainless braid with a corrugated inner tube. It has aluminized steel ends so it was easy to weld on. I just picked a spot close to the Y-Pipe with enough clearance. With the MORE engine mounts and poly trans mount, there shouldn't be much engine movement, but I still wanted a way to keep from cracking the Y-Pipe.

The dash in the yellow Jeep has become my favorite also. I made a full-size cardboard mock-up, and have come up with a pretty good design. It mounts the speedo and tach on either side of the column up high, and moves the radio to the center with 2 small gauges on each side. I'm still trying to decide on the lower "bump down" in the center section, everything fits without it, but I think that's part of the "cool factor". If I do the bump down, I might relocate the locker swithes to that area. I'll post up some pics once the mock up is finalized.
 
Back
Top