• Notice for iPhone users: DO NOT use the image size reduction option when uploading photos to the forum. This causes portrait images to post as landscape. We have added a warning to the image insert pop-up as well.

Spankrjs' 1984 Long Term Project

Getting closer and looking good!

Appreciate it:cheers: I think I am going to tackle the TV cable/transmission shifter projects next, hopefully the TV cable wont be too bad, since the engine/transmission are a factory matched set:shrug:

Looks good!

As far as tire size goes, the base model with stamped steel wheels got something like a P205/75/15. Upgrade to Wagon wheels got you the 235's. They were available as an option on the base model though. Dad ordered his with the base wheels (stamped) because he wanted MT's and figured it was dumb to order and pay for factory "off road" tires, so he took the base wheels, and bought American Racing white spokes with BFG MT's. The American Racing wheels are nice and rusty even though they have almost no miles on them, so I found a set of NOS white spokes a few years ago that I picked up, and if I can ever get the old man's credit card I'm going to put some 31x10.50 BFG MT's on them and get rid of the cracked/rotten 28 year old BFG's that are on there now (that still have the nubbies on them).

Still have the stamped wheels with the 205 Michelins on them that came on the Jeep when it was new. They've been stored indoors and actually appear to be in great shape (no cracking).
Wish they still made the KM. I don't like the looks of the tread patter on the KM2's.

Sorry for the Hijack.

Thanks, and no problem on the hijack:cheers:

I cant remember if the sticker said 205 or 235, I will have to look again:thumbsup:

I had a set of KM1's for about 3 weeks, then the Jeep they were on was stolen, so I can't rate them. The KM2's I have now work great, I have about 16,000 miles on them with no issues:fingerscrossed:

But, I liked the look of the KM1's better:twocents:
 
Quick update, not too many pictures, but I made some more forward progress.

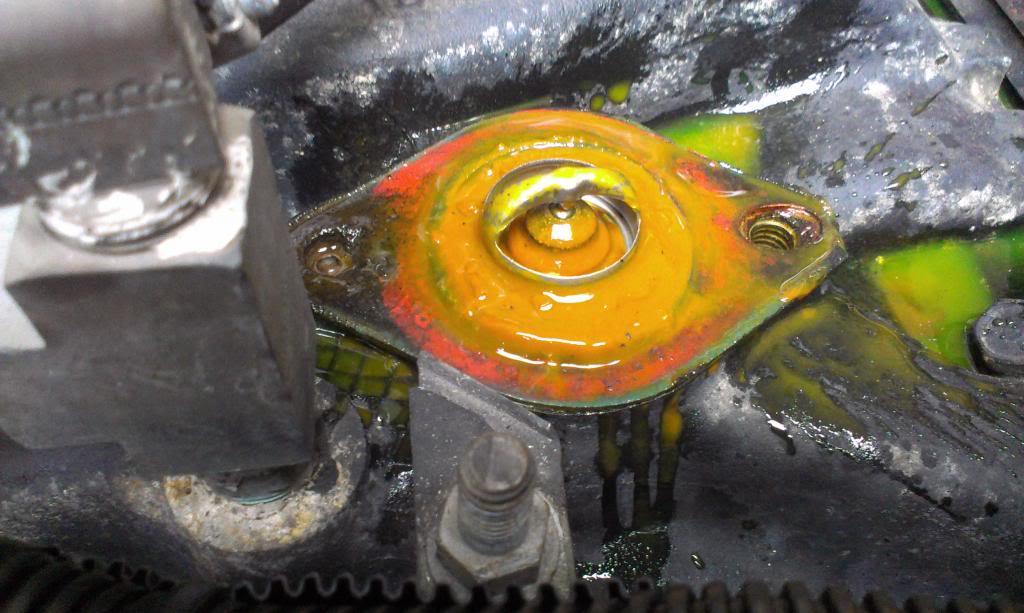
Drained some coolant out of the radiator, pulled the thermostat housing, this is what I found:

IMAG1925_zps88057d8d-1.jpg


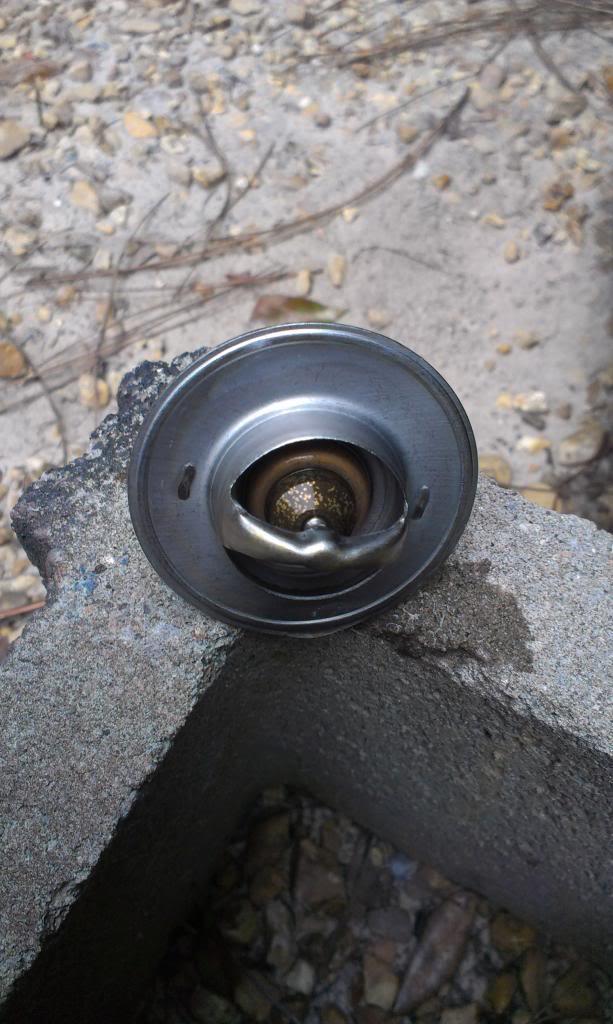
Looks bad, but I washed it off, and it seems OK:

IMAG1928_zps25e0a8da-1.jpg


I replaced this 195 degree thermostat with a new 195 degree thermostat, and now the engine is running around 200 degrees. I have drained the radiator several times since I started messing with the engine (coolant temp switch/heater core change, ect.) and each time I have drained the coolant, I have gotten a little bit of "trash" out. This last drain, hardly any "trash" was found, so maybe one more flush will have the coolant system 100% cleaned out.


Next, I wanted to figure out why I couldn't turn the Jeep off with the key.

Since I have an upcoming "install a different PIA to get to brake light switch", I changed out the ignition switch. No dice.

IMAG1930_zps7ed8e0d7-1.jpg


Next, in order to eliminate any kind of "alternator feedback" problem, I disconnected the alternator completely. No dice.


Hmm. So, sat down, did a little digging, and found my problem - For some reason, I hooked up the "ignition coil/ICM red wire", that comes out of the factory Jeep bulkhead connector straight to the battery. This is why I was having some other items staying hot all the time. And, I hooked up the TBI computer's "switched hot" to the factory Jeeps under dash computer hot wire, which stays hot all the time.

So, I cut the "hot battery wire" from the ICM/coil bulkhead wire, hooked the TBI computer to the stock "coil/ICM hot wire" (which stays hot on crank and run), and voila, Jeep stars and turns off with the key. Pretty happy about that, pretty simple fix, pretty bone headed wiring by me, but problem solved.

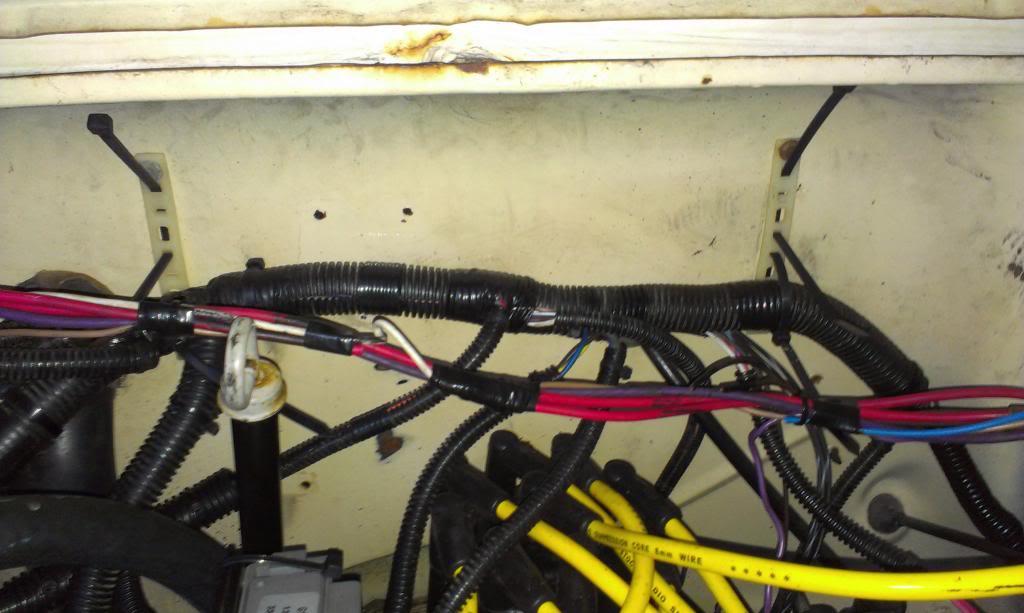
Once I run the remainder of the "to transmission wires" - transmission temperature gauge wire, VSS wiring, reverse light wires, and modify/reroute the TCC power wire (through he aforementioned PIA to get to new brake light switch) I can bundle this back up and clean up the under hood wiring a bit more.

IMAG1931_zpsabdfe6f3-1.jpg


I hope to get the transmission wiring installed, the transmission shifter installed, and the TV cable hooked up before Sunday's Saints game, so a short working weekend for me. But, once that stuff is finished, this thing should be drivable:fingerscrossed:

That's it for now:wave:
 
Busy weekend, but I did make some more forward progress on the Scrambler.

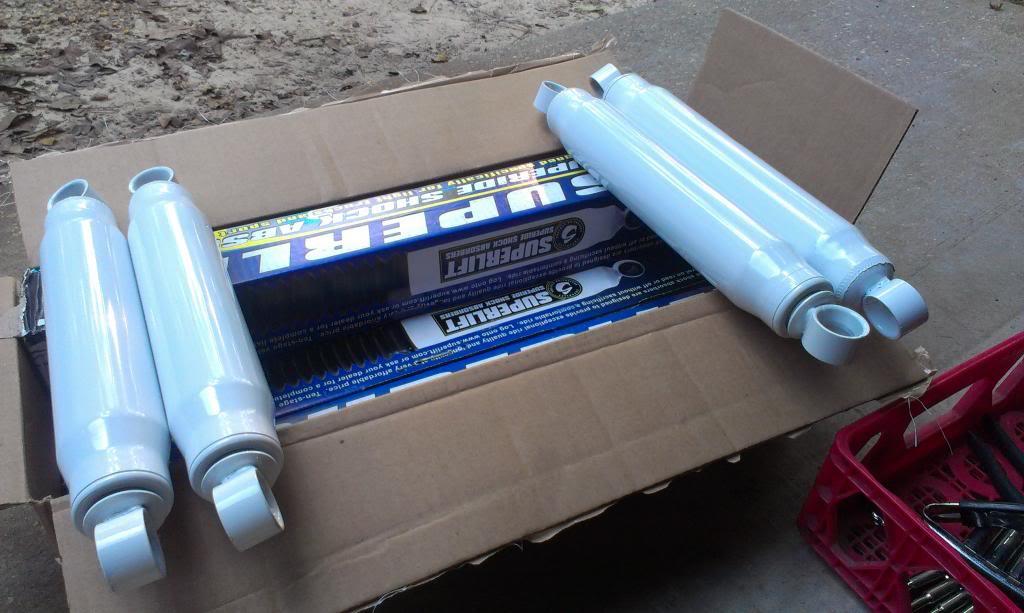
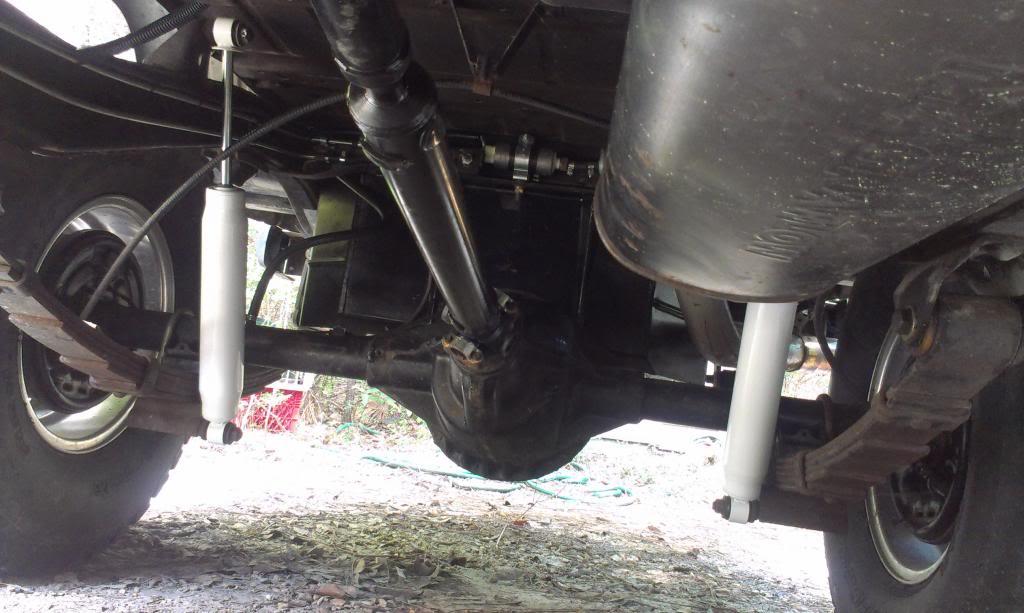
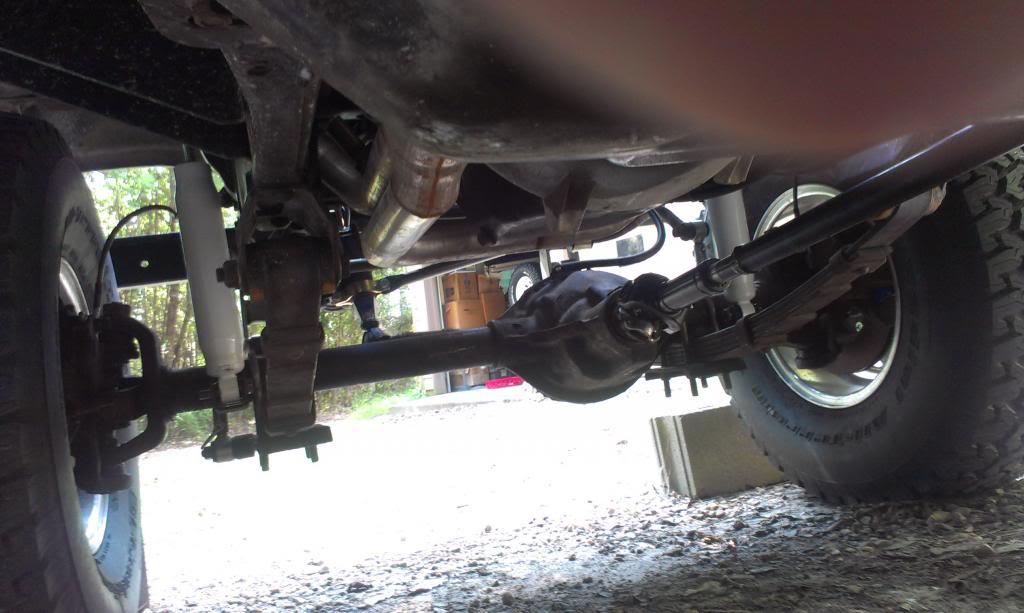
I ordered/installed the correct shocks for the 4" lift. This project came with four new shocks, but they are too long. I could have made them work, but this was easier/faster.

IMAG1932_zps4739128e-1.jpg


And installed, nothing too hard about this, I like "easy" tasks/projects. Just need to install the front shock lower retaining nuts on the bolts and I will be done with this little project.

IMAG1933_zps2e856286-1.jpg


IMAG1936_zpsf66ebba2-1.jpg


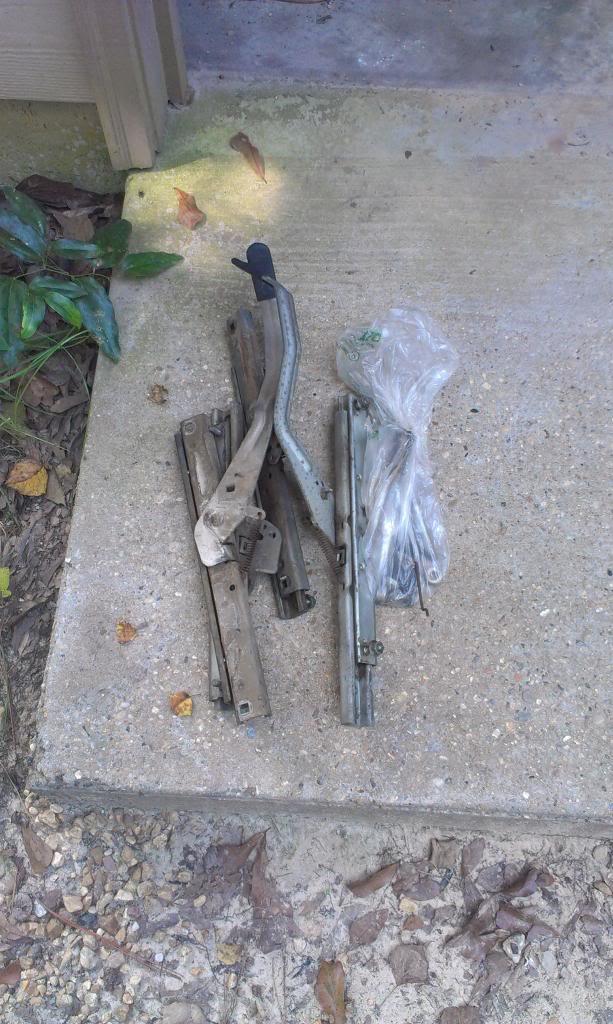
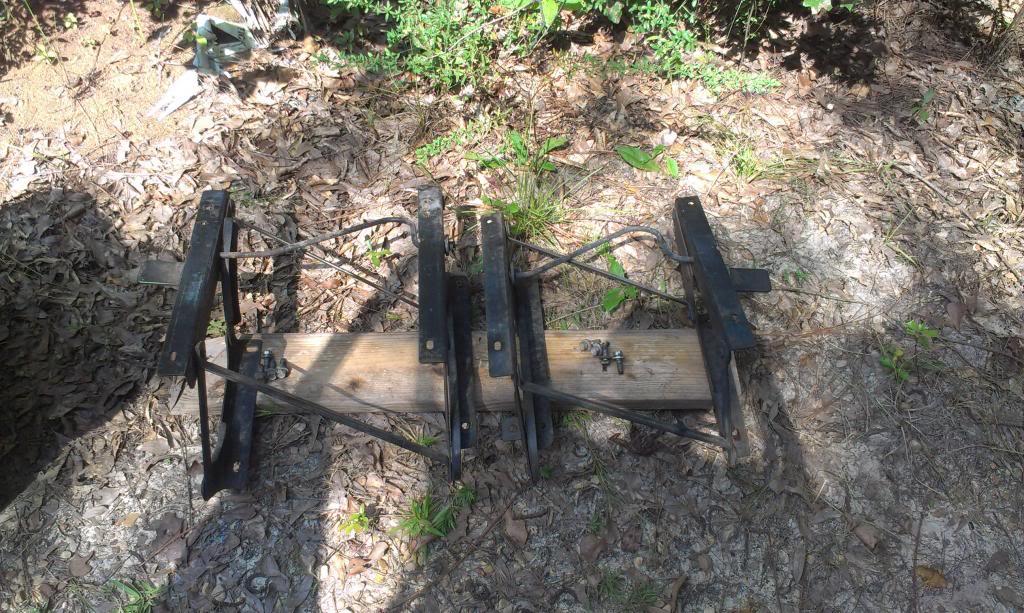
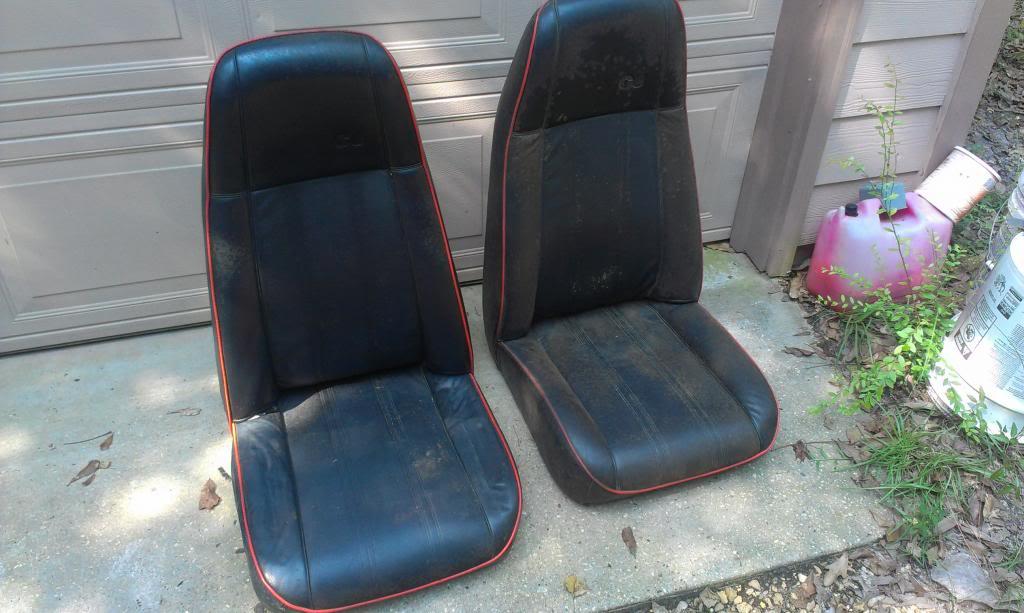
Gathered up all of my seat stuff to make sure I have everything, which luckily, I do.

IMAG1937_zps0b508ee5-1.jpg


IMAG1941_zpsecdfac08-1.jpg


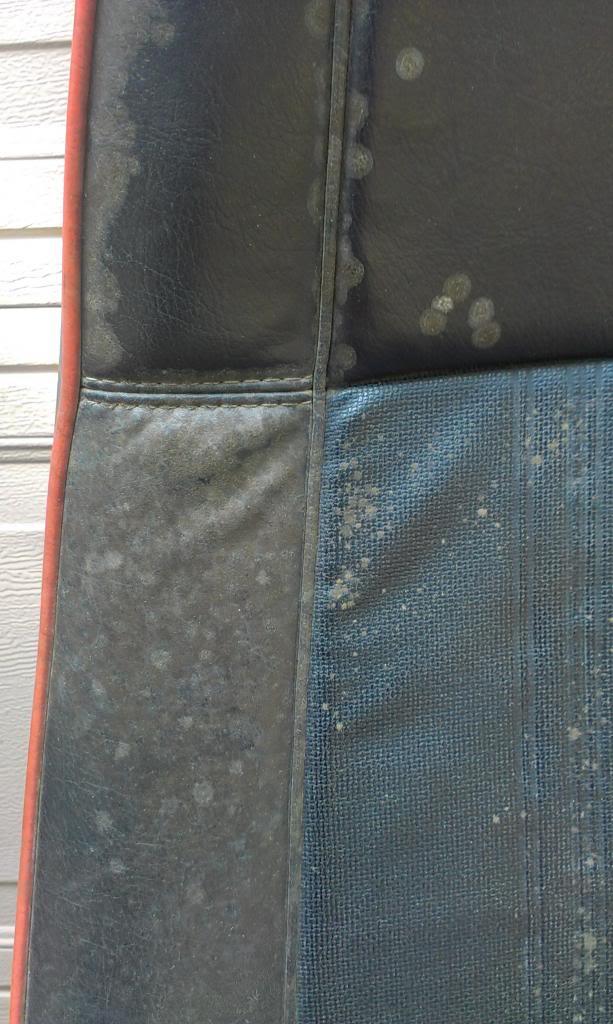
The seats were pretty dirty/nasty.

IMAG1939_zpsf106e1dd-1.jpg


IMAG1940_zps4b7d69f6-1.jpg


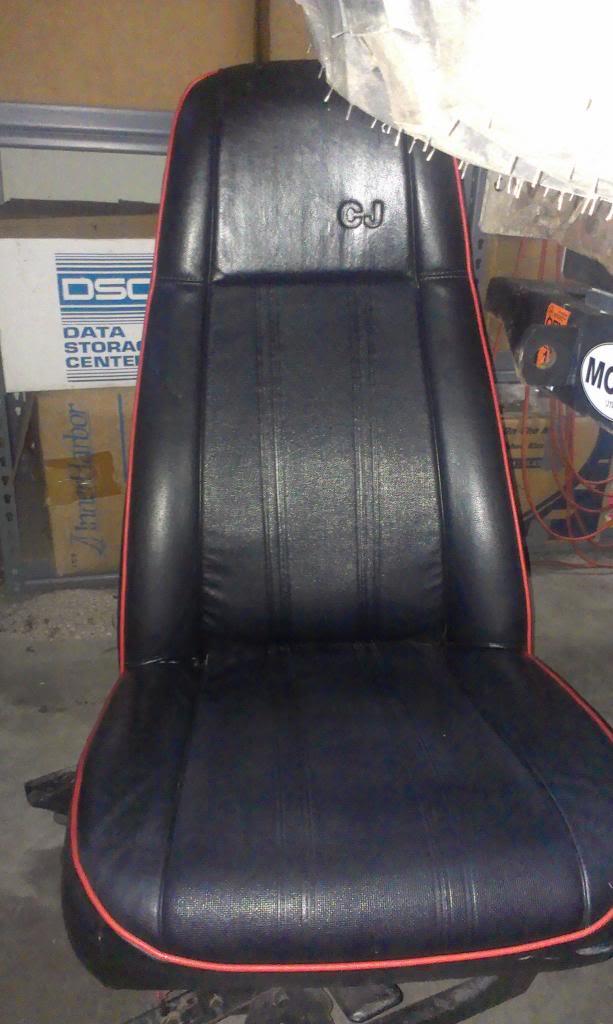
But, they cleaned up really well.

IMAG1960_zpsf3d8204e-1.jpg


I am going to wait until after I install the brake light switch to install the seats, since they will be in the way of the "gymnastics" involved in reaching this conveniently mounted piece of equipment!!!!!


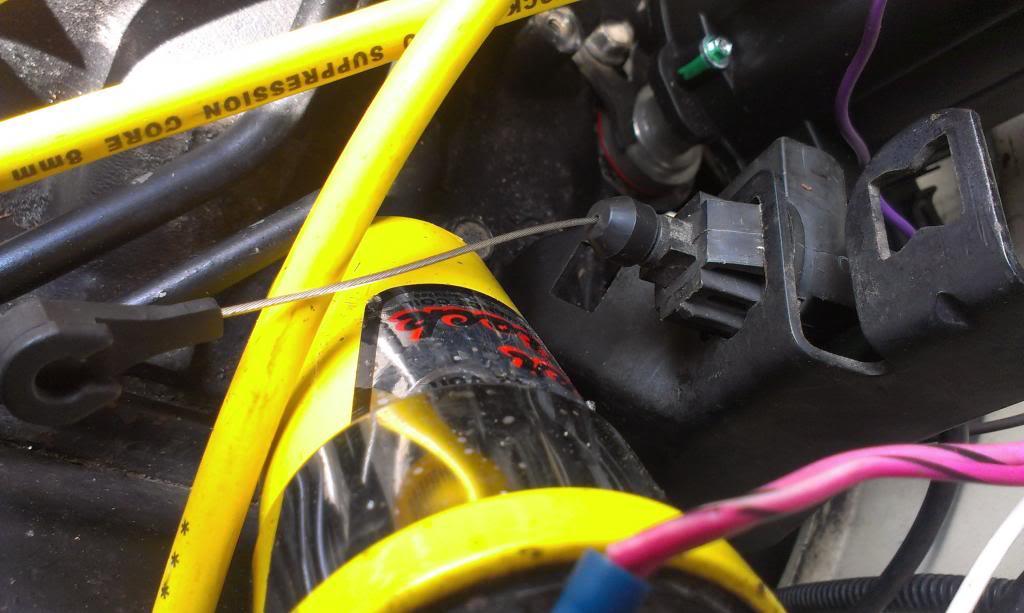
I also installed the throttle valve (TV) cable. On the 700R4, this cable controls the transmission, much more then just a "kick down" cable. Since I am using a factory engine/transmission combination, I simply hooked up this cable. I had to press the little tab, hook the cable on the throttle body throttle, and then move it to wide open throttle. When I did, I heard the adjuster "ratchet", so I think it is good. When swapping a 700R4 to an engine that originally did not have one, adjustment/routing/installing this cable is much more involved. I hope mine is correct, should be??

IMAG1944_zps62de9e3b-1.jpg


IMAG1946_zpse95d1891-1.jpg
 
I also installed the transmission shifter/transfer case shifter this past weekend.

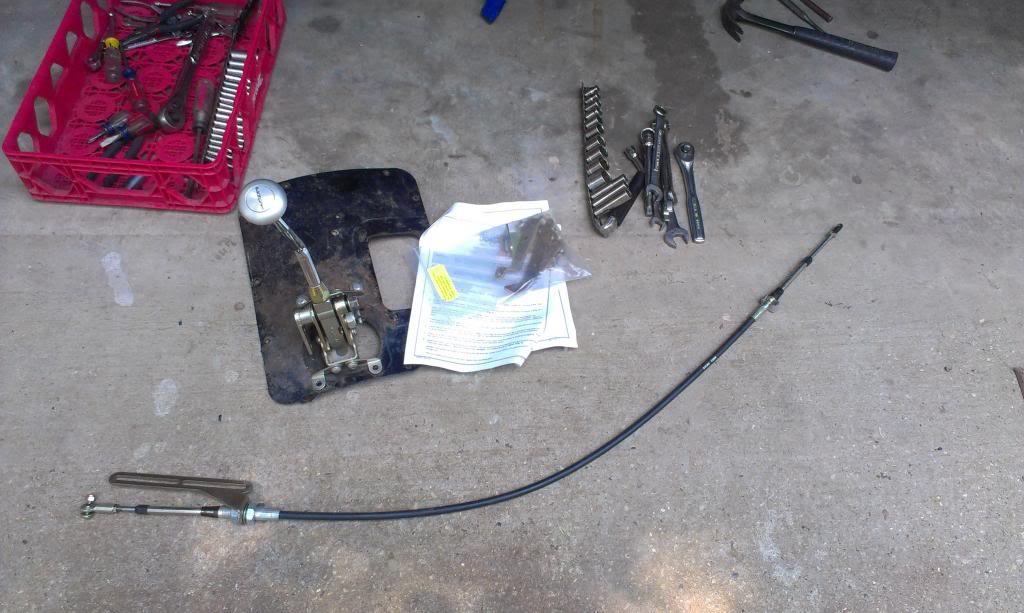
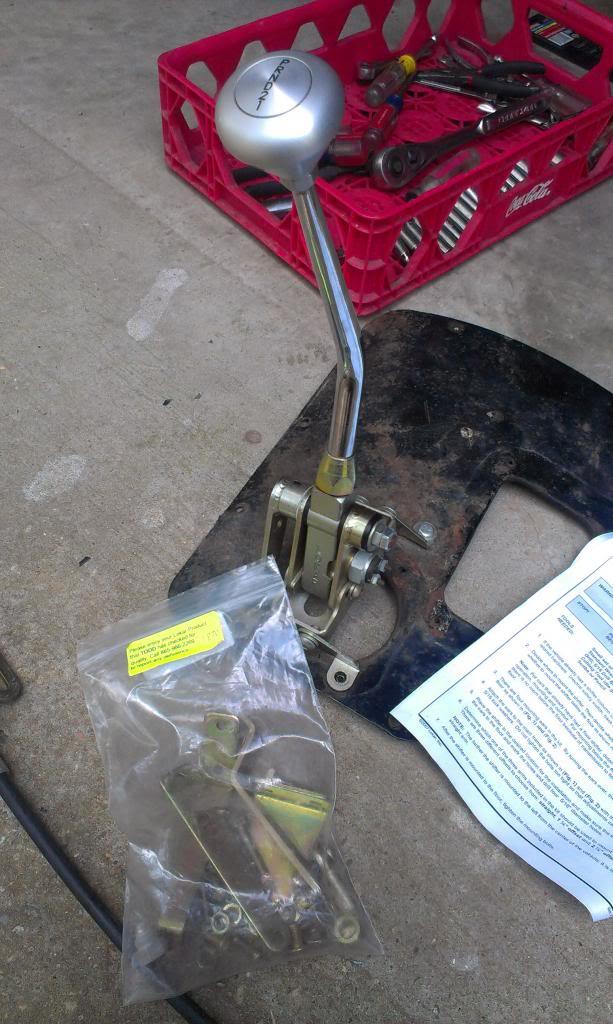
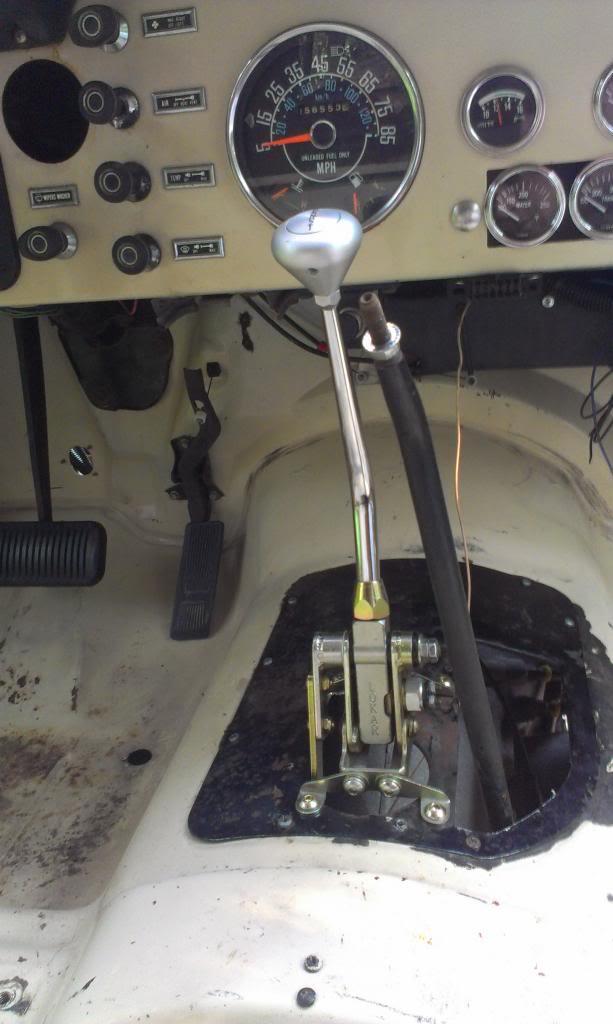
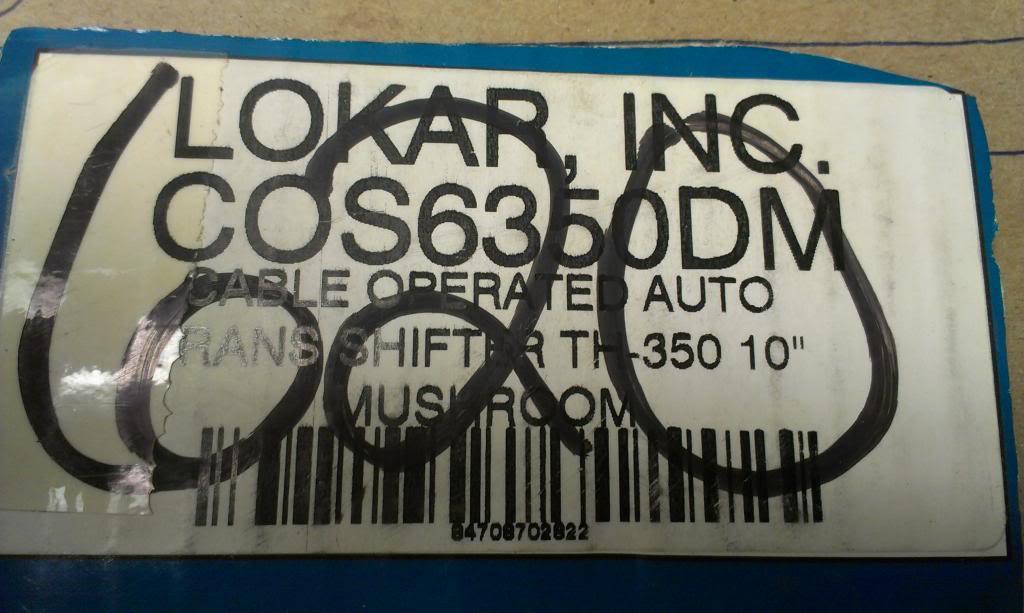
This project came with a new Lokar cable shifter, so I installed it. The shifter parts/cable/shifter assembly.

IMAG1942_zpsdb06c6d7-1.jpg


IMAG1943_zps1680e803-1.jpg


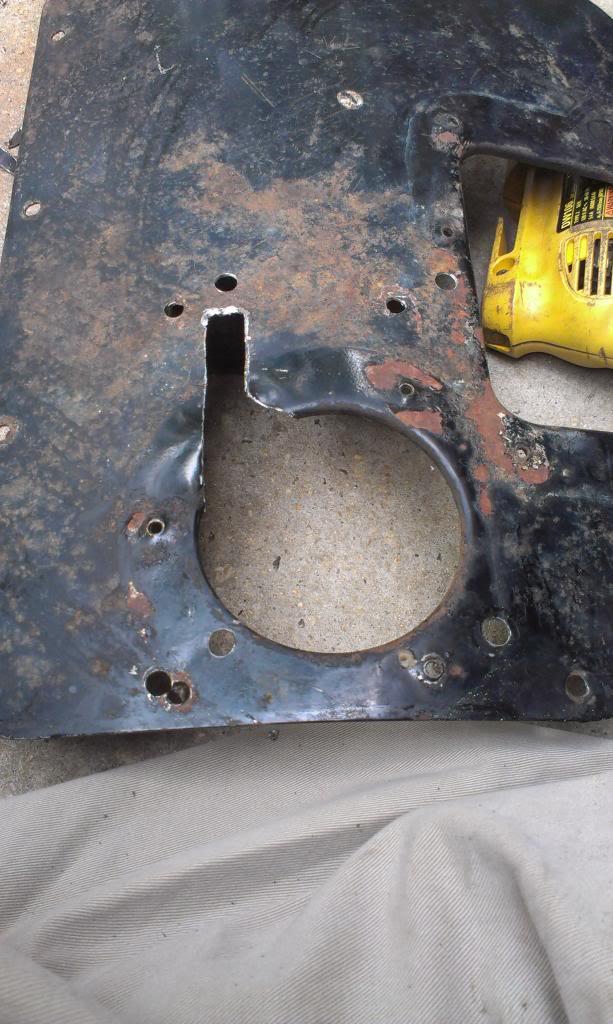
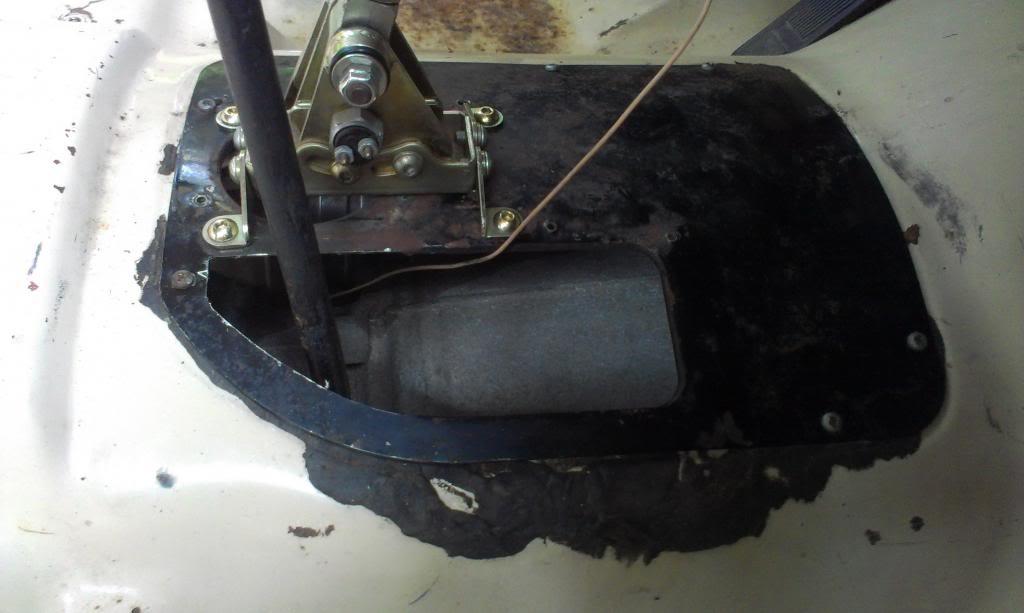
This shifter is made to be mounted to the floor, either above or below. The previous owner had already mounted the shifter above the plate, and I followed suit. I did move the shifter over to the driver side some more, meaning more holes. I also had to notch the plate to allow for shifter movement, maybe not as much as I did though LOL. This plate will be a template. Once I get everything how I want, I will get a new "blank" plate and do a more professional looking install. Consider this a work in progress.

IMAG1947_zpse95bfa45-1.jpg


Next, I ran/routed the cable. Not too difficult.

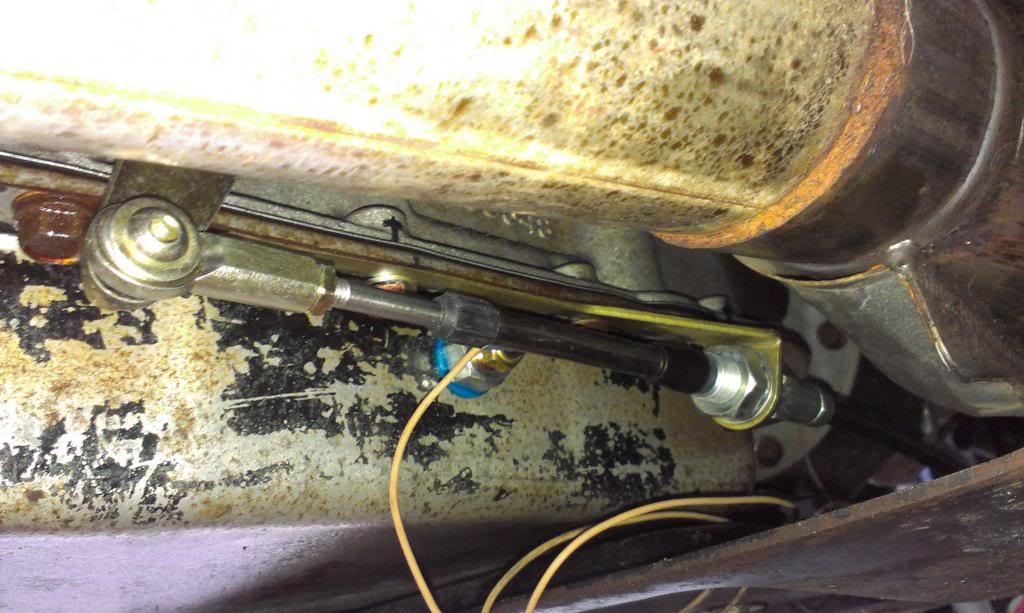
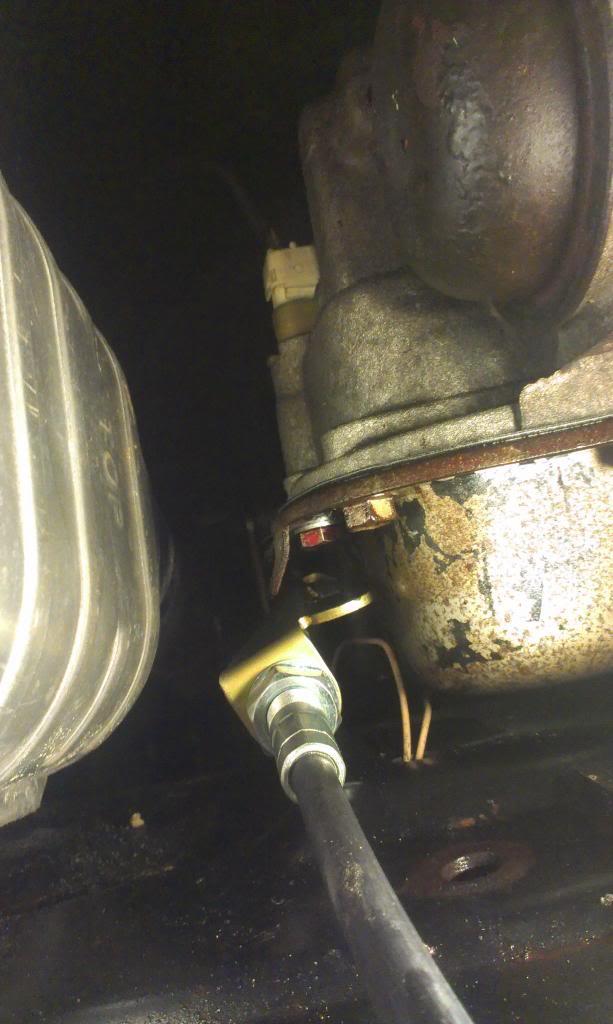
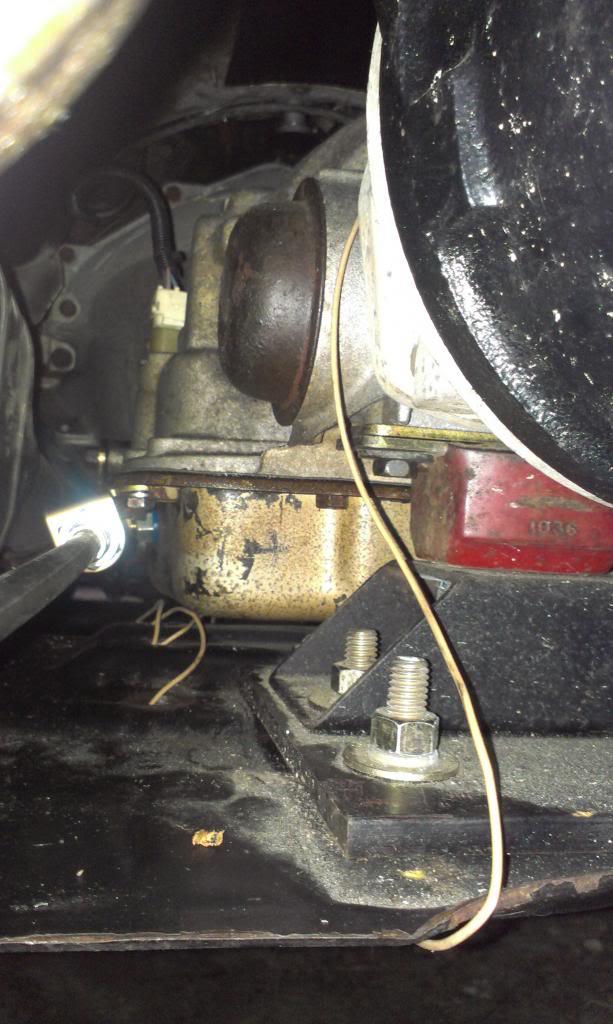
A bracket bolts to the transmission pan to secure the cable, the end of the cable bolts to the selector shaft. Note the various adjustment points.

IMAG1948_zpsc75112a8-1.jpg


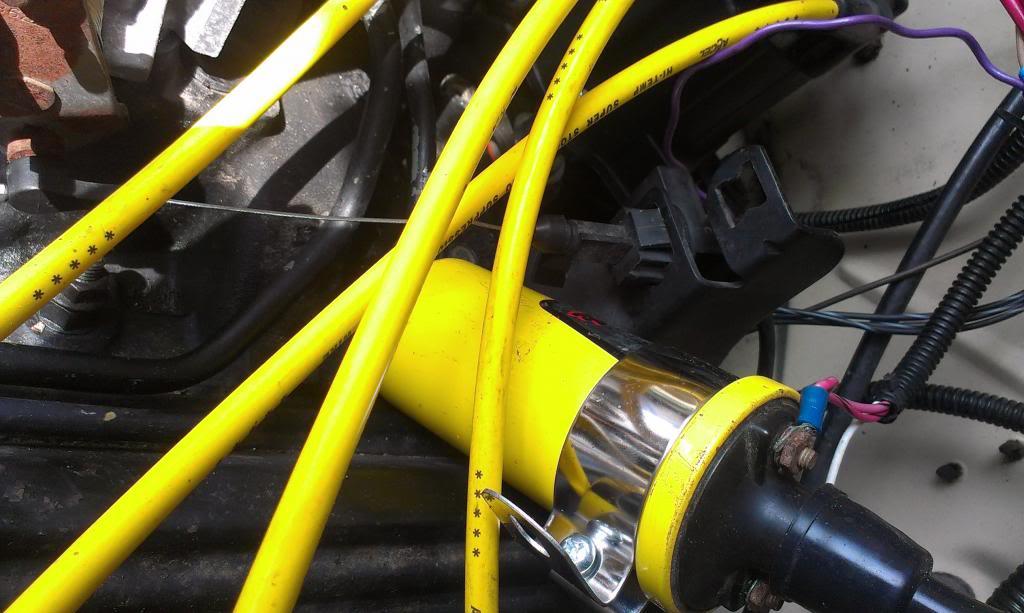
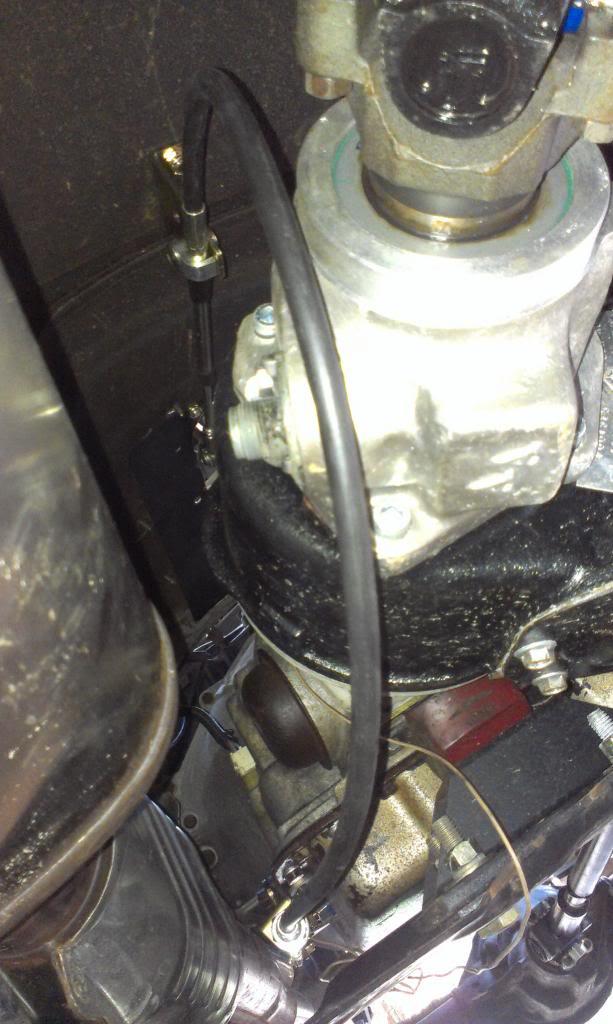
I got lucky, the shifter cable just clears my transmission temperature gauge sending unit temporary wire. Close, but it clears, and since the outer sheath does not move, this will work.

IMAG1949_zps092e38ec-1.jpg


The cable then moves toward the rear/arches nice and smooth upward. Clears the exhaust/driveshaft just fine.

IMAG1950_zpsec104305-1.jpg


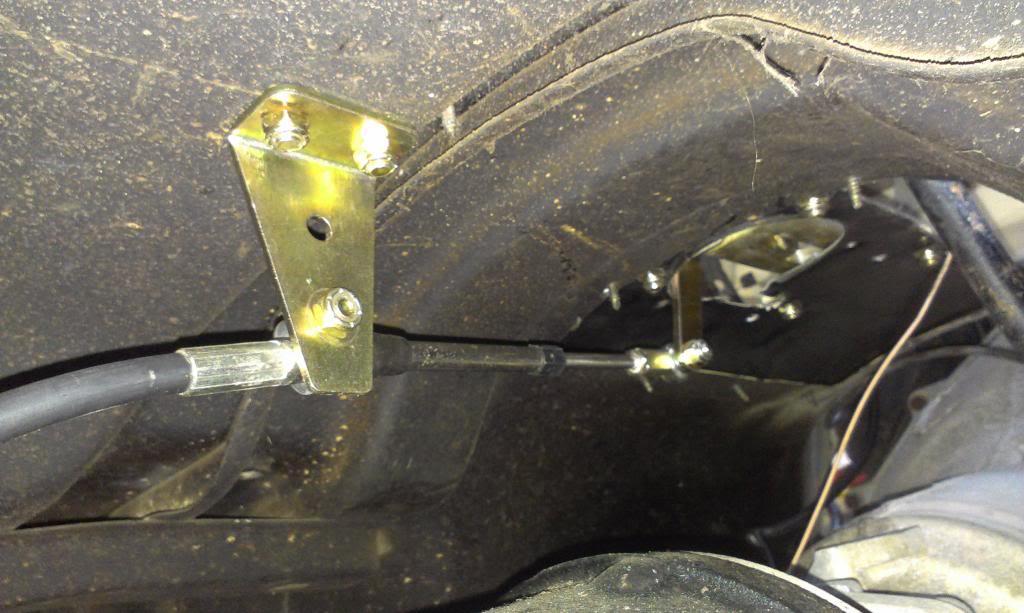
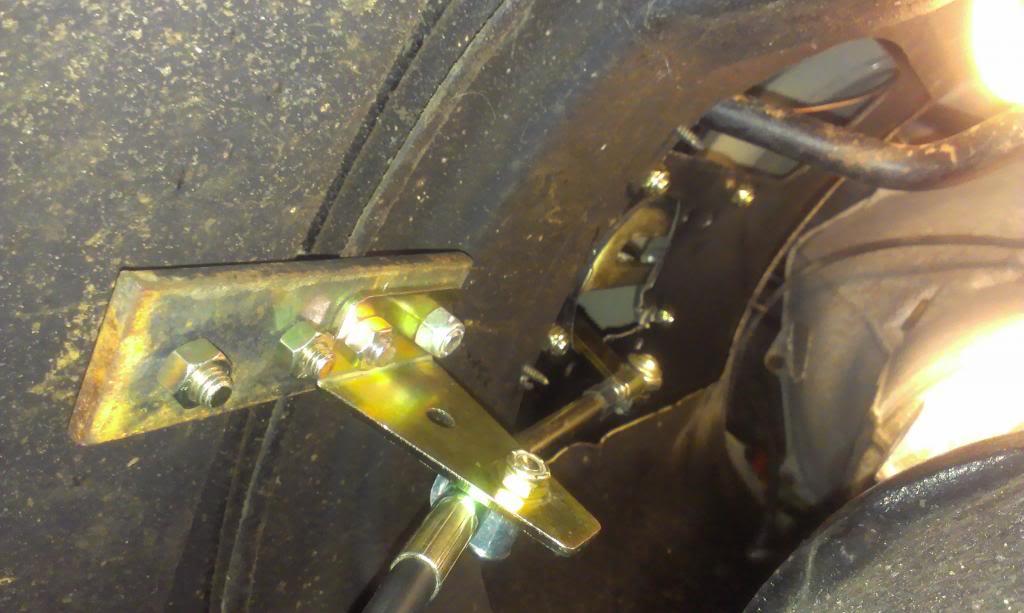
The cable is then secured to the gold bracket, then bolts to the shifter. Placement of the gold bracket is "critical", according to the instructions, for proper shifter operation. I mounted this bracket directly behind the shifter arm, and the cable sits nice and level.

IMAG1953_zps05ccb3f9-1.jpg


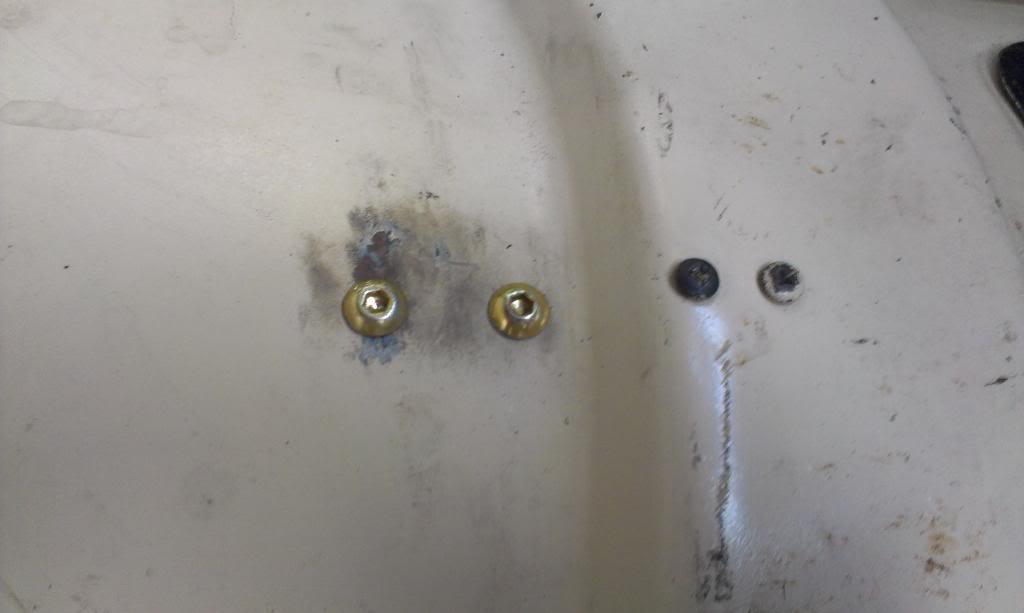
I did have to drill two 5/16 holes through the floor board to install the gold bracket, but I didn't really have a choice. But, the good thing, a center console will cover the holes, so no big deal.

IMAG1954_zps97df2df8-1.jpg


While I was messing with the transmission shifter, I tried my luck on the transfer case shifter, and I got lucky here, too. Using the "super long/weird/presumably from a 1980/81 CJ Dana 300 shifter, I now have an operable shifter here, too. Well, almost. I can get 4L, N, and 2H, but I think 4H will hit the floor. But, it will be easy enough to bend the shifter this little bit to clear. I also need to slightly bend the shifter over toward the passenger side so that it wont be so close to the transmission shifter.

IMAG1955_zpsd6600015-1.jpg


IMAG1958_zpsa4378d1d-1.jpg


Very happy about the 300 shifter, I was worried it was going to take a bunch of work to get the shifter through the inspection plate. Right now, the inspection plate has some big holes, but I can clean all of this up with a new, blank plate.

Once I got the shifters installed, I tried them out. The Dana 300 works, no problems. As for the transmission, kind of. I can get Park, Reverse, and Neutral, but not Drive or 3,2,1. IIRC, I manually shifted the transmission selector shaft by hand and was able to get all the gears, so must be something with the shifter itself. I will have to do some more trouble shooting/adjusting.

But, even with no seat, and brakes that still need to be bled a bit more, and no accelerator cable, it felt good to at least feel the Scrambler move rearward under its own power!!!!

A bit more shifter work, and a little bit more wiring, and this thing will hopefully be ready for a test drive!!

That's it for now.
 
Nice work Raymond :thumbsup: :wave:

I use a positive lock gate shifter on "Blue". Makes it a lot easier to manually shift gears on the Dunes. :bacon:
 
Nice work Raymond :thumbsup: :wave:

I use a positive lock gate shifter on "Blue". Makes it a lot easier to manually shift gears on the Dunes. :bacon:

Appreciate it Toby:thumbsup:

Yep, the Lokar does not "lock" into each gear, but it does have a "detent position" for each gear. But, like you, I would prefer a full "lock" in each gear for racing applications:thumbsup:

I believe this shifter works like most factory shifters, so you can "slap shift" it, just have to be careful not too slap it too hard and end up in neutral:rotfl: It will not allow a shift to reverse without pushing the button, though:)
 
Nice! That thing is screaming for a set of eBay TC twin sticks though to go with that fancy tranny shifter :thumbsup:
 
MMM... You got me thinking... You ready to try that purdy thing out next week? I'll bring your flag. One last "Dune Fix" for the summer!

That way you would have ALL WINTER to change the shifter if you need to. And I have several Twin-Sticks in stock if you need one and...and... we could install it here to save shipping! :D :wave:
 
Nice! That thing is screaming for a set of eBay TC twin sticks though to go with that fancy tranny shifter :thumbsup:

I was thinking more along the lines of gold plating my current TC shifter :thumbsup:

MMM... You got me thinking... You ready to try that purdy thing out next week? I'll bring your flag. One last "Dune Fix" for the summer!

That way you would have ALL WINTER to change the shifter if you need to. And I have several Twin-Sticks in stock if you need one and...and... we could install it here to save shipping! :D :wave:

Sounds good, but I will be super happy if I can get this thing to drive to the local Jeep club meeting this Saturday:cheers::thumbsup::wave:

Still lots of "itsy-bitsies":crazy:

"Save on Shipping" , and hopefully "free install", too,LOL:thumbsup::wave:
 
I watched football last night, but I did do some throttle cable work while sitting in front of the TV.

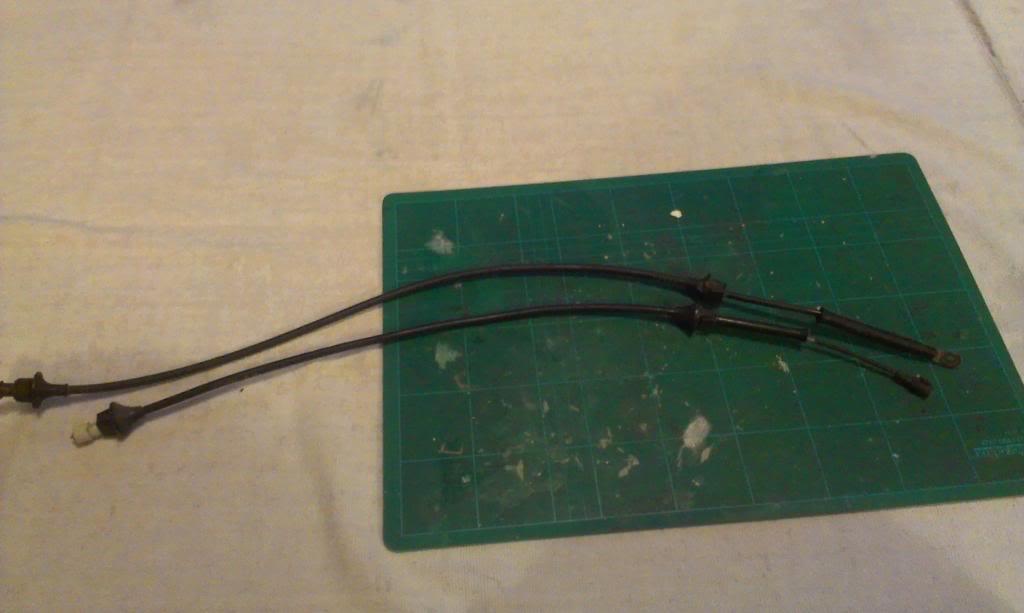
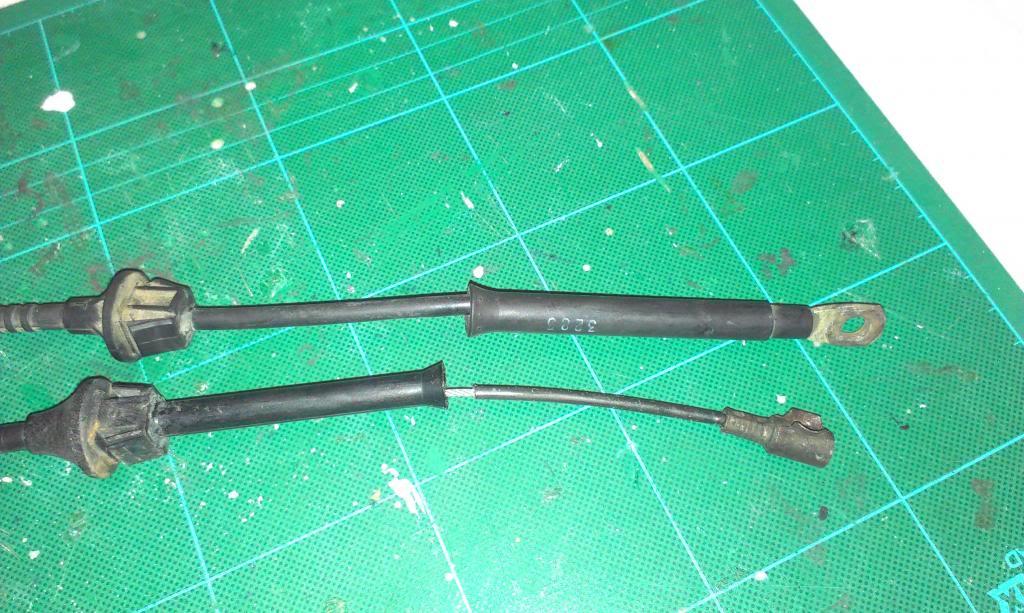
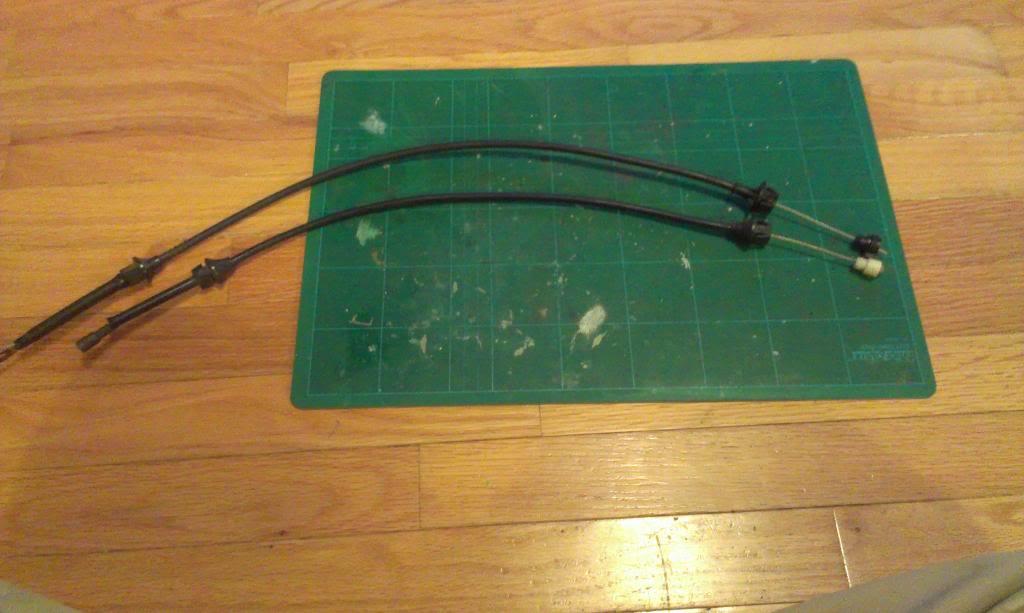
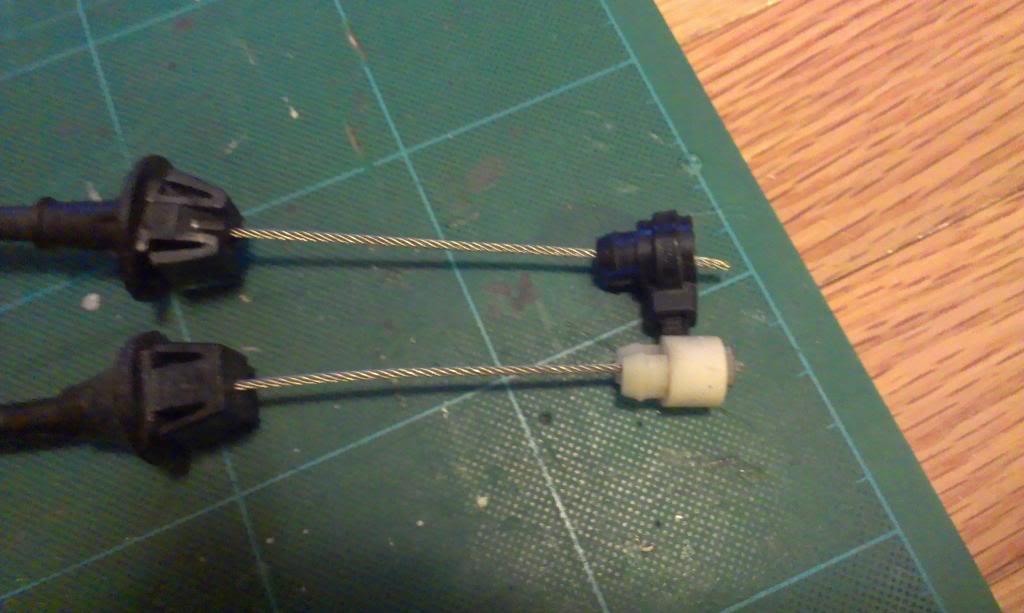
I started out with a factory CJ throttle cable (BOTTOM) and a TBI cable (TOP) I took from the junkyard.

IMAG1961_zps80710da4-1.jpg


The difference on the TBI/carb end, the TBI cable has a round hole, the factory carb cable has the "plug on" end fitting.

IMAG1962_zpsc09927d2-1.jpg


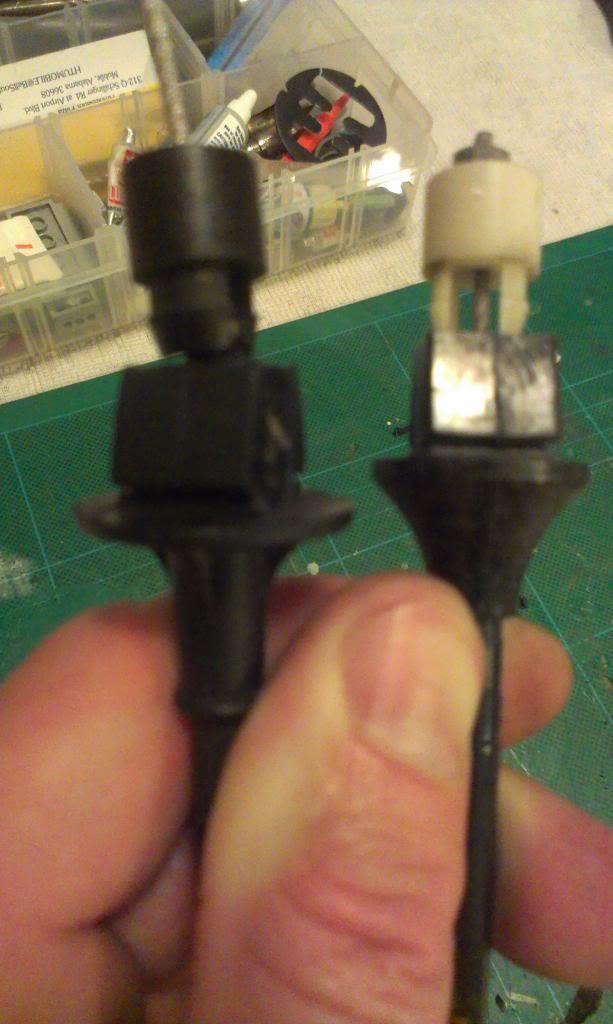
The ends of the cables that go to the gas pedal, inside the cab, are very similar.

IMAG1964_zps2c6aa329-1.jpg


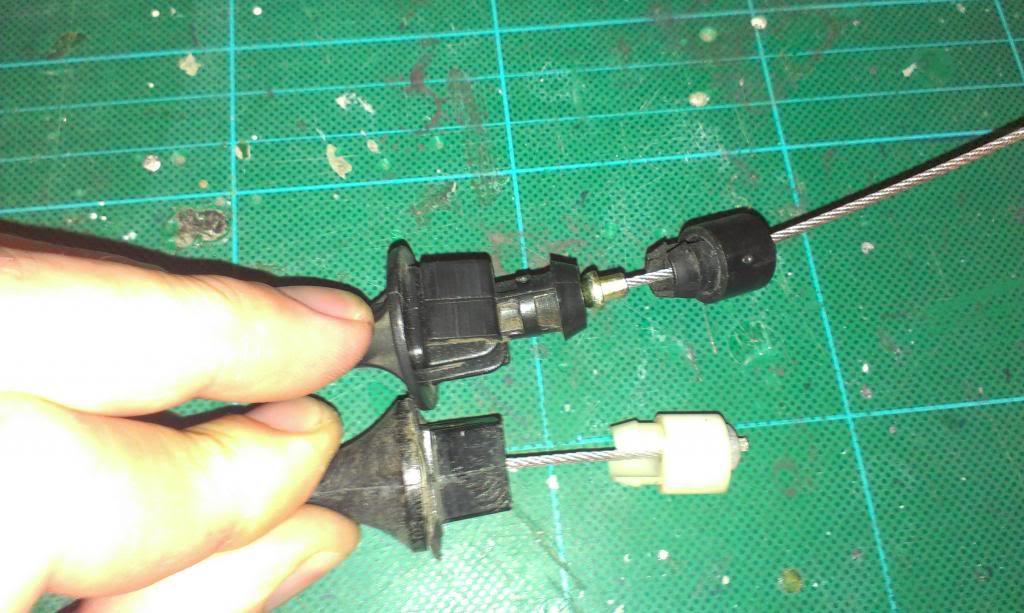
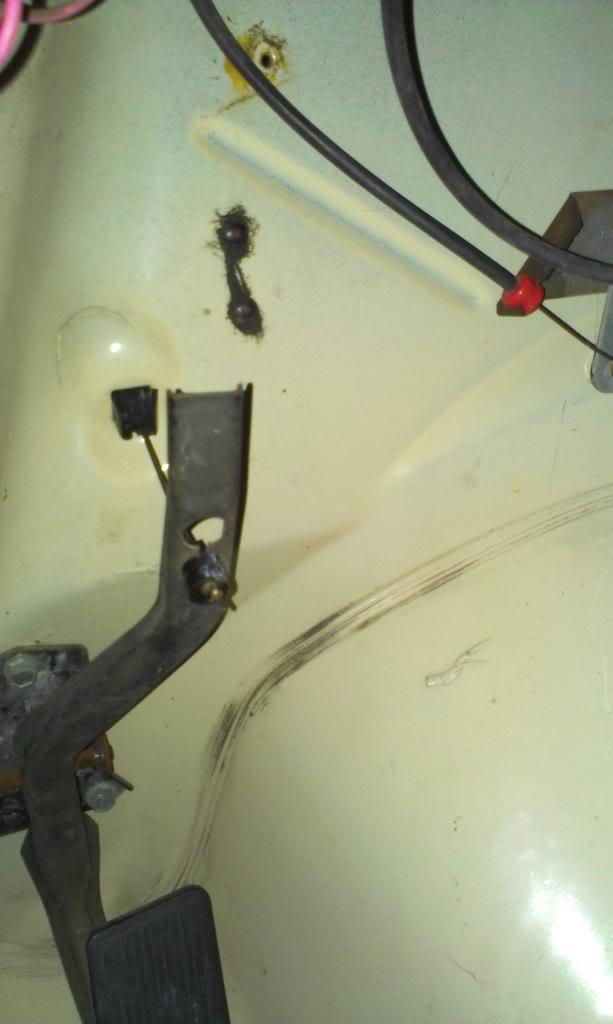
To get the TBI cable to go through the hole in the CJ firewall/hook on to the CJ pedal, I did the following:

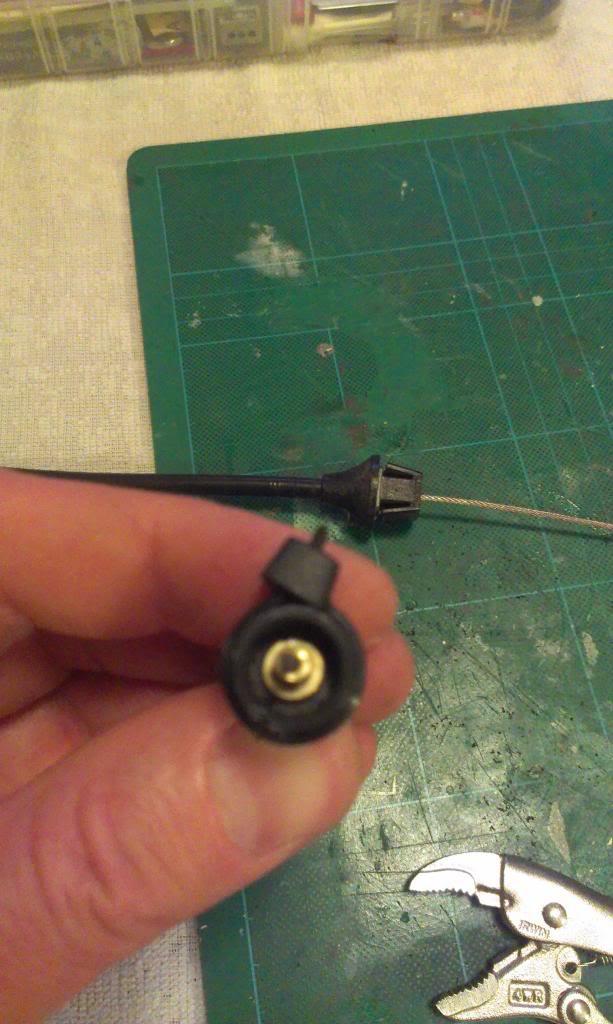
Cut the round black plastic protrusion off the square plastic plug (not sure what it does, must be a Chevy pedal thing)
Trimmed a bit of the plastic off from around the square tangs (just cleaned up the mold lines)

That's it, it fit.

IMAG1969_zpsa45a48a5-1.jpg


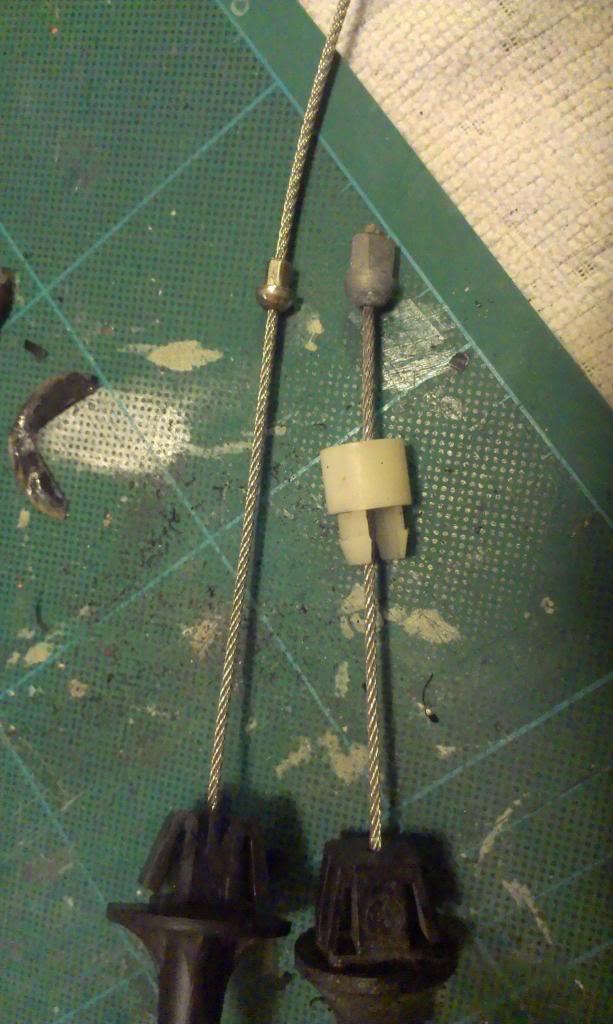
The Chevy cable is longer, the part by the gas pedal, and has two crimp on fittings. But, the fitting closest to the firewall plug is in exactly the same spot as the CJ cable throttle stop.

IMAG1972_zpsfa418147-1.jpg


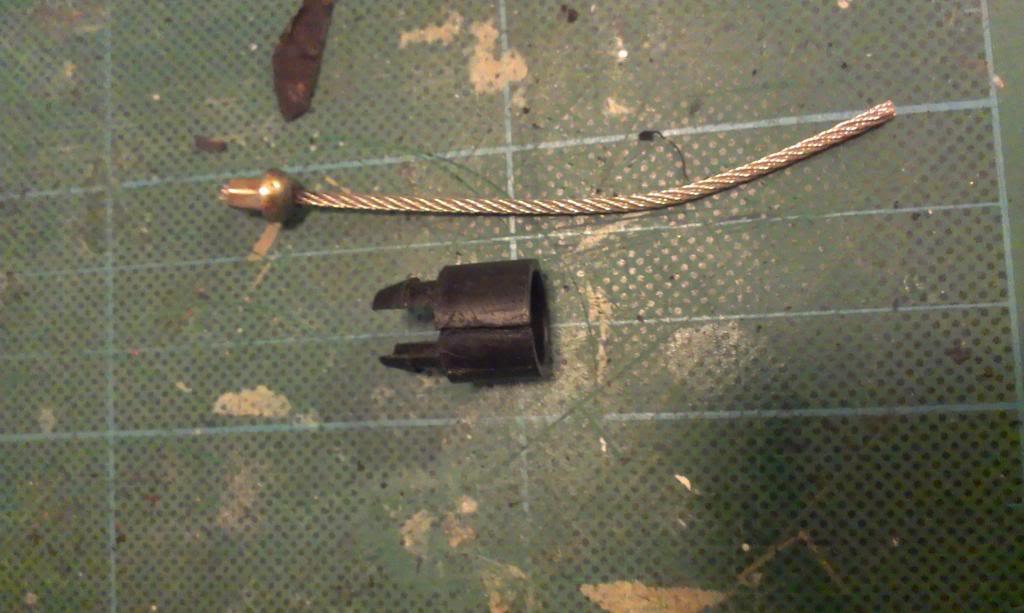
So, I cut a slice though the pedal connector, removed it, and trimmed the cable. I DO NOT THINK I SHOULD HAVE CUT THE CABLE YET, MORE ON THAT LATER.

IMAG1973_zps93b0a7d6-1.jpg


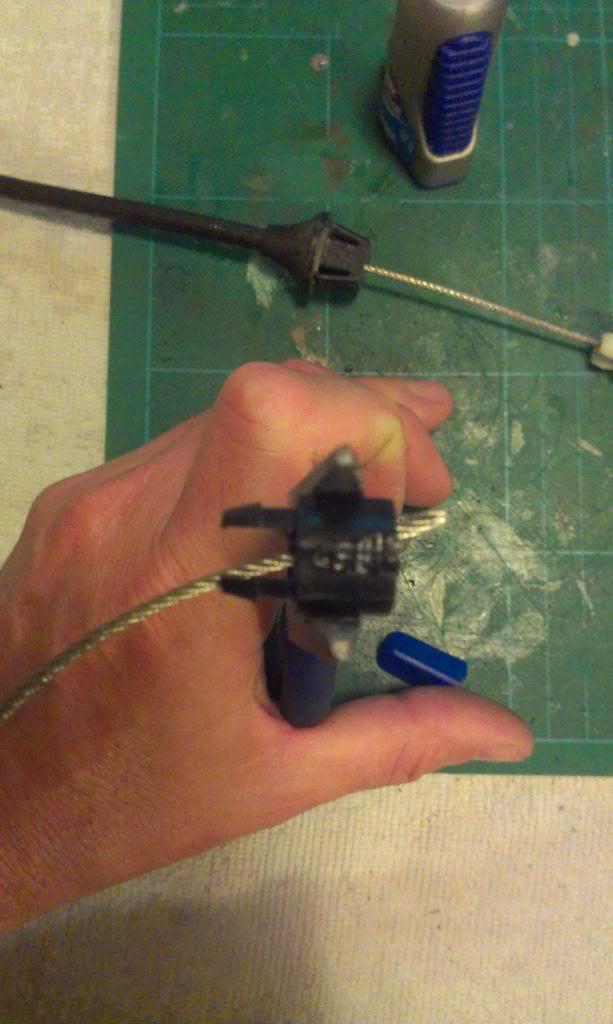
I then super glued the pedal connector back together, once it was back on the cable.

IMAG1976_zps94b32290-1.jpg


And, if you are worried about the super glued joint, you can reinforce the piece with a zip tie, hose clamp, piece of tubing, etc. Just wait until AFTER you get the cable though the fire wall hole before adding anything to this piece of plastic, or it wont fit.

IMAG1982_zpsb91f0a61-1.jpg


And voila, my "conversion/custom" throttle cable (TOP).

IMAG1983_zps5cd50a5c-1.jpg


IMAG1984_zpsc01fbb7d-1.jpg
 
BUT, not so fast:banghead:

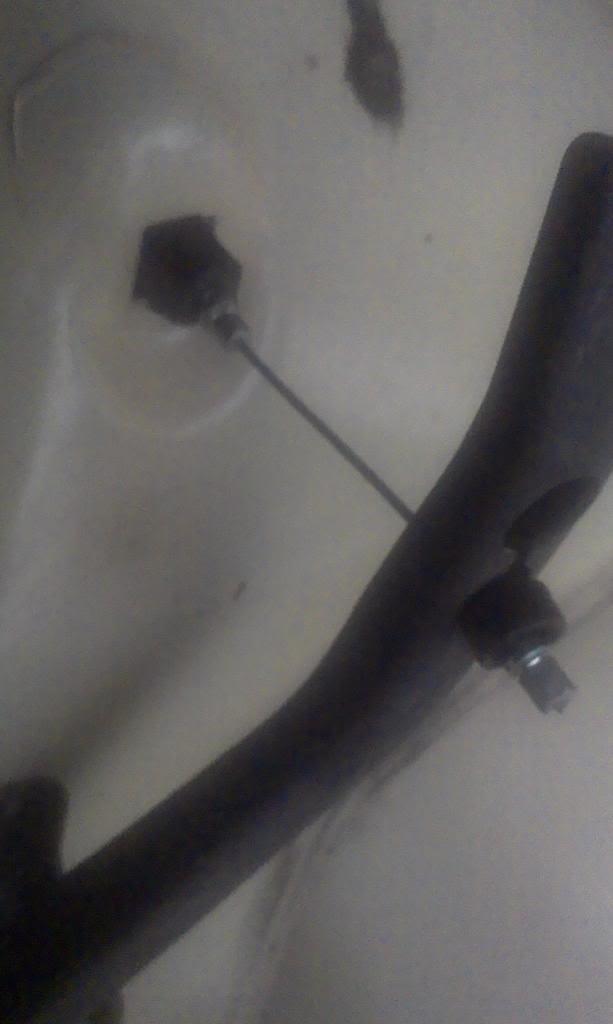
It fits perfect through the CJ fire wall/and attaches to the gas pedal, no problems:D

IMAG1986_zpse2722331-1.jpg


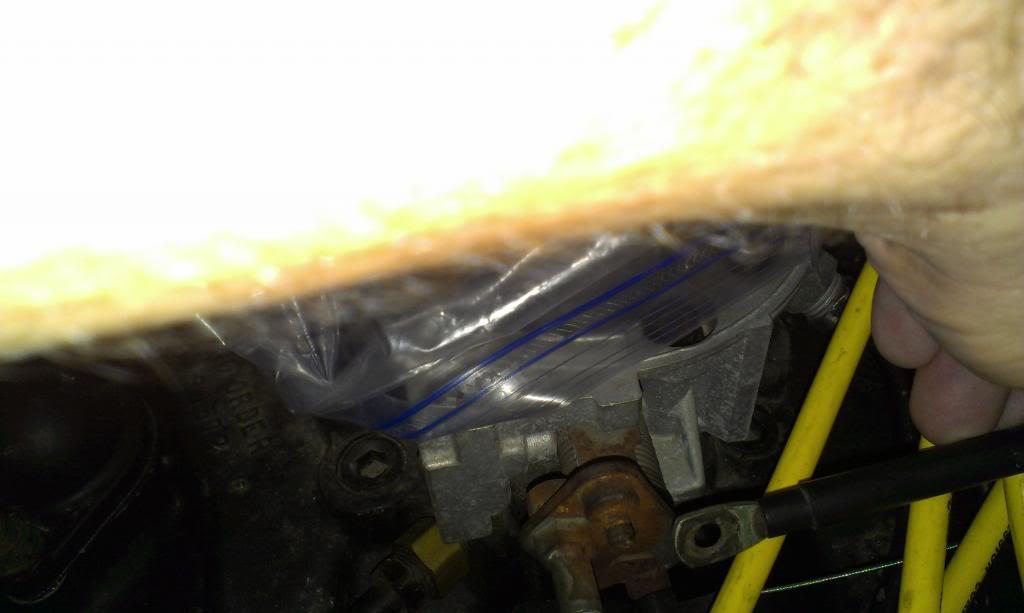
BUT, it is too short to reach the TBI throttle:eek:

IMAG1990_zpse3dee978-1.jpg


Due to the transmission TV cable, I can not simply "tweak" the intake manifold mounted bracket, or it will cause issues with the TV cable.

I probably should have left the cable a bit long before I cut it off. I should have ground off the factory cable stop, and installed a new one further down the line, so that the junk yard cable would have worked.

Maybe the junkyard cable I picked up is too short, I will look at a new one to see, but almost all Chevy TBI trucks use the same throttle cable.

I might make a steel plate, attach it to the TBI throttle, to move the mounting post to the cable.

Not sure yet, but not the end of the world.

That's it for now.
 
More forward progress, and figuring out some of my goofs.

I picked up a replacement throttle cable from NAPA, it is about a 1/4" longer. I trimmed the plastic around the square block that goes into the fire wall, fits good.

IMAG1993_zps2634ff45-1.jpg


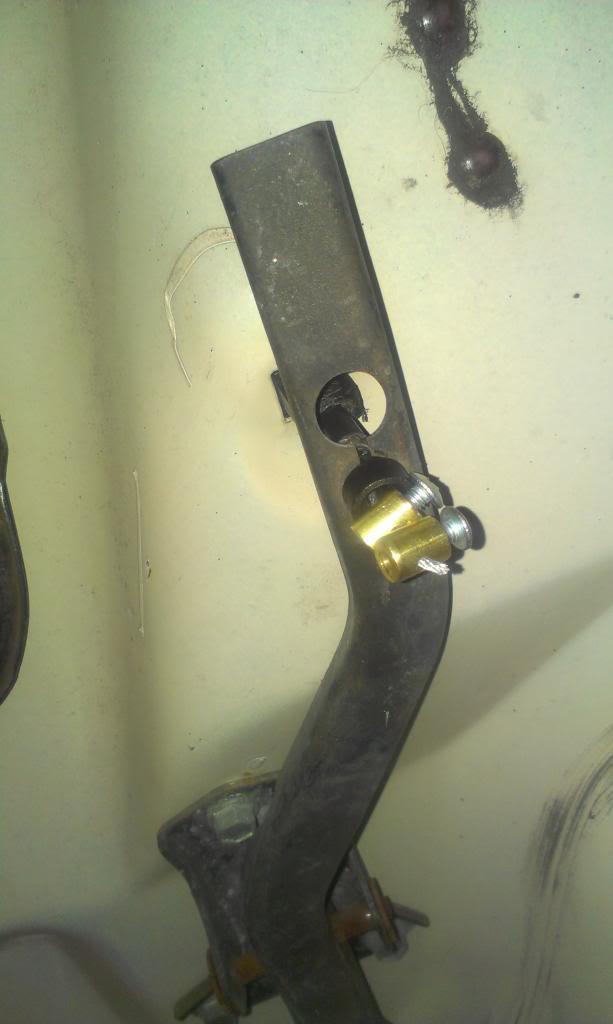
Ok, it fits fine. The picture above shows the throttle against the idle stop, and the pedal is hanging loose to the floor. So, I just needed to slide the cable stop toward the firewall. The cable stops on these cables are the "permanent crimp" kind, so I can't slide it.

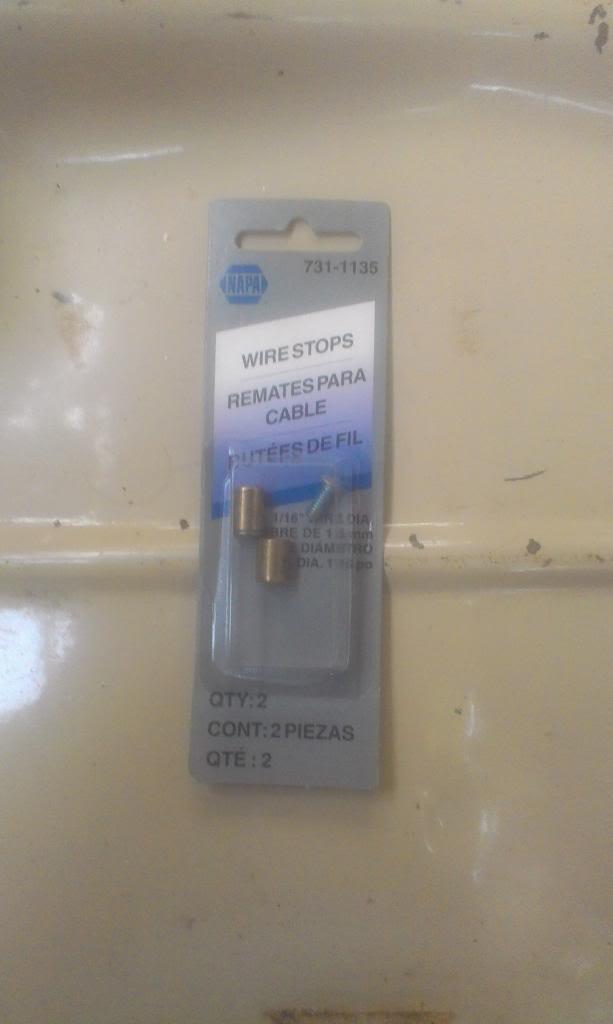
Bought these, drilled the holes out to 7/32" to fit tight on the cable.

IMAG1995_zps2e65b0c8-1.jpg


Cut the crimped on cable stop off, and installed the above screw stops, I now have a working gas pedal.

IMAG1997_zpsd9821fe8-1.jpg


Looks kind of "ghetto", but it will work for now. I would love to find a local place that could crimp on another permanent crimp cable stop. But for now, it works.

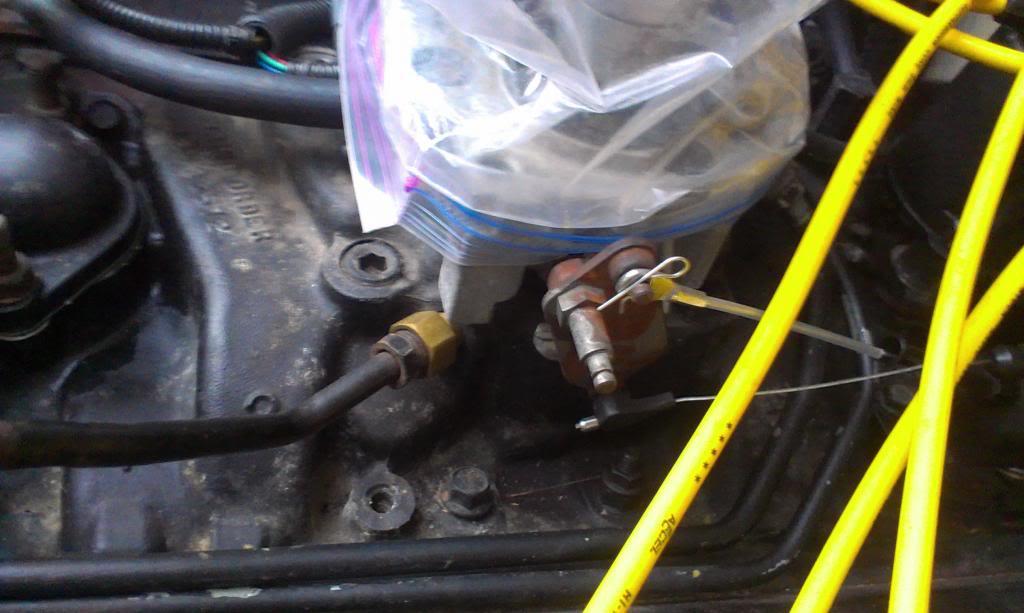
And the cable hooked to the TB, I need to find the "correct" throttle cable clip at the junk yard, but the little clip works for now.

IMAG2003_zps6866d372-1.jpg


With my above throttle linkage, I get 100% WOT with the pedal, so it is good to go, except for my ghetto cable crimps.


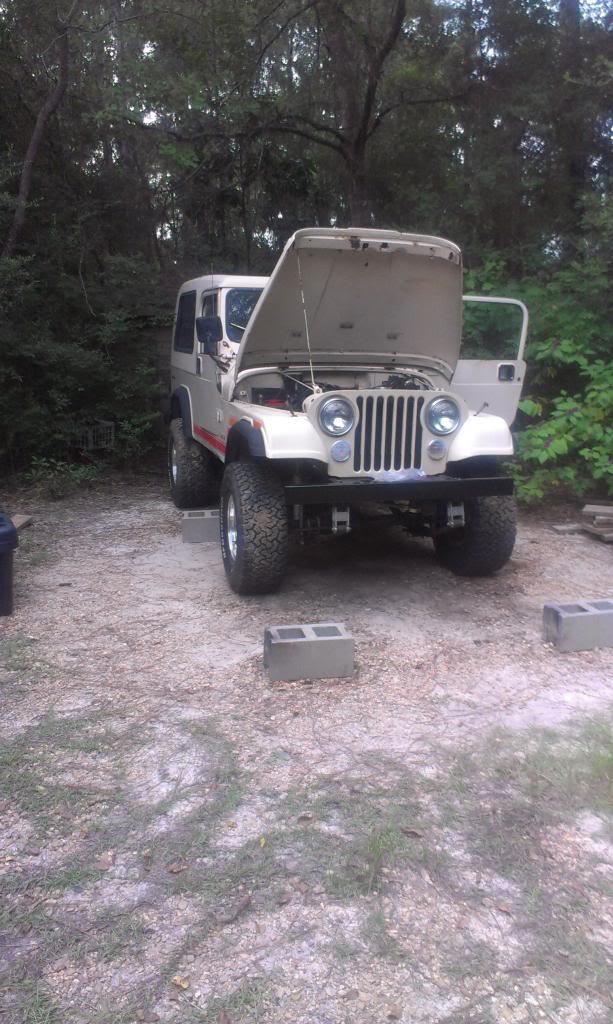
Once I got the gas pedal working, took it on a "reverse only" drive, and it moves, at least backwards for now.

Just to prove it move!!!! (note the cinder block wheel chocks)

IMAG1998_zpsba1a36cf-1.jpg


After that exciting 4' reverse drive, I decided to figure out why I can't shift past Neutral.

I disconnected the cable from the selector shaft, and shifted the transmission by hand. I can get all gears this way, so no internal transmission issue. So, I hooked the cable back up, shifted it to Neutral, and took a look. Turns out, I did not have the cable ran/mounted/adjusted correctly.

IMAG1999_zpse0c44b54-1.jpg


In the above picture, the shifter is in Neutral. Note how the jam nut is against the black part of the cable, the cable can not be pulled inward anymore, so it wont shift past Neutral.

I can fix this issue, but I have a bigger issue: The Lokar supplied selector shaft bracket/bolt on the cable method will not allow me to shift past Third.
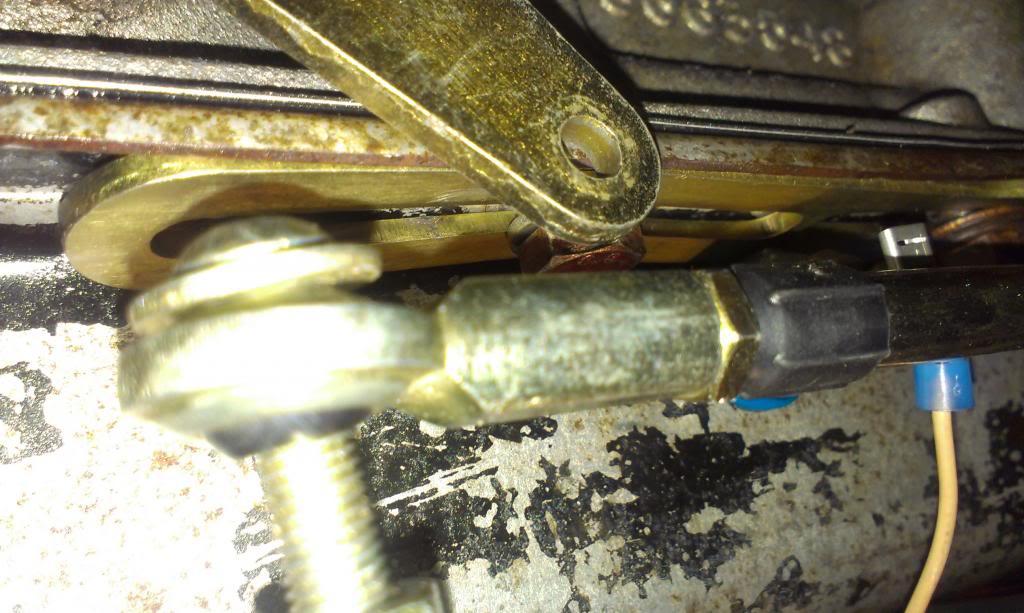
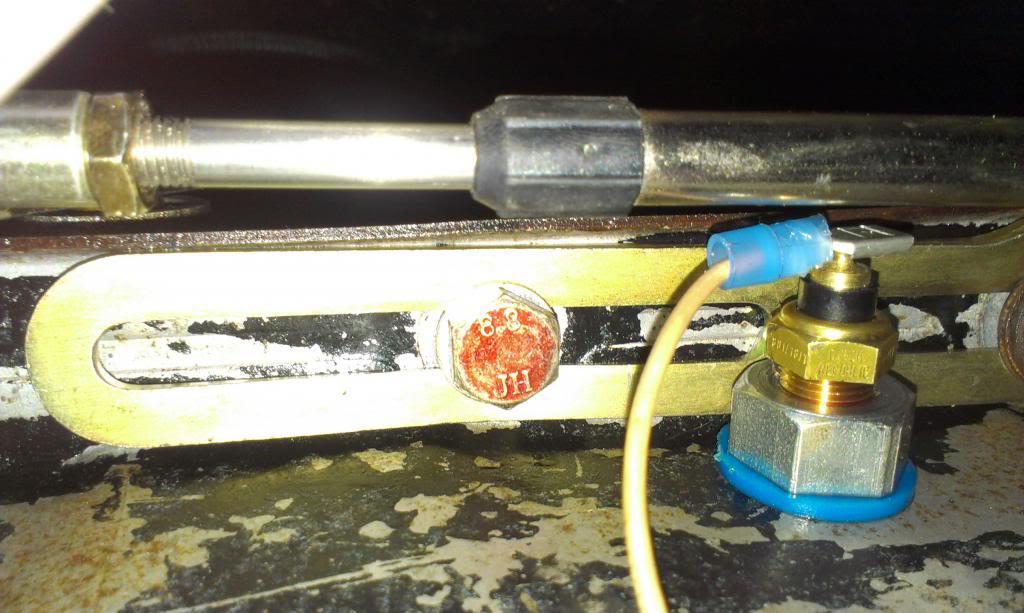
IMAG2000_zps66fec3b9-1.jpg


In the above picture, note the gold colored selector shaft arm. It sits flush against the transmission pan. There is no room for a nut between this arm and the pan. The instructions say the arm must be mounted downward, and it does, for the cable shifter to work properly. For now, I can bolt the cable on and get down to "Drive" and "Third". But, wont be able to shift manually to "2" or "1". My plan: I am going to weld a nut to the outside of the arm. That way, I can thread the cable attaching bolt to the nut, and wont have anything sticking out on the backside of the selector shaft arm to hit the transmission pan. I might call Lokar, I wonder if this kit just came with the wrong selector shaft arm?? I thought about bending this arm outward, then back down, to gain clearance for a nut on the backside. But, if I do this, I will effectively "shorten" the arm, and it might not work. For now, if I can get this thing to shift into drive, I will be happy. The fix to get the other two manual gear selections wont be too bad.

This shifter cable issue is partly my fault, no doubt, but the instructions are wrong, too, IMO. I mounted the cable bracket to the two pan bolts it says to use, and the cable is too far forward. So, I am going to slide the "gold colored transmission pan mounted cable attaching bracket" backwards, so that I gain more clearance between the selector shaft arm and the end of the cable, so that I gain the necessary clearance for the cable to operate through its full range of motion.

And of course, I can't just slide the bracket rearwards, because I left the stupid little metal "tang" on the pan!!!!! (bent outwards next to the red bolt head)

IMAG2001_zps9079e281-1.jpg


I was able to get the Dremel in there, and I cut the "tang" off, so no big deal. Now the bracket is where I want it.

IMAG2002_zps99a4e7f8-1.jpg


I am also pretty sure that I have the "floorboard mounted rear cable stabilizing bracket" mounted too far back. I do not want to drill anymore holes in the floor to move this bracket forward, so I will make a plate bracket to slide this bracket closer to the shifter. Shouldn't be too bad.

I "think" I have the shifter figured out, maybe!!!

I did figure out my Torque Convertor Control (TCC) wiring, so I also need to finish that wiring. It will be simple: it plugs into the transmission, the aftermarket harness has it built in. It contains three wires:

1) Purple Wire - 12 volt supply = This is the one I need to cut and splice into my "weird" brake light switch so that power is cut to the TCC when brakes are applied.
2) Another wire - ground back to computer = I don't do anything with this wire, it is already ran to the computer.
3) Another wire - signal wire = I don't do anything with this wire, it is already ran to the computer.

Mounting the brake light switch will be the hardest part of this task.

I still need to install/wire up the Vehicle Speed Sensor (VSS). This will be easy, just need to make a three wire harness: power/ground/signal. The signal wire is already supplied out of the aftermarket harness, so pretty easy.

Once those two wiring tasks are complete, and the shifter works, road test time!!!!

That's it for now.

 
Good times.

On the pedal connector you glued back together, a great way to reinforce that kind of joint without adding bulk is to wrap it with unwaxed dental floss (strong as hell in tension) or fishing line or something similar and then coating that with superglue.

I did that kind of thing with thin, long balsa wood strips around all the joints when we did a balsa wood bridge building competition as a kid and everyone thought I'd cheated (only allowed to use glue and wood). Most folks' bridge failed at a joint, not mine :D
 
Good times.

On the pedal connector you glued back together, a great way to reinforce that kind of joint without adding bulk is to wrap it with unwaxed dental floss (strong as hell in tension) or fishing line or something similar and then coating that with superglue.

I did that kind of thing with thin, long balsa wood strips around all the joints when we did a balsa wood bridge building competition as a kid and everyone thought I'd cheated (only allowed to use glue and wood). Most folks' bridge failed at a joint, not mine :D

Yep, nothing like doing the same thing twice, and having to look for the 8mmx1.25 tap at 9 pm:crazy::crazy:

My new throttle cable did not require the "cut the plastic thingy off" step, so I should be good, but great tip on the dental floss, we used to use string and do the same thing on the rubber band powered balsa wood airplanes:thumbsup::cheers:

Next stop, hopefully power braking :headbang::headbang:
 
get the Lokar throttle cable. Worked awesome for me and it will match your blingin shifter.
 
I do not have a bunch of pictures, but finally passed a major mile stone:thumbsup:

After bolting the shifter cable back up, I discovered that I did have to move the "mounted under the floor behind the shifter assembly rear cable support bracket". A small piece of 1/4" plate did the trick.

IMAG2006_zpsa21c76c8-1.jpg


I will revisit my home made plate in the future. I plan on moving the shifter over to the driver's side a bit more. If I do that, I will need a slightly wider plate so that I can offset this bracket, too.

Anyway, after mounting the cable back up, I get all the gears, except 2 and 1, due to the "shifter cable to selector shaft bracket attaching bolt" fouling on the oil pan.

But, finally, it now moves forward and reverse:headbang::headbang:


I only moved the Scrambler a couple of feet, I am going to make myself finish the wiring before I drive it.

As for wiring, I started on that last night, too. I ran the VSS signal wire, which comes from the TBI computer, an auxiliary 12v switched power source wire for the VSS which also came from the TBI computer, and my transmission temperature gauge sending wire. I am running this "mini harness" behind the not yet installed defrost duct. From there, they will go over the steering column, and drop down the firewall, where I will also tie in the TCC power wire, after I splice it through the brake light switch. I plan on running this harness through the old clutch linkage hole in the firewall. From there, it will follow the TCC harness/Jeep chassis mini harness (reverse lights and 4wd light wire) down to the transmission.

IMAG2007_zps285b4eb7-1.jpg


The above described wiring should finish this powertrain swap up. But, still quite a few smaller tasks to complete, but at least it will be drivable.

One other thing I just realized, but have kind of suspected, due to the shifter knob only having PRND21:

IMAG2009_zps16f0dfa9-1.jpg


I am going to have to contact Lokar to see what I need, if anything besides a different shift button, to make this work with the 700R4. The shifter itself has enough throw to catch all the gears, so maybe it is just a different selector shaft arm and shift knob??

That's it for now:wave:
 
I called Lokar this morning, and they sold me the parts I need to convert my Turbo 350 shifter to the 700R4:

1) Shifter knob
2) Lower part of the shifter (it will have the correct number of detents)
3) The correct 700R4 selector shaft arm


This should solve my shifter issues.
 
Back
Top