• Notice for iPhone users: DO NOT use the image size reduction option when uploading photos to the forum. This causes portrait images to post as landscape. We have added a warning to the image insert pop-up as well.

Spankrjs 1985 Spring Special CJ-7

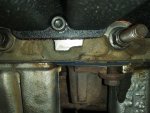
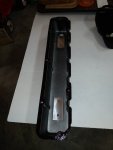
Finally have my tapped holes and hardware, time to dry fit the cover to the cylinder head.

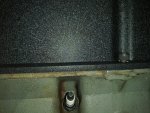
Installed the rear most bolt:

20200222_123822.jpg

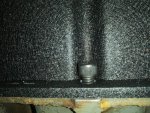
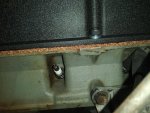
And the front hole will not line up:

20200222_123848.jpg

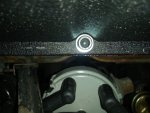
Passenger side front hole is no bueno:

20200222_123903.jpg

And driver side front hole is off, too, but no picture.

In the past, I have had to lightly file some of these holes, no big deal. On this cover, I think I had to mock it up 10 times before all the holes would line up. I assume the mold is wearing out?

Anyway, I used a bastard file, and drilled some of these holes out, to get everything to line up. You do NOT want to make the holes too big, especially on the driver side, because washers will NOT fit!!

After an hour or so of dry fitting:
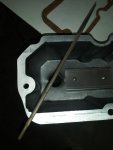
20200222_125354.jpg

20200222_125842.jpg

20200222_125919.jpg

20200222_125939.jpg

20200222_130233.jpg

Another "Redneck Ray" chart, showing what all I had to do to get the valve cover to fit:
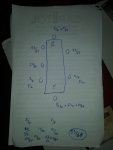
20200222_163601.jpg
 
One final "dry mock up", without the gasket. Pictures show bolt "stick up", without the 1/2" thick gasket in place.

Front:

20200222_163614.jpg

Rear:

20200222_163625.jpg

Driver side front hole:

20200222_163634.jpg

Driver side rear hole:

20200222_163649.jpg

Passenger side front hole:

20200222_163717.jpg

Passenger side center hole:

20200222_163730.jpg

Passenger side rear hole:

20200222_163739.jpg

Fits good to go:

20200223_092802.jpg
 
Nice work. Ran into these same problems about 9 months ago. Even had to drill out and file on some of the washers because of tight tolerances. Mine was used so I didn't know it was chinee but figured it was low rent stuff.
 
Time for the gasket.

In the past, I have installed these cork gaskets by putting a very thin coat of RTV on both sides of the gasket. This has worked well. This time, I decided to try something different.

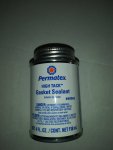
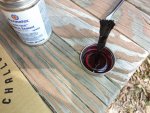
I glued the gasket to the valve cover with this stuff:

20200223_101321.jpg

Basically, it is like contact cement, except automotive fluid proof.

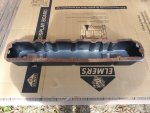
I put the gasket on top of the valve cover, upside down, to make it easier to brush the goop on:

20200223_101643.jpg

Thin coat on the gasket (valve cover side of gasket):

20200223_102226.jpg

Close up, the stuff is red:

20200223_102232.jpg

The stuff is a bit stringy, but not as bad as the 3M weather strip stuff:

20200223_102237.jpg

20200223_102244.jpg

Thin coat on the valve cover:

20200223_102846.jpg

I let the stuff tack up for about 5 minutes after I brushed it on, then stuck the gasket to the valve cover:

20200223_103118.jpg

This stuff really, really, really holds the gasket in place. You can move the gasket some, but not much once you stick it. On a long gasket like this, another pair of hands would be helpful.

I stuck a 40 pound tool box on top to make sure it stuck:

20200223_103238.jpg
 
The way the cylinder head flange is on the 258, it is pretty thin in some spots. This is why I wanted to glue the gasket into place, so it would not slide around. This stuff worked well.

The gasket is held firmly in place, even around all the odd corners and what nots:

20200223_103246.jpg

20200223_103251.jpg

20200223_103257.jpg

With the gasket secured to the valve cover, the cork extends a little bit into the holes that were filed out:

20200223_103314.jpg

Five minutes with an "X-Acto" knife, problem solved:

20200223_105941.jpg

20200223_110807.jpg

20200223_110815.jpg

This may seem OCD, but it is not. I do not want the bolts to either be tearing or trying to move the gasket out of the way.

The clearance between the valve cover and the socket headed cap screws is tight. It is so tight, I use metric washers on the SAE bolts due to the smaller OD of the metric washers:

20200223_111440.jpg

Checking bolt stick down length. On the driver side (pictured), the two holes that I put Helicoils in, I was able to use 1" long bolts instead of the included 3/4" long bolts.

20200223_111534.jpg
 
One final dry fit, to check hardware and washers.

Front hole, single washer:

20200223_112642.jpg

Driver side holes, no washers, no clearance, not needed anyway:

20200223_112655.jpg

Passenger side front and rear holes, double washers due to using 1" long bolts:

20200223_112706.jpg

Tight clearance:

20200223_112725.jpg

Mock up is successfull:

20200223_112744.jpg

And I pulled it back off, one last time.

Maybe not necessary, but I wanted to use something between the gasket and the head. So, I used my old standby:

20200223_121048.jpg

Put a thin coat on the bottom of the valve cover gasket:

20200223_121735.jpg

20200223_121741.jpg

And finally, finished:

20200223_123336.jpg

Simple bolt on indeed.
 
No OCD there. I forgot I used the X-Acto blade also on my Fel-Pro cork. I also believe there should be 2-3 more bolts on the driver side. Great job, I like reading your work in the postings
 
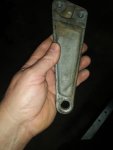
Putting the rest of the items back together under the hood is fairly simple, EXCEPT for the serpentine belt idler pulley cylinder head mounted bracket.

In the past, when I installed one of these valve covers on a CJ-7 with DEALER ADD ON Air Conditioning, I broke the flange on the valve cover when I tightened this bracket down. The DEALER ADD ON Air Conditioning kit uses a much cruder steel bracket, which is slightly different from the OEM aluminum bracket on this engine.

This engine does NOT have AC, but since it is a California model, it has the serpentine belt drive, which requires this idler pulley so the belt will clear the upper radiator hose.

The bracket I am talking about slides over/down the two forward most head studs on the driver side of the engine block. The aftermarket aluminum valve cover flange/gasket is thicker then the plastic valve cover.

In the below picture, you can see how the valve cover flange is almost even in height to the cylinder head stud nut:

20200224_172348.jpg

It will clear, BUT it is too close for comfort.

One washer spacer is what I went with, ultimately:

20200224_172503.jpg

You can stack two washers, for clearance, before any other modifications to the aluminum bracket are needed:

20200224_172900.jpg

The aluminum bracket I am referring to, besides sliding down the head studs and being clamped in place by two big nuts, also has a lower bolt on its face that bolts it to the water pump. IIRC, it is a 3/8" bolt, plenty of clearance in the round hole in the bottom face of the bracket for some shimming on the top side. If you go over two washers, you might have to enlarge/elongate this hole:

20200224_172914.jpg

This picture was taken with two washer spacers up top, just enough room to get the bolt in:

20200224_173136.jpg

The bracket installed with two washers, good clearance:


20200224_173206.jpg

20200224_173240.jpg

I wanted to lower the bracket down some, to make installing the face bolt a bit easier, but I was worried about clearance. So, I removed the bracket, coated the back side with anti seize:

20200224_180852.jpg

I reinstalled the bracket, tightened down the nuts, then took it off. You can see where some anti seize rubbed on the valve cover flange:

20200224_183512.jpg

On the bracket, above the black magic marker mark, is where I thought the bracket was hitting the valve cover:

20200224_185049.jpg
 
What I found out, because I must have took this bracket off and on 50 times, is that the bracket slightly twists/moves when you tighten down its two nuts and face bolt. Also, even without any spacers, if you do not install the two nuts/bolt in a certain sequence, you can not get the face bolt to go in.

My install method:

1) slide bracket down head studs
2) tighten up the forward most nut almost all the way tight
3) install/tighten up the face bolt
4) tighten down the rear nut

When you do this, and if you watch the bracket, you can see it slightly move/twist. What I found out, it will clear without any washer spacers.

Also, once you have the face bolt started, do not tighten it, or the two nuts, all the way down, until you get the big steel bracket that pivots over from the power steering pump bracket's two big bolts started; the two bolts that attach this steel bracket to the upper face of the aluminum bracket.

No washers, it will clear, BUT it is scary close:

20200224_192641.jpg

20200224_192650.jpg


In the end, I went with one washer spacer, just for piece of mind, worked out perfect, no rubbing/grinding/hacking necessary:

20200224_193629.jpg

20200224_193649.jpg

20200224_193655.jpg

And after 2.5 hours of screwing around with this bracket, the completed assembly:

20200224_200005.jpg

I spent a bunch of time on this, but I did not want to break the flange off another brand new valve cover!!!!!!!!!!!

Completed, except for the air cleaner assembly. When I changed all the under hood vacuum lines last year, I neglected to change the lines on the air cleaner that control the flapper doors. Anyway, I broke one, might as well change them all!!

20200224_204943.jpg

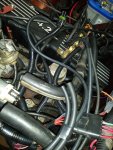
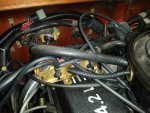
With regards to vacuum lines - when I redid them last year, I just threw everything together to get it operational, so it is a big mess.

20200224_205004.jpg

When I remove the current "1983 computer and associated 1983 under hood wire harness", and replace them with the correct 1985 parts, I will clean all this up. Well, clean it up the best that is possible!!!
 
The above mentioned air cleaner vacuum lines:

20200225_162534.jpg

20200225_162550.jpg

Probably close to 3-4' of old, dried out vacuum lines:

20200225_172149.jpg

And installed, covers up part of my existing vacuum line/wiring disaster:

20200225_173151.jpg

Before I went for a drive, the old card board under the Jeep was pretty stained. Not all of this is from active leaks, just old cardboard.

20200225_173317.jpg

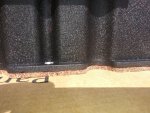
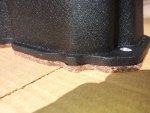
Not going to claim victory yet, but 20 minute drive last night, parked over night, what the new cardboard looked like this morning:

20200226_072245.jpg

The big stain to the far left was from something else, not a current leak. The Dana 300 does leak some, from around the intermediate shaft, but not enough to worry about.

Hopefully the valve cover is good to go :fingerscrossed:
 
I did some more carburetor adjustment this past weekend, to see if I could get rid of my minor "spot/surge" off idle.

Pulled the top plate off the carburetor to access the metering rods, accelerator pump, and vacuum piston:

20200228_165212.jpg

Reset the metering rod adjustment first, by loosening the screw with the screw driver pointing at it:

20200228_171131.jpg

Then the accelerator pump:

20200228_171136.jpg

Then spent an hour trying to find the damn vent bowl flapper that I flung off the air cleaner accidentally!!!

One important note on these two adjustments: They have to be done by backing the idle screw all the way off, then one of them is adjusted with the idle screw turned in one full turn after hitting the idle stop, the second adjustment takes two full turns:

20200228_171201.jpg

IIRC, the vacuum piston gap was dead on the .035 gap, BUT I think my accelerator pump setting was off. AFter the adjustment, much better. I still have a very, very, very slight "spot" when you transition from idle/super low speed to easy acceleration. If you accelerate fast, no issue. It is a very slight "spot", not sure what else I can do.

I played around with the vacuum piston gap setting after some test drives.

With the .035 gap, the allen wrench sits pointing right at 6 o'clock:

20200301_141341.jpg

I turned it a hair clock wise, to enrich it, to see if any change:

20200301_141359.jpg

Enriching the vacuum piston made the "spot" a bit worse. So,I turned it back to where it was at originally, very minor "spot".

I will probably try to lean this out a bit, see if the "spot" goes away.

The only other thing I noticed: the metering rods would occasionally not travel perfectly smooth throughout their range of motion when I was pushing them up and down. Every once in awhile they would stick a hair. They are not bent, no really bad noticeable wear, but might be causing my slight "spot".

Moving on, decided to address the worst "body damage" this Jeep has:

Some genius decided to run a cheap aftermarket temperature gauge. That is fine and good. The problem, the mechanical gauge and sender were all one piece, no way to remove the sender from its coolant line. So, they just drilled a bunch of small holes in the firewall to make one big hole, roughly 1", for the sending unit to pass through.

20200229_155036.jpg

Trip to Lowes for some 1.5" fender washers and rubber grommets:

20200229_155139.jpg

And fixed:

20200229_160152.jpg

Seals the hole up fine. Good for now.
 
A few more minor fixes.

The front passenger seat belt would not plug into its female plug. A few minutes digging/blowing sand/crud/plants out of the opening, the seat belt latches correctly:

20200301_093839.jpg

20200301_093845.jpg

Another problem with this seat belt, it won't retract.

So, I removed it, gotta love rust free Jeeps:

20200301_094644.jpg

After spraying it out with water, brake parts cleaner, and all kinds of other stuff, no bueno. It is broken.

Since I already decided it is broken, I decided to investigate why. I do NOT recommend trying to fix seat belts your self, I just wanted to see what makes it tick.

I carefully drilled out the three rivets, gently pried the plastic cover off, the cover that says "DO NOT REMOVE", this is what it looks like:

20200301_110956.jpg

The metal coil thing is spring steel, this is what retracts the belt. The spring steel inside this one is bent funny in a few places, and tore in several places.

20200301_111011.jpg

This is why it won't retract.

I got the bright idea of removing this coiled up metal, to see if I could repair it, at least enough to make it functional. Bad idea. Once part of it was pulled from the housing, it exploded outward like a meth fueled slinky. Not enough force to hurt you, but it scared the crap out of me.

I found a place in Massachusetts that will repair seat belts, so I sent it to them to see if they can repair it.

Link:

https://www.safetyrestore.com/jeep-seat-belts/37-jeep-seat-belt-repair.html

I will report back. I "bought" their service off of eBay, $49.95.


Even after replacing the heater core, I still had no heat.

The linkage that controls the fresh air vents, all three of them, was froze up:

20200301_132151.jpg

I removed the two cables, and the rod, from it, cleaned it up, lubed it, worked it repeatedly back and forth with my hand, finally got everything working again.

With this mechanism being "stuck in place", the previous owner pulled the knob off it's control cable. I did not have a spare cable, did not want "Made in China" crap, so I re-clamped the knob back on to the cable with a 3/8" fuel injection hose clamp. Looks "Redneck Ray", works like a charm:

20200301_132225.jpg

And installed a defroster duct.

20200301_133509.jpg

That's it for now:wave:
 
Appreciate some of the details you've provided here - helped me find the flap rubber and feel a little better about the aluminum heater core I installed last week (y)
 
Another great write-up. I get excited when I see your posts because I know they will be super informative!

I have a “helpful hint” for punching holes in cork gaskets. If you are a shooter, empty shell casings make great punches. If you aren’t, pulling the eraser out of an old school pencil will usually be good for a hole or two. I also have various pieces of steel fuel line and other tubing that I have cut to a couple inches and sharpened on the belt sander to make punches too.
 
Another great write-up. I get excited when I see your posts because I know they will be super informative!

I have a “helpful hint” for punching holes in cork gaskets. If you are a shooter, empty shell casings make great punches. If you aren’t, pulling the eraser out of an old school pencil will usually be good for a hole or two. I also have various pieces of steel fuel line and other tubing that I have cut to a couple inches and sharpened on the belt sander to make punches too.
I have actually sacrificed some cheap sockets and sharpen them on the bench grinder. Worked well
 
Not the most interesting stuff, but figured I would post some information/pictures.

The original MCU/emissions harness that came on this Jeep was in very bad shape. So, I temporarily installed my "known to be working correctly/intact" harness AND computer from my 1983 Scrambler on to this one. The '83 has Mopar MPI on it now, so this stuff was laying around doing nothing.

I did not think using the '83 stuff on the '85 was causing my "surging/miss" issue, and I was correct.

But anyway, here goes, bunch of pictures.

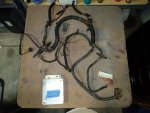
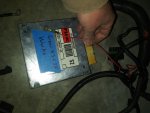
The 1985 CA emissions computer that came on this Jeep, and the used harness I got from JeeperDD, thank again Dustin!!!

20200306_182024.jpg

Finally got time to inspect the harness, a few issues, nothing major, a million times better then what I started with.

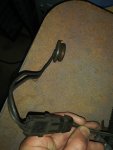
Rusted out diagnostic port bracket:
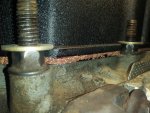
20200306_182035.jpg

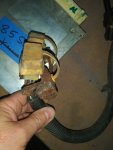
PCV solenoid still attached to this harness. This part was supposed to be removed via a recall:
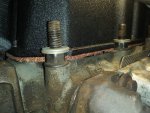
20200306_182045.jpg

Random connector taped shut:

20200306_182106.jpg

The intact "diode assembly". This is a major difference between 1983, and the '84 and up harnesses. The '83's do NOT have this thing:

20200306_182114.jpg

Free air cleaner temp switch:

20200306_182137.jpg

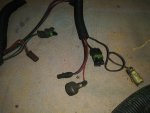
The most often melted portion of the harness is intact on this one: O2, SolVac, coolant temp, knock sensor, choke, and WOT plugs all good to go:

20200306_182729.jpg

Parts I wont be using:

20200306_182739.jpg

Reference picture of how the relay next to the firewall mounted 4"/10" vacuum switch was taped to harness wrap:

20200306_183251.jpg

I wanted to inspect the harness for any issues, and clean it up, so the first easy step, get rid of the wire wrap:

20200306_184229.jpg
 
All the old wire wrap:

20200306_184234.jpg

I labeled each piece, makes for cutting new stuff to length a bit easier:

20200306_184255.jpg

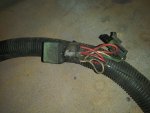
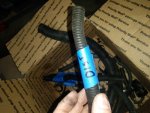
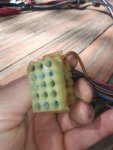
The worst "damage", and I still need to fix this 15 plug connector:

20200307_120545.jpg

Sever corrosion at ALL diagnostic port Molex connectors. Besides visible corrosion, the wires have rusted and become brittle/easy to break.

The plastic retainer clips on the Molex plugs are damaged, too:

20200307_120555.jpg

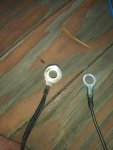
Missing ground eyelet/chaffed wire for the "Altitude ground wire":

20200307_120612.jpg

One wire cut at the WOT switch plug (next to silver tape):

20200307_120626.jpg

Spade terminal stuck inside one of the ICM plug ports:

20200307_120635.jpg

20200307_120644.jpg

The damage to the diagnostic port wires is the worst. Not complaining, this harness is way better then what I started with!!

On the 6 Pin Molex connector, I broke every wire coming out of it:
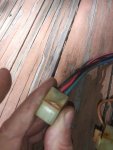
20200307_131024.jpg

No worries, time for RC car tools and parts to save the day!!!!

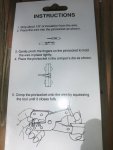
This crimp tool is made for these style connectors:

20200307_131155.jpg
 
Instructions on how to use the tool:

20200307_131246.jpg

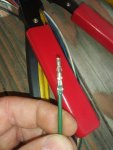
I'm a little "rusty", but the first one came out OK:

20200307_132415.jpg

Lucky for me, I had some spare female Molex connectors. I need to buy some more to repair the 15 pin plug.

I also had to cut the existing wires back one inch to get to clean copper. Lots of corrosion on these diagnostic port wires.

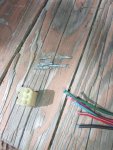
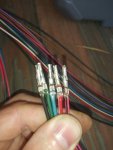
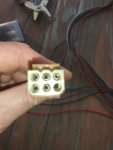
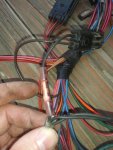
Repaired the five wires that go into the 6 pin plug, and installed them in the correct spot:
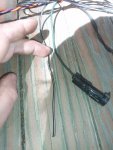
20200307_133203.jpg

20200307_135658.jpg

Clean wire, corrosion free contacts, good to go on the 6 pin, still need to do the 15 pin.

Repaired "Altitude" ground wire, and cleaned up the harness ground eyelet:

20200307_140644.jpg

20200307_140651.jpg

Repaired WOT switch wire:

20200307_141043.jpg

After inspection/repairs, re-wrapped the harness:

20200307_144241.jpg

Last wire to repair on the 1985 harness, the pink ground wire for the SolVac. This wire is pictured below on my 1983's harness:

20200307_162748.jpg

In preparation for the 1985 harness/computer install, I removed the 1983 harness and computer:

20200307_162810.jpg
 
Part numbers on the 1985 computer:

20200307_163031.jpg

20200307_163340.jpg

I also wanted to make sure I had the "three valve cover solenoids" plumbed up, so some notes I took on how they are supposed to go/wire colors to each:

20200308_140625.jpg

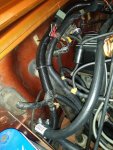
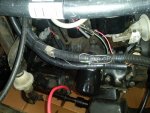
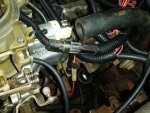
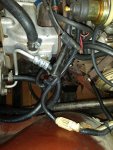
And installed the harness. Hard to picture, but it is way better then before. I tried to mimic the one under hood picture from the "1985 1,000 mile survivor Scrambler", and pictures from the "Adventures Under the Hood" website, since his Jeep is a 1985 Spring Special.

Anyway, just how I did it, hard to make this "beautiful", lots of crap (like a GM TBI set up", still more to do.

At the firewall exit/entrance point, and going down the firewall toward driver side:

20200308_140636.jpg

Driver side, near the distributor/chassis harness:

20200308_140649.jpg

At the "6 Pin Connector" junction, also showing wire tied relay and "Diode Assembly":

20200308_140702.jpg

I ran the two ICM harnesses next to each other down to the ICM:

20200308_140709.jpg

I secured the WOT plug to the carburetor like so:

20200308_140724.jpg

In the picture above, also NOTE: all wires need to be kept at the throttle cable height/below the pulse air hoses for the air cleaner to sit right.

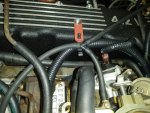
The hard part: choke, air cleaner thermal switch, O2, SolVac, Knock sensor, coolant temperature sensor stuff. I never realized that there was a valve cover mounted bracket to hold this harness up between the carburetor and the valve cover. The used harness came with this clip, so I routed all this stuff like "factory", BUT still keeping it all off the hot intake/exhaust manifolds.

The "bracket", on the valve cover, painted brown (I was out of black paint!!!), with the harness wrapping around from the back of the carburetor:

20200308_140729.jpg

And all the final terminations:

20200308_140741.jpg
 
I also rerouted/shortened/tied together the three vacuum lines that go to the air cleaner, and the one wire plug. You have to keep these a little bit long/loose to facilitate air cleaner housing removal:

20200308_141320.jpg

Still need to clean this area up, and find a better solution to the "PCV fresh air" hose routing. But, with the three vacuum solenoids, other vacuum lines, and the big pulse air hose, pretty tight:

20200308_141752.jpg

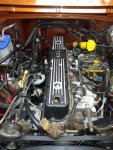
And finished, for now
:

20200308_141802.jpg

Pushed it outside, fired right up, no problems:

20200308_154032.jpg

I checked the system out with the "Scan Tool". I kept getting a "Altitude Circuit Error". I cleaned out this port on the 15 pin connector, and that cleared the code. So, I still need to re-pin the 15 pin connector. Other then that, scanned clean, except for the not used "PCV solenoid", so the system is working correctly.

I still have my slight "miss/surge", so more work to do,

That's it for now!!

20200308_154106.jpg
 
Back
Top