• Notice for iPhone users: DO NOT use the image size reduction option when uploading photos to the forum. This causes portrait images to post as landscape. We have added a warning to the image insert pop-up as well.

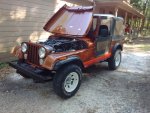
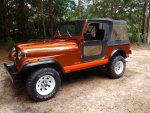
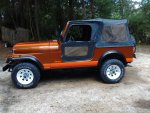
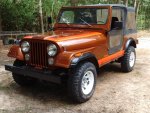
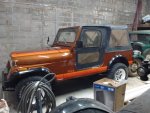
Spankrjs 1985 Spring Special CJ-7

Are those a brown or something more like a shiny honey ?

It’s actually called “Bronze Micatallic”. I’m not positive but pretty sure it was specific to the spring special in 85 only. Cherokee also had a spring special that year just not sure of the color options.
 

Attachments

  • B2CE9F3F-CF05-4E0E-8F7F-2944E6BA2AE5.jpeg
    B2CE9F3F-CF05-4E0E-8F7F-2944E6BA2AE5.jpeg
    140.8 KB · Views: 30
  • 2954A239-3254-499A-A1BD-848B799C7FD2.jpeg
    2954A239-3254-499A-A1BD-848B799C7FD2.jpeg
    195.8 KB · Views: 33
It’s actually called “Bronze Micatallic”. I’m not positive but pretty sure it was specific to the spring special in 85 only. Cherokee also had a spring special that year just not sure of the color options.

Yep, definitely bronze, more like honey then brown. I need to clean mine and take some pictures in the sun. The only decent picture of the color I have on this thread is the pic of the back corner with gas leaking out on the ground. The other one listed for sale is a repaint, also, look at the hood catches LOL.
 
Some more random pictures from when I first got this one.

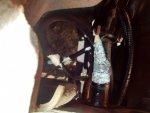
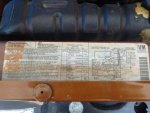
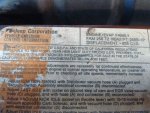
1985 California smog sticker, and a nice three core brass radiator, more on that in a bit:

IMG_20190210_135237493.jpg

IMG_20190210_135249587.jpg

Serpentine belt set up, and a nice dried out belt:

IMG_20190210_135256282.jpg

IMG_20190210_135310246.jpg

Overall under the hood shot, missing some stuff, should have most of it:

IMG_20190210_135330153.jpg

The problem with the three core radiator:

IMG_20190210_140743465.jpg

This one has the clutch fan, so I need to find a stock/OEM "HD 2 core radiator" and matching fan shroud. For now, I might swap on a 1978 fan clutch, that will give me a bit of breathing room.

Some newer pulse air parts on the passenger side:

IMG_20190210_135335788.jpg

Some newer pulse air parts on the driver side, plus a newer disconnected EGR valve:

IMG_20190210_135349272.jpg

Original paint on the firewall, and the VIN plate:

IMG_20190210_135420469.jpg

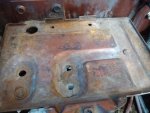
No rust battery tray:

IMG_20190210_135447643.jpg
 
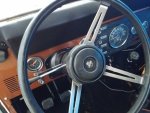
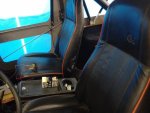
Steering wheel, dash, Spring Special seats:

IMG_20190210_135505046.jpg

IMG_20190210_135510595.jpg

IMG_20190210_135517582.jpg

Interior is in great shape, just needs to be cleaned up, dash parts put back together.

OEM door frames and skins. I will probably put new Bestop skins on the OEM frames, new Bestop snap top on the OEM top hardware. Frames are good, skins/windows are shot:

IMG_20190210_135531994_HDR.jpg

Close up of the stamp on the door upper window:

IMG_20190210_135546772.jpg

Close up of the stamp on the Bestop top, and damage to the top/windows. The top is completely dried out and will continue to deteriorate. I am not going to waste much time on trying to "pretty it up".

IMG_20190210_135552864.jpg

IMG_20190210_135556207.jpg

IMG_20190210_135601250.jpg

Most of the OEM spare tire carrier hardware is in good shape.

IMG_20190210_135611668.jpg

Assuming OEM tail light, with sun damage on the outer side:

IMG_20190210_135615432.jpg
 
Passenger side rear is pretty much all accounted for and in good shape:

IMG_20190210_135624600.jpg

Typical aftermarket radio antennae installation, not the worst spot I reckon:

IMG_20190210_135632478.jpg

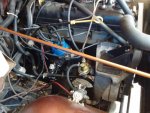
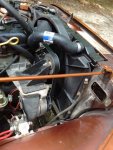
Under hood shot from the passenger side; previous owner "newer" fuel pump installed. The owner before JeepAddict mentioned "some engine work" had been completed. Grey cylinder head, maybe some work was done here?? Nice plastic valve cover, which surprisingly has not started to gush, yet!!!!!!!!!!

IMG_20190210_140716980.jpg

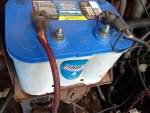
Put my "over 10 years old" Blue Optima in this one, seems to be holding a charge, even with the clock running. Need to work on the battery cables LOL:

IMG_20190210_140722595.jpg

Under hood shot from the passenger side:

IMG_20190210_140732829.jpg

I need to go through all the emissions/carb stuff. I m going to keep this one complete, and stock, with regards to all that stuff. Right now, off the top of my head:

missing Sol-Vac
EGR disconnected
Intake manifold heater temp switch removed, aftermarket temp gauge sender unit installed in its place
missing inner air cleaner trap door, and vacuum motor
I "think" PVC solenoid might still be in here somewhere

Anyway, the next work sessions will involve a lot of maintenance - belt, coolant hoses, carb rebuild, fluid swaps, brake lines and parts, PS lines, etc.

That's it for now :wave:
 
I worked on this one a little bit on Sunday. I had to reassemble some of the speedometer cluster lights and wires. I also had no turn signals. Changed the blinker flasher, which is hidden on the '85's. not in the fuse panel with the hazard flasher, did not fix the issue.

So, pulled all the lights off, scraped off some paint, cleaned the back side of the grill lights, and a few new bulbs. Finally got all the running lights and brake lights working, and the lights would flash with the Hazards, but no blinkers still.

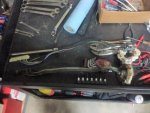
Finally, I noticed that if I held the turn signal stalk just right, I could get the blinkers to work, but it was very touchy. So, time to pull the column apart. This is what I found:

IMG_20190224_143021210.jpg

IMG_20190224_143025396.jpgIMG_20190224_143025396.jpg

Besides being really, really, dusty dirty, no obvious problems.

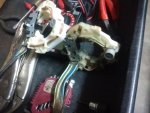
I cleaned up the contactors on the switch, to see if that would get them working, no go:

IMG_20190224_145000065.jpg

IMG_20190224_145004687.jpg

IMG_20190224_150245454.jpg

So, next step, a new turn signal switch. I compared the new to the old one, made sure all the wires were in the same slots, etc. The only difference I could find was the color of the big connector at the end of the pigtail:

IMG_20190225_180515761.jpg

IMG_20190225_180522160.jpg

IMG_20190225_180530787.jpg

Anyway, the new switch fixed the turn signals. Now, high/low beams (plus speedometer indicator), all gauges (including clock/tach), all dash and gauge lights, all exterior lights, 4wd and Parking brake light, basically all the electrical stuff works, so a good productive couple of hours spent chasing gremlins.

While I had the column apart, I also figured out/fixed the "why doesn't the steering wheel lock with the ignition" problem. As you saw previously, the inside of the column is/was very dirty. This little lock rod was stuck in its bore. I sprayed some penetrating lubricant around it, worked it in and out, problem solved:

IMG_20190224_145011474.jpg

That's it for the easy stuff, on to more difficult maintenance/repair items, when time is available.
 
A few more random thoughts and pictures.

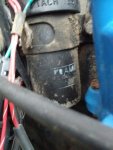
I thought this was pretty neat, original coil perhaps?

IMG_20190223_164906978.jpg

Thought it was kind of cool to find the tag on the distributor, too. Maybe OEM? One of those geeky things LOL:

IMG_20190223_164914006.jpg

I really need to wash this one to see what it's "true repainted color is". The VIN plate lists "AD" as the color, and it still has original 34 year old paint on it, probably not sun faded:

IMG_20190210_135420469.jpg

The "original" paint definitely has a "coppery/bronze" tint to it.

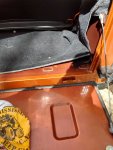
When looking here, original floor/inside tailgate paint vs the repainted exterior, the exterior looks too brown:

IMG_20190224_113502611_HDR.jpg

IMG_20190224_113509730_HDR.jpg

That being said, the original floorboard paint is pretty sun baked, just like the exterior was. When I compare the new paint on top of the front fenders with the OEM paint on the inner fenders, it is a closer looking match. Need to take pictures.

Just rambling. I am happy with the paint/color for now, I don't plan on a repaint anytime soon LOL. It just seems like it should be more "coppery/bronze". But, I still need to wash it, it hasn't been cleaned in over 9 years LOL.

In this picture, being put back into the garage, with the sun shining on the front fenders, you can kind of see a little bit more of the "coppery/bronze".

IMG_20190224_161843859_HDR.jpg

I would really like to see in person, or in pictures, an original paint "Bronze Mica-talic".


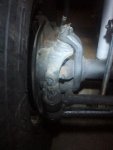
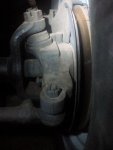
Another interesting find - the front knuckles. I had "heard" that the 1986 Dana 30 front steering knuckles are "fatter" then the earlier versions. This 1985, with the "March of 1985 gas tank production stamp", came with the later style fat front steering arms on the knuckles:

Pictures off of my green 1983, my red 1983 is the same, and my tan 1984 I sold to Dennis were all identical. Passenger, then Driver:

IMG_20190211_180212405.jpg

IMG_20190211_180220621.jpg

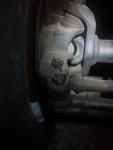
Now, the steering arms on this 1985, notice how much fatter the arms are:

IMG_20190211_180144096.jpg

IMG_20190211_180128575.jpg

Another quirky AMC Jeep thing.


That's it for now.
 
It’s actually called “Bronze Micatallic”. I’m not positive but pretty sure it was specific to the spring special in 85 only. Cherokee also had a spring special that year just not sure of the color options.

JA - looking further down where the tailgate area contrast is shown, is it possible your painter repainted it Copper Brown Metallic and not Bronze Micatallic?
 
Raymond - really enjoying the detailed pics and you threads as usual!!! ....I own one Bronze Micatallic Spring Special, or whats left of one I should say....it has no original paint left unfortunately. Your paint looks quite like 1E copper brown in the sunlight pics anyway. Also, can ya ask JA why he didnt correct the antenna before he had it painted? I know those antennas bother him, but maybe not as much then as they do now :oops::giggle:
 
Raymond - really enjoying the detailed pics and you threads as usual!!! ....I own one Bronze Micatallic Spring Special, or whats left of one I should say....it has no original paint left unfortunately. Your paint looks quite like 1E copper brown in the sunlight pics anyway. Also, can ya ask JA why he didnt correct the antenna before he had it painted? I know those antennas bother him, but maybe not as much then as they do now :oops::giggle:

I had asked JA about the paint color, he let his painter "handle it", so it may very well be 1E Copper Brown Metallic, instead of the correct color. It was 9 years ago, no records, so who knows :shrug:

I need to take a picture showing the top of the repainted fender, next to the original paint under hood inner fender. The color matches much closer here :shrug::twocents: Looking at the tailgate picture, it is way off :shrug:

On the antenna front, I'm going to sneak into his warehouse at night with a drill and add antennas to all of his Jeeps :evil::evil::evil:

I am going to research the paint color issue more, might re-paint the jeep in the future, to the "correct" color, if it is not, in the future. For now, I'm very happy with this Jeep, especially the complete lack of rust :twocents: :thumbsup:
 
I traded deer meat for the paint job. Moving the antenna would have mean killing more helpless animals. Yummy!
I sold the Jeep because of where the antenna was. If you trip the lasers in my warehouse I assure you will be captured by the hog trap and strung up by your... You ever see the movie saw?o_O
 
Decided to pull this one out of storage and work on it Friday night/Saturday. Amazingly, the old Optima battery is holding a charge. It started up fairly easy, considering I have not touched it in over 7 weeks.

Drove it home, and started to work on it. I no longer have my old Harbor Freight car canopy thing, I had to retire it. I need to get another shade structure of some kind, I am already matching my "Redneck Ray" moniker after only one day of not working in the shade!!!

IMG_20190517_173034618.jpg

Knocked out some easy tasks first. Changed out the two battery cables and the starter to solenoid cable. They were all in poor shape. I also sanded down the ground contact points, and added a ground strap from the battery to the firewall.

IMG_20190517_182444226.jpg

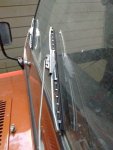
Another easy task, windshield wipers. The ones that were on there did not have much rubber left.

IMG_20190517_192611719.jpg

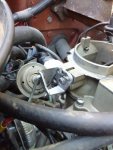
This Jeep drives and starts up great. As long as it is idled up, it idles fine. Once it warms up and the choke is off, it idles OK sometimes, like crap other times. I decided to clean out the idle tubes in the carb, since it is a pretty easy chore. It did not fix my issue, but it is still a fairly easy thing to check on a BBD carb.

A quick picture I took of how the choke linkage hooks to the shaft.

IMG_20190517_184223438.jpg

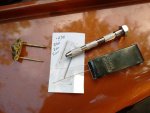
A picture of the idle tubes removed from the carb. I also drilled the tubes out to .032. I use some bits I bought from a hobby shop and the pin vice, works great. I also ran the torch tip cleaner wire thing through the tubes, to make sure there was no build up. You can buy these tip cleaners where ever they sell welding supplies. I think I bought this set at Lowes. Great tool to have in your box if you have BBD equipped CJ's.

IMG_20190517_185304918.jpg

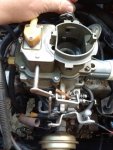
Another over all shot, I guess I took it to remember how something went back together.

IMG_20190517_185904616.jpg

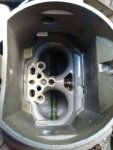
Looking down the carb throat, to where the idle tube thing sits. The carb is pretty clean.

IMG_20190517_185917021.jpg

Putting the idle tube assembly back together, note the gasket at the bottom and the one between the two parts. I got lucky, I was able to reuse both gaskets.

IMG_20190517_190051458.jpg

And screwed back down.

IMG_20190517_190246173.jpg

Like I mentioned earlier, the idle tubes were not my problem, but still an easy thing to check out. I am pretty sure I have a vacuum leak somewhere, probably at the intake manifold. I have an exhaust leak, which blows out exhaust under the hood at the manifold, so I will explore this possibility next.

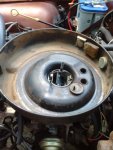
This Jeep saw lots of use in the desert, note the dirt stains inside the air cleaner!!!

IMG_20190517_191341624.jpg
 
  • Like
Reactions: SKT
So, I knocked out some easy tasks, decided to do some more involved work. Nothing really hard. The radiator hoses, serpentine belt, and power steering hoses are all shot. The three core radiator does not like the clutch fan. So, I decided to do all of the following at once:

1) install the correct two core radiator
2) install a fan shroud
3) change the water pump/thermostat while I was there
4) change the two power steering lines (easy to get to when the radiator is out)
5) install a new serpentine belt
6) replace the upper/lower radiator hoses
7) wasn't planned, but the fan clutch was leaking fluid, so I replaced it with a new one I had in the garage

Picture I took of how my belt is routed. This is a California emissions CJ-7.

IMG_20190518_084459945_HDR.jpg

To remove the belt, I consulted the FSM. It states to loosen two bolts on the front of the alternator: the bolt in the slotted hole at the top of the picture, the nut on the stud at the bottom of the bracket. Note all the grime on the timing chain cover.

IMG_20190518_084508421.jpg

Well, I'm here to tell you, you have to loosen the alternator adjusting bolt on the back side, too, or that alternator will not move LOL:

IMG_20190518_084519040.jpg

Personally, I do not really care for the serpentine belt set up. You still have to manually adjust the tension on the belt, either at the alternator and/or the power steering pump. Plus, you gain two idler pulleys that have bearings that go bad. The bearings in my two idler pulleys are OK, not great, that will be a future project. I just don't see what the big deal is, I like the V-belt set up better. You can have one v-belt break, and the water pump will still turn. You lose the serpentine belt, you are dead in the water. Anyway, I'm keeping the serpentine set up on this Jeep, since that's what it came with. I would not go out of my way to track down all the brackets/pulleys/pieces to install a serpentine set up.

Moving on, thermostat stuck to the head with orange RTV, lots of grime on the front of the engine.

IMG_20190518_085427412.jpg

Another PIA thing about the serpentine set up - you have to remove the front plate from the PS pump, plus the idler bracket, from the engine to remove the water pump. Not hard, just more stuff to do. Lots of bolts to keep track of, plus the orientation of the plate/brackets. One tip - when you go to put it back together, keep all the bolts loose until they are all started.
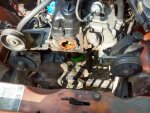
IMG_20190518_090527186_HDR.jpg

With the radiator out of the way, it is easy to get to the power steering lines. You can see the penetrating oil around the two lines at the box, I soaked them good, they broke free with no problem.
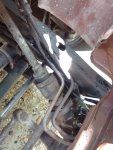
IMG_20190518_101621187.jpg

This is the return line, with fluid seeping out of it:

IMG_20190518_101636360.jpg

IMG_20190518_101652348_HDR.jpg

One word of wisdom - I should have loosened the pressure line from the back of the pump BEFORE taking the front brackets off. That would make it so much easier. With the front plate off, the pump just wants to turn.


New power steering lines installed. I purchased both lines from NAPA. I had to slightly bend one of them, other then that, they bolted right into place.

IMG_20190518_144724920.jpg

I installed a new, two core brass radiator, I bought from Summit. It bolted right into place, seems to be working fine. I also installed a new fan clutch. Plenty of clearance between the radiator and fan clutch, although the picture is not the best.

IMG_20190518_144737858.jpg
 
  • Like
Reactions: SKT
I installed a Crown "replacement" fan shroud. Surprisingly, it bolted right into place, no issues with it at all.

Over all shot, showing new serpentine belt, radiator, fan shroud, upper radiator hose.

IMG_20190518_144749807.jpg

I flushed the engine/overflow bottle. The old coolant had lots of sediment/rust in it. No big rust flakes, mainly really fine sediment.
IMG_20190520_072853102.jpg

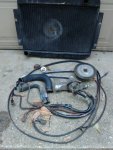
All of the parts I replaced. The three core radiator is brass, and still in good shape. The tubes are fine, the fins are bent, but I can straighten them out pretty easily. I will probably flush it out really well and install it in my red Scrambler, to replace the plastic tank/aluminum Autozone radiator.

IMG_20190518_145347311.jpg

On the coolant side, I still need to pull off the intake, so I will have to drain some coolant back out. Also, the heater core leaks, so it is bypassed for now. In the near future, I will pull the intake, change the heater core, change out the heater hoses.

I also decided to wash off the Jeep, it hasn't been washed since it was repainted 9 years ago. It cleans up really well, top still looks like $hit:

IMG_20190518_152209771.jpg

IMG_20190518_152218049.jpg

IMG_20190518_152231218.jpg

I got it back in storage Saturday afternoon, before the rain came. It looks better in the yard LOL:

IMG_20190518_161824653.jpg

That's it for now.
 
I'm with you on the Vbelt vs serpentine. The Vbelt to me makes much more sense.
 
Back
Top