• Notice for iPhone users: DO NOT use the image size reduction option when uploading photos to the forum. This causes portrait images to post as landscape. We have added a warning to the image insert pop-up as well.

Spankrjs 1985 Spring Special CJ-7

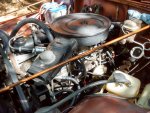
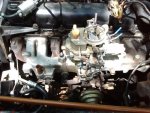
I just can’t believe how dirty that engine is. You should be ashamed!

LOL :thumbsup:

That's why I worked outside, so I could clean all the crud off of it.

I'm just hoping all that crud wasn't masking a leaking timing chain cover :fingerscrossed::fingerscrossed::fingerscrossed:

So far, no new leaks, time will tell :fingerscrossed::fingerscrossed::fingerscrossed:
 
OK, lots of pictures/updates/work completed over the Memorial Day weekend, it will take awhile.

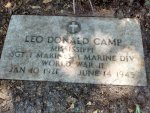
First, reason for Memorial Day. I did not work on the Jeep all weekend. I went with my mom, cleared off her fathers grave. He was killed on Okinawa, Japan, 2 months before the end of WWII. She never met him. He was killed in June, she was born in December.

15.jpg
 
Now, for the Jeep stuff.

This Jeep has ran "ok", but not great. I already addressed the fuel system, time to start looking at the rest of the engine stuff. This Jeep sat for a long while at JeepAddicts place, we never worked on it. The owner before, however, must have had some issues with it.

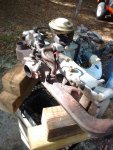
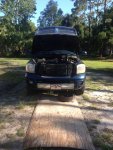
No room in the garage, time to be a "shade tree mechanic". It is already over 90 degrees here, and its only May!!!

5.jpg

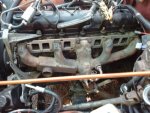
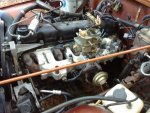
I wanted to check out the intake and exhaust manifold. The intake for leaks. The exhaust is leaking at the manifold. Lots of stuff to remove to get to them:

6.jpg

Intake manifold had a slight leak, gasket look suspect from here even:

7.jpg7.jpg

8.jpg

About two hours of vacuum hose, and wire removal, plus the PS pump (gotta love that serpentine belt LOL), ready to pull the manifolds.

9.jpg

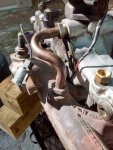
This EGR tube is always a PIA. The exhaust manifold fitting is frozen/heat welded to the tube. I had to wait until the intake was off to break it free.

10.jpg

The original/old gaskets:

11.jpg

Check out that carbon build up!!!!!!!

12.jpg

13.jpg

14.jpg
 
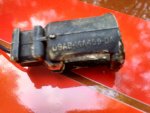
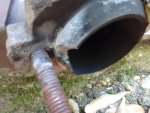
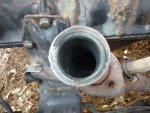
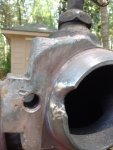
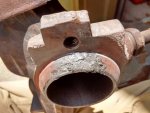
Found the exhaust leak, the cast in place donut on the exhaust manifold was blown out. Looks to me, previous mechanic/exhaust installer put a torch on the nearby stud, to remove it, and melted the manifold. Just a hunch, but that is what it looks like to me.

16.jpg

I had a spare manifold, BUT it is highly "eroded" around the #1 port, and it is warped so bad it would not fit over the studs located at either end of the head!!!

17.jpg

I straightened out the down tube, it was slightly bent where it met up with the blown out part of the cast donut on the manifold.

19.jpg

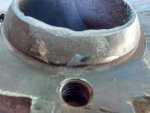
Close up of the cast in place donut damage.

20.jpg

You can also see a crack on this side of the manifold. But, it is not "through" crack. This was the only other damage to the manifold that I could find.

21.jpg

23.jpg

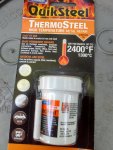
So, no spare manifold. I could have tried to weld the hole up, but that is always a crap shoot on a cast part. With nothing to lose, I tried this stuff:

22.jpg

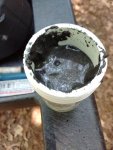
The JK guys rave about it, use it to fix their cracked manifolds. It was only $9.00, figured what the hell. I mixed it up, it is a tad "runny", so I let it sit up for about 15 minutes.

25.jpg

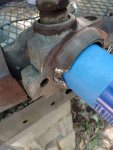
Jammed this can inside the manifold, so I had a "backing" to build up on:

24.jpg

Used an old screw driver/razor knife blade, built up the hole in about three separate "lifts". Put a big blob on the inside to reinforce the repair. A blob on the inside does not matter, the down pipe seals to the outside.

26.jpg
 
With it being 90 degrees outside, I would sit the manifold in the sun, the epoxy would harden in about one hour. I built it up rough and high:

27.jpg

28.jpg

Let is cure for about four hours, then came back and sanded/shaped it with emery cloth, came out great IMO:

29.jpg

30.jpg

I left a "blob" inside, to give it some "beef":

31.jpg

Spoiler alert - so far, about one hour running time, it has held up. On the pre-80's exhaust manifolds, the bottoms are smooth, and they use a separate, replaceable, lead donut gasket. I ordered one, it came in on Tuesday. Anyway, if the epoxy repair fails, I will pull the manifold, grind off the cast in place donut, use this gasket.

32.5.jpg

Mocking up the exhaust manifold/gaskets:

32.jpg

One thing I have found, I always have to trim cut the intake gaskets to clear the exhaust manifold, If not, everything will not sit flush:

33.jpg

34.jpg

Another thing I have found: IF using the EGR cross over tube, go ahead and install it to both manifolds on the bench, then install the entire assembly. It is too difficult trying to install that tube with both manifolds bolted to the engine. It is possible, it is a PIA. If you strip out the threads in either manifold, IIRC it is a 7/8 fine thread tap that will fix them. Ask me how I know LOL.

35.jpg

I replaced my original EGR tube with a replacement part I bought from Collins Brothers a few years ago. This tube was on my green Scrambler. IIRC, there tube is stainless, so it shouldn't rust out. Might be worth your while to have spare sitting around, just in case.
 
Close up of the replacement EGR tube. I threaded the ends in almost all the way in, left them loose. I will put a final torque on them once the manifolds are installed. Best to leave them loose, until the manifolds are torqued down. The fittings take a 1" wrench, so not much room once install to tighten them.

36.jpg

And the manifolds installed.

37.jpg

And realizing you forgot to change the to intake manifold heater gaskets. Which you can not change with the manifolds installed on the engine. Poo.

38.jpg

I decided to test the heater. Hooked up 12 volts, it gets really hot in about 15 seconds, will burn the tar out of you, must work. It gets even hotter if you ground it. I might put a ground strap to one of the attaching bolts, since stock it just grounds to the aluminum intake manifold.

39.jpg

I removed a previous owner installed temperature gauge. They used the intake port that this manifold heaters coolant switch is supposed to use. I used the switch that was in my green Scrambler, since I know it works. I ended up using a bunch of emission/MCU switches/doo-hickies from my green Scrambler stash, since they all work. A few years ago I fixed all of the original computer controlled carb/emissions stuff on it, except for the pulse air system. I them promptly rebuilt that engine and installed Mopar MPI on it, leaving me a whole box of used/working MCU/emissions parts. You will see more of this later.

39.5.jpg

I then reinstalled the manifolds, hooked up the exhaust down pipe, reinstalled all the PS pump stuff, and all the other "easy" stuff.

40.jpg

Since this is a California emissions model, it has this weird "decel valve" thing. It goes on the manifold vacuum source of the PCV system. It has a trap door inside that shuts if you come off the throttle fast. It works. I can hear it thunk shut if I dump off the throttle.

41.jpg

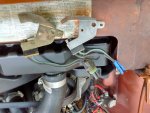
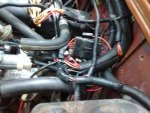
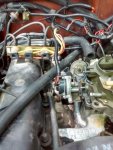
And then, my simple little project snowballed. I noticed a bunch of my computer controlled carb/emissions system wiring harness was FUBAR, and had a bunch of previous "mechanic" hacks/attempted repairs. Enjoy:

Crimps on the WOT switch, located on the side of the carb. Without the proper connector/plug, you can't remove the carb from the engine, without re-
cutting the wires.

42.jpg

Melted plug on the carb's stepper motor:

43.jpg

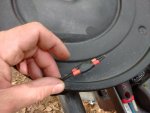
Hard to make out, but crimps on the thermal electric switch, located inside the air cleaner. Without the proper connector/plug, you can't remove the air cleaner without re-cutting the wires.


44.jpg
 
So, I pull out my "known to be functional" '83 MCU harness, which I got from Dustin, aka JeeperDD, a few years ago, thanks again!!!

45.jpg

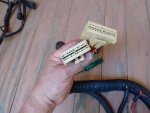
My '83 harness is perfect. BUT, big problem. 1983 harness to computer plugs:

46.jpg

1984-up till the end of the 4.2 in YJ's, use a single plug:

47.jpg

Besides the plug, the only other difference I could find between an '83 and post '83 harness:

48.jpg

The later harness use this "diode assembly". Of course, mine is melted. I am not 100% sure on this thing, but it does have diodes inside of it. Wires go in and out of it, with regards to the computer voltage source, the sol-vac, maybe the AC? It ties into the big 6 pin connector, and protects something, I guess the computer from shorts or voltage over loads? Besides this "diode assembly", and the computer plug difference, I could find no other differences. Both computers/harnesses have 27 wires coming out of them, maybe 29, can't remember, but the same count on both.

I briefly thought about putting the newer style connector on my '83 harness, you can remove/reinstall the pins simple enough, but decided against it. For now, I installed my "known to be good" '83 computer AND harness into this '85. Dustin, aka JeeperDD, is sending me an '85 harness from his stash. I will eventually swap in my '85 computer and this new to me '85 harness.

More damage pictures.

Thermal electric switch crimps:

49.jpg

Replacing the cut WOT switch with a known good one:

50.jpg

'85 harness, melted knock sensor wiring/connector (in the foreground):

51.jpg


Cut/crimped O2 sensor wire:

52.jpg

Not sure what, but cut, something on the intake side of harness, maybe Sol-Vac related:

53.jpg

Two more, same as above:

54.jpg

Besides the cuts/crimps, previous "mechanics" spliced in different color wire all over the place. So, a circuit might start out red, then go gray, then black, then green, whatever color wire was handy. The only way to trace wires on this harness, start at the end, and physically follow the wire until it terminates. Fun.
 
Choke wiring:

55.jpg

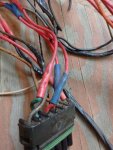
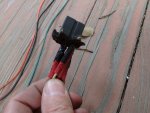
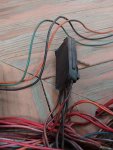
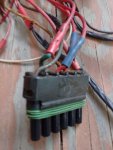
Six Pin connector, crimps and wrong color wires inserted:

56.jpg

More crimps, back side of the stepper motor plug, every wire is crimped:

57.jpg

Another picture of the "diode assembly":

58.jpg

Another 6 pin connector shot:

59.jpg

Can't remember what, I think the coolant temp switch plug, more crimps:

60.jpg

PCV solenoid connector, melted. (PCV solenoid was removed via a recall)

61.jpg

You know you have messed with this stuff for too long when you have five separate MCU harnesses!!!!

62.jpg

Amazingly, the previous owner electrical hacks only happened to the MCU harness. All of the other under hood, chassis, dash wiring is 100% intact/functional/not butchered up. Can't complain, easy enough to swap out the MCU harness.

I have four computers:

63.jpg

Plug difference:

64.jpg
 
Melted coolant temp switch, replaced with a known good one.

65.jpg

Cracked carb phenolic spacer, replaced with a used/good one:

66.jpg

Melted/damaged accelerator cable, replaced with a good used one:

67.jpg

Judging by the damage, I am pretty sure this Jeep had an under hood fire at some point, on the intake side, Too many melted parts in this area for any other explanation. The intake still has traces of black/melted goo on it, too. If I were too guess, the Nevada owner had an under hood fire. He either tried to fix it himself, took it to a mechanic, they gave up. They got it running again, but it would not pass emissions, even with brand new cat/muffler/all pulse air parts. Well, I can see why. This thing was "butch", hence my snowballing repairs.

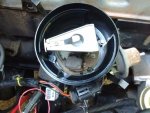
Air cleaner missing inner trap door:

68.jpg

Love it!!!!!!!!!!!!!!!!!!!!!!!!!!!!!!!!!!!!

69.jpg

In my stash, I had a correct non-power brake air cleaner assembly, intake hose, and fully functional trap door(s):

70.jpg

Green Scrambler "known to be good MCU parts" goody box:

71.jpg

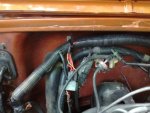
I installed my '83 computer and harness. On the driver side, I routed the harness this way, tied to the grill prop rod. This keeps it off the hot intake/exhaust, will help keep it from melting/shorting/catching fire. There is a bunch of crap on this side of the engine, the "hot" side:

72.jpg

73.jpg

74.jpg

I was careful to keep all the wire off of the engine.
 
Another wire/Pulse Air tube shot, keeping the choke wire off the hot intake:

75.jpg

Not the prettiest job, but works for now. I will eventually remove this harness/computer and reinstall the "correct" '85 stuff:

76.jpg

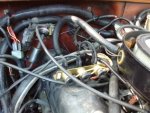
After i got the wire harness installed, I realized the previous owner really messed up all the vacuum lines. They were plumbed incorrectly, missing, dry rotted, melted, or plugged. Three hours later, all new vacuum lines under the hood. I still need to double check some of the pulse air hose routing, everything else is correct and functioning as it should. Like I said, "snowballed".

77.jpg

78.jpg

After all that, it still ran like crap. Well, it runs good, idles like crap. A bit better, but still blah, especially after three days of work. One thing I noticed when I pulled the MCU harness - the "high altitude" wire was grounded. I am at low altitude. So, I checked the timing, it was way off. Readjusted the timing, much better, but still not 100%. Wish I would have painted these lines when I had the water pump/front of engine apart, a bit hard to see from above:

79.jpg

Getting better, still not 100%. I did some more work, will update later.

That's it for now.

80.jpg
 
The Spring Special write up is good and all but major props to you clearing off your grandfather's grave. My grandfather passed away about two weeks ago at 93 years old. He was in the Navy and also stationed on Okinawa during WWII. No doubt they were on the island at the same time. :usflag:
 
I agree with JA's comment. They were the greatest generation. The fate of the world rested on the outcome of WWII. If the Allied's has lost, this would be a miserable place. Your grandfather's bravery, that of JA's grandfather and their fellow soldiers/sailors/airmen kept our freedom. Something we all need to be very thankful of.
 
No room in the garage, time to be a "shade tree mechanic". It is already over 90 degrees here, and its only May!!!

5-jpg.73081
I feel your pain...IMG_0846.JPGtemp.jpg

Had to replace hydraulic lines to the hydroboost in the "shade", no longer have a backup vehicle. :(
 
X2 on the above comments. My F-I-L ( Air Force mechanic ) and Father (Navy PT Boat machinist ) arrived out in the Pacific right near the end of the war and were very lucky not to have to see any serious action. Those men back then really were the greatest generation !
 
Love your Spring Special. So many things to fix. Did you replace that funky freeze plug while the manifolds were off? Great detailed report!
 
Love your Spring Special. So many things to fix. Did you replace that funky freeze plug while the manifolds were off? Great detailed report!

No, I left that odd freeze plug in there, had too much other stuff to mess with. I guess that is some type of "one size fits all" parts store special :shrug::thumbsup:
 
So, after the intake/exhaust manifold gasket replacement, redoing the MCU wiring, and redoing the vacuum stuff. it ran a bit better. The Jeep has always started up fine, and drives well. just doesn't idle well/consistent.

Adjusting the timing helped some. Before, and after the timing adjustment, the Jeep would not rev past 3,000 RPM while driving. By that, I mean you could leave it in 3rd gear, it just would not pull past 3,000 RPM.

The spark plugs, plug wires, cap, rotor, and coil look old. The coil especially, it still has the original AMC stamp!!

I bought some new plugs, and dug out/installed my old "TeamRush" upgrade. Basically, a Ford cap, rotor, MSD coil, and Motorcraft plug wires. I had installed this stuff on my green Scrambler, which at the time had a perfectly working stock ignition system. Since I had this stuff, and it only had a couple thousand miles on it, I installed it.

You can Google "TeamRush", but this is it, basically: different cap (with adapter), rotor, coil, plug wires.

IMG_20190528_170640113.jpg

The plug wires were dry rotting pretty good, have never had this happen before:

IMG_20190528_171455565.jpg

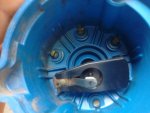
The cap and rotor still looked "OK", no bad corrosion:

IMG_20190528_171504806.jpg

IMG_20190528_171727193.jpg

Pick up coil in the distributor looked OK, seems to be functioning fine:

IMG_20190528_171742340.jpg

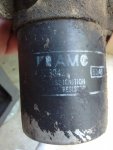
Original, 1985 coil, perhaps:

IMG_20190528_172058767.jpg
 
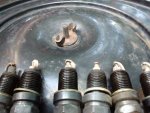
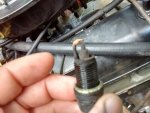
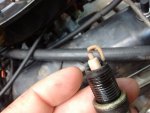
The spark plugs themselves, all looked like this. All six are the same, no oil, just a bunch of build up:

IMG_20190528_173505699.jpg

IMG_20190528_173515850_HDR.jpg

IMG_20190528_173519159.jpgIMG_20190528_173526761.jpg

IMG_20190528_173541143.jpg

IMG_20190528_173544679.jpg

I'm sure some fresh plugs will help.

The "TeamRush" rotor and distributor cap adapter. The rotor drops right on, fits my '85 distributor tight. I remember on my '83, the rotor felt a hair loose. The black "adapter" screws on to the distributor where the stock cap screws on.

IMG_20190528_175100473.jpg

And the cap, which is shorter/wider then the stock cap.

IMG_20190528_175145044_HDR.jpg

Before I pulled all the wires off, I marked the distributor base with white chalk (on the vacuum advance assembly, directly behind the black pick up coil plug) to where #1 was at. The replacement parts lined up perfectly.

IMG_20190528_175156599_HDR.jpg

And finished:

IMG_20190528_181929262.jpg

The new coil helped, I can now easily pull to 55-60 mph in 3rd gear, 4,000 RPM, so happy with that. I do not really think the "TeamRush" is a miracle upgrade, but I do think that these parts are better then stock replacements.

But, the idle is still kind of blahh.
 
After the ignition parts install, I turned my attention to the carb. Previous "mechanics" have messed with it. It has new gaskets, and is really clean. Upon further inspection................................

This Jeep starts really easy. Turn the key on, 1/2 way press gas pedal down twice, it fires right up, and the centering pins are centered like they should be:

IMG_20190529_174103081.jpg

Random picture, showing from top to bottom: Upstream Pulse Air inlet, Downstream Pulse Air inlet, thermal electric switch:

IMG_20190529_174712524.jpg

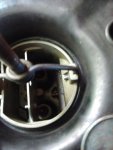
If I remember correctly, at idle, the computer is in "Open Loop", and the metering pins are centered. I could be wrong. Once you give it some gas, the pins will start to move. Hard to see, but they have slid back to the "lean" position:
IMG_20190529_174732450.jpg

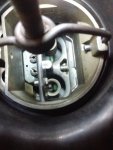
One problem. After a few minutes, my pins slide all the way forward to the full "rich" position:
IMG_20190529_182724014.jpg

Out of curiosity, I disconnected the O2 sensor, no change. I had the O2 sensor I used in my green Scrambler, so I installed it. NOTE - It is getting hard to find new O2 sensors. My local NAPA was the only regular parts store who could get the correct one, and it is coming from Seattle!!!

Broken sensor, short wire, replacement sensor, long wire:
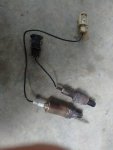
IMG_20190529_184351949.jpg

Not sure if this is the original O2 sensor, here are some markings that are on it:

IMG_20190529_191020182.jpg

IMG_20190529_190958930_HDR.jpg

To remove the old sensor, I warmed the Jeep all the way up, and removed it when it was still super hot. In my experience, and not just with Jeeps, O2 sensors are best removed while the manifolds are still super hot.

Anyway, the new sensor seems to have worked, stepper pins move in and out like they should, center up at idle and start up:
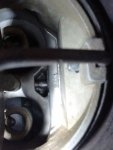
IMG_20190529_190639604.jpg

But, this did not help the idle.

Getting back to the carb, I decided to mess with the mixture screws. One screw was 6 turn out, the other was 1 turn out. So, I turned the Jeep off, screwed both screws all the way in, then backed them out 2.5 turns. Started Jeep up, disconnected stepper motor, turned them in till the idle dropped some, then back out 50 RPM.

It idles perfectly smooth now at 600 RPM.

BUT, the idle screws feel rough, and they did not seem to be making very precise changes. So, I will pull the carb this weekend, rebuild it and replace parts as needed, plus readjust it.

For now, I am very happy at how it idles, starts up, shuts off, and drives/accelerates/decelerates. A little more fine tuning, and it will be good as new.

Good thing the hood hinges have oil holes!!!
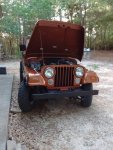
IMG_20190529_190912049.jpg

That's it for now:thumbsup:
 
Those depression era WWII old boys would have cleaned up those plugs. :). Otherwise great report. I can see you have patience with the wiring.
 
Back
Top