• Notice for iPhone users: DO NOT use the image size reduction option when uploading photos to the forum. This causes portrait images to post as landscape. We have added a warning to the image insert pop-up as well.

What's on your Work Bench?

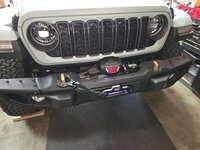
In progress, winch install into the factory winch ready bumper, 2024 392.

20250929_174830.jpg

So far, biggest PIA was removing the front bumper fog light wiring harness plastic clips, without damaging them.
 
More 392 winch install.

When did Warn stop installing the wire/rope on new winches?
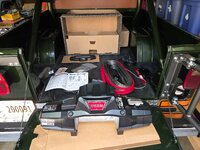
20250930_163048.jpg

Bolted the winch to the mounting bracket, threading rope through the spool, installing the cam lock. This was a PIA.

20250930_181151.jpg

Front bumper reinstalled, all the mounting bolts snugged up, wiring ran from winch under the grill up to the engine compartment. Still need to finish the fog light wiring harness reinstallation, lower skid pan, the inner bumper bolts (fun), and a few other details.
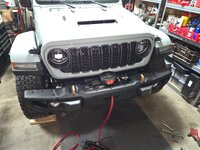
20250930_190426.jpg

My front springs sagged a 1/4" after the install. I have read lots of BS on the internet about JL factory front springs. Best I can tell, and from the dealer parts department, if your JL came with the winch ready steel bumper it has winch springs. The bumper package is the deciding factor, NOT the factory installed winch. That being said, a 2 door vs 4 door vs Sahara vs Rubicon vs 4xe vs 392 all use different steel bumper group front springs.

My 2024 392 came with the steel bumpers, no winch. I found another early 2024 392 that came with the winch. Our front spring part numbers match. Another interesting note, there are differnet part numbers for the right vs left front springs, same for the rear springs. That being said, all three of the 2025 392 models at the dealership, with factory winches, have different part numbers from the 2024 models 🤯 Me and the parts guys can't figure it out, especially when the spring part numbers will say they fit 2018 through 2026 vehicles!!

Anyway, much bigger PIA to put a winch on a JL compared to a CJ. I went with a 10k pound Warn, figured 8k is cutting it close. I run a 9,500k Warn on my Scrambler and have been very happy with its performance. This 10k fits perfectly on the Warn mount and OEM steel bumper.

 
My experience doing this install multiple times is Zeon never comes pre spooled. I hook to another Jeep point slight uphill and backup to set cam flush and then spool in. The EVO model comes spooled as it is made overseas.

As for the 1/4” settle, pretty standard. I use the Terafex 1/2” coil spacer on top of stock spring and the stance is fixed. The different spring numbers left to right is due to fuel tank on passenger side causes the JL lean. Check measurements from side to side as you can add or remove coil spacer to level.

If you decide to add a spring spacer it is a good time to change the lower front spring retainer. The Mopar one is plastic and flexible. Several brands, here is Teraflex https://teraflex.com/jl-jt-hd-spring-perch-kit-front-lower.html
 
Last edited:
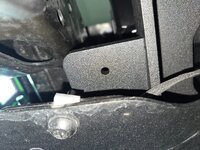
More 392 winch install. The Warn mount comes with a hole on each side of the plate for the OEM fog light harness clips to pop into at these locations. I was able to reuse all the factory holes/clips except at this location. The OEM plastic clips attached to the harness really won't come loose and slide over to pop into these holes. I did not want to cut these two clips off and track down new clips, and the harness needs to be secure in this area due to the lower bumper skid plate attaching bolts threading up into this space.

20251001_180926.jpg

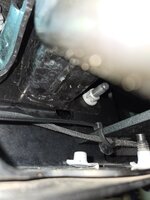
So, the Warn plate comes with big square holes on each side to temporarily hold it up into place until the bumper is reinstalled. I used these holes to ziptie the OEM fog light harness up, worked perfectly.

20251001_180914.jpg

I was able to get all the bumper and winch mount bolts torqued to spec. I was worried about access to the inner bumper nuts on each side but it was actually super easy. Started them on the studs from underneath the Jeep. Then moved on top and simply used a deep socket and 3/8 ratchet with short extension to tighten them up. I was also able to use my 1/2" drive torque wrench with a deep socket and one short extension to torque the nuts easily. From the bottom this would be a huge PIA, but the topside was easy. Maybe the 2024 grill is easier to work around compared to the earlier versions?

20251001_185205.jpg

Just need to finish running and routing the underhood wires, spool in the cable, and a few other small details to finish this up.
 
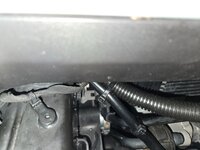
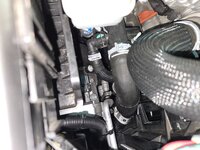
Ran and secured the wiring. I went under the grill and outboard of the fuse box/battery. The factory winch 392's run the cables next to the engine which I didn't like.

20251002_092837.jpg

20251002_092851.jpg

20251002_092859.jpg

20251002_101444.jpg

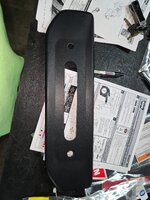
I decided to reuse the OEM plastic front filler panel as opposed to the Warn metal plate. I didn't like the license plate flange on the Warn piece, and didn't feel like cutting it off. I traced my plastic piece from the back side, cut it out with a 1" hole saw, drill bits, Dremel cut off wheel, and files. Also had to remove the mounting clips from the back side of this piece due to the Warn winch mounting plate blocking off all but two of the slots.

20251002_092938.jpg

It's alive!!

20251002_101454.jpg

The lights around the "W" are kind of meh but useful. The bottom lights that light up the spool are priceless due to the entire winch being concealed by the bumper.
 
  • Like
Reactions: SKT
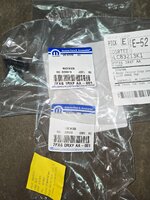
I had to remove the long plastic frame cover to install the winch. I was going to use the OEM winch equipped plastic filler panels but my winch is too wide. Oh well. Part numbers pictured if this is useful to any one.20251002_111813.jpg

20251002_111824.jpg

The slight gap. I won't lose any sleep over it.

20251002_111908.jpg

Outside setting the cam lock, pre-stretching the cable, and spooling it up.

20251002_105035.jpg

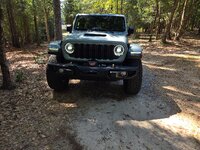
All finished. I might install another line end piece to get rid of the hook, something that can lay flat on the fairlead.

20251002_111917.jpg

20251002_125947.jpg

One other note: the winch lights stay on for 20 minutes after you use the winch. I had to call tech support about that, I thought there was a problem. They are dimmer then when the winch is operating, and minimal amp load, just odd IMO.
 
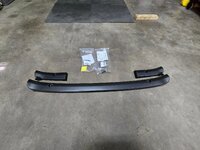
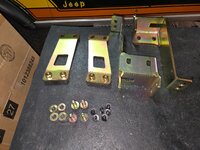
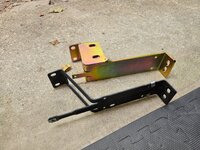
More 392 upgrades. I installed the Metal Cloak reinforcing brackets for the stock metal rear bumper. OEM brackets are thin and can lead to the rear bumper hitting the tub if you smack it hard enough. I believe these brackets are part of some type of rack system. This should help the rear bumper survive, pretty cheap insurance.

The parts:

20251002_130003.jpg

Compared to the OEM bracket:

20251002_132427.jpg

20251002_132435.jpg

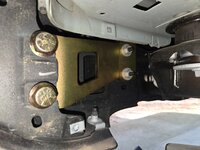
Fairly painless install. I installed both sides without having to remove the rear tires. In progress shot with all the OEM parts removed from the passenger side.

20251002_132535.jpg

I used the supplied bolts to temporarily secure the inner bracket in position while I snugged up the PIA to get to nuts on the OEM rear bumper studs.

20251002_133337.jpg

Installed.

20251002_134906.jpg

Fairly simple install, I just followed the instructions. I did have to unplug/unclip the rear bumper electrical harness, driver side, run it through a hole in the inner bracket, then reconnect it. Pretty easy.

The only other deviation: I did not want to use the provided push pins to secure the lower inner wheel well plastic guards. The original nut clips are not wide enough to clip over the much thicker Metal Cloak brackets. I used a Dremel, cut one side off of each clip, and was able to tape/hold them in position, and screw them back on. Probably nothing the matter with the plastic push pins, I prefer screws.

20251002_164155.jpg

Finished, pretty much hidden from view unless you lay underneath the Jeep.

20251002_172340.jpg

One more small JL upgrade then time to start spending money on CJ's again!!!
 
One last 392 addition, Metal Cloak dead pedal. I never needed one of these in any of my CJ's, TJ/LJ, or Gladiators, but something about the seat position in this JL necessitated it.

20251004_091514.jpg

20251004_093346.jpg

Drove the 392 to New Orleans and back yesterday for the Saints game, pedal works great!!
 
Last edited:
Call it the work office workbench. Giving a Starlink Mini a try here and at the job site. All I can say is that it’s a Game Changer!
yep, agree, will broadcast through my JT hardtop so I have mounted inside and use while driving in remote areas. Has quick release so I can move around.
 
yep, agree, will broadcast through my JT hardtop so I have mounted inside and use while driving in remote areas. Has quick release so I can move around.
Man, I’m always behind the curve……
The onboard power, solar, lithium is a rabbit hole I don’t want to go down…..$$$$)
 
The only thing on my workbench at the moment is my 8. I tore the speedometer apart on Sunday, spun everything by hand, works fine. Didn't get to drive it again yet, as I am still tracing issues with the fuel gauge. Of course, the simple things I forget to check. 3A fuse in the block, blown. Put a new one in and BAM! fuel gauge goes past full and stays there. Yes, I know I will also need to figure out why it blew, if it pops again. Now I need to figure out the ground issue, since the troubleshooting I got on here tells me that is the problem. I do still need to test the sender, but at this point I'm starting at the gauge. Does anyone know if the light bulbs are part of the ground of the fuel/temp gauges? I don't have all of those in and obviously none of them will light up without being plugged in so I am guessing the speedometer and the dash are the ground points for them.
I hope once this is fixed I can drive it for a few days and put the Victory Highball on the workbench and get the forks rebuilt.
 
Finally received the new chain tensioner idler wheels in the mail for the Dr Field and Brush mower.

20251006_150009.jpg

Installed. There is a spring that runs from bolt to bolt that puts tension on the rollers/chain, not installed in the below picture.

20251006_152745.jpg

I was kind of leary of my new axle bearings and retainers.

20251006_152752.jpg

Operated the machine for about four hours with no issues so I'm gonna call this project finally finished, for now, until I tear it up again 😆
 
A new napa fan for the heater (upgraded size) goes in in the morning. It's cccold out lol, still rocking the bikini/windjammer & soft doors atm.
Trying tio time the hard top with finding a good windshield frame, any color let me know if anyone in VA or NC has one for sale please =)
where'd my soa member badge on the left go??
followolaccttoyo.webp
 
A new napa fan for the heater (upgraded size) goes in in the morning. It's cccold out lol, still rocking the bikini/windjammer & soft doors atm.
Trying tio time the hard top with finding a good windshield frame, any color let me know if anyone in VA or NC has one for sale please =)
where'd my soa member badge on the left go??
View attachment 119162
Look in Lexington NC FB marketplace. Michael has one
 
Back
Top