• Notice for iPhone users: DO NOT use the image size reduction option when uploading photos to the forum. This causes portrait images to post as landscape. We have added a warning to the image insert pop-up as well.

Need a little prayer

Ok I got the caps that bolt to the floor cleaned, painted and then installed and another coat along with the rubber floor plugs.


dad132.jpg
 
So the good news is the Don's buddy will be ready in just over a week--time to shift up a gear...


So its time to start putting some things back onto the car. I went and cleaned up the hood release/latch assembly and gave it a coat of pant and then threw it on with the horns.


dad133.jpg


The radiator also went back in.


dad134.jpg
 
When I removed the front brake hard lines each one was pretty toast at the brake hose fitting due to having to use vise grips to remove them. They were also kinda pitted from rust so I needed to build new ones.


The drivers side. I chose to copy the origional one.


dad135.jpg


The passenger side I chose to do different than the stock one as I thought there were unneeded bends in it.


dad136.jpg
 
I finally rebuilt the carb so now thats ready.


dad137.jpg


I hated the fuel line from the fuel pump and it too had some rust pitting in it but more than anything it was bent this way and that way.So I made a new one.


dad138.jpg


I also made a new line for the vacuum advance.


dad139.jpg
 
So since the coating I put on the floor was now hard I went back into there. Near the beggining of the thread I showed a picture of the fuse panel that was dead. Along with that I had some other issues I needed to resolve and the best way to get them resolved was pull the cluster. OMG that was not an easy task since there are no main connectors on these instead you have 11 individual connectors and like 8 bulb connectors. But I did manage to get it out and took good notes for when it goes back in.


dad140.jpg


So I had 3 issues that I knew of at hand to take care of. The first was the washer pump. The car from the factory has a washerpump but it was not wired like so and had wires just ran to it and not using any of the factory pass thru connectors. I got the wiper switch undone from the dash and found this.


dad141.jpg


I dug out my multimeter and one of the books my dad gave me(I am spoiled with the wiring schematics I use daily at work compared to this old stuff). Well my hunch was correct on where I "thought" the washer feed wend thru the firewall. There are 2 main passthru's and one double wire passthru and the washer feed went thru there.


dad142.jpg


The stotchlock had damaged the wire so I nipped it and replaced that section of wire along with the trerminal in the switch connector.


And here is the dead fuel block---I threw that damn thing away.


dad143.jpg


I went and installed the blade style fuse panels I use on my custom wire jobs for my customers. The car also had nothing I could find in the way of power feeds for the stereo and instead somebody had ran a hot wire from the battery. So I went and ran 2 new circuits at the new fuse box for the stereo.


dad144.jpg


I still have to make a bracket so it can mount under the dash on the lip of the dash.
 
Got the new fuel and vacuum line installed


dad148.jpg


I also got the carb put on. My dad ordered a new chrome valve cover and Don has sand blasted the old one for me so I decided I to paint it just so I could remove the rags I had covering the the valve train and it just also looked better,lol.


dad149.jpg
 
So since I got the wiring taken care of under the dash I was able to get the wiring passthru's installed into the firewall.


dad150.jpg


So now that is done I can finally start to getting the engine bay wired back up again--my way...


Started with the passenger side harness since it was the easier of the 2.


dad151.jpg


Got my start..


dad152.jpg


And here is where I got after 10 tonight and finally ran outa steam.


dad153.jpg
 
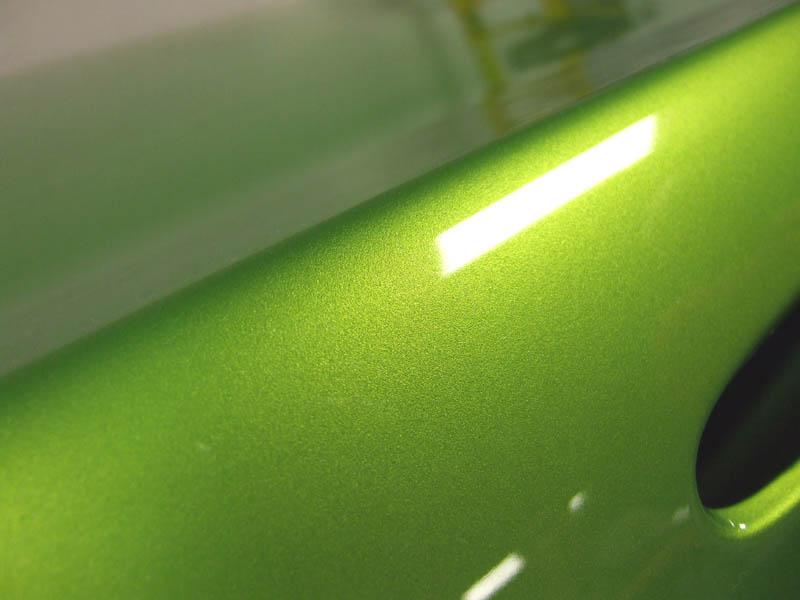
My dad also finally picked the color he wanted. He sat there thumbing thru colors and this one just caught his eye--he LOVED it--going to be an eye catcher. So he went with Don and bought the needed amount along with primers/ect.

Snake Skin Green

sgreen-1.jpg
 
Hey Crash,

Did you think about doing a Heat/Sound coating on the inside. Something like Lizard Skin. It is supposed to spray on and really help out with the heat. Supposed to be easier than the Dyna Mat.

There is a thread over on the HAMB site that hot rodders use on how to order the micro spheres on their own and mix it with your paint. So you should be able to use that Eastwood coating and spray it with an undercoating gun.

I know that most of your stuff is 4x4 and exposed to the elements, so you probably have not tried it. But on a car like this might make it better for your folks to help insulate from road noise and heat.


The progress is great.


Carl
 
What the heck is that chair I saw in one of those pictures doing in your garage? It's obvious you never sit down! :thumbsup:

My father-in-law would have loved to have seen this thread. He passed away a few years ago, but his hobby was always buying, fixing up, and re-selling the late 60s Mustangs. All three of his daughters drove them. My wife had a '67 hard top with the 200 6cyl and three speed manual when I met her.

Nice work, as always! Thanks for the updates!

-Mike
 
Hey Crash,

Did you think about doing a Heat/Sound coating on the inside. Something like Lizard Skin. It is supposed to spray on and really help out with the heat. Supposed to be easier than the Dyna Mat.

There is a thread over on the HAMB site that hot rodders use on how to order the micro spheres on their own and mix it with your paint. So you should be able to use that Eastwood coating and spray it with an undercoating gun.

I know that most of your stuff is 4x4 and exposed to the elements, so you probably have not tried it. But on a car like this might make it better for your folks to help insulate from road noise and heat.


The progress is great.


Carl

Thanks carl. Ya I had talked about some sort of noise barrier a while back and my dad didn't really seem to care much about it. But I am still looking into spary on coatings because I would still like to do the inside of the car with it and something on the underside.

And ya this car stuff has me confused,lol....

What the heck is that chair I saw in one of those pictures doing in your garage? It's obvious you never sit down! :thumbsup:

My father-in-law would have loved to have seen this thread. He passed away a few years ago, but his hobby was always buying, fixing up, and re-selling the late 60s Mustangs. All three of his daughters drove them. My wife had a '67 hard top with the 200 6cyl and three speed manual when I met her.

Nice work, as always! Thanks for the updates!

-Mike
Ha ha. Ya that chair. Well I brought it out so I could sit down on some of the RC stuff I do. Ya I will be working along and relize I could be sitting and working. So the chair still don't get used much...

So your wife pretty much had the identical car as to my dads... :cool:
 
Nice Work, Crash. I enjoy following your build-ups. It's great how your Dad picked the color, chrome valve color, ect. So glad to hear he's getting the upper hand on the cancer, too. :thumbsup:
 
Ok I put in another late night and chomped thru more wiring and moving faster than I thought for doing more than I origionaly planned on. I was going to rework the stock stuff but tossed it and doing all new..


Here is the stock drivers side harness ready to be hacked up for needed ends.


dad154.jpg


Here is the passenger harness where it goes down for the temp/oil pressure and coil.


dad155.jpg


Passenger harness at the firewall behind motor.


dad156.jpg


How I decided to run the harness down under the blower motor.


dad157.jpg


To the main relay..


dad158.jpg
 
New drivers side harness. I chose to integrate the washer pump into the harness and will tie it in with a bullet connector to the pass thru above the main one.


dad159.jpg


New harness down the fenderwell


dad160.jpg


dad161.jpg


And across the core support.


dad162.jpg


So the mian harness is almost ran and then to the ends--making progress.


My dad also dropped off another load of parts--man he's getting excited and even more when I told him we are a lil over a week for it to go to the body guy.
 
Nice Work, Crash. I enjoy following your build-ups. It's great how your Dad picked the color, chrome valve color, ect. So glad to hear he's getting the upper hand on the cancer, too. :thumbsup:

Thanks Randy. You should see the pile of parts stacking up for the car for after paint....

He's going to beat this thing....:smokin:
 
This is my porn.

:drool:

I LOVE your wiring work, I was just sitting around waiting for you to redo the engine bay in that thing. I knew you'd end up redoing it all. Just awesome awesome stuff. :bow:
 
This is my porn.

:drool:

I LOVE your wiring work, I was just sitting around waiting for you to redo the engine bay in that thing. I knew you'd end up redoing it all. Just awesome awesome stuff. :bow:

I got more for ya :thumbsup:
 
Back
Top