

You are using an out of date browser. It may not display this or other websites correctly.
You should upgrade or use an alternative browser.
You should upgrade or use an alternative browser.
Another Scrambler Purchase/Road Trip - UPDATE- BODY ON FRAME AGAIN
- Thread starter spankrjs
- Start date


- City
- Biloxi
- State
- MS
Appreciate it everybody
The only person who has seen this Scrambler in real life who is on the board is JeepAddict, but that was a while ago, but he still might vouch for it
As far as the progress/time issue, I wanted to keep up a steady pace of progress on this rebuild. When I began planning to do this project I was only originally figuring on fixing the body and painting the frame. But, once I had it all apart, it just didn't make any sense to bolt on all the old/dirty/leaking stuff and not due upgrades at the same time. I guess I could have bolted all the original stuff back onto the freshly painted frame and body, but then i would just end up redoing it all later on. So, i figured might as well just do it all at one time, especially considering how easy it is to do alot of this work why the entire vehicle is in pieces.. Once I made up my mind to rebuild/replace/upgrade everything at the same time, I kind of thought about in what sequence to do things in the available space that I have. Once the body and frame were out of my garage at the paint shop I had enough room to lay out all the power train pieces and rebuild them. I knew that I really needed to get all that stuff ready to bolt back in because as soon as the frame/body were finished they would be back in the garage taking up all my work space. Once I started bolting the frame/body/power train back together, and seeing how nice all that stuff looked, I knew if i took any "shortcuts" on anything else that it would stick out like a sore thumb and bug me to no end. Basically, one nice/new/rebuilt/replaced piece fed onto others and pretty soon snowballed out of control into what you see here
I don't work at home, I have to go to the office every day, unfortunately If I was supposed to be "working" at home, I would have been fired due to lack of self discipline, i.e. I would be spending all my time in the garage playing with Scramblers instead of "working" I just tried to use my available work on jeep time as efficiently as possible. I would try to do a whole bunch of "prep" type work on weekday nights to get ready for weekend work sessions. This project as taken a vast majority of all my free time the last 7 months or so, but I still found time to do other things, too. I figured I would rather try to complete this build in the shortest amount of time with constant progress versus stretching the project out over several years. Once I start to work on something I like to "attack" it until it is finished. I think that the steady work/progress motivates me and resulting progress feeds on itself. There were times when I looked out into my garage at the piles of rusty parts, 100's of zip-lock bags full of rusty hardware, power train pieces scattered about the floor, no body or frame to be seen, and I thought "What did I get myself into?". But, I learned early on not to look at the project as a "whole" but instead to look at it a series of "mini projects" and it would stay manageable. I wish I would have kept some of my "to do" lists scratched out on paper. I have probably been through at least one hundred "to do" and "to buy" lists
I am glad that all the pictures in this thread are useful reference to others, too. This is definitely not a definitive step by step "how to rebuild a jeep" thread, but hopefully it provides some good reference material and is enjoyable to view
Appreciate all the compliments/suggestions/critiques/opinions etc.
Oh, and this particular post by me is

The only person who has seen this Scrambler in real life who is on the board is JeepAddict, but that was a while ago, but he still might vouch for it
As far as the progress/time issue, I wanted to keep up a steady pace of progress on this rebuild. When I began planning to do this project I was only originally figuring on fixing the body and painting the frame. But, once I had it all apart, it just didn't make any sense to bolt on all the old/dirty/leaking stuff and not due upgrades at the same time. I guess I could have bolted all the original stuff back onto the freshly painted frame and body, but then i would just end up redoing it all later on. So, i figured might as well just do it all at one time, especially considering how easy it is to do alot of this work why the entire vehicle is in pieces.. Once I made up my mind to rebuild/replace/upgrade everything at the same time, I kind of thought about in what sequence to do things in the available space that I have. Once the body and frame were out of my garage at the paint shop I had enough room to lay out all the power train pieces and rebuild them. I knew that I really needed to get all that stuff ready to bolt back in because as soon as the frame/body were finished they would be back in the garage taking up all my work space. Once I started bolting the frame/body/power train back together, and seeing how nice all that stuff looked, I knew if i took any "shortcuts" on anything else that it would stick out like a sore thumb and bug me to no end. Basically, one nice/new/rebuilt/replaced piece fed onto others and pretty soon snowballed out of control into what you see here
I don't work at home, I have to go to the office every day, unfortunately
If I was supposed to be "working" at home, I would have been fired due to lack of self discipline, i.e. I would be spending all my time in the garage playing with Scramblers instead of "working" I just tried to use my available work on jeep time as efficiently as possible. I would try to do a whole bunch of "prep" type work on weekday nights to get ready for weekend work sessions. This project as taken a vast majority of all my free time the last 7 months or so, but I still found time to do other things, too. I figured I would rather try to complete this build in the shortest amount of time with constant progress versus stretching the project out over several years. Once I start to work on something I like to "attack" it until it is finished. I think that the steady work/progress motivates me and resulting progress feeds on itself. There were times when I looked out into my garage at the piles of rusty parts, 100's of zip-lock bags full of rusty hardware, power train pieces scattered about the floor, no body or frame to be seen, and I thought "What did I get myself into?". But, I learned early on not to look at the project as a "whole" but instead to look at it a series of "mini projects" and it would stay manageable. I wish I would have kept some of my "to do" lists scratched out on paper. I have probably been through at least one hundred "to do" and "to buy" listsI am glad that all the pictures in this thread are useful reference to others, too. This is definitely not a definitive step by step "how to rebuild a jeep" thread, but hopefully it provides some good reference material and is enjoyable to view
Appreciate all the compliments/suggestions/critiques/opinions etc.
Oh, and this particular post by me is

- City
- Baton Rouge
- State
- La
Appreciate it everybody
The only person who has seen this Scrambler in real life who is on the board is JeepAddict, but that was a while ago, but he still might vouch for it
This Scrambler is just as nice in person.
The only problem I have is that I am trying to follow this thread while rebuilding mine and do the same things as spankrjs. We'll some of the same...
All I end up with is a bunch of broken bolts, greasy clothes, and too many phone calls to spankrjs.
- City
- Biloxi
- State
- MS
The only person who has seen this Scrambler in real life who is on the board is JeepAddict, but that was a while ago, but he still might vouch for it
This Scrambler is just as nice in person.
The only problem I have is that I am trying to follow this thread while rebuilding mine and do the same things as spankrjs. We'll some of the same...
All I end up with is a bunch of broken bolts, greasy clothes, and too many phone calls to spankrjs.
Appreciate the compliment and for vouching for this Scrambler's existence Jeep Addict
All the phone calls and questions are fine, I am just glad I can be of some help
- City
- Biloxi
- State
- MS
All in good fun, keep up the great work
It's been a while so

Just for you bigwalton, here is the next update
- City
- Biloxi
- State
- MS
Reassembled the clutch/brake pedal assembly. Pic of all the parts.
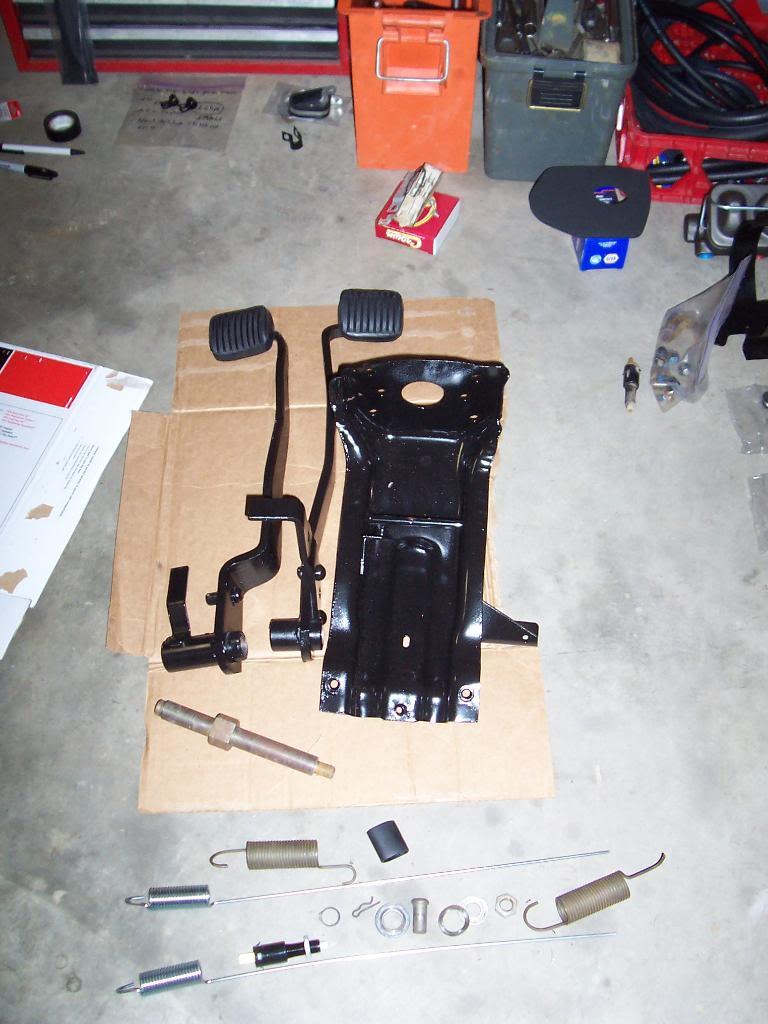
It is fairly easy to put back together, the big shaft and the two pedals will really only go back on there one way. There are 2 bushings in each pedal where they ride on the big shaft. I had bought replacements for mine, but after taking it apart and putting it back together several times I realized there was no slack in the factory bushings, so I left the originals bushings in place.
Some detailed pics of the assembly that might be helpful to others. I had to look at my green Scrambler a few times to make sure I got it all back together correctly.
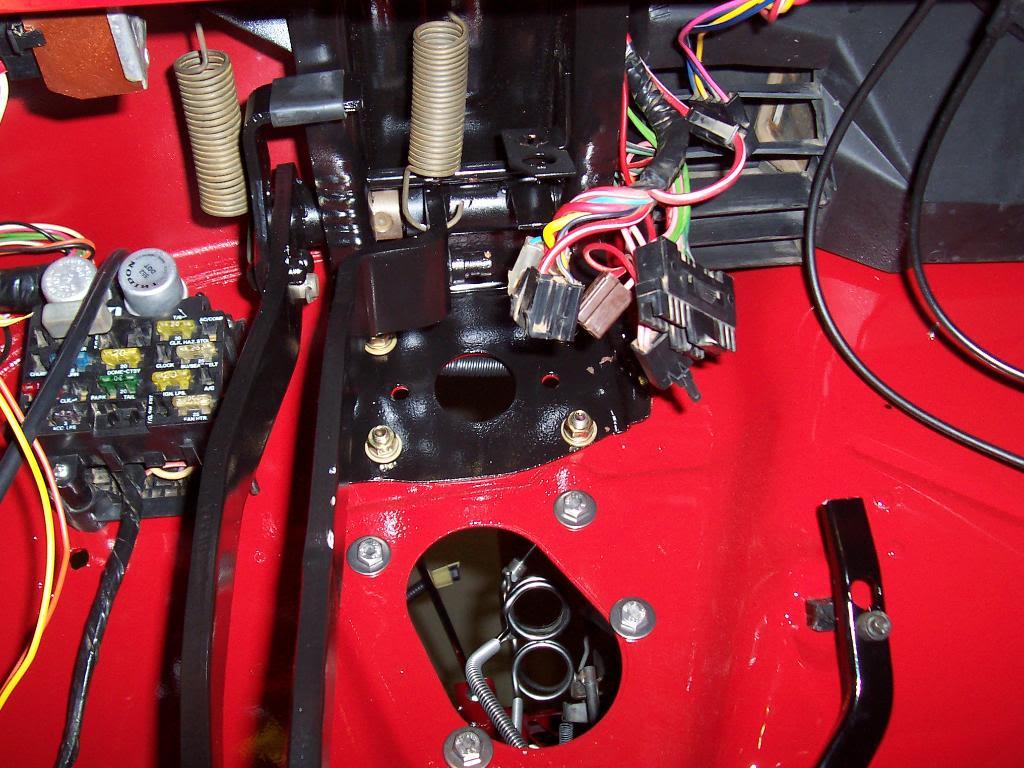
Inside, showing the spring placement.
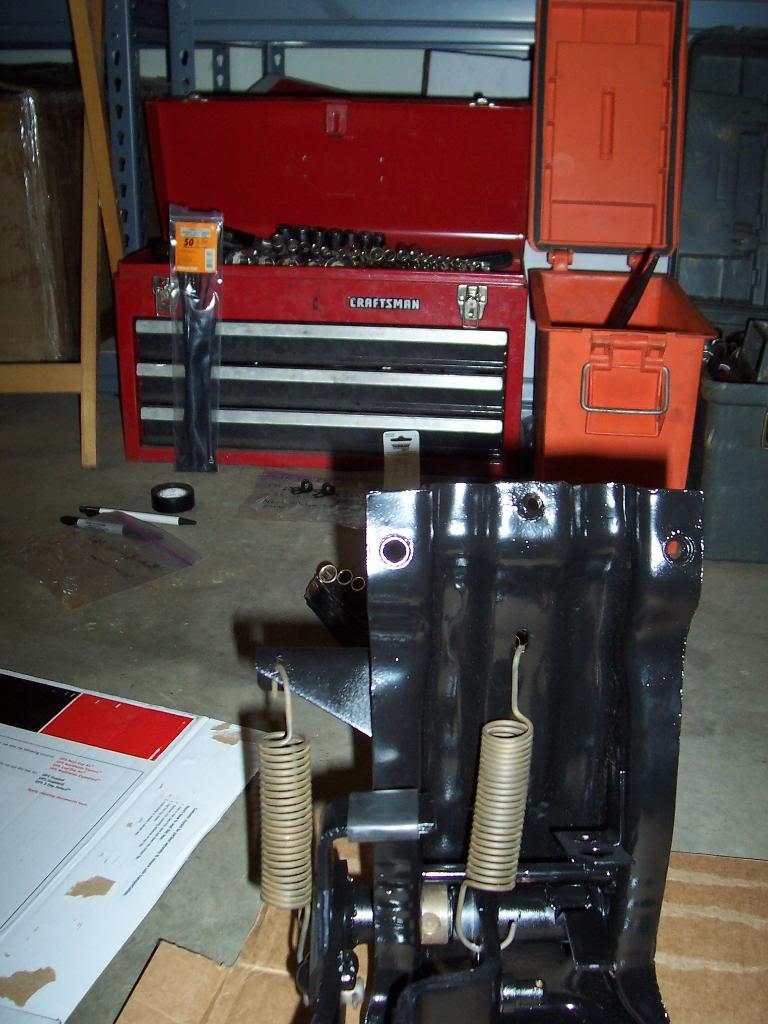
Clutch pedal side.
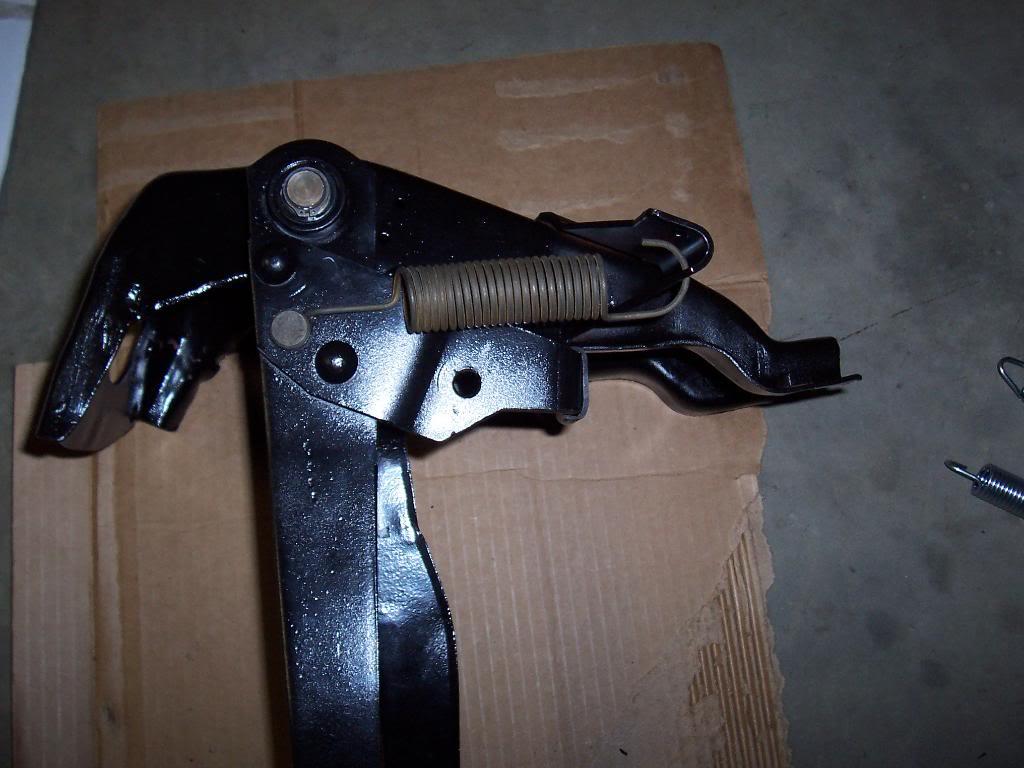
Brake pedal side.
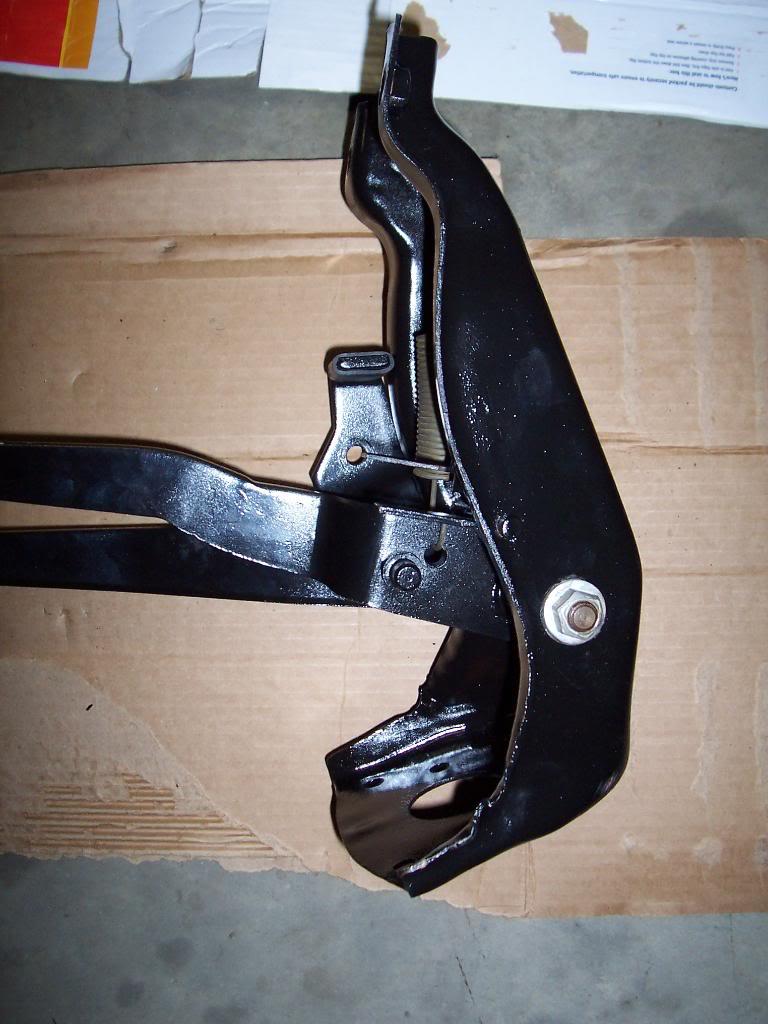
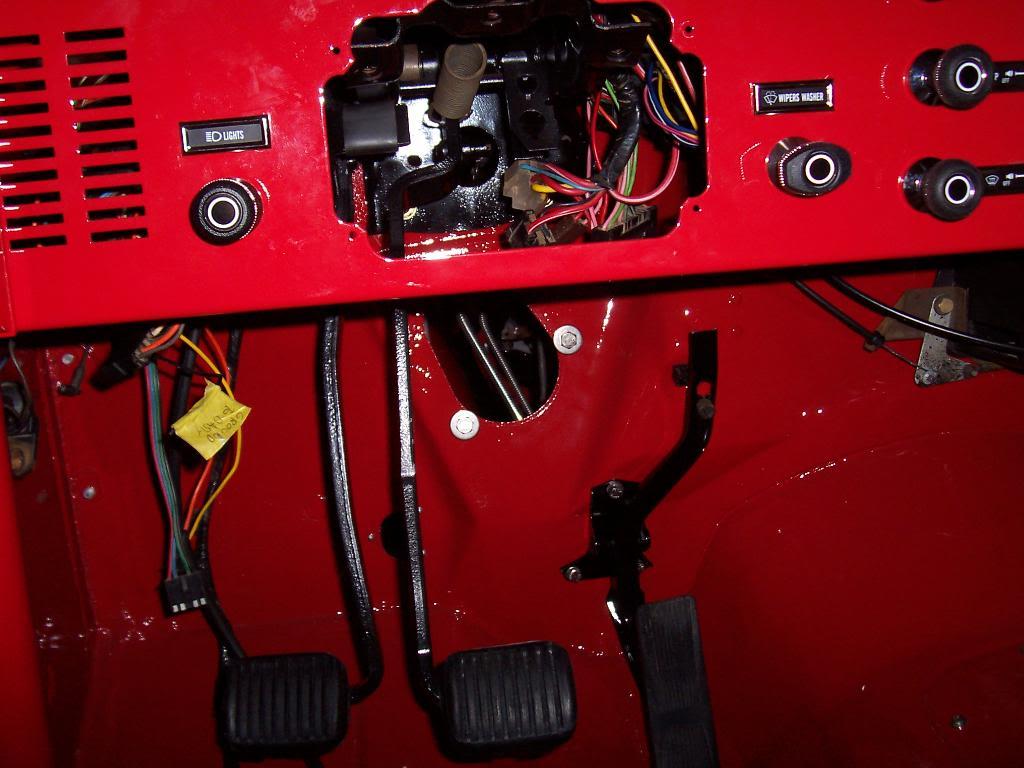
Two pics of the installed assembly. Just make sure all the wire harness stuff goes over the top of the bracket.
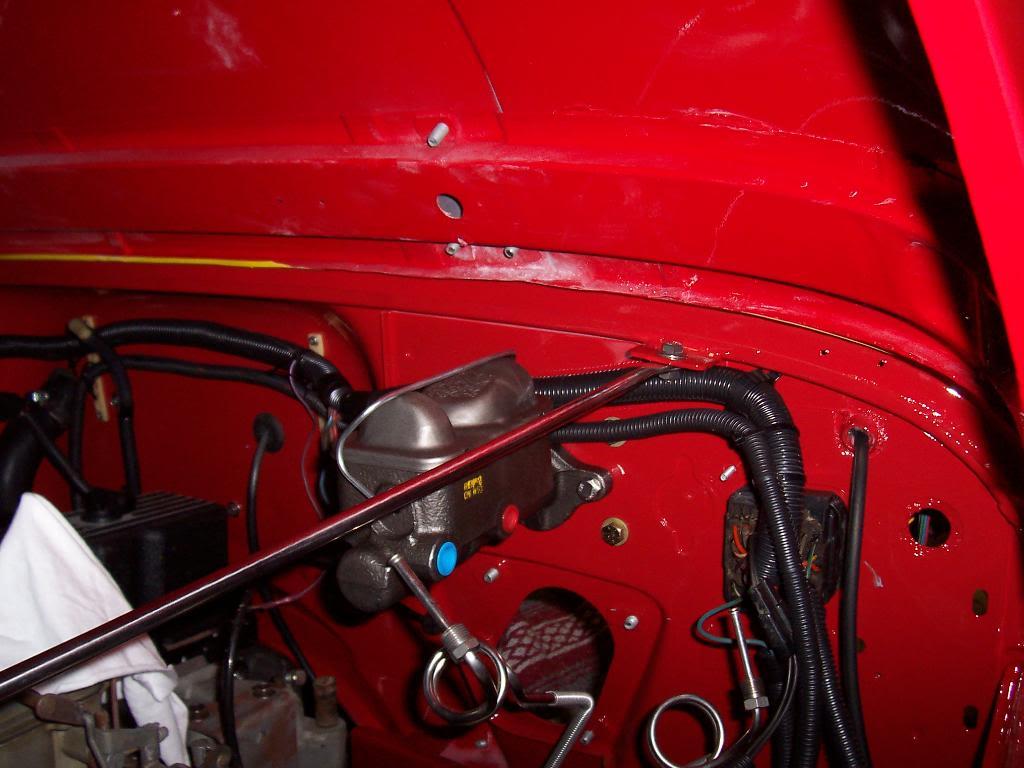
Once that big clutch/brake pedal assembly was bolted in I could bolt on the master cylinder.
It is fairly easy to put back together, the big shaft and the two pedals will really only go back on there one way. There are 2 bushings in each pedal where they ride on the big shaft. I had bought replacements for mine, but after taking it apart and putting it back together several times I realized there was no slack in the factory bushings, so I left the originals bushings in place.
Some detailed pics of the assembly that might be helpful to others. I had to look at my green Scrambler a few times to make sure I got it all back together correctly.
Inside, showing the spring placement.
Clutch pedal side.
Brake pedal side.
Two pics of the installed assembly. Just make sure all the wire harness stuff goes over the top of the bracket.
Once that big clutch/brake pedal assembly was bolted in I could bolt on the master cylinder.
- City
- Biloxi
- State
- MS
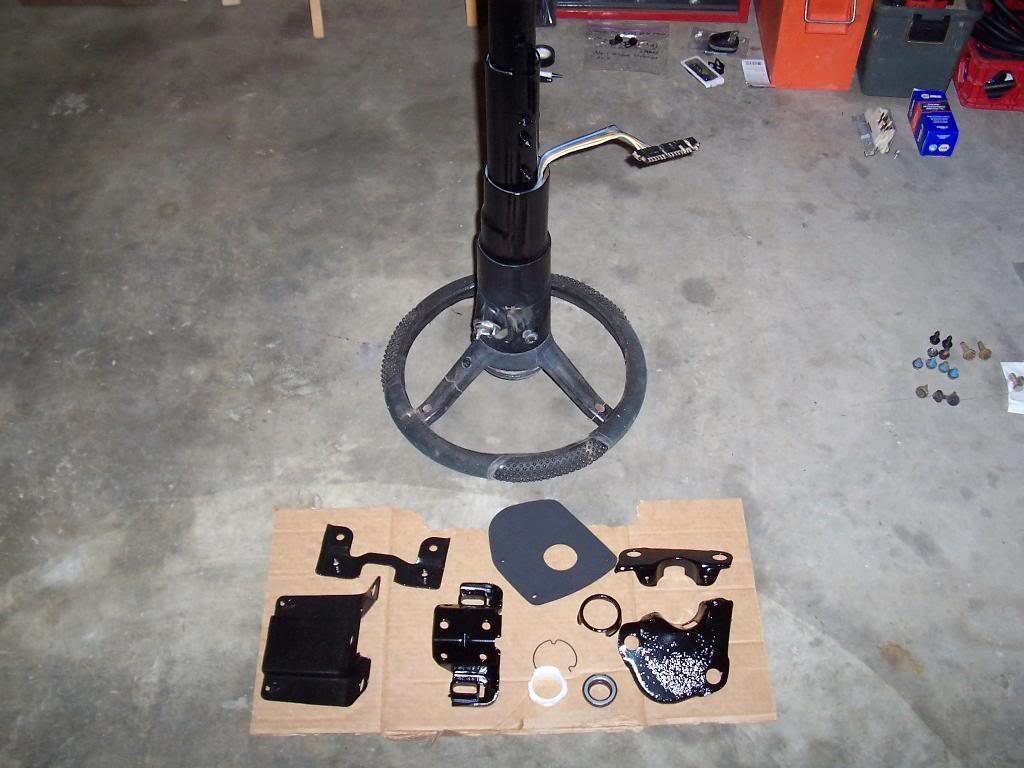
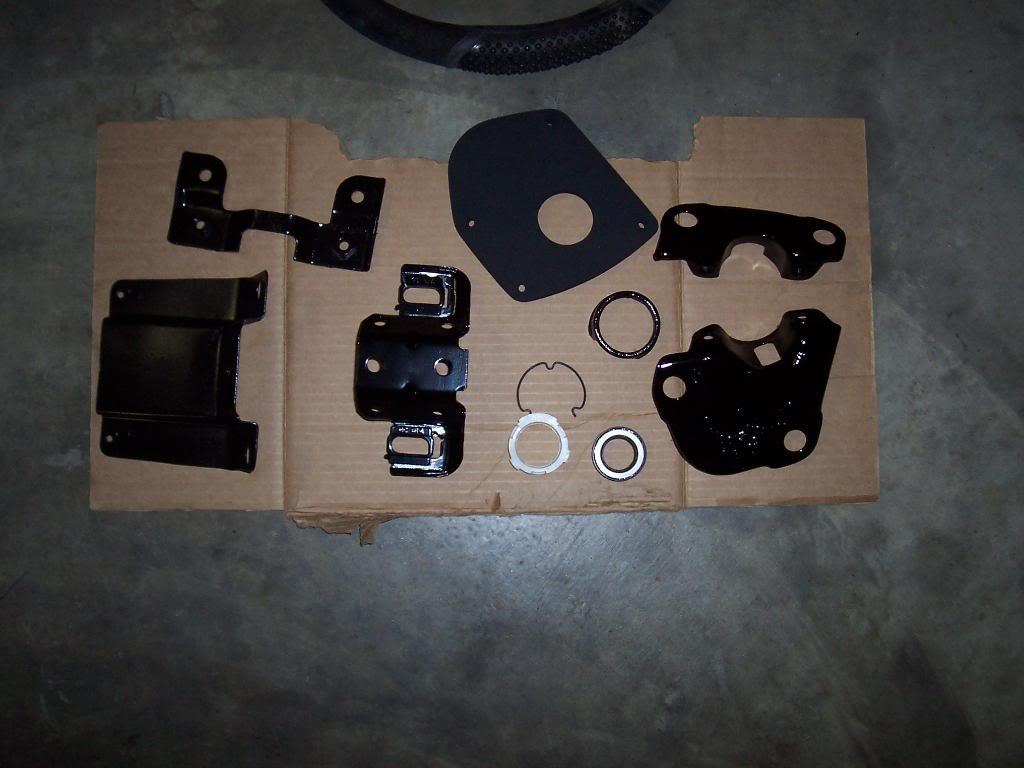
Started to work on the steering column next. Picture of all the steering column brackets, column, and the replacement lower bearing parts. My original lower bearing disintegrated.
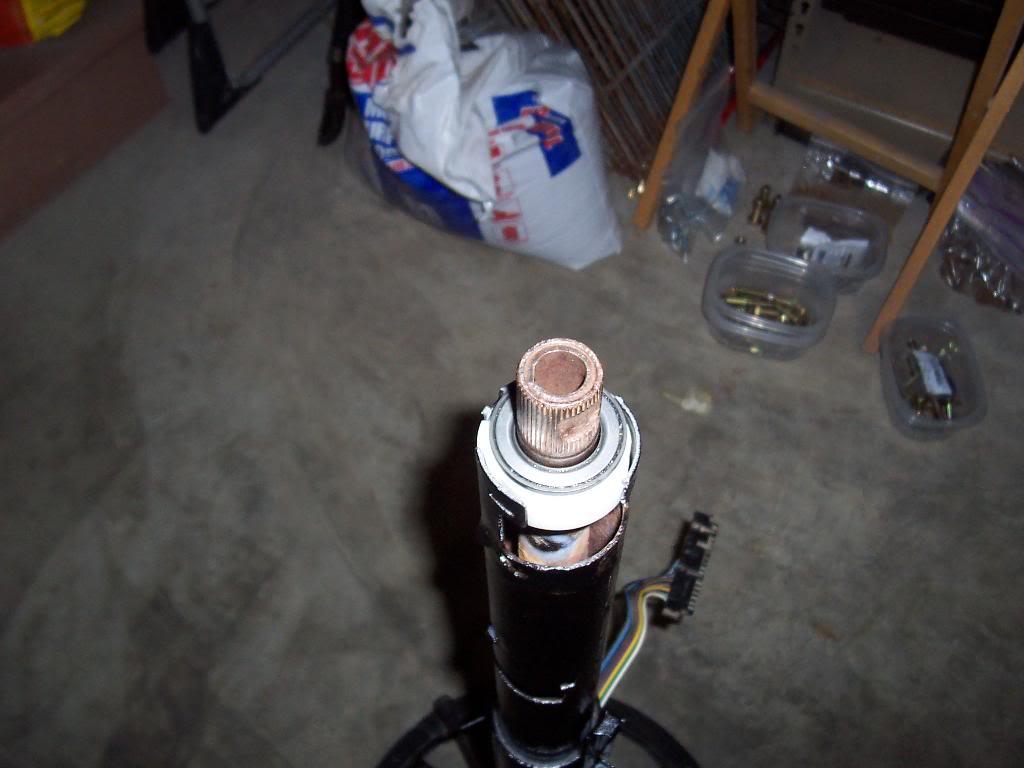
Installed the lower bearing into the plastic bearing thing and installed it in the column.
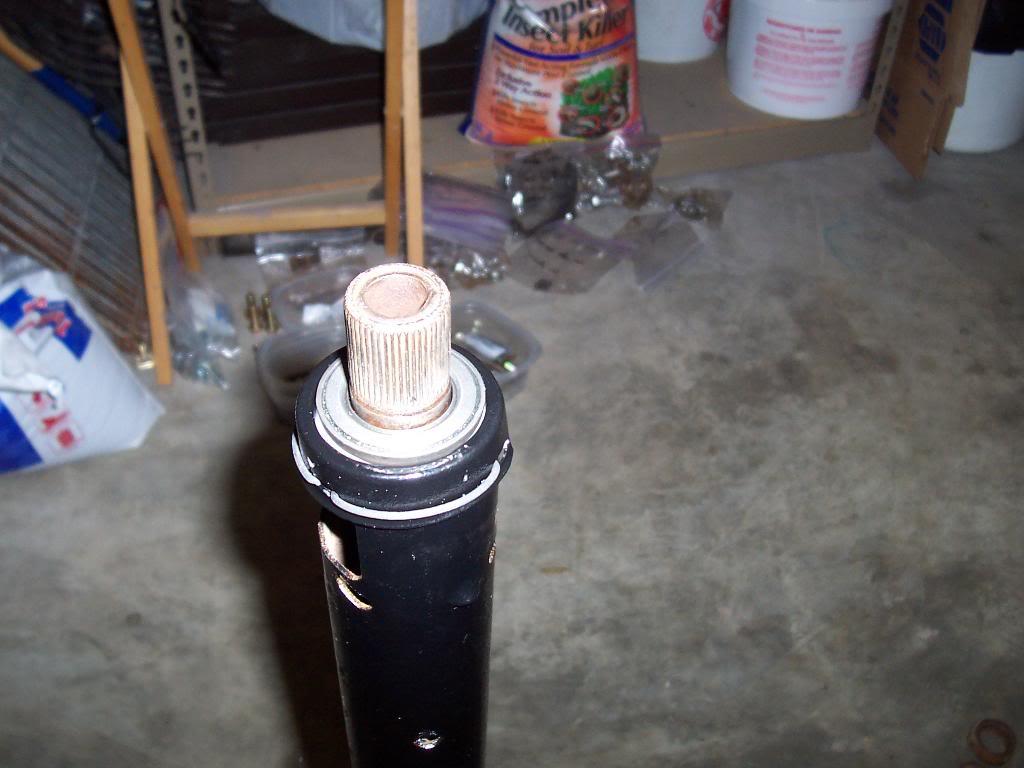
Finished that up by sliding over the retainer piece and secured it with the snap ring.
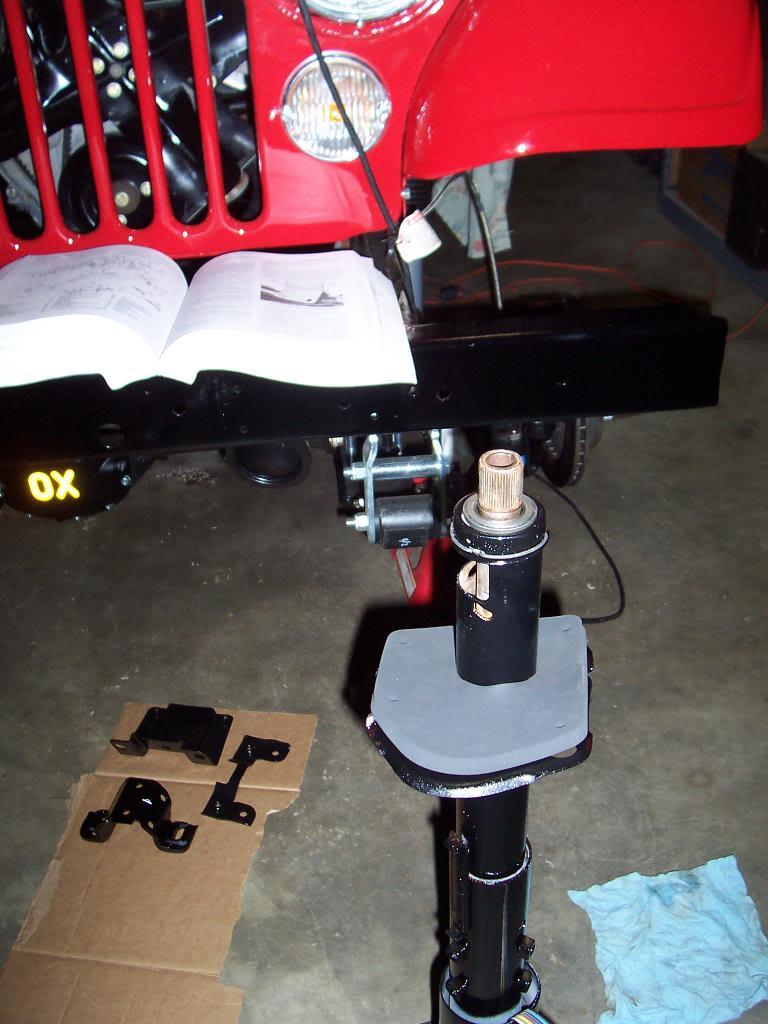
Slid on the two brackets that clamp around the column and hold it to the firewall. Loosely bolted them together. I also slid on the replacement foam firewall seal.
Close up pic of where these brackets go. There are two little protruding tangs on the column that stick out. The holes in the brackets slide down the column until they hit the protrusions. Pics a little blurry.
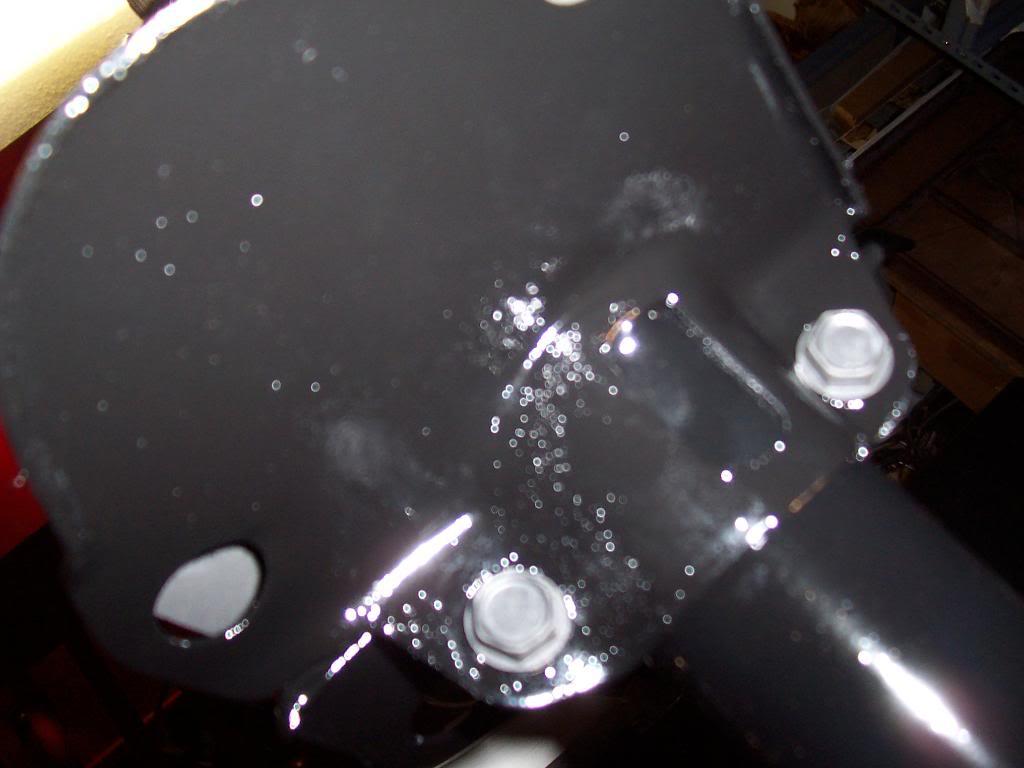
I then bolted on this bracket next.
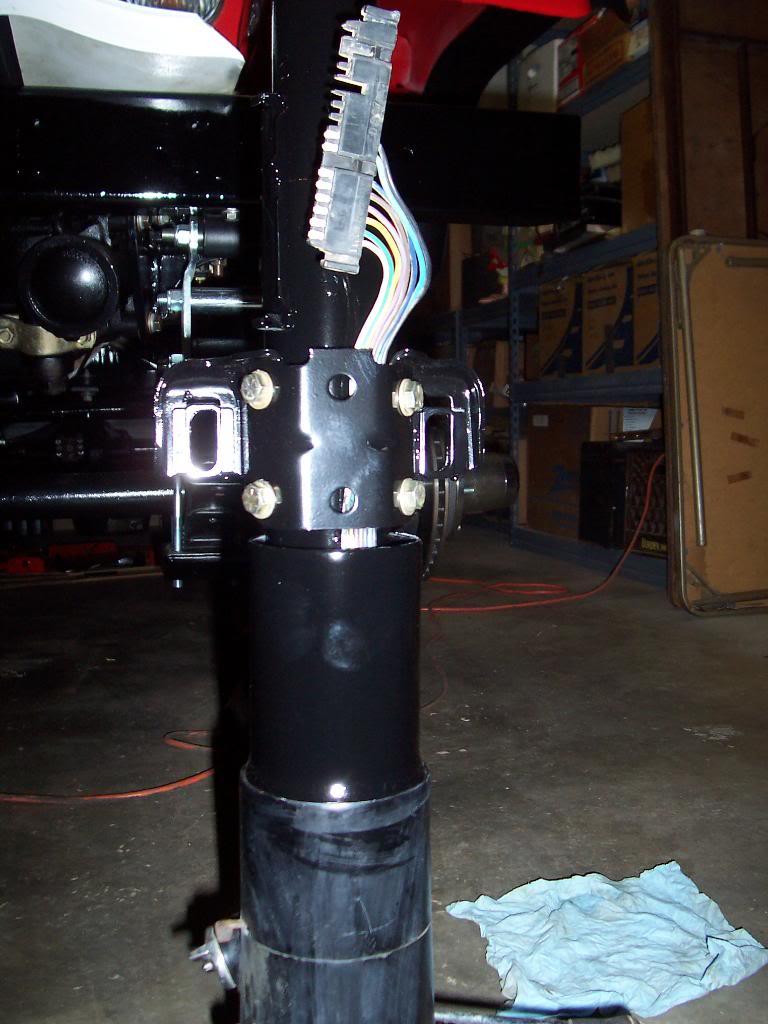
And that's as far as I got last night. Will finish installing the column tonight.
Installed the lower bearing into the plastic bearing thing and installed it in the column.
Finished that up by sliding over the retainer piece and secured it with the snap ring.
Slid on the two brackets that clamp around the column and hold it to the firewall. Loosely bolted them together. I also slid on the replacement foam firewall seal.
Close up pic of where these brackets go. There are two little protruding tangs on the column that stick out. The holes in the brackets slide down the column until they hit the protrusions. Pics a little blurry.
I then bolted on this bracket next.
And that's as far as I got last night. Will finish installing the column tonight.

Will_Texas
Legacy Registered User
- City
- Longview
- State
- TX
what are those 2 long springs for in the pic of the clutch stuff? I've wrapped up most of the parts I need for my auto to manual conversion but I've never seen those springs before.
She's really looking good, do you have an estimated time of completion?
She's really looking good, do you have an estimated time of completion?
- City
- Biloxi
- State
- MS
what are those 2 long springs for in the pic of the clutch stuff? I've wrapped up most of the parts I need for my auto to manual conversion but I've never seen those springs before.
She's really looking good, do you have an estimated time of completion?
Appreciate it
I hope to at least get it running again by the end of the month. The tires I want plus a few other items might take a little while longer due to $$$$$$$
The shiny long springs I bought at NAPA. I was going to cut them down and bend them to make new pedal return springs but I decided just to reuse my old springs for now. The new ones from NAPA are a little bit bigger diameter and stiffer, but they should work fine
- City
- Biloxi
- State
- MS
Finished installing the steering column last night.
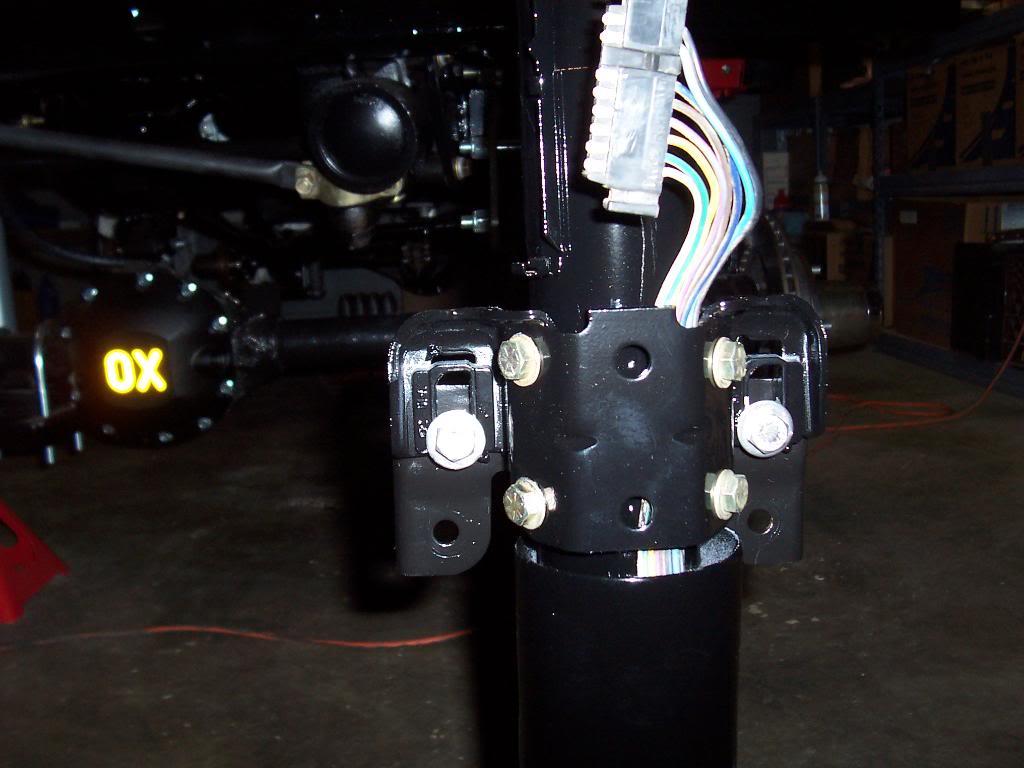
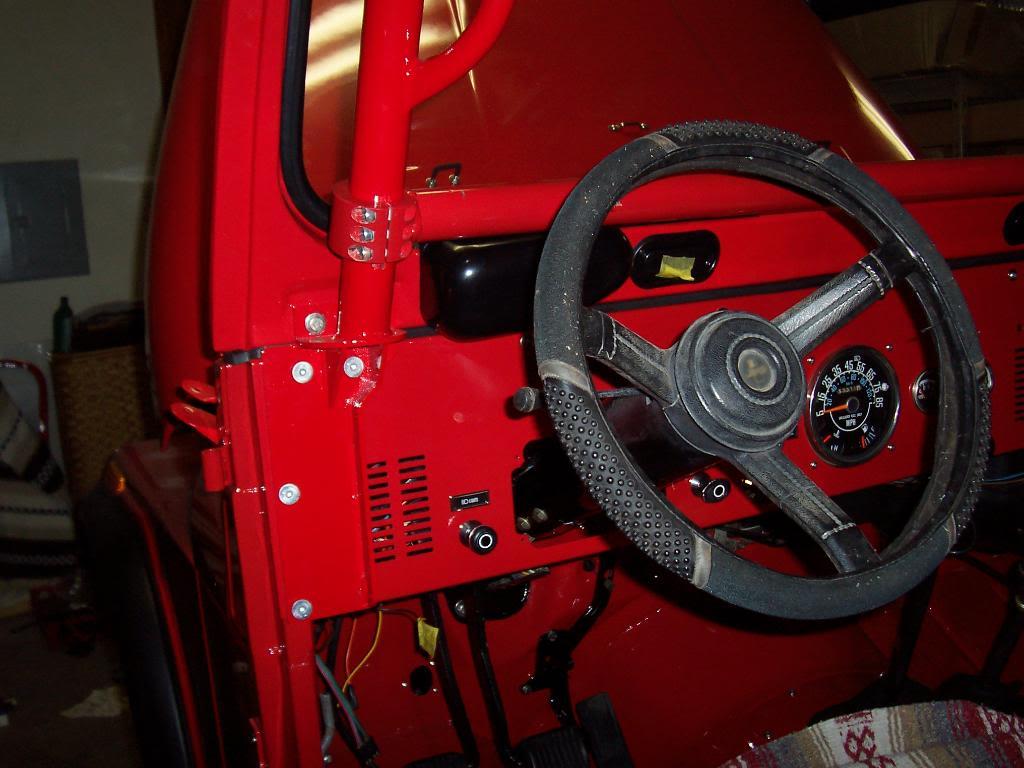
Picture of how the rest of the brackets bolt up. NOTE - The only bracket I left installed to the column was the one secured by the 4 gold colored bolts. All of the other brackets must be taken off the steering column so that it will fit through the hole in the dash. I just wanted to post up pics of how it all goes together outside of the vehicle, a little bit easier to see.
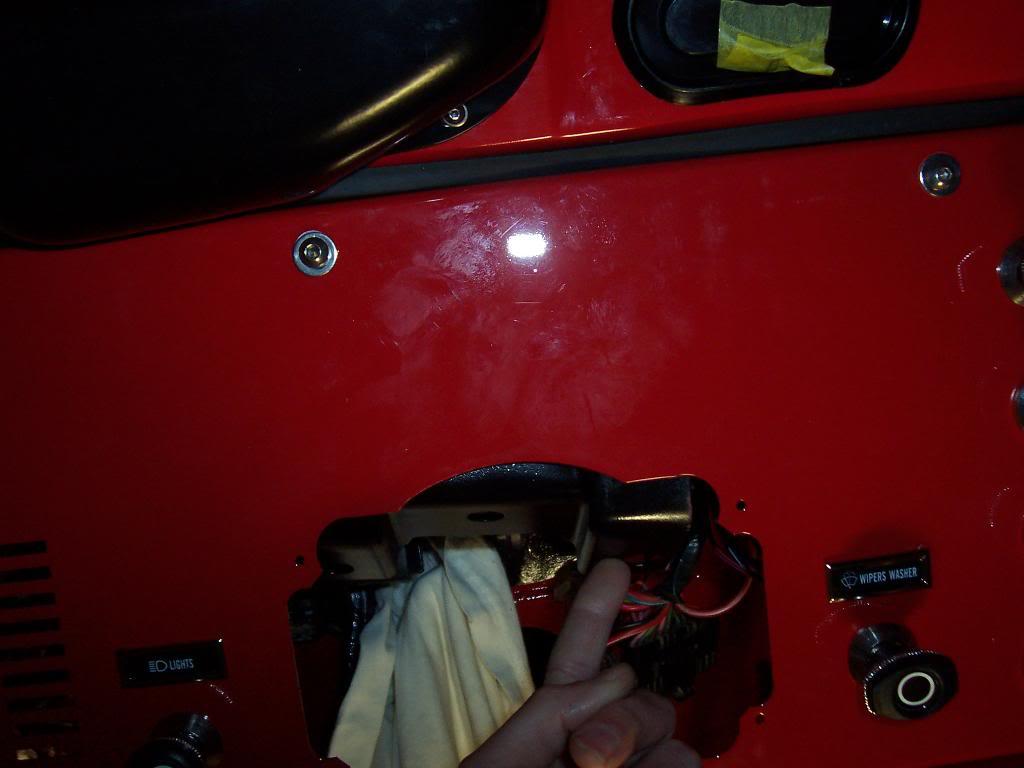
Picture of the bracket that goes directly behind dash. I put it in first because it would be impossible to get it where it needs to go once the column is installed. This bracket has two captured nuts on it in which bolts are inserted through the face of the dash to secure it. The stainless bolt directly below the wiper motor cover is one of the bolts that secures it. This dash only had one hole in it, so I only bolted it on with one bolt. I could always go back and drill the other hole through the dash, but I am not even sure if the factory dashes have both holes? My finger is pointing at the referenced bracket.
And installed. I didn't take step by step pics of how to install all the brackets because they are difficult to see and my description would probably cause more confusion then good. It is kind of aggravating to get all the holes to line up, but not terribly difficult. I fought with it for a little while, but finally figured out the right sequence of bolt installation and it went in easy. This is the sequence I used, don't know if it is the "correct" way, but it worked perfectly.
Loosely installed the four bolts that hold the two plate clamps to the firewall.
Loosely installed the two bolts that tie the two plate clamps together.
Bolted the plate that goes between the bracket I have pictured with my finger on and the bracket that is secured directly to the steering column with the four short bolt. Bolted this bracket to the upper bracket first.
Bolted the above mentioned bracket to the steering column.
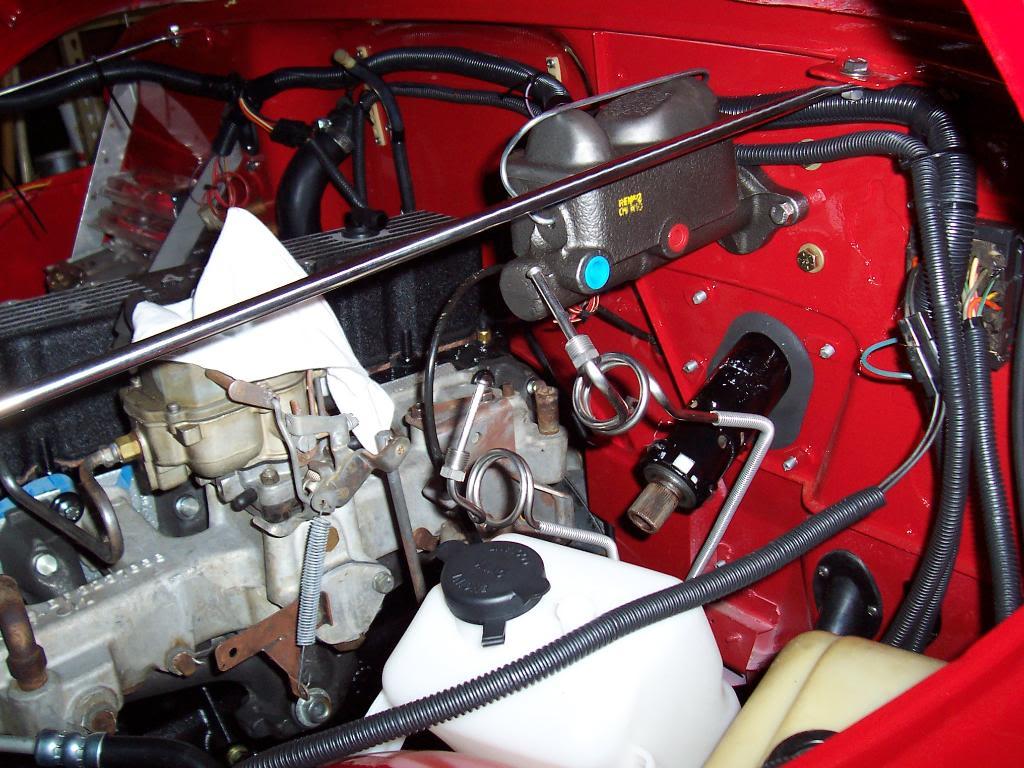
And an under hood shot. I nicked the paint up a little bit on the steering column while installing it.
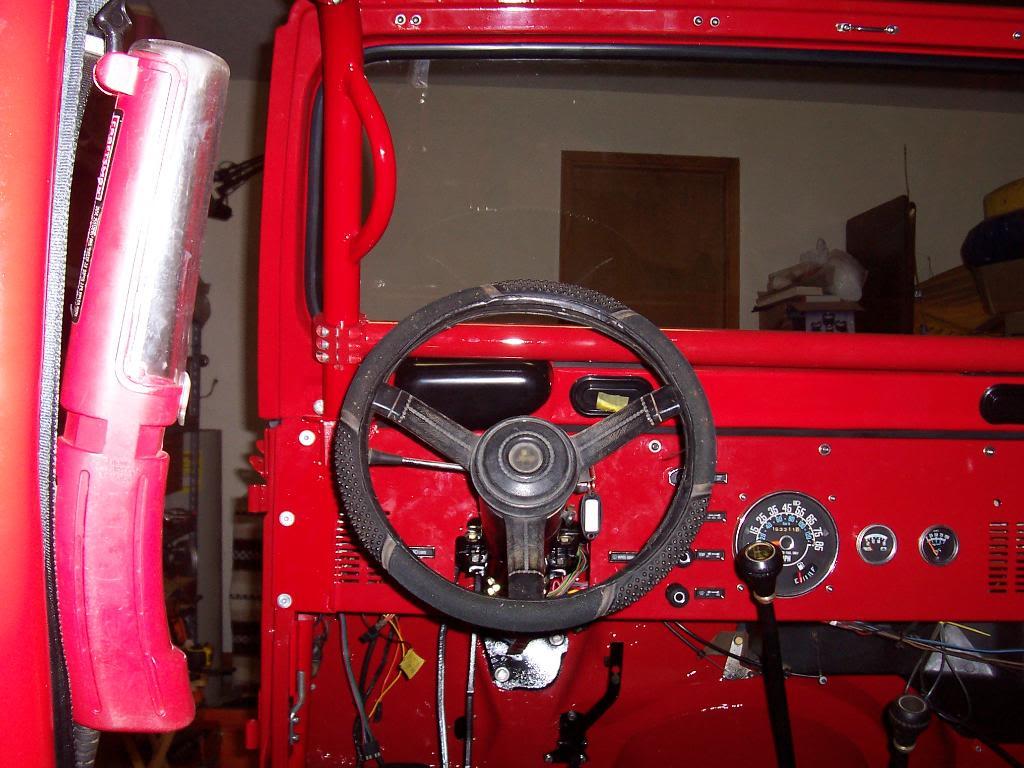
Getting there, finally. Still need to clean up the plastic steering wheel and the plastic part of the steering column.
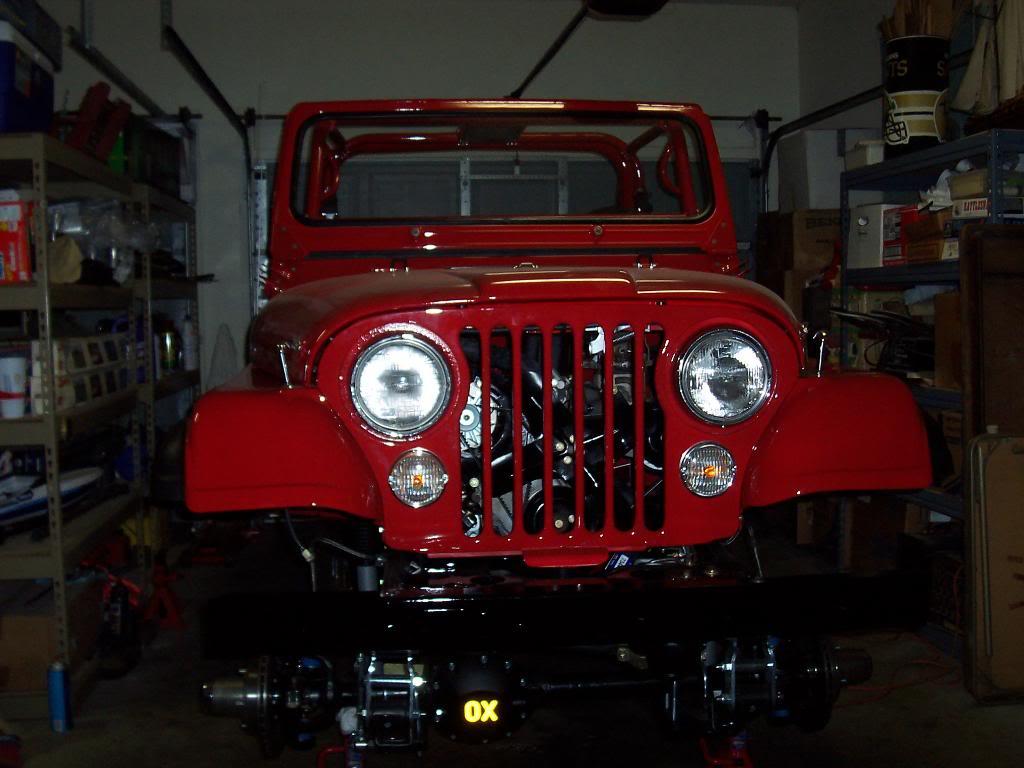
And a quick shot of the entire vehicle mainly because the only pics I have been posting lately are of little bitty widgets and misc stuff.
That's it for now.
Picture of how the rest of the brackets bolt up. NOTE - The only bracket I left installed to the column was the one secured by the 4 gold colored bolts. All of the other brackets must be taken off the steering column so that it will fit through the hole in the dash. I just wanted to post up pics of how it all goes together outside of the vehicle, a little bit easier to see.
Picture of the bracket that goes directly behind dash. I put it in first because it would be impossible to get it where it needs to go once the column is installed. This bracket has two captured nuts on it in which bolts are inserted through the face of the dash to secure it. The stainless bolt directly below the wiper motor cover is one of the bolts that secures it. This dash only had one hole in it, so I only bolted it on with one bolt. I could always go back and drill the other hole through the dash, but I am not even sure if the factory dashes have both holes? My finger is pointing at the referenced bracket.
And installed. I didn't take step by step pics of how to install all the brackets because they are difficult to see and my description would probably cause more confusion then good. It is kind of aggravating to get all the holes to line up, but not terribly difficult. I fought with it for a little while, but finally figured out the right sequence of bolt installation and it went in easy. This is the sequence I used, don't know if it is the "correct" way, but it worked perfectly.
Loosely installed the four bolts that hold the two plate clamps to the firewall.
Loosely installed the two bolts that tie the two plate clamps together.
Bolted the plate that goes between the bracket I have pictured with my finger on and the bracket that is secured directly to the steering column with the four short bolt. Bolted this bracket to the upper bracket first.
Bolted the above mentioned bracket to the steering column.
And an under hood shot. I nicked the paint up a little bit on the steering column while installing it.
Getting there, finally. Still need to clean up the plastic steering wheel and the plastic part of the steering column.
And a quick shot of the entire vehicle mainly because the only pics I have been posting lately are of little bitty widgets and misc stuff.
That's it for now.

Gary R
Legacy Registered User
- City
- Arlington
- State
- TX
Dang, Dude....we need to re-title this thread "Motivation" !!!!!
This makes me want to do two things:
1. Go out and get to work on mine, even though it has been anywhere from 9 to 20 degrees farenheit each evening when I get home from work.
2. I need to quit bitching and moaning that my 30x40 shop is too small and that I should have built it bigger.
Amazing work! I love it.
This makes me want to do two things:
1. Go out and get to work on mine, even though it has been anywhere from 9 to 20 degrees farenheit each evening when I get home from work.
2. I need to quit bitching and moaning that my 30x40 shop is too small and that I should have built it bigger.
Amazing work! I love it.

- City
- Cobourg, Ontario, Cana
- State
- da
2. I need to quit bitching and moaning that my 30x40 shop is too small and that I should have built it bigger.
30x40???
 i hate you... mine is about 19x19. I have 2 Jeeps in there, work benches, tools, sand blasting cabinet, stairs, garbage cans.... quit your moaning and get out there and work on your Jeep!!!

- City
- Greenbackville
- State
- VA
...2. I need to quit bitching and moaning that my 30x40 shop is too small and that I should have built it bigger...
30x40???
Shops? And MAJOR TOOLS?!? I've got just enough walkaround room in the garage to utilize my handtool IF I watch my step. All y'all can just take those shops and tools and...
...do all the stuff I wish I could
I love this thread!
- City
- Biloxi
- State
- MS
I am always jealous of everyone who has a shop. My garage is a little tight, but it sure beats working outside, that and I am used to the small size so it doesn't bother me too much anymore
I would hate to see the kind of trouble i could get into if I had a real "shop" type building, i.e there would be multiple jeeps and parts everywhere
I would hate to see the kind of trouble i could get into if I had a real "shop" type building, i.e there would be multiple jeeps and parts everywhere
Gary R
Legacy Registered User
- City
- Arlington
- State
- TX
I just try to get home before the wife everyday. If so, I can get the parts from UPS off the front porch and out to the shop before she notices 
If I was working in the garage (ie: she could see all these parts that are required) she would have already divorced me.
If I was working in the garage (ie: she could see all these parts that are required) she would have already divorced me.

- City
- Columbia
- State
- MO
I just try to get home before the wife everyday. If so, I can get the parts from UPS off the front porch and out to the shop before she notices
I do the same thing! However, it always seems they all show up when she is home!
- City
- Redmond
- State
- OR
i dont hide anything from my wife. she knows what i spend...
Me too...now that I've bought most of my stuff...
spankrjs- this is an awesome thread and great pics! Made me realize I forgot about the brake pedal return spring...
Will_Texas
Legacy Registered User
- City
- Longview
- State
- TX
My dad and I just finished our shop. It is the best investment any guy can make, regardless of hobby (but especially the jeep one). Nothing beats a place to work efficiently and easily without being restricted by space or someone bugging you about a cluttered garage. All your tools are laid out how you want and you have spacious areas to get around vehicles and such. The wiring will be completed this week and after that I'll post an update over on my thread at jeepforum.
I'll offer this to anybody though, if you're going to build a shop build the absolute biggest one you can afford. Save your money for the next bigger size. It's worth it. Skimp on the other stuff if you have to so you can spend your money on more space. It's a lot easier to add more electrical outlets, etc. then it is to add shop space later on down the road.
Spankrjs I could only imagine what you could do if you had a shop based on how fast you work in your garage
I'll offer this to anybody though, if you're going to build a shop build the absolute biggest one you can afford. Save your money for the next bigger size. It's worth it. Skimp on the other stuff if you have to so you can spend your money on more space. It's a lot easier to add more electrical outlets, etc. then it is to add shop space later on down the road.
Spankrjs I could only imagine what you could do if you had a shop based on how fast you work in your garage