• Notice for iPhone users: DO NOT use the image size reduction option when uploading photos to the forum. This causes portrait images to post as landscape. We have added a warning to the image insert pop-up as well.

Another Scrambler Purchase/Road Trip - UPDATE- BODY ON FRAME AGAIN

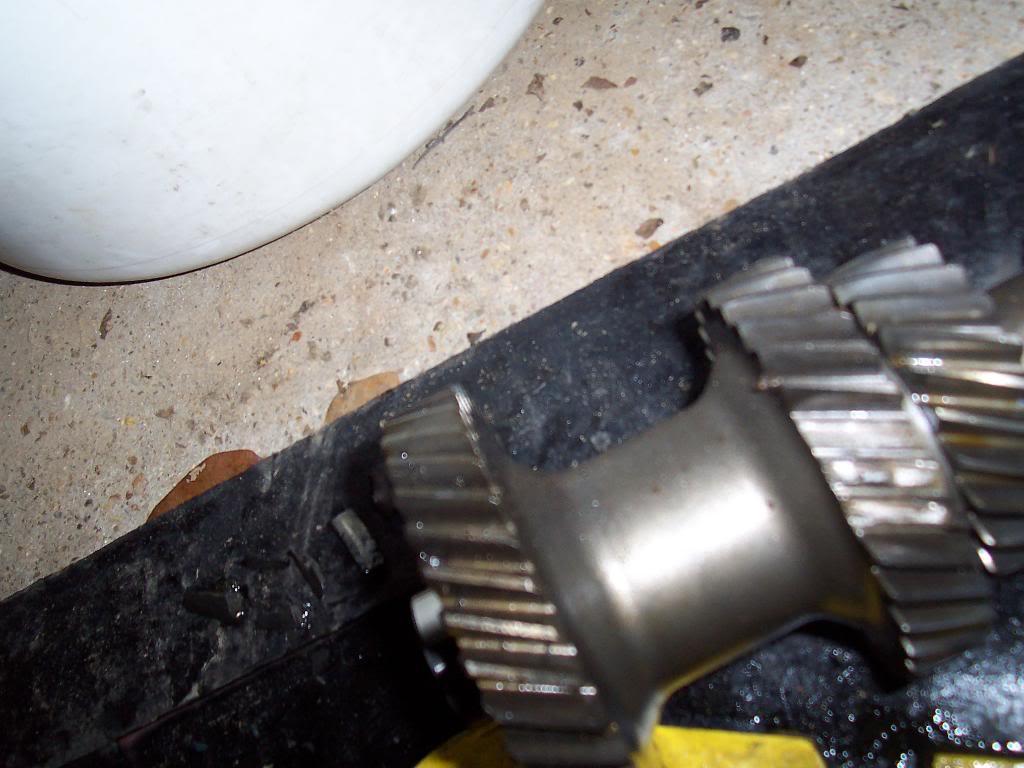
Finished up the 4:1 gear install in the Dana 300. I was able to remove the idler gear (the reason why you have to notch the case) with some very gentle prying with a screw driver. You might want to make your notch slightly larger.

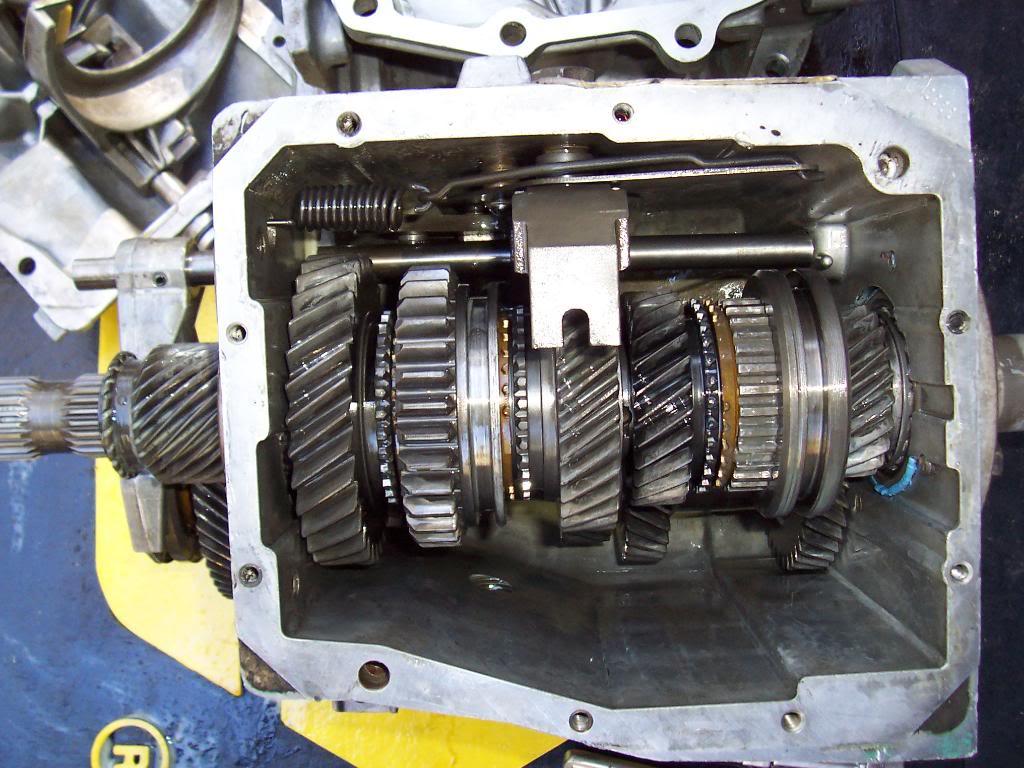
Picture of the internals one last time.

00818-1.jpg


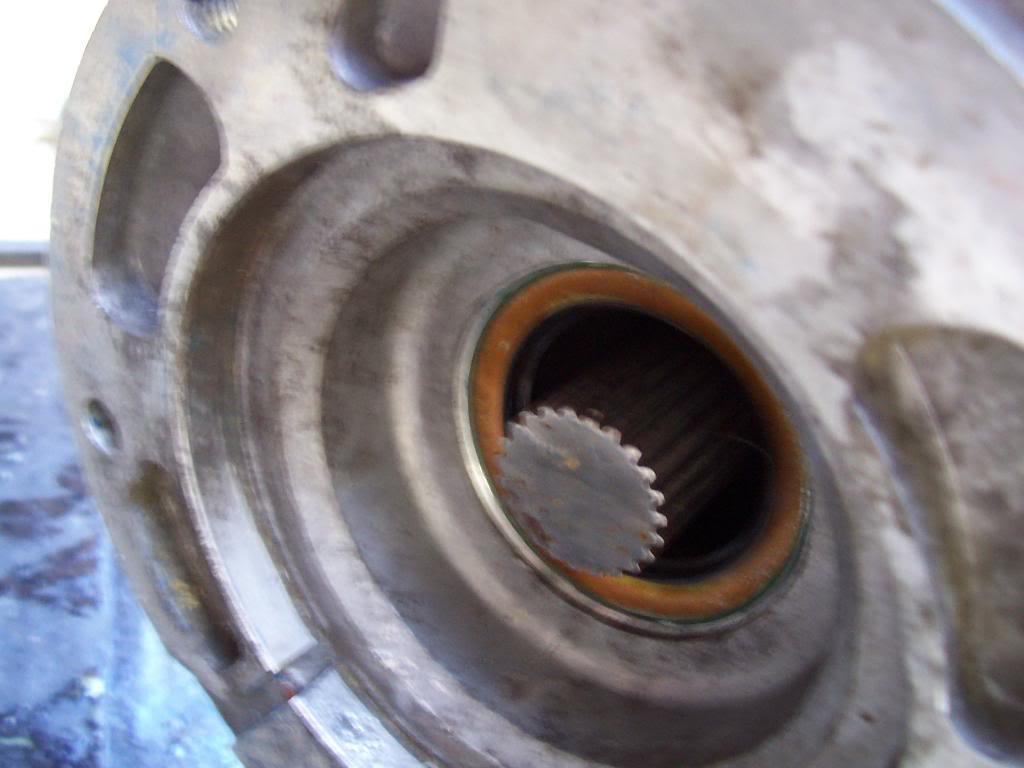
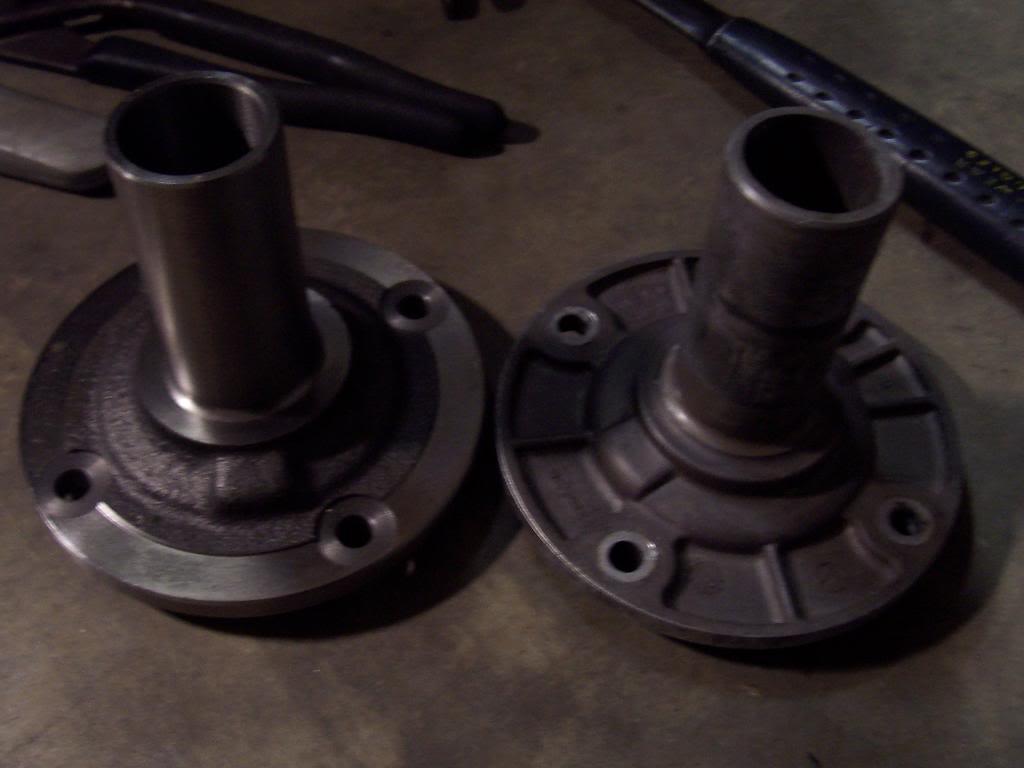
Checking the end play on the output shafts. The rear was fine, but I had to re shim the front several times. The sealant I was using on the shims increases the overall shim thickness, resulting in too much end play. Took several times to get the end play correct. I have .002 end play, within the .001 to .005 range. A little on the tight side, but these are also new bearings.

00917-1.jpg


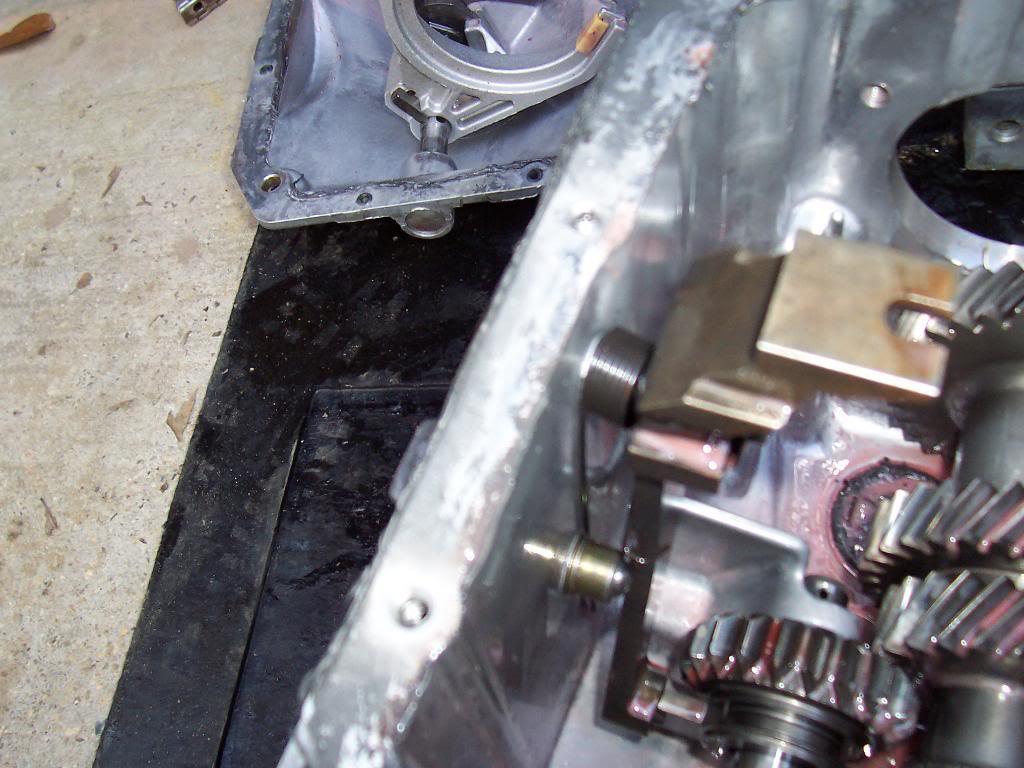
And fully assembled.

01015-1.jpg


That's it for he 4:1 gear install.
 
Last edited:
Well, well, well, what do we have here???

Four T5 transmissions (actually three T5's and one T4, but more on that later). The blue shifter is a B&M short shifter.

01113-1.jpg


This one has a broke cluster gear.

01213-1.jpg


0158-1.jpg


I plan on taking all the transmissions apart and getting at least two good units out of all of these transmissions.


After steam cleaning.

01312-1.jpg


01411-1.jpg


I wont do a step by step break down, the FSM goes over that pretty well. The only special tool I used during disassembly was a two jaw gear puller to remove 5th gear.

Disassembly pictures of the transmission that came with the B&M shifter, this transmission is in perfect shape.

0168-1.jpg


0177-1.jpg


0186-1.jpg


0196-1.jpg


Cleaning the case one more time to get the rest of the oil out. I will be installing this transmission in my red Scrambler. The cases, shift cover, shifter, and all internal parts look like new. I am just going to install new bearings and seals.

0206-1.jpg
 
Last edited:
The next T5 I took apart was the one with the complete original shifter. This is a complete unit that came out of a running CJ-7. It worked perfectly when removed. Upon disassembly I found two problems: a slightly chipped 3rd gear and these little parts resting in the bottom of the case. I believe they are part of the 5th gear synchronizer assembly.

0216-1.jpg


The rest of the transmission looked great. I plan on rebuilding this transmission, using a 3rd gear from one of the other units, and keeping it as a spare.


The third transmission i took apart was actually a T4. I wondered why it looked different. This transmission was missing the input shaft. Also, someone cut off the very rear of the output shaft. I took his transmission apart and cleaned all the parts. I wont be using this transmission. A few pictures of the T4, it is very different then a T5 on the inside.

0224-1.jpg


Someone stripped the bottom hole and forced in a SAE bolt.

0233-1.jpg


0243-1.jpg


0252-1.jpg


0263-1.jpg


0273-1.jpg


Note the different shift mechanism of the T4.

0282-1.jpg


And disassembled the 4th transmission, another T5. This one was in the crate with a broken cluster gear. All other parts looked fine.

0302-1.jpg


0292-1.jpg


Four transmissions disassembled in one day, that is enough for now.
 
Last edited:
Those B&M shifters shift great...like a sports car.
 
Raymond,

Have you thought about starting a side business rebuilding trans and transfer cases? Looks like you have the skills and the tools to do the job.
 
Those B&M shifters shift great...like a sports car.

It seems like it is a big improvement over the factory shifter assembly:cheers: Before I took the transmission apart, I was playing around with it. It has much shorter/tighter throws when compared to the factory shifter:thumbsup:

I just have to remember: It is still a T5, no speed/clutch-less race shifting:rotfl:;)
 
Raymond,

Have you thought about starting a side business rebuilding trans and transfer cases? Looks like you have the skills and the tools to do the job.

Appreciate it:cheers:

I don't have enough time to open up a side business right now, but I appreciate the vote of confidence:thumbsup: Also, I tend to take my sweet time when I am rebuilding these things. If I charged by the hour, the price would be ridiculous:rotfl: But, if I had a parts washer, it would definitely speed up the process, since I spend most of my time cleaning parts:shrug:

Surprisingly, it does not take too many special tools to rebuild this stuff, but,I have only rebuilt: T176, T150, T5, Dana 20, Dana 300, and T18. The only special tools I have used:

press, bearing puller, 2 and 3 jaw gear pullers, magnetic dial indicator, torque wrench,feeler gauges


I have found these rebuilds to be a very satisfying endeavor. They are not too hard to do, as long as you have the FSM, and I guess the biggest thing, patience:thumbsup::cheers:
 
Did a little more T5 cleaning and inspection last night.

Picture of the two new rebuild kits.

00134-1.jpg


Picture of T5 #3, the one that had a broke cluster gear. I am using this T5 as spares.

00235-1.jpg


Picture of T5 #2, soaking in Purple Power. This one came out of a running CJ-7.

00330-1.jpg


And the first problem. Out of 3 main shafts, 2 have issues.

00528-1.jpg


The main shaft that came out of the B&M equipped T5 has severely damaged splines on the end of the output shaft. I slid this output shaft into the Dana 300's input gear and had about 1/8" of slack. The rest of the shaft is fine, but this damage relegates this shaft to the scrap heap.

00622-1.jpg


The main shaft that came from T5 #3, spare parts transmission, has a chipped spline on this part of the shaft. This area is after the snap ring that holds on 5th gear. This MIGHT not be an issue, I do not think anything splines on to this part of the shaft. I think it is only splined here to allow the splined gear to slide past this part. If that is the case, this shaft will be usable.

00721-1.jpg


The main shaft that came from the running CJ-7 is in great shape. No wear, stripped splines, or any other damage.

00819-1.jpg


The cluster gear that came out of the B&M equipped T5 also has minor "issues". Most of the teeth have very small chips on the leading edge of the gears. This might not affect the operation of this gear, but it is not necessarily confidence inspiring. The cluster gear from the CJ-7 T5 is in perfect shape. The way it is looking now, the running CJ-7 T5 might be in the best shape. I will know more once I get finished cleaning and inspecting all of its other parts.

00918-1.jpg


And more issues from the B&M equipped T5. The front bearing retainer is damaged where the throw out bearing slides. Also, the input shaft is damaged where it rides on the pilot bearing; this shaft is also damaged where the front bearing rides. Some time in the past, the bearing spun on this shaft. The new bearing will slide on and off the shaft, it is no longer a press fit. You can see highly polished looking area of the shaft where the front bearing rides.

01016-1.jpg


Looks like I will only be able to get 1 complete/great shape T5 out of all the parts I have on hand. To build a second T5, I will have to go shopping.

That's it for now.
 
Updated "To Do List"

Quick list of some changes I want to make before heading to Moab:

1) Finish 4:1 Dana 300 rebuild - Complete, ready to install
2) Rebuild T5 transmission(s) - All transmissions disassembled and cleaned, rebuild kits on hand, rebuilds have started
3) Take 1" body lift off, rework clutch linkage - will wait till after tire switch, might need the 1" of extra clearance
4) Switch 35" BFG's for 33" BFG's
5) Install Tuffy Stereo Console - sitting in garage
6) Install larger gas tank - possible candidate found to purchase this weekend, ordered heavy duty skid plate
7) Rocker Protection - Should receive the week of 1/23/12
 
Last edited:
What rocker protection are you going with??

I am going to wait and see if/how long it takes for them show up before I disclose any information or form an opinion on the guards or the company that makes them;)
 
Small T5 rebuild update.

Spent a few hours cleaning the aluminum housings. Ran a tap through all the threaded holes to clean all the old gunk out, removed all the old silicone from the mating surfaces.

00236-1.jpg


I thought something looked "off" about this case, and it was - it is missing the magnet in the bottom of the case. I was able to pull a magnet out of one of the other cases. Pulling these magnets is a pain. They have a PIA clip that holds them in place. Luckily, the magnets weren't epoxied in place, too. I tried to pull a magnet out of a cracked S10 T5 case, it was epoxied in place, it crumbled. Heat might help.

00722-1.jpg


I went back and looked over all the gears and shafts from the B&M equipped T5. After looking at all the parts with a fresh set of eyes, I determined that what I thought were small "chips" on the edges of all the gears were actually just the machined edges of the gears. So, I can rebuild B&M T5 with all of it's original gears. I only had to use the spare T5's main shaft to get a complete, great condition T5. Also, after polishing the nose of the input shaft with emery cloth and test fitting a pilot bearing on the end, I can reuse the input shaft, too. I thought that the input shaft might have been damaged where the front bearing goes, too, but it is not. Picture of all the large parts of B&M T5, ready to be put back together.

00623-1.jpg


Next, I went through all of the gears/shafts from the CJ-7 T5. Everything is in great shape except for three gears. The three gears that had slight damage have blue tape on them in the picture below. The spare T5 had the gears that I needed to complete this T5. So, I will have a complete spare T5, too, minus the front bearing retainer. The replacement gears from the spare T5 are in the right part of the picture.

00529-1.jpg


One thing you have to be careful about with transmissions: When you start mixing and matching gears, if the gears have heavy wear, or different wear patterns, the resulting rebuilt transmission can be noisy. That's why I am happy I was able to reuse the compete B&M T5 gear set. This should hopefully result in a smooth, quiet transmission. The spare T5 should be pretty good, too, since none of the gears have heavy or uneven wear patterns.

That's it for now.
 
Pressed the input shaft bearings on at work today. I should be able to get one of these transmissions put back together this weekend. If I can find another T5 front bearing retainer locally, might be able to get them both back together.

And after endless Internet searching, researching, and talking to mechanics, I finally chose an oil to put in my T5. If you get bored one day, just Google "T5 fluid". How I made my decision:

The FSM calls for regular gear oil. They then revised this to AMC Part# 8983 000 000. To confuse the issue, they later said that it is "OK to top off with gear oil, but complete fluid changes should only use 8983 000 000". Of course, you can no longer buy AMC Part# 8983 000 000. Chrysler, who bought out AMC, says that their Mopar 4874464 is equal to the AMC Part # 4874464. The Mopar stuff is a synthetic manual transmission fluid used in the NV 3500's and NSG370 manual transmissions. I figure that if my 05 Rubicon's manual transmission has lasted 125,000 miles with the Mopar stuff in it, should work fine in a T5. NOTE - World Class T5's must use ATF due to the friction bands of their synchronizers.

The Mopar Part # 4874464 can supposedly be replaced by the following fluids:

AMSOIL 5-30 Manual Synchromesh Transmission Fluid
Pennzoil Synchromesh (supposedly the same thing as 30 weight synthetic oil)
GM Synchromesh Transmission fluids
Royal Purple Synchromax

The Mopar stuff and the synthetics range from $12-$20 a quart. The Pennzoil is about $7 a quart.


I think the biggest issue is that the T5 has to have some type of fluid in it. I know people who have successfully used 80-90 weight gear oil and ATF in these non world class T5's successfully. For me, the ATF always seemed too thin and the gear oil seemed to thick. The Mopar stuff is just in between, as far as viscosity goes.

I personally think that the 80-90 weight gear oil is too thick for these transmissions. We can get away with it down here in the south, due to our higher temperatures. Also, after comparing the internals of a T5 (small bearings, small oil ports and passages) to the other gear boxes I have built (Dana 20, Dana 300, T176, T150, T18 which all have much bigger bearings and oil passages) I think the thinner oil is the right choice for the Jeep non world class T5.

Well, that's my theory anyway;)
 
I have just spent 3 days reading the post on your scrambler build. I love it. I did a 1981 CJ-7 a few years ago. Had $30,000 into the complete nut and bolt restoration. Ended up selling it because it was to nice to take offraod. Never drove it in bad weather either.

Then bought a JK Unlimited with a Hemi. Had fun with that also. Sold it a year a go.

Now looking for a srambler or another cj-7 to do a rebuild on.
 
Update from this weekend.

Picture of the transmission fluid that I am using. Looks/feels/tastes like 30 weight motor oil to me.

00135-1.jpg


Picked up a new front bearing retainer from the local transmission rebuild/parts house. It is a steel replacement piece, on the left, versus the stock aluminum one, on the right. I like this steel replacement piece much better then the stock aluminum part. This will be my HD T5 LOL.

00237-1.jpg


Picture showing the different syncro pieces.

00331-1.jpg


Picture showing the difference in the two sets of blocking rings. One set has wider slots versus the other set.

00431-1.jpg


Partially assembled main shaft.

00530-1.jpg


Picture of the sealant I used to seal the front cluster gear bearing to the case.

00624-1.jpg


Picture of the installed cluster gear. I forgot to put in a new magnet in the bottom of the case, so I had to pull the cluster gear back out and install a replacement magnet.

00723-1.jpg


Picture of the loosely installed main shaft.

00919-1.jpg


Picture of the front input shaft, with the installed roller bearings, and the thrust bearing and washer laying on the ground in front of it.

01017-1.jpg


Picture of the installed input shaft.

01114-1.jpg
 
Picture of the assembled transmission. At this point, everything is loosely bolted up in place, not sealed together. Once you reach this point, you have to measure the main shaft end play, add 3 thousandths worth of shims to this measurement behind the front bearing race, and then reassemble. The end play measurement/preload step is very important.

0169-1.jpg


I spent a lot of time cleaning up and inspecting another transmission case, to use for my spare T5. Well, after wasting a lot of time cleaning it up, I noticed this crack in the case.

01412-1.jpg


0159-1.jpg


This crack goes all the way through. This case is ruined. Good thing I have a third case, which is in good shape, to use. I am not sure if this case cracked due to catastrophic component failure; or was the result of someone using an impact wrench, instead of a torque wrench, on an aluminum case; or maybe the old silicone was not removed from the bottom of the threaded holes before reinstalling the bolts. If the old sealant is not removed from the bottom of the holes and the bolts are reinstalled, the resulting hydraulic pressure from too much old sealant at the bottom of the threaded holes and the bolts pushing against the excess sealant can result in "fracking" the case. That is one reason why I spend so much time cleaning up all the old components: to inspect for cracks and to prevent new ones.

I will hopefully start on the second transmission rebuild tonight, and maybe get them both finished in a couple of days. Then, I will install one.


Spent Saturday going to pick up a used, factory 20 gallon plastic tank. The tank was removed from a flooded 1983 CJ-7. The plastic tank is fine, no cracks or any other issues. I was also able to salvage the 3 "liner pieces" that go between the tank and the skid. Picture of the tank as I received it.

01214-1.jpg


When we pulled the tank, it was still full of water/fuel. As you can imagine, the metal sending unit did not like this. The sending unit completely disintegrated. I also broke one of the vent valves at the top of the tank when I was removing it, and I also dropped both vent grommets inside the tank when I was removing them. Picture of the parts I fished out from inside the tank.

01313-1.jpg


I used one of the transmission magnets, attached to a close hanger, to fish out all of the metal particles. I have a NOS Stewart Warner sending unit in the mail, and I have two replacement valves/grommets in the garage, to replace the damaged components. I dumped two gallons of old Purple Power inside the tank to remove the rust stain from the plastic. After soaking for 24 hours, most of the stain is gone. It is currently soaking in Dawn soap. I will take the tank to the pressure washer to thoroughly clean it. But as of right now, it is 98% clean.

That' s it for now.
 
Last edited:

whatever you do... KEEP THAT FLOAT!!! The ones they have now are just a plastic can that eventually cracks, filling with fuel and sinking to the bottom of the tank, for ever. I was lucky enough to find one and put it on my new sending unit.
 
whatever you do... KEEP THAT FLOAT!!! The ones they have now are just a plastic can that eventually cracks, filling with fuel and sinking to the bottom of the tank, for ever. I was lucky enough to find one and put it on my new sending unit.

Thanks for the tip:thumbsup: I have a NOS Stewart Warner Sending unit coming in the mail, hopefully it has the same type of float.

The funny thing is, the float that is pictured above was still floating around inside the tank just fine:crazy: You can imagine the fun I had trying to fish the detached float from inside the tank:eek:
 
Back
Top