

You are using an out of date browser. It may not display this or other websites correctly.
You should upgrade or use an alternative browser.
You should upgrade or use an alternative browser.
Spankrjs' 1984 Long Term Project
- Thread starter spankrjs
- Start date


- City
- Dexter
- State
- MI
That Aviation sealant is awesome. I did the rear main seal in my LJ last weekend and when reading threads, I saw where people were using plain RTV to seal the rear main cap back on  There's no way the proper bearing tolerances would be maintained with something as thick as that in there! I went right to this stuff.
Anytime there's a close-fit metal to metal joint, especially where tolerances need to be maintained, I use that stuff.
There's no way the proper bearing tolerances would be maintained with something as thick as that in there! I went right to this stuff.Anytime there's a close-fit metal to metal joint, especially where tolerances need to be maintained, I use that stuff.

- City
- Biloxi
- State
- MS
Nice work and excellent detail (as usual)
Appreciate it, hope this stuff is useful as reference material/entertainment


That Aviation sealant is awesome. I did the rear main seal in my LJ last weekend and when reading threads, I saw where people were using plain RTV to seal the rear main cap back on
Anytime there's a close-fit metal to metal joint, especially where tolerances need to be maintained, I use that stuff.
Yep, this stuff is great for close tolerance work
But, it is very sticky/stains stuff easily, so be careful Even though it looks like syrup/molasses, sure doesn't taste like it

- City
- Biloxi
- State
- MS
Kinda like Franks red hot sauce... "I use that sh!t on everything!!"
I take it you have had good results with this product, too, hopefully only on "automotive sealing" applications, and not the "culinary arts" that you eluded to

- City
- Biloxi
- State
- MS
I was able to get a bunch of work done this weekend, so a pretty large progress report.
To get my mind off the transfer case rebuild, I started another side "project". The mismatched colored grill has been bugging me. Since I have no idea what type of primer/paint is on it, i decided to strip it down to bare metal.
It has just been bugging me.
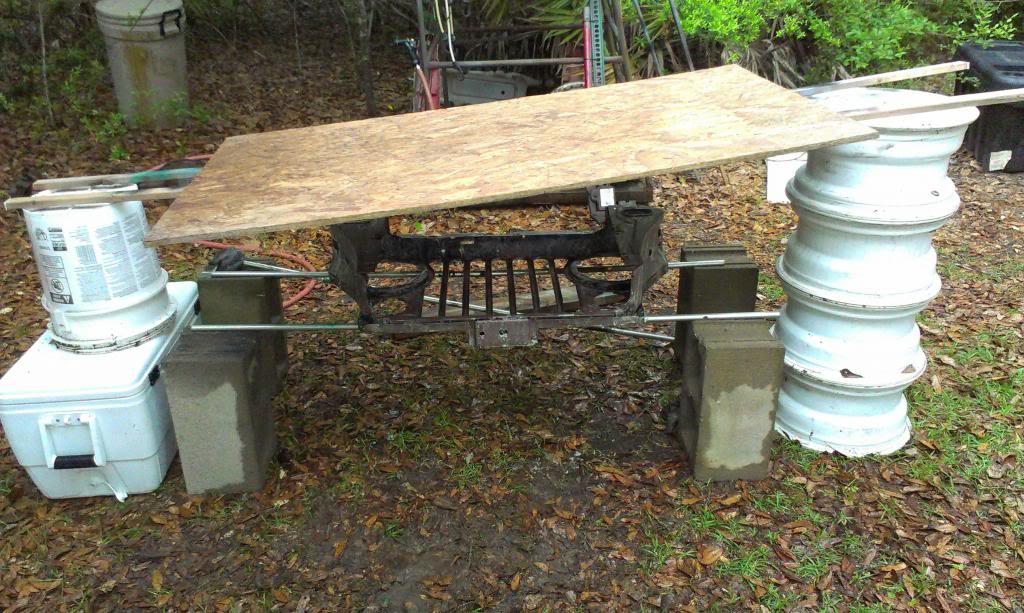
The grill removed, sitting on my home made paint stripping stand.
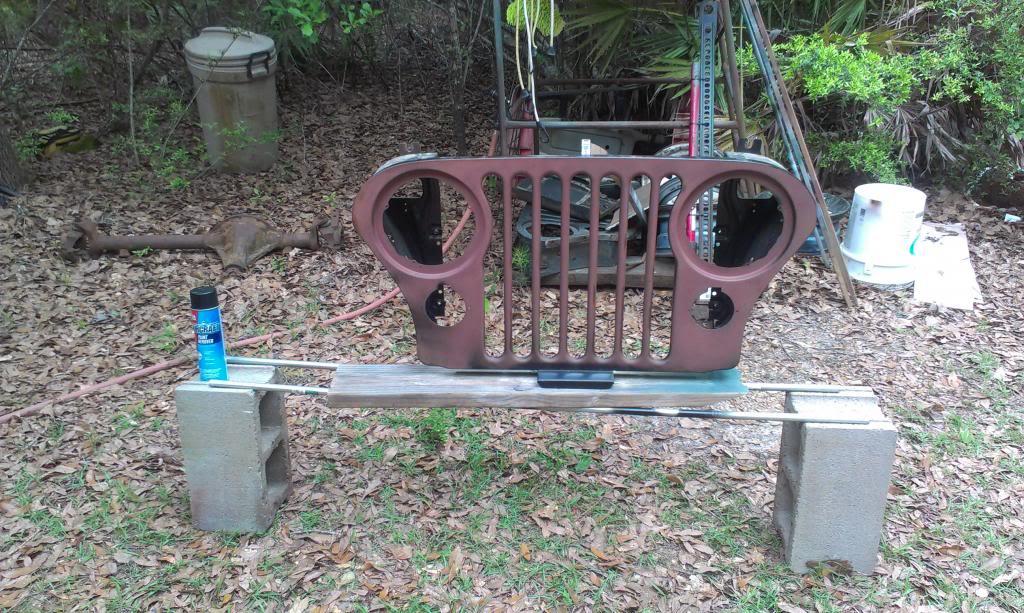
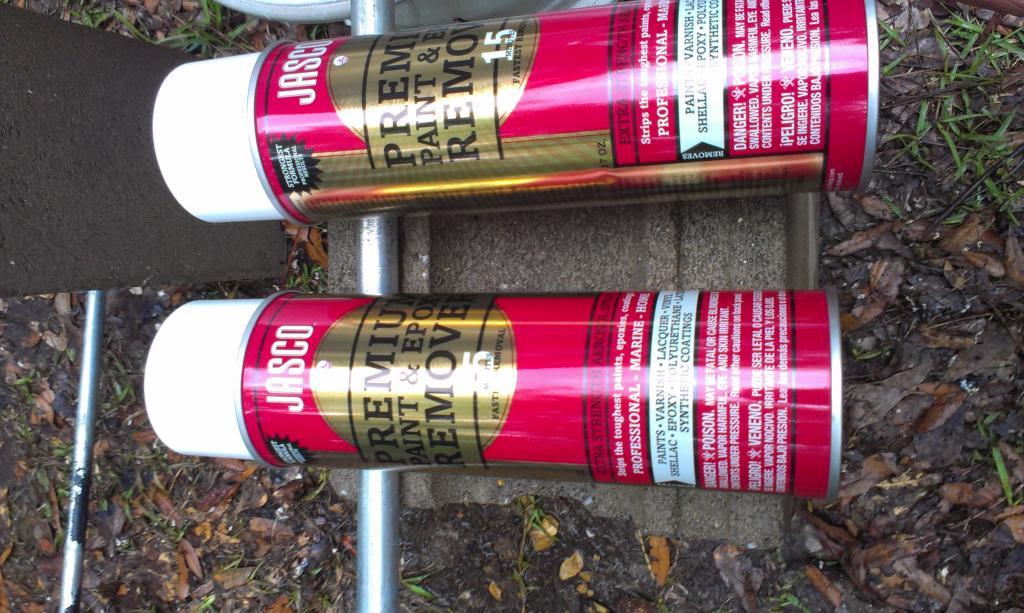
I used two cans of this stuff. It removed the black paint easy enough, I believe it was some type pf spray paint, but it hardly touched the red primer, which I now beleive is some type of "sure enough/real deal automotive primer".

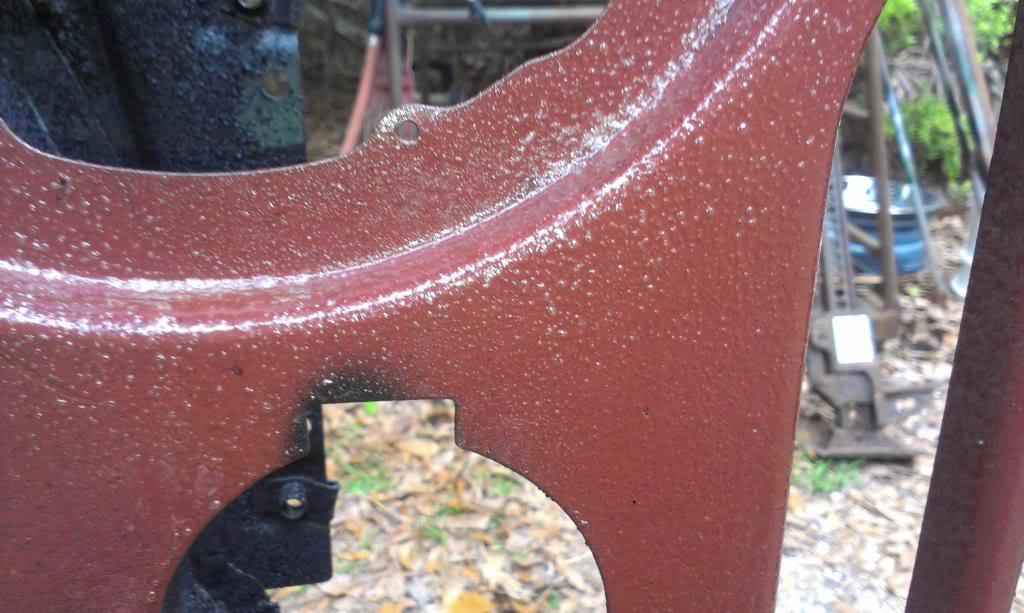
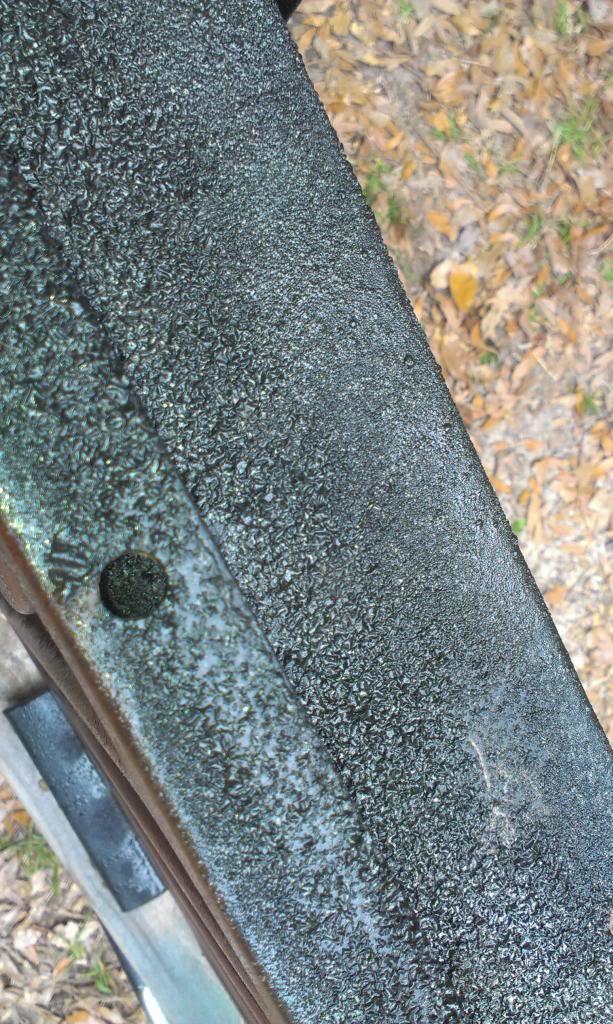
That was Friday afternoon, once it got dark, I started back to work on the Dana 300.
After previously setting the front output shaft end play, I installed the front seal and sealed the aluminum housing to the cast iron case with some anaerobic sealant.
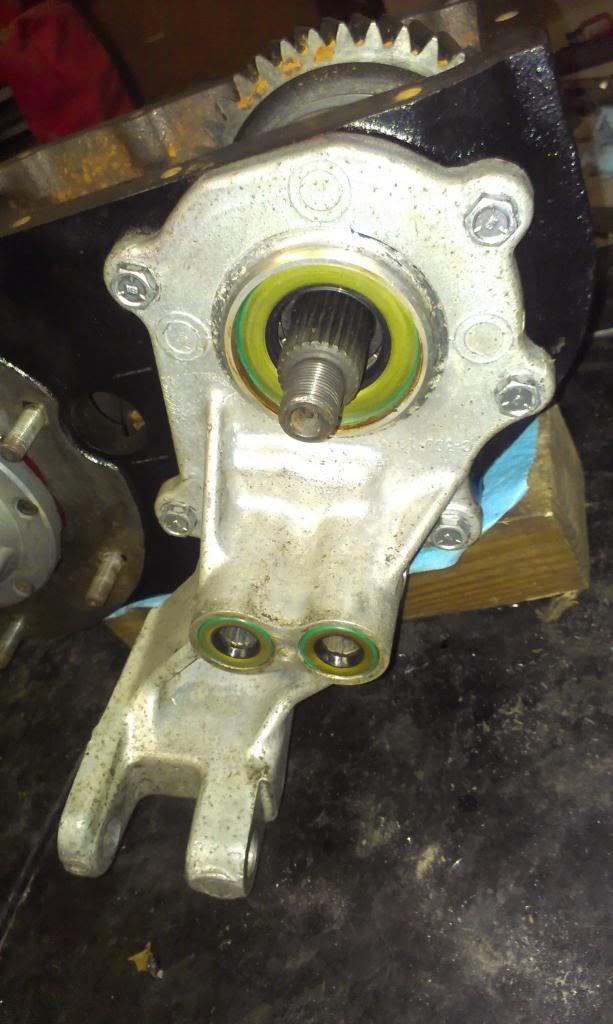
Next, I installed the two shift forks.
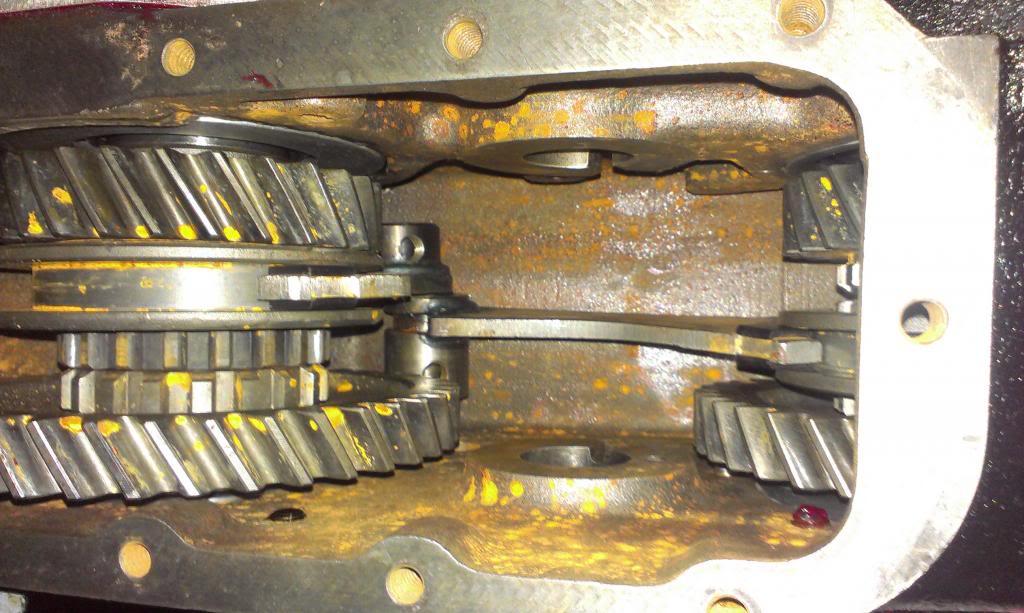
And now, the fun part. After trying to install the two shift forks according to the LoMax instructions, and getting no where, I decided to take a look at how these thing go in/work/interlock pin relationship, and came up with my own method, which worked very easily, no beating the rails with a BFH or cursing necessary.
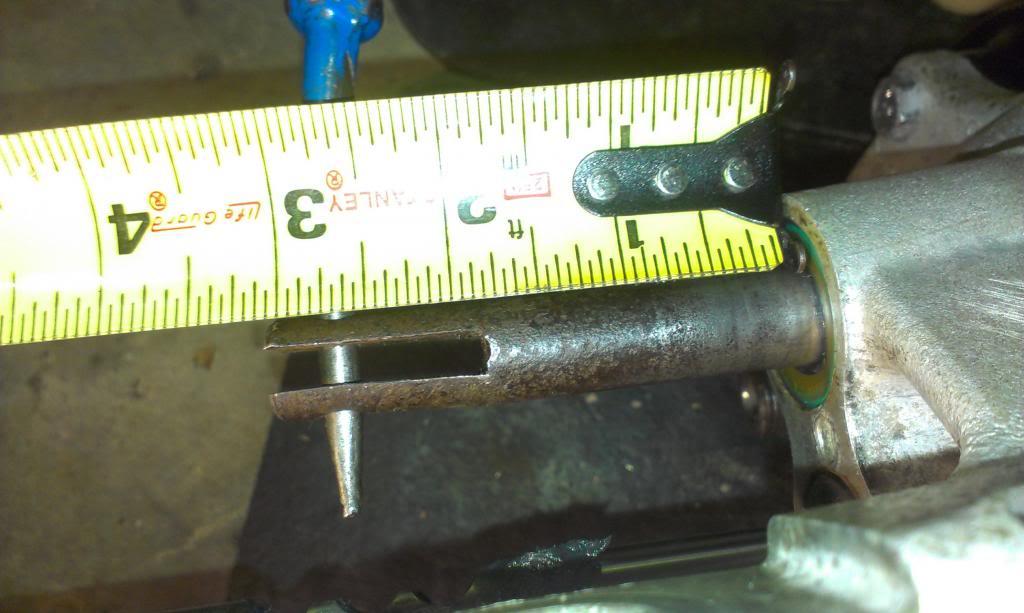
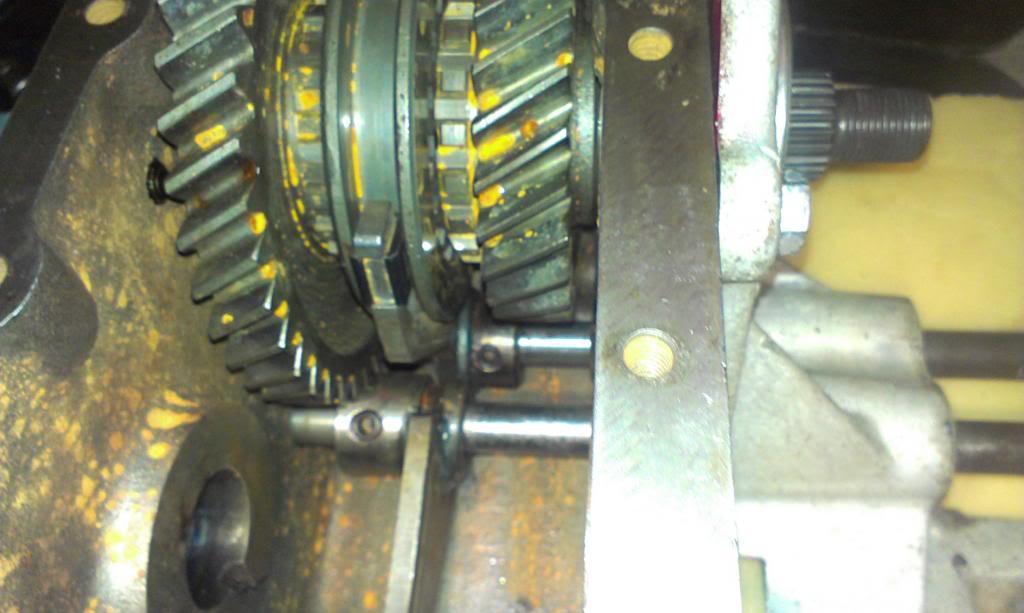
First, I installed the outer rail as shown below, with 3-1/16" sticking out past the cover. Note its orientation. If looking from the front of the upside down case, it needs to be twisted 90 degrees counter clockwise to be in the correct spot. DO NOT TWIST IT UNTIL AFTER THE OTHER RAIL IS IN PLACE!!!
Next, I installed the other rail as shown. It will have to be twisted 90 degrees clockwise to be in the correct position. DO NOT TWIST UNTIL IT IS ALMOST EVEN WITH THE OTHER RAIL!!!
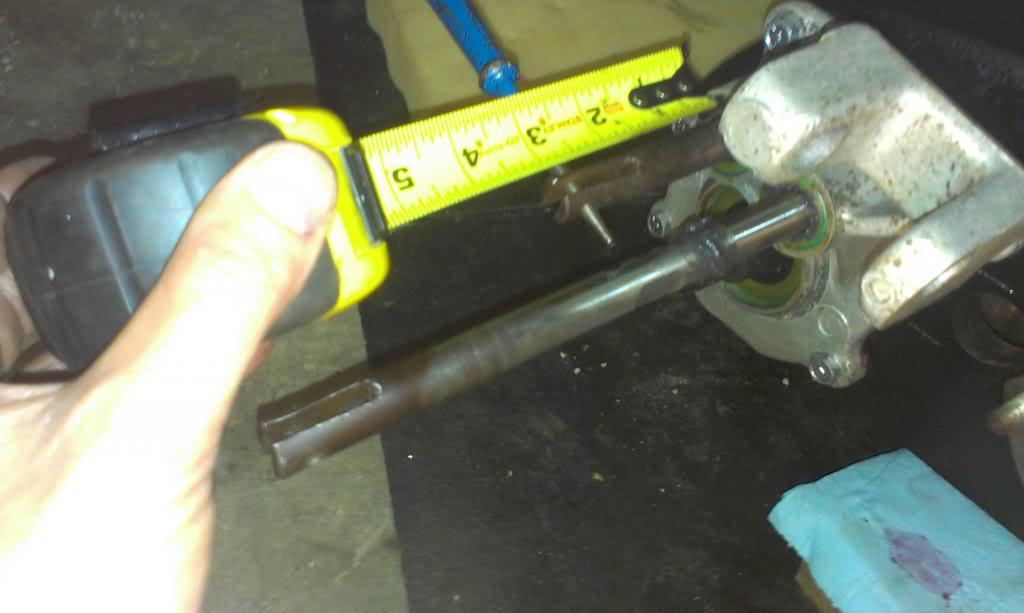
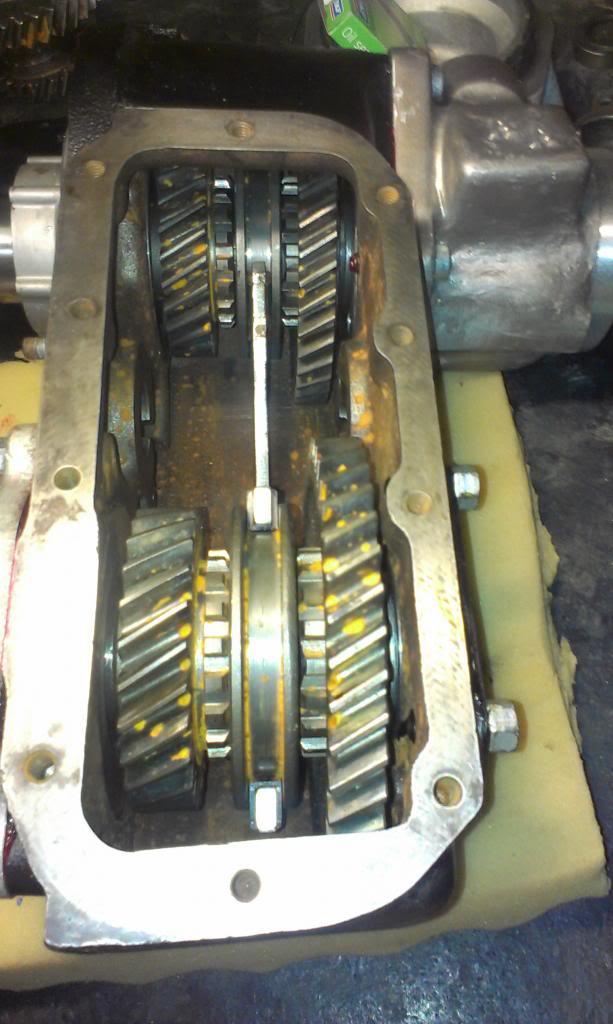
I then twisted both the rails, and I was done. Very easy, took 5 minutes, no beating necessary. Worked perfectly. NOTE - This is for stock rails. The 4:1 rail that comes with the LoMax gears is different. Follow their instruction if you have their gears/shift rail.
Next, I installed the set screws that hold the forks to the rails. IIRC, I gently tapped both rails to the neutral position, then slid the shift collars to neatral, and it lined up perfect.
To get my mind off the transfer case rebuild, I started another side "project". The mismatched colored grill has been bugging me. Since I have no idea what type of primer/paint is on it, i decided to strip it down to bare metal.
It has just been bugging me.
The grill removed, sitting on my home made paint stripping stand.
I used two cans of this stuff. It removed the black paint easy enough, I believe it was some type pf spray paint, but it hardly touched the red primer, which I now beleive is some type of "sure enough/real deal automotive primer".
That was Friday afternoon, once it got dark, I started back to work on the Dana 300.
After previously setting the front output shaft end play, I installed the front seal and sealed the aluminum housing to the cast iron case with some anaerobic sealant.
Next, I installed the two shift forks.
And now, the fun part. After trying to install the two shift forks according to the LoMax instructions, and getting no where, I decided to take a look at how these thing go in/work/interlock pin relationship, and came up with my own method, which worked very easily, no beating the rails with a BFH or cursing necessary.
First, I installed the outer rail as shown below, with 3-1/16" sticking out past the cover. Note its orientation. If looking from the front of the upside down case, it needs to be twisted 90 degrees counter clockwise to be in the correct spot. DO NOT TWIST IT UNTIL AFTER THE OTHER RAIL IS IN PLACE!!!
Next, I installed the other rail as shown. It will have to be twisted 90 degrees clockwise to be in the correct position. DO NOT TWIST UNTIL IT IS ALMOST EVEN WITH THE OTHER RAIL!!!
I then twisted both the rails, and I was done. Very easy, took 5 minutes, no beating necessary. Worked perfectly. NOTE - This is for stock rails. The 4:1 rail that comes with the LoMax gears is different. Follow their instruction if you have their gears/shift rail.
Next, I installed the set screws that hold the forks to the rails. IIRC, I gently tapped both rails to the neutral position, then slid the shift collars to neatral, and it lined up perfect.
- City
- Biloxi
- State
- MS
One more picture of the installed shift rails/forks, both are in the neutral position.
Next, time to install the intermediate gear. I reused the old shaft and bearings, they were in perfect shape. If the factory intermediate shaft is not damaged, I reuse them. I am kind of suspect about some of the "replacements" that come in a lot of the rebuild kits, i.e. too soft.
Picture of the gear, needle bearings, and the three spacers. The fat spacer goes in the middle, the two thinner spacers go on either end.
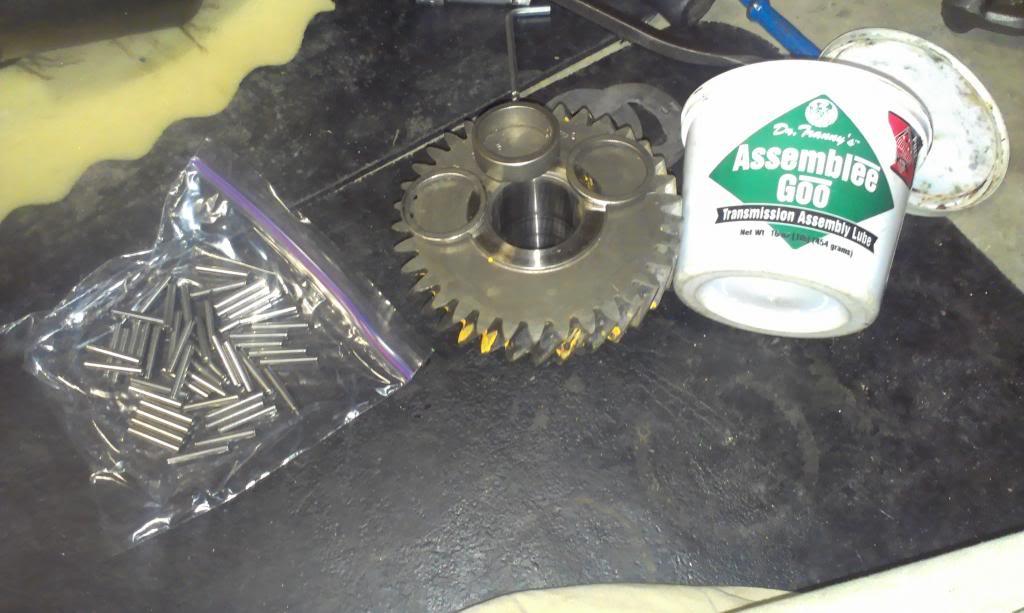
After a bunch of assembly lube to hold it all together, the ready to install assembly.

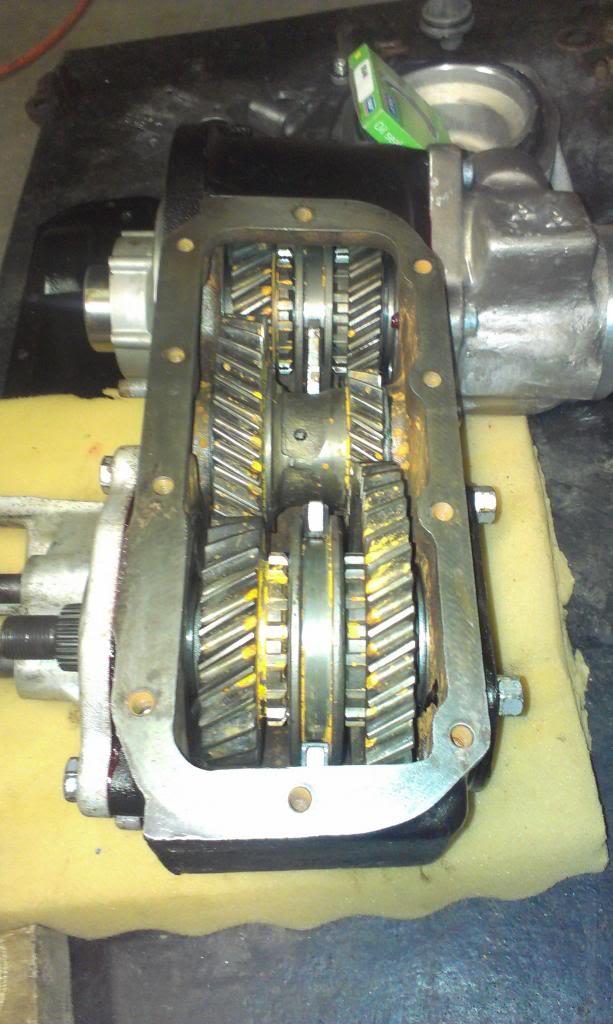
And installed. A thrust washer goes on either end of the gear, the gear drops down, the shaft is tapped through the gear, once it is in place. I use the shaft, inserted just a little, to hold the rear thrust washer in place. I use a suitable sized socket to hold the front washer in place. I then gently lower the gear into position, then tap shaft in.
The lock plate and two tags installed and bolted down. I use a little sealant on the bolt to prevent leaks.
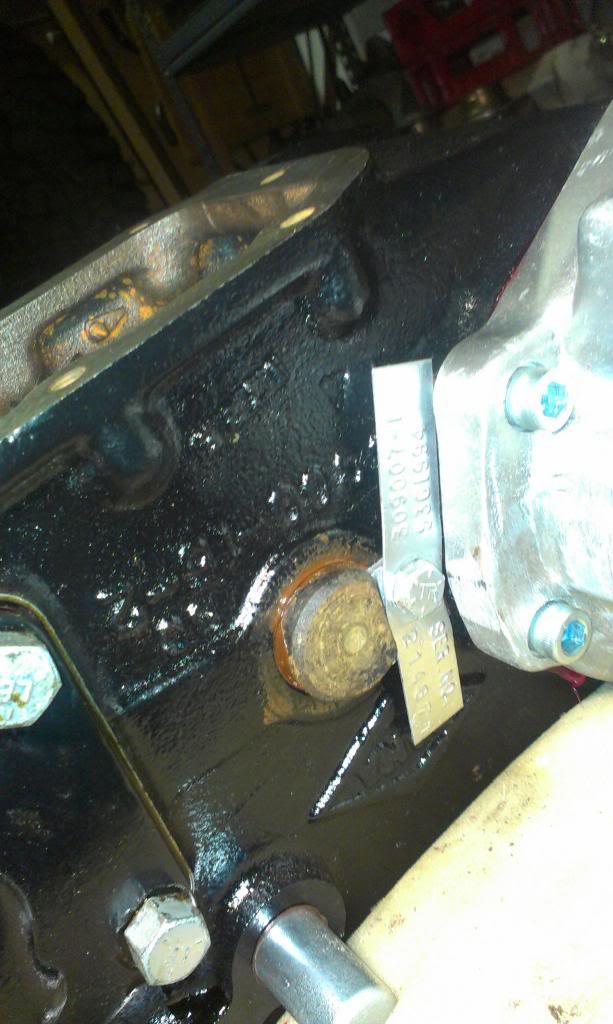
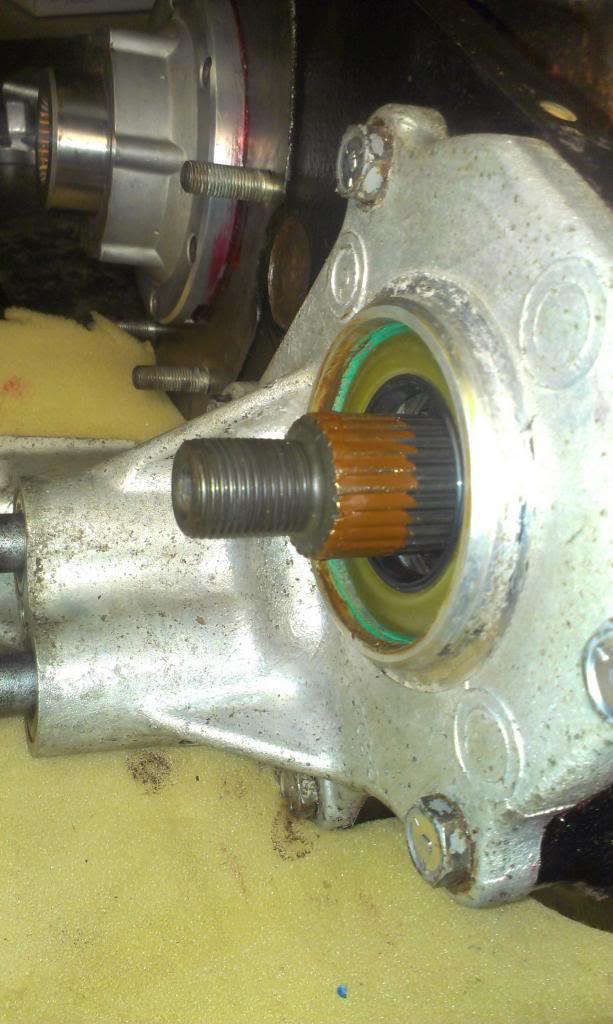
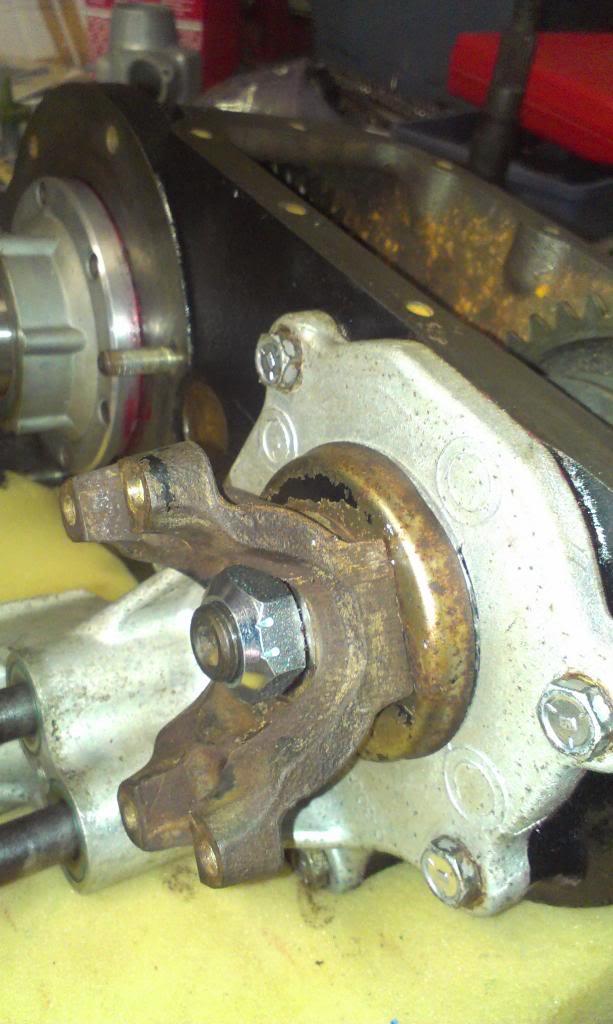
Next, I installed the front yoke. I put a little sealant on the splines to help prevent leaks. The yoke/shaft fit is very tight, but I figure a little sealant can only help prevent leaks.
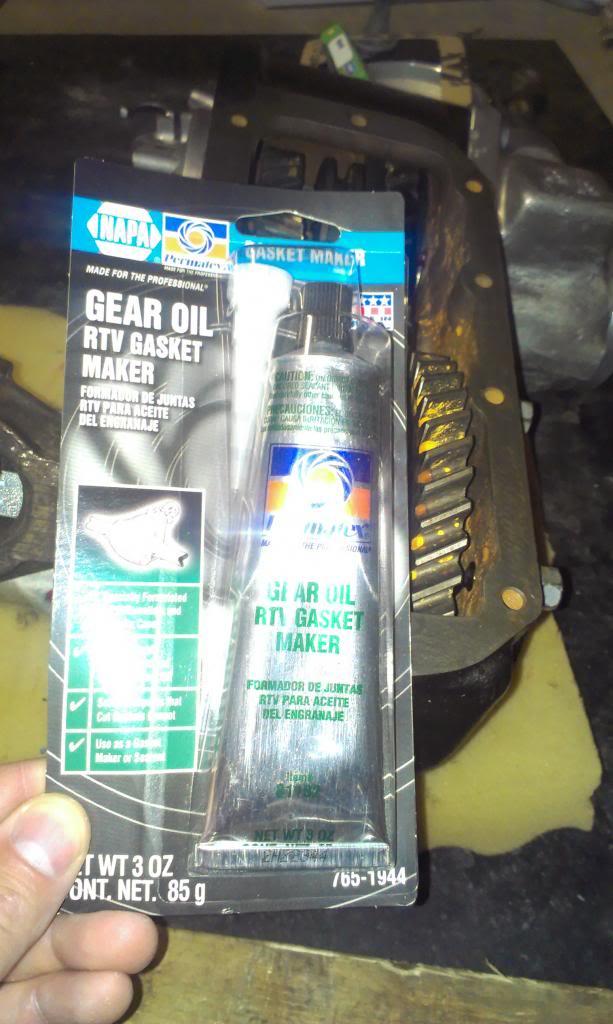
Next, I installed the pan gasket. I saw this sealant at the store, figured I would give it a shot. Maybe just a marketing gimmick?? Anyway, I put a thin coat on the case, cover, and both sides of the gasket. Bolted down finger tight, then torqued 2 hours later. I now have a cool grey racing strip of excess sealant going around the inspection plate, SWEET!!
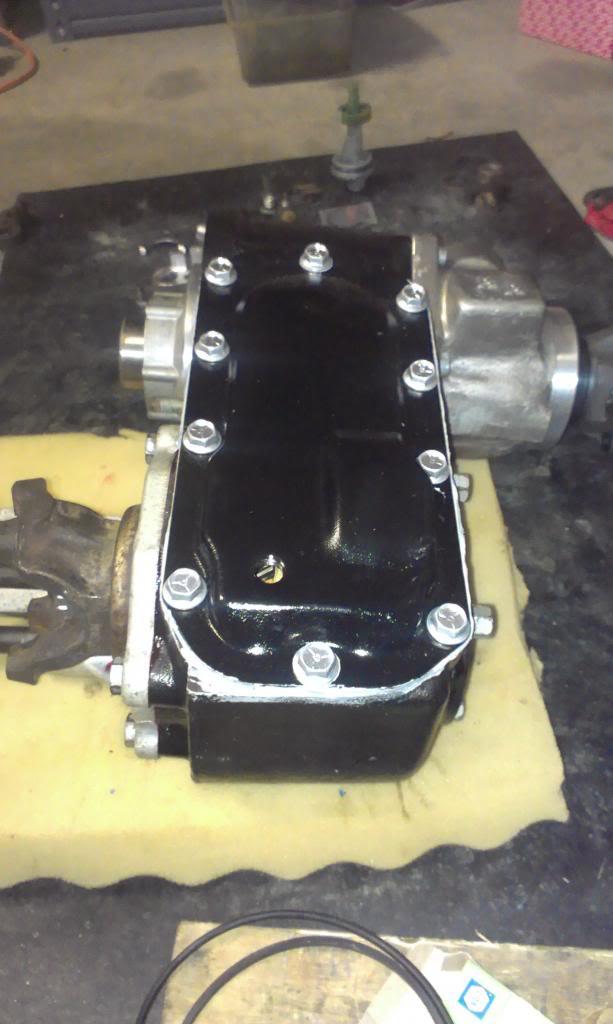
I installed the speedo gear, shift rail plug, 4wd indicator switch, and the shifter bolt stuff. Ready to install.

Next, time to install the intermediate gear. I reused the old shaft and bearings, they were in perfect shape. If the factory intermediate shaft is not damaged, I reuse them. I am kind of suspect about some of the "replacements" that come in a lot of the rebuild kits, i.e. too soft.
Picture of the gear, needle bearings, and the three spacers. The fat spacer goes in the middle, the two thinner spacers go on either end.
After a bunch of assembly lube to hold it all together, the ready to install assembly.
And installed. A thrust washer goes on either end of the gear, the gear drops down, the shaft is tapped through the gear, once it is in place. I use the shaft, inserted just a little, to hold the rear thrust washer in place. I use a suitable sized socket to hold the front washer in place. I then gently lower the gear into position, then tap shaft in.
The lock plate and two tags installed and bolted down. I use a little sealant on the bolt to prevent leaks.
Next, I installed the front yoke. I put a little sealant on the splines to help prevent leaks. The yoke/shaft fit is very tight, but I figure a little sealant can only help prevent leaks.
Next, I installed the pan gasket. I saw this sealant at the store, figured I would give it a shot. Maybe just a marketing gimmick?? Anyway, I put a thin coat on the case, cover, and both sides of the gasket. Bolted down finger tight, then torqued 2 hours later. I now have a cool grey racing strip of excess sealant going around the inspection plate, SWEET!!
I installed the speedo gear, shift rail plug, 4wd indicator switch, and the shifter bolt stuff. Ready to install.

- City
- Biloxi
- State
- MS
Of course, I was missing part of the shifter linkage. I was missing the shift shaft and two of the bushings.

You have to install these parts before you bolt the transfer case to the adapter. Luckily, my good buddy Chuck had the parts I needed. Thanks again Chuck.
Next, I installed a new seal in the adapter housing. I used the following seal, it was a match for the National Seal that was in there. I like this seal better, it is a "double lip" seal. This seal is very important. There is no rear seal installed in the back of the 700R4. This seal is all that keeps the ATF from leaking past the output shaft. Actually, fluid will leak past the output shaft. This seal keeps the fluid from going into the Dana 300 side of the adapter.

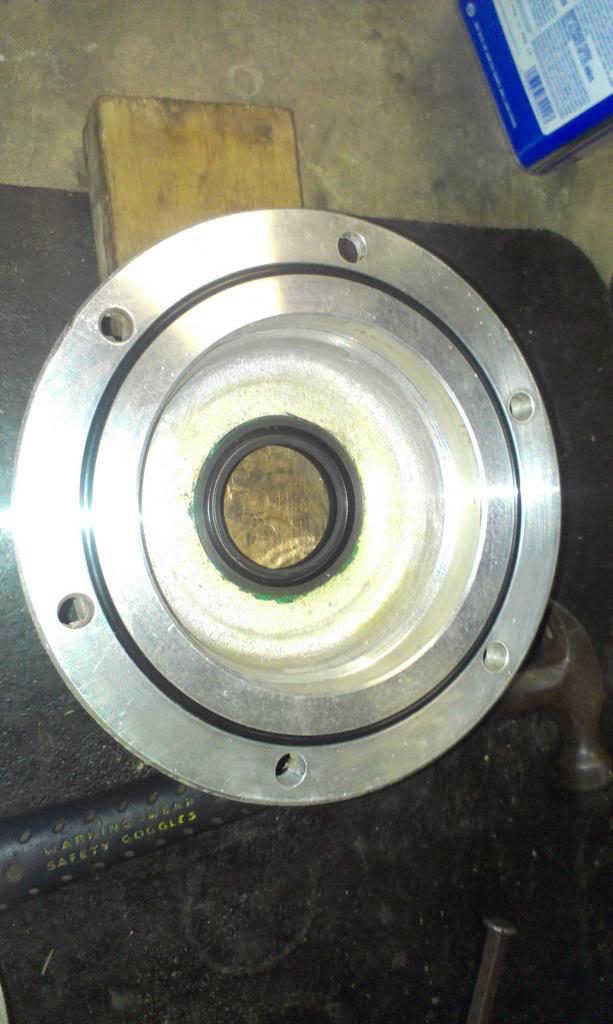
The seal installed. I used some sealant around the outer edge of the seal. I also greased up the seal lip. This picture shows the back of the adapter that bolts to the face of the Dana 300. Note the large o-ring seal that seals the adapter to the face of the transfer case.
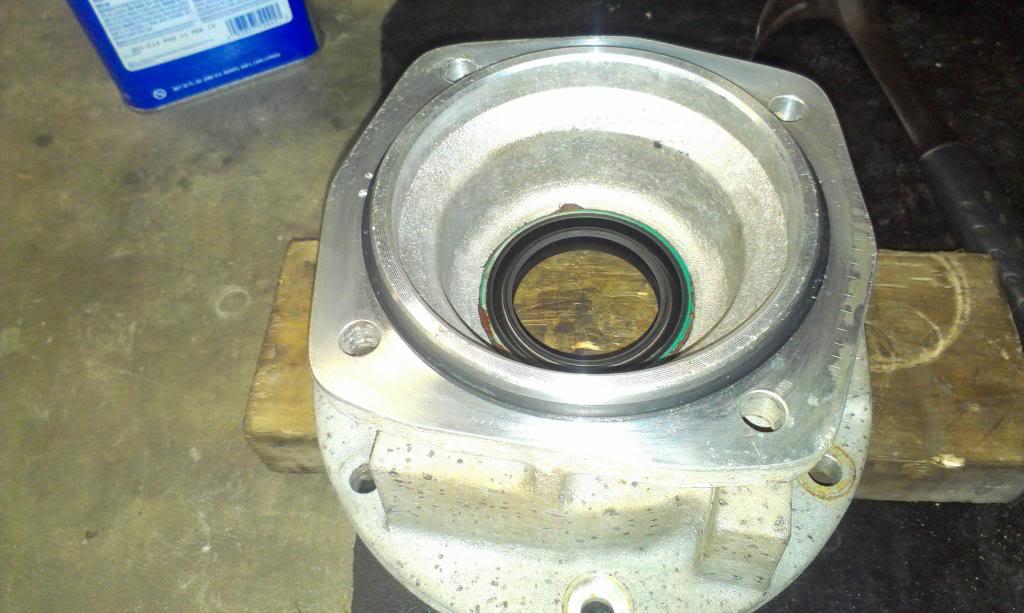
This picture shows the front of the adapter, that bolts to the 700R4. Note the "square" o-ring that seals the adapter to the transmission
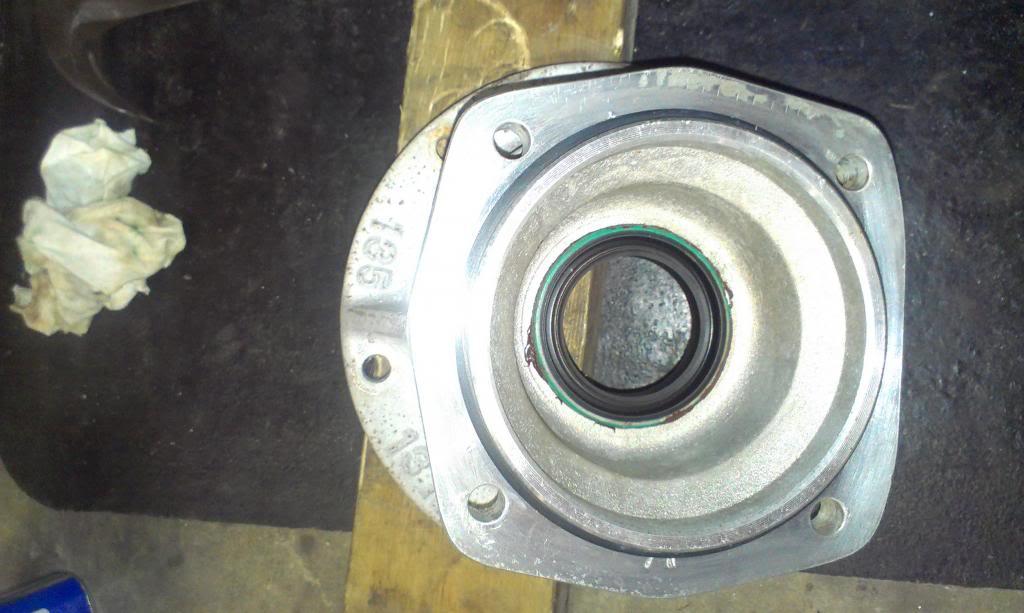
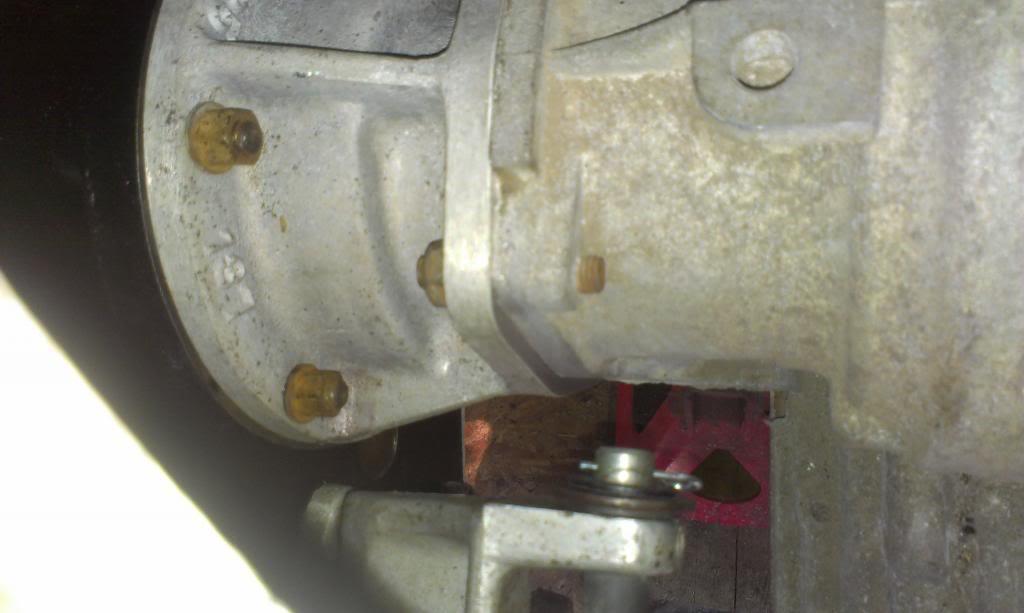
When you bolt the adapter to the transfer case, these number must be at the top, or the "clocking" will not be right.
I would also like to give a big THANK YOU to NOVAK. Even though I did not buy this adapter from them, I contacted them about it. They were very helpful. They went back and looked through their archives, since this is an older/no longer produced adapter, and emailed me the instructions, and offered to answer any questions that I may have. If I ever need to buy an adapter, I know who to go to. Top notch customer support, even though I was not a customer. A huge THANK YOU to Novak, highly recommended.
I then bolted the adapter to the transmission. Easy enough. The fun part, bolting the Dana 300 to the adapter. The adapter fits super, super tight around the 300's input shaft retainer. The holes in the adapter that line up with the transfer case studs is also an exact/precise fit. These two facts, coupled to the fact that their is a very important seal installed in the adapter, which would be easy to knock out, ruled out the old "bench press the transfer case back in" install method. I tried this, and failed.
So, I put the transfer case on a floor jack, raised it to position, and got the transmission output shaft to spline into the transfer case input shaft. I had to shift the t-case to 2wd, so I could get the spline to line up. Once the splines were engaged, I put the t-case back in neutral. Now, all this time, the splines are barely engaged, maybe a 1/4". Once back in neutral, I rotated the transfer case to the correct position, and gently shoved it forward. It stopped when the transfer case input shaft housing met the adapter. Once I verified the alignment, I gently pulled the two units together using two slightly loner bolts. Like I mentioned before, the fit between the adapter and the input shaft is super tight, you can not shove the two together. After gently pulling the the two together, i installed the correct bolts/nuts.
The re-installed transfer case.
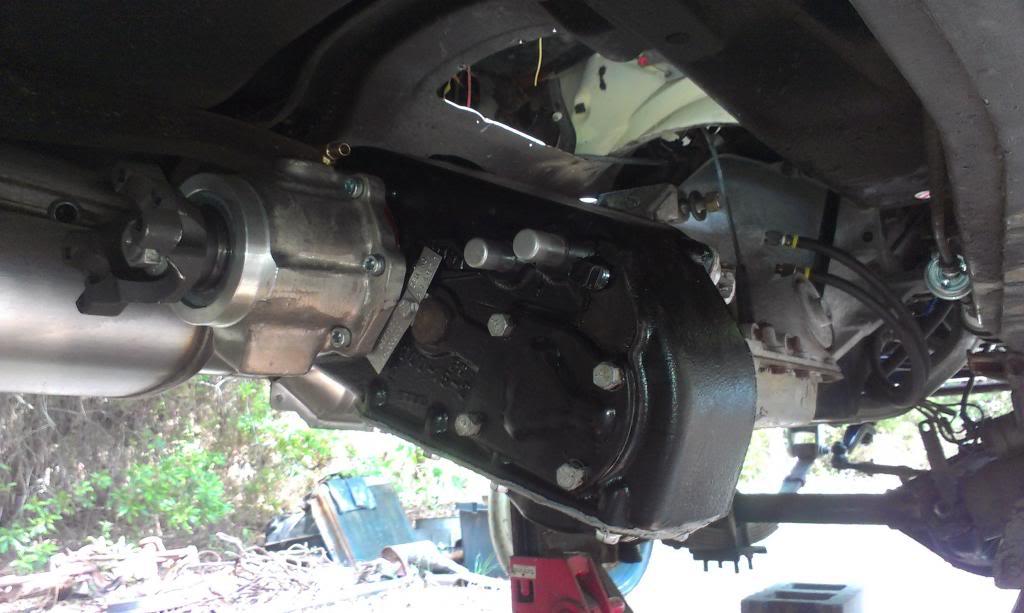
Picture from the top, note the numbers are at the top.
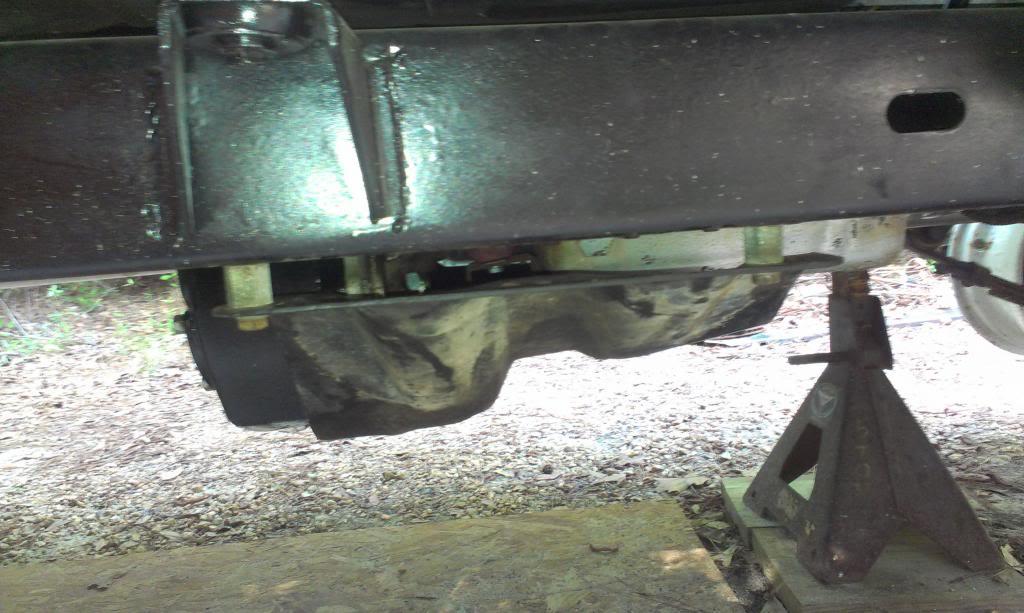
Now, after reinstalling the transfer case/skid plate, I did some head scratching. I do not like how the PO lowered the skid plate. But, there is not much choice. The size of the transmission (depth) almost dictates this. Also, if the skid is not lowered, the transfer case would hit it. While I don't necessarily like this, for now, I am going to go with it. Once I get the Scrambler running, I am going to revisit this issue. The engine needs to be sitting at about a 4 degree down hill slope. I am not sure where it is set currently. Once i get it running, and on level ground, I can do some more checking. I "might" be able to space the entire engine upward, then move the skid plate up, too. No chance of clocking the transfer case with the 700R4, the front drive shaft clearance, as is, will be tight.
Side shot, showing the home made drop. If I have to keep it dropped, i will install a continuous drop spacer, and install the middle bolts on each side.
Rear shot, showing the minimal space between the bottom of the transfer case and the skid plate. Also, note the minimal exhaust clearance. I might just have to live with the drop, unless I want to reinvent everything.
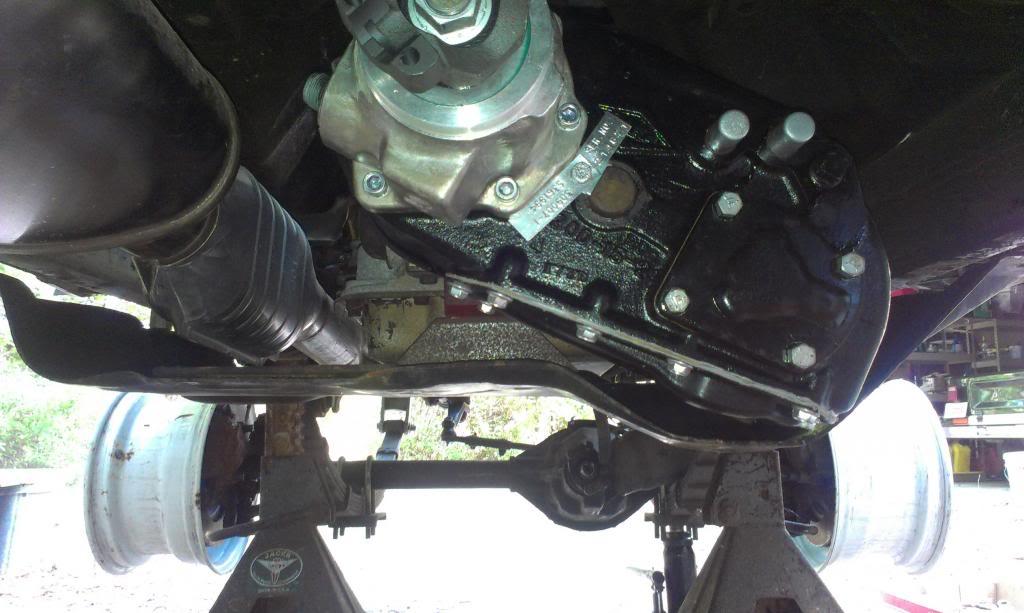
Picture showing clearance between the transmission pan and the skid plate. No room for a fancy, deep pan. The current pan has a drain plug, so I will probably keep it. I plan on dropping the pan, changing the filter, and installing a Lube Locker gasket. I will probably also install a temperature gauge sending unit port in the side of the pan, too.
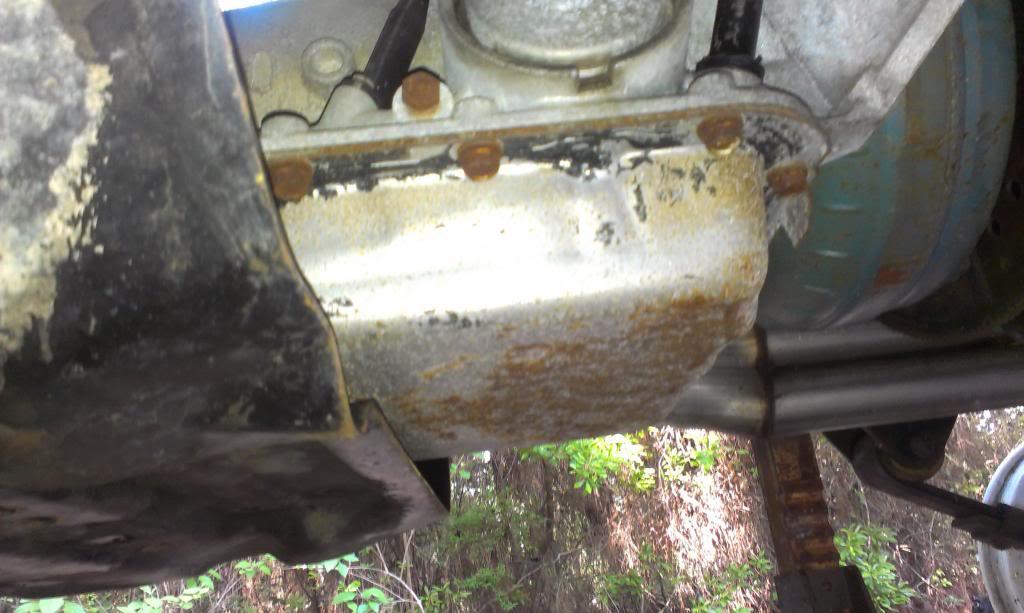
I still need to bolt the transmission mount down to the skid plate, too. And also, probably, need to install some type of "torque mount" similar to the factory deal. In one of the above pictures, you will see the piece of steel bolted below the transmission mount. I will probably weld a flat 1/4" plate to the bottom of this, then bolt this plate down to some of the existing holes in the skid plate.
You have to install these parts before you bolt the transfer case to the adapter. Luckily, my good buddy Chuck had the parts I needed. Thanks again Chuck.
Next, I installed a new seal in the adapter housing. I used the following seal, it was a match for the National Seal that was in there. I like this seal better, it is a "double lip" seal. This seal is very important. There is no rear seal installed in the back of the 700R4. This seal is all that keeps the ATF from leaking past the output shaft. Actually, fluid will leak past the output shaft. This seal keeps the fluid from going into the Dana 300 side of the adapter.
The seal installed. I used some sealant around the outer edge of the seal. I also greased up the seal lip. This picture shows the back of the adapter that bolts to the face of the Dana 300. Note the large o-ring seal that seals the adapter to the face of the transfer case.
This picture shows the front of the adapter, that bolts to the 700R4. Note the "square" o-ring that seals the adapter to the transmission
When you bolt the adapter to the transfer case, these number must be at the top, or the "clocking" will not be right.
I would also like to give a big THANK YOU to NOVAK. Even though I did not buy this adapter from them, I contacted them about it. They were very helpful. They went back and looked through their archives, since this is an older/no longer produced adapter, and emailed me the instructions, and offered to answer any questions that I may have. If I ever need to buy an adapter, I know who to go to. Top notch customer support, even though I was not a customer. A huge THANK YOU to Novak, highly recommended.
I then bolted the adapter to the transmission. Easy enough. The fun part, bolting the Dana 300 to the adapter. The adapter fits super, super tight around the 300's input shaft retainer. The holes in the adapter that line up with the transfer case studs is also an exact/precise fit. These two facts, coupled to the fact that their is a very important seal installed in the adapter, which would be easy to knock out, ruled out the old "bench press the transfer case back in" install method. I tried this, and failed.
So, I put the transfer case on a floor jack, raised it to position, and got the transmission output shaft to spline into the transfer case input shaft. I had to shift the t-case to 2wd, so I could get the spline to line up. Once the splines were engaged, I put the t-case back in neutral. Now, all this time, the splines are barely engaged, maybe a 1/4". Once back in neutral, I rotated the transfer case to the correct position, and gently shoved it forward. It stopped when the transfer case input shaft housing met the adapter. Once I verified the alignment, I gently pulled the two units together using two slightly loner bolts. Like I mentioned before, the fit between the adapter and the input shaft is super tight, you can not shove the two together. After gently pulling the the two together, i installed the correct bolts/nuts.
The re-installed transfer case.
Picture from the top, note the numbers are at the top.
Now, after reinstalling the transfer case/skid plate, I did some head scratching. I do not like how the PO lowered the skid plate. But, there is not much choice. The size of the transmission (depth) almost dictates this. Also, if the skid is not lowered, the transfer case would hit it. While I don't necessarily like this, for now, I am going to go with it. Once I get the Scrambler running, I am going to revisit this issue. The engine needs to be sitting at about a 4 degree down hill slope. I am not sure where it is set currently. Once i get it running, and on level ground, I can do some more checking. I "might" be able to space the entire engine upward, then move the skid plate up, too. No chance of clocking the transfer case with the 700R4, the front drive shaft clearance, as is, will be tight.
Side shot, showing the home made drop. If I have to keep it dropped, i will install a continuous drop spacer, and install the middle bolts on each side.
Rear shot, showing the minimal space between the bottom of the transfer case and the skid plate. Also, note the minimal exhaust clearance. I might just have to live with the drop, unless I want to reinvent everything.
Picture showing clearance between the transmission pan and the skid plate. No room for a fancy, deep pan. The current pan has a drain plug, so I will probably keep it. I plan on dropping the pan, changing the filter, and installing a Lube Locker gasket. I will probably also install a temperature gauge sending unit port in the side of the pan, too.
I still need to bolt the transmission mount down to the skid plate, too. And also, probably, need to install some type of "torque mount" similar to the factory deal. In one of the above pictures, you will see the piece of steel bolted below the transmission mount. I will probably weld a flat 1/4" plate to the bottom of this, then bolt this plate down to some of the existing holes in the skid plate.
- City
- Biloxi
- State
- MS
After all the "hard work", I decided to do some easy work.
Since the front frame was already on jack stands, I decided to install a M.O.R.E. steering box brace. I feel a brace like this should almost be mandatory for any CJ that goes off road, or even on road. There is a bunch of stress on the frame form the PS box, this is a good way to eliminate cracks and bracket failure.
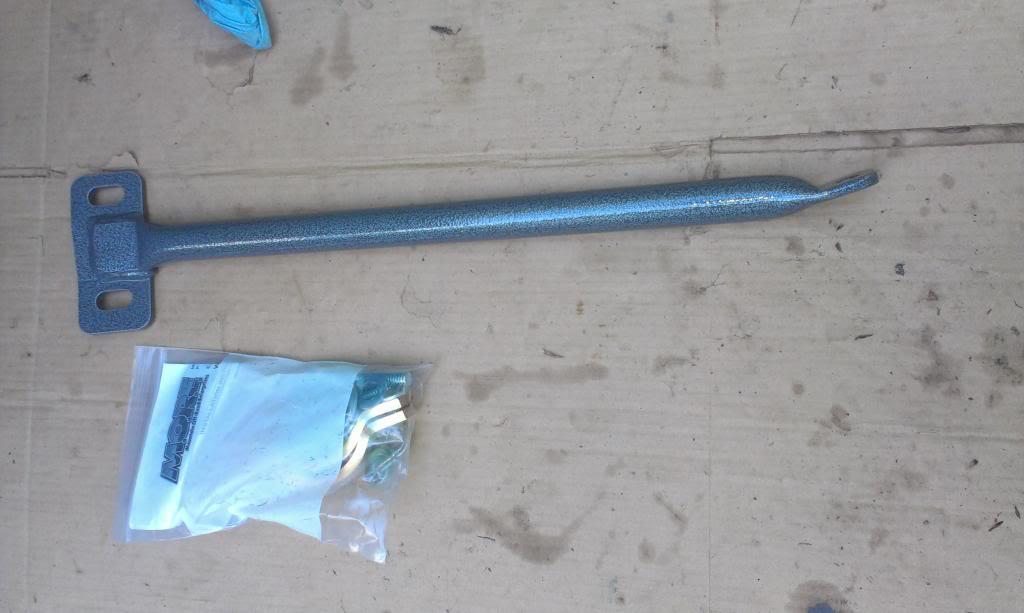
The parts.
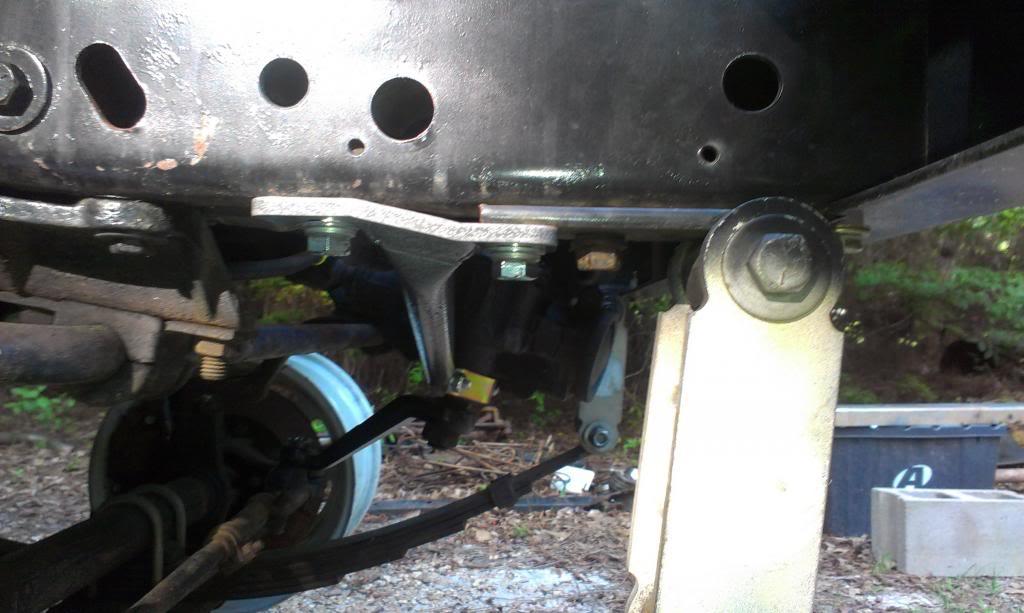
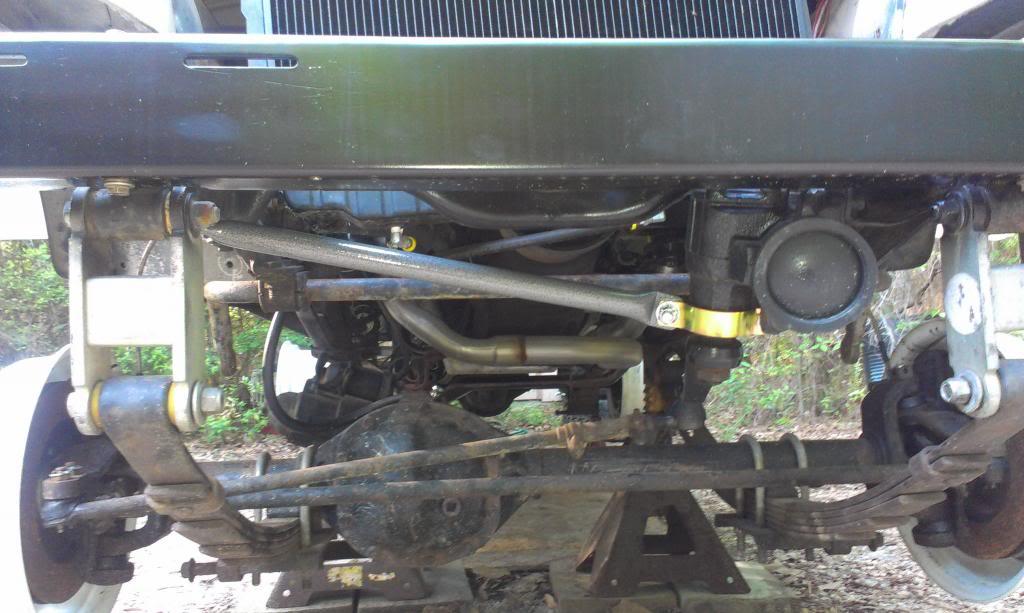
And installed, a simple, bolt on modification, worth its weight in gold, IMO.
I love this Scrambler. The shackle hanger bolts came right out the frame, no rust, no fuss.
Back to paint stripping. After scraping off what the first two cans loosened, I was left with this.
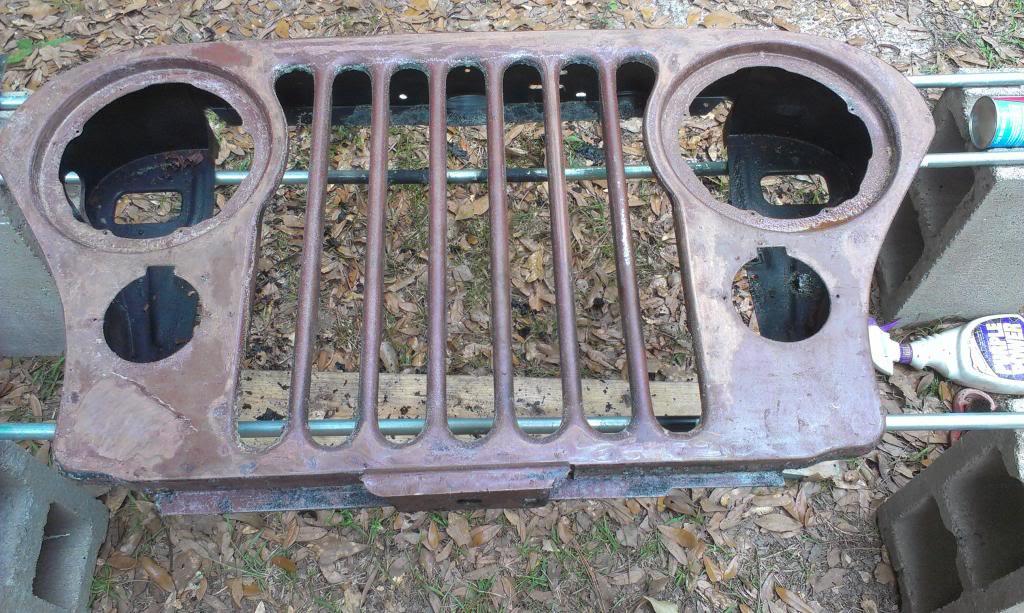
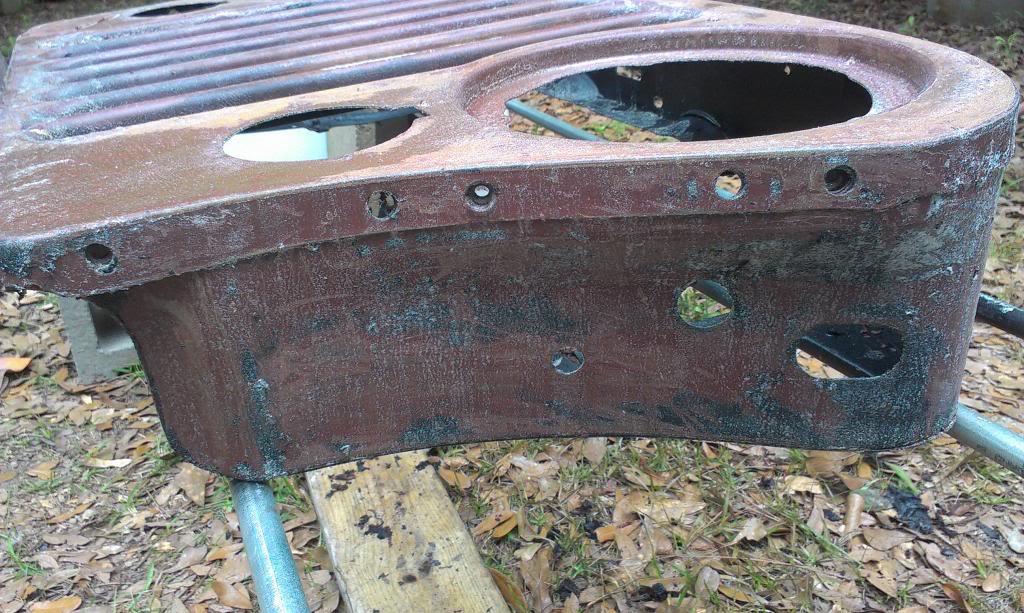
The two spray cans did OK, so I bought a quart of the jell, and here are the results, after two applications/scrapings.
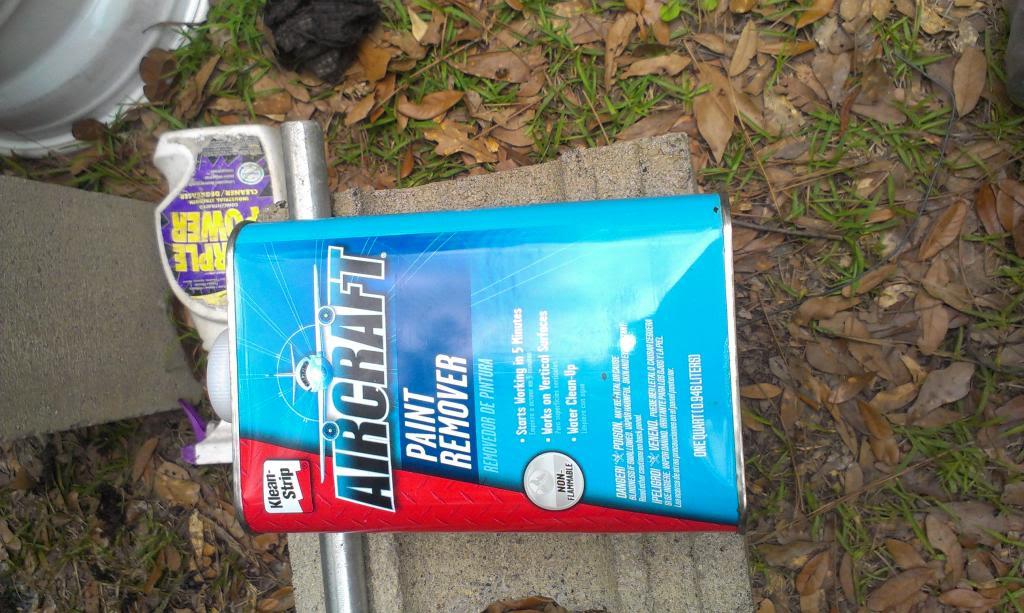
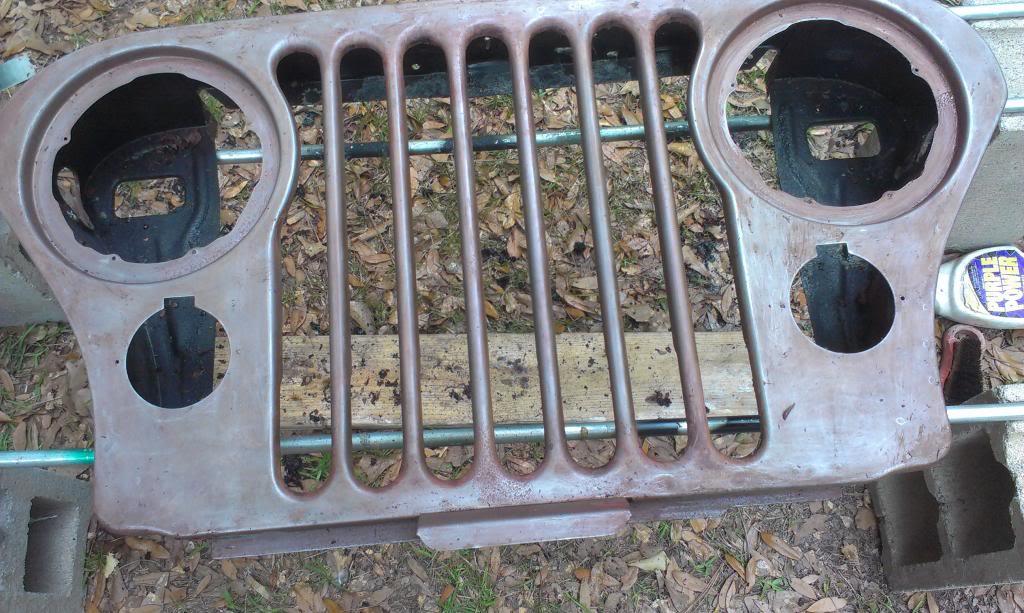
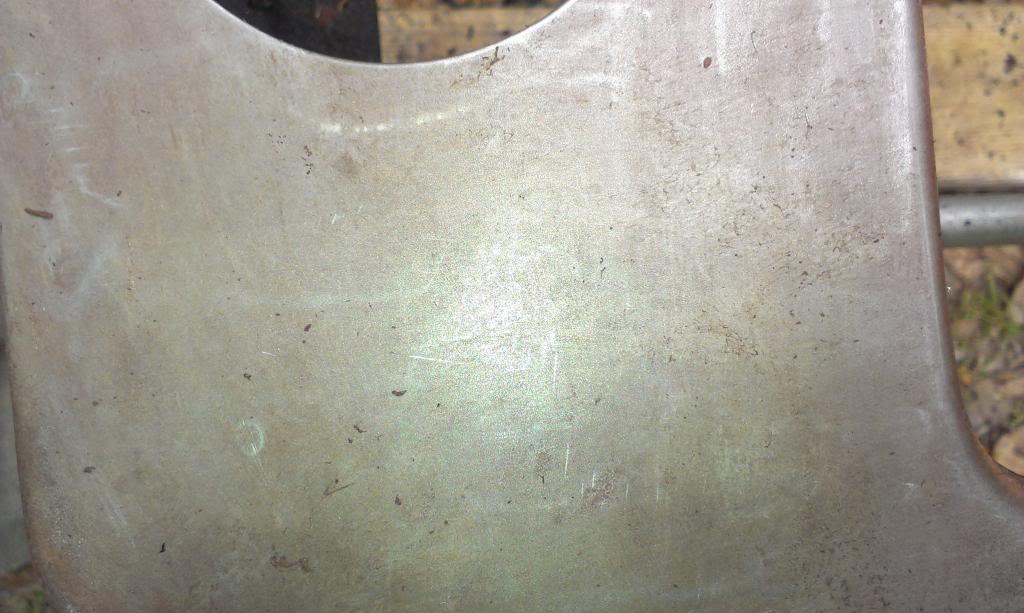
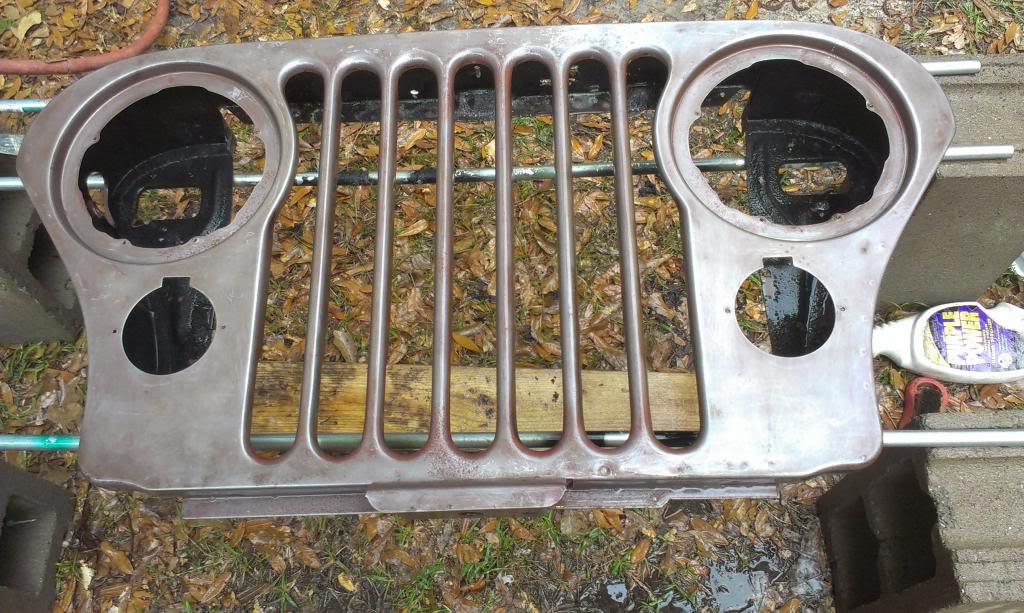
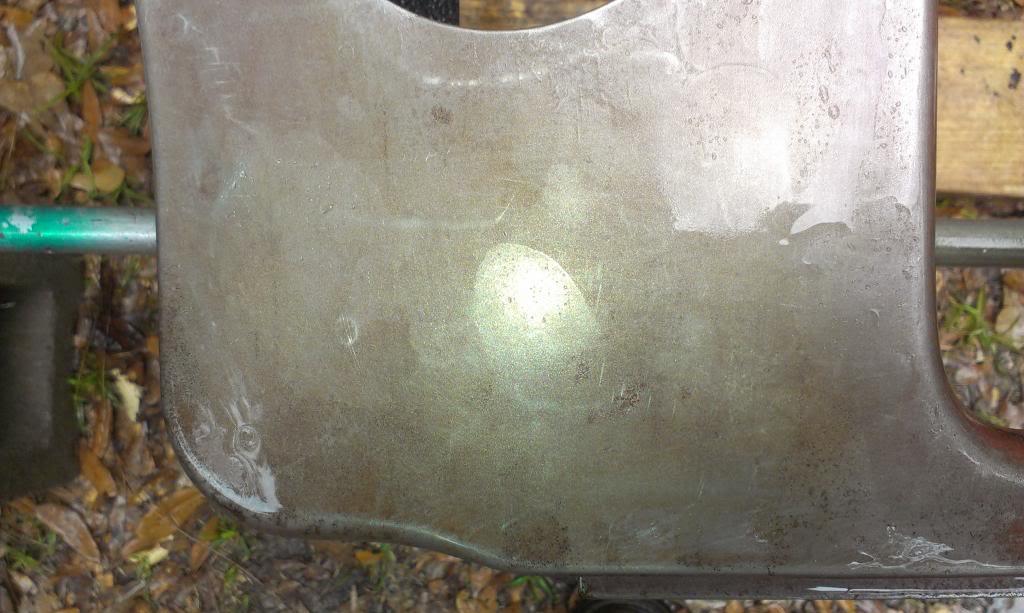
Now, we are getting some where. The stripper, coupled to a bunch of scrubbing with #3 steel wool, worked great on the front/sides, which are easy to sand/scrape/scrub.
Since the front frame was already on jack stands, I decided to install a M.O.R.E. steering box brace. I feel a brace like this should almost be mandatory for any CJ that goes off road, or even on road. There is a bunch of stress on the frame form the PS box, this is a good way to eliminate cracks and bracket failure.
The parts.
And installed, a simple, bolt on modification, worth its weight in gold, IMO.
I love this Scrambler. The shackle hanger bolts came right out the frame, no rust, no fuss.
Back to paint stripping. After scraping off what the first two cans loosened, I was left with this.
The two spray cans did OK, so I bought a quart of the jell, and here are the results, after two applications/scrapings.
Now, we are getting some where. The stripper, coupled to a bunch of scrubbing with #3 steel wool, worked great on the front/sides, which are easy to sand/scrape/scrub.
- City
- Biloxi
- State
- MS
The back, however, sucks. All the nooks and crannies make it hard to scrape/scrub. The stripper worked OK, but much more work is needed.
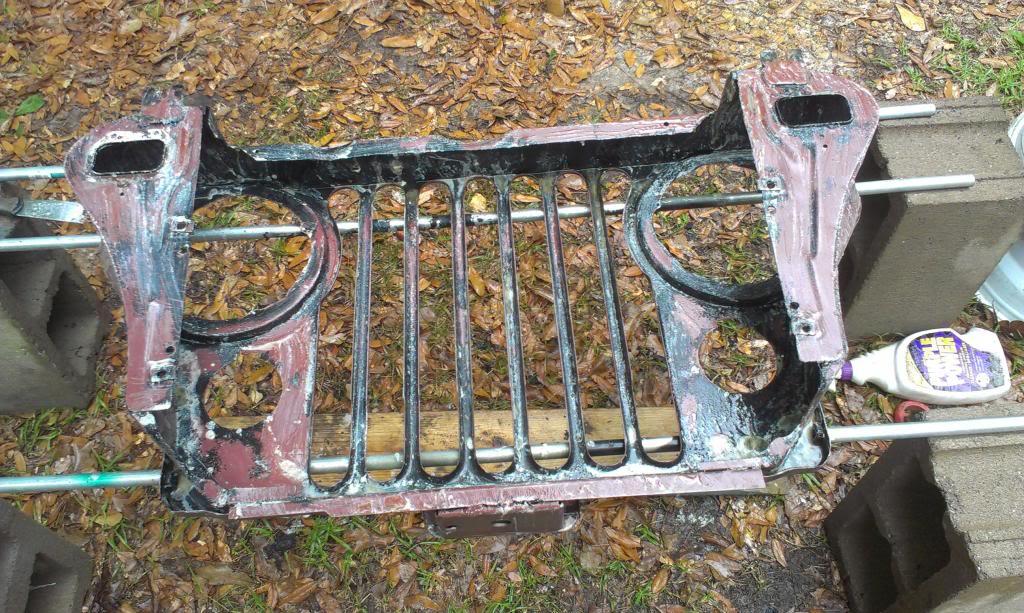
It started to rain, so i built a little "lean-to" over the grill. I put about 3 coats of the jell stripper on.
The jell worked OK, but I used it all up. So, I bought two cans of this stripper. It worked about the same. Most of these strippers, unless environmentally friendly, all have the same active chemical. Unfortunately, the stuff you buy at the store is probably safe/diluted. I wish I could buy some "sure 'nuff/professional strength/melt your eyeballs/burn your skin off" stripper, but I haven't found it at the hardware store yet???
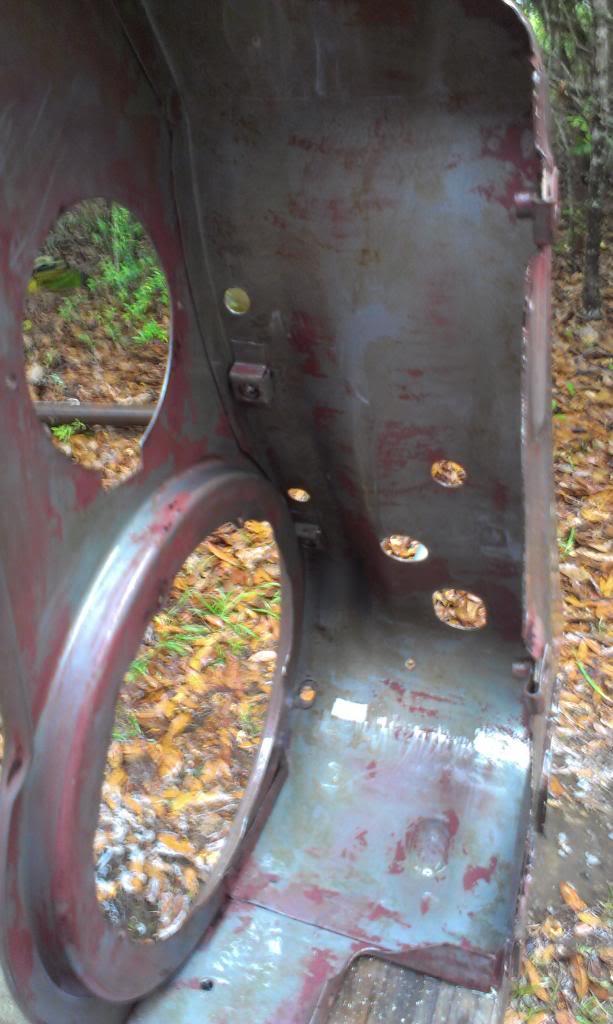
And the results. Worked pretty good. In hind sight, it might have been cheaper to pay someone to sand blast it. I used four cans of stripper, and one quart container, and still have a bunch of mechanical stripping to look forward to. Hind sight is always 20/20.

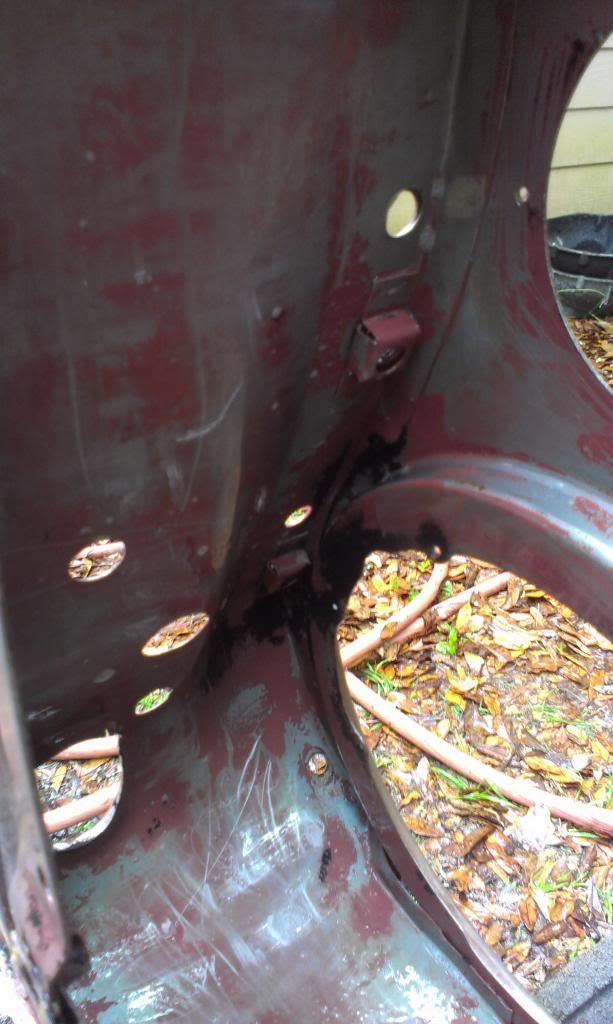
I am probably going to bring the grill to work and blast the hell out of it with the steam cleaner. Hopefully, the stripper loosened the remaining stuff, and the steam might blast it off, finger's crossed. If not, a bunch of sanding to look forward to.
After the stripping, I sprayed on a 1 part phosphoric acid/ 3parts water solution on the metal to prevent flash rust. It still flash rusted. But, I think I should have let the acid sit longer then I did. Sorry for the bad picture.
As for the paint I plan on doing, that is the question. I am going to paint the grill the same color as the rest of the Jeep. I thought about painting it with some already bought touch up paint, but I think it will require too many cans to build up the color enough to match the rest of the Jeep. I was going to prime/paint it with Rust oleum first, then apply the color match paint on top to get it to blend. I found a Rust Oleum "Satin" color that might be a close match. But, I can not apply Acrylic Urethane paint over the enamel Rustoleum paint, so scratch that. I am going to spray some of the Rustoleum color I found on a test piece, to see if t matches "close enough". If not, I might try to find some Duplicolor paint that is a close match. Or, just punt, bring it to a "real" painter. I just hate giving up...........
It started to rain, so i built a little "lean-to" over the grill. I put about 3 coats of the jell stripper on.
The jell worked OK, but I used it all up. So, I bought two cans of this stripper. It worked about the same. Most of these strippers, unless environmentally friendly, all have the same active chemical. Unfortunately, the stuff you buy at the store is probably safe/diluted. I wish I could buy some "sure 'nuff/professional strength/melt your eyeballs/burn your skin off" stripper, but I haven't found it at the hardware store yet???
And the results. Worked pretty good. In hind sight, it might have been cheaper to pay someone to sand blast it. I used four cans of stripper, and one quart container, and still have a bunch of mechanical stripping to look forward to. Hind sight is always 20/20.
I am probably going to bring the grill to work and blast the hell out of it with the steam cleaner. Hopefully, the stripper loosened the remaining stuff, and the steam might blast it off, finger's crossed. If not, a bunch of sanding to look forward to.
After the stripping, I sprayed on a 1 part phosphoric acid/ 3parts water solution on the metal to prevent flash rust. It still flash rusted. But, I think I should have let the acid sit longer then I did. Sorry for the bad picture.
As for the paint I plan on doing, that is the question. I am going to paint the grill the same color as the rest of the Jeep. I thought about painting it with some already bought touch up paint, but I think it will require too many cans to build up the color enough to match the rest of the Jeep. I was going to prime/paint it with Rust oleum first, then apply the color match paint on top to get it to blend. I found a Rust Oleum "Satin" color that might be a close match. But, I can not apply Acrylic Urethane paint over the enamel Rustoleum paint, so scratch that. I am going to spray some of the Rustoleum color I found on a test piece, to see if t matches "close enough". If not, I might try to find some Duplicolor paint that is a close match. Or, just punt, bring it to a "real" painter. I just hate giving up...........
- City
- Biloxi
- State
- MS
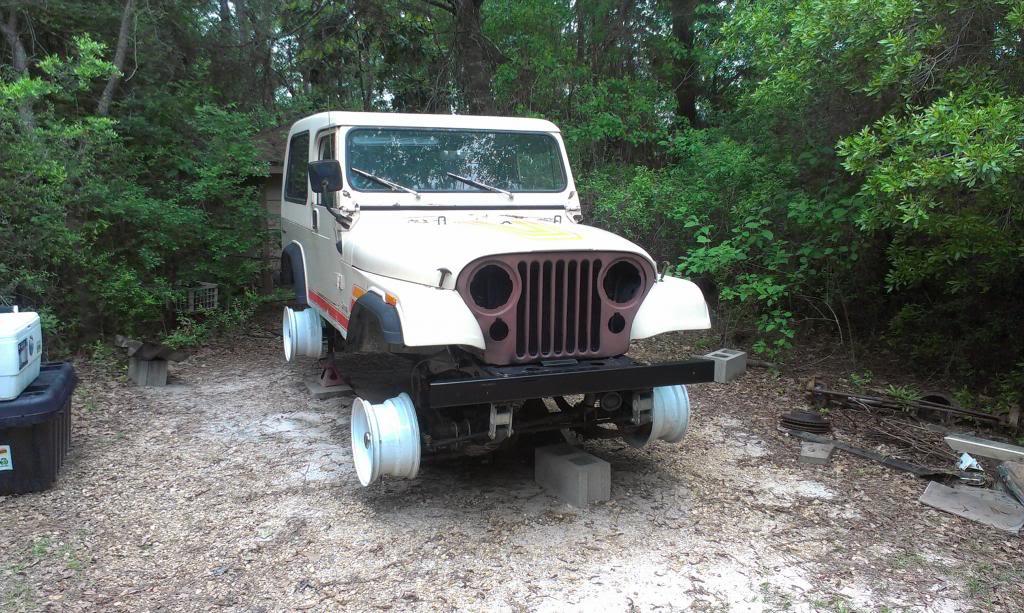
Last, but not least, my favorite "progress picture"
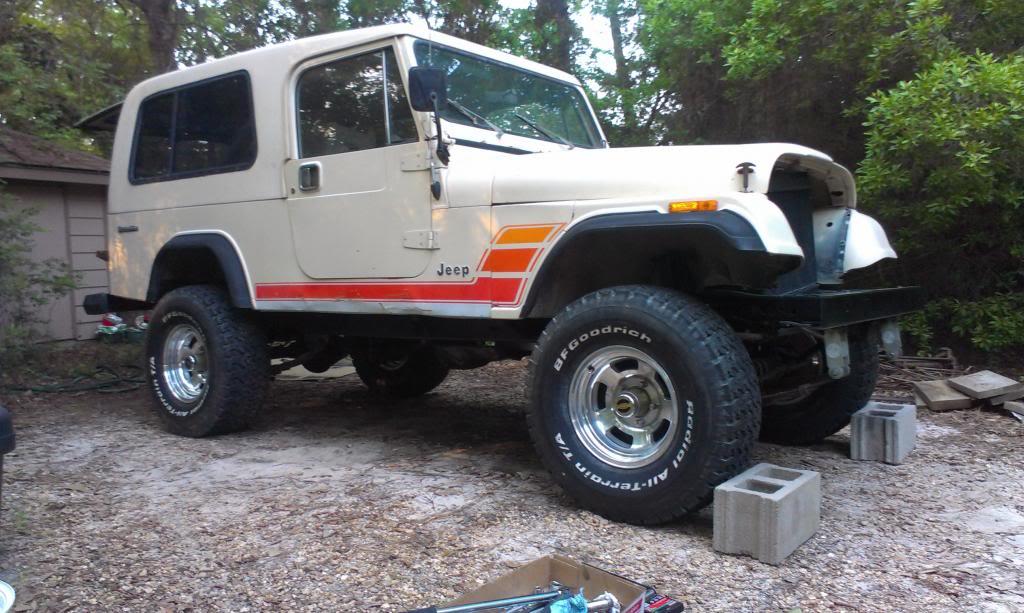
I finally installed the wheels/tires. It is starting to look like a Scrambler again, and, looks bad azz, if I do say so myself
I currently have them bolted on with the lug nuts that came with the steel rims, which are the incorrect type. They are only finger tight, so no harm. I already went out and bought the correct lug nuts, so easy fix.
The bigger issue: I went to torque all the suspension bolts down,:
1) Shackles to 24 foot pounds, no problem
2) U-bolts to 55 foot pounds, no problem (Superlift says 85, but at 55 the stock plates are almost bending, so 55 for me)
3) Main eye bolts, 100 foot pounds, PROBLEM.
I do not think the PO installed the steel sleeves inside the main eye bushings. I started to bend the first (and only)spring hanger inward that I attempted, before I reached torque. If the sleeves are installed, this will not happen. So, I get to take it all back apart, and install some sleeves. My good buddy Chuck has some I can have, so at least that issue is solved. It just sucks to take it all back apart again, but so be it. At least I will know it is "done right".
That's it for now
I finally installed the wheels/tires. It is starting to look like a Scrambler again, and, looks bad azz, if I do say so myself
I currently have them bolted on with the lug nuts that came with the steel rims, which are the incorrect type. They are only finger tight, so no harm. I already went out and bought the correct lug nuts, so easy fix.
The bigger issue: I went to torque all the suspension bolts down,:
1) Shackles to 24 foot pounds, no problem
2) U-bolts to 55 foot pounds, no problem (Superlift says 85, but at 55 the stock plates are almost bending, so 55 for me)
3) Main eye bolts, 100 foot pounds, PROBLEM.
I do not think the PO installed the steel sleeves inside the main eye bushings. I started to bend the first (and only)spring hanger inward that I attempted, before I reached torque. If the sleeves are installed, this will not happen. So, I get to take it all back apart, and install some sleeves. My good buddy Chuck has some I can have, so at least that issue is solved. It just sucks to take it all back apart again, but so be it. At least I will know it is "done right".
That's it for now
Last edited:
- City
- Biloxi
- State
- MS
The mechanic that rebuilt my D300 (I feel so very lame saying that in this thread) told me about the grey RTV, he swears by it for gear oil.
I have had good luck with regular RTV, I saw this stuff, figured "what the heck"
Don't feel bad at all about the transfer case, they take me awhile to do, and can be frustrating at times. If I knew someone down here, that I could "trust", to do it right, I might take them there. But, now that I have rebuilt 4 in the last few years, and none have blown up yet, I feel comfortable with them. But, between cleaning, disassembling, pressing, checking, etc, I probably have about 20-25 hours into it 

Nice.... May need a little more rubber on those wheels though. LOW rider Jeeps are just not kool.
Fixed it for you, check the last picture

- City
- Biloxi
- State
- MS
Much more Sand Friendly now!
Until I get it running/driving, it is going to be pretty tough to "push" through the sand, but I have been practicing up on my "make engine sounds with mouth skillz"

- City
- God's Country
- State
- AR
You can get auto paint in spray cans from Paintscratch.com. I got a couple of cans to do my inner fenders and back part of my grill when i got my Jeep painted. Is that paint 3A Almond Beige or is it some non-stock color that is close to Almond Beige?

