

You are using an out of date browser. It may not display this or other websites correctly.
You should upgrade or use an alternative browser.
You should upgrade or use an alternative browser.
Spankrjs' 1984 Long Term Project
- Thread starter spankrjs
- Start date


- City
- Biloxi
- State
- MS
Nice!!!
Appreciate it

For painting it in the backyard, on my redneck paint stand outside, using rattle cans, I think it came out pretty good


It will feel/look good to bolt the grill back on, with all the lights etc. It will look like a "real" Jeep again


scramfan01
Basic User
- City
- taylorsville
- State
- ky
Nice, well thought out work, as usual.
- City
- Biloxi
- State
- MS
Looks good to me. I can tell you were really sweating this out. Glad it lightened for you and here's to no adverse effects in the future.
Appreciate it
Since I didn't have to use the Rustoleum, I shouldn't have any paint compatibility issuesOnce everything is buffed out and you have all the lights and trim rings on and a winch sitting in front of it, no one will ever notice any color difference. Nice job!
Yep, that's what I am thinking, too
The paint already feels cured, but I am going to wait a few days, then gently buff the grill out, and call it doneNice, well thought out work, as usual.
Appreciate it
- City
- Biloxi
- State
- MS
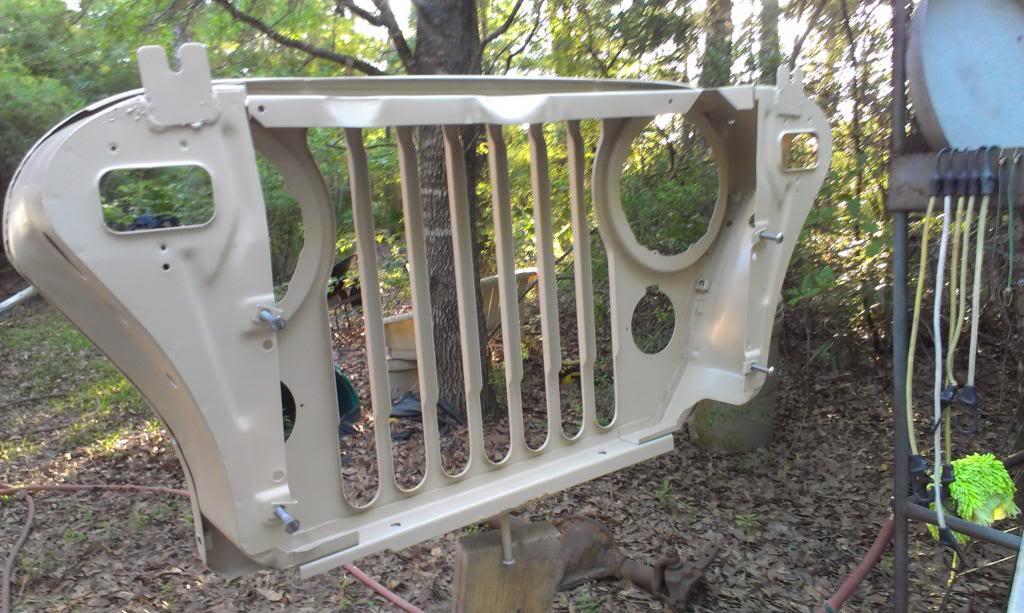
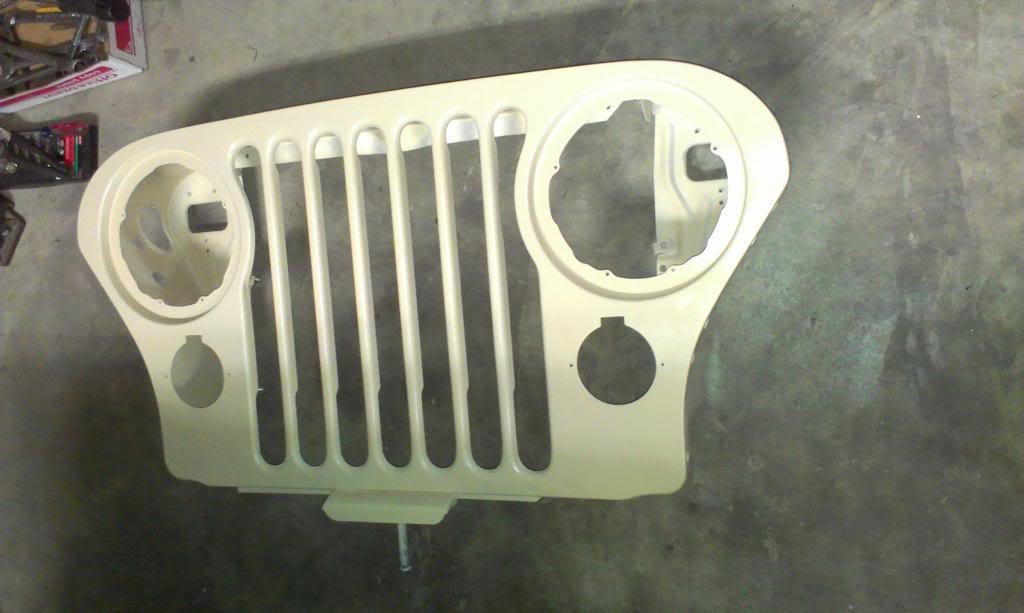
One more "paint the grill update".
I was able to spray some clear over the grill late yesterday. I used one can of clear, and was able to get about 5 light coats on it.
And again, the side facing the sun looks more brown.

But the back side, away from the sun, looks like the correct color.
After spraying the clear, I started back on some other "small" projects. I have been kind of in a "rut" here lately, feeling like I am not making forward progress. So, I am going to start tackling some smaller projects to get moving again.
I finally bolted on the torque converter inspection cover. I was able to get 5 of the 6 bolts in, the exhaust is preventing me from installing one of the bolts, but it is not going anywhere.
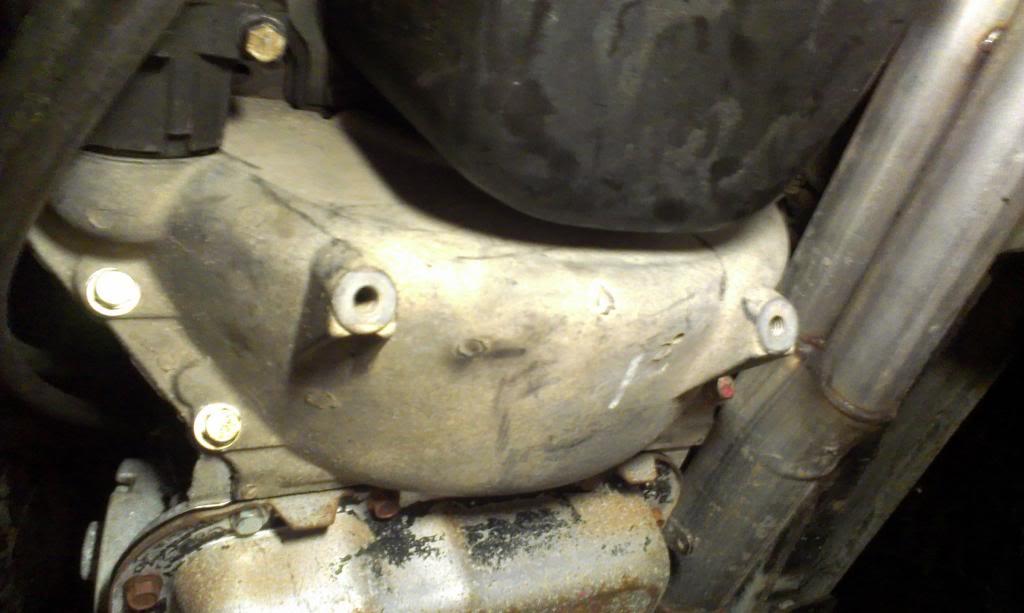
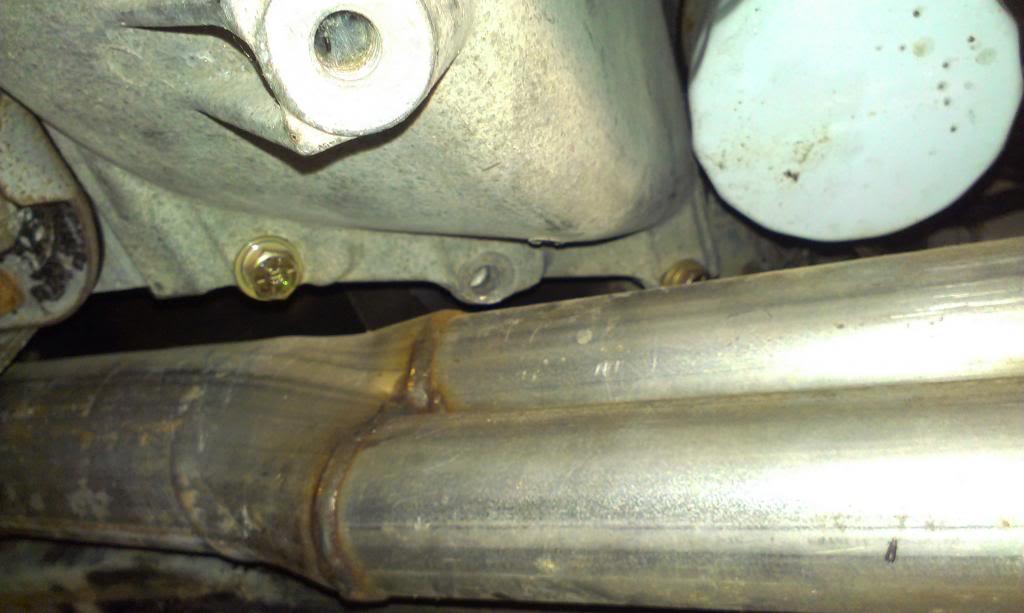
I also hooked up the transmission cooler lines to the transmission. They have been just dangling. Small step, but progress. I am going to fabricate/purchase/install some type of bracket to help secure the lines to the recently bolted on inspection cover, probably not needed, but it bugs me.
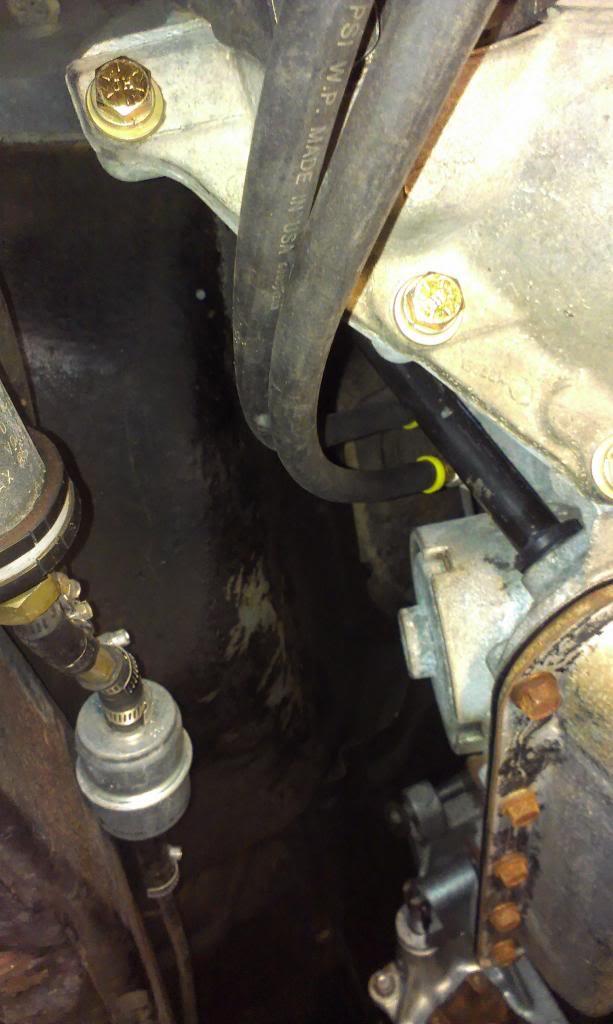
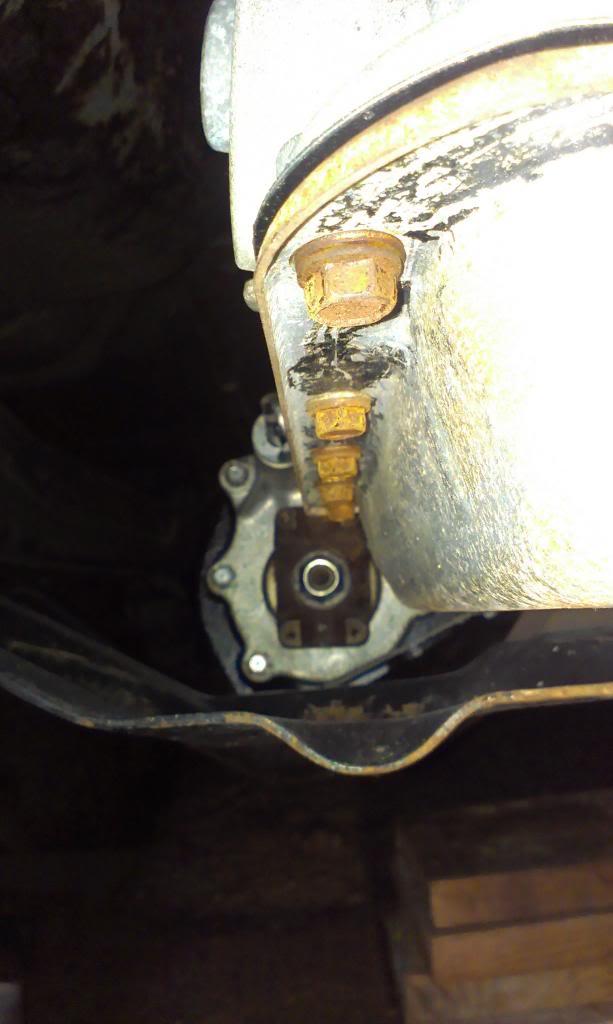
And since I was laying on the ground down there, quick picture showing the front drive shaft clearance concerns. It is tight, but it should clear (FINGERS CROSSED). I am currently having a front drive shaft made, and I am also having the rear drive shaft shortened, due to the increased length of the Advance Adapter's HD Dana 300 rear output. The new output is 1" longer, and the existing drive shaft was a hair too long, i.e. on compression it would have bottomed out hard.
After a couple of hours, the grill looks the correct color again. It could also be the bright, overhead lighting, too.
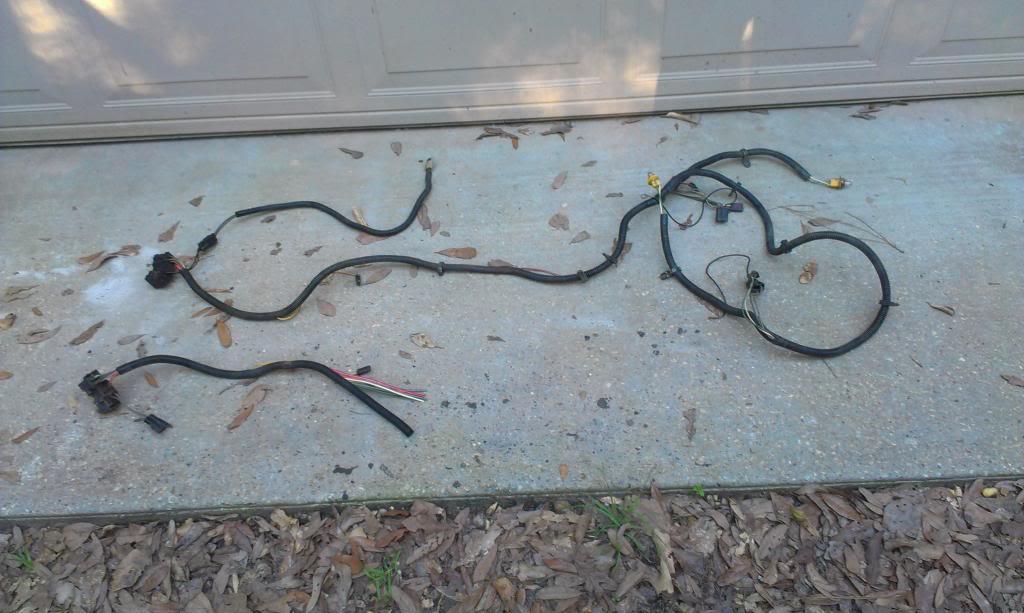
I also removed my "cut in 1/2" front light harness, so I can install my recently acquired "not cut in 1/2" front light harness. Full one at top, half one at bottom. I could have fixed the old one, but it would have been pretty butch. I think this is a cleaner/simpler/easier fix.
Two quick pictures from this morning, I really believe the grill matches pretty darn good now.
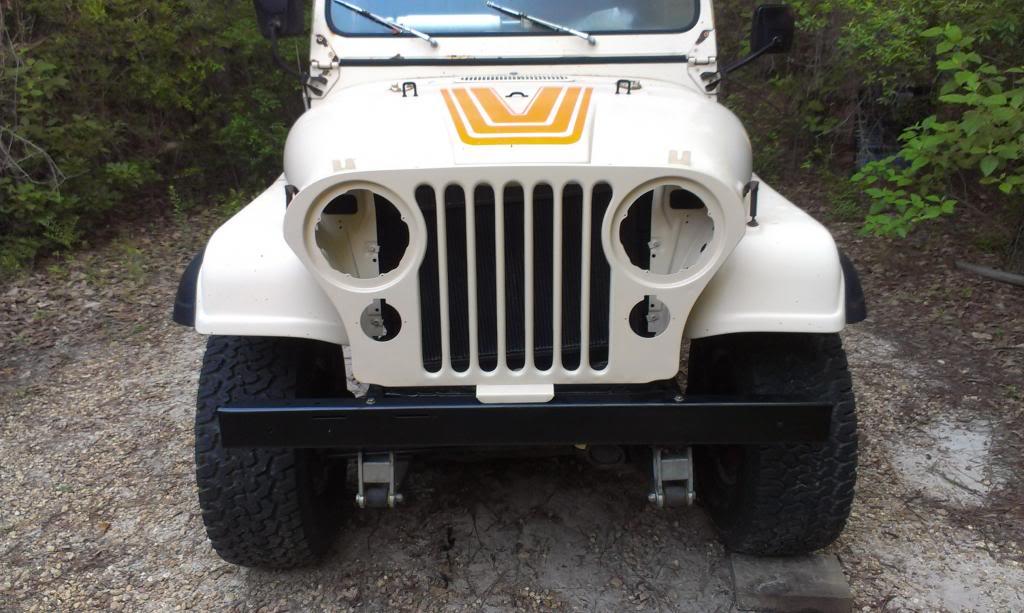
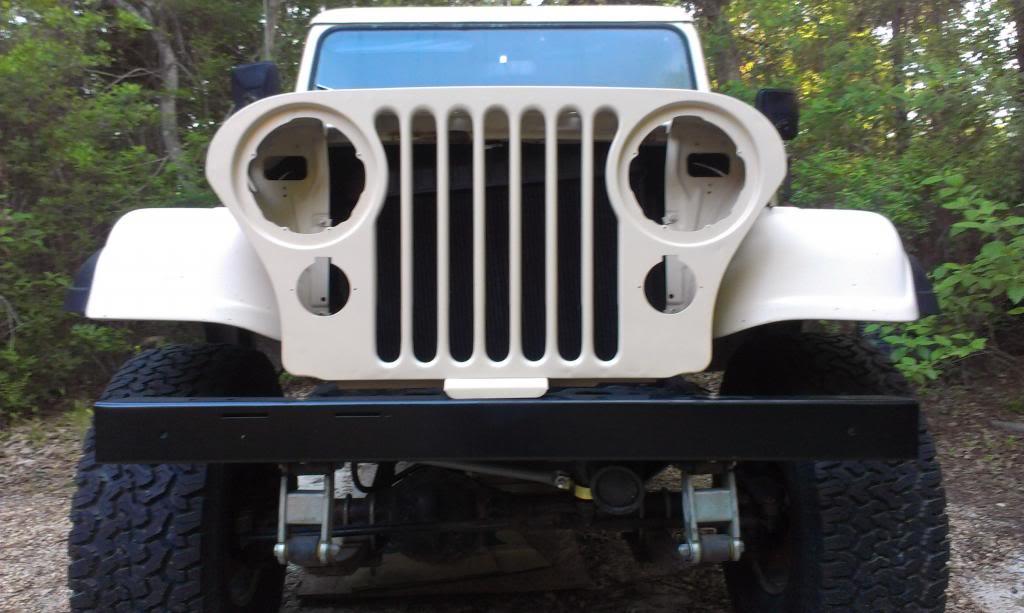
I am going to wait a few days, then buff/install the front grill and all of the lights. I also need to spend some time adjusting the hood/fenders. They were quickly bolted back on by the previous owner, and they need a little adjusting/finish installing/bolting down.
I also plan on pulling off the fuel pump and running new return/supply fuel lines. I have an 8' straight stick of 1/4"/5/16"/3/8" steel tube, just need to bend them up. I plan on running both lines down the passenger side frame rail, since that is what side the lines come off of the engine on.
Will 5/16" be large enough for a V8 supply line, or should I step up to 3/8"? I need to see what size line are on the engine.
I also plan on swapping out the current clutch/brake pedal assembly for the auto trans brake only assembly I have. I forgot how much stuff I have to remove to swap them out!!
And, hopefully, install the leaf spring main eye bushing sleeves, and then install all the sway bar stuff.
That's it for now.
I was able to spray some clear over the grill late yesterday. I used one can of clear, and was able to get about 5 light coats on it.
And again, the side facing the sun looks more brown.
But the back side, away from the sun, looks like the correct color.
After spraying the clear, I started back on some other "small" projects. I have been kind of in a "rut" here lately, feeling like I am not making forward progress. So, I am going to start tackling some smaller projects to get moving again.
I finally bolted on the torque converter inspection cover. I was able to get 5 of the 6 bolts in, the exhaust is preventing me from installing one of the bolts, but it is not going anywhere.
I also hooked up the transmission cooler lines to the transmission. They have been just dangling. Small step, but progress. I am going to fabricate/purchase/install some type of bracket to help secure the lines to the recently bolted on inspection cover, probably not needed, but it bugs me.
And since I was laying on the ground down there, quick picture showing the front drive shaft clearance concerns. It is tight, but it should clear (FINGERS CROSSED). I am currently having a front drive shaft made, and I am also having the rear drive shaft shortened, due to the increased length of the Advance Adapter's HD Dana 300 rear output. The new output is 1" longer, and the existing drive shaft was a hair too long, i.e. on compression it would have bottomed out hard.
After a couple of hours, the grill looks the correct color again. It could also be the bright, overhead lighting, too.
I also removed my "cut in 1/2" front light harness, so I can install my recently acquired "not cut in 1/2" front light harness. Full one at top, half one at bottom. I could have fixed the old one, but it would have been pretty butch. I think this is a cleaner/simpler/easier fix.
Two quick pictures from this morning, I really believe the grill matches pretty darn good now.
I am going to wait a few days, then buff/install the front grill and all of the lights. I also need to spend some time adjusting the hood/fenders. They were quickly bolted back on by the previous owner, and they need a little adjusting/finish installing/bolting down.
I also plan on pulling off the fuel pump and running new return/supply fuel lines. I have an 8' straight stick of 1/4"/5/16"/3/8" steel tube, just need to bend them up. I plan on running both lines down the passenger side frame rail, since that is what side the lines come off of the engine on.
Will 5/16" be large enough for a V8 supply line, or should I step up to 3/8"? I need to see what size line are on the engine.
I also plan on swapping out the current clutch/brake pedal assembly for the auto trans brake only assembly I have. I forgot how much stuff I have to remove to swap them out!!
And, hopefully, install the leaf spring main eye bushing sleeves, and then install all the sway bar stuff.
That's it for now.

- City
- Biloxi
- State
- MS
With all your jeep projects, you need a bigger garage or shop. You could have a full time job doing this when you retire.
Nope, if I had a bigger garage/shop/yard, I would just have a bunch more "projects"
I think once I get this one back together and running, I might take a little "break"........................nah
- City
- Biloxi
- State
- MS
Switching gears from painting to plumbing.
I was not too happy with the current fuel supply/return set up. The fuel pump was mounted near the front spring hanger, the return line was "t'd" into the supply line right in front of the electric pump, generally, just didn't like it.
My new plan:
Mount pump on rear cross member (the one that holds up the front of the fuel tank)
Run new supply/return lines down the passenger side frame rail (on this engine, the supply/return pickups are both on passenger side, right in front of the motor mount)
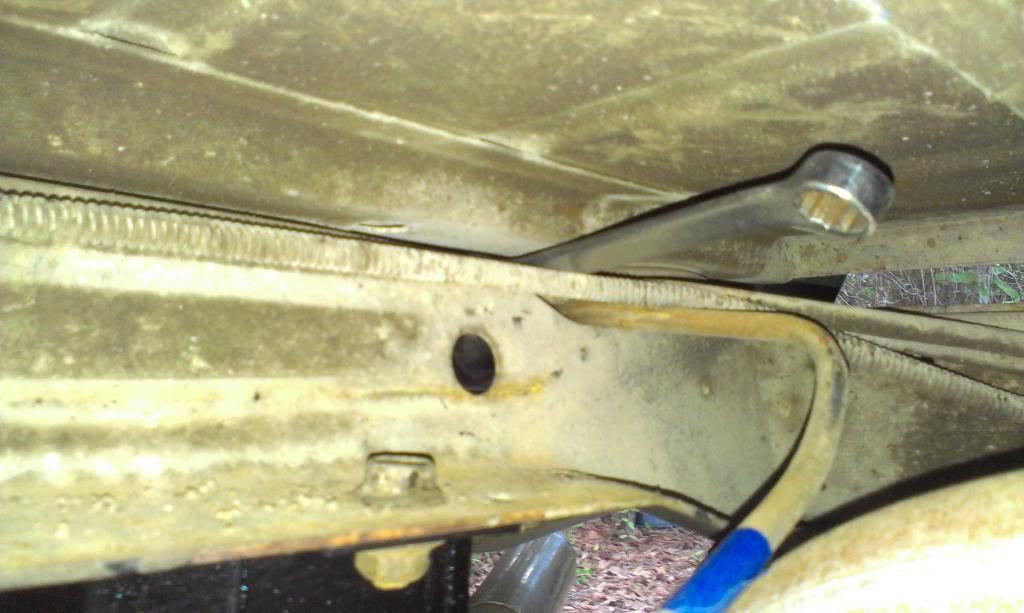
First up, taking off the old fuel supply line. The blue tape shows where I plan on cutting the line. I am going to reuse a short piece of the original line, from the tank to the cross member. The 3 lines that pass over the cross member and go to the back, are secured by a hidden clamp. There is a bolt that holds the clamp down, in the below picture the wrench is on it. It is very much fun to loosen/tighten!!!
Quick picture of the old plumbing removed. Note the "T'd" in return line.
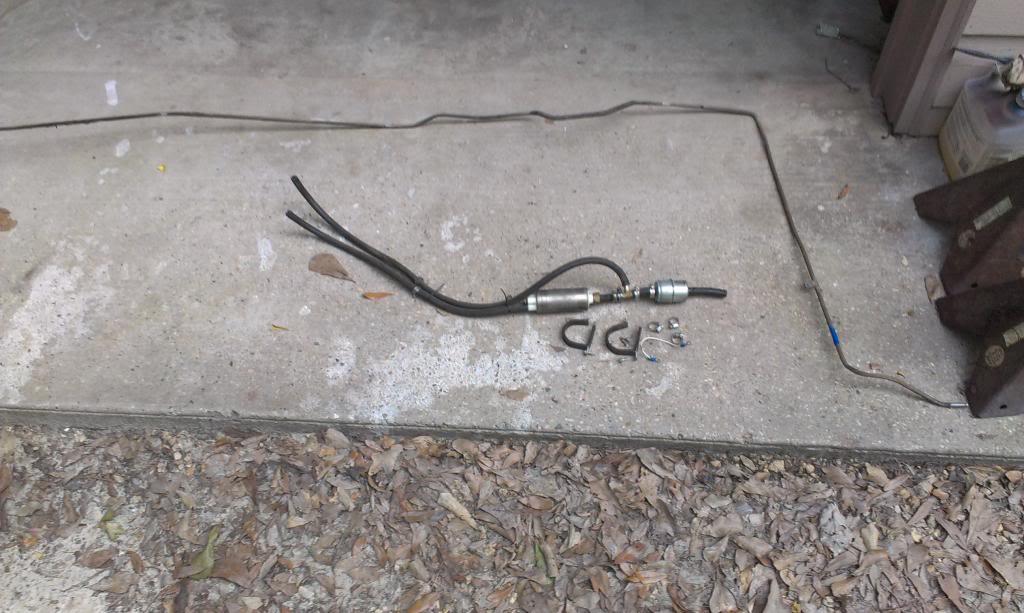
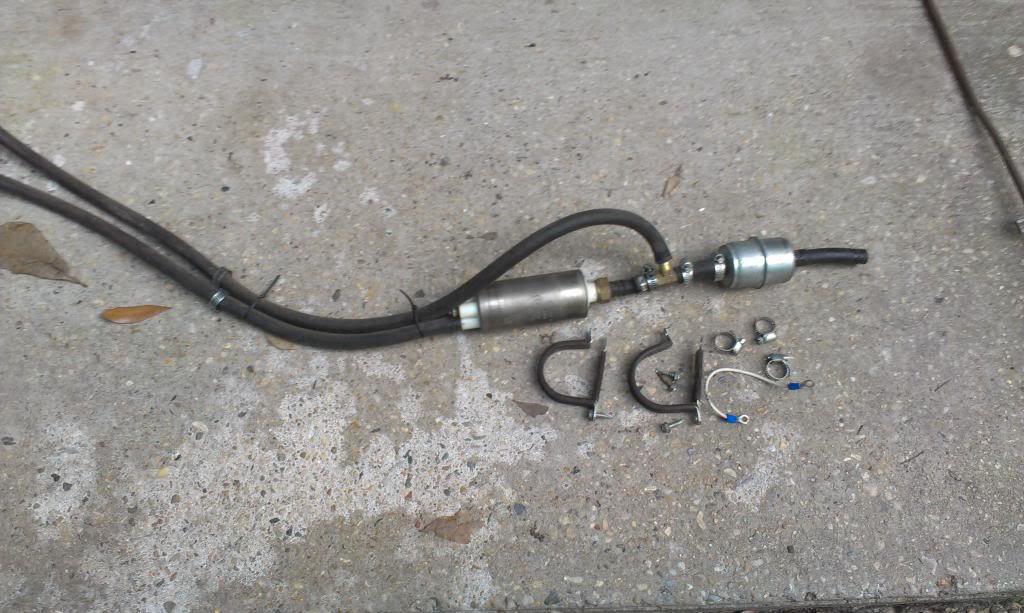
And the easy part cutting, the old line and flaring the end. This short piece of line will tie into the rubber supply line on top of the gas tank, then pass over the cross member, then turn 90 degrees toward the passenger frame rail. I will tie my filter/pump at this point.

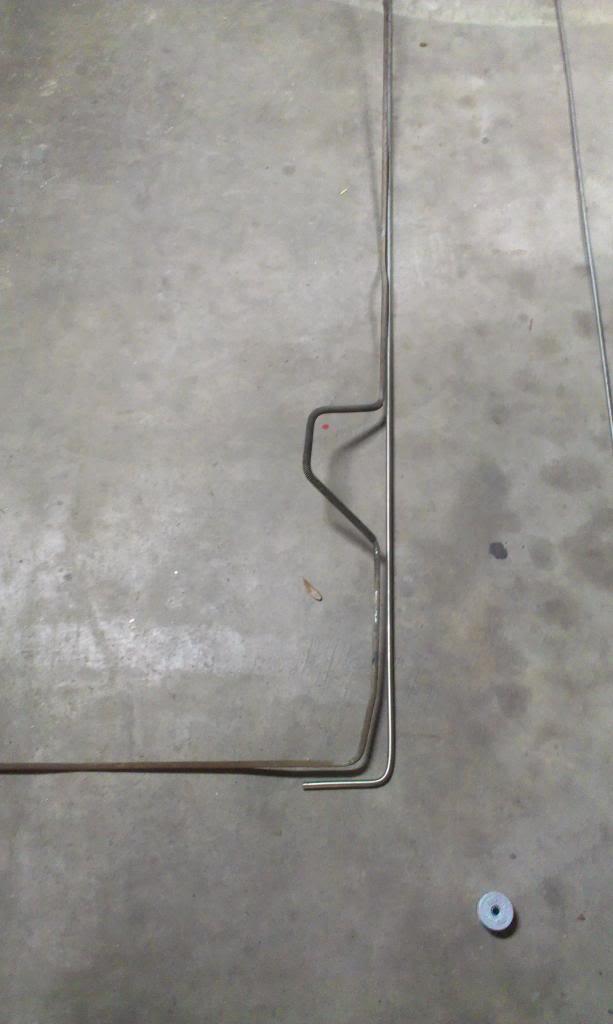
Quick picture of my new lines next to the original. In a "lack of planning moment", I only bought 8' long pieces of tubing. This will work, and the hard lines will end right at the front spring hangers. In hind sight, I wish I would have bought 10' long pieces of tubing, this would have brought the hard line almost to the engine mount, and would only require approximately 6" pieces of rubber line. With my 8' pieces, I am going to have to run 18" long pieces of rubber line. Not the end of the world, but hind sight is always 20/20. The tubing I purchased is .035, stainless. I bought it from a local hydraulic/pneumatic repair shop.
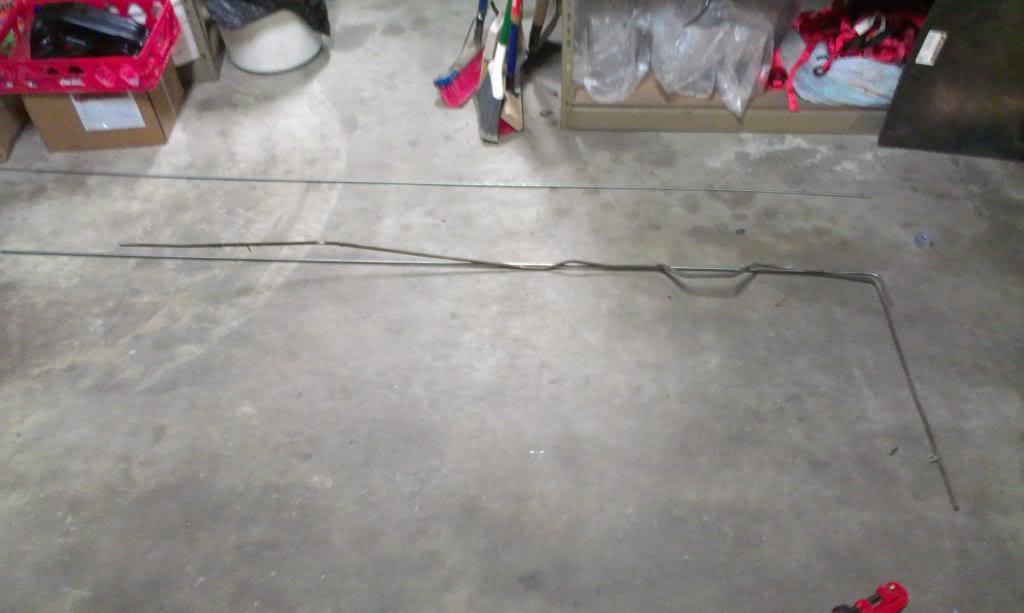
The factory supply line has the weird "bump out, go around, then go back to the frame" bend. This is to clear the old style, full bodied shocks. Since I am running newer shocks, with only the "shiney rod" passing next to the frame, I do not need to make this weird "clearance bend".
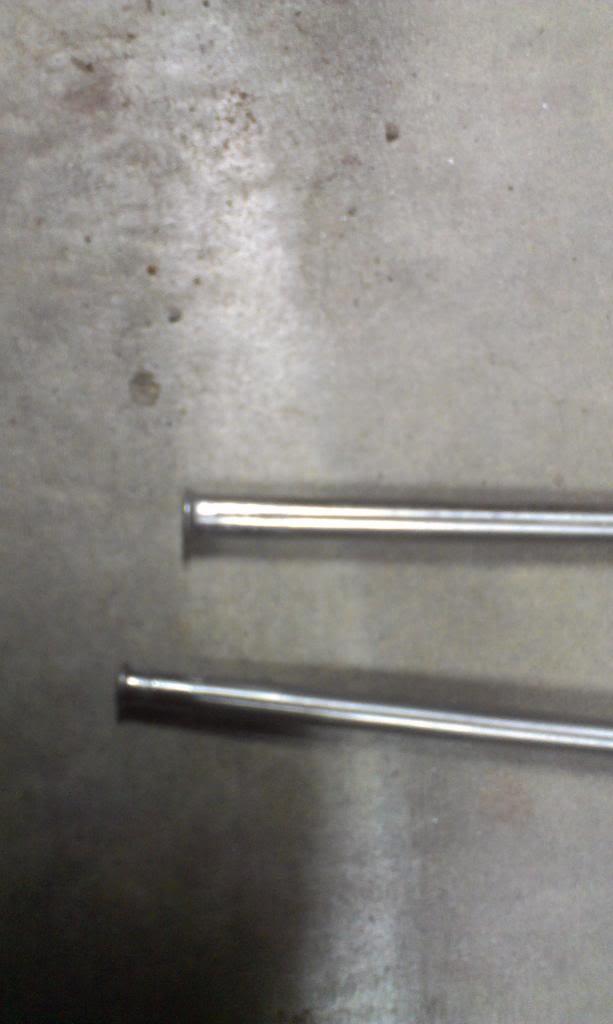
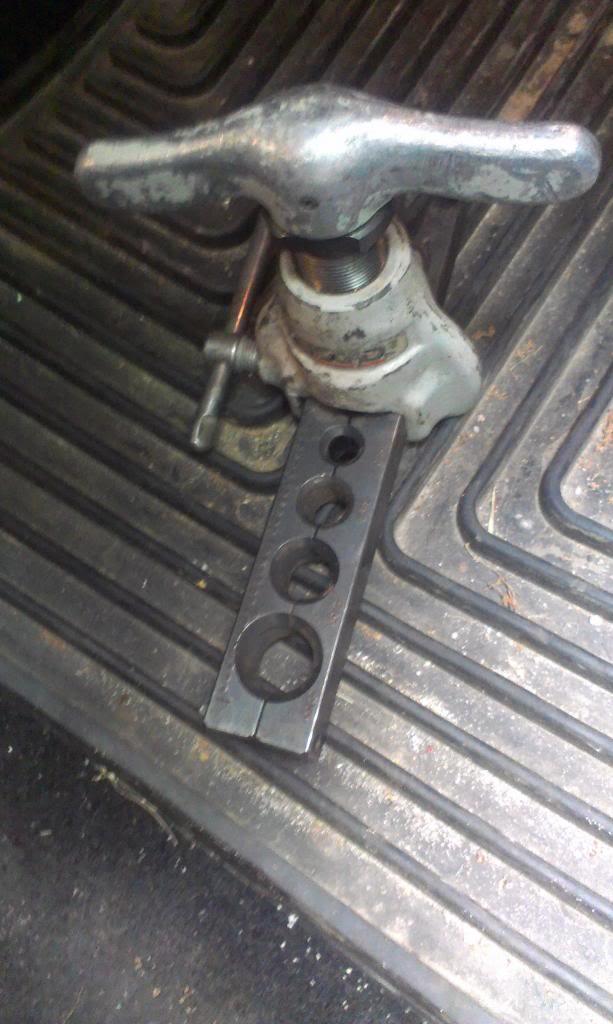
And the most frustrating part, making "flared/bump out ridges" on the ends of the metal line to help secure the rubber lines. I should have learned my lessen with this when I was messing around with my lines from In Line Tube on the red Scrambler - typical POS flare tools will not touch SS tubing, easily!!!!
After about 4 hours of frustration/cursing, I was able to make some "flares" on the ends of the lines. In hindsight, I should have let the hydraulic shop do this. Not the pretties job, but it will work.

I need to clean all the old grease/oil grime off the frame rail, then start mounting up these new lines. I am going to start at the back, and work forward. I am going to bend them as I go, so lots of "off/on/mock up/take on/take off" to get them how I want them.
I also plan on cutting off a short section of the original hard return line, and rebending it to face the passenger side frame rail, much like I did with the original supply line. Since the original return line is on the driver side, and runs/secure with the vent and rear brake line, I will most probably cap the ends of it, and "abandon it in place". If I remove it, the factory clamps will not secure the other two lines too good.
Once I get finished with this plumbing work, then I can work on getting the engine fired up!!!
That's it for now.
I was not too happy with the current fuel supply/return set up. The fuel pump was mounted near the front spring hanger, the return line was "t'd" into the supply line right in front of the electric pump, generally, just didn't like it.
My new plan:
Mount pump on rear cross member (the one that holds up the front of the fuel tank)
Run new supply/return lines down the passenger side frame rail (on this engine, the supply/return pickups are both on passenger side, right in front of the motor mount)
First up, taking off the old fuel supply line. The blue tape shows where I plan on cutting the line. I am going to reuse a short piece of the original line, from the tank to the cross member. The 3 lines that pass over the cross member and go to the back, are secured by a hidden clamp. There is a bolt that holds the clamp down, in the below picture the wrench is on it. It is very much fun to loosen/tighten!!!
Quick picture of the old plumbing removed. Note the "T'd" in return line.
And the easy part cutting, the old line and flaring the end. This short piece of line will tie into the rubber supply line on top of the gas tank, then pass over the cross member, then turn 90 degrees toward the passenger frame rail. I will tie my filter/pump at this point.
Quick picture of my new lines next to the original. In a "lack of planning moment", I only bought 8' long pieces of tubing. This will work, and the hard lines will end right at the front spring hangers. In hind sight, I wish I would have bought 10' long pieces of tubing, this would have brought the hard line almost to the engine mount, and would only require approximately 6" pieces of rubber line. With my 8' pieces, I am going to have to run 18" long pieces of rubber line. Not the end of the world, but hind sight is always 20/20. The tubing I purchased is .035, stainless. I bought it from a local hydraulic/pneumatic repair shop.
The factory supply line has the weird "bump out, go around, then go back to the frame" bend. This is to clear the old style, full bodied shocks. Since I am running newer shocks, with only the "shiney rod" passing next to the frame, I do not need to make this weird "clearance bend".
And the most frustrating part, making "flared/bump out ridges" on the ends of the metal line to help secure the rubber lines. I should have learned my lessen with this when I was messing around with my lines from In Line Tube on the red Scrambler - typical POS flare tools will not touch SS tubing, easily!!!!
After about 4 hours of frustration/cursing, I was able to make some "flares" on the ends of the lines. In hindsight, I should have let the hydraulic shop do this. Not the pretties job, but it will work.
I need to clean all the old grease/oil grime off the frame rail, then start mounting up these new lines. I am going to start at the back, and work forward. I am going to bend them as I go, so lots of "off/on/mock up/take on/take off" to get them how I want them.
I also plan on cutting off a short section of the original hard return line, and rebending it to face the passenger side frame rail, much like I did with the original supply line. Since the original return line is on the driver side, and runs/secure with the vent and rear brake line, I will most probably cap the ends of it, and "abandon it in place". If I remove it, the factory clamps will not secure the other two lines too good.
Once I get finished with this plumbing work, then I can work on getting the engine fired up!!!
That's it for now.
- City
- Biloxi
- State
- MS
The more I think about it, and the more I research, and since the engine is set up this way, and I already have a 10' stick of line, I think I am going to run a 3/8 supply/5/16 return lines. I will still have a "choke point" at the tank, since the factory sending unit is 5/16 OUT/1/4" IN, but this should help alleviate this
Other people say 5/16 Supply/1/4" Return will work fine, but since I already have the lines, maybe better off safe then sorry, and one less thing to worry about
Other people say 5/16 Supply/1/4" Return will work fine, but since I already have the lines, maybe better off safe then sorry, and one less thing to worry about

- City
- Baton Rouge
- State
- La
That grill matches great. I bet the whole jeep was painted that way.
- City
- Biloxi
- State
- MS
A little bit more work complete.
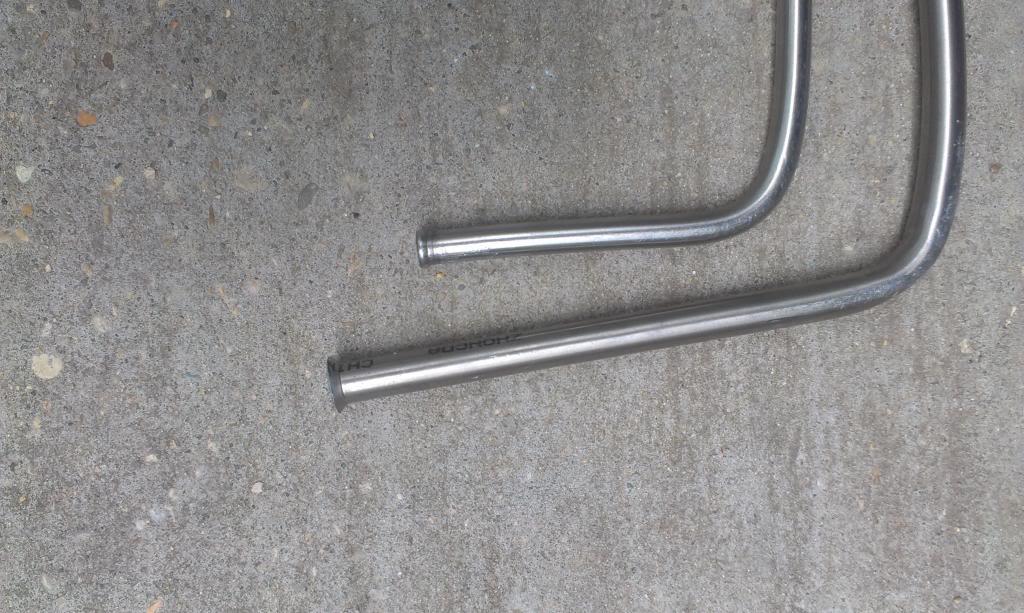
I borrowed a different flaring tool, and had a little bit better luck flaring the ends of the stainless lines.
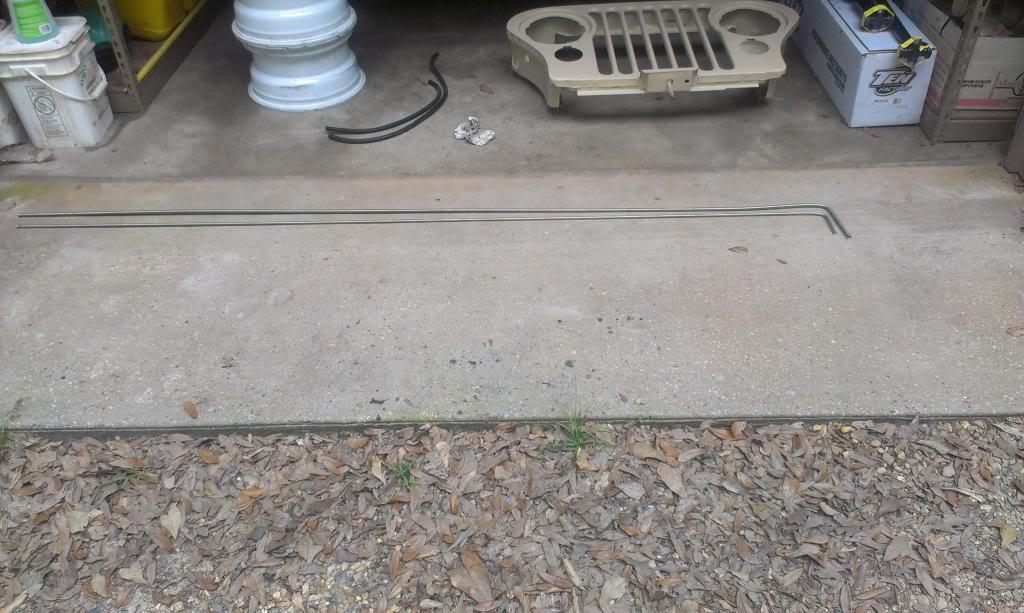
And a picture of my new "supply/return" lines, pretty long, wish they were a hair longer, but they should work.
I am going to take a small break from the plumbing for now, still not 100% happy with it. It should work, I just need to get down there and route/bend/install them. I was thinking about purchasing a stock 5/16 supply and a 3/8 supply, bent just like the 5/16 line, to run. They might look a little better, and be a bit longer, but my "fabricated" lines should work fine.
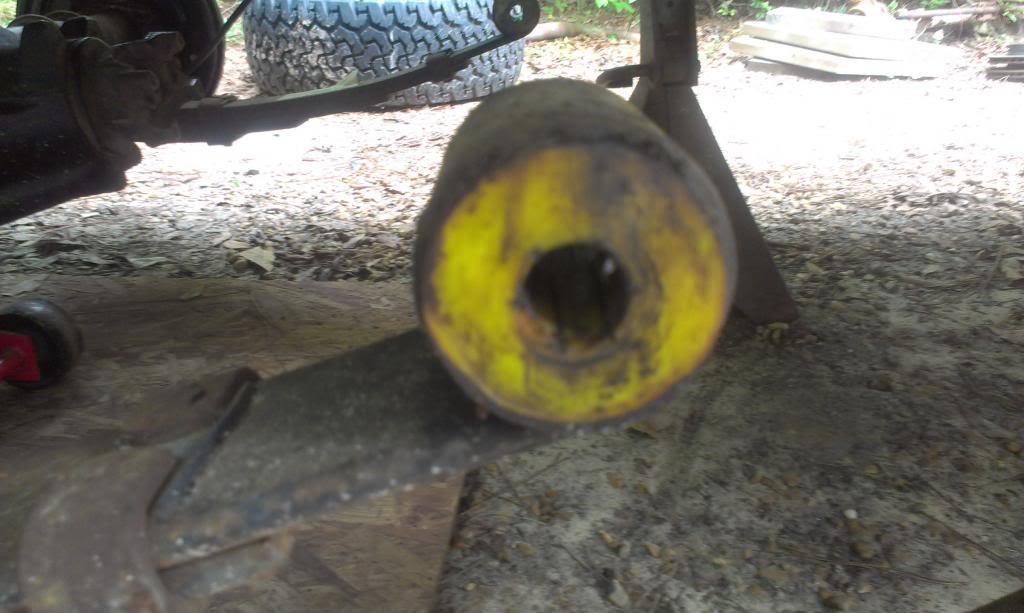
I also did some more suspension work. I had previously discovered, when trying to torque one of the main eye bolts, what I thought was a missing internal sleeve. Turns out I was right, all four main eyes had no sleeves.
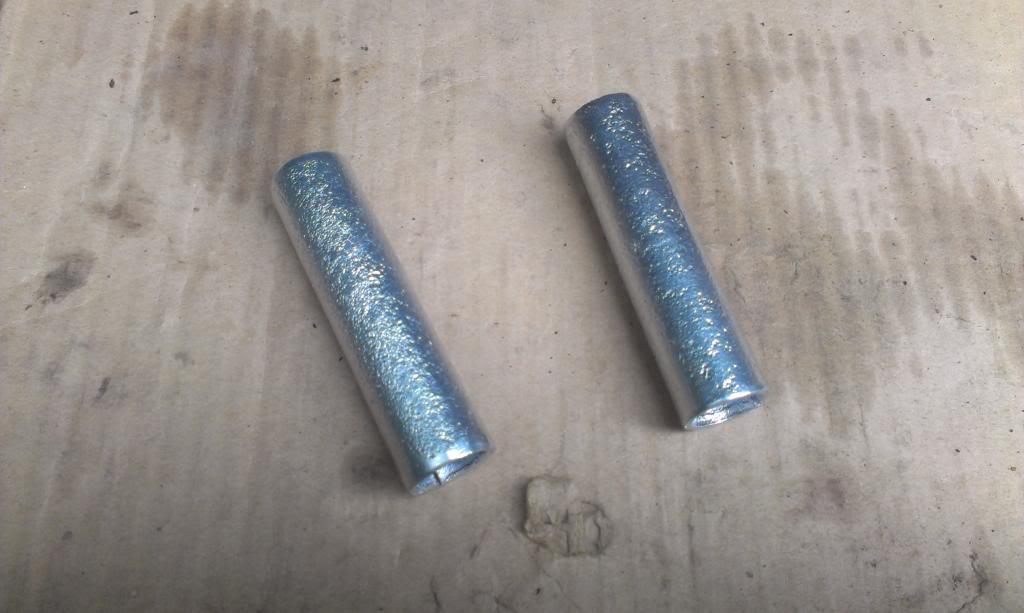
Quick picture of my "bling-bling" replacement sleeves.
The sleeves installed. They tapped in very easily.
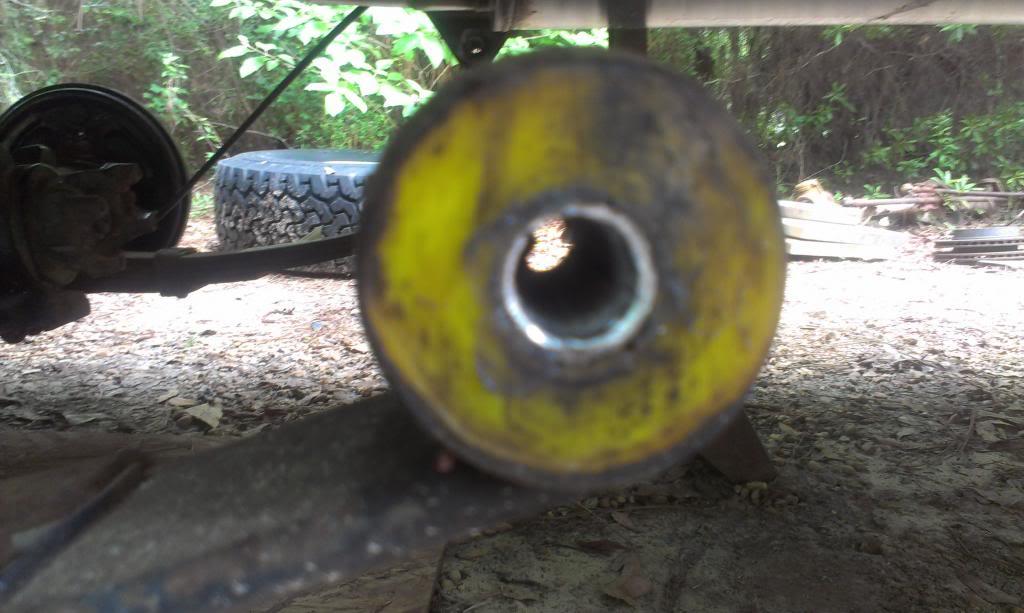
On the one spring eye hanger that I previously tried to toque, I had to use my "redneck spreader tool" to open back up the hanger slightly. Since I had not previously tried to torque the other 3 main eye bolts, those hangers were fine, the bushings/spring slid right back in.
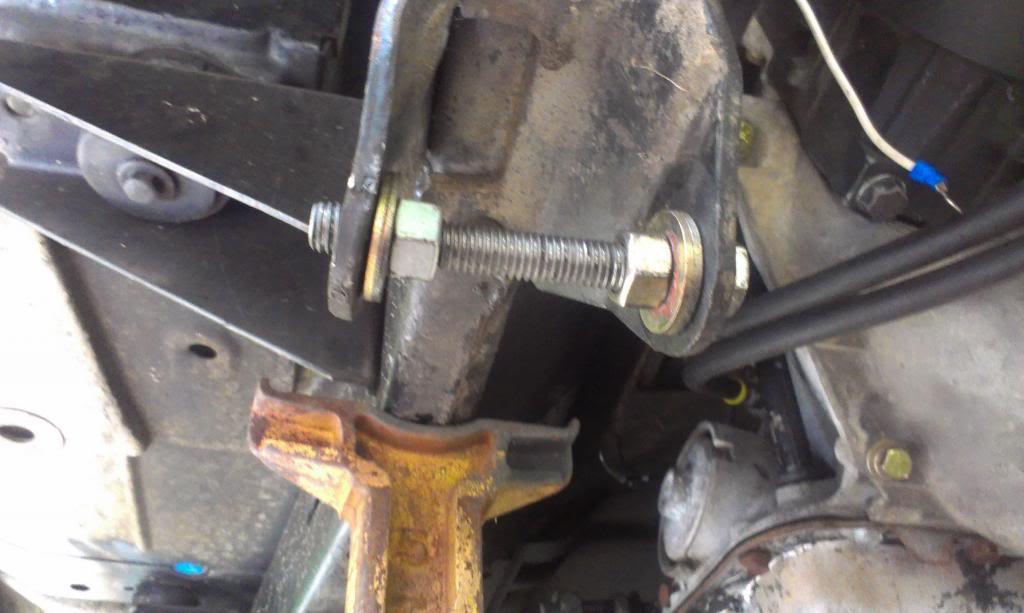
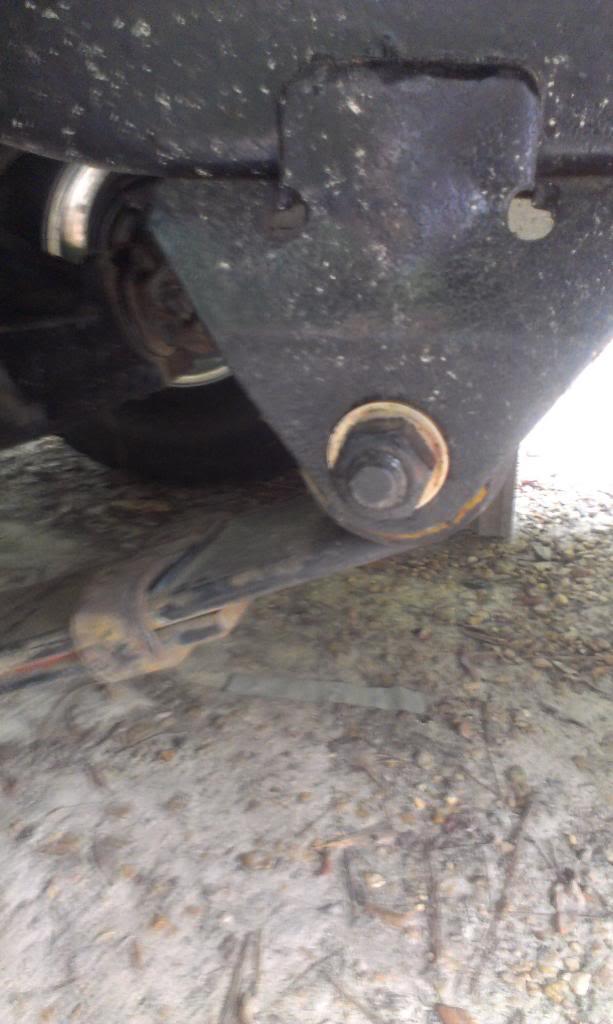
And all bolted back together/torqued. This was a bunch of work for four bolts!!!
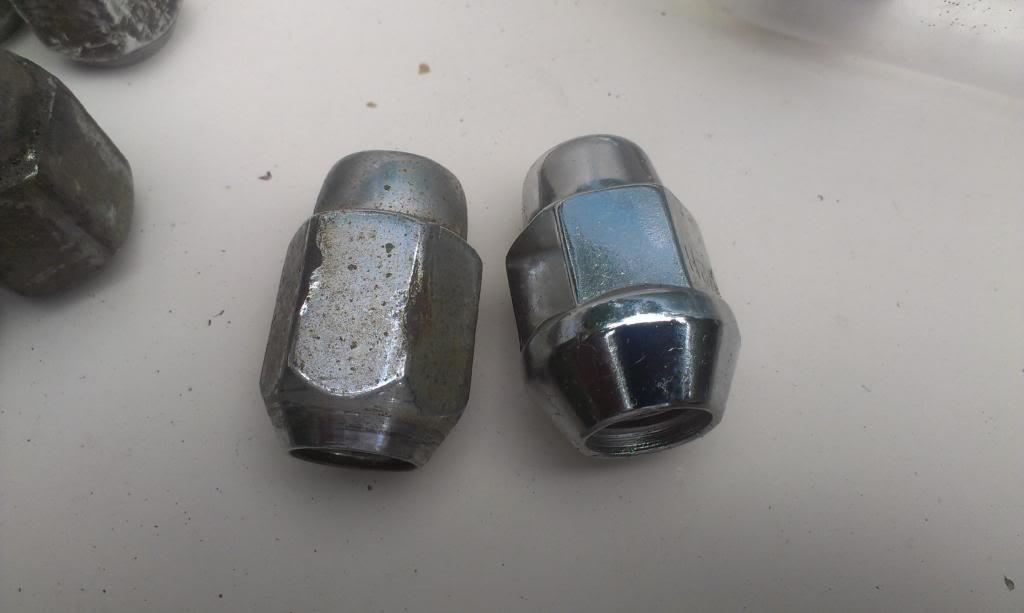
And since I had the tires off, I also replaced all of the incorrect lug nuts with the correct type. The correct type is on the right, the nut on the left is for the stock steel wheels.
I borrowed a different flaring tool, and had a little bit better luck flaring the ends of the stainless lines.
And a picture of my new "supply/return" lines, pretty long, wish they were a hair longer, but they should work.
I am going to take a small break from the plumbing for now, still not 100% happy with it. It should work, I just need to get down there and route/bend/install them. I was thinking about purchasing a stock 5/16 supply and a 3/8 supply, bent just like the 5/16 line, to run. They might look a little better, and be a bit longer, but my "fabricated" lines should work fine.
I also did some more suspension work. I had previously discovered, when trying to torque one of the main eye bolts, what I thought was a missing internal sleeve. Turns out I was right, all four main eyes had no sleeves.
Quick picture of my "bling-bling" replacement sleeves.
The sleeves installed. They tapped in very easily.
On the one spring eye hanger that I previously tried to toque, I had to use my "redneck spreader tool" to open back up the hanger slightly. Since I had not previously tried to torque the other 3 main eye bolts, those hangers were fine, the bushings/spring slid right back in.
And all bolted back together/torqued. This was a bunch of work for four bolts!!!
And since I had the tires off, I also replaced all of the incorrect lug nuts with the correct type. The correct type is on the right, the nut on the left is for the stock steel wheels.
- City
- Biloxi
- State
- MS
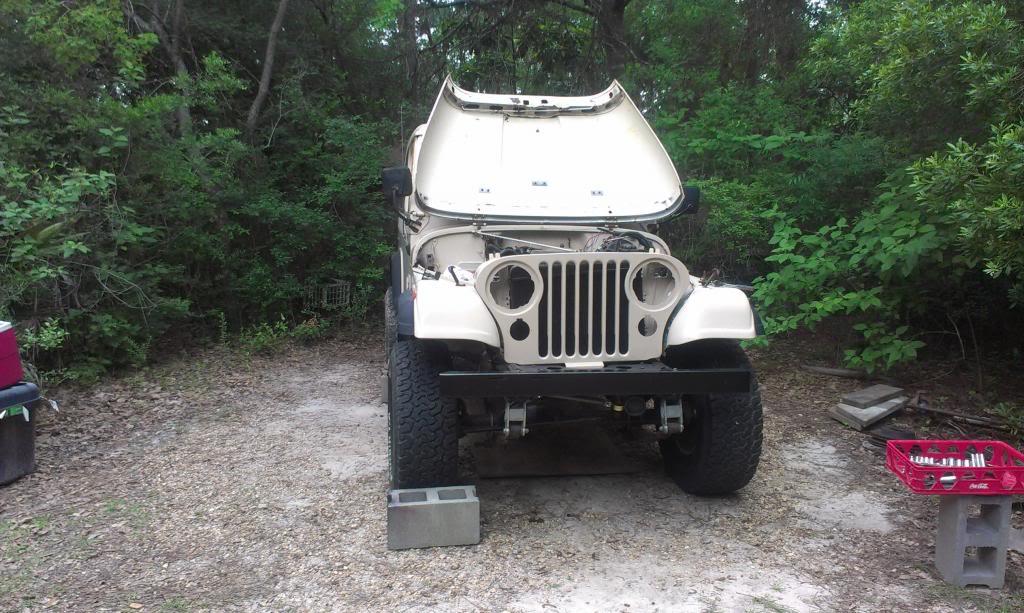
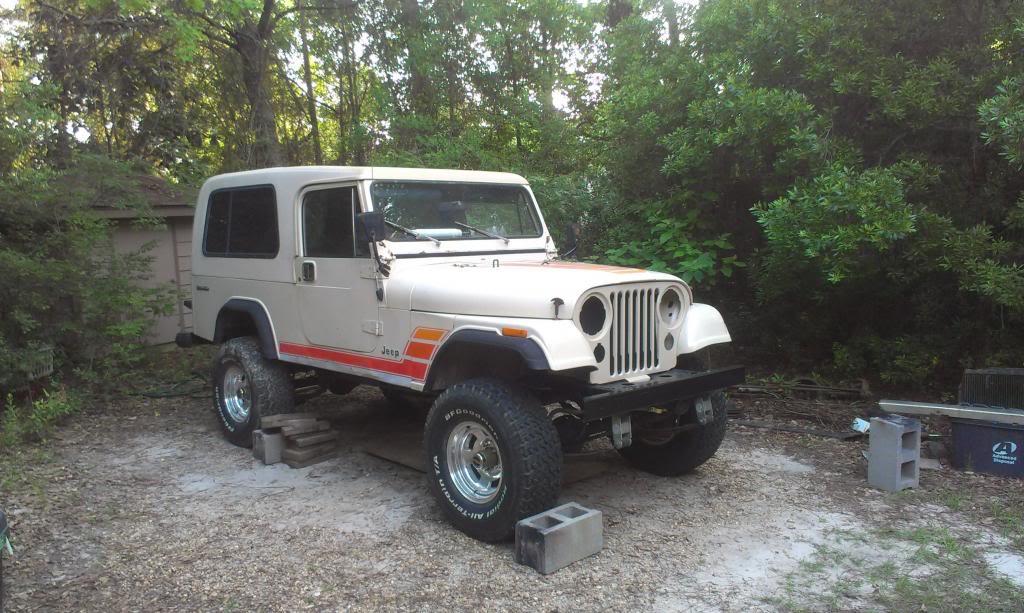
I also started to bolt the grill back on. I still need to adjust the front fenders/hood, but its a start. I think the paint matches pretty good, not perfect, but good enough. Once I install the headlights/turn signals, the slight shade difference might be less noticeable.

I have a few more evening of "work on CA Scrambler" before I will be away for a bit. So, I am going to try to install some easy/already have all the parts components, before starting on more involved tasks.
That's it for now.
I have a few more evening of "work on CA Scrambler" before I will be away for a bit. So, I am going to try to install some easy/already have all the parts components, before starting on more involved tasks.
That's it for now.
- City
- Biloxi
- State
- MS
I went back and re-flared the tubing, much better results. The pictures do not show it too clearly, but I now have a nice, round, 1/2 bubble on all the ends. This will prevent the rubber lines from coming off, and will not cut them. My previous flares on the 3/8 tubing were too sharp/abrupt.

And, more importantly, I test fit my new front drive shaft, and it fits just fine. I was really worried about this, 700R4's and stock width axles can sometimes cause major front drive shaft clearance issues. But, whoever installed the engine mounts did a great job. My engine is offset to the driver side by at least 2". The driver side exhaust manifold is about 1" from the steering shaft. As a result, using a stock OD front drive shaft, I still have about 1/2" clearance between the side of the transmission pan and the drive shaft. And, I have plenty of clearance between the top of the drive shaft and the bottom of the pan-case mounting flange.
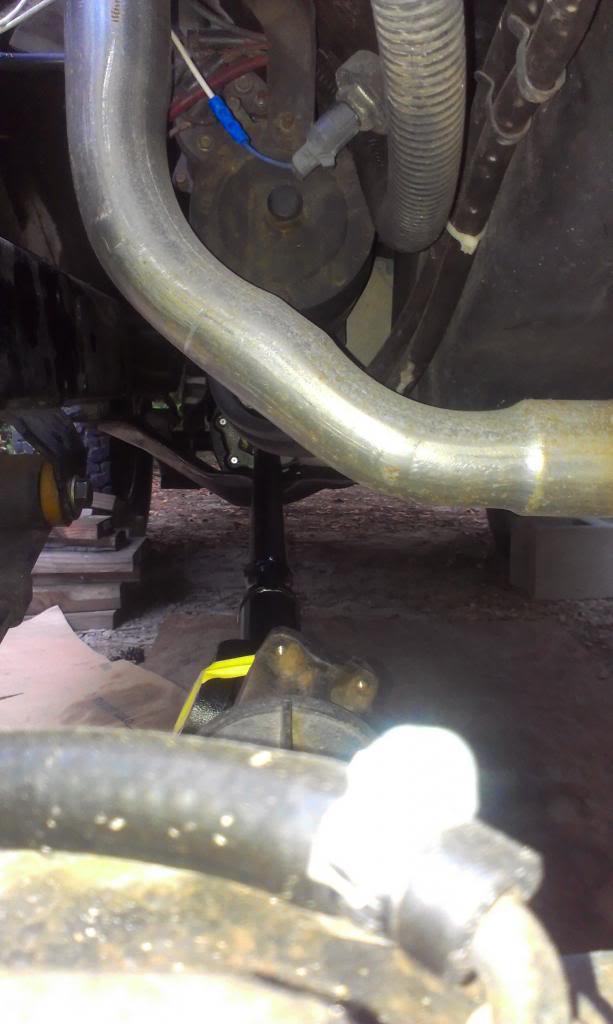
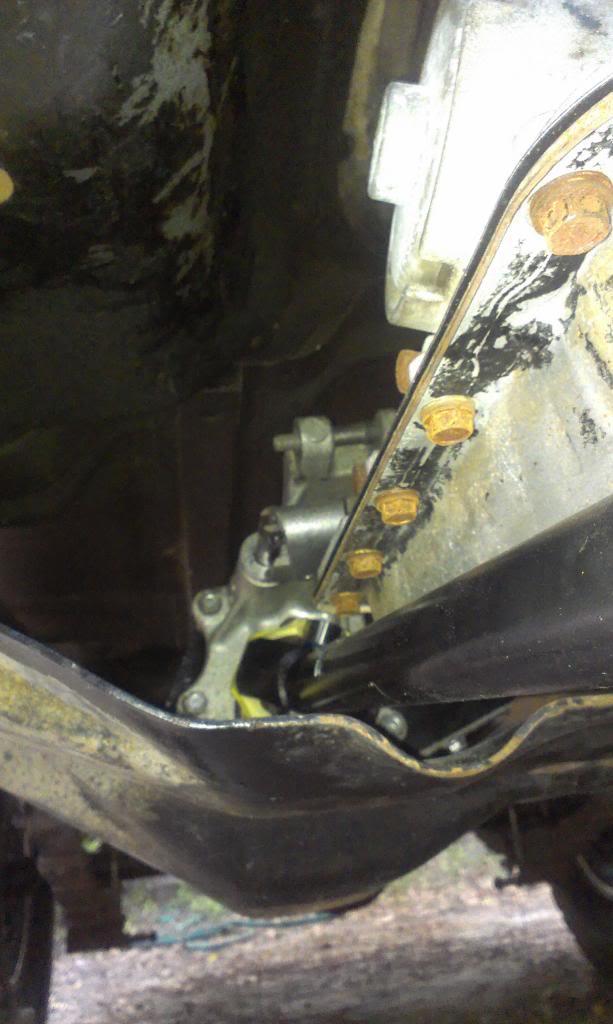
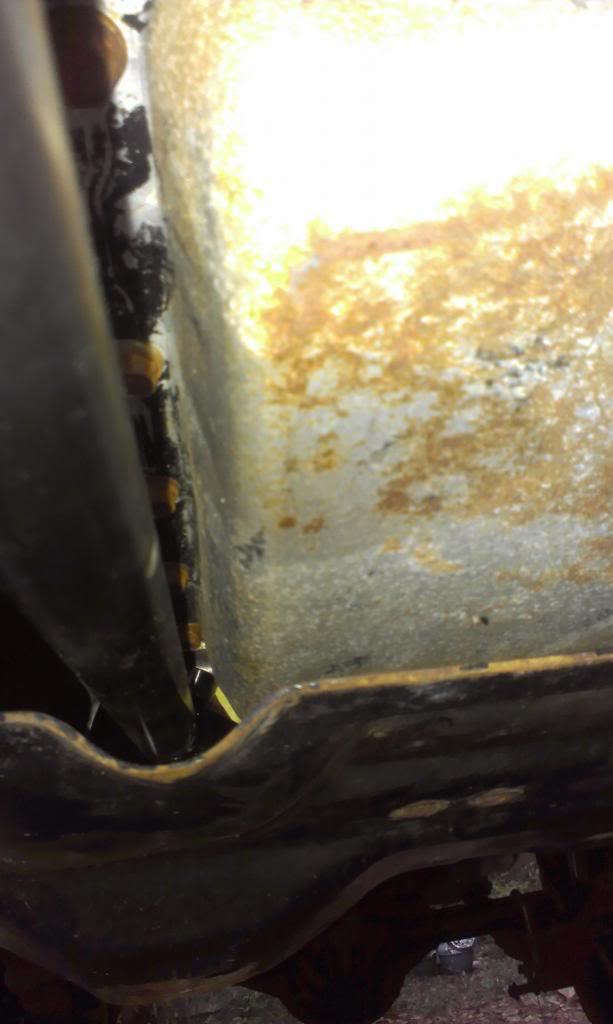
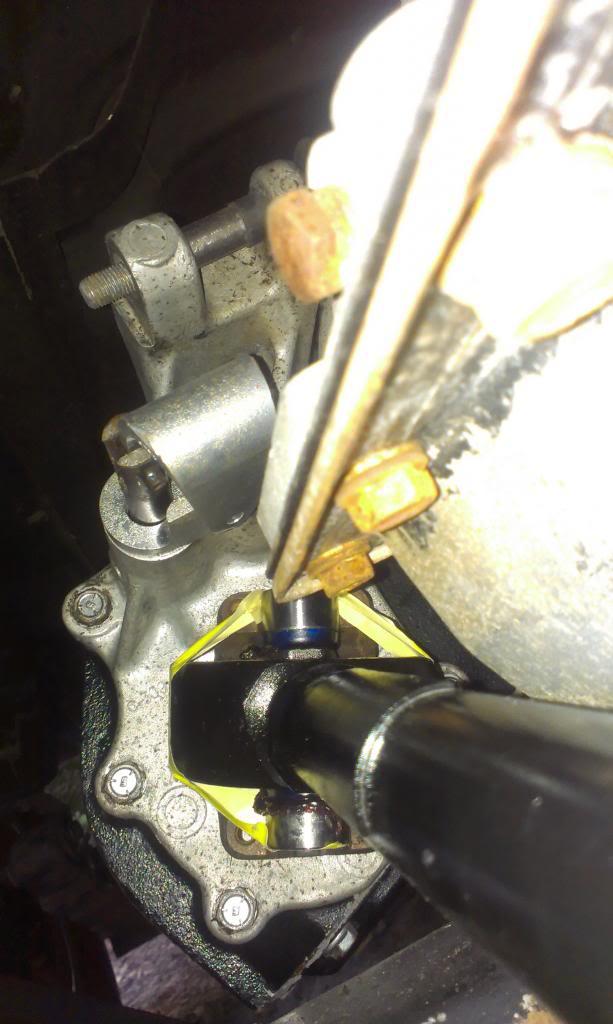
Since the drive shafts are fairly easy to install, and they get in he way once installed, I am going to wait until I finish running all my fuel lines, and finish the transmission mount, before getting them in my way.
The only "under Scrambler" project left are:
1) mount fuel pump/filter, install my new supply and return hard fuel lines
2) fabricate a transmission mount
3) install shocks (need bushings)
4) install sway bar bushings/end links
But, still plenty of "above Scrambler" projects left:
1) finish installing grill/fenders/hood, lights and front wire harness
2) clean up/finish connecting under hood wiring (TBI, start and charge circuits, etc.)
3) swap brake pedal assembly
4) install seats
5) install new hard top clamps/rear lift gate struts
6) install/fabricate transmission/transfer case shifters
And a bunch of stuff I am forgetting.
That's it for now.
And, more importantly, I test fit my new front drive shaft, and it fits just fine. I was really worried about this, 700R4's and stock width axles can sometimes cause major front drive shaft clearance issues. But, whoever installed the engine mounts did a great job. My engine is offset to the driver side by at least 2". The driver side exhaust manifold is about 1" from the steering shaft. As a result, using a stock OD front drive shaft, I still have about 1/2" clearance between the side of the transmission pan and the drive shaft. And, I have plenty of clearance between the top of the drive shaft and the bottom of the pan-case mounting flange.
Since the drive shafts are fairly easy to install, and they get in he way once installed, I am going to wait until I finish running all my fuel lines, and finish the transmission mount, before getting them in my way.
The only "under Scrambler" project left are:
1) mount fuel pump/filter, install my new supply and return hard fuel lines
2) fabricate a transmission mount
3) install shocks (need bushings)
4) install sway bar bushings/end links
But, still plenty of "above Scrambler" projects left:
1) finish installing grill/fenders/hood, lights and front wire harness
2) clean up/finish connecting under hood wiring (TBI, start and charge circuits, etc.)
3) swap brake pedal assembly
4) install seats
5) install new hard top clamps/rear lift gate struts
6) install/fabricate transmission/transfer case shifters
And a bunch of stuff I am forgetting.
That's it for now.
Last edited:
Major Jack
Legacy Registered User
- City
- Zillah
- State
- Wa
2) fabricate a transmission mount
Interested in seeing what you come up with on trans mount. I looked at the AA mount for the 700r4. Just doesn't look like a strong mount. I was looking at building something out of poly. Saw many posts saying it doesn't hold up well for a trans mount due to torque.
My next step will be to see if a mount exists that will bolt to the 700r4 that can be modified to work.
As always Raymond, looking great.
Interested in seeing what you come up with on trans mount. I looked at the AA mount for the 700r4. Just doesn't look like a strong mount. I was looking at building something out of poly. Saw many posts saying it doesn't hold up well for a trans mount due to torque.
My next step will be to see if a mount exists that will bolt to the 700r4 that can be modified to work.
As always Raymond, looking great.

Dave The Sparky
Rebuilding my CJ8 very,very slowly...
- City
- Halifax
- State
- UK
Dont want to hi-jack this thread, but is there any reason you lot in the States use Steel/Stainless fuel and brake lines as in the U.K we just use cupronickel or even just copper to replace brake and fuel lines.Im just curious if theres a motoring law about this or if its just because the parts are so much more easy to get hold of in the States?
- City
- Biloxi
- State
- MS
2) fabricate a transmission mount
Interested in seeing what you come up with on trans mount. I looked at the AA mount for the 700r4. Just doesn't look like a strong mount. I was looking at building something out of poly. Saw many posts saying it doesn't hold up well for a trans mount due to torque.
My next step will be to see if a mount exists that will bolt to the 700r4 that can be modified to work.
As always Raymond, looking great.
Appreciate it
I currently have a poly mount that came with the Scrambler. I am going to try to use it first, since I already have it, and it should be easy to make it work
It is basically a "stock CJ" transmission mount, that bolts to the adapter housing. I just need to bolt it to a "spacer", then the spacer to the skid plate. My motor mounts are straight up and down, so I do not think their will be too much "twist" I am not sure what a "stock" 700R4 mount looks like
I assume it bolts to the 2wd tailhousing/4wd adapter, and looks similar to a stock CJ transmission mount? Dont want to hi-jack this thread, but is there any reason you lot in the States use Steel/Stainless fuel and brake lines as in the U.K we just use cupronickel or even just copper to replace brake and fuel lines.Im just curious if theres a motoring law about this or if its just because the parts are so much more easy to get hold of in the States?
Regular parts stores around here sell regular metal lines, that are much softer then the stainless I am using. But, the longest pieces they sell are only 4' long, I needed 10'. Some people use "coil" tubing, which would probably be fine, too. For me, since there is a hydraulic repair shop a few blocks away, the 10' sticks of stainless tube were very easy to get a hold of

- City
- God's Country
- State
- AR
Dont want to hi-jack this thread, but is there any reason you lot in the States use Steel/Stainless fuel and brake lines as in the U.K we just use cupronickel or even just copper to replace brake and fuel lines.Im just curious if theres a motoring law about this or if its just because the parts are so much more easy to get hold of in the States?
That's a good question. Using copper lines would get rid of those nasty rust issues. Anyone know if there's a requirement to use steel?