

You are using an out of date browser. It may not display this or other websites correctly.
You should upgrade or use an alternative browser.
You should upgrade or use an alternative browser.
Another Scrambler Purchase/Road Trip - UPDATE- BODY ON FRAME AGAIN
- Thread starter spankrjs
- Start date


- City
- Dillsboro
- State
- IN
Great work Tiffany.
I saw that one coming!

I did have that problem in the mid seventies when I was running a high horsepower stroked AMC 304 (401 crank) with a Lakewood "Blow Proof" bell housing. Kept shattering pilot bushing and front bearings on my Super T-10. They walked me through basicly the same steps you went through. Mine was WAY out! Don't remember what it was, but they sent several offset dowels that didn't even get it close. They ended up sending me another bell housing. I think their manufacturing tolerances was the root of the problem.


- City
- Biloxi
- State
- MS
Great work Tiffany.
Who do you think I got the spare dial indicator from
I saw that one coming!
I did have that problem in the mid seventies when I was running a high horsepower stroked AMC 304 (401 crank) with a Lakewood "Blow Proof" bell housing. Kept shattering pilot bushing and front bearings on my Super T-10. They walked me through basicly the same steps you went through. Mine was WAY out! Don't remember what it was, but they sent several offset dowels that didn't even get it close. They ended up sending me another bell housing. I think their manufacturing tolerances was the root of the problem.
I somehow knew you would have experience with this, i.e. high HP AMC racing stuff

It seems this is a common issue with the aftermarket racing bell housings, and GM stuff. I only found one AMC example of this problem on the internet, and it was with an aftermarket scatter shield.
Well, at least I know my setup is well within tolerance


mysunnshine
Legacy Registered User
- City
- Phoenix
- State
- AZ
The problem is probably more of how many times the block has been line bored. As that is cut, the crank center moves up into the block.
Sent from my SCH-I545
Sent from my SCH-I545
- City
- Biloxi
- State
- MS
The problem is probably more of how many times the block has been line bored. As that is cut, the crank center moves up into the block.
Sent from my SCH-I545
I figured you would have some info, too
Does your shop run into this issue on a regular basis

- City
- Biloxi
- State
- MS
I got back from Texas late Saturday night, without another Scrambler, so I got back to work on this one.
For being a "bolt in" swap, I keep running into snafu's every step of the way.
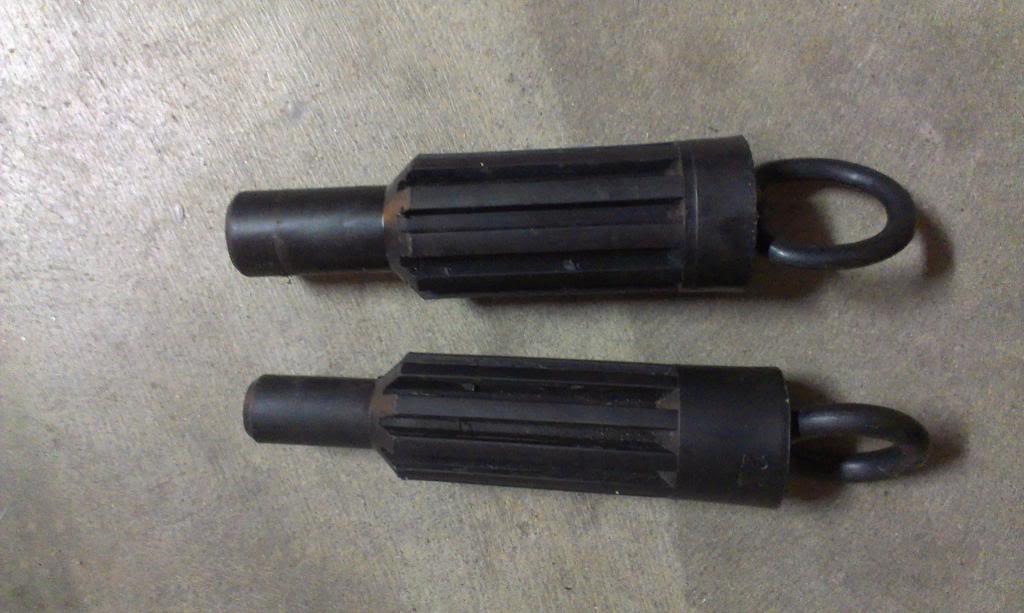
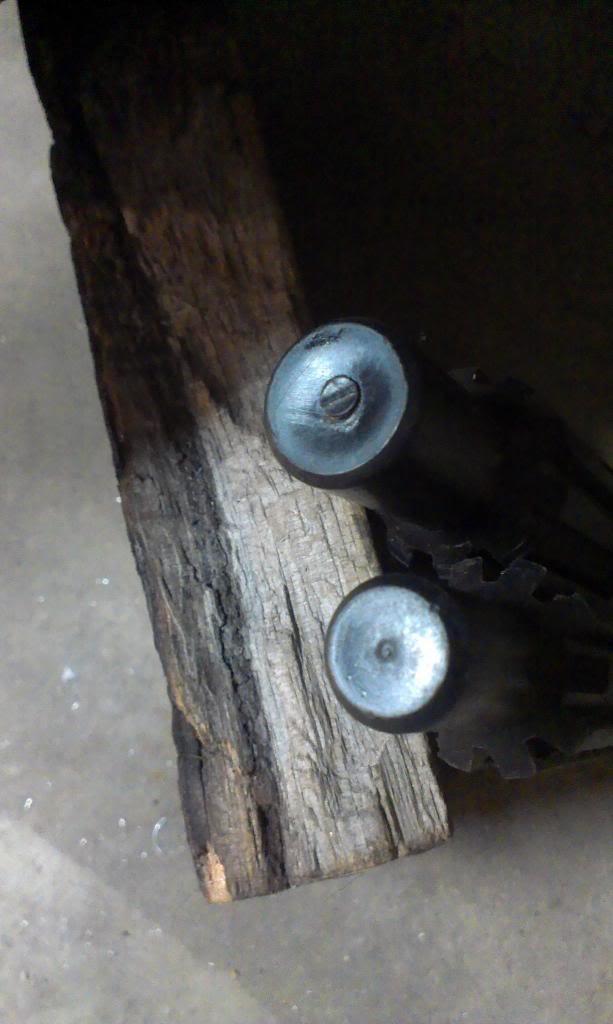
The AX15 uses the same clutch disc as the stock 80's Jeeps, but it uses a different pilot bushing. The stock T5 install tool wont work, and the install tool I found at work, which has the correct tip for the AX15 pilot bushing, is for a 10 spline 1-1/4" disc.
The regular CJ tool on the bottom, but note that the larger tool to the top has the correct tip for the AX15 pilot bushing.
Well, no one I know has the correct tool, and I did not feel like buying a $35.00 clutch disc alignment set, and I can not find anywhere that will sell this tool without buying an entire clutch kit. I kind of got aggravated, so I decided to go all redneck on its azz:
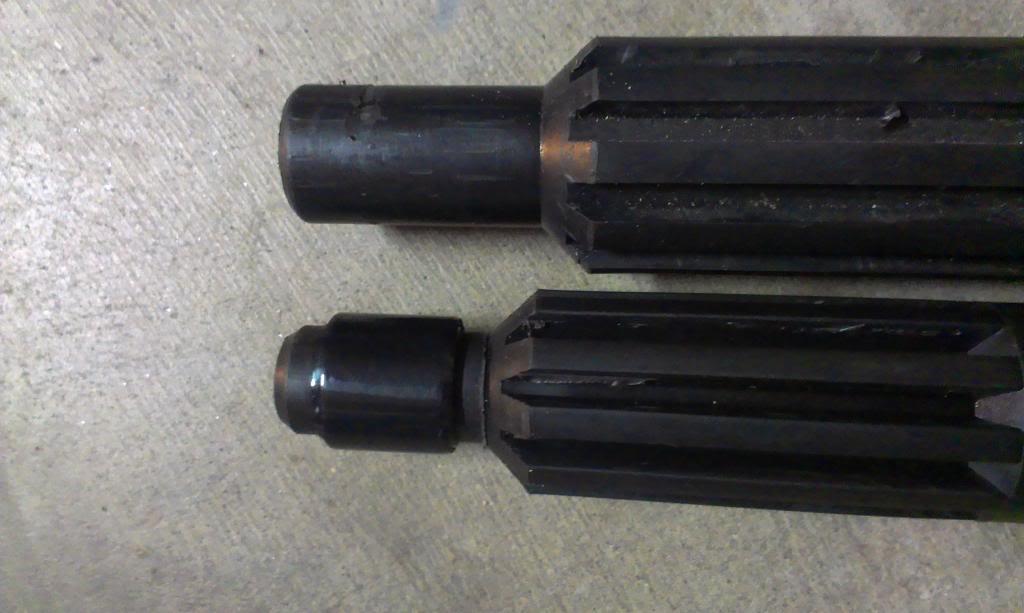
Yes, that is electrical tape wrapped around the end of the stock CJ clutch disc tool, and yes it worked perfect!!! I did use my caliper, and wrapped the tape around the tool until it had the same OD as the correct sized tool.
Finally, clutch is back in.

Ok, now time to simply bolt the bell housing to the transmission and get this baby swapped in. WRONG
Novak supplied (x4) 7/16" diameter bolts to secure the bell housing to their adapter. But, there is a problem:
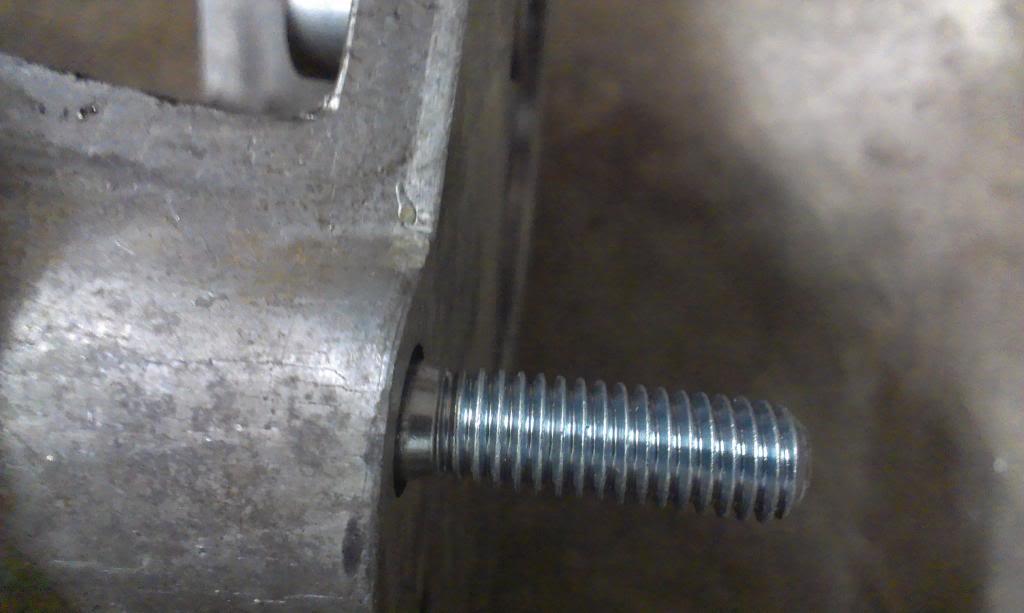
If you just use (x1) lock washer on each bolt, the shoulder of the bolt will pass through the bell housing. The problem with this, the adapter threads start right at the face of the adapter. If you use the supplied bolts, you will destroy the threads in the adapter. Glad I took some time to figure this out.
On the top two bolts, no problem. Using two flat washers and one lock washer, you get this, works perfect:
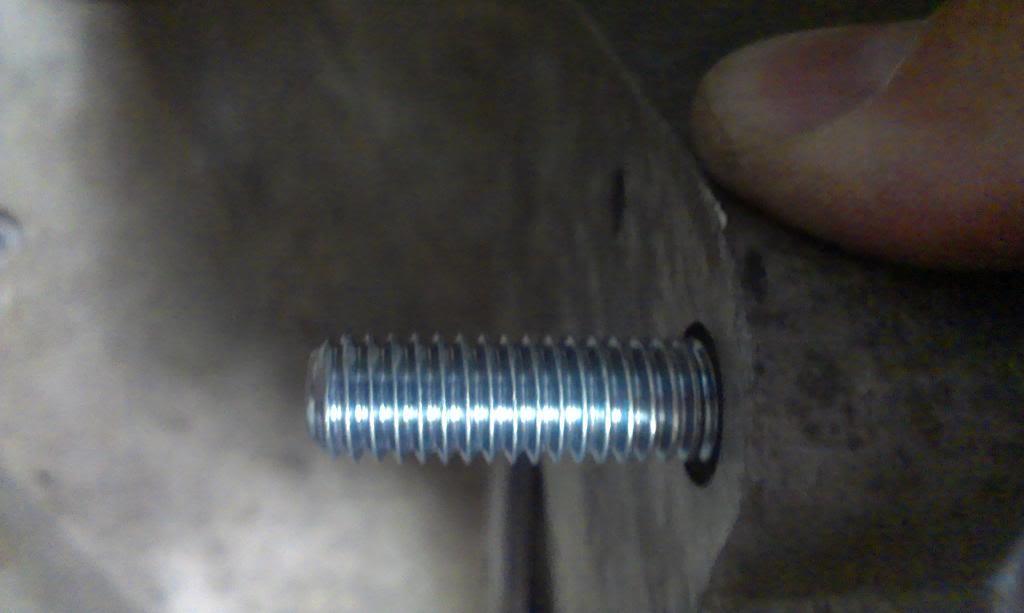
The problem is the lower two bolts. The way the bell housing is made, you can not fit standard 7/16" washesr flush with the housing. If you stack two lock washers it will work, but that is kind of sketchy. What is needed are some washers/spacers with a 7/16" ID and a 5/8"-11/16" OD. The only thing I have found that is this size are brake banjo washers, which are copper. I do not want to use a copper washer, it might split when you torque the bolts.
I think I have found something easily available that will work, more on this once I confirm.
That's it for now
For being a "bolt in" swap, I keep running into snafu's every step of the way.
The AX15 uses the same clutch disc as the stock 80's Jeeps, but it uses a different pilot bushing. The stock T5 install tool wont work, and the install tool I found at work, which has the correct tip for the AX15 pilot bushing, is for a 10 spline 1-1/4" disc.
The regular CJ tool on the bottom, but note that the larger tool to the top has the correct tip for the AX15 pilot bushing.
Well, no one I know has the correct tool, and I did not feel like buying a $35.00 clutch disc alignment set, and I can not find anywhere that will sell this tool without buying an entire clutch kit. I kind of got aggravated, so I decided to go all redneck on its azz:
Yes, that is electrical tape wrapped around the end of the stock CJ clutch disc tool, and yes it worked perfect!!! I did use my caliper, and wrapped the tape around the tool until it had the same OD as the correct sized tool.
Finally, clutch is back in.
Ok, now time to simply bolt the bell housing to the transmission and get this baby swapped in. WRONG
Novak supplied (x4) 7/16" diameter bolts to secure the bell housing to their adapter. But, there is a problem:
If you just use (x1) lock washer on each bolt, the shoulder of the bolt will pass through the bell housing. The problem with this, the adapter threads start right at the face of the adapter. If you use the supplied bolts, you will destroy the threads in the adapter. Glad I took some time to figure this out.
On the top two bolts, no problem. Using two flat washers and one lock washer, you get this, works perfect:
The problem is the lower two bolts. The way the bell housing is made, you can not fit standard 7/16" washesr flush with the housing. If you stack two lock washers it will work, but that is kind of sketchy. What is needed are some washers/spacers with a 7/16" ID and a 5/8"-11/16" OD. The only thing I have found that is this size are brake banjo washers, which are copper. I do not want to use a copper washer, it might split when you torque the bolts.
I think I have found something easily available that will work, more on this once I confirm.
That's it for now
mysunnshine
Legacy Registered User
- City
- Phoenix
- State
- AZ
About the only issues we run into now is rear main leaks because of the off center issue. Now you need to shim the lower seal relative to the top. Most projects now do not run manual transmissions so it's getting less common now having alignment issues.
- City
- Biloxi
- State
- MS
Time for a bunch of spacer/bolt and "machining" information.
As mentioned previously, on the lower two bolts, the clearance inside the bell housing is tight. I needed to make some spacers, so I broke out the Dremel and files, aka "Redneck Machine Shop":

I used 10mm washers that I bought at Lowes. They only needed slight "machining" to get them to fit on the 7/16" bolts.
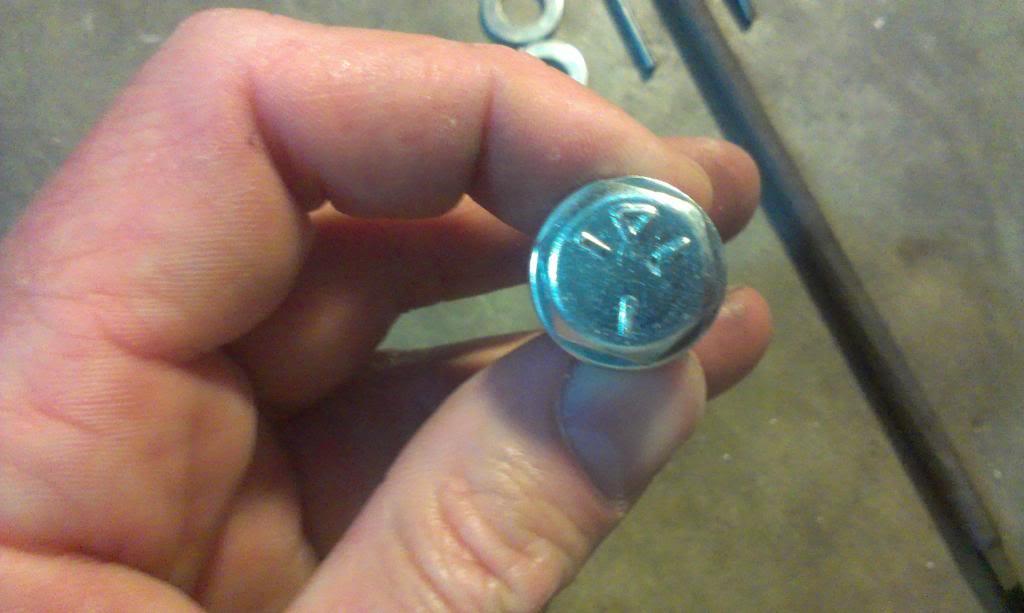
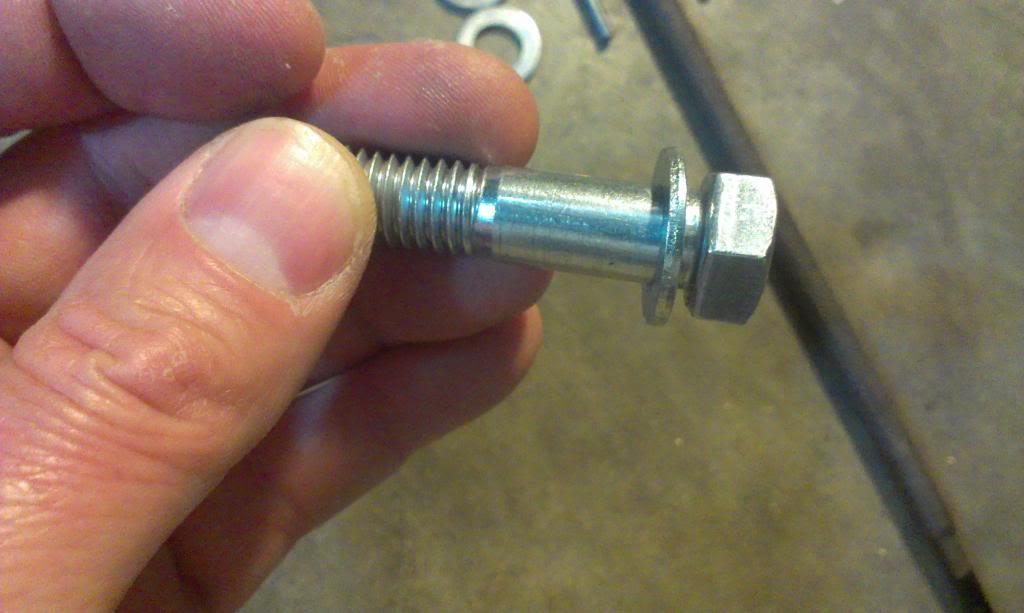
Even using my modified metric washers, the clearance inside the bell housing at the lower two bolts it too tight. The way the inside of the bell housing is "rounded" around one side of the bolt holes will not allow the washers to sit flat, causing the bolts to want to "cock" at a bad angle.
The end of the file is pointing at one of the areas around the lower bolt holes that needs "machining":
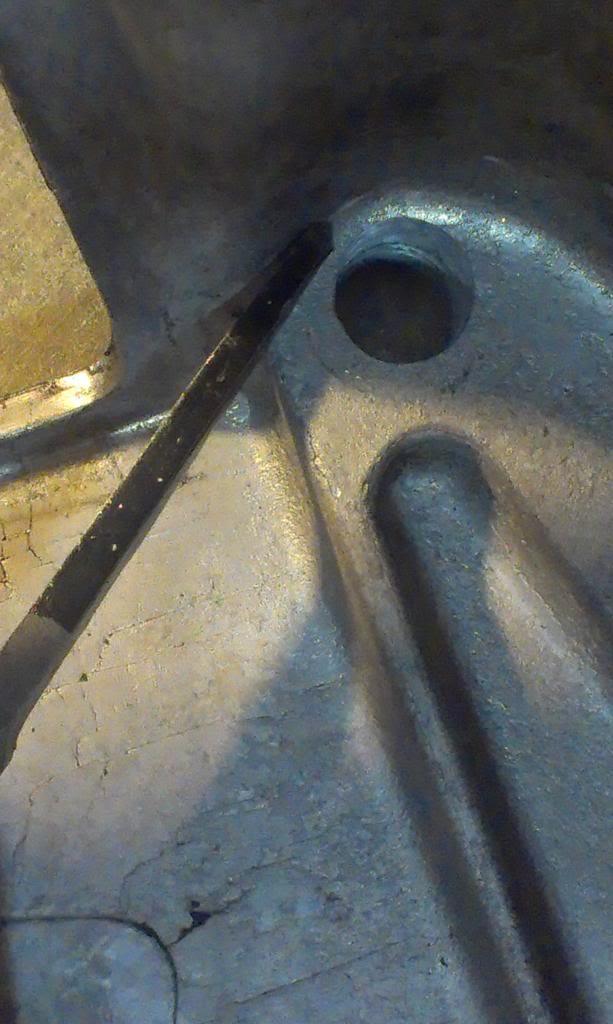
And again I broke out the "Redneck machine shop", aka Dremel, and used the below pictured attachments to "machine" the bell housing:

You do not have to remove a lot of material. This is more of a "sanding/polishing" operation. But, you do have to get aggressive to ensure that the surface of the bell housing is flat where the bolt head rests.
The lower hole near the clutch fork opening took the most work:
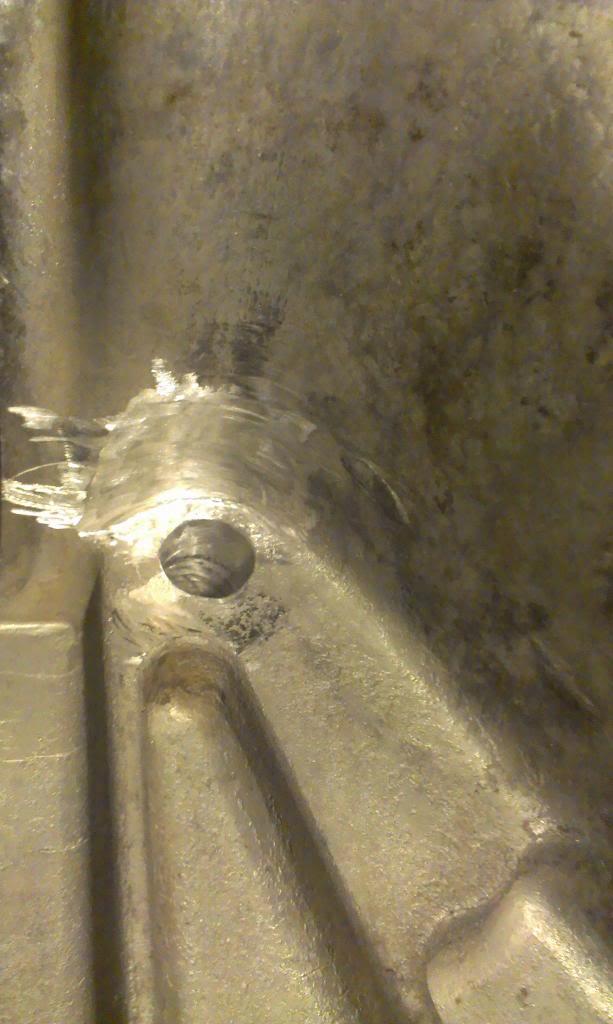
The other lower hole needed some attention, too:

Again, I did not have to remove a bunch of material. My total "machining" time, including making the washers, was around one hour.
A quick picture of my bolts/spacer stacks. Remember, due to the smooth shoulder length of the bolts, the bolt must be spaced back some, or you will mess up the threads inside of the adapter. The two bolts on the left are for the upper holes, the two bolts on the right are for the lower holes:
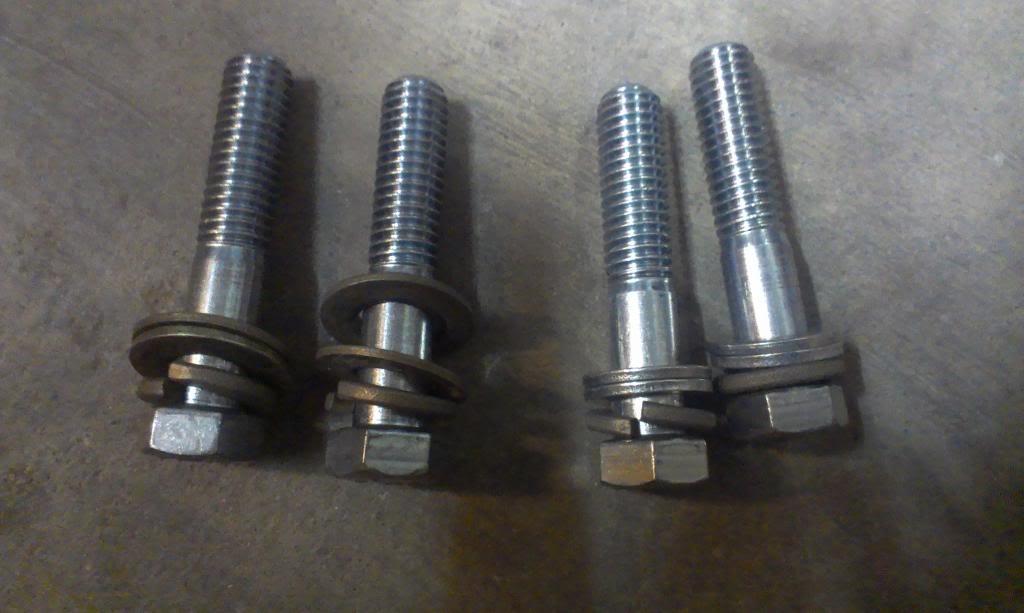
Before you bolt the bell housing to the adapter/front of transmission, make sure you install the clutch fork/spring/ball/throw out bearing!!!!!!
And the bell housing finally installed:
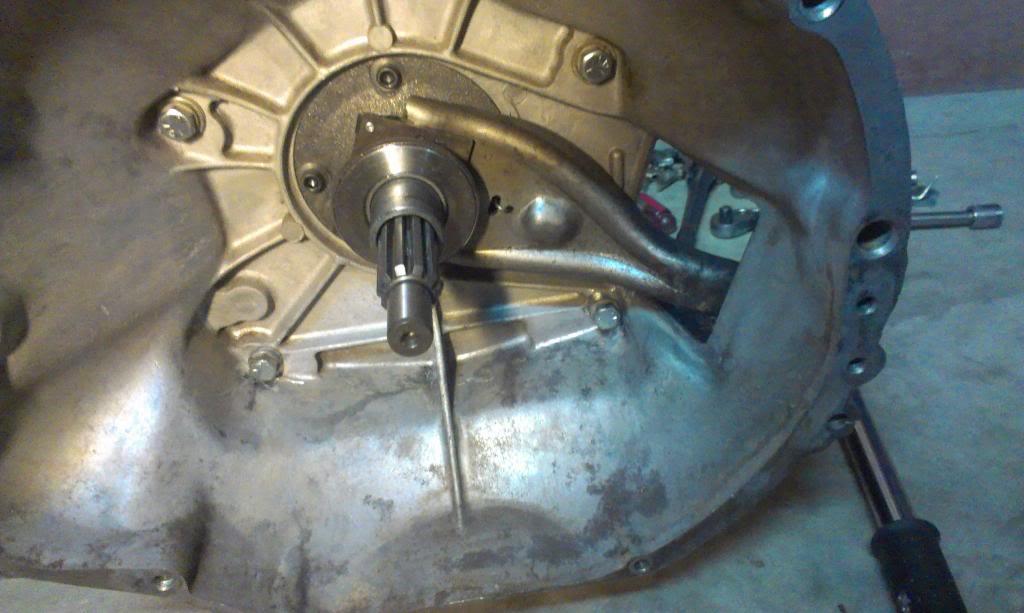
The lower bolt, nearest to the clutch fork opening in the bell housing, is still a little bit of a PIA to get to. The clearance around the head of the bolt is tight in some places, so you can not use a socket to tighten the bolt all the way down. I was able to start it with a socket, then I had to turn it with a wrench until it was tight. Once the bolt was tightened down with the wrench, I was able to get a 3/8 drive socket on it, to torque it down properly with the torque wrench. A socket headed cap screw would be good to use here, but all the places I went to yesterday did not carry/were out of stock on this size.
NOTE - there is still plenty of clearance inside the bell housing, i.e. nothing that spins will hit the bolt heads.
And a side shot of the installed bell housing:

All four bolts are secured with lock washers, and red lock tite, torqued to 45 foot pounds. There is close to 1" of thread engagement in the adapter plate, should be fine. If the lower two bolts were longer, then you could also use a nut on the outside. But, that would take a custom bolt, with the proper shoulder/threaded portion length.
Up next, hopefully soon and trouble free, lets bolt this damn thing to the engine!!!!!!!!!!
That's it for now.
As mentioned previously, on the lower two bolts, the clearance inside the bell housing is tight. I needed to make some spacers, so I broke out the Dremel and files, aka "Redneck Machine Shop":
I used 10mm washers that I bought at Lowes. They only needed slight "machining" to get them to fit on the 7/16" bolts.
Even using my modified metric washers, the clearance inside the bell housing at the lower two bolts it too tight. The way the inside of the bell housing is "rounded" around one side of the bolt holes will not allow the washers to sit flat, causing the bolts to want to "cock" at a bad angle.
The end of the file is pointing at one of the areas around the lower bolt holes that needs "machining":
And again I broke out the "Redneck machine shop", aka Dremel, and used the below pictured attachments to "machine" the bell housing:
You do not have to remove a lot of material. This is more of a "sanding/polishing" operation. But, you do have to get aggressive to ensure that the surface of the bell housing is flat where the bolt head rests.
The lower hole near the clutch fork opening took the most work:
The other lower hole needed some attention, too:
Again, I did not have to remove a bunch of material. My total "machining" time, including making the washers, was around one hour.
A quick picture of my bolts/spacer stacks. Remember, due to the smooth shoulder length of the bolts, the bolt must be spaced back some, or you will mess up the threads inside of the adapter. The two bolts on the left are for the upper holes, the two bolts on the right are for the lower holes:
Before you bolt the bell housing to the adapter/front of transmission, make sure you install the clutch fork/spring/ball/throw out bearing!!!!!!
And the bell housing finally installed:
The lower bolt, nearest to the clutch fork opening in the bell housing, is still a little bit of a PIA to get to. The clearance around the head of the bolt is tight in some places, so you can not use a socket to tighten the bolt all the way down. I was able to start it with a socket, then I had to turn it with a wrench until it was tight. Once the bolt was tightened down with the wrench, I was able to get a 3/8 drive socket on it, to torque it down properly with the torque wrench. A socket headed cap screw would be good to use here, but all the places I went to yesterday did not carry/were out of stock on this size.
NOTE - there is still plenty of clearance inside the bell housing, i.e. nothing that spins will hit the bolt heads.
And a side shot of the installed bell housing:
All four bolts are secured with lock washers, and red lock tite, torqued to 45 foot pounds. There is close to 1" of thread engagement in the adapter plate, should be fine. If the lower two bolts were longer, then you could also use a nut on the outside. But, that would take a custom bolt, with the proper shoulder/threaded portion length.
Up next, hopefully soon and trouble free, lets bolt this damn thing to the engine!!!!!!!!!!
That's it for now.
- City
- Biloxi
- State
- MS
I was able to complete some more of the AX15 swap project yesterday, here's the pictures/info.
Two quick pictures, showing where the shifters exit the T5 and the AX15. On the AX15, I pulled from the outer face of the adapter.
AX15:
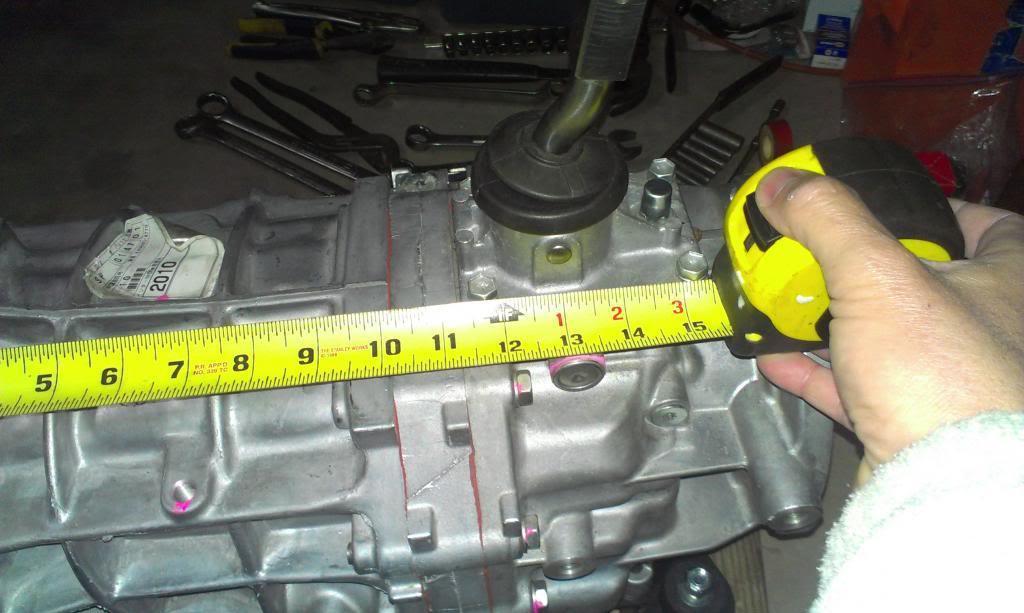
T5:
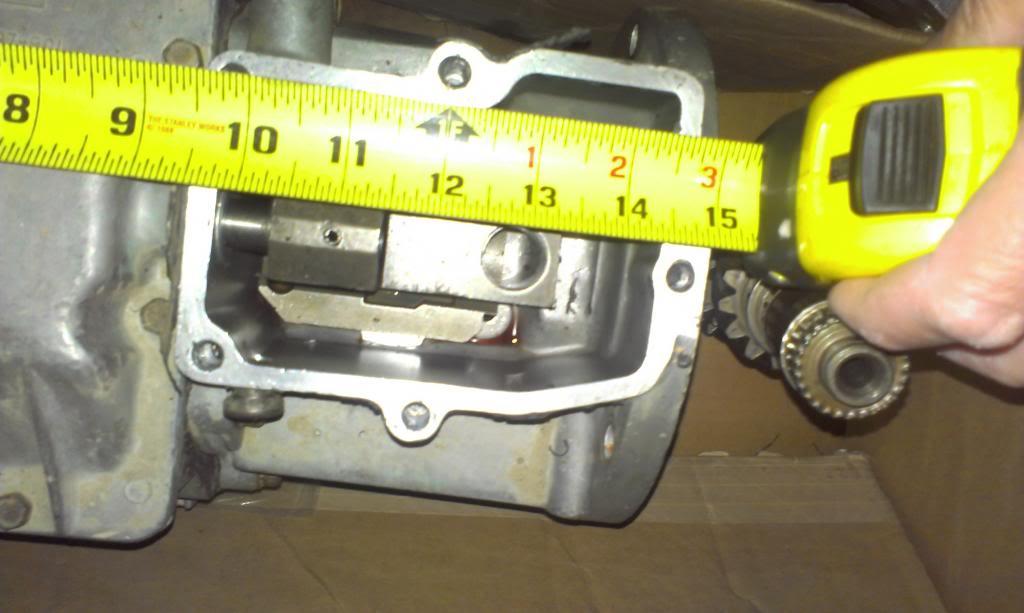
Now, while they are both almost identical, there is an issue with the AX15, more on this in a little while.
Quick picture of the complete AX15/bell housing assembly:

Loaded up on the Harbor Freight transmission jack:

Due to the transmission/bell housing being so tall, when it is placed on the jack, I had to jack up the Scrambler to get everything under the frame rail:
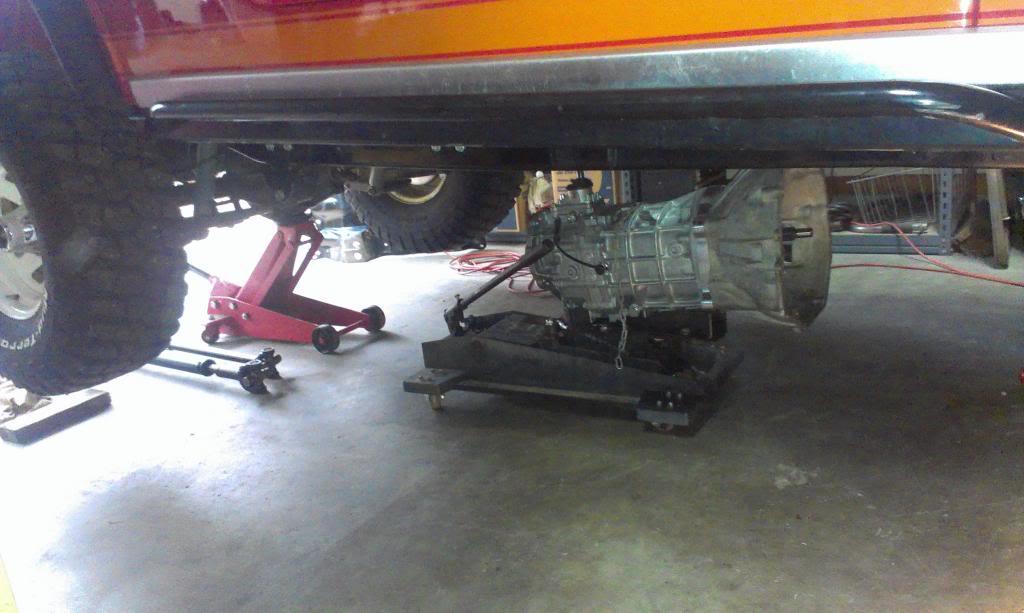
Surprisingly, it slid in fairly easy. I should have removed the shifter from the AX15, it did rub the body some, but I got it in.

The bell housing cleared the exhaust just fine, so besides the shifter rub, pretty easy install. It is, however, a PIA to install the bell housing to engine bolts, while the transmission is in the way. But, not the end of the world.
A quick picture of some notes I took before I pulled the T5 out.
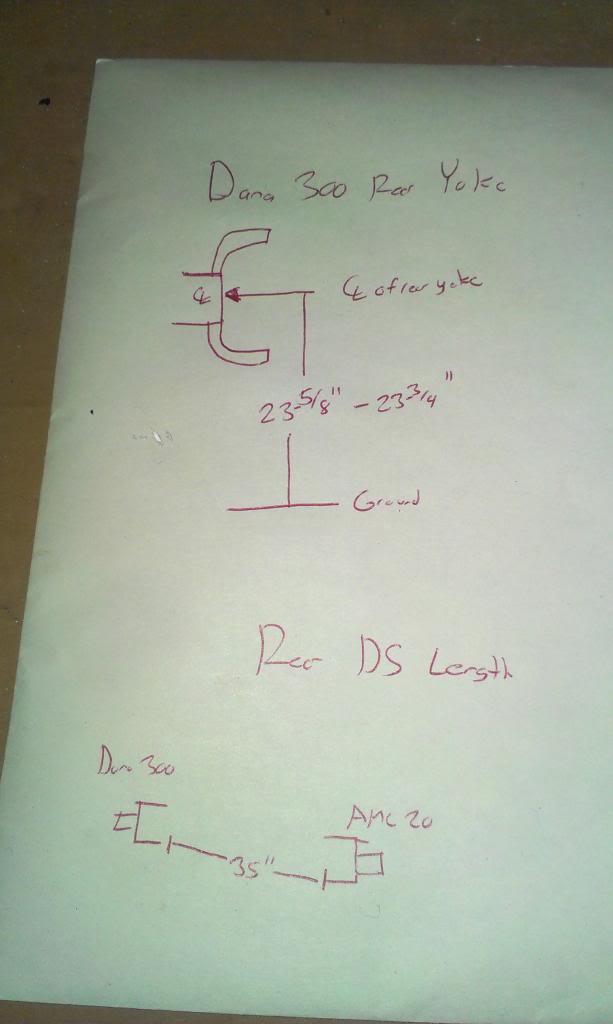
Once I had the transmission bolted in place, I gently jacked it up to the height of where the Dana 300 output was at, roughly 24". Now, I know that the transfer case will add some length, so the transmission will end up a bit higher, but I still have a problem with the AX15 shifter location.
Two quick pictures showing how the shifter hits the body tub. It clears in Neutral, and 1,3, and 5, but it hits the body in 2 and 4. Note, I have a 1" body lift.
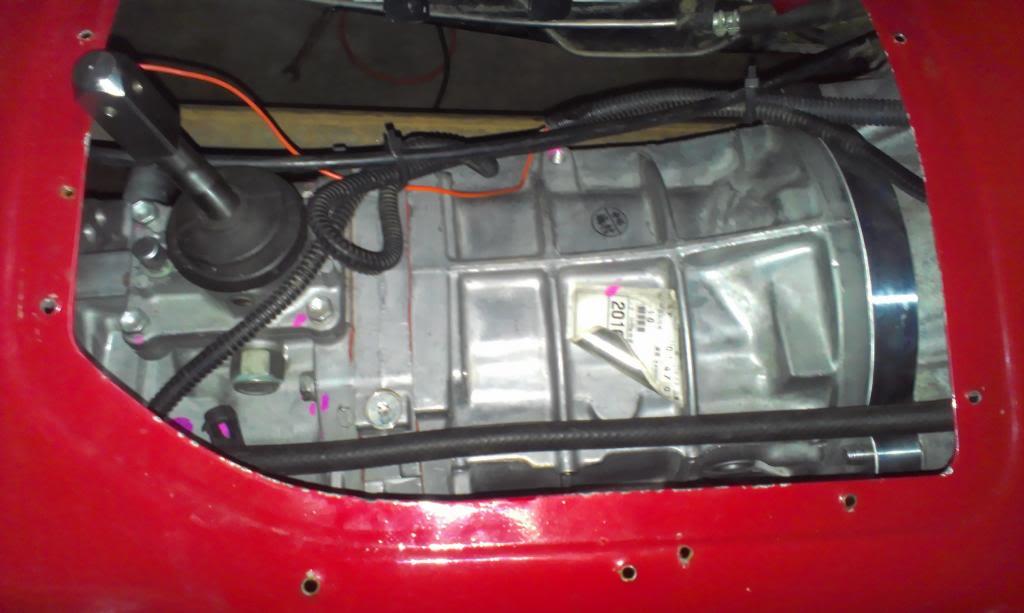

The shifter on this AX15 bends backwards, towards the rear. Maybe I can disassemble this part of the shifter, turn it 180 degrees, and everything will be OK. Might have to look into a "speed shifter", i.e. a B&M unit, to see if that will help. I do not want to cut the floor out, or move my cup holders!!!!
Up next, the transfer case.
That's it for now.
Two quick pictures, showing where the shifters exit the T5 and the AX15. On the AX15, I pulled from the outer face of the adapter.
AX15:
T5:
Now, while they are both almost identical, there is an issue with the AX15, more on this in a little while.
Quick picture of the complete AX15/bell housing assembly:
Loaded up on the Harbor Freight transmission jack:
Due to the transmission/bell housing being so tall, when it is placed on the jack, I had to jack up the Scrambler to get everything under the frame rail:
Surprisingly, it slid in fairly easy. I should have removed the shifter from the AX15, it did rub the body some, but I got it in.
The bell housing cleared the exhaust just fine, so besides the shifter rub, pretty easy install. It is, however, a PIA to install the bell housing to engine bolts, while the transmission is in the way. But, not the end of the world.
A quick picture of some notes I took before I pulled the T5 out.
Once I had the transmission bolted in place, I gently jacked it up to the height of where the Dana 300 output was at, roughly 24". Now, I know that the transfer case will add some length, so the transmission will end up a bit higher, but I still have a problem with the AX15 shifter location.
Two quick pictures showing how the shifter hits the body tub. It clears in Neutral, and 1,3, and 5, but it hits the body in 2 and 4. Note, I have a 1" body lift.
The shifter on this AX15 bends backwards, towards the rear. Maybe I can disassemble this part of the shifter, turn it 180 degrees, and everything will be OK. Might have to look into a "speed shifter", i.e. a B&M unit, to see if that will help. I do not want to cut the floor out, or move my cup holders!!!!
Up next, the transfer case.
That's it for now.

- City
- Biloxi
- State
- MS
B&M shifter. You'll love the shift feel.
Alternatively, cut/weld a custom shifter instead of that stub.
Yep, I have a B&M on my green Scrambler's T5, love it
I might be able to just rotate my current "stub" 180 degrees, problem solved for free

Or, Rough Country makes this for $60:
http://www.roughcountry.com/jeep-tj-straight-lower-gear-selector-1021.html
I have seen some "stubs" that are straight, might be able to pull one out a junk yard, or, straighten my current "stub".
I do like the B&M, but I am going to save that $230 for now, still early into this swap
I will have to see if the taller B&M body will clear my tub, that is the biggest issue
- City
- Biloxi
- State
- MS
Quick update on the transmission shifter.
Before:

After:
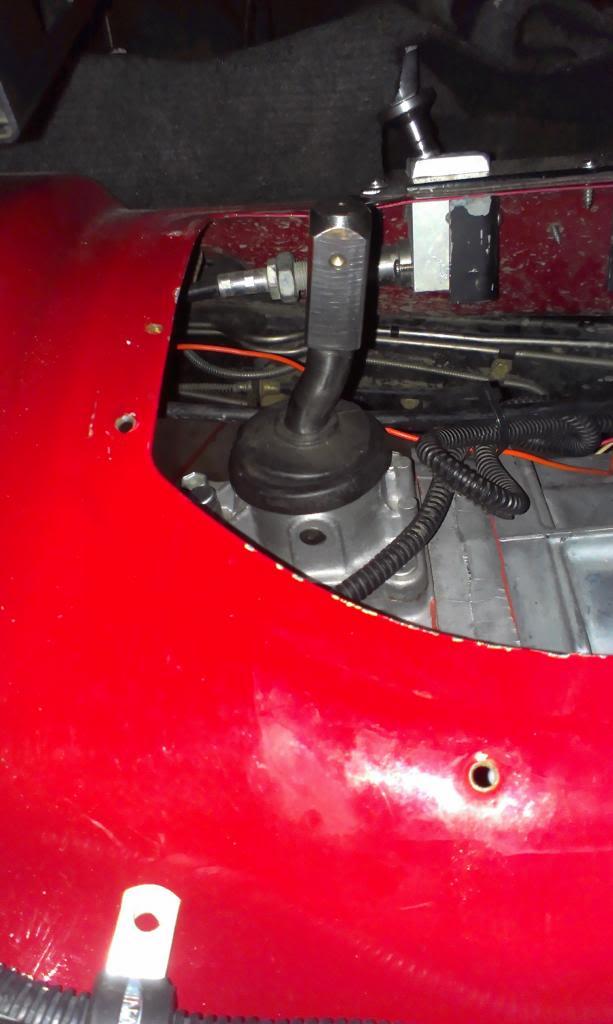
To remove the shifter "stub", I removed the rubber seal, then you just do the old T176 push and twist. The spring loaded retainer comes off, then you can remove the stub. The way the stub is made, it can be reversed.
Quick picture with the Novak supplied shifter on. Reversing the "stub" has no affect on function. I can now shift into all gears. Obviously, the shifter handle will be bent!!!!
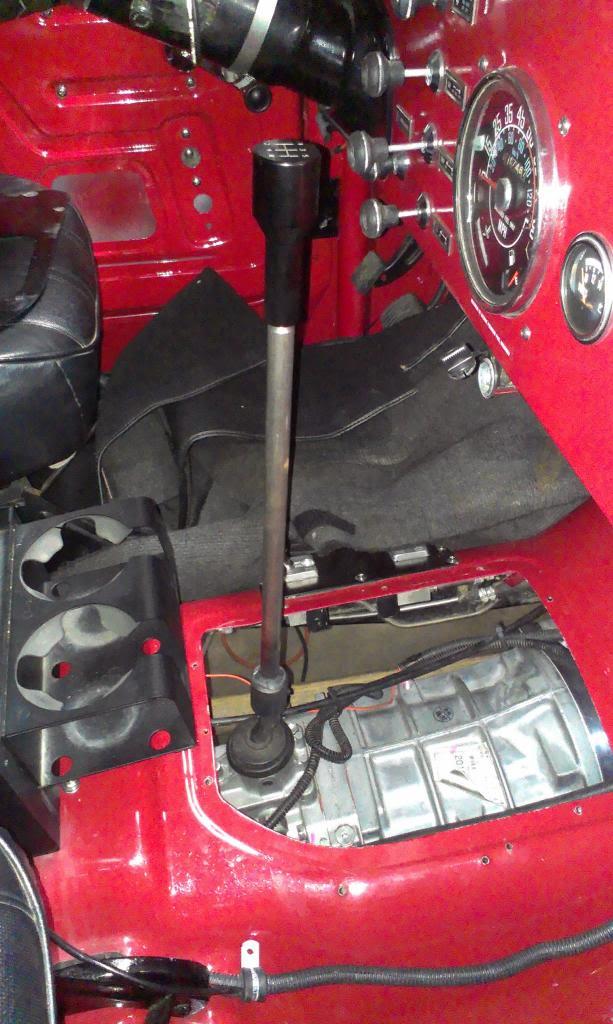
While I can grab all the gears now, I still have a minor issue:
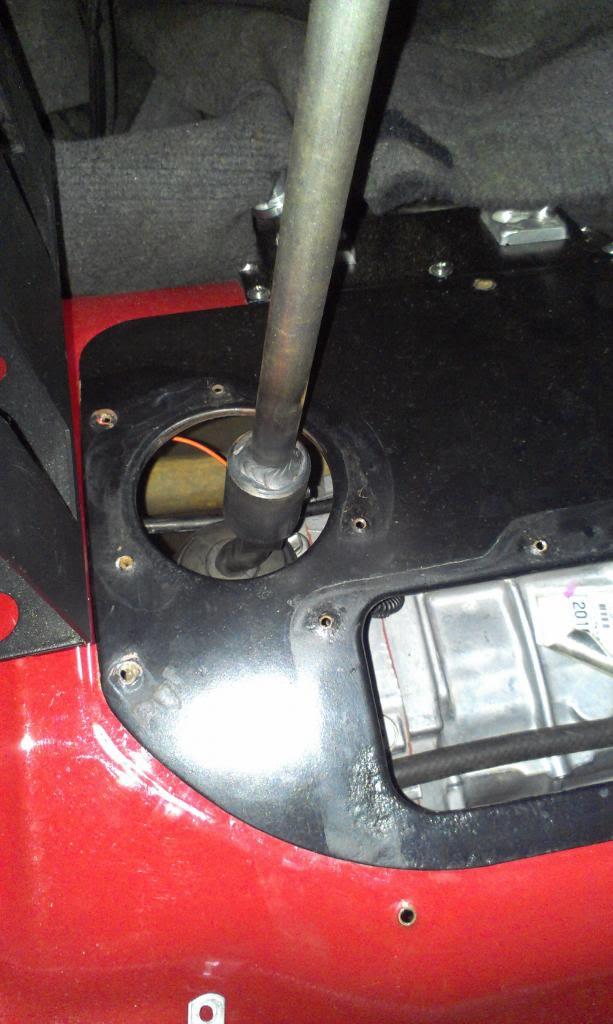
The shifter "stub" that came with my transmission is bent in two different angles. The bend to the side causes it to be off center. If I can straighten mine/find a straight "stub", my shifter will be dead center to the original T5 shifter hole.
After shifting this transmission with the stock shifter, a B&M shifter would be a huge improvement. The stock AX15 shifter is fairly "loose" feeling, especially compared to my B&M equipped T5.
Before:
After:
To remove the shifter "stub", I removed the rubber seal, then you just do the old T176 push and twist. The spring loaded retainer comes off, then you can remove the stub. The way the stub is made, it can be reversed.
Quick picture with the Novak supplied shifter on. Reversing the "stub" has no affect on function. I can now shift into all gears. Obviously, the shifter handle will be bent!!!!
While I can grab all the gears now, I still have a minor issue:
The shifter "stub" that came with my transmission is bent in two different angles. The bend to the side causes it to be off center. If I can straighten mine/find a straight "stub", my shifter will be dead center to the original T5 shifter hole.
After shifting this transmission with the stock shifter, a B&M shifter would be a huge improvement. The stock AX15 shifter is fairly "loose" feeling, especially compared to my B&M equipped T5.
- City
- Biloxi
- State
- MS
Time for the transfer case.
The AX15 output shaft sticks out further then a stock CJ transmission's. If you try to slide the Dana 300 on the AX15 shaft, you will have a gap. The transmission output shaft will bottom out inside the transfer case input shaft before the Dana 300 sits flush against the AX15.
So, Novak supplied one of their "clocking rings" to adapt the 300 to the AX15.

Basically, the clocking ring will act as a spacer. For now, I am just going to clock the transfer case the same as stock.
Novak supplies a new seal that they want you to install in the input housing of the Dana 300. This is a double lip seal, keeps oil in the 300 and oil out of the 300. I think a lot of people use these seals, fairly common.


Well, that's all fine and good. If you have stock transfer case gears, it is simple to pull off the input housing. But, I have 4:1 gears. Due to the different gear sizes, you can not just pull off the input housing. The Novak instructions mention this. I tried to remove my input housing, it would not come off.
So, time to pull the idler gear.
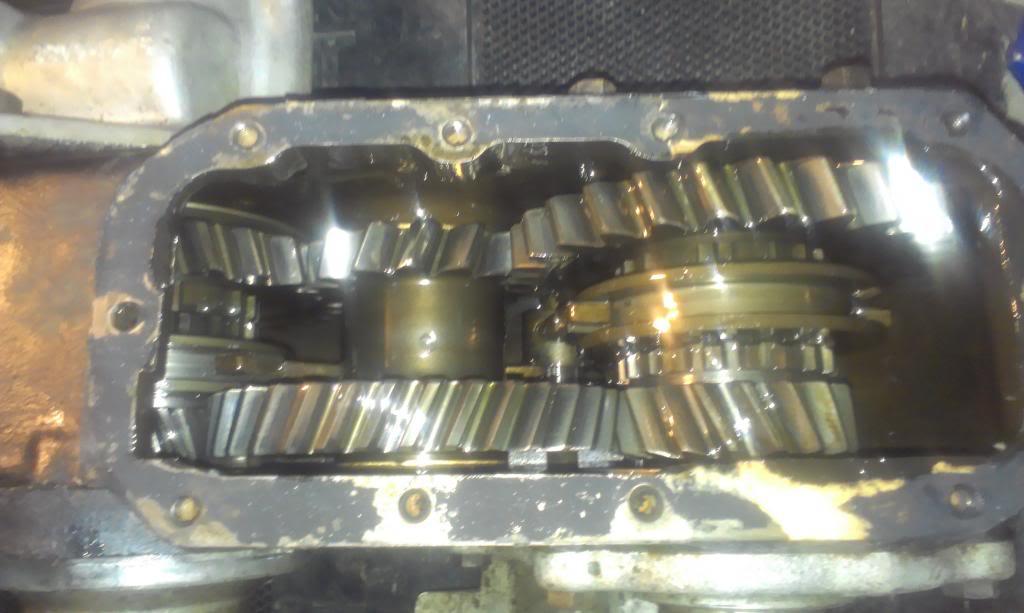
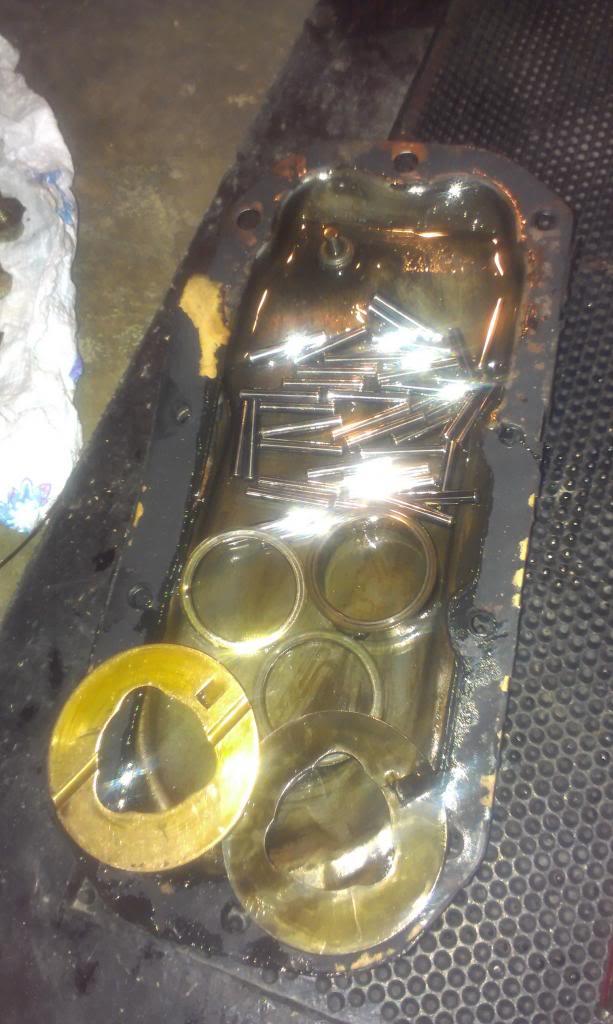
Which is a PIA. The 4:1 gears use a larger idler gear. I had to notch the case to install it. Removing it was just as much fun. After about 15 minutes, I got it out, and left about half the needle bearing in the bottom of the Dana 300!!!

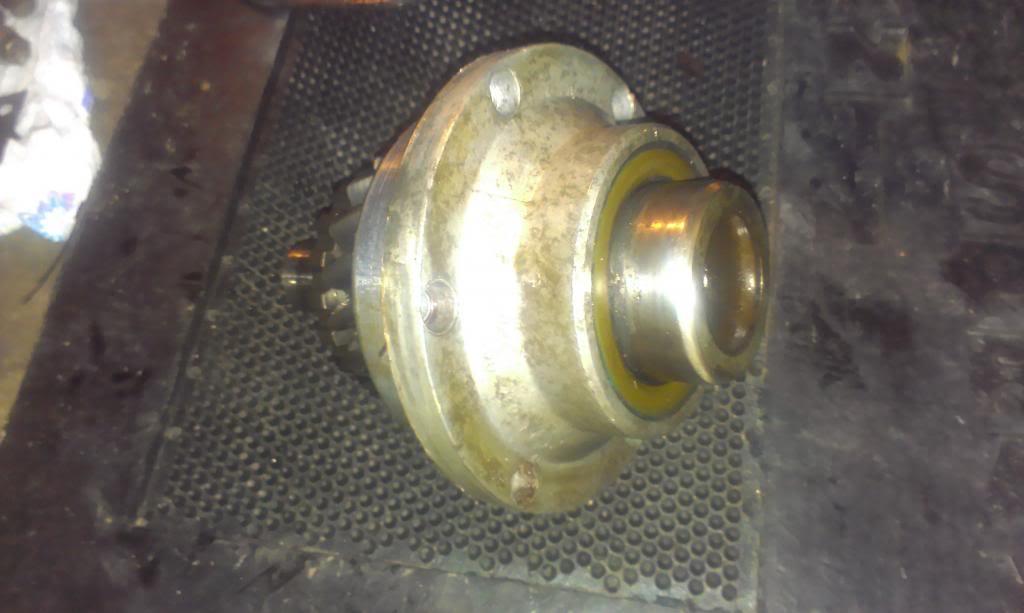
After all that, the input housing comes out very easy.
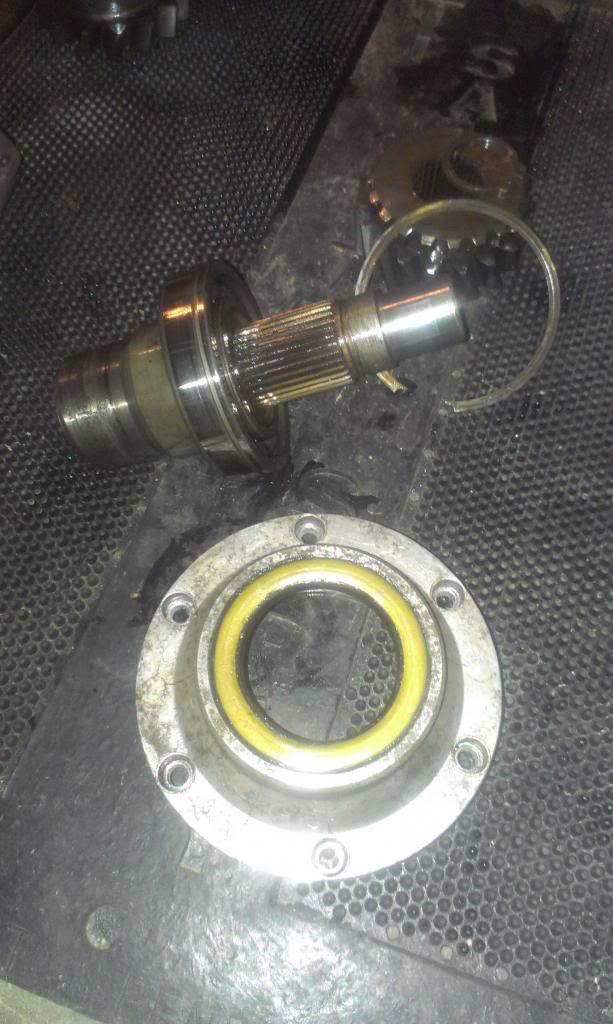
And the input assembly disassembled, ready to be cleaned/new seal installed.
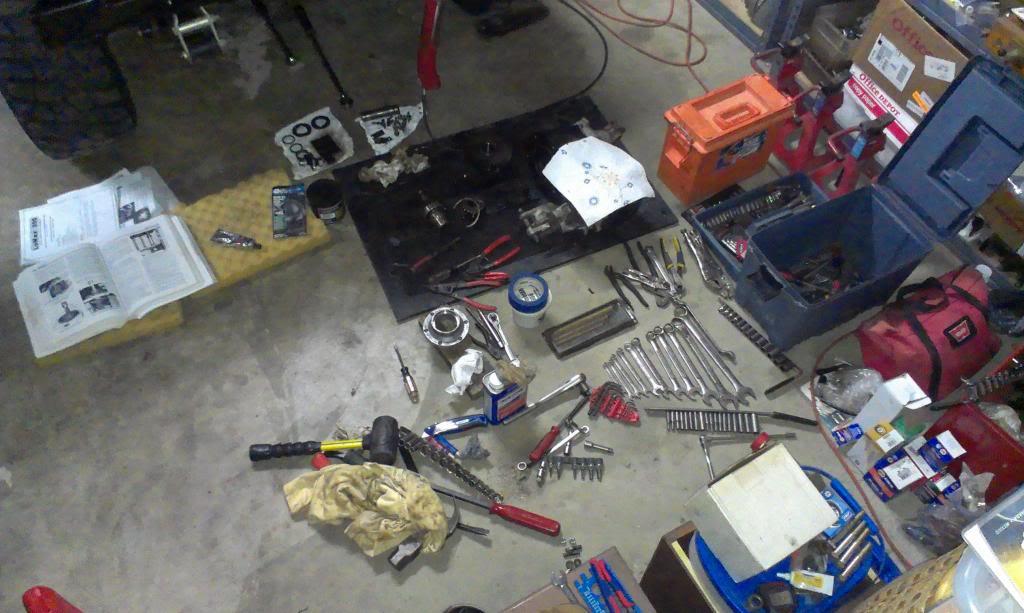
One more, how I left the garage floor!!!!!!
That's it for now.
The AX15 output shaft sticks out further then a stock CJ transmission's. If you try to slide the Dana 300 on the AX15 shaft, you will have a gap. The transmission output shaft will bottom out inside the transfer case input shaft before the Dana 300 sits flush against the AX15.
So, Novak supplied one of their "clocking rings" to adapt the 300 to the AX15.
Basically, the clocking ring will act as a spacer. For now, I am just going to clock the transfer case the same as stock.
Novak supplies a new seal that they want you to install in the input housing of the Dana 300. This is a double lip seal, keeps oil in the 300 and oil out of the 300. I think a lot of people use these seals, fairly common.
Well, that's all fine and good. If you have stock transfer case gears, it is simple to pull off the input housing. But, I have 4:1 gears. Due to the different gear sizes, you can not just pull off the input housing. The Novak instructions mention this. I tried to remove my input housing, it would not come off.
So, time to pull the idler gear.
Which is a PIA. The 4:1 gears use a larger idler gear. I had to notch the case to install it. Removing it was just as much fun. After about 15 minutes, I got it out, and left about half the needle bearing in the bottom of the Dana 300!!!
After all that, the input housing comes out very easy.
And the input assembly disassembled, ready to be cleaned/new seal installed.
One more, how I left the garage floor!!!!!!
That's it for now.

- City
- stafford
- State
- va
Just asking
Can the ax15 shaft be cut down ?
Can the ax15 shaft be cut down ?
- City
- Biloxi
- State
- MS
Just asking
Can the ax15 shaft be cut down ?
Yes, I imagine you could just cut the AX15 output shaft down. BUT, the bolt pattern on the rear of the AX15 does not have the same clocking angle as the stock CJ transmissions, so the Dana 300 would be sitting at a weird angle, I guess
- City
- stafford
- State
- va
Yes, I imagine you could just cut the AX15 output shaft down. BUT, the bolt pattern on the rear of the AX15 does not have the same clocking angle as the stock CJ transmissions, so the Dana 300 would be sitting at a weird angle, I guess
Thank you
Looks good !!
- City
- Biloxi
- State
- MS
A bit more work complete.
Installed the new seal, reassembled the input shaft assembly. The new seal sticks out past the face of the input housing a bit, shouldn't be an issue.

Cleaned some of the parts.
Slowly, carefully scraping off old sealant from the case, trying to keep the inside clean, slow going.

I will be out of town for part of the weekend, but I hope to get the transfer case back together, maybe installed, before Monday.
That's it for now
Installed the new seal, reassembled the input shaft assembly. The new seal sticks out past the face of the input housing a bit, shouldn't be an issue.
Cleaned some of the parts.
Slowly, carefully scraping off old sealant from the case, trying to keep the inside clean, slow going.
I will be out of town for part of the weekend, but I hope to get the transfer case back together, maybe installed, before Monday.
That's it for now
- City
- Biloxi
- State
- MS
- City
- Biloxi
- State
- MS
I was able to reassemble the Dana 300 this past weekend, here's the pictures/information.
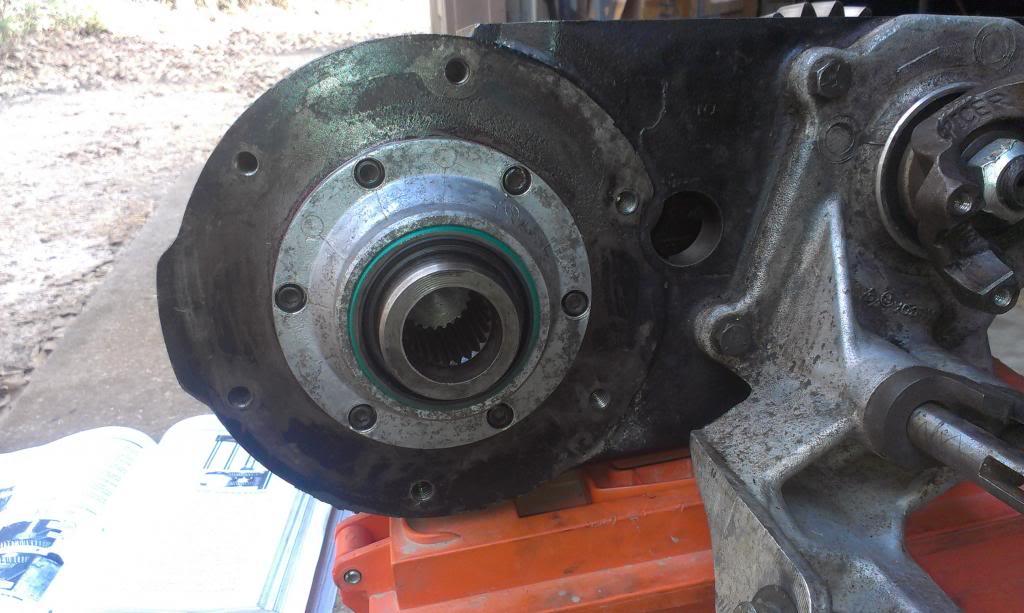
When I sat down to reassemble the Dana 300, I started to panic. What are these/is the case cracked!!!!!!
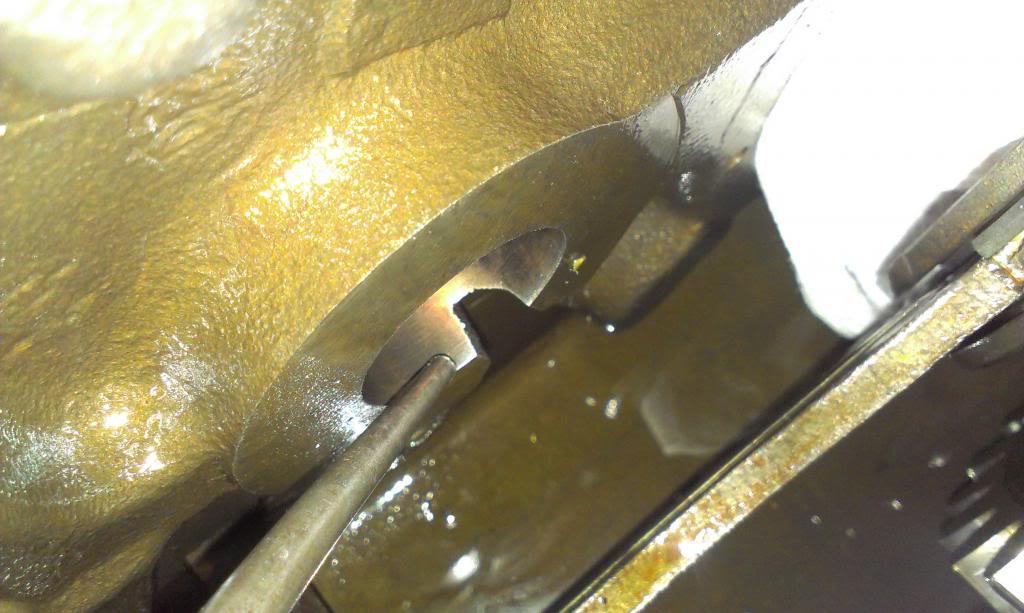

Then I remembered they were just oiling slots, so I settled back down. I went back and looked at pictures of all the Dan 300's I have rebuilt, they are all like this, so all is good. Later on, when I reinstalled the idler shaft, I knew it was OK, the slots are also where the little nubs on the thrust washers key into.
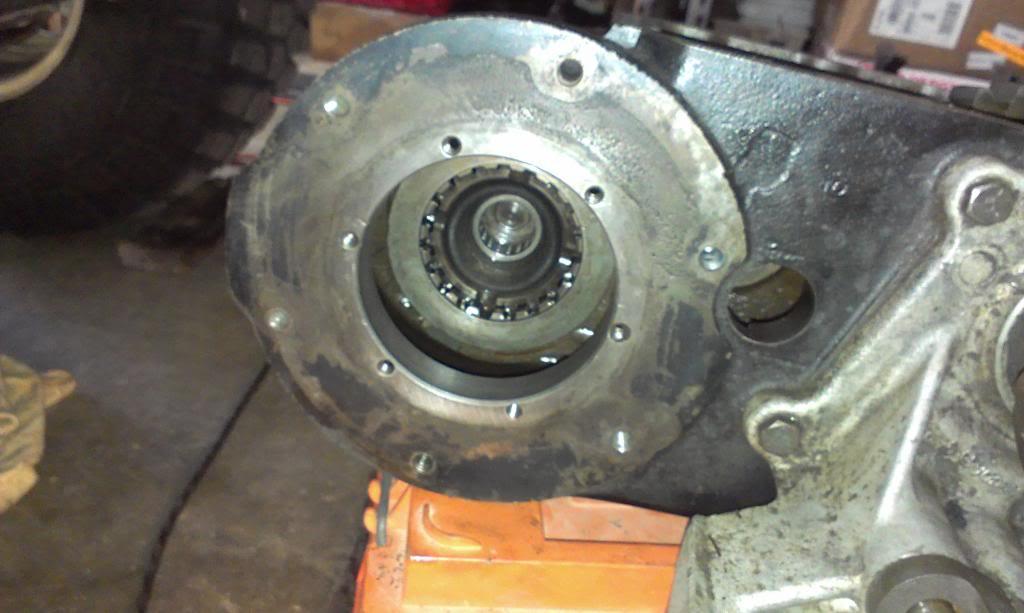
Anyway, back to work, cleaned the front input housing area:
And cleaned a bunch of bolts:

Primed the Dana 300, put the anerobic sealant on the input housing, reading to install:
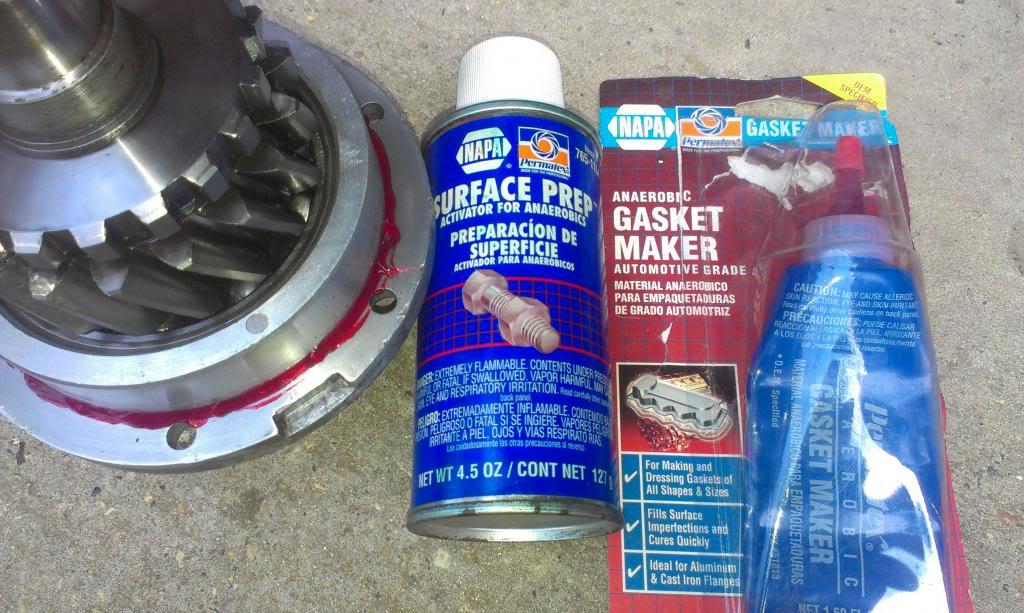
And the input housing installed:
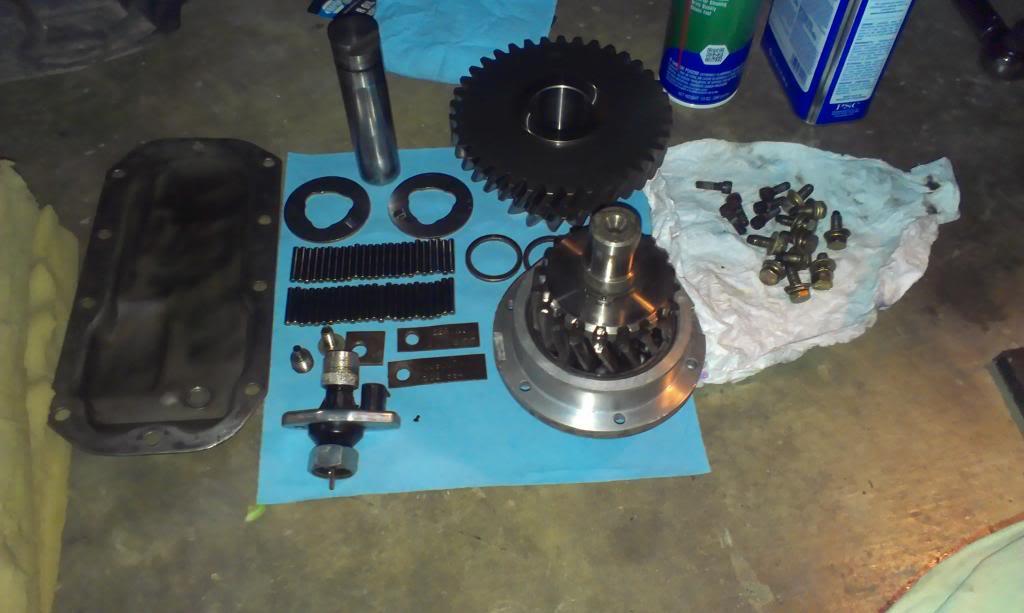
The idler gear/components:
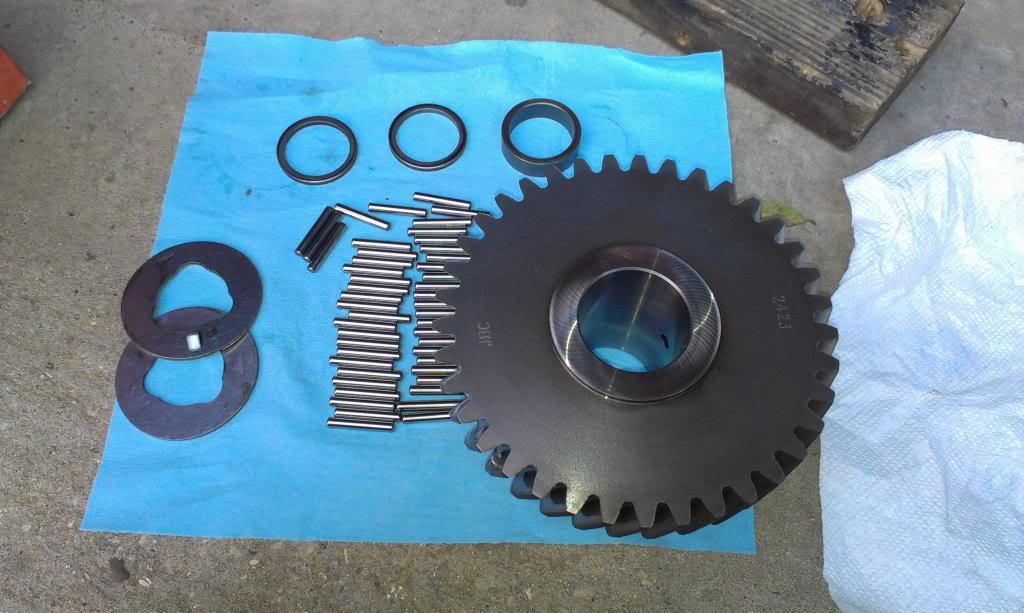
I used some assembly lube/grease, all 48 needle bearings installed, with spacers:
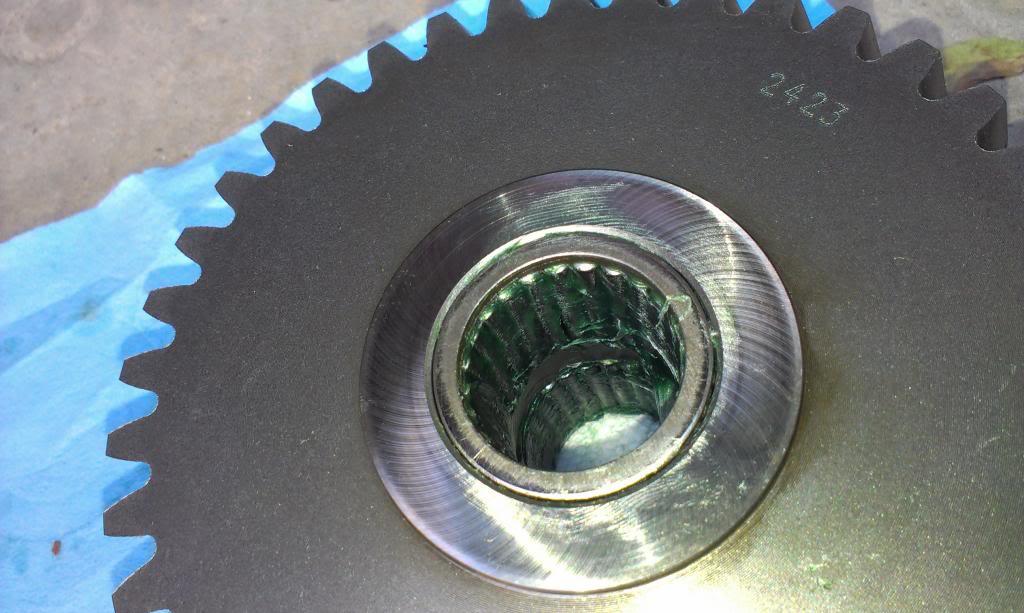
Next, I installed the thrust washers. On the left side, I used the idler shaft to hold the bushing in place. On the right side, I used a socket to hold the washer in place.

The gear dropped in fairly easy, just had to hand roll the gears over, dropped in. Much easier to install the idler gear then to remove it. I forgot to take a picture.
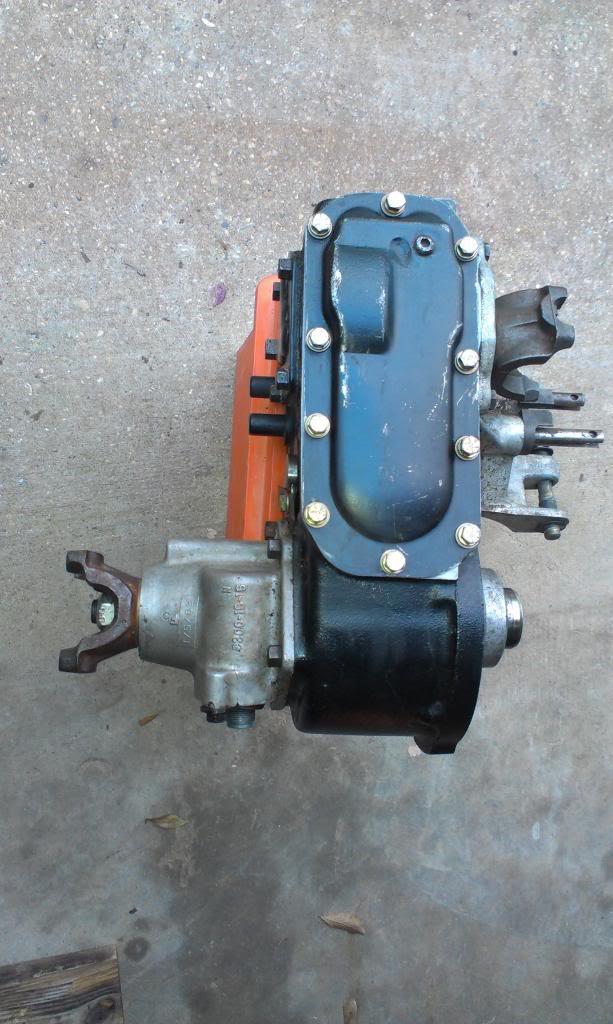
And the bottom cover installed, Dana 300 ready to go.
When I sat down to reassemble the Dana 300, I started to panic. What are these/is the case cracked!!!!!!
Then I remembered they were just oiling slots, so I settled back down. I went back and looked at pictures of all the Dan 300's I have rebuilt, they are all like this, so all is good. Later on, when I reinstalled the idler shaft, I knew it was OK, the slots are also where the little nubs on the thrust washers key into.
Anyway, back to work, cleaned the front input housing area:
And cleaned a bunch of bolts:
Primed the Dana 300, put the anerobic sealant on the input housing, reading to install:
And the input housing installed:
The idler gear/components:
I used some assembly lube/grease, all 48 needle bearings installed, with spacers:
Next, I installed the thrust washers. On the left side, I used the idler shaft to hold the bushing in place. On the right side, I used a socket to hold the washer in place.
The gear dropped in fairly easy, just had to hand roll the gears over, dropped in. Much easier to install the idler gear then to remove it. I forgot to take a picture.
And the bottom cover installed, Dana 300 ready to go.
- City
- Biloxi
- State
- MS
Now that the Dana 300 was back together, time to start work on installing the spacer/clocking ring I got from Novak.
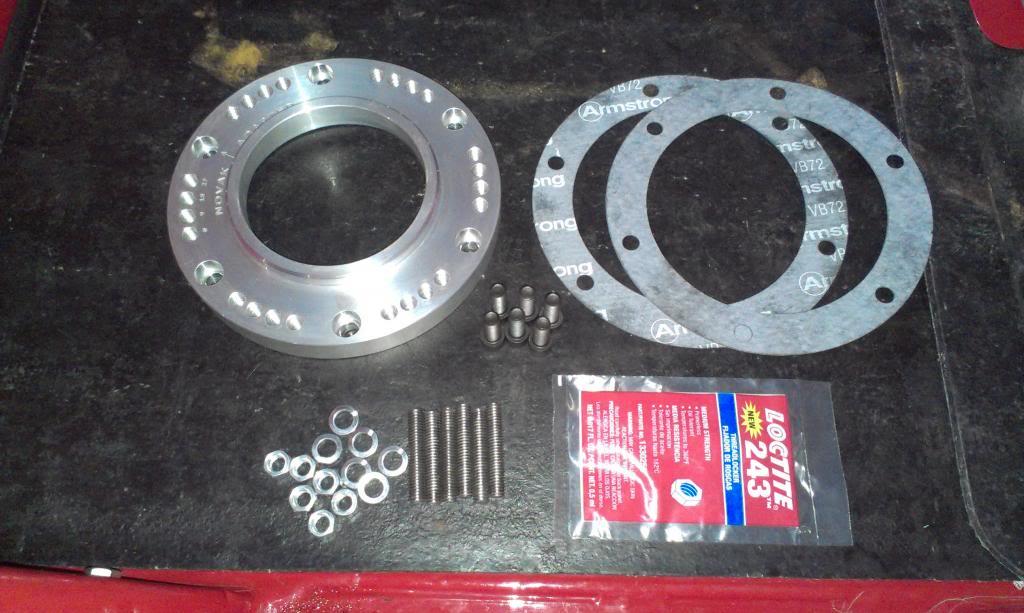
What constitutes the clocking ring kit:
All the previous work on the Dana 300 was just to install a double lip seal on the input shaft. This seal will keep the Dana 300 oil inside the transfer case, and keep transmission fluid out. According to the Novak instructions, the cavity created by the clocking ring will be full of transmission fluid. I thought that the input snout of the Dana 300 would slide all the way into the rear seal on the AX15, I guess not???
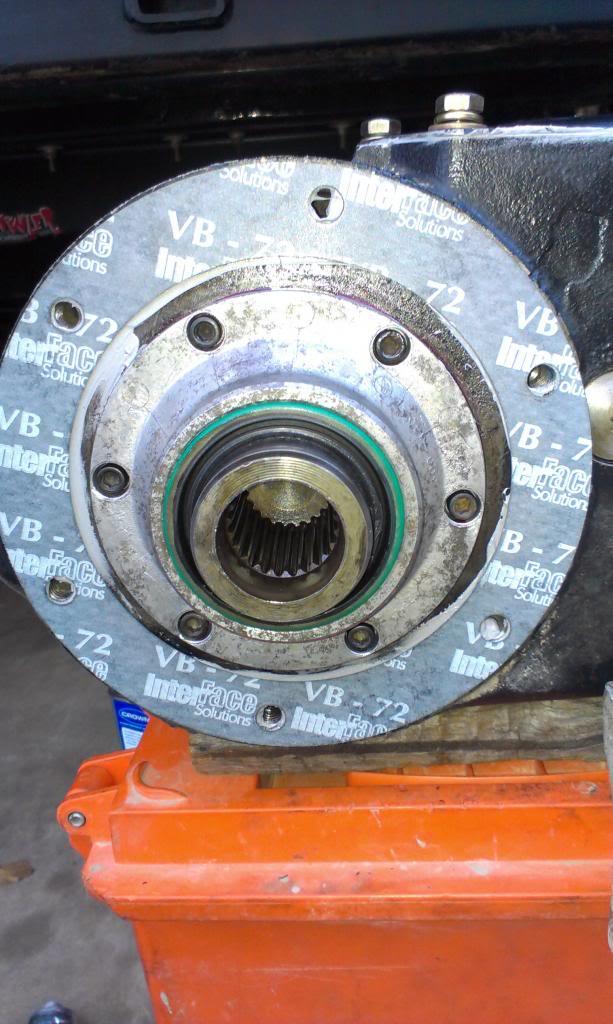
Since the inside of the clocking ring will be "wet" inside, it is important to seal it up. So, first I glued one of the included gaskets to the face of the Dana 300:
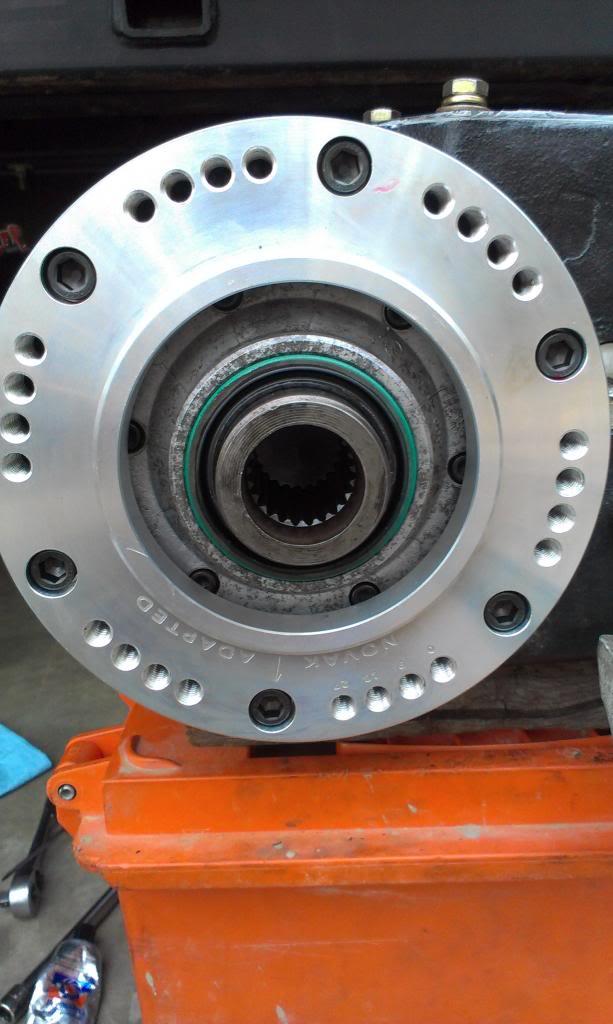
Next, I smeared RTV on the back side of the clocking ring, and bolted it in place. NOTE - my transfer case is upside down in all of these pictures. Note that the arrow on the clocking ring is pointing toward the top of the Dana 300, this is how it is supposed to be installed.
Now, if I would have been smart, I would have figured out which clocking positions will work, BEFORE I installed the transmission. Since I did not do this, I did some experimenting.
If you install the studs in the "0" degree holes, the Dana 300 will sit flat. I do not think this will work, unless you modify the transmission case/Dana 300 shifter.
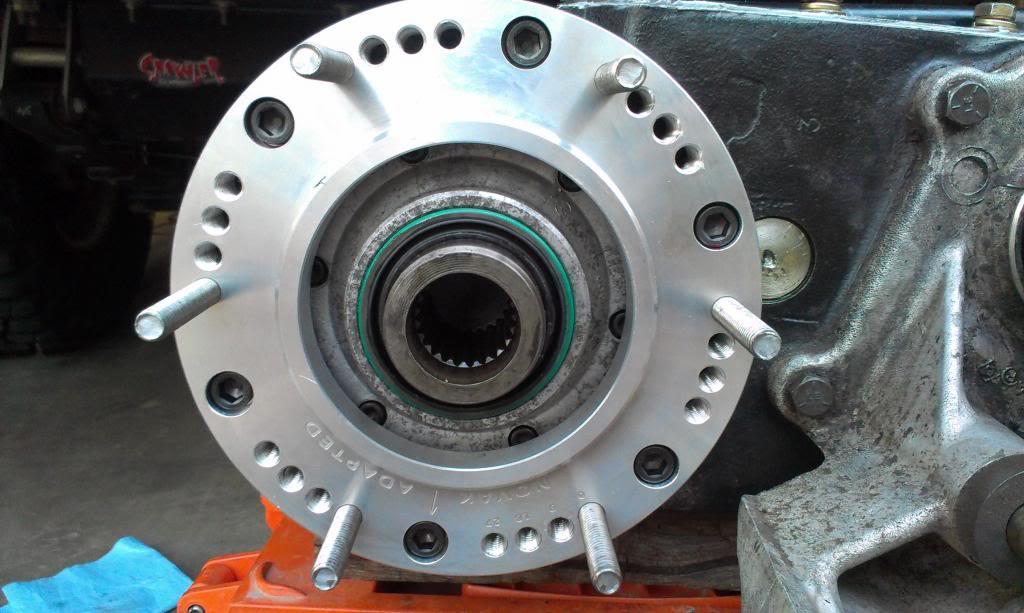
I believe this set of holes will be the best compromise, it will clock the Dana 300 up some, but wont require more modifications:
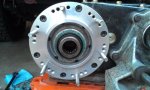

I am going to test fit in the above position, to see if it will work. I might try one other set of holes, too. I should have messed with this before installing the transmission. Oh well, live and learn.
One other note - this second gasket will only install over the studs one way. Do not force it. Keep rotating the gasket until it lines up. You can see I marked the holes, "Top" and "Bottom":
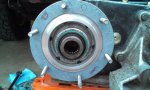

That's it for now
What constitutes the clocking ring kit:
All the previous work on the Dana 300 was just to install a double lip seal on the input shaft. This seal will keep the Dana 300 oil inside the transfer case, and keep transmission fluid out. According to the Novak instructions, the cavity created by the clocking ring will be full of transmission fluid. I thought that the input snout of the Dana 300 would slide all the way into the rear seal on the AX15, I guess not???
Since the inside of the clocking ring will be "wet" inside, it is important to seal it up. So, first I glued one of the included gaskets to the face of the Dana 300:
Next, I smeared RTV on the back side of the clocking ring, and bolted it in place. NOTE - my transfer case is upside down in all of these pictures. Note that the arrow on the clocking ring is pointing toward the top of the Dana 300, this is how it is supposed to be installed.
Now, if I would have been smart, I would have figured out which clocking positions will work, BEFORE I installed the transmission. Since I did not do this, I did some experimenting.
If you install the studs in the "0" degree holes, the Dana 300 will sit flat. I do not think this will work, unless you modify the transmission case/Dana 300 shifter.
I believe this set of holes will be the best compromise, it will clock the Dana 300 up some, but wont require more modifications:
I am going to test fit in the above position, to see if it will work. I might try one other set of holes, too. I should have messed with this before installing the transmission. Oh well, live and learn.
One other note - this second gasket will only install over the studs one way. Do not force it. Keep rotating the gasket until it lines up. You can see I marked the holes, "Top" and "Bottom":
That's it for now
Last edited: