• Notice for iPhone users: DO NOT use the image size reduction option when uploading photos to the forum. This causes portrait images to post as landscape. We have added a warning to the image insert pop-up as well.

Someone called it a TJ 6

I had the same issue on mine. The S10 had the heater return bung on the radiator. I changed my water pump as the original didn't have a port for the heater hose. The reman had a plug, so I added the bung and routed the heater hose to it. I don't know if this gives the "correct" flow. The heater works and it doesn't overheat....

Sucks you have to remove the engine after all that. Had the same thing happen with a buddies jeep. Lots of work for a freeze plug. Of course it wouldn't be the ones accessible without removal. Still remember sitting on his driveway changing them out.
 
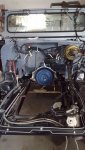
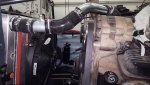
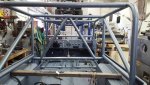
Motor out. It is is a wonder that this motor sat around the shop for a good number of years and.....
20191021_111330.jpgresized.jpg

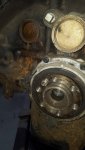
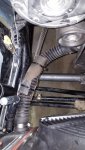
never noticed that the freeze plug was missing. It was gone not there, not rusted out just not there!
20191021_111354.jpgresized.jpg

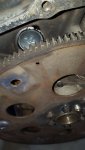
New one in.
20191021_150841.jpgresized.jpg
Also found another one that looked bad so I changed it as well but didn't take pictures.
 
Last edited:
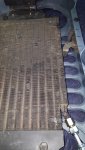
Also had a leak in the radiator, that didn't surprise me. The radiator had been banging around the shop for almost as long as the motor. Took to the radiator shop, they pressure tested it was swiss cheese. Spent the next day chasing a Jeep CJ to Chevy motor conversion radiator. I will let everyone know what I got when it gets here. (hint it wasn't cheap)
 
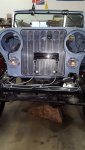
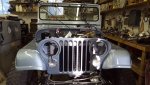
While waiting on the radiator to arrive I set the grill again and finished fitting the trany cooler hoses and cooler.
20191028_132041.jpgresized.jpg

20191028_132949.jpgresized.jpg

20191028_133006.jpgresized.jpg
 
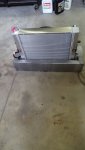
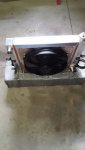
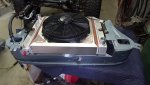
The new radiator arrived today about noon my time. I ordered it from Novak. Checked several different brands, makes and materials. Decided on the this one because the radiator is not directly mounted to the grill. It sit is in a cradle isolated by a rubber liner and bushings. The second reason for ordering the Novak is it also had a fan available and would come assembled, I would not have to refab what I had if it didn't fit and it is a better fan than the one I had. My grill is modified to shift the radiator to the passenger side to clear the TJ steering box. ( to late to really tell but this one may not have needed to be shifted it is shorter and the bottom tapers more inward that the other one I had) but I know I have more room now.

20191029_121234.jpgresized.jpg20191029_121245.jpgresized.jpg

Installed rubber baby buggy bumpers on the A/C condenser frame to make sure they did not rub together and on the grill lip.
20191029_131340.jpgresized.jpg

I had to do a little bit of trimming to get it to drop in. (because of the shift) but it was just a small bit in 3 places. Will need to make a couple of cover plates to close up some of the space from shifting it.
20191029_132538.jpgresized.jpg

The price of this one was comparable to the Advance Adapters Brass/Copper one available, but I would have still had to deal with a fan (the one I had would have probably worked). Buying the fan added a little over $300 but it came pre-assembled.
 
That's a cool tool. Homemade or who is the mfg?
1572454471640.png
 
He is correct it is AA. I have used it more than I thought I would when I bought it. Breaks down fits in a tool bag.
 
Put the front back together again

,20191031_165302.jpgesized.jpg

Redid the plumbing
20191102_110723.jpgresized.jpg20191102_143408.jpgresized.jpg
 
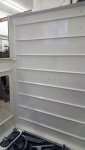
I had been trying to figure out how to get some insulation on the top inside. Decided to take advantage of the ribs.
20190728_152207.jpgresized.jpg

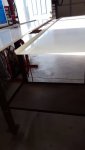
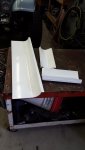
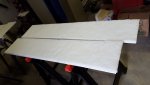
I had a local Heating and Metal shop look at an idea I had and make panels that will drop in between the ribs but not all the wan down. So we bent a 1/4 ins lip on each side to match the angle of the ribs and sit about a half inch off the top.
20191119_123703.jpgresized.jpg

Also had them make pieces for the edge.
20191121_111708.jpgresized.jpg

Bought some DEI D-mat insulation and cut and glued to the under side of the panels.
20191120_114911.jpgresized.jpg

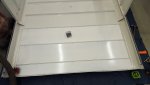
Laid the panels between the ribs and pop riveted then in place.
20191120_103713.jpgresized.jpg

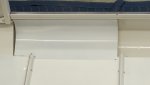
Test fitted how the side covers are going to fit. The lower edge will get pop riveted to the other panels.
20191121_113037.jpgresized.jpg
Still have to glue in the insulation around the sides then install the side pieces. It may not make a big difference but any little bit will help with the metal top.
 
I have been hung up on the ignition wiring at the steering column for a bit so I turned to some diversion.

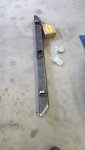
This is the style of rear bumper I wanted to put on the CJ6. I had planned to build it but got to messing around on the web and found out the Rock Hard makes exactly what I wanted, so I ordered one with out the carrier or powder coating.

20191204_110212.jpgresized.jpg

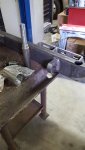
I already had the pivot point parts on the shelf so as soon as I got it I put the hole through the new bumper for the pivot. Yes it goes clear through from top to bottom.
20191204_115037.jpgresized.jpg

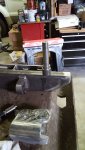
I will taper the hole edges and weld it in. I plan on making me another carrier like on my other 2 Jeeps. There is a link to what built in the Fab section.
20191204_115103.jpgresized.jpg
 
While fighting the ignition problem for 3 weeks I finally pulled the column and took it to a shop. The rebuild off of Ebay was not so hot. They had to readjust the rod to the switch. It's back in know so I can move forward again.

In the mean time I spent a little more time on the bumper/tire carrier.
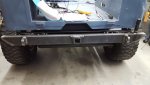
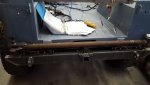
Bumper mounted up.
20191205_085005_001.jpgresized.jpg
20191205_085039.jpgresized.jpg

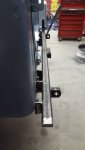
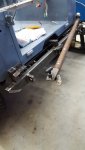
Swing arm built.
20191209_100722.jpgresized.jpg20191209_100810.jpgresized.jpg

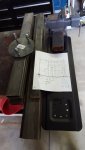
Parts for the tire/rotopax cans carrier. I plan on taking down to the local High School welding program and let the students assemble and weld up. I am building another carrier like the one I posted about in the Fab section. I will add more pictures there as well as I get time.
20191209_134953.jpgresized.jpg
Under my supervision of course. I sub for the welding instructor when she needs to be off so I know the students a bit and she thought it would be good project of the students.
 
While fighting the ignition problem for 3 weeks I finally pulled the column and took it to a shop. The rebuild off of Ebay was not so hot. They had to readjust the rod to the switch. It's back in know so I can move forward again.

In the mean time I spent a little more time on the bumper/tire carrier.
Bumper mounted up.
View attachment 78194
View attachment 78195

Swing arm built.
View attachment 78196View attachment 78197

Parts for the tire/rotopax cans carrier. I plan on taking down to the local High School welding program and let the students assemble and weld up. I am building another carrier like the one I posted about in the Fab section. I will add more pictures there as well as I get time.
View attachment 78198
Under my supervision of course. I sub for the welding instructor when she needs to be off so I know the students a bit and she thought it would be good project of the students.


That is awesome. I took metal shop in high school because one of my football coaches was the teacher. I didn't really know what I was getting myself into. It turned out that I loved the class and I learned to weld and other things. I have used those skills learned over 20 years ago now more than just about anything else I learned in high school, except for typing...
 
My High School didn't have a metal/welding shop I learned later at the job. I substitute for the schools from time to time and try to take the welding class if the instructor needs off. I am the only sub in the district that can work with the students in the shop. I have been there a few times this year so I know a bit about the students. They have really NICE Shop!
 
I'm about to build a new high school, and they are including 3 fully equiped welding shops with 2 classrooms per shop, support spaces, etc... They will have 72 welding stations.

Amazing what ISDs are doing today.

Then again, this school is only a couple miles down the road from a major commercial HVAC equipment manufacturer.
 
Spent most of the last week work toward getting it to run. I put the column back in and the switch works and the engine turns over but did not start. So back to trouble shooting. Chased the fuel system first, no fuel to throttle body. In tank pump not putting out. Added an in line pump, have fuel to the throttle body now but still not starting. Not getting anything out of the injectors. So now to chase the electrical issue. I did a little checking on that and I think I have the ECM power on the wrong Jeep circuit. Need a Hot on and start circuit, the one I used I thought it did that but it doesn't so now find one that does........then maybe it will come A LIVE! Also did a little more on the insulation for the top, working on the corner pieces.
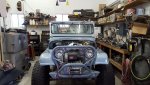
 
I was going to post a video of this but I don't know how to get it here. BUT I got the motor to RUN!!!!!
 
Got busy adding parts. If you notice the grab bar in the first picture then notice it the later pictures you will notice I had a issue with the stanchions not letting it fit in the normal location. Had to figure out some other place to put it. Its now mounted at the top of the dash.
.20191231_141253.jpgresized.jpg20200103_114100.jpgresized.jpg20200103_114154.jpgresized.jpg20200103_115015.jpgresized.jpg20200103_115053.jpgresized.jpg20200103_115015.jpgresized.jpg
 
Last edited:
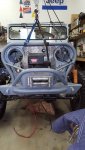
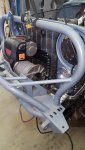
I should have said how I really like your front bumper sooner. You said the base plate is from A to Z fab. Is it pre drilled where it mounts to the frame ? Do the holes line up for a CJ 7 or CJ 8 ? Thanks
 
Back
Top