• Notice for iPhone users: DO NOT use the image size reduction option when uploading photos to the forum. This causes portrait images to post as landscape. We have added a warning to the image insert pop-up as well.

What's on your Work Bench?

You can still get CCA treated materials. Usually it is for larger materials like 4x6 or larger. Some of the specialty lumber yards have it in smaller sizes, but it can’t be used for residential construction nor most commercial construction. On of the few uses where it is still allowed is piles / dock construction.

The newer MCQ, ACQ, and the many other copper based treatments just don’t work very well. Some are extremely corrosive and require specialized coatings on the fasteners or stainless fasteners.

I have bought CCA lumber from a commercial yard in Houston (Bayou City Lumber), but that was roughly 8-10 years ago.

The CCA lumber is not nearly as bad as 60 minutes wants you to believe.
Yep, two lumber yards down here sell it, for dock use "only". The boards they sell are more like timber dimensions. The 2x8's I bought measured a true 2-1/8 to 2-1/4 wide, at least 8-3/16 tall. I hated having to rip them down to 7.5 but had to for them to work with existing framing.
 
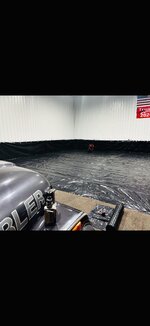
Finally got concrete guys to say they are going to be here next week to pour first half of my shop. So I’m putting down the plastic to protect my shiny new walls and moisture barrier on the asphalt.
 

Attachments

  • IMG_0748.jpeg
    IMG_0748.jpeg
    438.1 KB · Views: 17
Yep, two lumber yards down here sell it, for dock use "only". The boards they sell are more like timber dimensions. The 2x8's I bought measured a true 2-1/8 to 2-1/4 wide, at least 8-3/16 tall. I hated having to rip them down to 7.5 but had to for them to work with existing framing.
I think those dimensions are intentional, it prevents the boards from being classified as dimensional lumber. It puts them in the timber classification.
 
Finally got concrete guys to say they are going to be here next week to pour first half of my shop. So I’m putting down the plastic to protect my shiny new walls and moisture barrier on the asphalt.
So you're pouring the concrete on top of the asphalt?
 
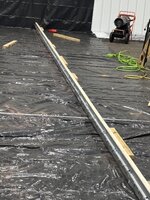
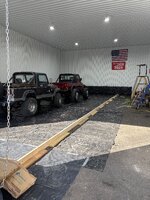
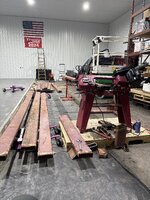
First side forms in place and steel expansion key way in place. pouring first 25 yards concrete Friday morning
 

Attachments

  • IMG_0756.jpeg
    IMG_0756.jpeg
    1.7 MB · Views: 27
  • image.jpg
    image.jpg
    2.8 MB · Views: 25
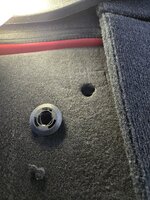
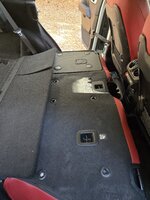
Not too technical, just have to cut 15 holes in the back of the 392's rear seat, so that first cut had a pucker factor for sure!!!

20241221_101558.jpg

20241221_101610.jpg

20241221_102239.jpg

20241221_105044.jpg

20241221_110832.jpg

20241221_111348.jpg

20241221_111606.jpg

20241221_111809.jpg

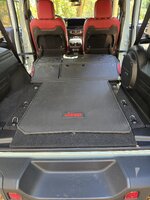
Kind of bugged my OCD that the front and rear seat areas have good rubber floor mats, but nothing in the rear cargo area!

I wish the rear floor mat would have went from wheel well to wheel well, with cut outs for the hold down loops, but still way better than before. I don't plan on throwing dead deer in the back or anything, so good to go.

The Mopar trail rail system would finish the rear cargo area floor nicely, but $600 for something I would hardly use is a tough pill to swallow 😆
 
Cutting fluid will speed it up and extend the life of the blade.
 
Not too technical, just have to cut 15 holes in the back of the 392's rear seat, so that first cut had a pucker factor for sure!!!

View attachment 115744

View attachment 115745

View attachment 115746

View attachment 115747

View attachment 115748

View attachment 115749

View attachment 115750

View attachment 115751

Kind of bugged my OCD that the front and rear seat areas have good rubber floor mats, but nothing in the rear cargo area!

I wish the rear floor mat would have went from wheel well to wheel well, with cut outs for the hold down loops, but still way better than before. I don't plan on throwing dead deer in the back or anything, so good to go.

The Mopar trail rail system would finish the rear cargo area floor nicely, but $600 for something I would hardly use is a tough pill to swallow 😆
Somehow I missed in your past posts that you had the red interior on the 392. That looks so good with the paint color!
 
Won’t fit on the work bench….

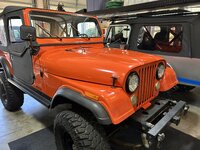
This is the one that started it all for me. My very first CJ that I bought in 2006.

It started life as a 1976 304/3spd Levi edition. H4 paint code Dark Cocoa Metallic. When I bought it all that was left of the Levi interior was a ripped to shreds rear seat. Outside was spray bombed flat black. It ran but barely. With limited knowledge and budget I built what you see here. If something worked I kept it as-is. This is the first paint job my guy ever did for me and the first motor build the late Jerry Tucker did for me.

Right as I was finishing it up life happened and I found myself divorced and needed to replenish my bank account.

Sold it to a local guy in early 2011. We kept in touch for about a year and then nothing.

Fast forward to 2 weeks ago and I get a friend request on FB. It’s him. He still has it. He’s ready to sell it. There are a few odds and ends that need fixing like a few gauges, leaking front pumpkin, etc. nothing major. He wants these things fixed before he lists it.

I did give him crap for removing the spare and carrier. He still has it but thinks the Jeep looks better naked out back. He took the full doors off when he got it home 13 yrs ago and they’ve never gone back on.

It’ll be fun getting re-acquainted with the ‘ol girl


IMG_2703.jpegIMG_2702.jpeg
 
Are you planning on buying it?
As cool as it would be to have it back I can’t justify it at the moment. My mind has been set on picking up another Vette if I wanted another project / fun car. We’ll see how things progress as I mess with it
 
95% finished with the pier, just need to add a few more bolts on the other pile to stringers connections, I ran out, and the tide came in.

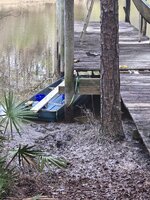
Had to use the old Coleman plasticky/rubbery boat as a work barge, ended up working well, glad it still floats. Added a strong back underneath the existing slightly damaged stringers, secured with some 3/8" diameter 10" long timber lag bolts. Working by myself, used a ratchet strap on either end to hold it in place. Now you see why I left a few deck boards out.

20250104_100653.jpg
Slightly better picture of the old work barge. I also use this thing as a sled, winch it up and down the hill in the back yard, hauling material or yard debris. Pretty durable since I have been abusing it since 1991. Good river boat, flat bottom, like a little landing craft for beaching on shore. Won't talk about the time in high school we put a Mercury 9.9 on the back!!!
20250104_105020.jpg

The 2x12 made a perfect bench/work platform. Sucks working off the boat, you would have you lash it at both ends to the pier when trying to install the large lag bolts.

Added a few boards to tie the strong back to the original slightly damaged piece above. Probably overkill but I had some scrap wood laying around.

20250104_160006.jpg

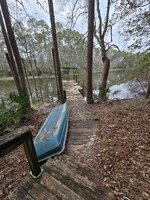
Installed the missing deck boards, removed the slide (fiberglass exposed to the sun for over 30 years, it had some cracks, and really didn't use it anymore) and pretty much finished for now.
20250104_155924.jpg

20250104_160024.jpg

A few more bolts to install underneath, also need to remove the remaining rusted metal roof panels. Not sure if I will.replace them, probably should just for the hell of it.

Not bad for a pier built in 1991, this is the only work it has ever really needed.

If you think Jeeps are expensive definitely don't get into boats!! It's funny I live on the river, and besides the old Coleman boat pictured above, the only other boat I have is my old green 13' Gheenoe skiff pictured to the right in the below picture.

20250104_160208.jpg

The Gheenoe is a great little river skiff. It was designed for fishing and duck hunting. Very stable, you can stand up in it and shoot shotguns out of it!! I keep saying I'm gonna buy a little 5hp for it but just never get around to it.

We have some really cold weather (for us anyway) the next week, might do some more yard clearing work, wait for it to warm up some and then get back to work on my '86 CJ-7 project.

 
Back
Top