• Notice for iPhone users: DO NOT use the image size reduction option when uploading photos to the forum. This causes portrait images to post as landscape. We have added a warning to the image insert pop-up as well.

Another Scrambler Purchase/Road Trip - UPDATE- BODY ON FRAME AGAIN

Since I was back here, and the driver side caliper piston did not want to compress/spin back in, I installed new rear calipers. I purchased these calipers a year or two ago from NAPA. I need to find the part number, they are for a Ford passenger car rear brake application. The SSBC calipers lasted 15 years, so no complaints. I will send them back to SSBC for a rebuild, and keep them as spares. These calipers are not super common, either.
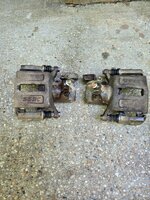
20250525_155057.jpg

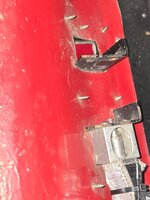
Installed, fighting with the parking brake cables.......

20250525_155111.jpg

Ignored the instructions, looked back on my pictures, done.

20250525_173954.jpg

The parking brake does work, and works well for normal use. It will NOT hold you on a super steep off road hill. That being said, the drum brake parking brake is marginally better, and both are better with stock size tires. It is not too fiddly to get the OEM parking brake cables to hook up to these calipers, and well worth the effort.

Up next.....
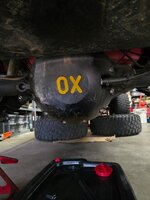
20250525_185709.jpg

Differential cover gasket and Ox Locker shifter cable o-ring replacement. These items are only 15 years old.......
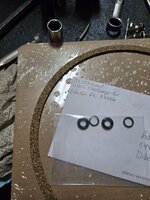
20250525_190008.jpg
 
From new to used and back to new again! Great work Raymond. Personally love these full float AMC 20 rears with drive slugs. I used GM front calipers off of an S-10 and an inline 1/4 turn valve for a "holding" brake.
 
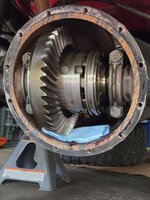
Back at it today, removing the Ox Locker differential cover.

20250526_095101.jpg

20250526_095107.jpg

I unscrewed the cover from the cable.

20250526_100045.jpg

Technically, I could have just screwed the cover back on to the cable, but I ended up removing the entire cable and shifter mechanism. This set up is pretty durable, I have never had to mess with this cable in the 15 years it has been in service. One time, in Moab, I did pull the cable out of the shifter when I spun an axle tube.......

Cleaning the axle housing, wasn't too bad, I didn't use any RTV when I installed the original cork gasket, just some aviation sealant, or glue.

20250526_113015.jpg

When my ring and pinion guy installed the Ox Lockers/4.10 gears, he safety wired all the carrier bolts for me, per the instructions.

20250526_113026.jpg

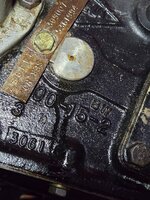
Serial number.

20250526_113046.jpg

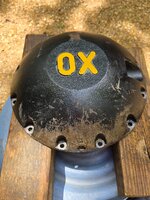
The Ox Locker differential cover is beefy as all get out. I have smashed it into all kinds of things, no problem.

20250526_113143.jpg

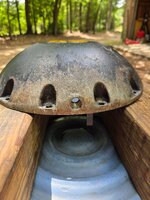
Built in drain plug, lots of rock rash!

20250526_113156.jpg

The drain plug comes in very handy. I have changed the gear oil out numerous times in the past 92k miles, I have never had to remove this cover, which is a good thing, it is heavy.

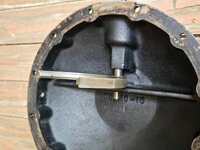
And the magic part, the shift fork that slides the collar on the differential case to lock the differential.

20250526_113213.jpg
 
  • Like
Reactions: SKT
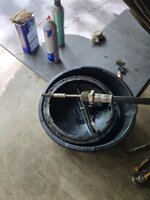
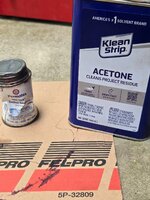
I glued the gasket to the housing with some Permatex High Tack. If you have messed with this stringy sticky stuff you will understand why the can is all smashed up. Acetone cleans it up.

20250526_115212.jpg

20250526_115223.jpg

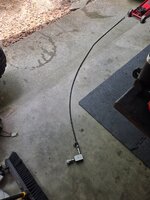
Shifter and cable removed.

20250526_130703.jpg

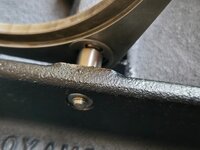
I have a bracket, made by Searchers 4x4, that holds both my Ox Locker shifters, right on the driver side of the transmission hump. Too bad he doesn't make these for CJ's anymore. Some underbody shots of the bracket, front Ox Locker Shifter still in place.

20250526_130731.jpg

20250526_130752.jpg

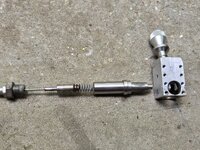
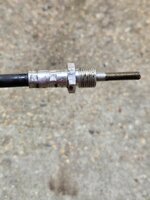
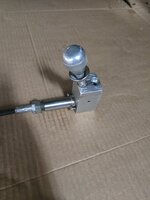
Shifter and it's cable end and parts.

20250526_131713.jpg

Differential cover cable end.

20250526_131747.jpg
 
  • Like
Reactions: SKT
There was no way I was going to be able to reinstall the cable and keep my sanity without some further disassembly. I need to remove the piston that the cable screws into. The fork also threads on this piston. It is secured with two e-clips. This is what I did, worked out fine. Newer pistons are different. I removed the e-clips, unscrewed the piston out of the fork, removed piston.

20250526_134753.jpg

I needed to remove the piston to install a new o-ring, so not wasted effort.

20250526_134848.jpg

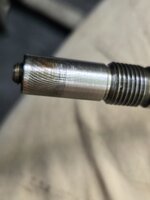
My piston is the older style, it has internal threads that the cable screws into.

20250526_134857.jpg

I threaded the shifter cable into the piston, one to two threads sticking out past the end of the piston.

20250526_135331.jpg

It then inserted the cable into the cover, threaded the outer piston threads into the shift fork, centered fork between the two e-clip grooves, installed e-clips, and verified the cable was still threaded past the end of the piston one to two threads. Kind of fiddly, not too bad.

20250526_141626.jpg

Unlocked, note one of the e-clips. There is one on either side of the shift fork.

20250526_141630.jpg

Locked.

20250526_141635.jpg

Shifter end of the cable. I lock tited this piston to the cable threads 15 years ago just like the instructions said. Just wanted to check, it is still perfect.

20250526_141644.jpg

20250526_141656.jpg

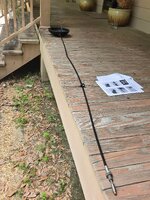
A long work bench was needed for all this cable work LOL.

20250526_141939.jpg
 
  • Like
Reactions: SKT
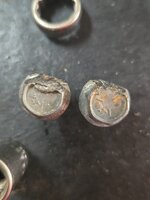
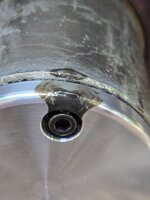
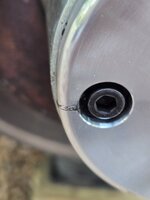
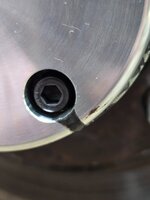
Two lower cap bolts that secure the cover to the axle housing have seen better days. All the rock dragging has actually wore down the bottom of my axle housing and the cover equal amounts. These two bolts built in washer/heads now hang down a hair below the housing. I need to install some Allen headed cap bolts here. But, I do like the grade 5 hex bolts here for one reason: external head, and they are soft, so I was able to hammer a socket on to the hex and remove them without any drama. Carnage pictures.

20250526_143247.jpg

20250526_143258.jpg

Cover reinstalled. I put a thin coat of aviation sealant on the cork gasket to cover interface.

20250526_153406.jpg

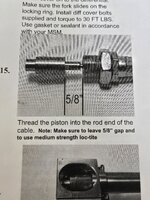
Adjusting the shifter end of the shift cable. This is where all the adjustments take place. As long as you thread the cable into the differential covers piston correctly, and have the 5/8" gap on the other end, you are golden. You fine tune/adjust at the shifter where the cables male end threads into the shifters female collar tube.

20250526_154622.jpg

You want the larger OD of the shifter piston to be barely touching the shifters shift rods notch.

20250526_154632.jpg

Reinstalled, and a picture of my Ox Lockers shifters mounting bracket, and handy location.

20250526_164805.jpg

Even with the cable and shifter all routed and mounted you can still easily.make adjustments at the shifter end, on the female tube. Mine should be good to go, I'll know for sure once I reinstall the axle shafts/drive flanges/tires. Once this cable is adjusted and locked down, no reason to ever have to touch it again, unless you damage the cable somehow and have to replace it. I had to replace the front cable a few years ago due to it becoming unsecured and the outer sheath getting melted by the exhaust down pipe. I also repeatedly smashed that cable into rocks.

Waiting on my new drive flanges, should be able to finish this part of the project up tomorrow evening.

20250526_164840.jpg

That's it for now.
 
No drive flanges, so some piddling completed.

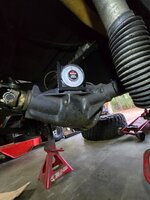
Dumped one quart of gear oil into the rear axle, just to see if the cover/drain plug will leak. Can't fill it all the way up until the axle shafts are slid in. While I was down there, checked the axle upward rotation. Measured on the machined flat surface on the driver side.

20250527_180814.jpg

20250527_180808.jpg

I'm at about 9 degrees, not sure what the stock angle is. I have this rear axle shimmed upward to meet the CV equipped driveshaft. The FSM says about 2.5 quarts of oil, so I am going to carefully add only that much to the rear axle this time around and see how far below the fill plug I am. I have just been blindly filling it up to the bottom of the plug, maybe part of my leakage issue is from overfilling the rear axle? Worth a shot.

Since I am waiting on parts, going to half ass try to stop my last leak:

20250527_180849.jpg

I always have a slight leak from the Dana 300 intermediate shaft, only at the rear. IIRC the front of the shaft/case uses a flat o-ring seal. The rear has nothing. This never leaked UNTIL I had to clock the Dana 300 upward to work with the swapped in AX15. Maybe at stock clocking angle this shaft is not submerged in oil, not sure. I probably also always over full this gear box, too. In actually, kind of stupid on my part, since the flatter clocked angle provides better lubrication to the rear output shaft bearings.

Drained the Dana 300, cleaned it up, but not much hope of really sealing this up without taking the whole Dana 300 apart, and even then, a crapshoot at best.

20250527_184753.jpg

20250527_184808.jpg

When I rebuilt this Dana 300, and added the Lomax 4:1 gears, shaft to case bore was tight. Still appears that way, can't move the shaft. Going to try to put some Permatex hardening sealant around the shaft where it sticks out past the case. That might work on 2/3 of it, but the part of the shaft that is machined to take the little metal square anti rotation piece, meh. Will smear it there and then put the plate in, also put some sealant in that bolt holes threads, which it had. Worth a shot while I'm waiting on parts. If I stop this leak, besides a little oil that comes out of the speedometer gear housing, will be sealed up pretty good.

That's it for now.
 
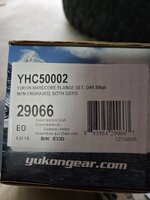
The Yukon drive flanges arrived today.

20250528_182114.jpg

20250528_182222.jpg

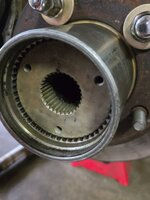
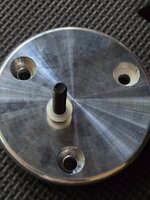
Drive slugs OD fits the Warn hubs perfect.

20250528_182514.jpg

And the drive slugs ID fits the Warn axle shafts perfectly.

20250528_182602.jpg

Two reasons I prefer these drive flanges over the RCV flange kit.

1) I like how the Yukon cap attaches directly to the drive slugs. The RCV uses a separate part for the cap to attach to, which allows for some shaft/slug movement. On the Yukons, cap secures the slugs in place, no slug "float".

2) On the Yukons, the cap o-ring seals to the ID of the wheel hubs.

20250528_182651.jpg

On the RCV, the cap o-ring seals against the hub face, so the cap is never positively locked into place.

20250528_182708.jpg

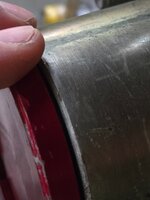
With the Yukon o-ring fitting the ID of the wheel hubs, make sure there are not any burrs/damage that could damage the o-ring. The picture below shows where the RCV o-ring rides on the outer surface of the wheel hubs. The Yukon o-ring will seal to the ID of the wheel hub.
hubs.

20250528_182725.jpg

The Yukon caps are also machined to fit a washer below the cap screw heads, thus another better sealing solution.

20250528_182817.jpg

So far, I am pleased with this purchase. These Yukon drive slugs/flanges seem like an upgrade over the RCV units, at least in this application. More testing is needed. Also, shop around for these Yukon units, price varies from $600 down to $300, which is what I paid via eBay.

One disappointment with the Yukon kit: no written install instructions are included. The box contained a brochure with one of those QR scan things, which would be OK, but when you scan the code and go to Yukon's websites instruction database, there are no instructions available for these parts. These are obviously not a super complicated install, but still, instructions would be nice.

I should be able to finish the rest of the drive flange install tomorrow, button up a few other loose ends Friday evening, maybe put this one back into service by Saturday.

That's it for now.
 
Last edited:
Finished the drive flange install last night.

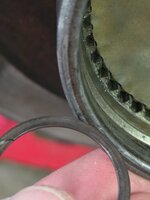
Flange in, axle snap ring on (I reused the original Warn snap ring, the Yukon rings would not work on these shafts), and the larger drive slug ring in place.

20250529_163646.jpg

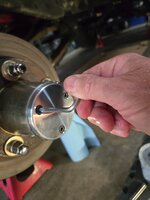
I used an Allen wrench, snugged the bolts up just using the leverage provided by the small end of the wrench. I started all three bolts, when cap got close to hub, I popped it in with my hand, it is a good tight fit.

20250529_164322.jpg

Finished.

20250529_164334.jpg

I also put Permatex #1 Hardening sealant around the Dana 300 intermediate shaft, and under the little metal plate, and on the bolt that threads into the case. Time will tell on this RedneckRay repair.....
20250529_172302.jpg

I have been having to work late/weekends at my pay the bills job, hope to finish this one up tonight so I can drive it to work tomorrow and start testing out all these rear axle seal repairs.

That's it for now.
 
When my ring and pinion guy installed the Ox Lockers/4.10 gears, he safety wired all the carrier bolts for me, per the instructions.

View attachment 117444


That's for sure not the correct way to safety wire stuff.... It will likely work, but... I'll put a pair of Safety wire pliers in your Canadian care package being delivered to you at Sandblast. This is an awesome video on the youtubes that shows how to do it....
 
So, good news first. Transmission, engine, cooling system have been leak free the last few weeks. Clutch and transmission working perfectly. Rear differential cover/gasket/drain plug/shift cable assembly are also leak free. Dana 300 only leaves one little drop spot, we will call that a win for now.
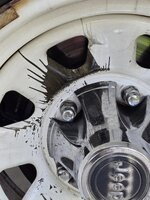
Rear drive flanges/hubs, different story. I noticed very minor "wheel spin art" after three days of driving. Yesterday, out of nowhere, major leakage on the passenger side.

20250609_142754.jpg

20250609_173932.jpg

Got home, pulled the wheel and tire off, leakage around all three bolts. All three bolts were also loose.

20250609_182542.jpg

20250609_182551.jpg

20250609_182558.jpg

O-ring/cap is not leaking, even though it looks like it. All the grease/oil is coming from the three bolts holes.

20250609_182606.jpg

The grease/oil fills up the center cap then runs out the back side all over the inside of the wheel. The rear wheel hub seals are fine, spindle to axle housing end seals fine.

20250609_182613.jpg

Went ahead and pulled off the non leaking driver side tire/wheel, glad I did!!

20250609_184816.jpg

Yep, the only thing that kept the bolts from falling out was the center cap!!

Two lessons learned here:

1) I initially only barely snugged these bolts. Bad idea. This time I snugged them up with a 3/8 ratchet. Maybe some blue lock tite upon initial installation would be helpful.

2) On the driver side, only grease coming out, no gear oil. Spindle seal works on this side. On the passenger side, gear oil and grease, the new spindle seal already failed. I am thinking the passenger side tube must be bent a little bit, causing the shaft to ride on the seal hard. No big deal, wheel bearings don't care if they have grease or gear oil as lubricant. Or in my case, both. Might be interesting to pull it all back apart, remove the spindle seals, just let the gear oil freely move back in forth between the wheel hubs and differential. The rear hub seal is a double lip seal, actually listed as a rear main seal, so they do a great job of not leaking. For now it will stay as it is.

Removed the center caps, put about 100 miles on the Jeep today, no leaks and no loose bolts so far.

20250610_125815.jpg

Going to leave the rear center caps off for now, makes checking these bolts easy. I might reinstall a set of front caps on the rear, which should enable easy bolt torque checks, too. It also makes tire rotations faster.

Been using this one as my work truck, put about 500 miles a week on it, so good pre-National shake down runs.

On the job site.

20250610_125631.jpg

Just one more change to this one before National, that's it for now!!
 
Snugging up the rear drive slug cap bolts seemed to work. No more leaks, no more loose bolts.

Bit the bullet tonight after work:

20250612_171019.jpg

Five new tires, to replace the 5 year old tires that had over 60k miles on them, and the one spare that was from 2012 with zero miles!!

20250612_190642.jpg

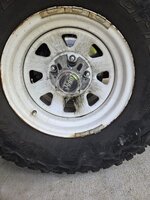
Same tires as before, 33x12.50x15 BFG KM3 Mud Terrains on my old factory 8" steel wheels. The four road tires were KM3's, the spare was a KM2. Gonna keep the old spare, for what I don't know. My 5th tire will be here tomorrow. Note the wood in the back, work truck mode!!

The four road tires wore great. All four wore even, all four were on the wear bars. They weren't vibrating bad, but I knew it was time. The new tires obviously ride great, much smoother. Didn't bother with an alignment check, I don't have any pulling or shimmy, even tire wear. If it ain't broke don't fix it lol. Last alignment, and balance, was when I purchased the KM3's I just replaced right before the National in Hurricane, Utah.

I've been happy with the KM3's. Seem to work fine everywhere I take them, just need a bit less air offroad then what I ran in the original KM2's.

That's it for now.
 
Quick post oil pan gasket/rear main seal/timing chain swap oil change. Put about 700 miles on the regular NAPA 20W-50, put back in my normal Valvoline VR1 20W-50. Just a few more things I want to check before the ride up to the National in Kentucky.

20250613_183640.jpg
 
One last quick fix before the National trip, battery swap. My AGM battery died about a year ago and I've been using the older battery that I bought for the black '86 CJ7 that's in my yard. It is still OK, but loses a charge after a few days. It's fine for a knock around spare battery but I finally broke down and bought another AGM battery for this one.

Black Jeep knock around battery:

20250617_185052.jpg

New NAPA AGM, just like the one that used to be in here.

20250617_185011.jpg

20250617_185014.jpg

Checked all the oil pan and timing chain cover bolts I could get to, all good. Only waiting for my new spare tire, pack up Friday night, hit the road early Saturday morning.

I've been daily driving this one, all the current repairs seem to be good to go, and the new tires are noticeably smoother than the ones I pulled off that were on the wear bars.

That's it for now!
 
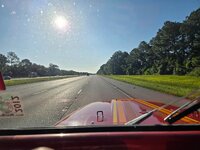
Made it up to the National and back in one piece, no problems with the Scrambler. Did not take hardly any pictures, sorry, but here are three....

On the way up:

69c93173-df09-4709-9c8a-465fb43f81cf.jpg

Monument in downtown Harlan:

20250621_194644.jpg

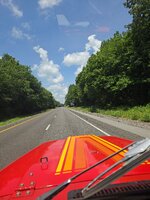
And on the way home:

20250626_124205.jpg

No real issues with the Scrambler. All the recent repairs and new parts held up. I had a little bit of rear driver side drive flange seapage, will have to recheck the bolts. Minor, so not overly concerned.

Drove the Jeep up to Kentucky, and back home, between 70-75 mph. Drove trails on Sunday and Monday, scenic drive Tuesday, got ill Tuesday night so did not leave the house on Wednesday. Drove home on Thursday. Pretty sure I picked up some kind of virus, finally feeling 95% normal today.

A few minor things to checkout/replace before the annual Michigan pilgrimage, so no rest for the weary.

Had a great time at the National, seeing old friends and making new friends, thanks to everyone who helps make this event possible!!!
 
I have been having an odd low speed (25ish to 35ish) mile per hour kind of surge feeling. Not like a bearing or gear issue, and don't really think it is a rear drive shaft issue. Not the engine. Not a vibration, just an odd surge feeling. The Kentucky trip did not fix or aggravate this issue. It did get a little better with the new tires.

Awhile back I did a half ass repair on one of my rear shocks. The bottom eyelet came off the threaded shock shaft. IIRC I installed a helicoil in the eyelet. It is still there and connected, but when checking shock lengths I did notice it is loose on the shaft. It has some up/down slack at the threads, maybe 1/4".

I figured it wouldn't be a bad idea to install some new shocks. The current Bilsteins that are on this Jeep were installed in February of 2016, and have well over 50k miles on them. I didn't want to just order four of the same shocks again without checking all the measurements, so that's what I did tonight.

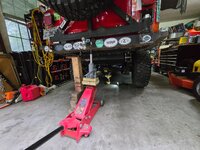
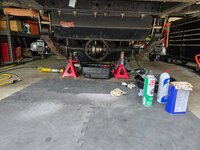
Jacked up the frame until both back tires came off the ground with the shocks disconnected from the lower attaching studs.

20250630_171913.jpg

With the rear suspension all the way drooped, the existing shocks would still reach, but it is close.

20250630_171919.jpg

I did the same thing at the front end, no pictures. On the front you also need to disconnect the sway bar to get full droop.

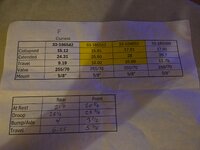
Took a bunch of measurements, then math.

20250630_201305.jpg

20250630_201323.jpg

20250630_201353.jpg

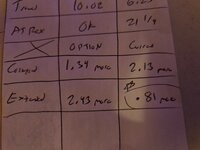
On the rear, the current shocks are showing to be only .81" longer then needed at full droop. This is probably OK. Pretty sure I damaged that lower rear shock eyelet smashing into rocks. The front shocks are fine in compression and droop. The rear has more travel then the front, which is common. At full front droop that draglink acts like a trackbar and limits droop. Not ideal, is what it is, unless you go full hydraulic steering. I do have a bit of an angle on the front drag link, lesser slope would allow for a bit more droop.

I have been running identical shocks front and rear, 33-186542. They do work, but I decided to go with a slightly longer rear shock this time, 33-185552.

20250630_201403.jpg

With the current rears, only .81" of extra shock on droop. With the new rear shock, 2.43". BUT, with the new longer rear shocks I will only have 1.34" of compression post bump stop before the shock bottoms out. So, I will probably shim the rear bump stops down another 1/2" just to be safe.

I probably would have been safe using the same shocks again, but I like the slightly longer rear shocks with the current set up. All these leaf spring packs are newer, and I added an extra main leaf to each spring pack when they were brand new. So, I do sit a bit higher then just the stock Rubicon Express 4.5" spring packs.

Once the new shocks show up I will install and report back.

That's it for now!!
 
Back
Top