
You are using an out of date browser. It may not display this or other websites correctly.
You should upgrade or use an alternative browser.
You should upgrade or use an alternative browser.
Another Scrambler Purchase/Road Trip - UPDATE- BODY ON FRAME AGAIN
- Thread starter spankrjs
- Start date
- City
- Biloxi
- State
- MS
Finally getting around to installing my J.B. Conversions 4:1 Dana 300 transfer case gears. These gears take the place of the stock 2.6:1 low range gears and change the low range ratio to 4:1.
Picture of the nice shiny parts.

In order to install these gears, you have to remove the transfer case and completely disassemble it. Since the transfer case in my Red Scrambler was just rebuilt, I am going to install these gears in the recently removed "Yard Scrambler's" Dana 300. I will then install the modified and rebuilt 4:1 Dana 300 in my red Scrambler and install the red Scrambler's 6 month old rebuilt transfer case into "Yard Scrambler", to match its recently rebuilt transmission.
Last weekend I took apart the yard Scrambler's transfer case. I had to modify the stock case by grinding a notch in the metal of the case that surrounds the inspection plate. The notch must be cut into the case in order to get the idler gear to fit into the case upon reassembly. This is because two of the replacement gears are larger then stock, so the idler gear is going to require some extra space to fit back in. The instructions are not too clear about how big of a notch to cut, hopefully my notch is big enough. I wont know until the last step of reassembly. If the notch is not big enough, time to take the case back apart.
Picture of the modified case after a thorough cleaning and repaint.

I will take some pictures of the notch I cut and post them up. Plan is to get the case reassembled this weekend.
That's it for now.
Picture of the nice shiny parts.
In order to install these gears, you have to remove the transfer case and completely disassemble it. Since the transfer case in my Red Scrambler was just rebuilt, I am going to install these gears in the recently removed "Yard Scrambler's" Dana 300. I will then install the modified and rebuilt 4:1 Dana 300 in my red Scrambler and install the red Scrambler's 6 month old rebuilt transfer case into "Yard Scrambler", to match its recently rebuilt transmission.
Last weekend I took apart the yard Scrambler's transfer case. I had to modify the stock case by grinding a notch in the metal of the case that surrounds the inspection plate. The notch must be cut into the case in order to get the idler gear to fit into the case upon reassembly. This is because two of the replacement gears are larger then stock, so the idler gear is going to require some extra space to fit back in. The instructions are not too clear about how big of a notch to cut, hopefully my notch is big enough. I wont know until the last step of reassembly. If the notch is not big enough, time to take the case back apart.
Picture of the modified case after a thorough cleaning and repaint.
I will take some pictures of the notch I cut and post them up. Plan is to get the case reassembled this weekend.
That's it for now.
- City
- Dexter
- State
- MI
It'll be a Rubicon!! 
Just a quick thought, why paint this stuff black? People do it in the engine bay too. Doesn't it make it next to impossible to spot leaks? I painted my tcase a light grey and always liked that the engine bay was white (just the scrambler's color) for the same reason. I spotted a leaky seal on my old 258's dizzy because I saw the fresh oil on the white.
Of course, if you're just sick of seeing leaks, black would be great but if you're rebuilding, why not do something so you could catch any future issues earlier?
Just something that's floated in my head and came popping up when I saw your paint setup (very cool way to paint it BTW
Just a quick thought, why paint this stuff black? People do it in the engine bay too. Doesn't it make it next to impossible to spot leaks? I painted my tcase a light grey and always liked that the engine bay was white (just the scrambler's color) for the same reason. I spotted a leaky seal on my old 258's dizzy because I saw the fresh oil on the white.
Of course, if you're just sick of seeing leaks, black would be great
but if you're rebuilding, why not do something so you could catch any future issues earlier?Just something that's floated in my head and came popping up when I saw your paint setup (very cool way to paint it BTW
- City
- Biloxi
- State
- MS
It'll be a Rubicon!!
Just a quick thought, why paint this stuff black? People do it in the engine bay too. Doesn't it make it next to impossible to spot leaks? I painted my tcase a light grey and always liked that the engine bay was white (just the scrambler's color) for the same reason. I spotted a leaky seal on my old 258's dizzy because I saw the fresh oil on the white.
Of course, if you're just sick of seeing leaks, black would be great
Just something that's floated in my head and came popping up when I saw your paint setup (very cool way to paint it BTW
Yep, the paint stand is the bomb
I painted my whole jeep body the same red color, including underneath and under the hood. I don't like black under the hood, either, unless the rest of the jeep is black

I just like how black looks on the transfer case. They look "funny", IMO, when people paint them different colors. Leaks would show up better on a different color, though. I do leave the aluminum housings that bolt on to the transfer case the natural aluminum color, I like how it looks

Hopefully, when I finish putting this transfer case back together, it wont leak (that sound you here is me knocking on wood
 )
)- City
- Cincinnati
- State
- Oh
I always thought that you should leave transmissions and t-cases unpainted, as the paint would inhibit cooling. If you look at rust under a magnifier, you will see that it is billions and billions (my apologies to that famous dead science fella) of little bumps, that increase the surface area and must aid in cooling. Yeah, that's it. My rust is better than your paint.")
- City
- Biloxi
- State
- MS
I always thought that you should leave transmissions and t-cases unpainted, as the paint would inhibit cooling. If you look at rust under a magnifier, you will see that it is billions and billions (my apologies to that famous dead science fella) of little bumps, that increase the surface area and must aid in cooling. Yeah, that's it. My rust is better than your paint.
Never thought of it that way, but you are correct, rust does increase surface area for better cooling
bobbysjeep
Legacy Registered User
- City
- Charlotte
- State
- NC
Rust also helps with gas mileage by reducing the weight of your vehicle?
- City
- Cincinnati
- State
- Oh
Rust also helps with gas mileage by reducing the weight of your vehicle?
I think the additional tin foil, bondo and corner guards more than make up for that. Plus, rust is not very aerodynamic, although the flow through ventilation does have its advantages.

- City
- Cincinnati
- State
- Oh
Embrace the Rust. Be one with the Rust. Do not disturb the aura of the Rust. Poking the Rust is tantamount to popping a Zit. No good can come of it.
- City
- Biloxi
- State
- MS
Didn't get too much work accomplished this past weekend on the transfer case, but here is an update.
General picture of a bunch of parts. The gears/shafts on the left are the new parts that replace the factory parts in the middle. The pieces on the far right (input shaft, output shafts, shift collars, shift forks) are the factory parts that are reused.


Quick Picture of my reference material: FSM, Excellent Jeep CJ Book, 4:1 kit instructions.


A few pictures of my case modifications. This was my interpretation of what the instructions picture. I hope the notch is big enough.


Started the rebuild/reassemble. Removed and installed the new needle bearing in the rear output shaft. This is kind of a pain, unless you have a small slide hammer or a pilot bushing removal tool. Note the depth of the bearing, it does not get drove to the bottom of the cavity.


Time for the press. After placing the correct gear/shift collar on the front output shaft, I pressed on the front bearing. NOTE - The front bearing of the front output shaft is slightly smaller then the front output shaft rear bearing. Make sure you put the correct bearings in the correct spot. You can press this bearing on while the shaft is out of the case.


I then placed the front output shaft assembly inside the case, put the large gear on the shaft, and pressed on the rear bearing. This is when having a helper is handy. It is kind of a pain to hold the parts in place, keep the case out of the way, and press the bearing on with only two hands. NOTE - DO not put any pressure on the case. You are pressing the bearing on the shaft, not pressing anything into the case. Due to the size of the gears, both factory and 4:1, you must position this assembly in the case before pressing the bearing on. Note how the shaft is on the steel plate. You are pressing the bearing on the shaft. Support the shaft independently from the case. You are not pressing on the case itself. The blocks of wood are to hold the case in position out of the way. DO NOT PUT PRESSURE ON THE CASE.

Time for the inner bearing on the rear output shaft. Again, you are pressing the bearing on the shaft, not pressing anything into the case. Due to the size of the gears, both factory and 4:1, you must position this assembly in the case before pressing the bearing on. Note chunk of steal underneath the shaft onto which the bearing is being pressed. The blocks of wood are to help hold the case out of the way. These shafts/gears/bearings are just free floating inside the case, not bearing on it.

That is all I accomplished. The rest of the parts can be assembled with hand tools, no more press, if I remember correctly. I did not exactly outline all the parts that must be placed on these shafts before pressing the bearings on. Make sure you put all the parts on the shafts before pressing on the corresponding bearings.
That's it for now.
General picture of a bunch of parts. The gears/shafts on the left are the new parts that replace the factory parts in the middle. The pieces on the far right (input shaft, output shafts, shift collars, shift forks) are the factory parts that are reused.
Quick Picture of my reference material: FSM, Excellent Jeep CJ Book, 4:1 kit instructions.
A few pictures of my case modifications. This was my interpretation of what the instructions picture. I hope the notch is big enough.
Started the rebuild/reassemble. Removed and installed the new needle bearing in the rear output shaft. This is kind of a pain, unless you have a small slide hammer or a pilot bushing removal tool. Note the depth of the bearing, it does not get drove to the bottom of the cavity.
Time for the press. After placing the correct gear/shift collar on the front output shaft, I pressed on the front bearing. NOTE - The front bearing of the front output shaft is slightly smaller then the front output shaft rear bearing. Make sure you put the correct bearings in the correct spot. You can press this bearing on while the shaft is out of the case.
I then placed the front output shaft assembly inside the case, put the large gear on the shaft, and pressed on the rear bearing. This is when having a helper is handy. It is kind of a pain to hold the parts in place, keep the case out of the way, and press the bearing on with only two hands. NOTE - DO not put any pressure on the case. You are pressing the bearing on the shaft, not pressing anything into the case. Due to the size of the gears, both factory and 4:1, you must position this assembly in the case before pressing the bearing on. Note how the shaft is on the steel plate. You are pressing the bearing on the shaft. Support the shaft independently from the case. You are not pressing on the case itself. The blocks of wood are to hold the case in position out of the way. DO NOT PUT PRESSURE ON THE CASE.
Time for the inner bearing on the rear output shaft. Again, you are pressing the bearing on the shaft, not pressing anything into the case. Due to the size of the gears, both factory and 4:1, you must position this assembly in the case before pressing the bearing on. Note chunk of steal underneath the shaft onto which the bearing is being pressed. The blocks of wood are to help hold the case out of the way. These shafts/gears/bearings are just free floating inside the case, not bearing on it.
That is all I accomplished. The rest of the parts can be assembled with hand tools, no more press, if I remember correctly. I did not exactly outline all the parts that must be placed on these shafts before pressing the bearings on. Make sure you put all the parts on the shafts before pressing on the corresponding bearings.
That's it for now.
Last edited:
- City
- Cincinnati
- State
- Oh
But, should I put pressure on the case?
The Boy put this kit in his and loves it. He also clocked it up out of the way when he reinstalled it. Are you considering that? Makes the shifters kind of funky, but nothing a smoke wrench won't take care of.
Build looks great! Keep the pics coming.
The Boy put this kit in his and loves it. He also clocked it up out of the way when he reinstalled it. Are you considering that? Makes the shifters kind of funky, but nothing a smoke wrench won't take care of.
Build looks great! Keep the pics coming.
- City
- Biloxi
- State
- MS
But, should I put pressure on the case?
The Boy put this kit in his and loves it. He also clocked it up out of the way when he reinstalled it. Are you considering that? Makes the shifters kind of funky, but nothing a smoke wrench won't take care of.
Build looks great! Keep the pics coming.
Just enough pressure till it cracks
I think I will be very happy with the 4:1 gears. My 05 Rubicon has them, and they work great. There is obviously a trade off to the deeper gears, i.e. 4:1 kinda suck in sand and mud, but that's is why the transmission has multiple gears
For me, the drastically improved low speed control gain outweighs the negatives of this swap.I thought about clocking it, would make sense to do it now, but for now, no. I figure clocking it will give me another excuse to drop the transfer case out again, which is so much fun
I guess if I was smart, I would have installed the 4:1 gears, a clocking kit, and twin sticks when I originally rebuilt the transfer case the first time around, but where is the fun in thatAppreciate the compliments, I will keep the pics and witty banter coming
kryptoniteCJ8
Legacy Registered User
- City
- Houston
- State
- Tx
I have a quick question. What should the back lash on the front shaft be set to? I know its adjustable via shims under the housing. Just dont know the spec.
- City
- Biloxi
- State
- MS
I have a quick question. What should the back lash on the front shaft be set to? I know its adjustable via shims under the housing. Just dont know the spec.
I will have to look it up and post up the info
- City
- Biloxi
- State
- MS
Unfortunately, no update on the 4:1 gear install. Work has cut into all my wrenching time. But, I did go jeeping the other day, and have a few pics, just to prove this thing does get dirty from time to time
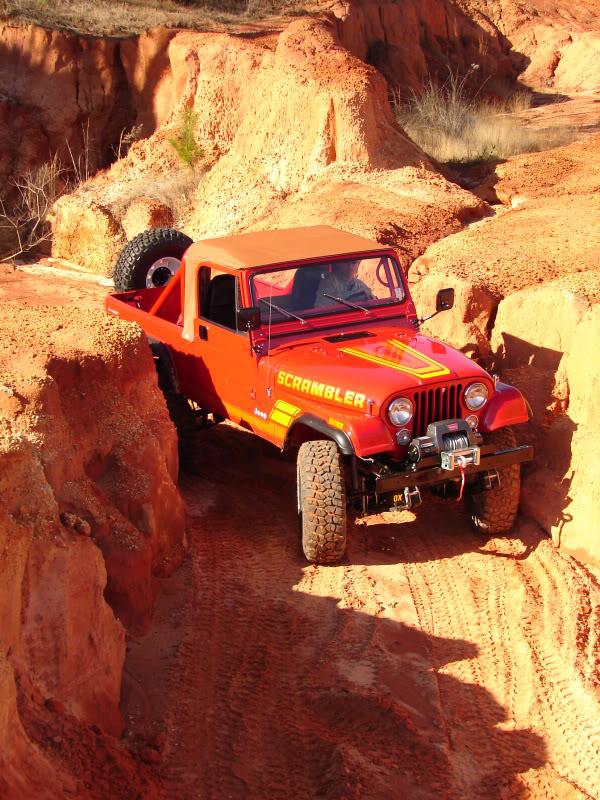


Not really "hard core" wheeling, but very fun. The location is an old gravel pit that a guy in the local jeep clubs family owns. They use the land for hunting, so they don't mind us jeepers. Bunch of loose sand and "wash out' canyons to play on.
The stock low range ratio is perfect for this type of terrain. I mainly drove around in low range, third and fourth transmission gear. Once I go to 4:1, I will lose this "higher speed" capability in low range. You can still get around, just not as much fun. I have drove at this same location in my Rubicon, so I am used to the diminished speeds that the 4:1 brings. The low speed control more then makes up for the diminished top speed for my intended uses.
That's it for now.
- City
- Dexter
- State
- MI
Excellent!
Goes to show what different types of wheeling require because I'm the opposite, having the 4:1 in the LJ and the stock gears in the Postal, I'd never do the 4:1 swap in the D300. Barring really insane, barely moving rock crawling, I've never felt that it was needed for what I do with the Postal.
Goes to show what different types of wheeling require because I'm the opposite, having the 4:1 in the LJ and the stock gears in the Postal, I'd never do the 4:1 swap in the D300. Barring really insane, barely moving rock crawling, I've never felt that it was needed for what I do with the Postal.
- City
- Cobourg, Ontario, Cana
- State
- da
Excellent!
Goes to show what different types of wheeling require because I'm the opposite, having the 4:1 in the LJ and the stock gears in the Postal, I'd never do the 4:1 swap in the D300. Barring really insane, barely moving rock crawling, I've never felt that it was needed for what I do with the Postal.
I have a 6.35:1 first gear in my tranny. gives me a super slow crawl. I'll never go 4:1 in my 300 either.
Scrambler looks AWESOME!!! love it!
- City
- Biloxi
- State
- MS
Excellent!
Goes to show what different types of wheeling require because I'm the opposite, having the 4:1 in the LJ and the stock gears in the Postal, I'd never do the 4:1 swap in the D300. Barring really insane, barely moving rock crawling, I've never felt that it was needed for what I do with the Postal.
I said the same thing before I got my Rubicon
You are correct, 4:1 is not for everyone or every situation At first, I hated the 4:1 low range unless I really wanted to go slow. But, over time, I came to love it. It is a liability as far as higher speed dune running and mud bogging go, but that's why you have multiple transmission gears. I am going to like the 4:1 even better in the Scrambler, the super low speed ability will make it easier to not smash it up on rocks and trees Most of my four wheeling is not "extreme" type stuff, but I do love the capability, makes stuff look easy- City
- Biloxi
- State
- MS
I have a 6.35:1 first gear in my tranny. gives me a super slow crawl. I'll never go 4:1 in my 300 either.
Scrambler looks AWESOME!!! love it!
Yep, I had a granny low T18 in my previous trail CJ7, loved it for offroad
You could easily shift from the "crawler" granny gear to the "I need some wheel speed/momentum" second and third gear. I disliked the granny 4 speed on the highway, only 3 widely spaced gears and shifted like a dump truck, but was pretty much bomb proof. I like my current T176 for on road driving, it's nice having 4 gears to use, especially with the 6 cylinder. With the 4:1 in my Dana 300, I will just start out in 3rd or 4th gear most of the timeWould love to find a TJ 6 speed manual transmission (my Rubicon has one and I love it) to swap into my Scrambler, the slightly deep first and overdrive 6th are very nice, and all gears and reverse are synchronized
Appreciate the compliments