• Notice for iPhone users: DO NOT use the image size reduction option when uploading photos to the forum. This causes portrait images to post as landscape. We have added a warning to the image insert pop-up as well.

1982 "Vintage Red" CJ-7 Renegade

Diff cover and gasket on:

20220212_121151.jpg

Rear brake lines reassembled and bolted back down:
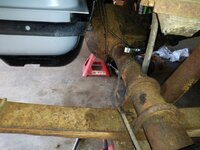
20220212_121203.jpg

Rear brake parts reassembled, both sides:
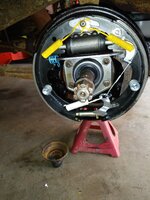
20220212_150110.jpg

Drilled out the four busted screws, re-tapped the holes in both rear wheel hubs:
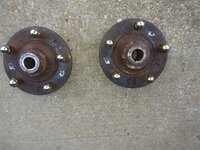
20220212_150131.jpg

Oiled the hubs/shafts/threads/washers/nuts, reinstalled rear axle hubs. Initial hit with the impact, almost to 1-5/16":
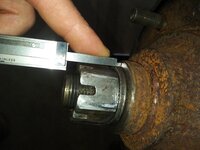
20220212_152426.jpg

Reinstalled rear tires, took it off the jack stands:
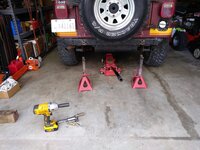
20220212_160053.jpg

Torqued to 250 foot pounds, 1-5/16", holes lined up:
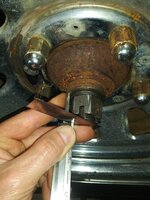
20220212_155706.jpg

Adjusted brake shoes, finished with the rear end, finally/hopefully (need to refill diff with oil, bleed brakes):
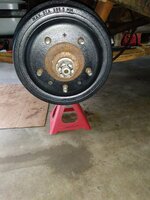
20220212_165455.jpg

Going to start on the front wheel bearings/spindle bearings/u-joints/brakes/etc tomorrow, that's it for now :wave:
 
I was going to say a John D MacDonald book of Travis McGee talking about the Busted Flush. I guess I'm just older.
 
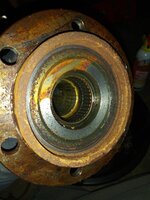
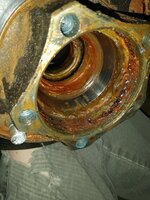
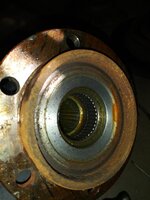
Good idea to service the front end. No damage, but the grease was funky and some moisture was present.

20220213_091140.jpg

20220213_091431.jpg

20220213_091446.jpg

20220213_092701.jpg

Driver side was about the same condition:

20220213_093625.jpg

20220213_094607.jpg

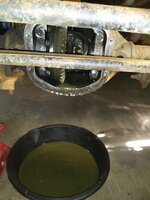
Gear oil wasn't too bad:

20220213_100412.jpg

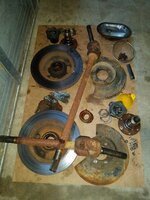
And a big pile of parts to clean and further disassemble:

20220213_103208.jpg

Good news, nothing was really damaged, so a wise decision to get ahead of the maintenance curve.
 
Some of the pictures make this Jeep look rusty, but it really isn't. Most of it is just funk, with light surface rust.

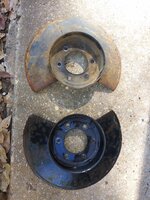
An example: These damn splash shields are usually pretty crusty. Two minutes with some Simple Green and a dish scouring pad:

20220213_105210.jpg

Front axle u-joints, my favorite!!!

20220213_152707.jpg

These still had grease and moved really well, but the seals were cracked/falling apart. In for a penny in for a pound....

Measuring how deep inside the spindles the spindle bearings are located before pulling them out (thickness of the rubber seal):

20220213_155910.jpg

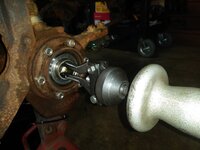
Bolting a spindle backwards on to the knuckle and using a slide hammer to pull the bearing out. Only takes a few light whacks, not at all worried about damaging the knuckle/ball joints.

20220213_154600.jpg

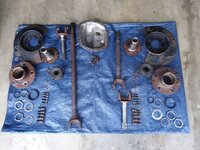
Took advantage of the decent weather and got all the parts disassembled and past the initial cleaning phase:

20220213_155928.jpg

A few more hours of cleaning, then I can start reassembling all the various subassemblies.

Left it like this, just in time for the Super Bowl, that's it for now!!!

20220213_160250.jpg
 
Last edited:
I’ve found a pilot bearing puller works great for spindle bearings, also for D300 input shaft bearings. But you have to pony up for a good one. I have a Snap-On that I found for cheap. The Harbor Freight one is trash.
 
I’ve found a pilot bearing puller works great for spindle bearings, also for D300 input shaft bearings. But you have to pony up for a good one. I have a Snap-On that I found for cheap. The Harbor Freight one is trash.
Yep, I need to find a good pilot bearing puller. I need to keep my eyes opened the next time I go to the big flea market in Mobile :thumbsup:
 
Some of the pictures make this Jeep look rusty, but it really isn't. Most of it is just funk, with light surface rust.

An example: These damn slash shields are usually pretty crusty. Two minutes with some Simple Green and a dish scouring pad:

View attachment 100539

Front axle u-joints, my favorite!!!

View attachment 100540

These still had grease and moved really well, but the seals were cracked/falling apart. In for a penny in for a pound....

Measuring how deep inside the spindles the spindle bearings are located before pulling them out (thickness of the rubber seal):

View attachment 100541

Bolting a spindle backwards on to the knuckle and using a slide hammer to pull the bearing out. Only takes a few light whacks, not at all worried about damaging the knuckle/ball joints.

View attachment 100542

Took advantage of the decent weather and got all the parts disassembled and past the initial cleaning phase:

View attachment 100543

A few more hours of cleaning, then I can start reassembling all the various subassemblies.

Left it like this, just in time for the Super Bowl, that's it for now!!!

View attachment 100544

I need to go through the front on my green CJ7. Have ujoints, bearings, and a Spartan to go in, just need to make time to do them.

Please take lots of pics when you reassemble!
 
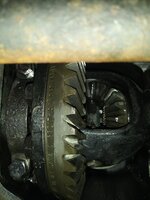
Cleaned out the front differential housing. 3.31 ratio, open differential, looks and feels good:

20220214_181405.jpg

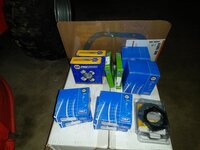
New axle shaft u-joints, spindle bearing kits, wheel bearings, hub seals, brake rotors, spindle nut kits, and diff cover gasket:

20220214_181423.jpg

Kind of bummed about this, and hard to picture:

20220214_181435.jpg

The passenger side inner axle oil seal had been leaking. The diff fluid was low when I checked it. Driver side long tube was bone dry, but the short passenger tube had oil mixed in with the crud. It would be criminal not to change these two PIA seals out while I have everything tore down this far. More backwards before forwards......

I am going to at least work on my "sub assemblies" before taking even more crap apart!!!

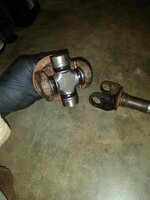
I tackled the hardest part tonight, installing new front axle u-joints!!!!! I have a mental block about this for some reason, but I have actually gotten semi decent at this chore. I got ballsy this time and didn't even buy a spare u-joint to keep handy!!!

Started with the short shaft, installed the joint in the stub axle first:

20220214_183345.jpg

You can see the little clips that hold the caps in place.

Then, installed the inner shaft to the stub shaft:

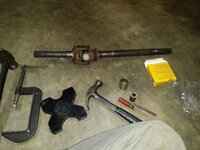
20220214_184407.jpg

I had the c-clamp out, but did not use it. I just used a hammer, old sockets, abd the little punch to insert the clips. The press table slab of steel is handy to hammer on. I keep assembled spare shafts with me when wheeling. I would not want to do this on the trail, trying to keep dirt out of the caps. And, 9 times out of 10, you break one of these u-joints, you usually take out the ear(s) on the axle shaft, too.

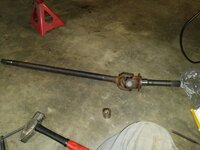
And the long side finished.

20220214_185709.jpg

That's it for now :wave:
 
I've gotten the impression that the axle ujoints are much more of a PITA to swap out than driveshaft ujoints.

I'm pretty sure the driveshafts in all of my rigs are probably original to the Jeep. The ones in my green CJ are bad, actually make a popping noise they are so worn, but I almost never use 4wd in that Jeep so I've been putting it off.

Is there any particular part of the axle ujoint swap that makes it more difficult than a regular driveshaft ujoint? If nothing else, I'm guessing it's going to be a female dog to get the old joints out.
 
I've gotten the impression that the axle ujoints are much more of a PITA to swap out than driveshaft ujoints.

I'm pretty sure the driveshafts in all of my rigs are probably original to the Jeep. The ones in my green CJ are bad, actually make a popping noise they are so worn, but I almost never use 4wd in that Jeep so I've been putting it off.

Is there any particular part of the axle ujoint swap that makes it more difficult than a regular driveshaft ujoint? If nothing else, I'm guessing it's going to be a female dog to get the old joints out.
A few tips:

Clean the hell out of the axles before you start. Get them spotless where the cups go into the shafts. You want to be able to see the clips to remove them.
Soak all four caps in PB Blaster, or similar
I prefer using a hammer/sockets to remove the u-joints, I feel the "shock" aids in removal. You can use a press, just be careful.
I'll take a picture, but besides just hitting the u-joint caps, there is a part of the axle you will want to smack.

After the getting the old u-joints out, clean the axle shafts again. You will be all up in their business, and you do not want crud falling into your new u-joints.
I install the u-joint into the longer part of the assembly first, then add the stub shaft into the mix. An extra set of hands doesn't hurt, not required.
Take your time, install one cap at a time, with the cross inserted into it to keep the needle bearings from falling out. Get the first cup in, then slide the cross out some to help guide the second cap/needle bearings into place. Light taps will do it. You shouldn't have to beat the crap out of anything.
Don't forget the little cap clips!!!!!

When you get the shaft back together, it might feel stiff. I'll post a picture of where to tap to get it un-binded.

Post #119 shows me removing/installing new u-joints on my Spring Special's driveshafts. Same tips/tricks apply :thumbsup:

 
Last edited:
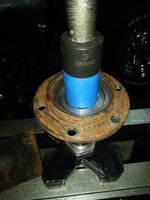
Used a socket and my press to install the spindle bearings. I put a pen mark on the tape so I wouldn't press the bearing in too deep.

20220215_173001.jpg

I packed the bearing with grease before pressing it in. Letters up on the bearing:

20220215_173156.jpg

Pressed in only deep enough so that the spindle seal is flush with the face of the spindle:

20220215_173201.jpg

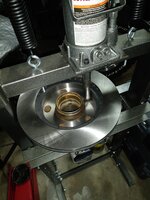
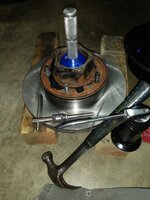
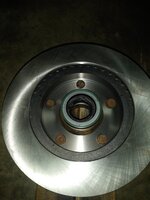
Used the press to install new rotors on the wheel hubs, pressing in the wheel studs.

20220215_180312.jpg

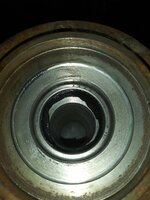
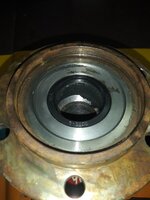
Using my Harbor Freight race/seal driver kit to install the bearing races into the wheel hubs:

20220215_183443.jpg

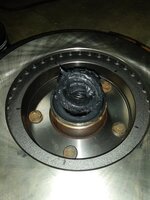
I also cleaned all the gunk out of the lock in hub bolt holes, chased the threads out, no damage.

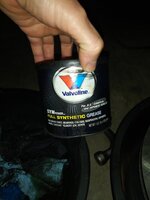
Packed all four wheel bearings with my favorite grease, need to pick up another can to finish packing the wheel hubs, I ran out:

20220215_194758.jpg

20220215_194807.jpg

And installed the hub seals, Harbor Freight driver set to the rescue!!!

20220215_195700.jpg

That's it for now!!!
 
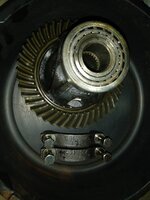
Removed the front differential last night, not too terrible. Used a wrench on one of the ring gear bolts up top to keep differential from spinning, short pry bar on lower ring gear bolt head, gently pried it out:

20220216_181222.jpg

Keep track of which side each bearing cap came from, and top vs bottom. I marked each one with a permanent marker.

I did NOT have to remove the tie rod or drag link, there is enough room between the front axle housing and the steering linkages to manipulate the differential/ring gear assembly out:

20220216_181232.jpg

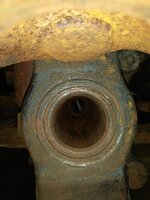
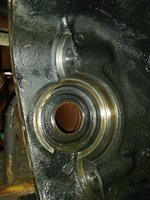
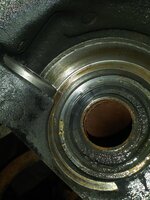
Not the best pictures, but the old inner axle seals, note the depth they are installed into the axle tubes:

20220216_181449.jpg20220216_181507.jpg

Easy enough to remove the old seals, floor jack handle and a hammer did the trick:

20220216_182435.jpg

And of course, lots of crud gets trapped just outboard of these seals, that will have to be cleaned up/out:

20220216_182443.jpg

Installing the new seals is where the fun begins!!!

What I tried to use, some success:

20220216_192310.jpg

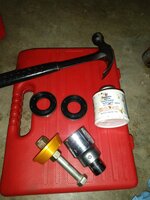
I put some aviation sealant around the freshly cleaned/sanded/polished axle tubes where the seals go. I used the yellow seal driver, on a custom made (read short 1/2" bolt) to drive the seal in flush to the axle tube. No problem, seal went in straight and true, no damage.
The problem began when I went to drive the seal the rest of the way in to the axle bore. The 1-5/16" socket fits tight INSIDE the seal, BUT you do not have enough swing room inside the axle housing to swing a hammer. My floor jack handle fit tight around the 3/4" to 1/2" drive adapter on the back of the 1-5/16" socket, so I ran the floor jack handle through the axle tube and attempted to drive the seal the rest of the way in.

Mui No Bueno:

20220216_194015.jpg

20220216_194028.jpg

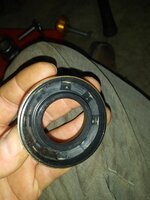
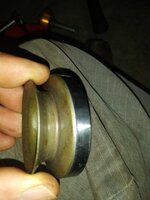
This seal fits super tight inside the axle bore. Using a socket INSIDE the seal to drive it in only pushed/bowed the seal outward, ruining it. I could NOT drive the seal home this way.

So, one new seal ordered, different strategy for round 2. I will build a "tool" (read 1/2" all thread, some nuts, AND the correct seal driver that will press on the OUTER steel band of the seal) and install the seals this way.
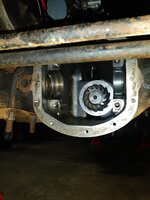
IMHO, if you try to drive the seal with a socket INSIDE the seal, you will ruin the seal :twocents:
 
Used threaded rod and pulled from outside once seal was set. Not pretty but worked out
I am going to attempt to "push" it in place from the diff side, but pulling would work, too, just need a long piece of all-thread for the driver side seal.
 
Back
Top