• Notice for iPhone users: DO NOT use the image size reduction option when uploading photos to the forum. This causes portrait images to post as landscape. We have added a warning to the image insert pop-up as well.

1983 frame off refresh - finally

certifiablejeep

Definitley Certifiable
Lifetime Member
City
Bedford
State
NH
Looking good, in a couple more weeks, I will be right back to where you are now with the project, just finishing up a lot of loose ends.

cb
 

mhinchliffe

CJ-8 Member
City
W-S
State
NC
Thanks for the kind words CB. It's so much fun to do the steel repair I'm really enjoying it.
I'm pretty proud of how my repair to the B pillar on the right side came out. How's that for some metal manipulation?!


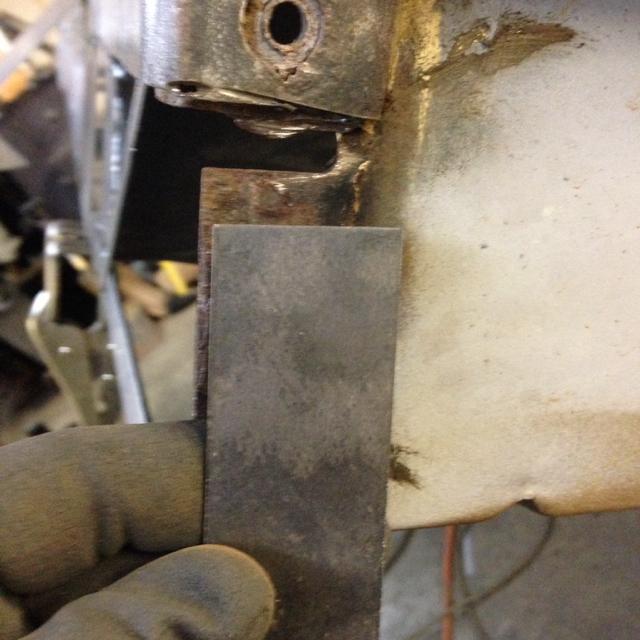
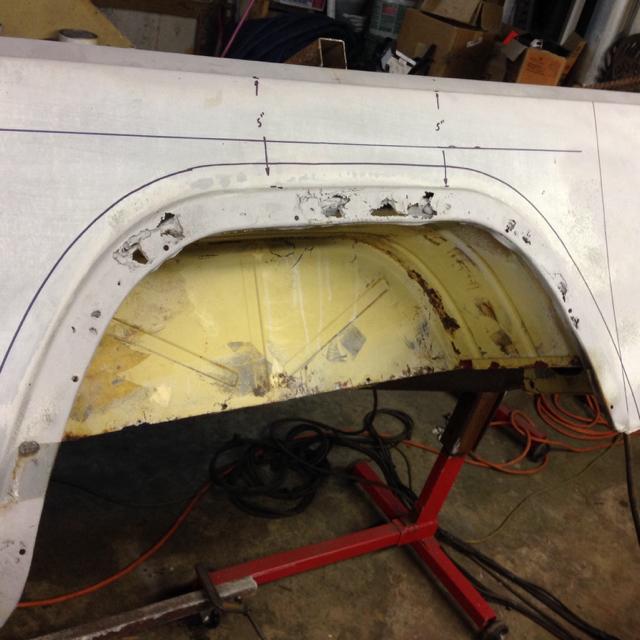
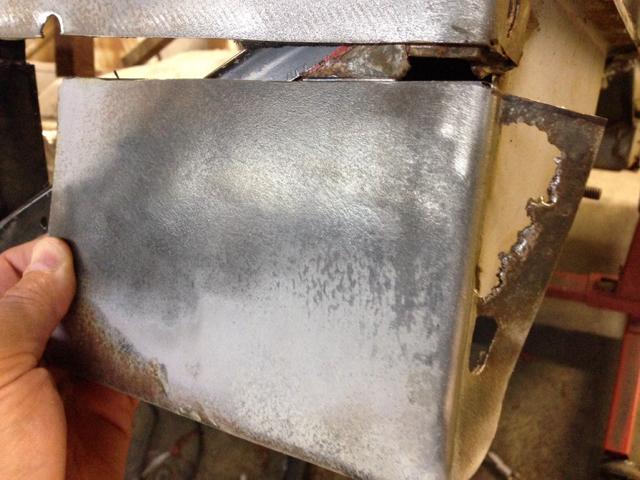
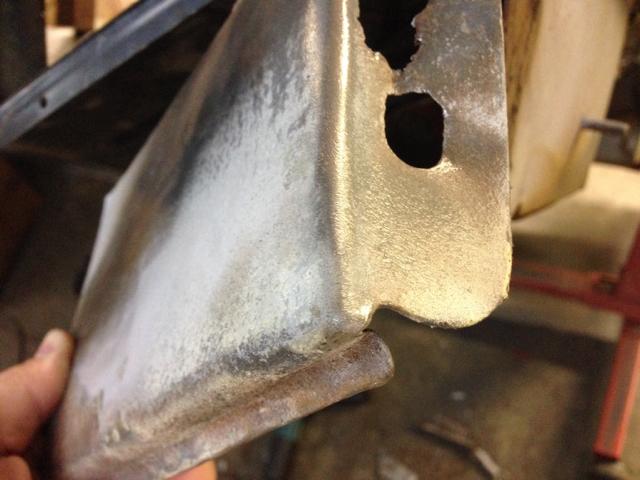
Here's the cut out damaged piece
59317174a28b644f5f6f8c2c43838ed1-1.jpg


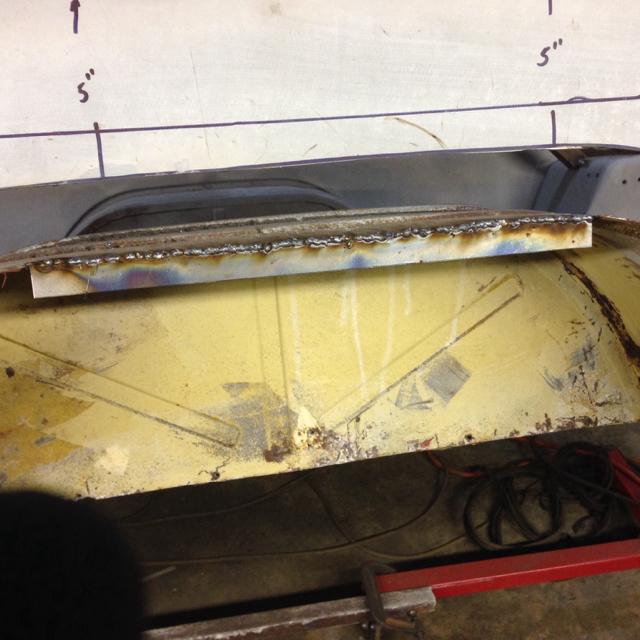
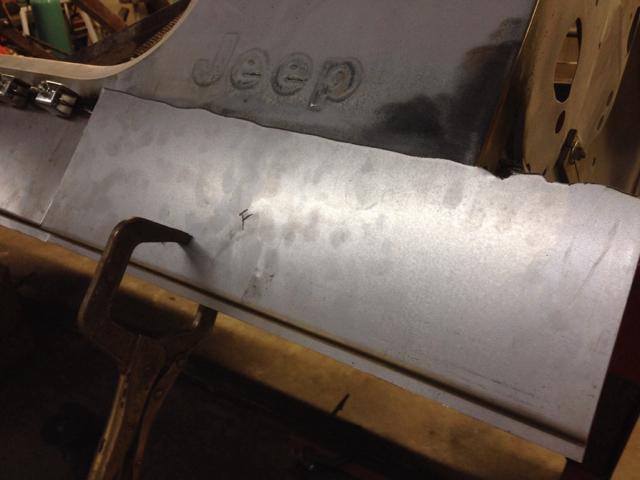
And the repair piece I made
e3df4255f474aec58fc961f8100ddc27-1.jpg


Once that was done me and my helper had to go 'catchin for a little bit
81b6b09e40cbb070ab366e00ca3bf575-1.jpg

I'm telling you that was the fastest hour of the day and it fired him up

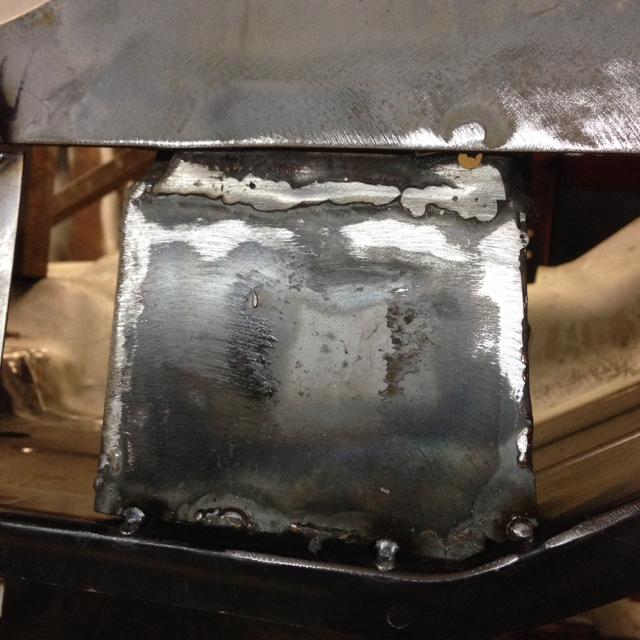
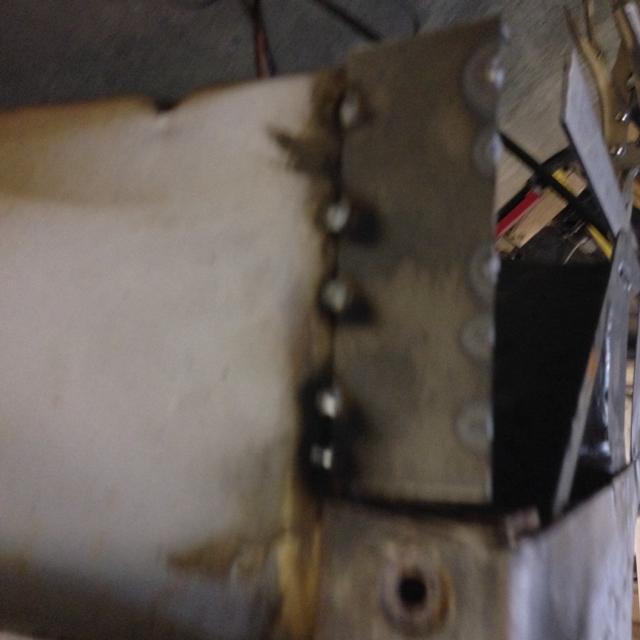
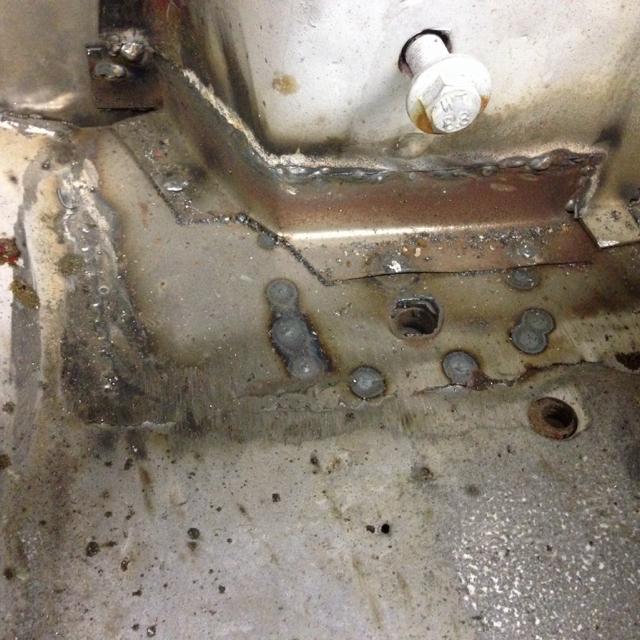
When we finished fishing we built the right cowl support leg. These are the same I built for Firefighter on his build. What I did on mine was to shear an 1-1/4" 16 ga strip, bent it to follow the angles of the floor and also to width. Once this was complete I placed it on a piece of 16 ga and made the outside of the support and welded it out. I'll have to get a picture up for you guys so you can see it.

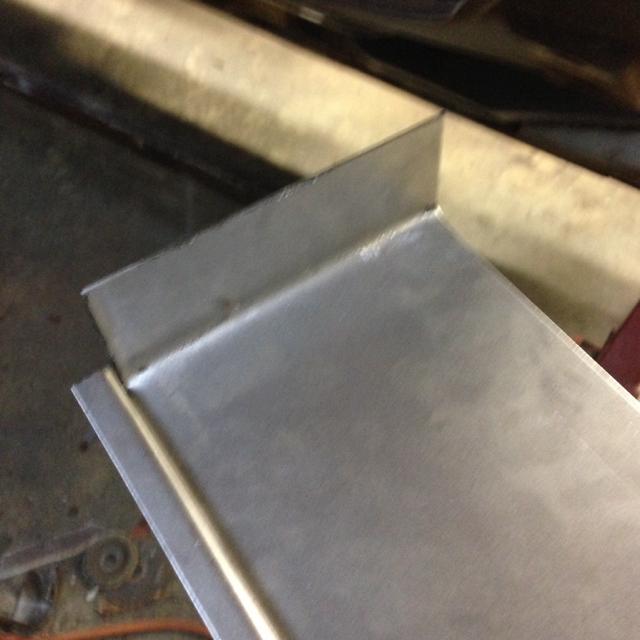
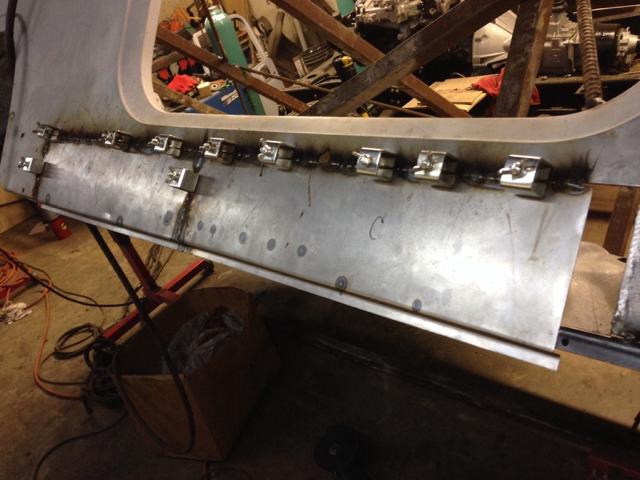
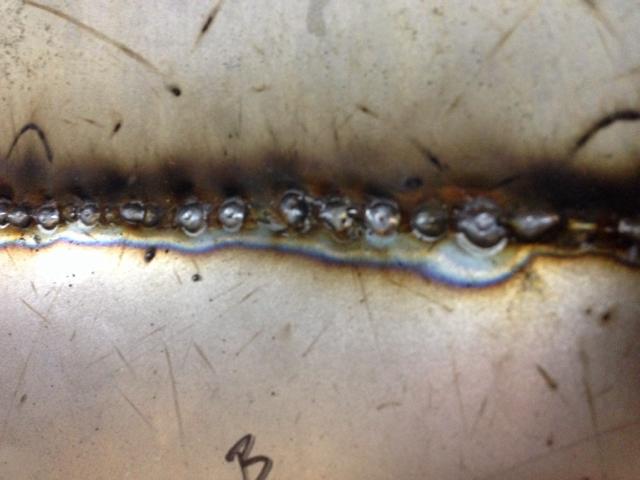
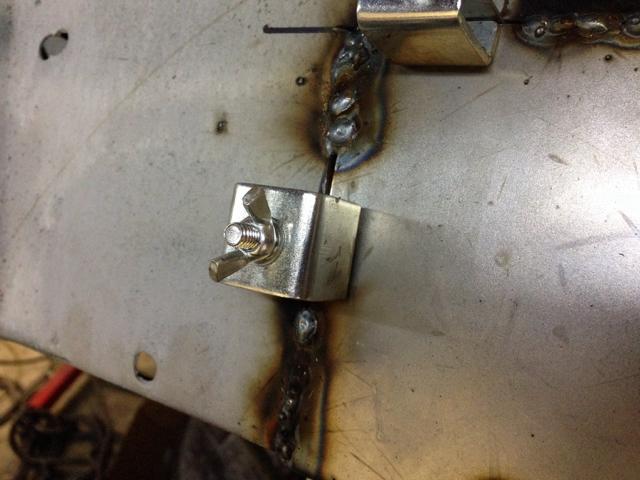
Next I ripped 8" strips off the 18 ga sheet I bought to make the new rocker panels from. I wanted to make the lip so it was 1/4"-90* followed by 1/2"-90* opposite. Since I really don't get a crisp bend out of my break using the entire 48" width I cut these into 19" sections to insure crisp bends. Here's the end result tacked in.

d7e4af3043f347056b96a13d85c44a56-1.jpg


30ee9d60b028a8c46761eded4e1b9ba1-1.jpg


04290bc73ad26587c777b4bed3e959d8-1.jpg


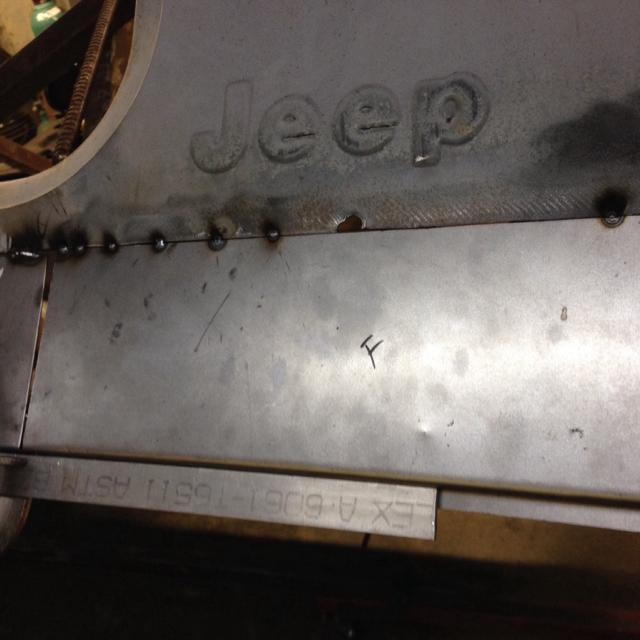
I've got the very front to fabricate where it wraps around the cowl where the lower fender bolt is. It shouldn't be too bad.

ff723b76160b3d9fa88d315a2cbe3235-1.jpg


67b5d3adf0dbd1f022d765541481046c-1.jpg


Here's the formed front piece that needs to wrap clamped into position. Note how it's too tall, the plasma cut line......I'll mark this and put it in the shear and cut it to width so I've got a nice straight edge fit to the existing.

f64c49fc84f64e06232ac4b444c83390-1.jpg


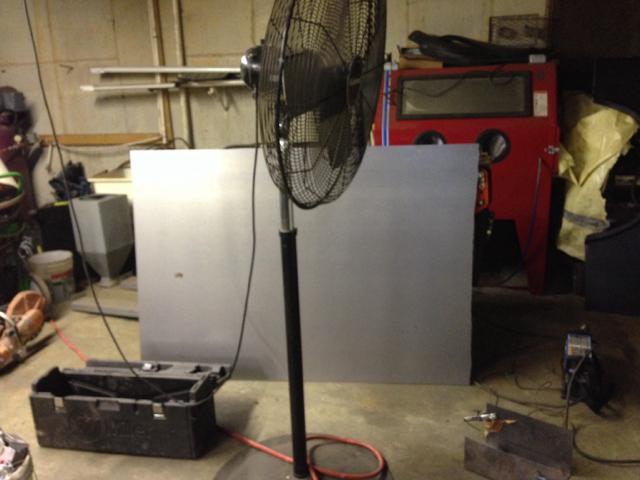
And what's left of the 4'x8' sheet of 18 ga sheet

45c71243abd18c2c6f308272e4659e6f-1.jpg
 

BRKLYNZ28

Scrambler Junkie
Lifetime Member
City
BROOKLYN
State
NY
Nice work.. i got to get a set of those clamps. I use welding magnets but i could always use another tool. :)
 

mhinchliffe

CJ-8 Member
City
W-S
State
NC
Here's the picture of the cowl support

4faeadbd86adac8668ebb1ab94214444-1.jpg


And another

a855c6ef75ac86d432c36cb4c33826b7-1.jpg


On to the last rocker piece I had made and had to fit to the cowl

9f27381032e6f728939b2a53a63225f7-1.jpg


And another

237bf714ca552d8fdeb948e2b68ea3ce-1.jpg


Here's the back side of it

d8c0dea4a5380464db85336c7f5e1de2-1.jpg


Let's not forget that there's a spacer between the cowl and the rocker

b59f2be43aa3f7c1b13c49201e2ca501-1.jpg


And tacked in

b9c1650a110d32c4331da0e11f71f76b-1.jpg


Stacking the tacks

5fd5f0823f2cf6470fc3923fd576da4d-1.jpg


I finished the right rocker out and moved on to the left rear wheel well. At this point you can't be scared to cut on em!

ac3f5b427a0c0cbc5bf77965a1235448-1.jpg


Out and working on the wheel house lip

fe5be2ab2fbaf47cb17ad4b89b622cbf-1.jpg


More to come
 

certifiablejeep

Definitley Certifiable
Lifetime Member
City
Bedford
State
NH
And here's the finished door support repair piece

39a700290a90c78ef1efb247ce41cfb6-1.jpg


Let's get this thing on the road!

That came out nice... I have to do the same exact thing about the same exact size... just shy of the large seat belt hole mount on the backside.
I have to get the floor in place first!

cb
 

certifiablejeep

Definitley Certifiable
Lifetime Member
City
Bedford
State
NH
Thanks for the offer but I am working on getting the whole piece from a donor tub

cb
Sent from the garage
 

mhinchliffe

CJ-8 Member
City
W-S
State
NC
Well, it's been several weeks since I've been able to get in the shop to do some work. I've remodeled a house for my in-laws so now child care isn't an issue with it being just me and Mrs. CJ8 here with the kids, her working and my traveling about the country for work. We also took a week and went to the beach for a family vacation, relaxing! I'm getting so very close to having the tub done I can see the light at the end of the tunnel.
Went out last night and finished the left rear wheel house lip.

IMG_5280.jpg

I then cut the side panel so as to use only the wheel arc section I needed to replace. I intentionally cut it about 1" larger than what I needed so as to allow of an overlap. I then spray painted the back side of it once I had it located properly so that I was positive I would have the perfect cut and fit.

IMG_5282.jpg

I then used all but 2 of the panel welding clamps that I love so much to set the weld gap and align the panels.

IMG_5284.jpg

Time to stack up the tacks

IMG_5285.jpg

Here it is all shined up!

IMG_5286.jpg


I went out at about 9:30 and came back in at 11:48.....not too bad. Next is the removal of the bed for the installation of the Classic Enterprises replacement
 

certifiablejeep

Definitley Certifiable
Lifetime Member
City
Bedford
State
NH
Looks good... I am looking forward to continuing on with mine once the weather cools a bit and the kids are back in school.

cb
 

mhinchliffe

CJ-8 Member
City
W-S
State
NC
Got a little more time in on this project. Really no too too bad, it's just finding time. I've been channeling energy,read, seeing how others have done their bed floors. I think Firefighter736 put his in first and was able to get it to go under the rear tailgate support. Then came Certifiable and he "over played" his over the tailgate support. But first you got to get the rotten metal out.

IMG_5288.jpgIMG_5289.jpgIMG_5290.jpgIMG_5291.jpgIMG_5292.jpg

And subsequently end up with this.

IMG_5293.jpgIMG_5294.jpg
 

mhinchliffe

CJ-8 Member
City
W-S
State
NC
Then it was time to cut, trim and fit. repeat, repeat and repeat again. I was able to get all of the old bed material out of the tailgate support thus enabling me to install the new sheetmetal under the support like it came from the factory. I used self-tapping screws to draw the pieces together tight prior to plug welding. Now it's on to the corners and then off to the painter. I'd really like to have the welding repairs done by the end of the week. I'm going to POR15 the inside of the tub and the underside prior to shooting the color matched Raptor Liner on it. Please chime in on the POR15 idea please.


IMG_5317.jpgIMG_5330.jpgIMG_5331.jpgIMG_5332.jpgIMG_5333.jpgIMG_5334.jpgIMG_5335.jpg
 

mhinchliffe

CJ-8 Member
City
W-S
State
NC
Ok, I was finally able to get the corners installed. Again, many thanks to all on the forum and those who answer my phone calls asking advice. Following Certifiable's lead I mocked the corners in with the tailgate to enable me to set the gaps, etc. I was especially happy with the bed sides and how they met up with the corners. I'd also read quite a few horror stories about how the top flange of the tub didn't quite make up well to aftermarket replacement corners. Mine came out really nice.

IMG_5351.jpg

Once that was done I did a once over on all of the welds with a flapper disc, hit it all with a green scotch brite and then wiped it with acetone prior to applying silver POR15.

IMG_5380.jpgIMG_5384.jpgIMG_5386.jpgIMG_5382.jpgIMG_5383.jpgIMG_5385.jpg

It's off to paint now! Let's hope it comes home soon!
 

certifiablejeep

Definitley Certifiable
Lifetime Member
City
Bedford
State
NH
The gate gaps look good... all even and level.
I like the remnants under the Jeep... giving warning to all other pieces of metal to not rust or they will end up like that.

cb
 

spankrjs

Scrambler Junkie
Lifetime Member
SOA Member
City
Biloxi
State
MS
Next is the removal of the bed for the installation of the Classic Enterprises replacement


Did you verify that all the body mount channels were installed in the correct location on the Classic floor piece?:fingerscrossed::fingerscrossed:

Mine were not, didn't find out until after paint :banghead:
 
Top